In part five of this task, you learned about the MVVM design pattern and how it promotes separation of concerns within an app. You set up a Supabase account and created a database to store the to-do list items. Finally, you saw how Supabase sends data from the database over the World Wide Web.
In this continuation of that tutorial, you will learn how to consume data from a Supabase cloud-hosted database directly within an iOS app.
Unpause your database
If you completed part 5 of this tutorial series in the prior module here at LCS, it’s quite likely that your database, hosted by Supabase, has been paused to conserve server-side resources. This occurs automatically for free-tier projects at Supabase when a database has been inactive for 7 days.
To get started, first be sure you are signed in at GitHub.
REMINDER
It’s been a while, but recall that when you created a Supabase account, you used your GitHub credentials.
Now, visit the sign in page at Supabase and you will see a page like this:
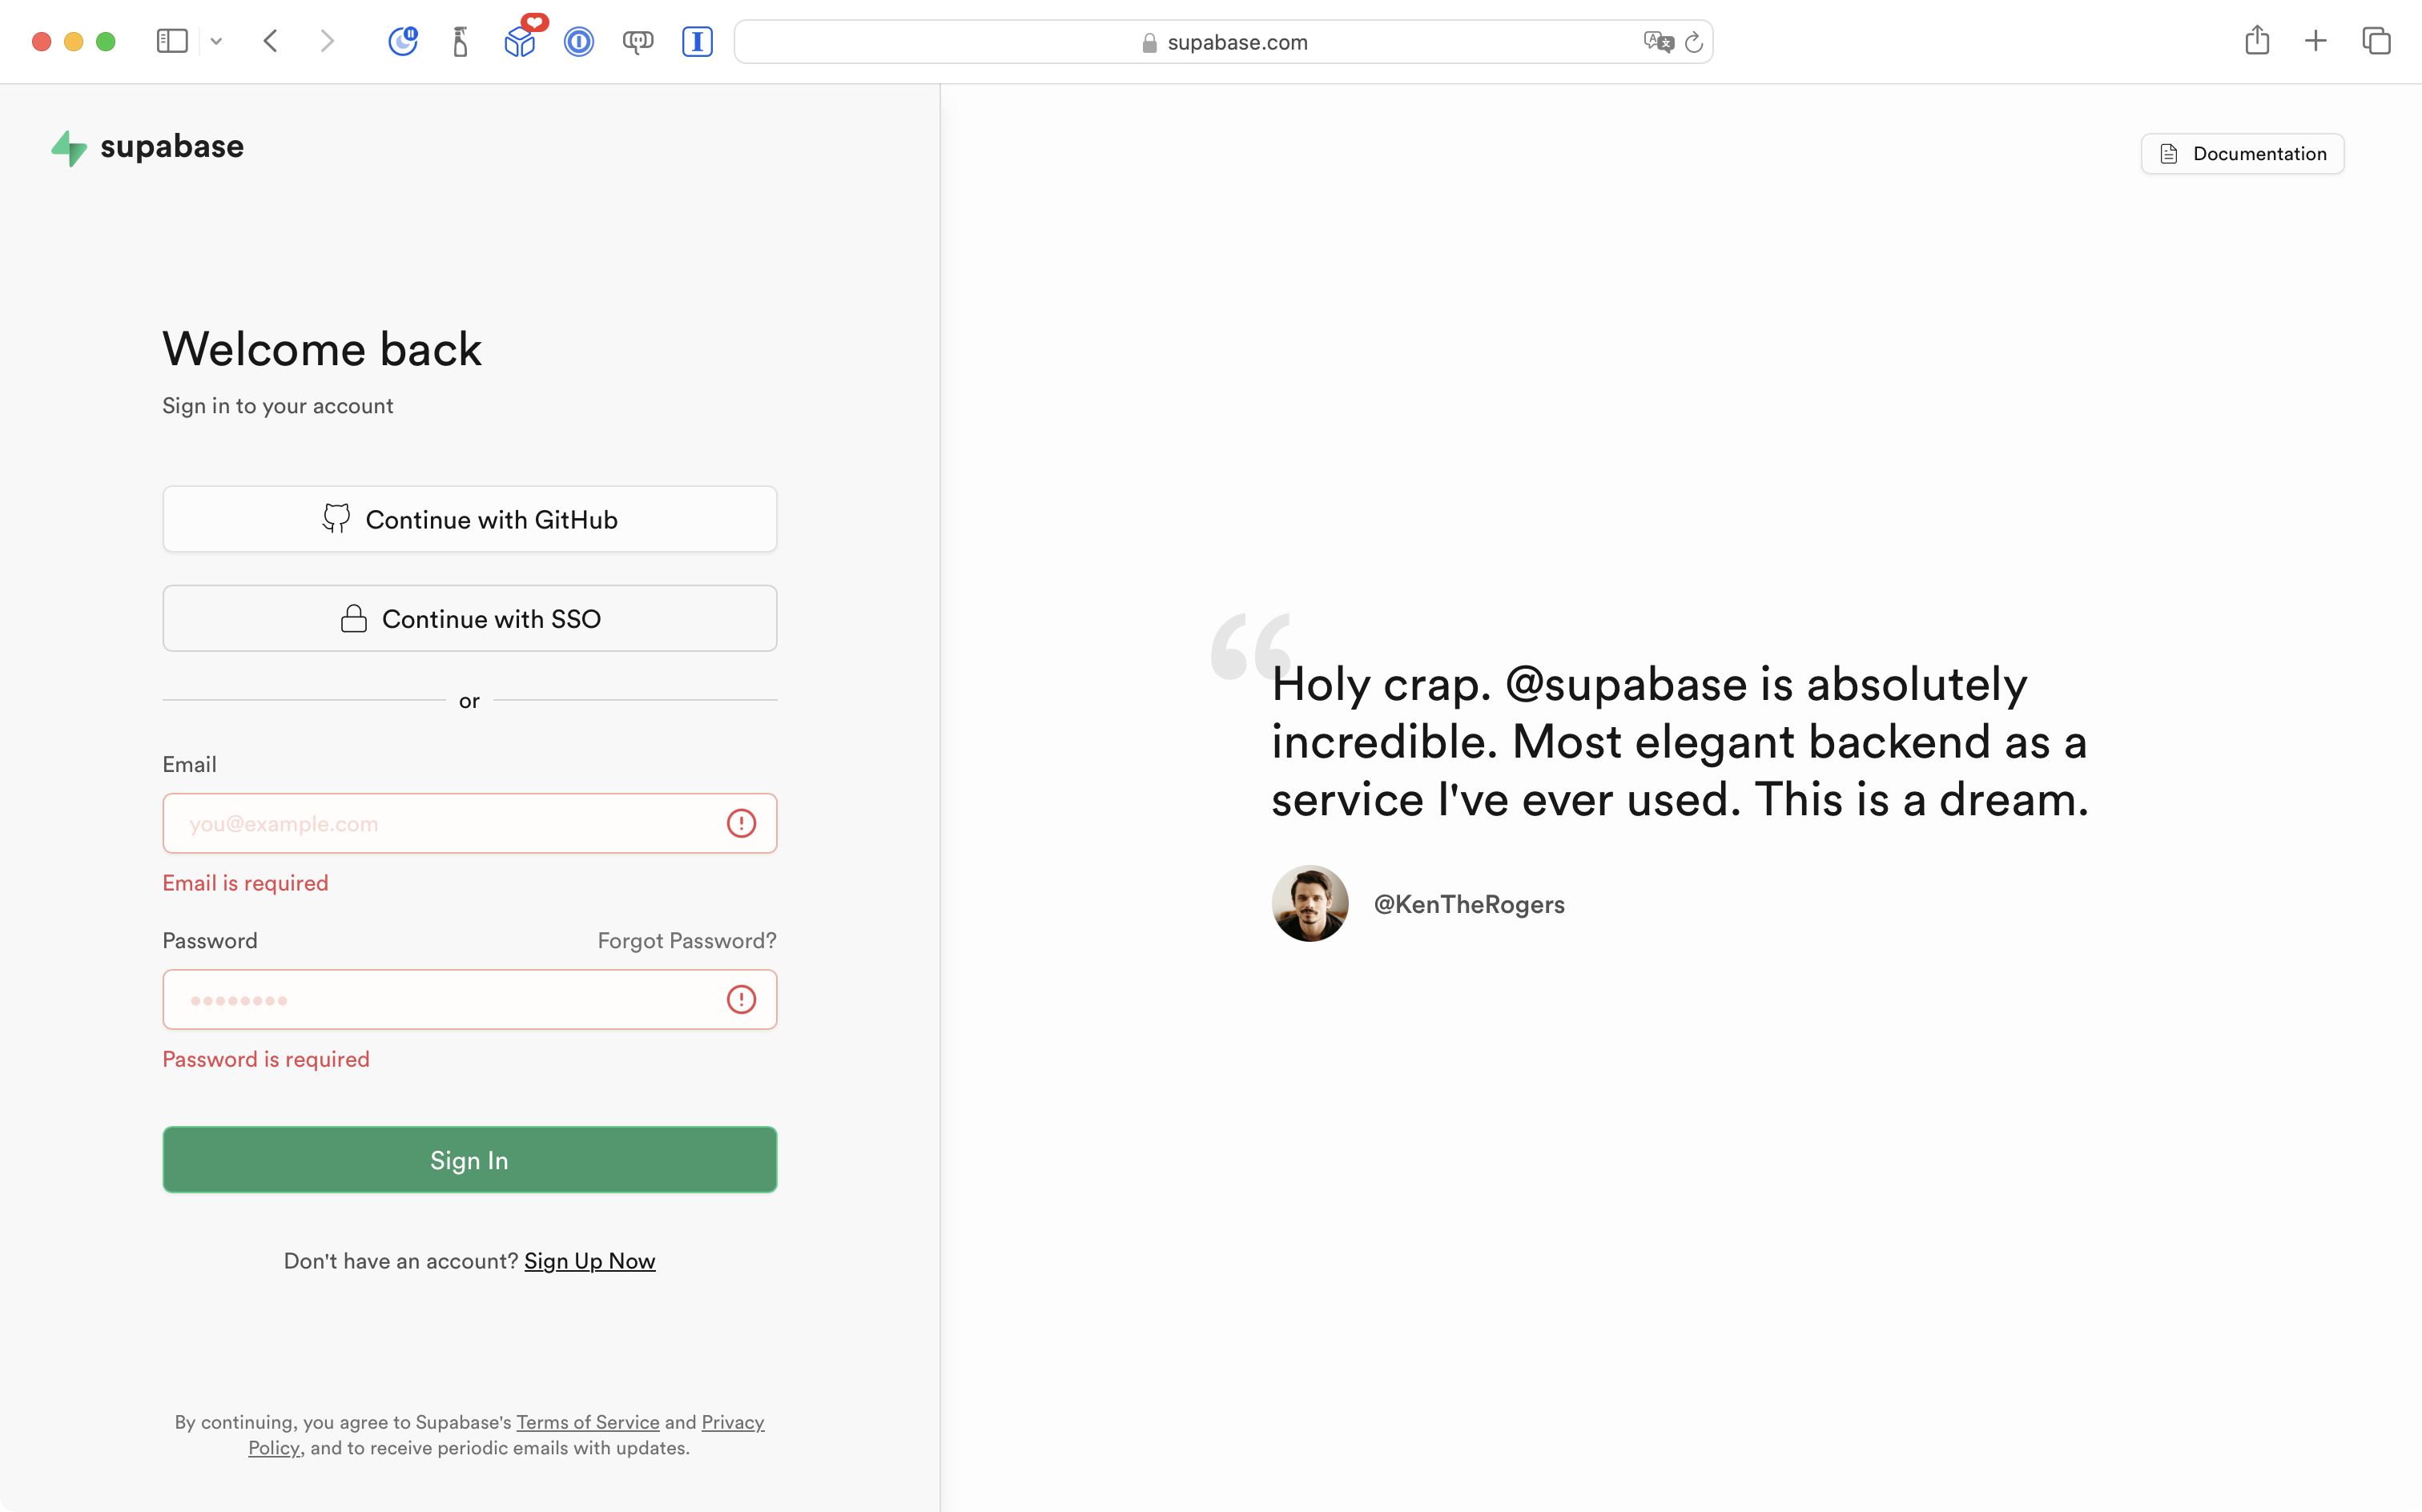
Please choose Continue with GitHub.
After a moment, you will see your dashboard at Supabase:

Notice that your project is likely listed as paused. If you click on your project to open it, you will see this message:
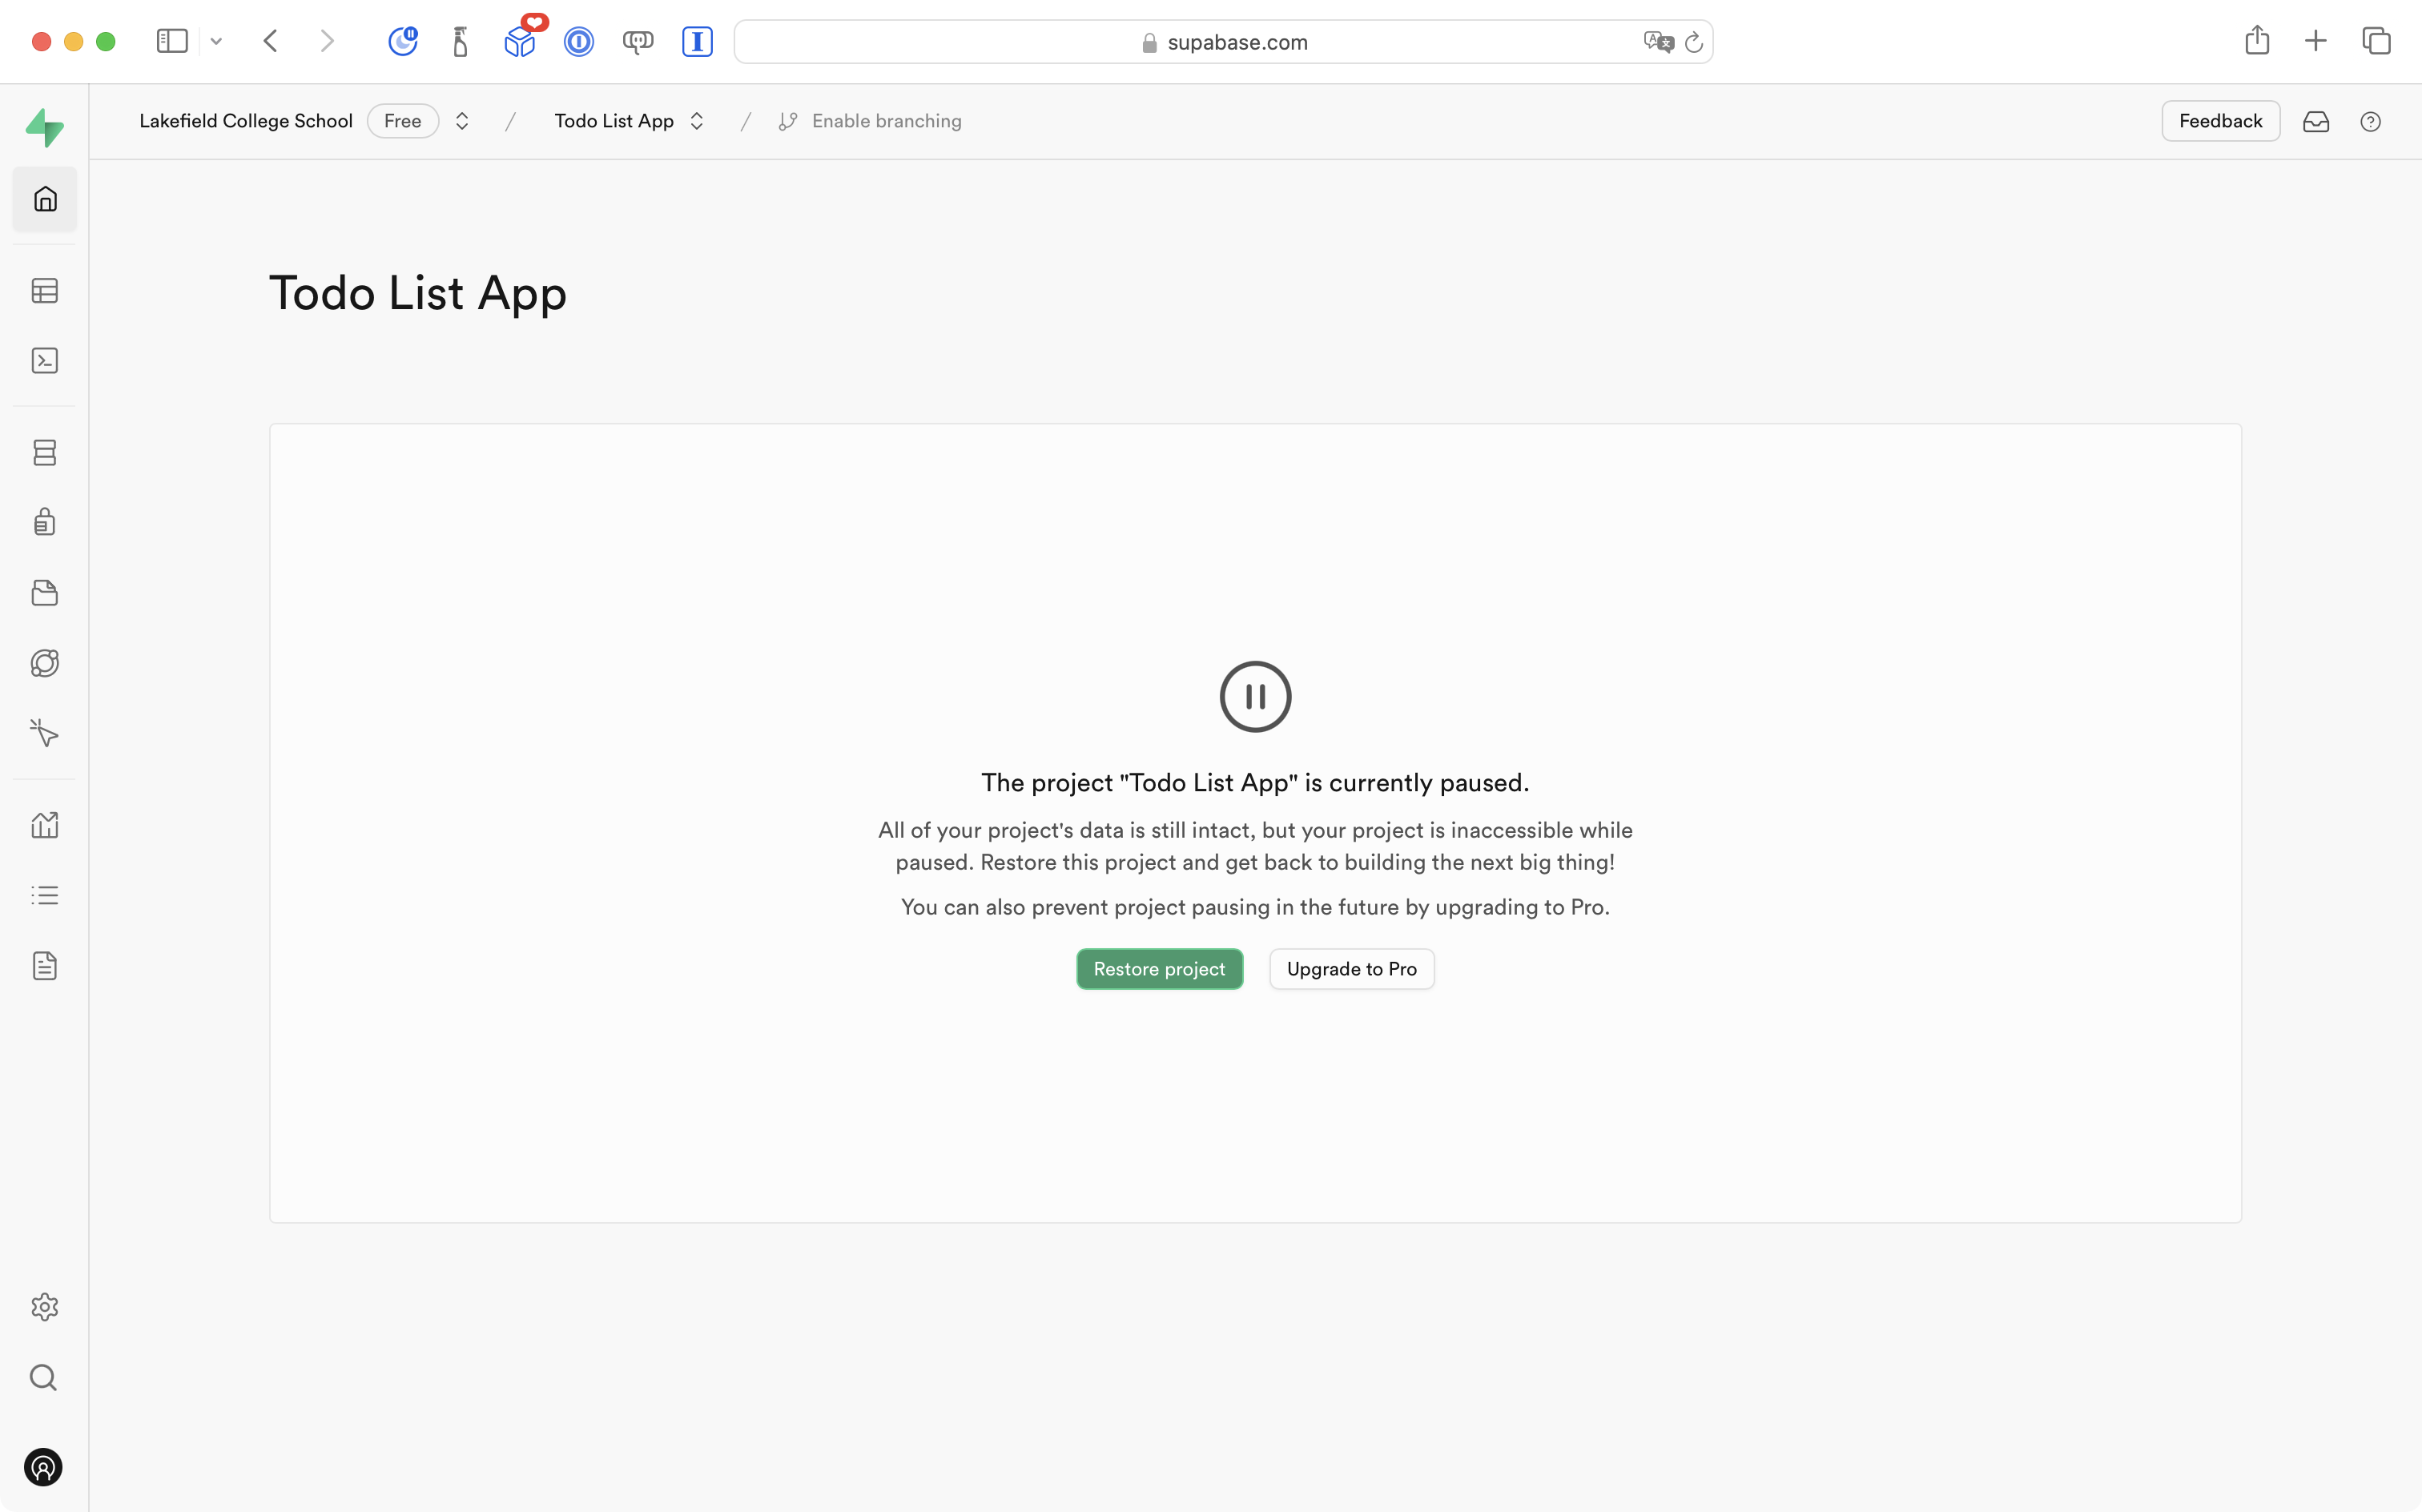
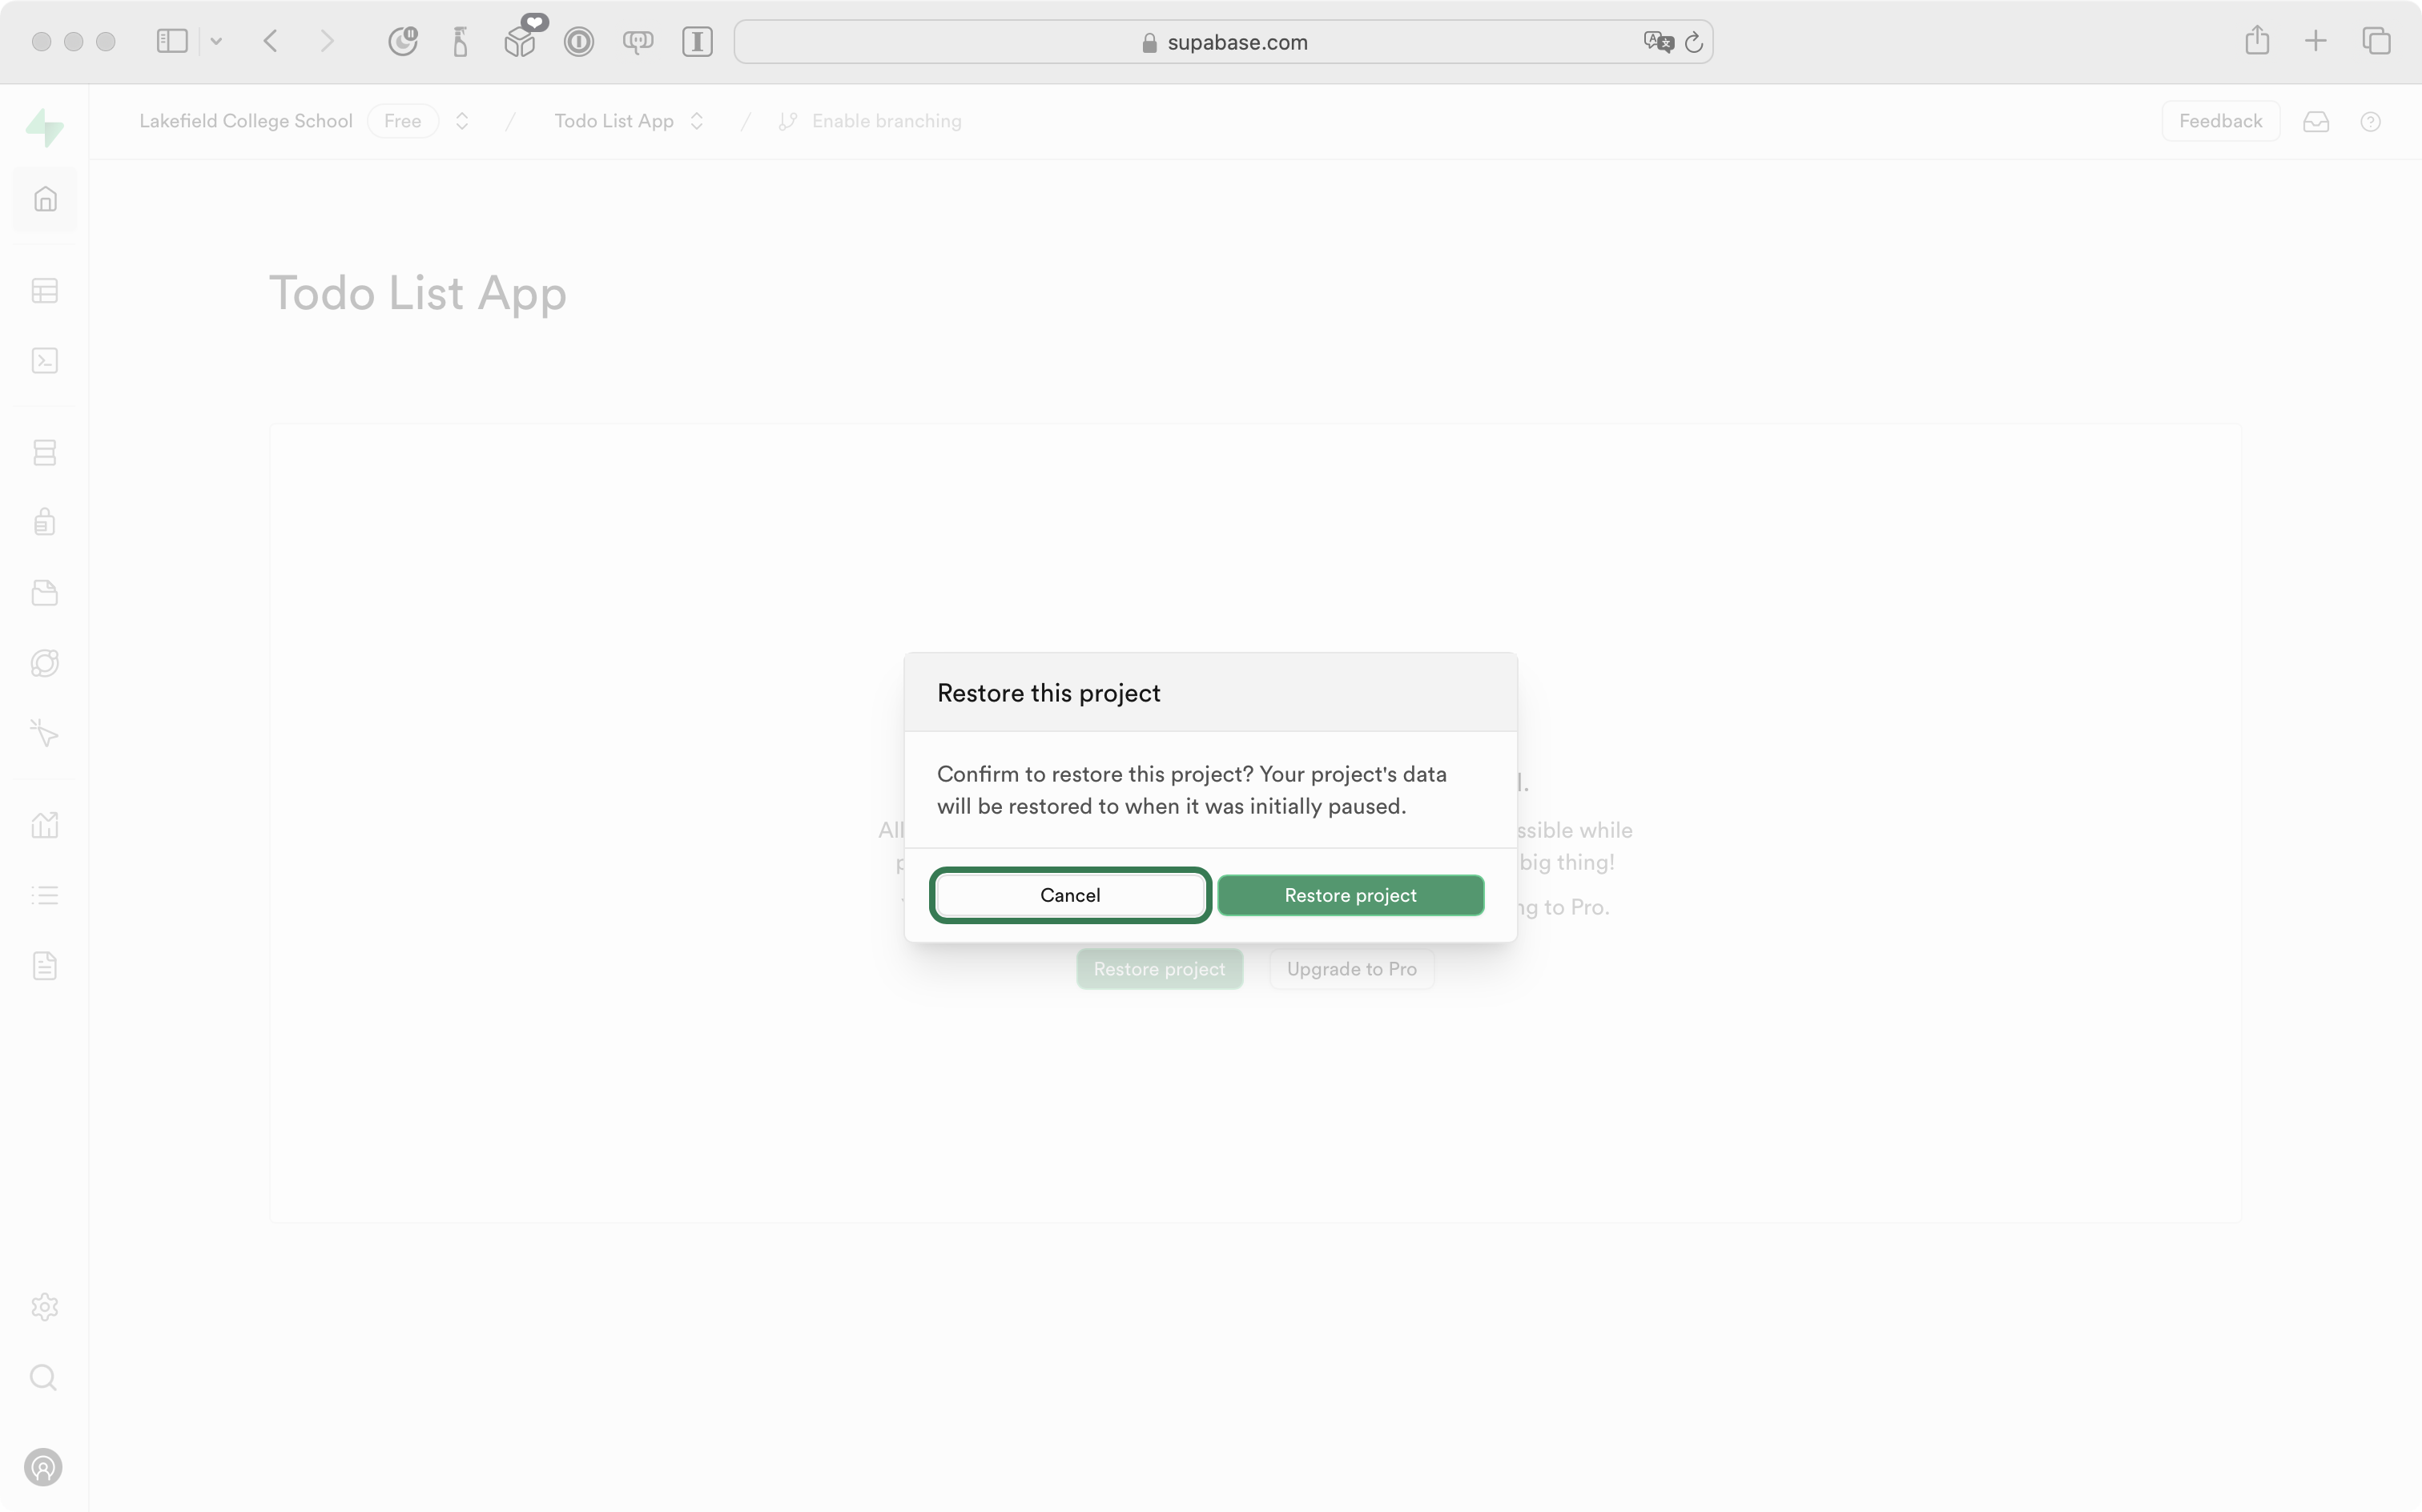
Just press the green Restore project button and then press it again on the confirmation screen:
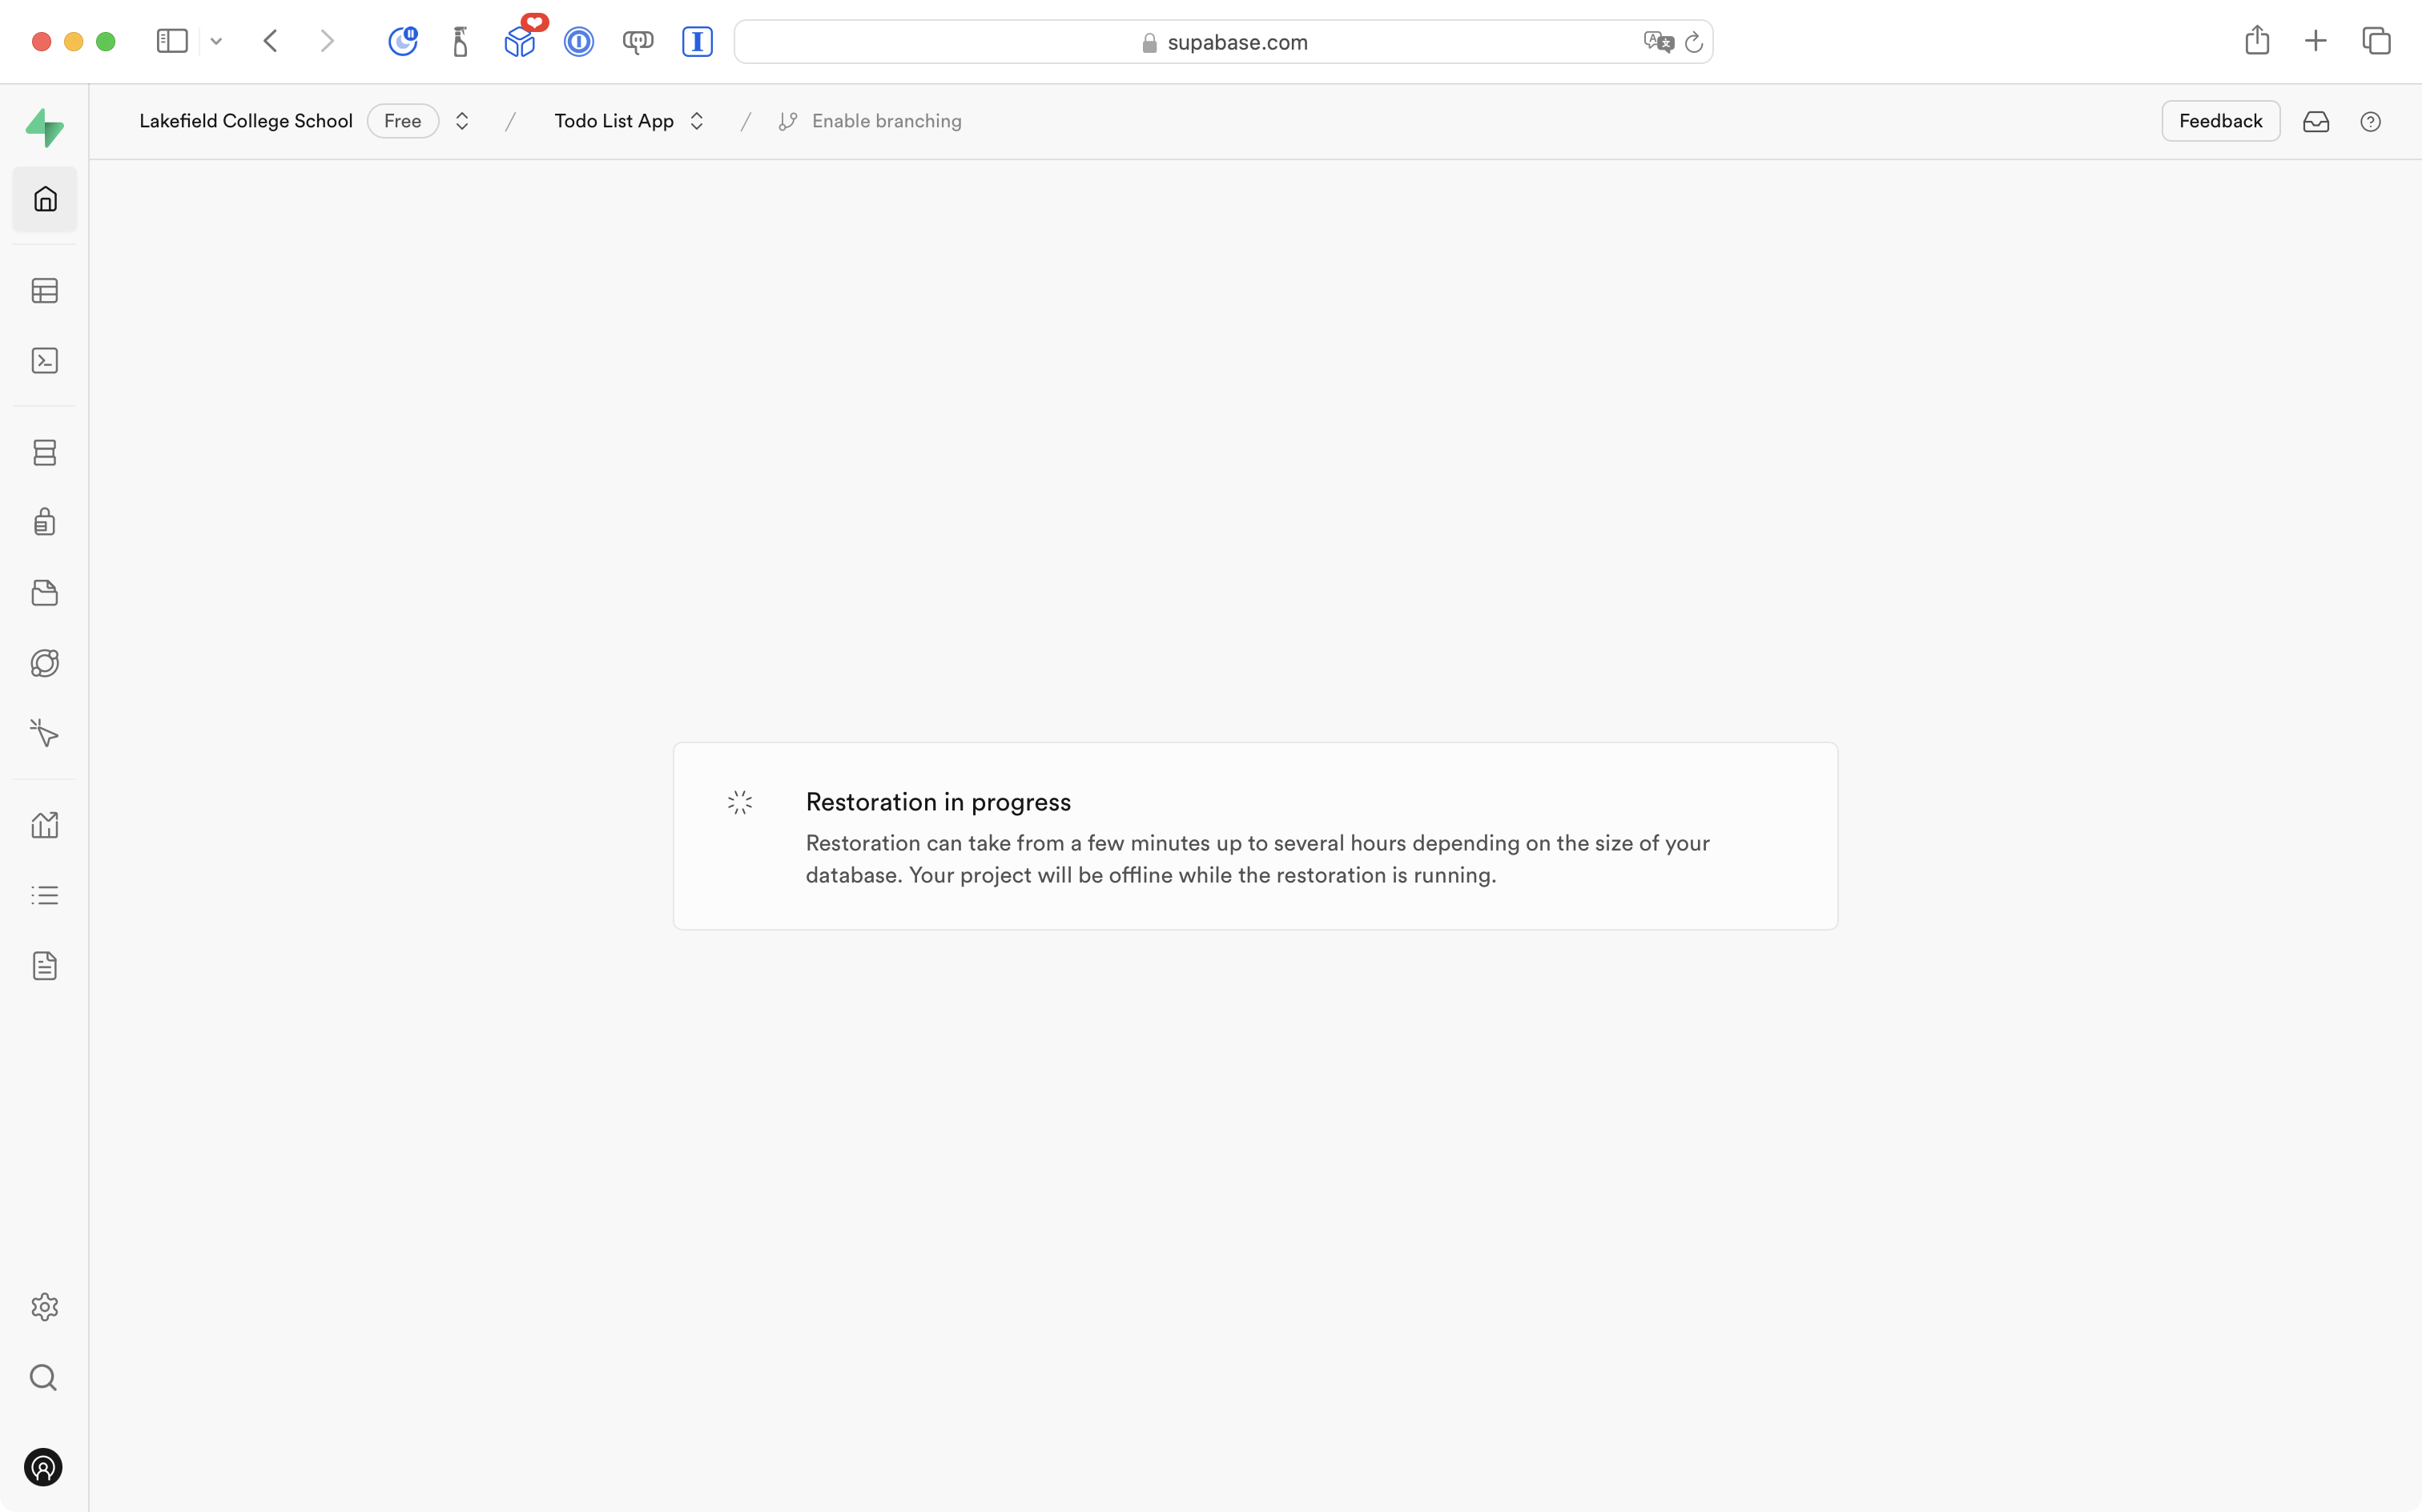
You will see this message for a few minutes. Since your database is very small, it won’t take long to restore:
When restoration is complete, you will see a screen like this one:
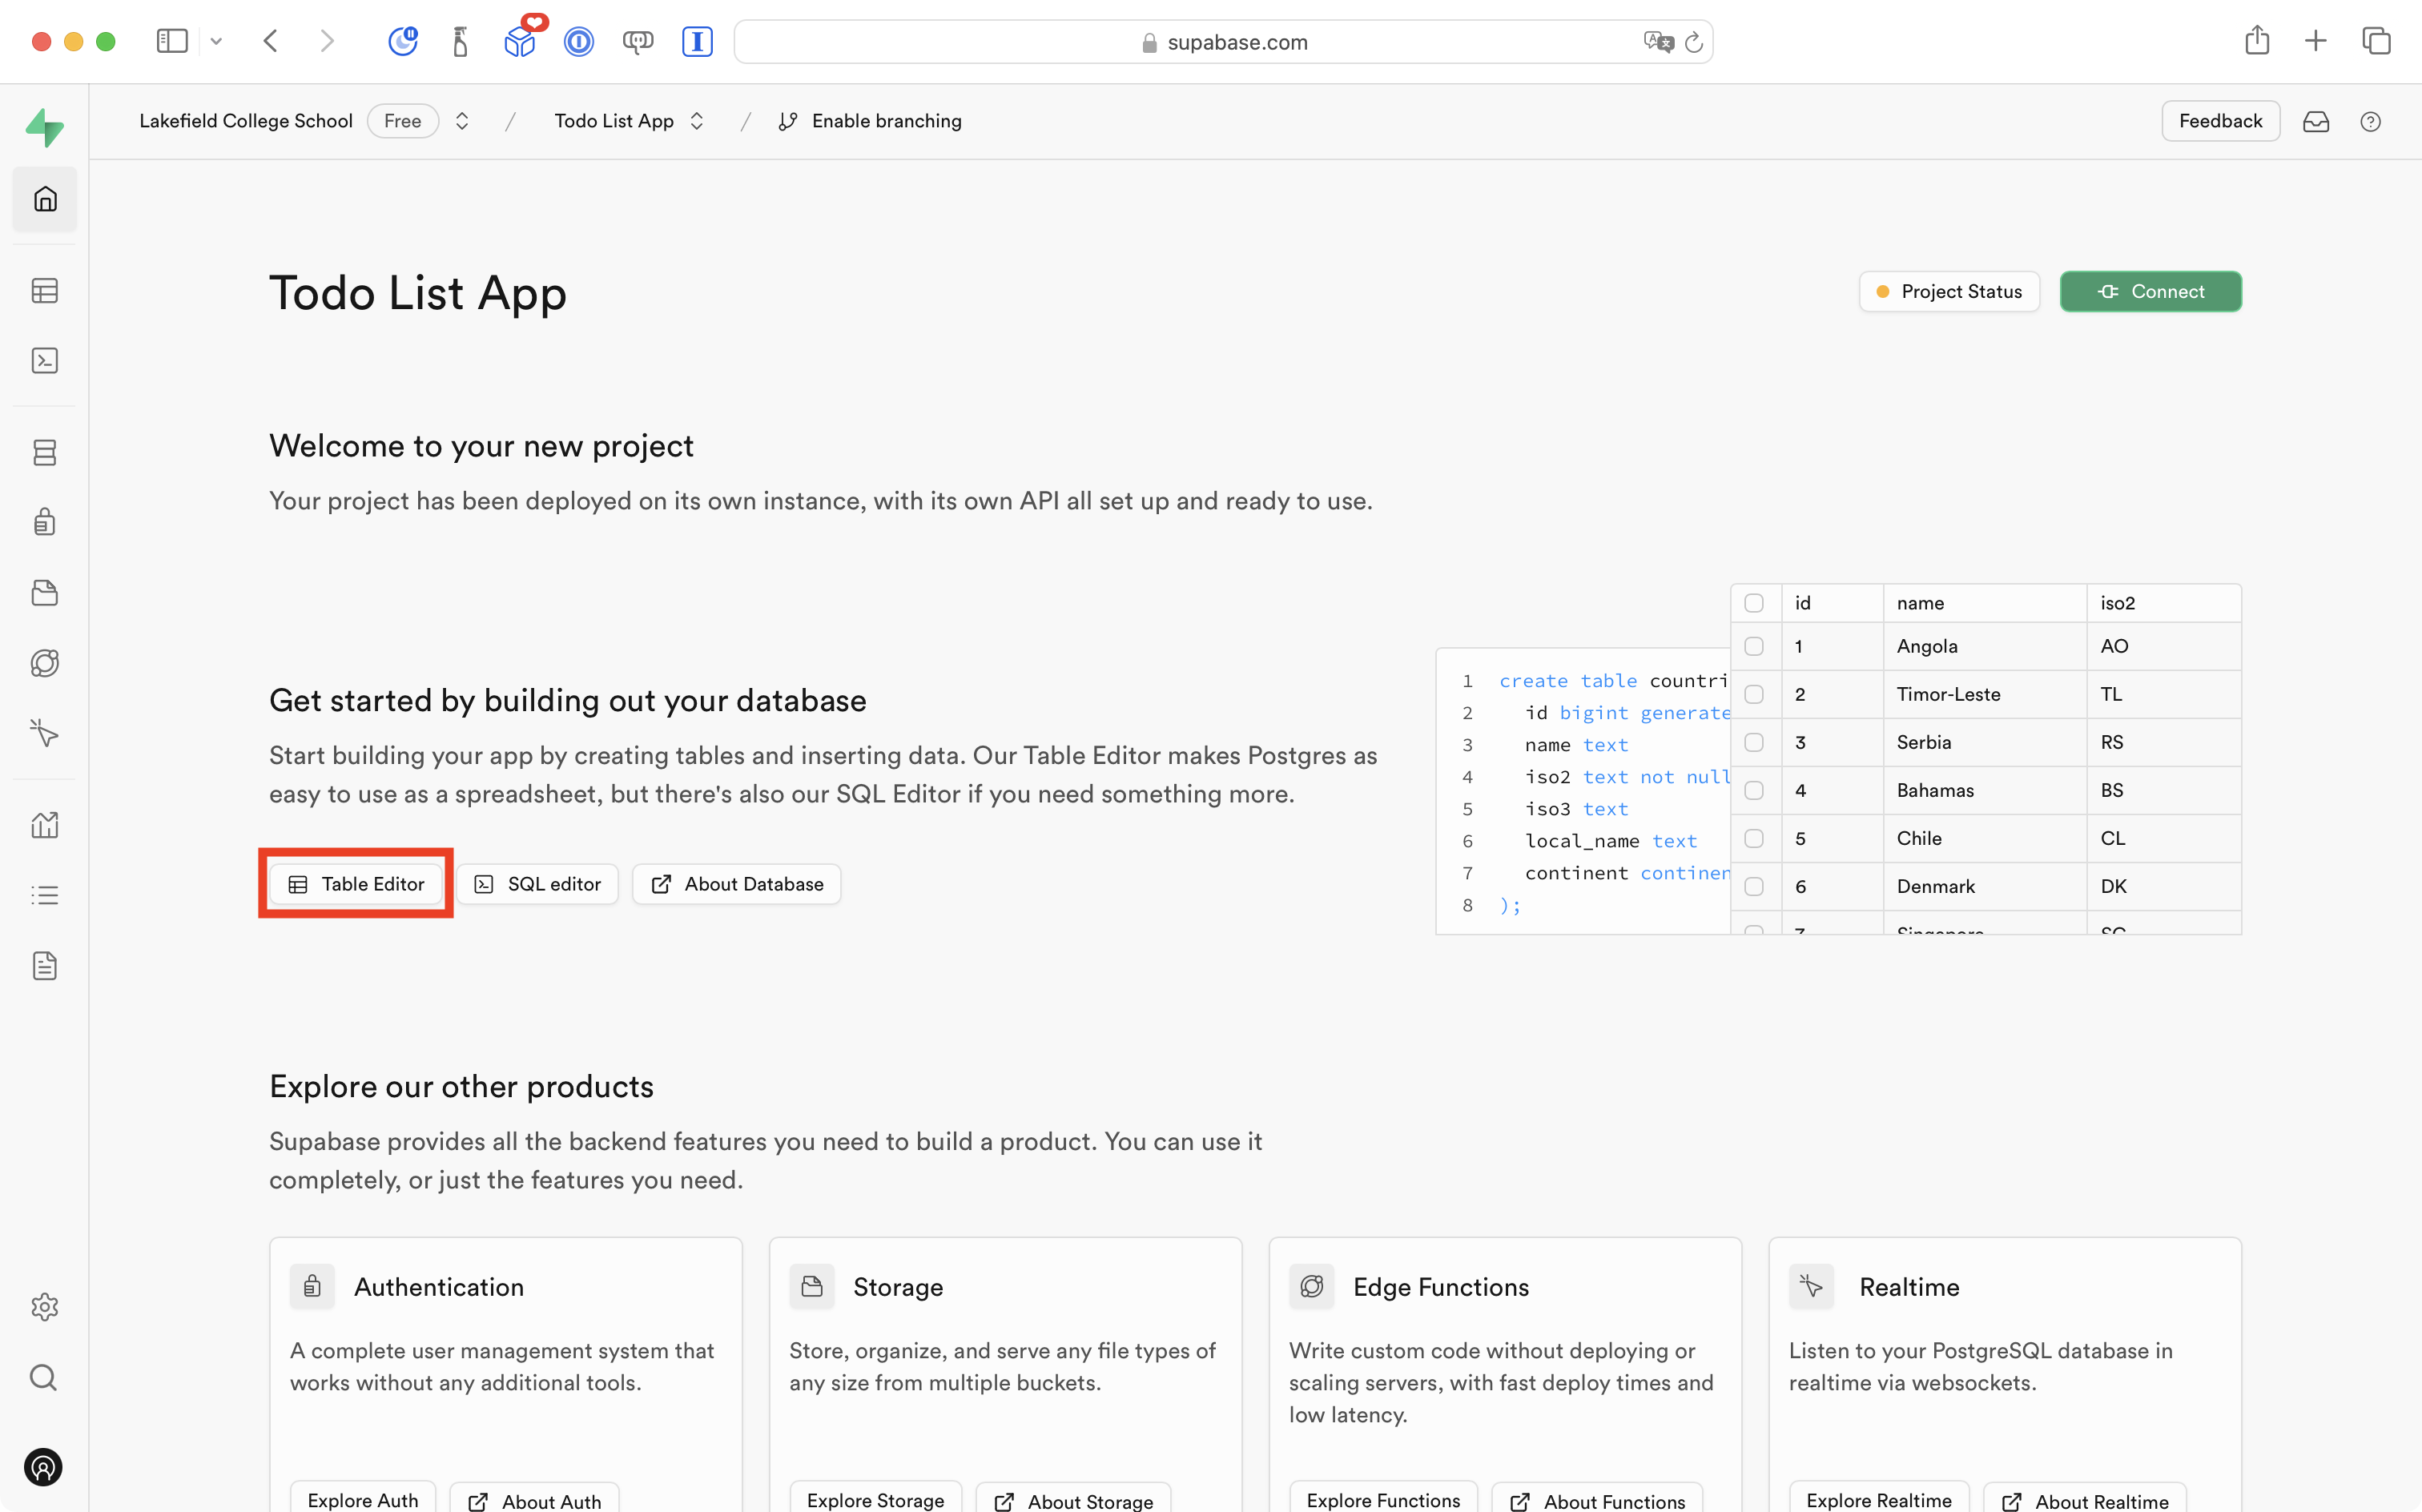
Select the Table Editor button and then select the todos table at left:
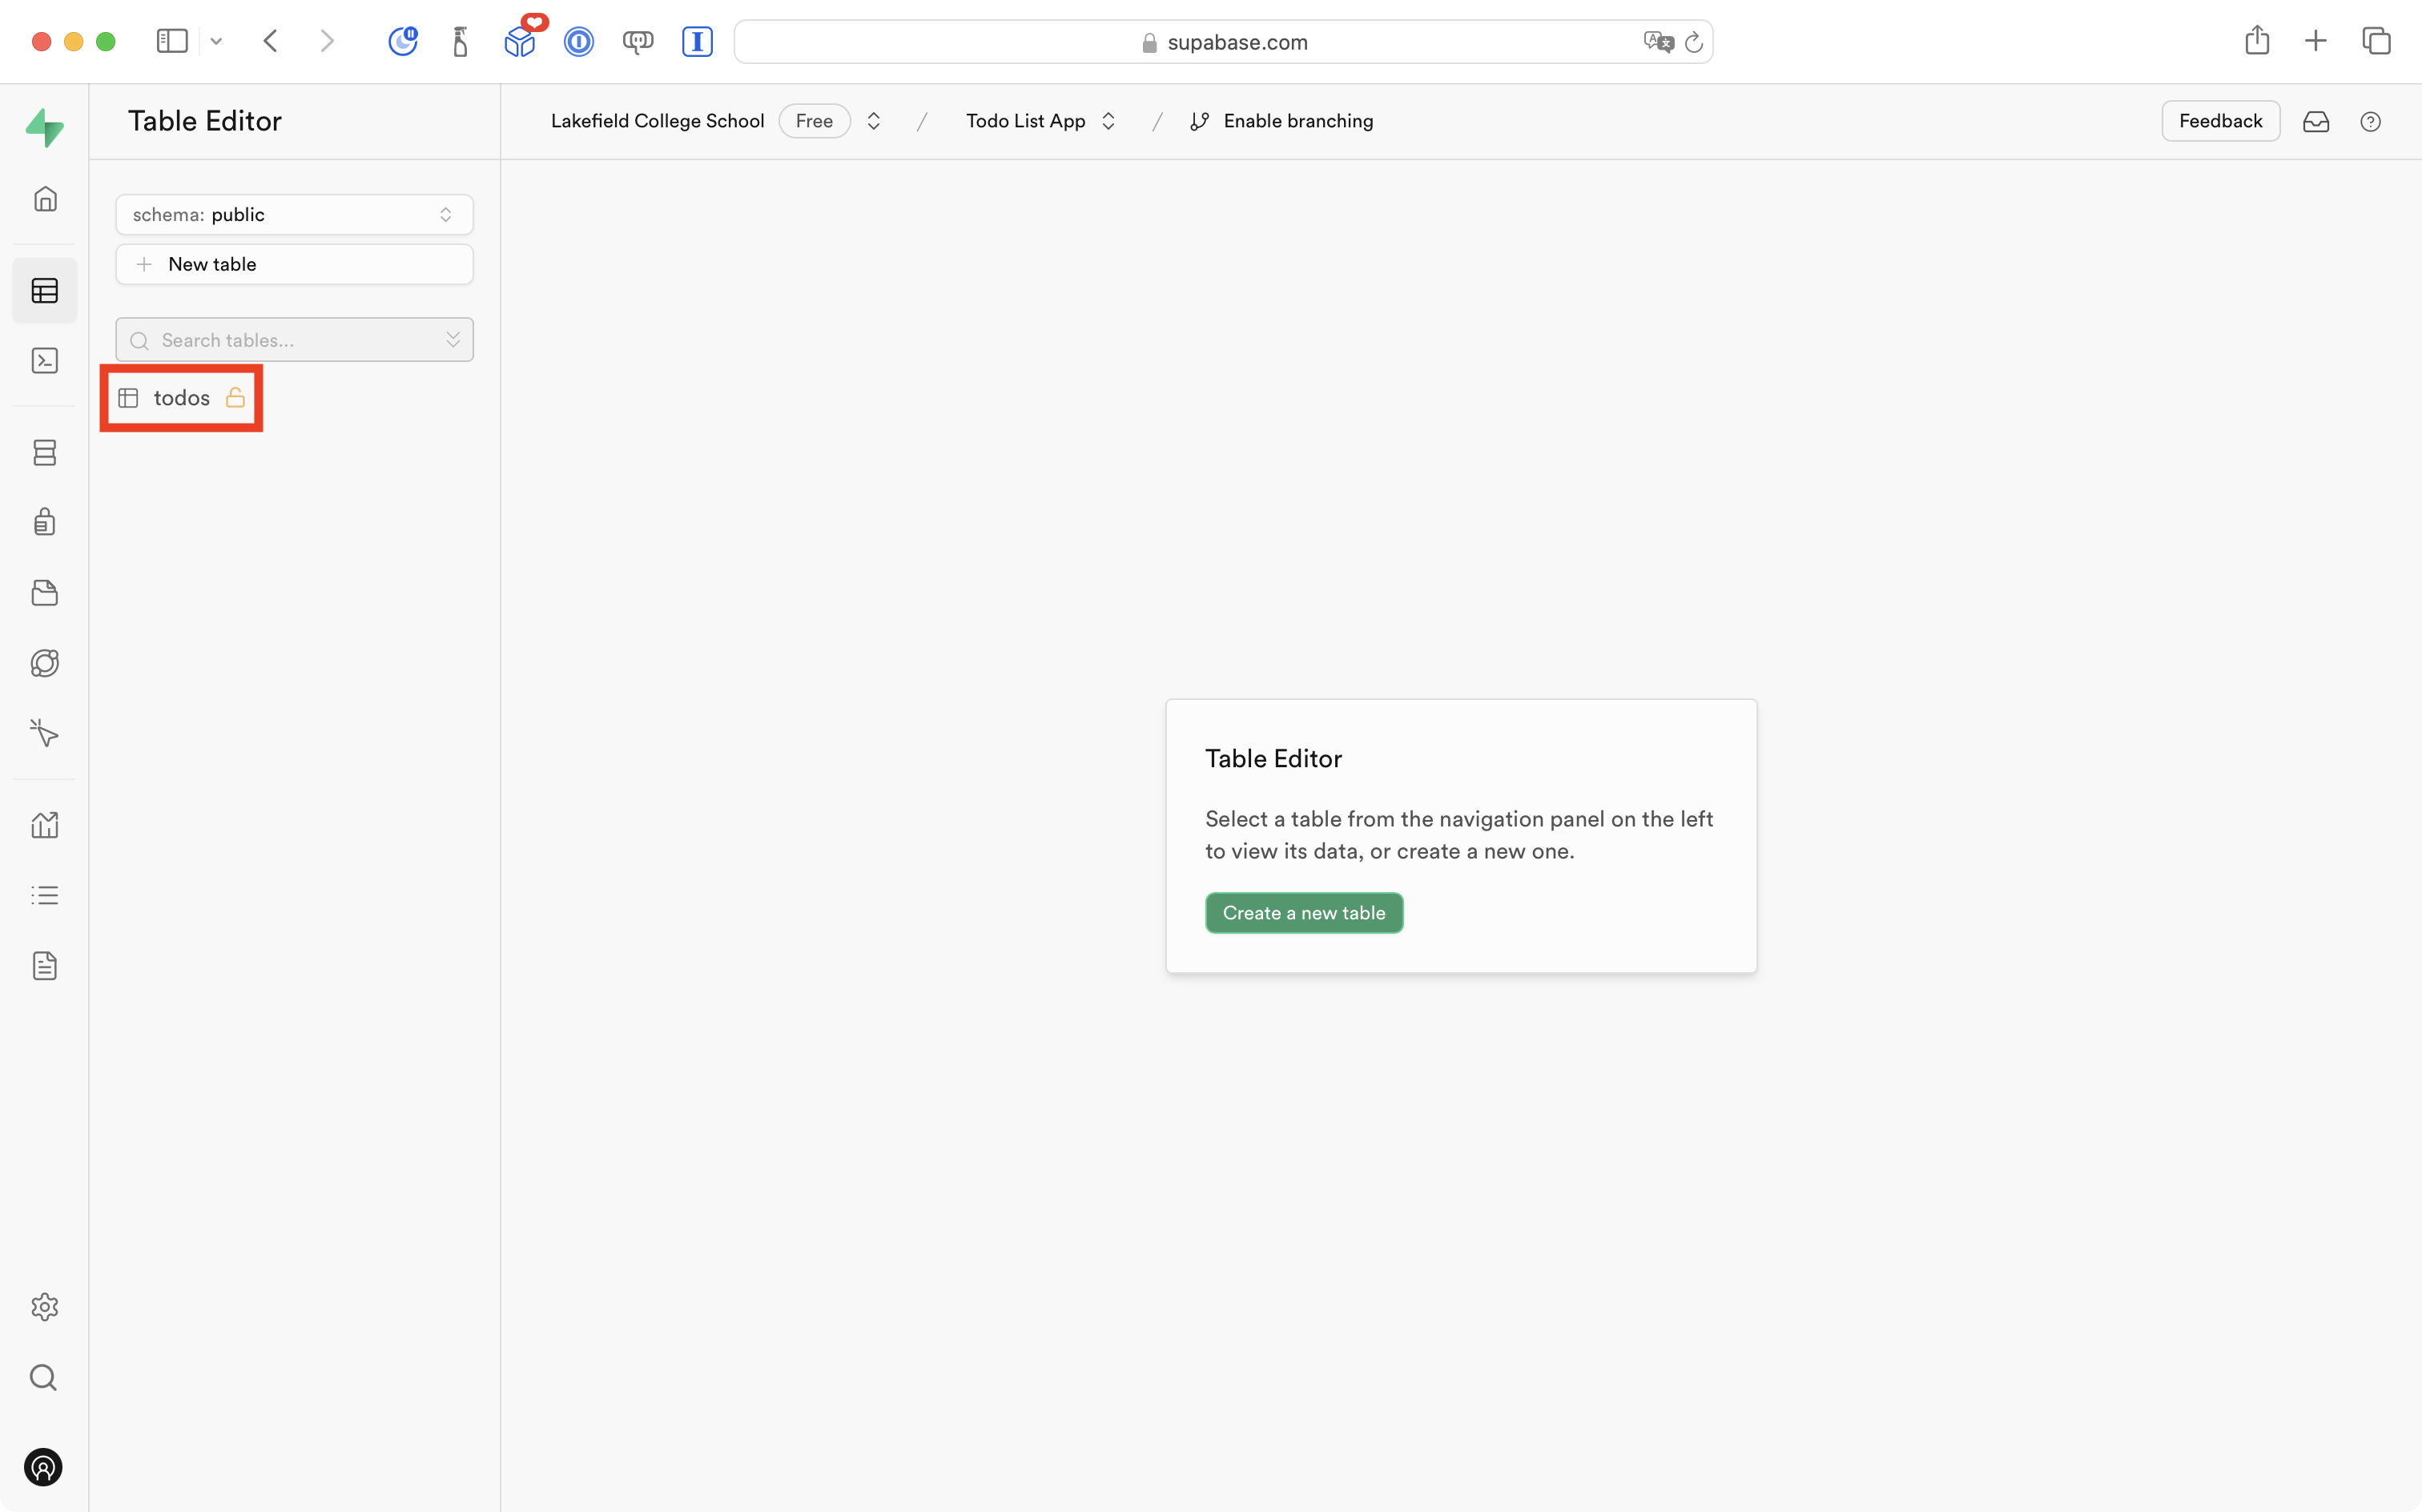
You should then see whatever to-do list items you created in part 5 of this tutorial series:

Understanding JSON
In part 5 you learned how to see the items in your database table over the web, except you used the curl command-line app as your “web browser”.
Right-click and open those instructions again. Follow them to refresh your memory so that you see output like this in the terminal:
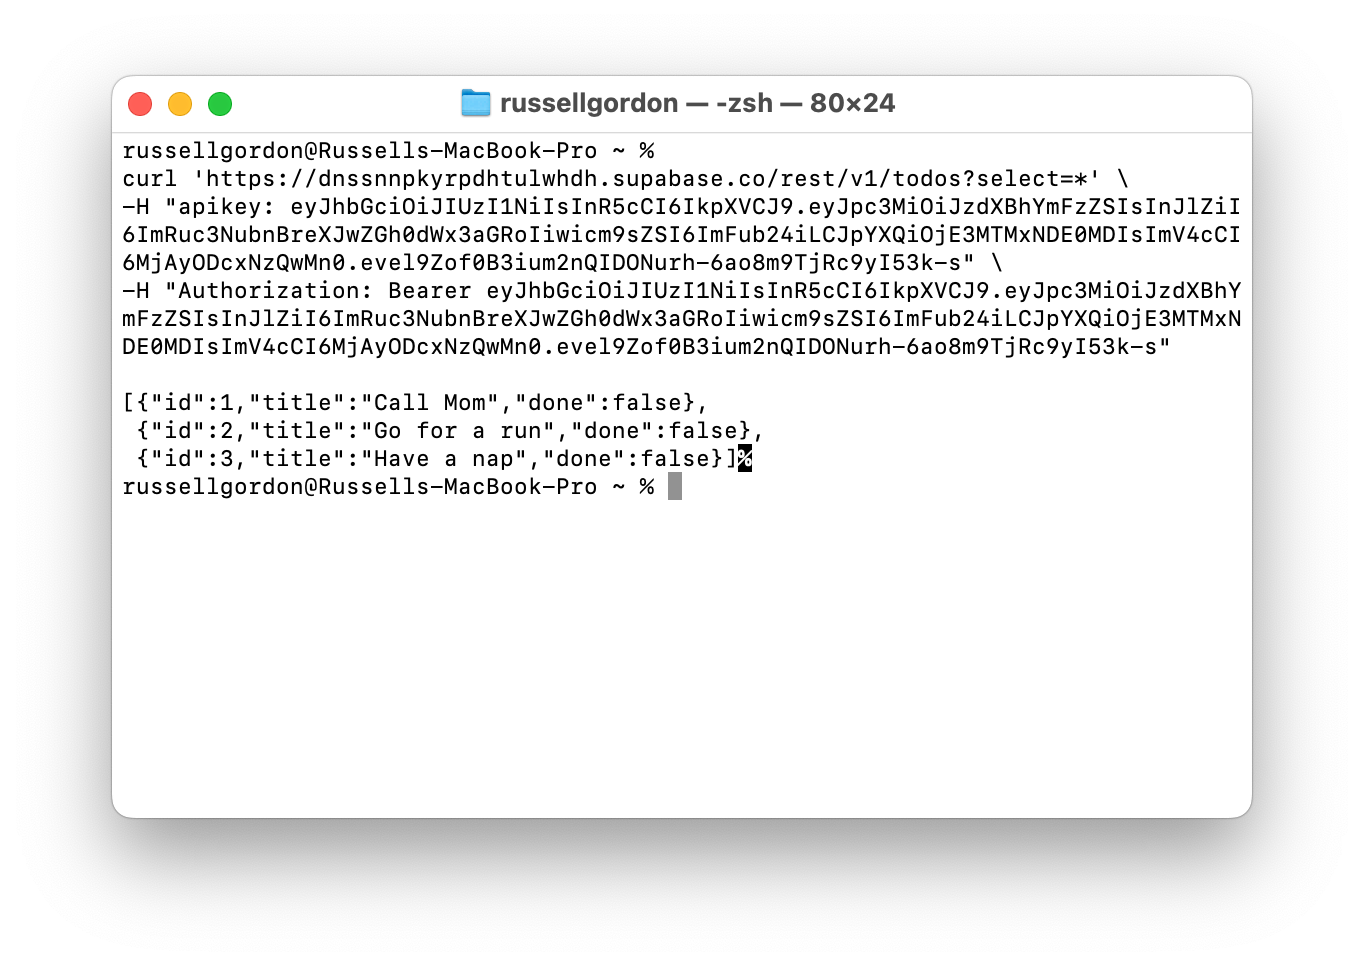
So, what is this information that was returned when we made our request to the database?
[{"id":1,"title":"Call Mom","done":false},
 {"id":2,"title":"Go for a run","done":false},
 {"id":3,"title":"Have a nap","done":false}]
The information shown there is simply plain text – however, certain rules are followed so that the information is in a predictable format.
JavaScript Object Notation format, or JSON, is the set of rules being used to format the information sent to us by the Supabase platform.
In JSON:
- square brackets mark the start and end of an array
- curly brackets mark the start and end of an object
- an object is composed of data
- data are sent in name/value pairs
- the name comes before a colon
- the value comes after a colon
- data are sent in name/value pairs
So for this data:
[{"id":1,"title":"Call Mom","done":false},
 {"id":2,"title":"Go for a run","done":false},
 {"id":3,"title":"Have a nap","done":false}]
… there is:
- one array
- three objects are in the array
- each object has three name/value pairs
Our goal is to get that data out of it’s plain-text JSON format, and into the Swift data structures we set up in part 5.
Each JSON object will correspond to an instance of our TodoItem structure:
struct TodoItem: Identifiable {
    let id = UUID()
    var title: String
    var done:  Bool
}
The JSON array corresponds to the todos array we set up in our view model:
We are going to use the framework provided by Supabase so that this process of converting data kept in JSON format into Swift data structures is super convenient and automatic.
NOTE
Eagle-eyed readers may have noticed that the
idproperty being sent to us by Supabase is a simple integer value (1,2,3, and so on) but theidproperty in ourTodoItemstructure is aUUIDor universally-unique identifier, which looks something like this:5F944282-A194-4A6C-A1E4-2022FBD8D8A8Don’t worry. We’ll fix this in a moment, and it’s easy to do!
Adding the Supabase framework
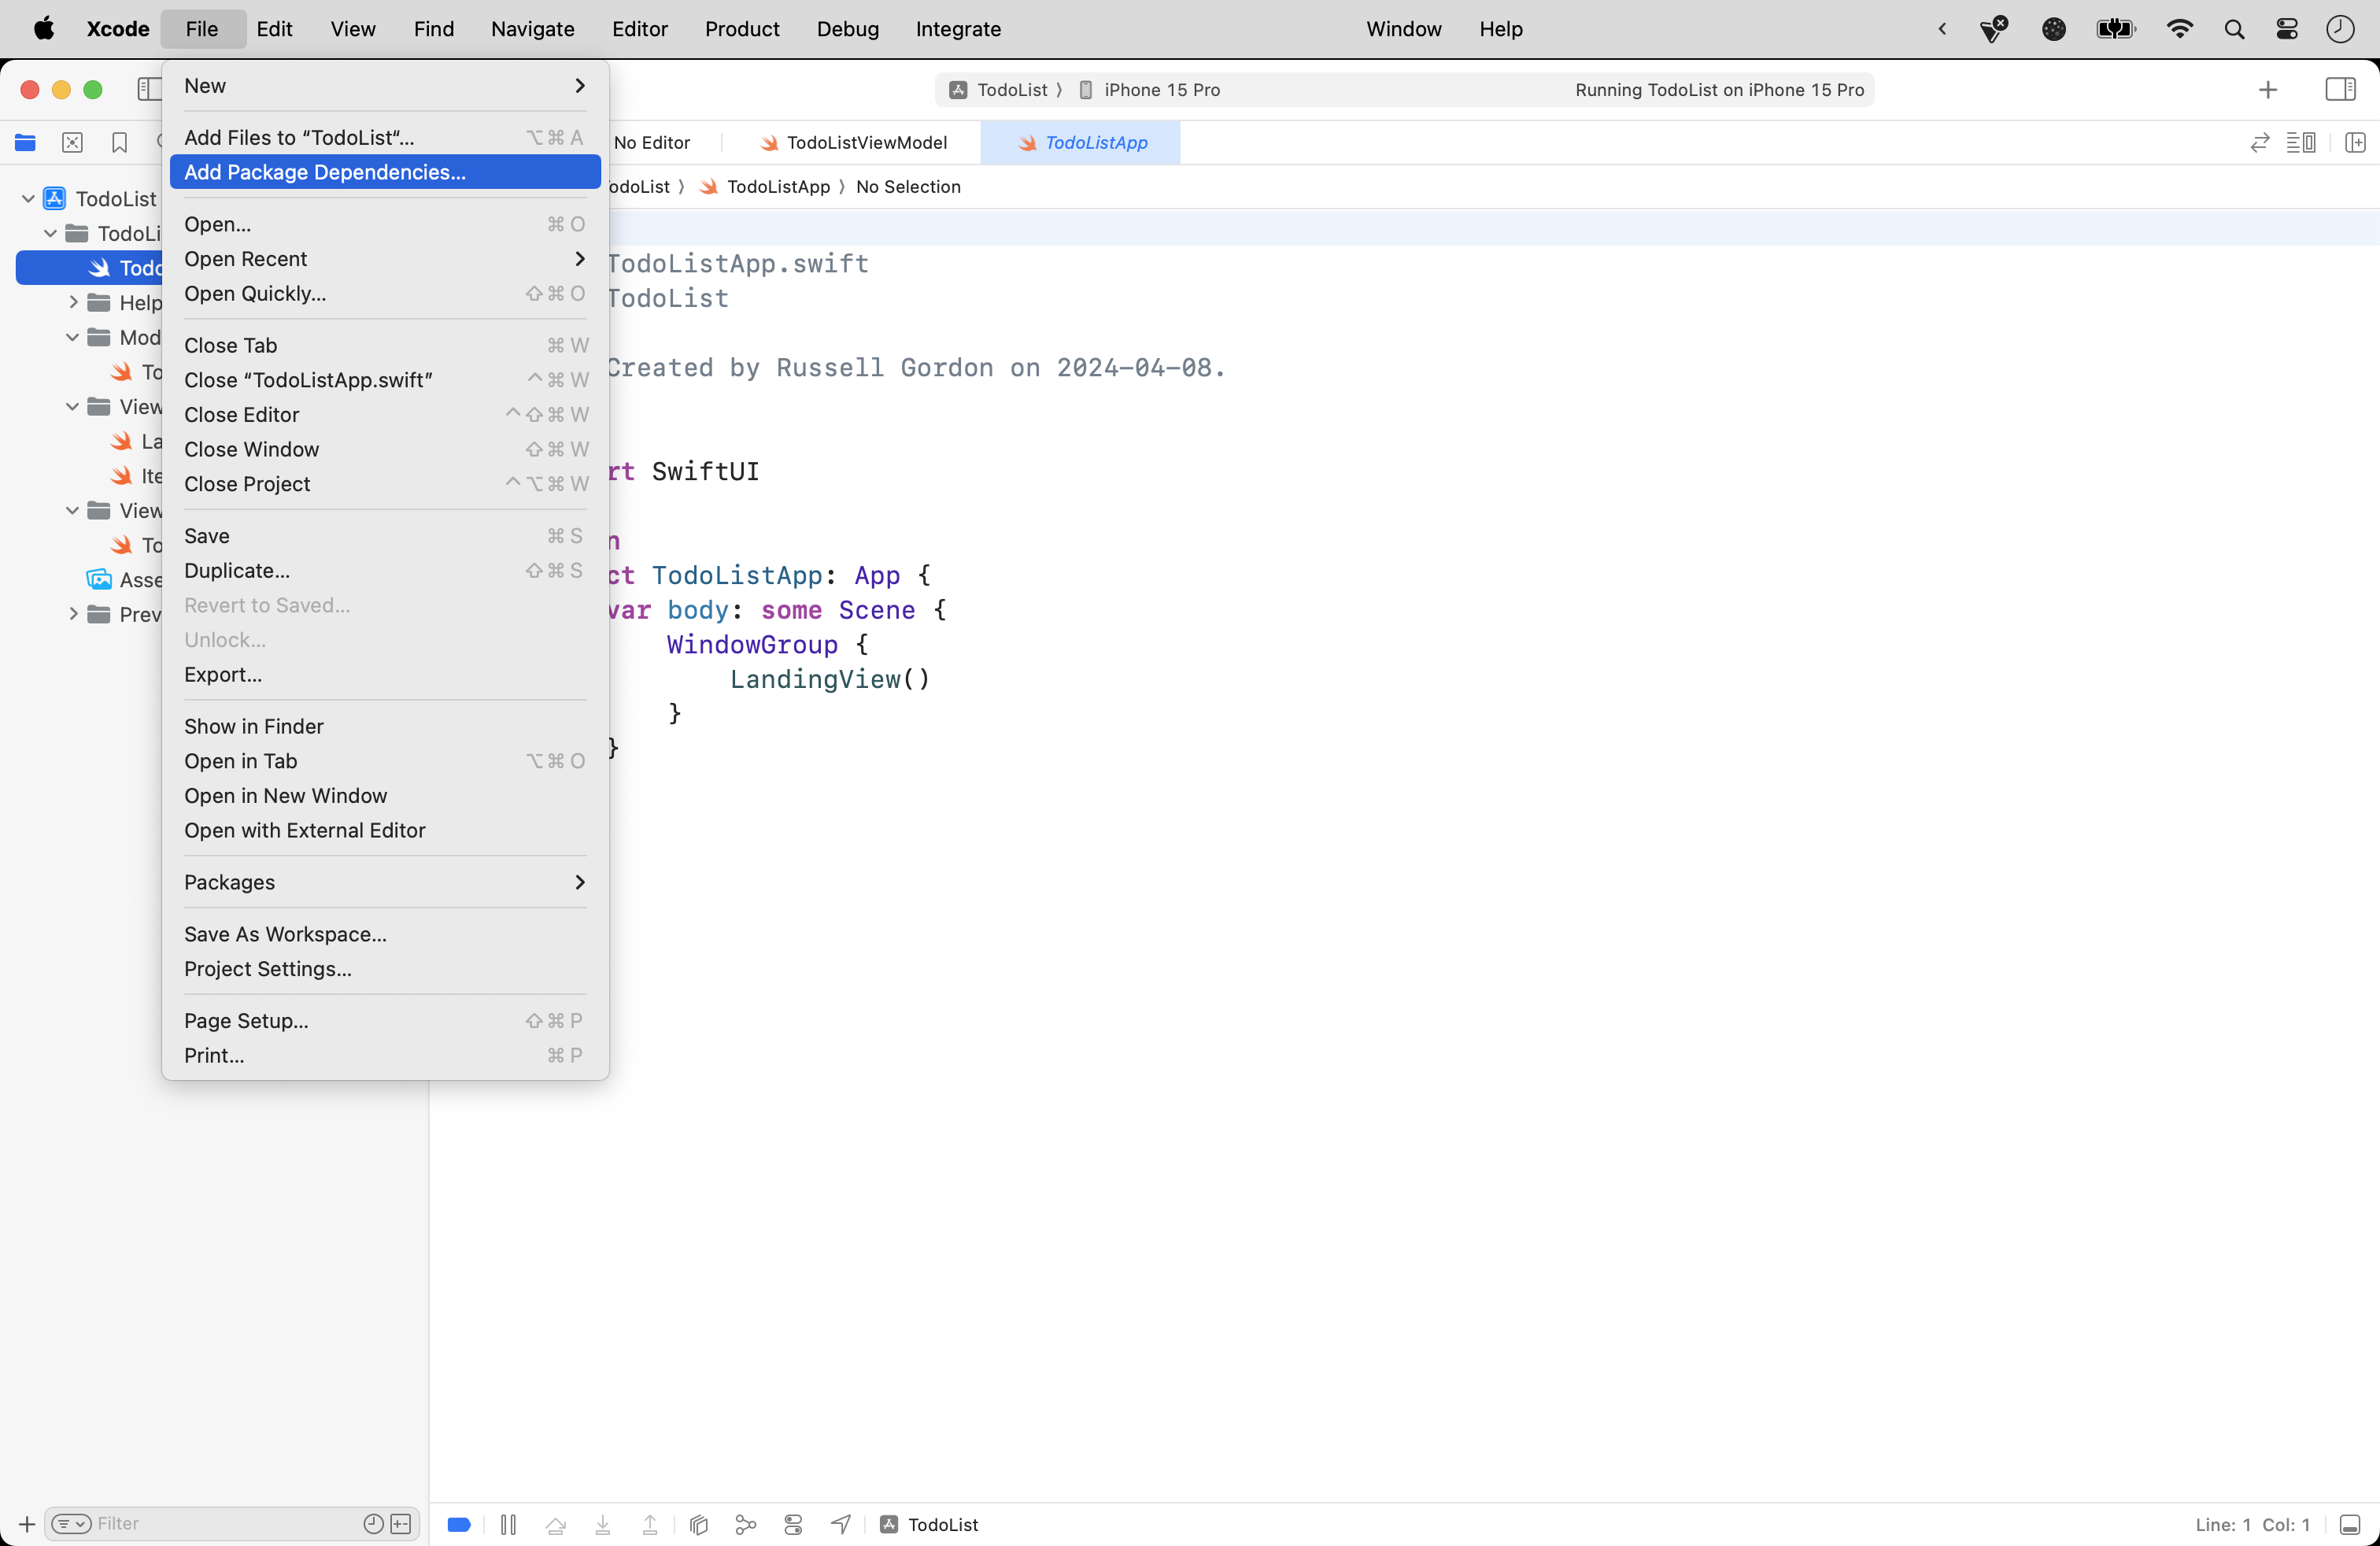
To add the Supabase framework, from the menus, select File > Add Package Dependences…:
Paste the address shown here in the top-right corner:
https://github.com/supabase-community/supabase-swift
You should see the following:
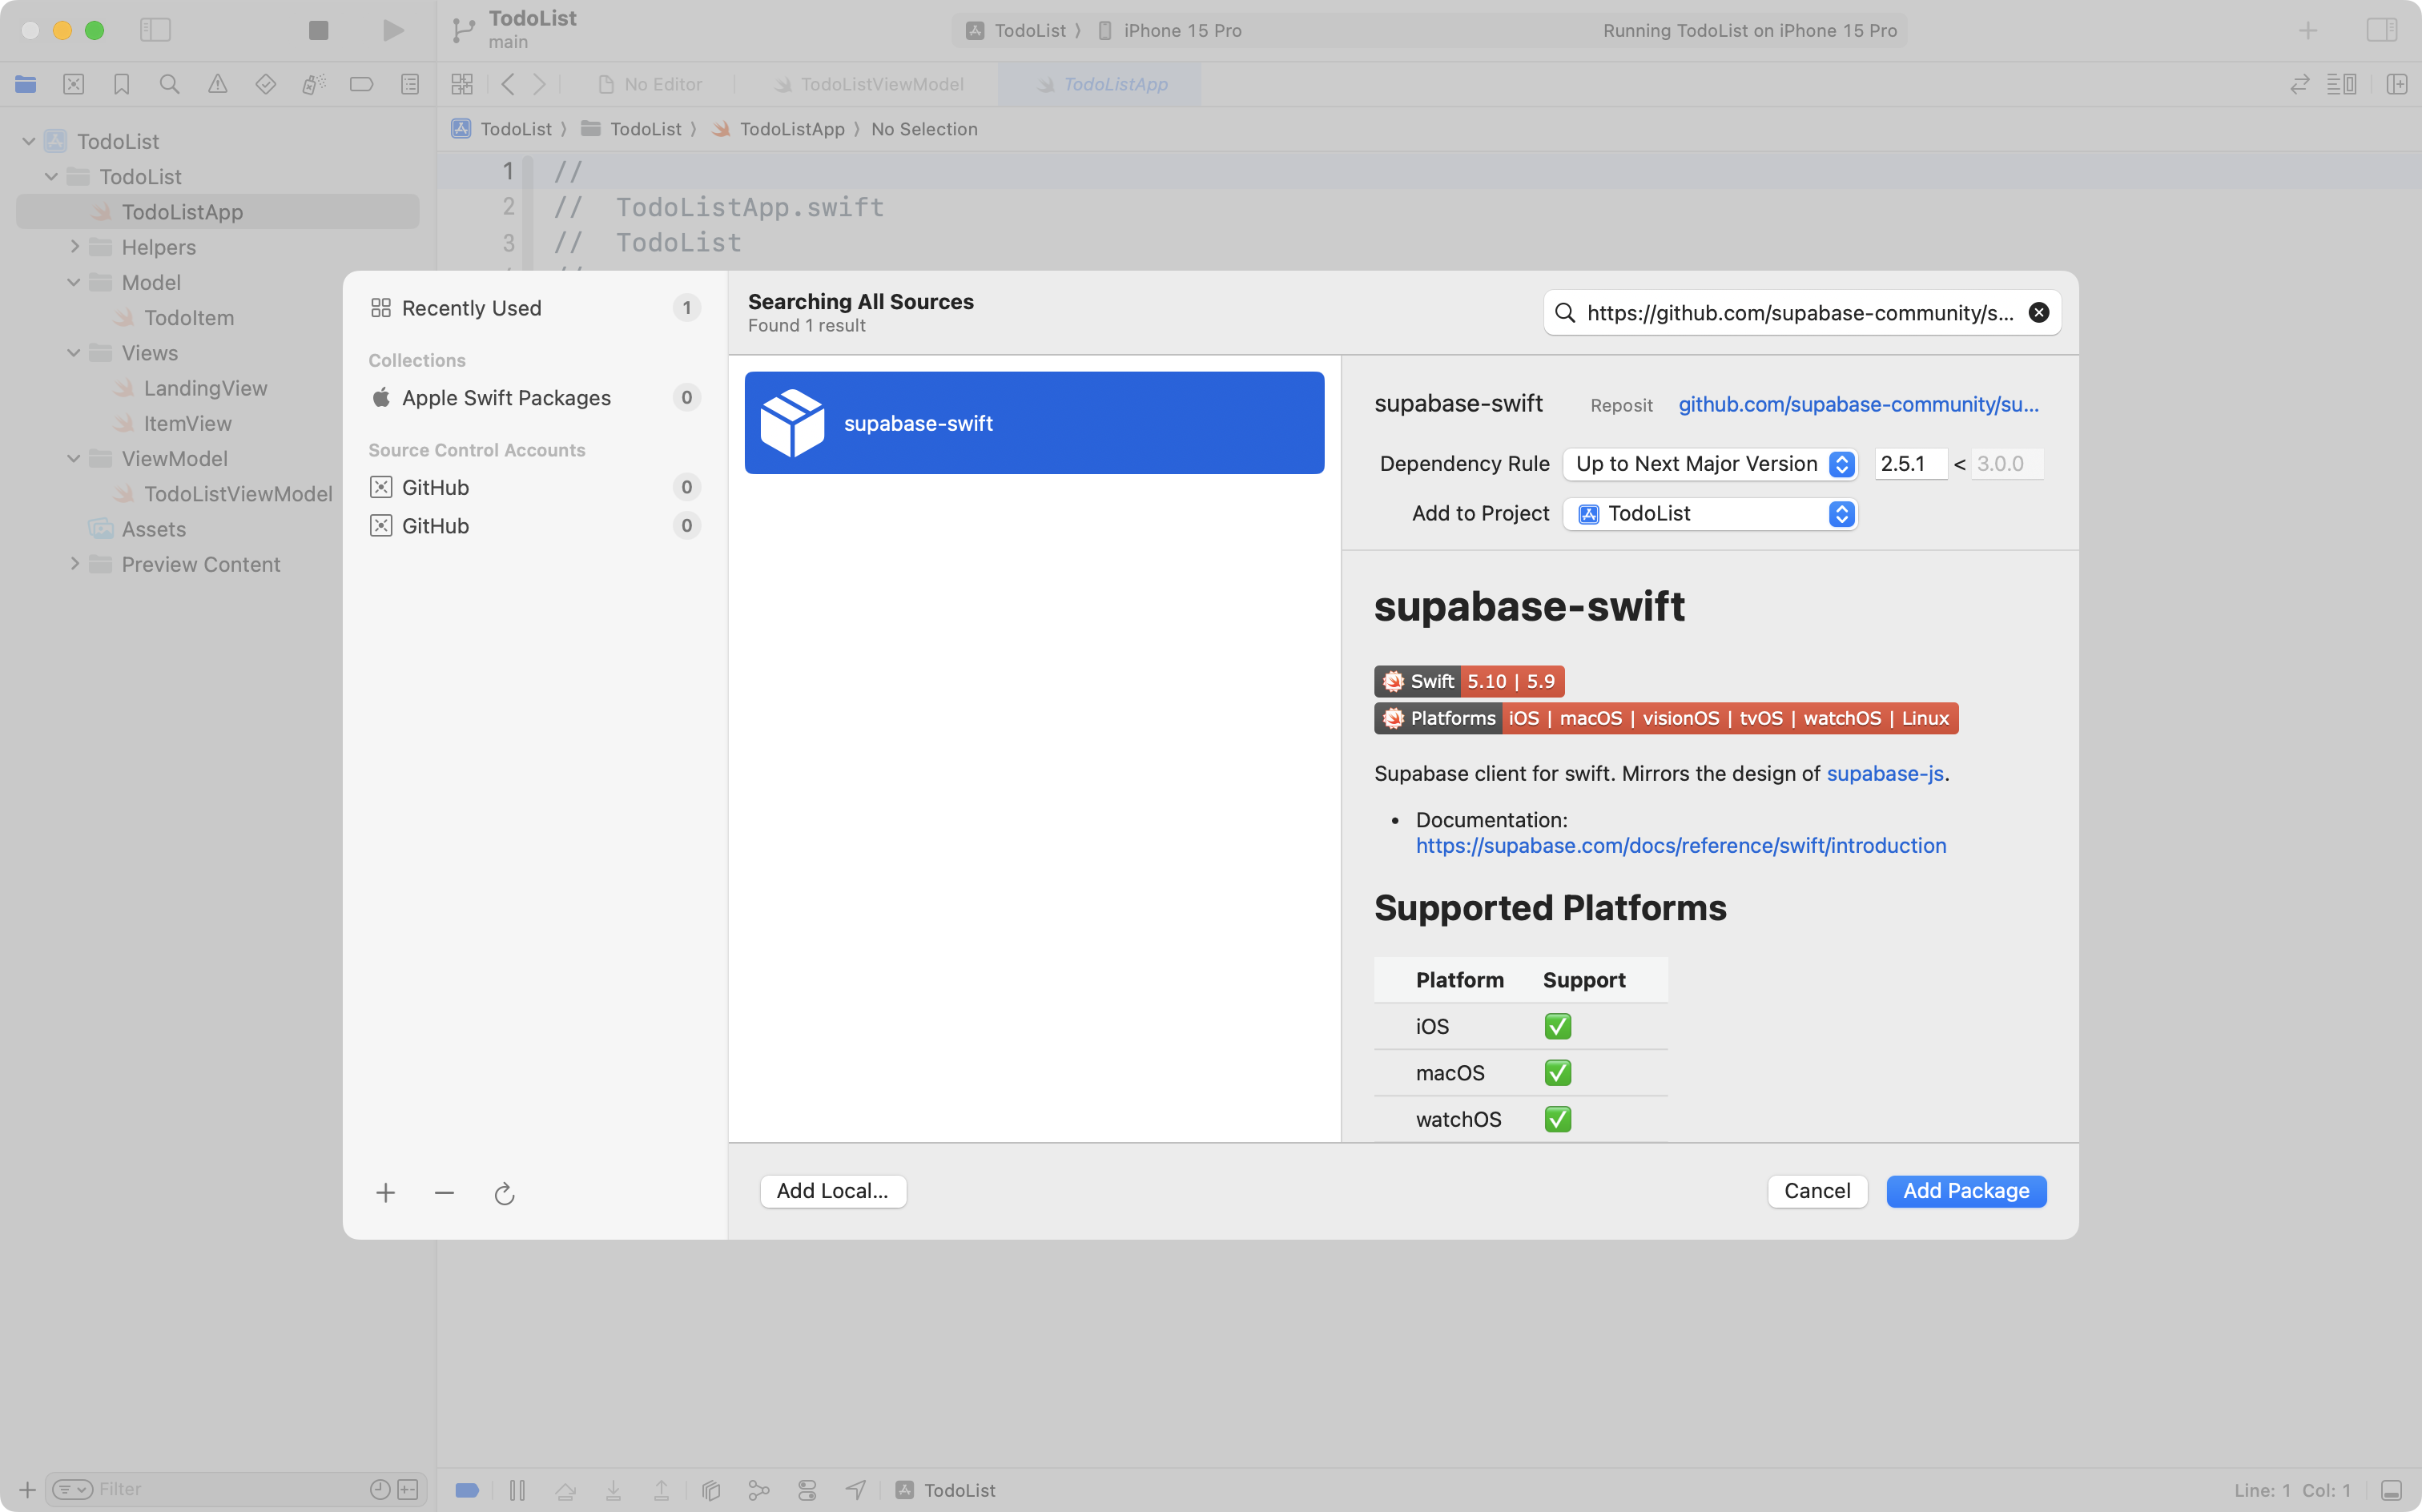
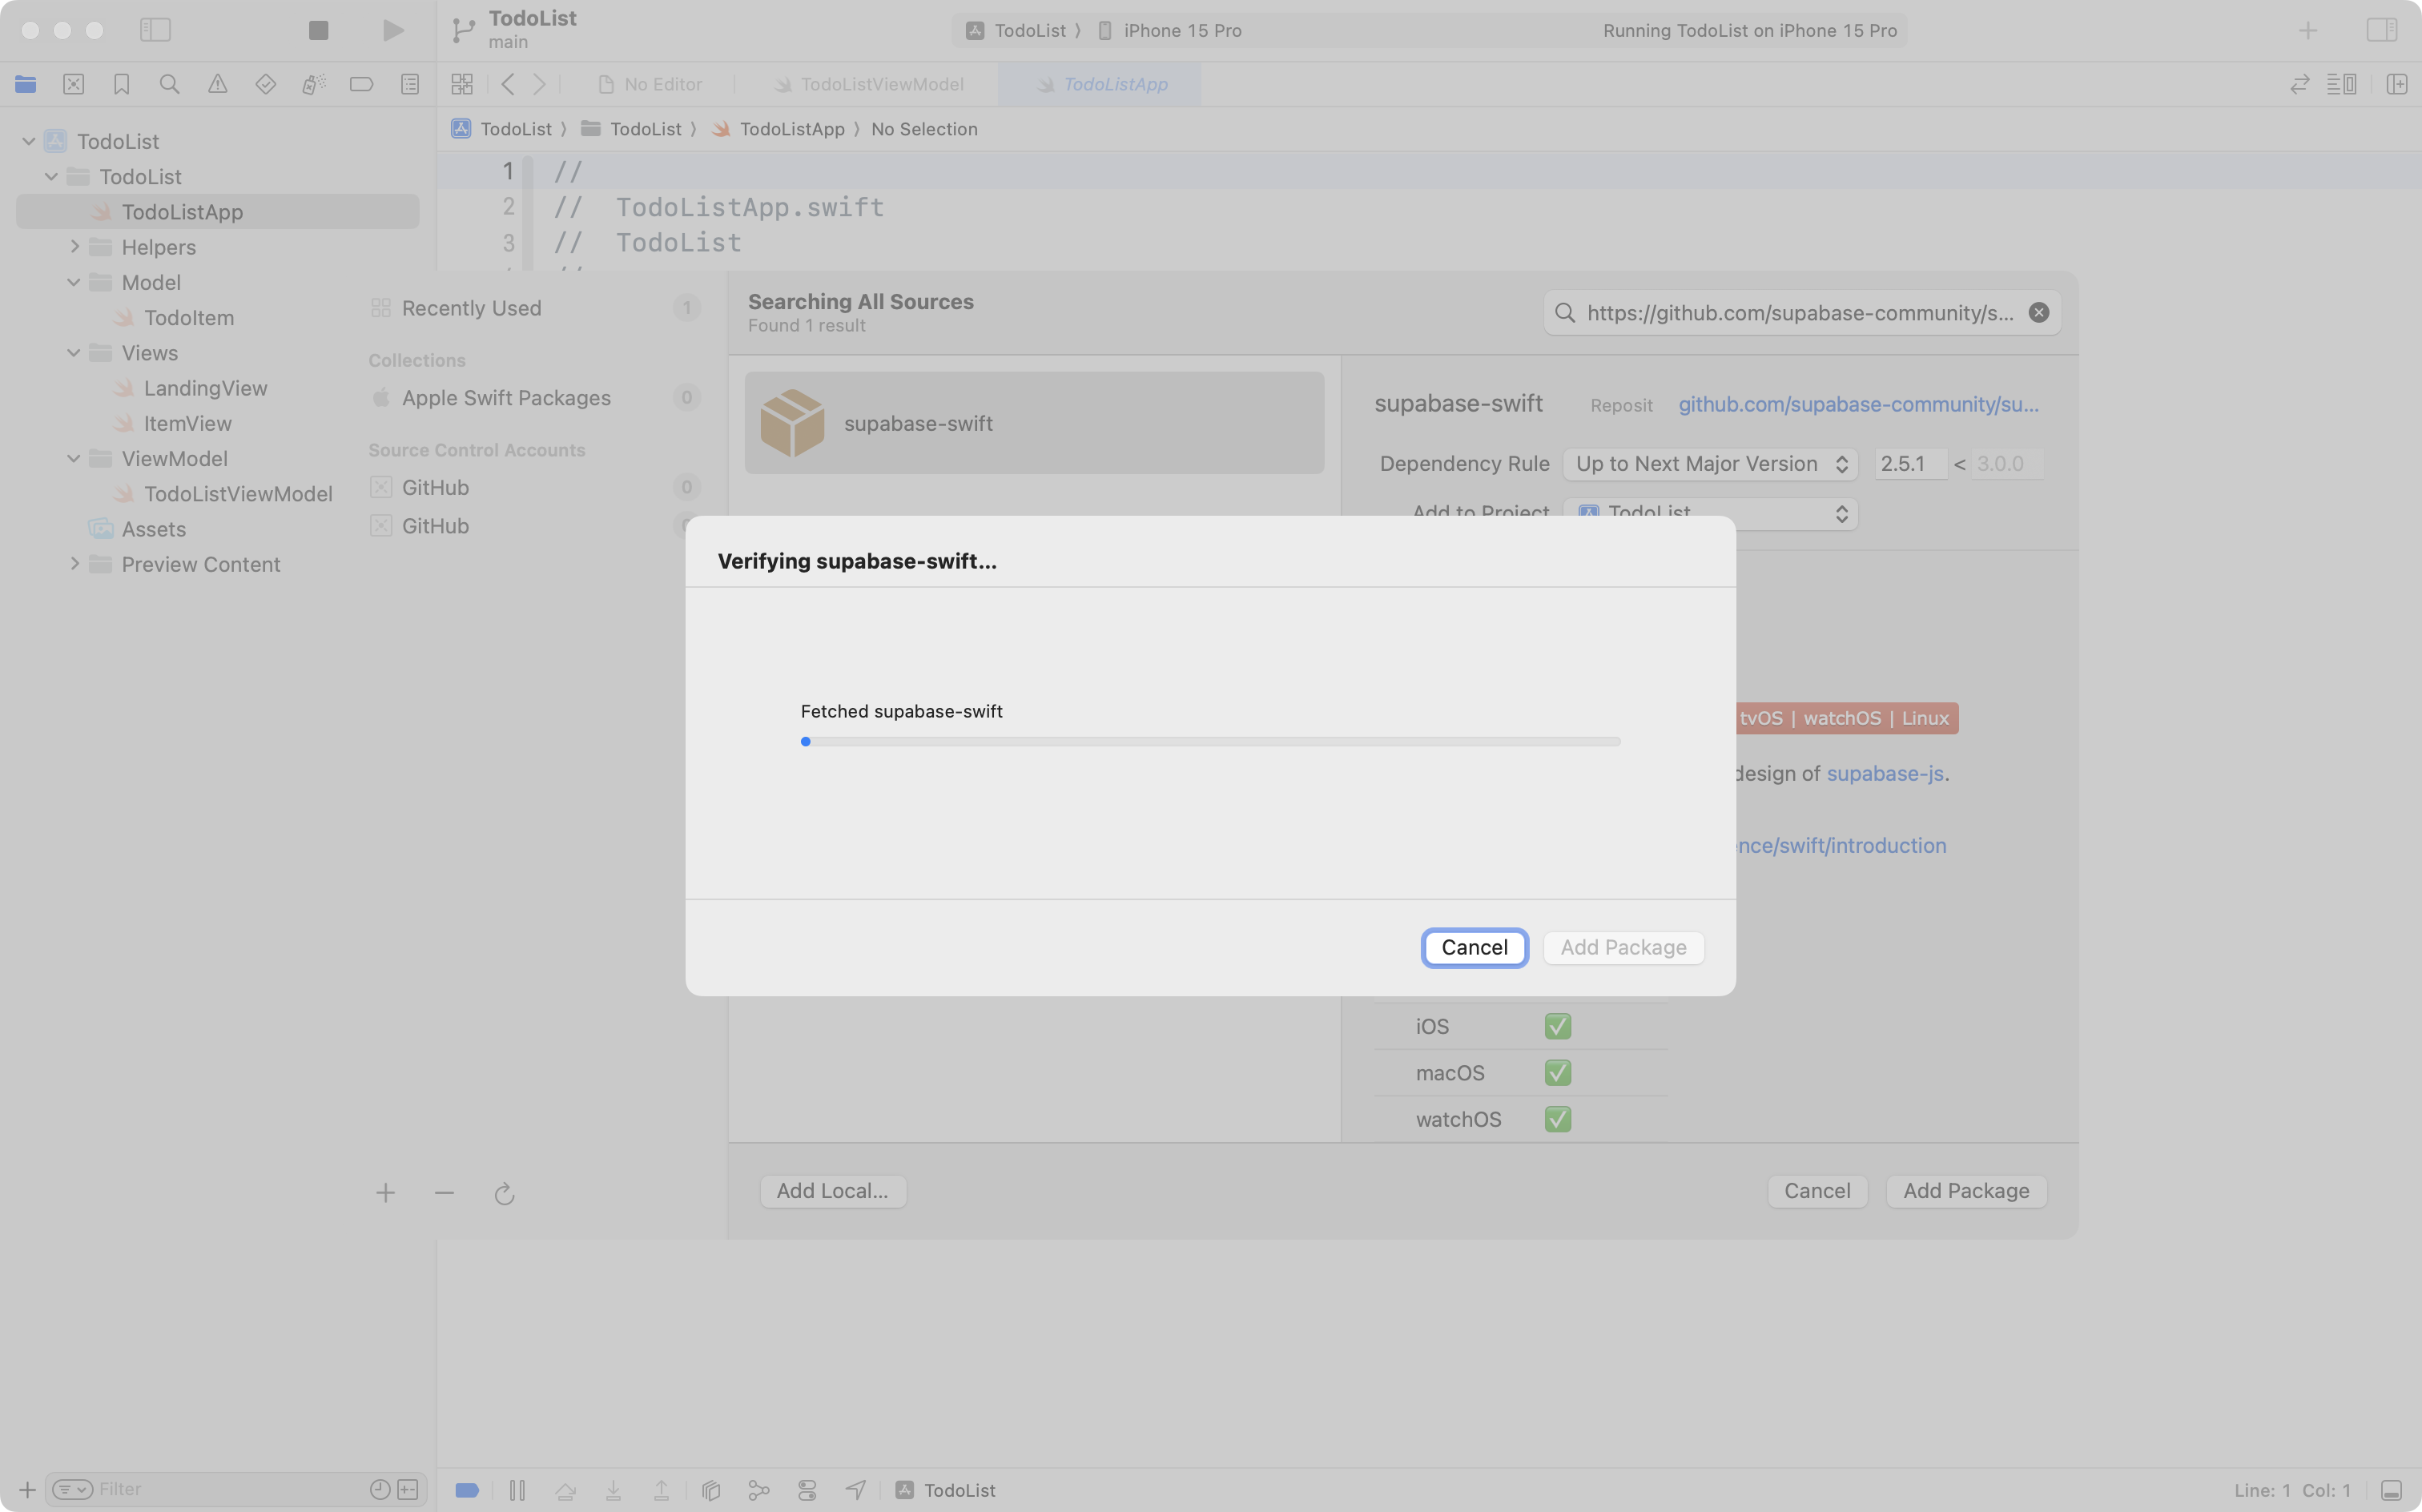
Then select Add Package and you will see this screen briefly:
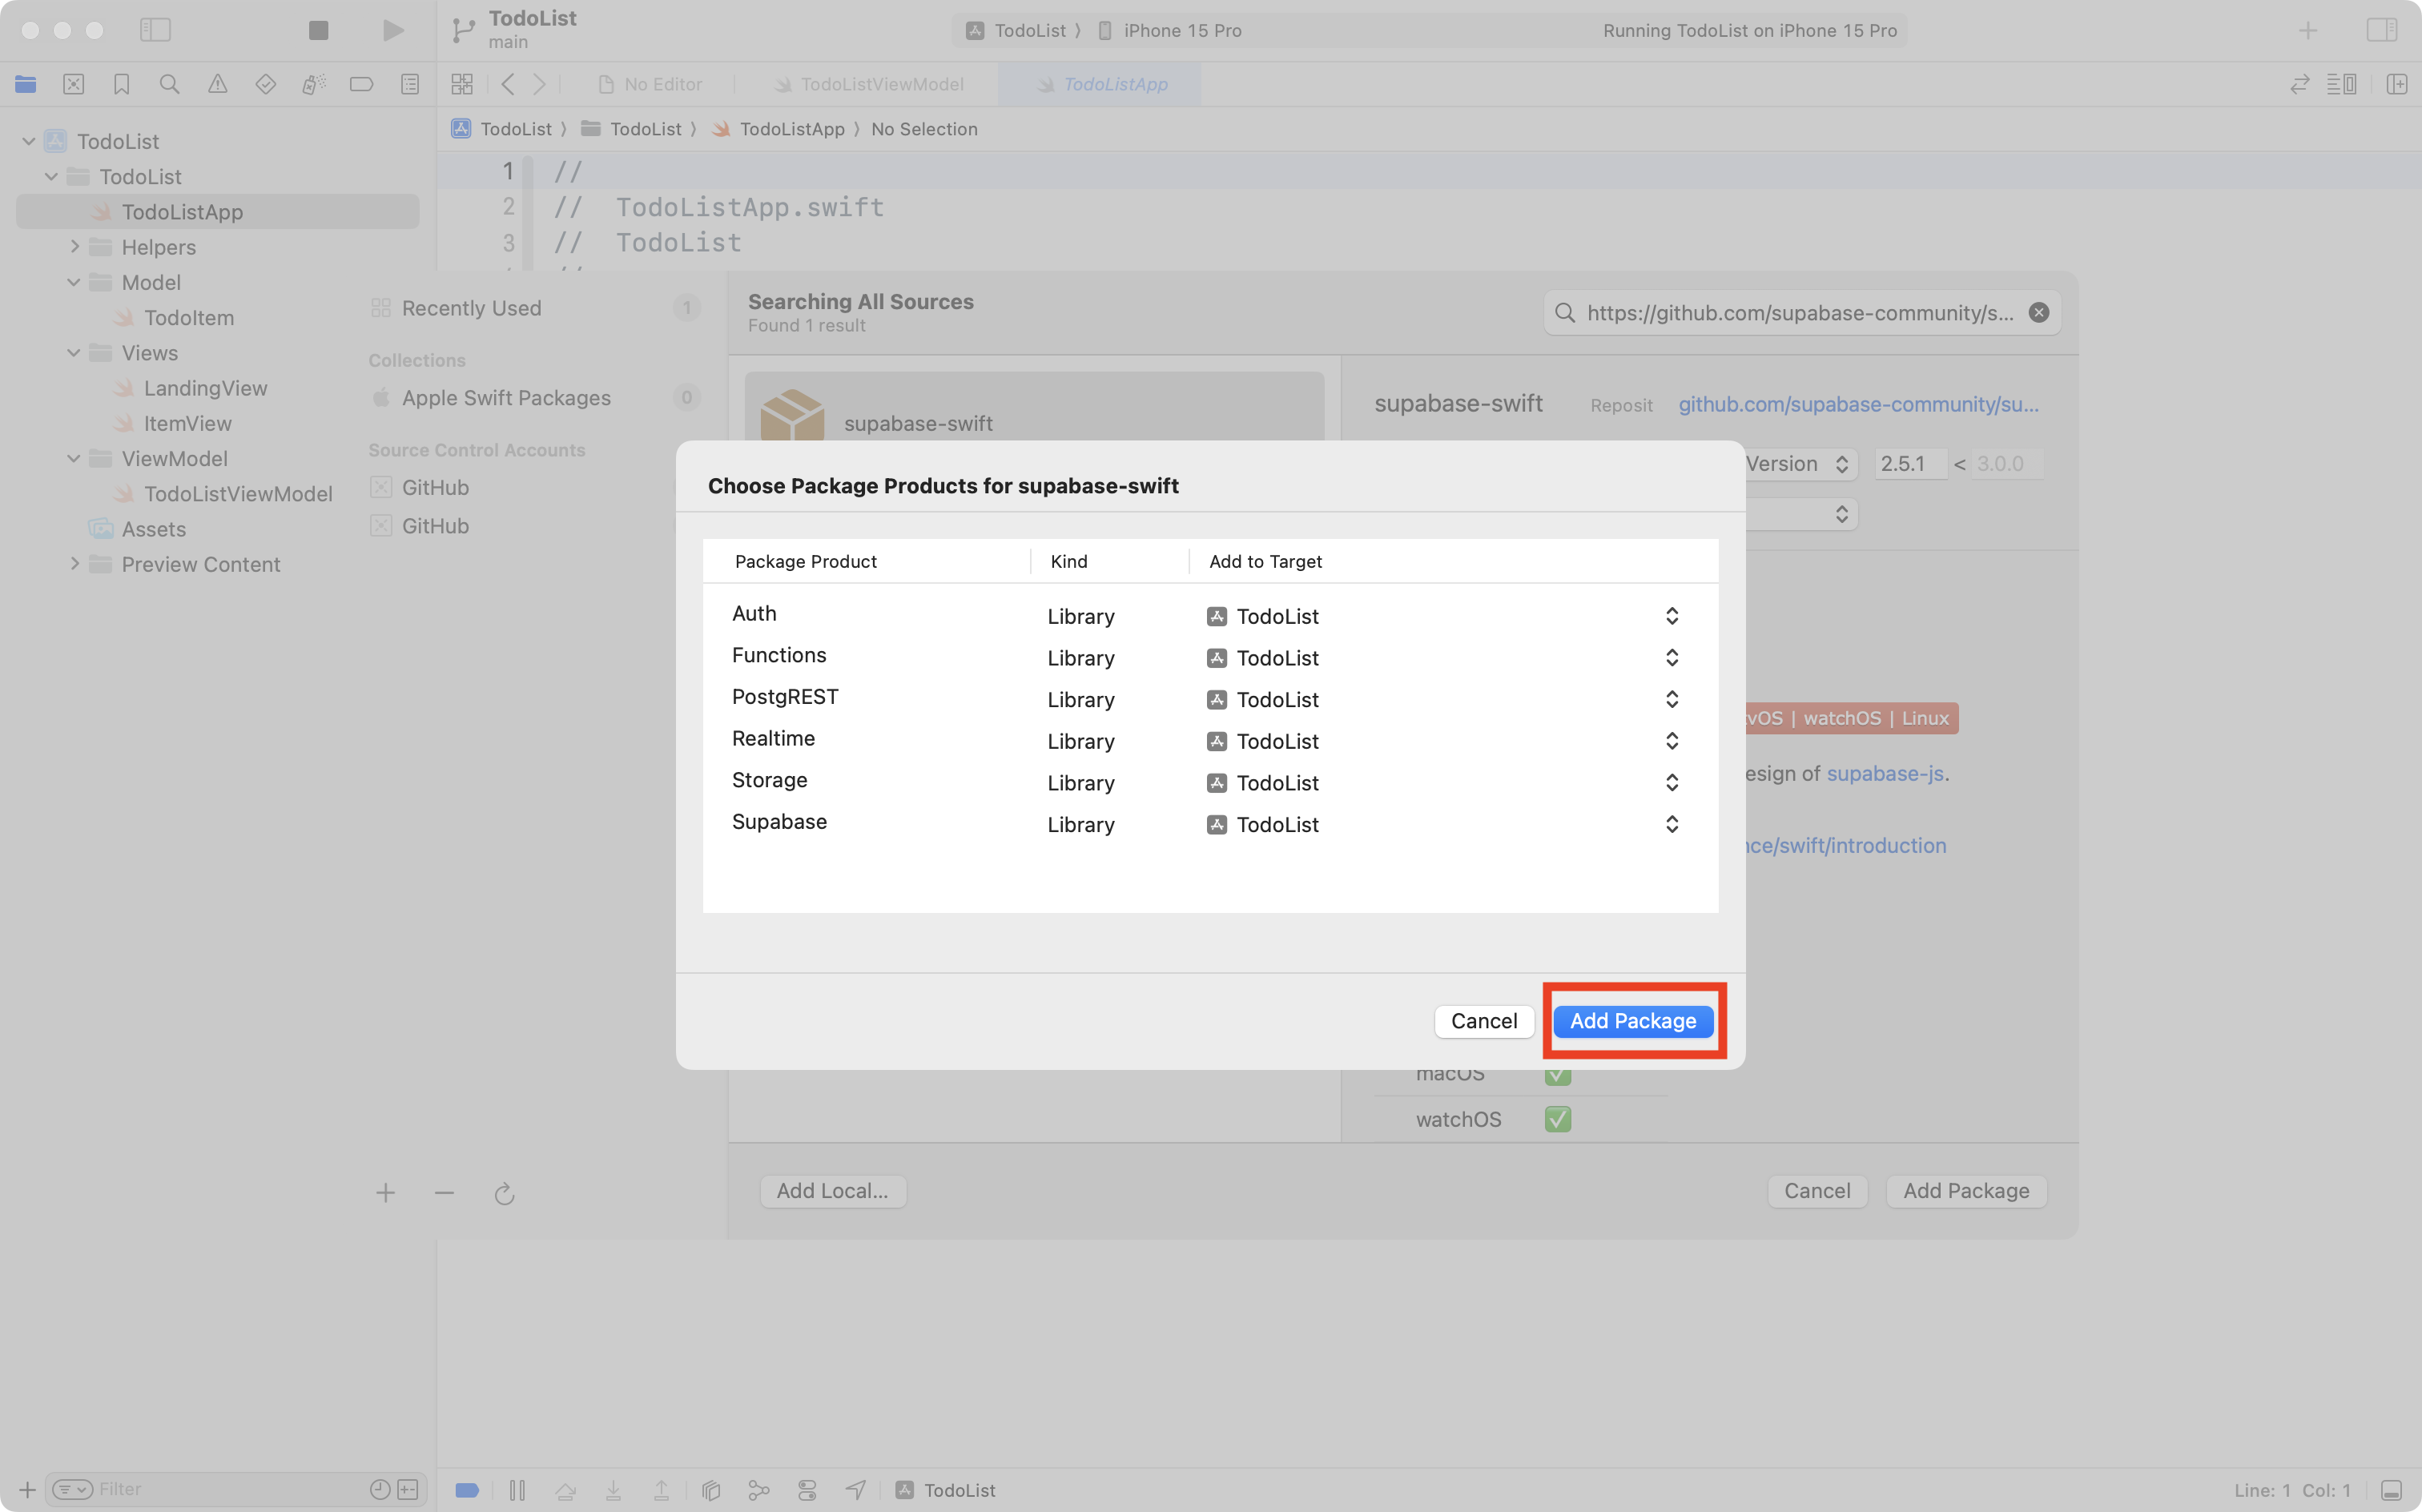
On the screen that appears, expand the window if needed, then for each package product shown, change the option for the Add to Target column to read TodoList (this is the app or target name of your project):
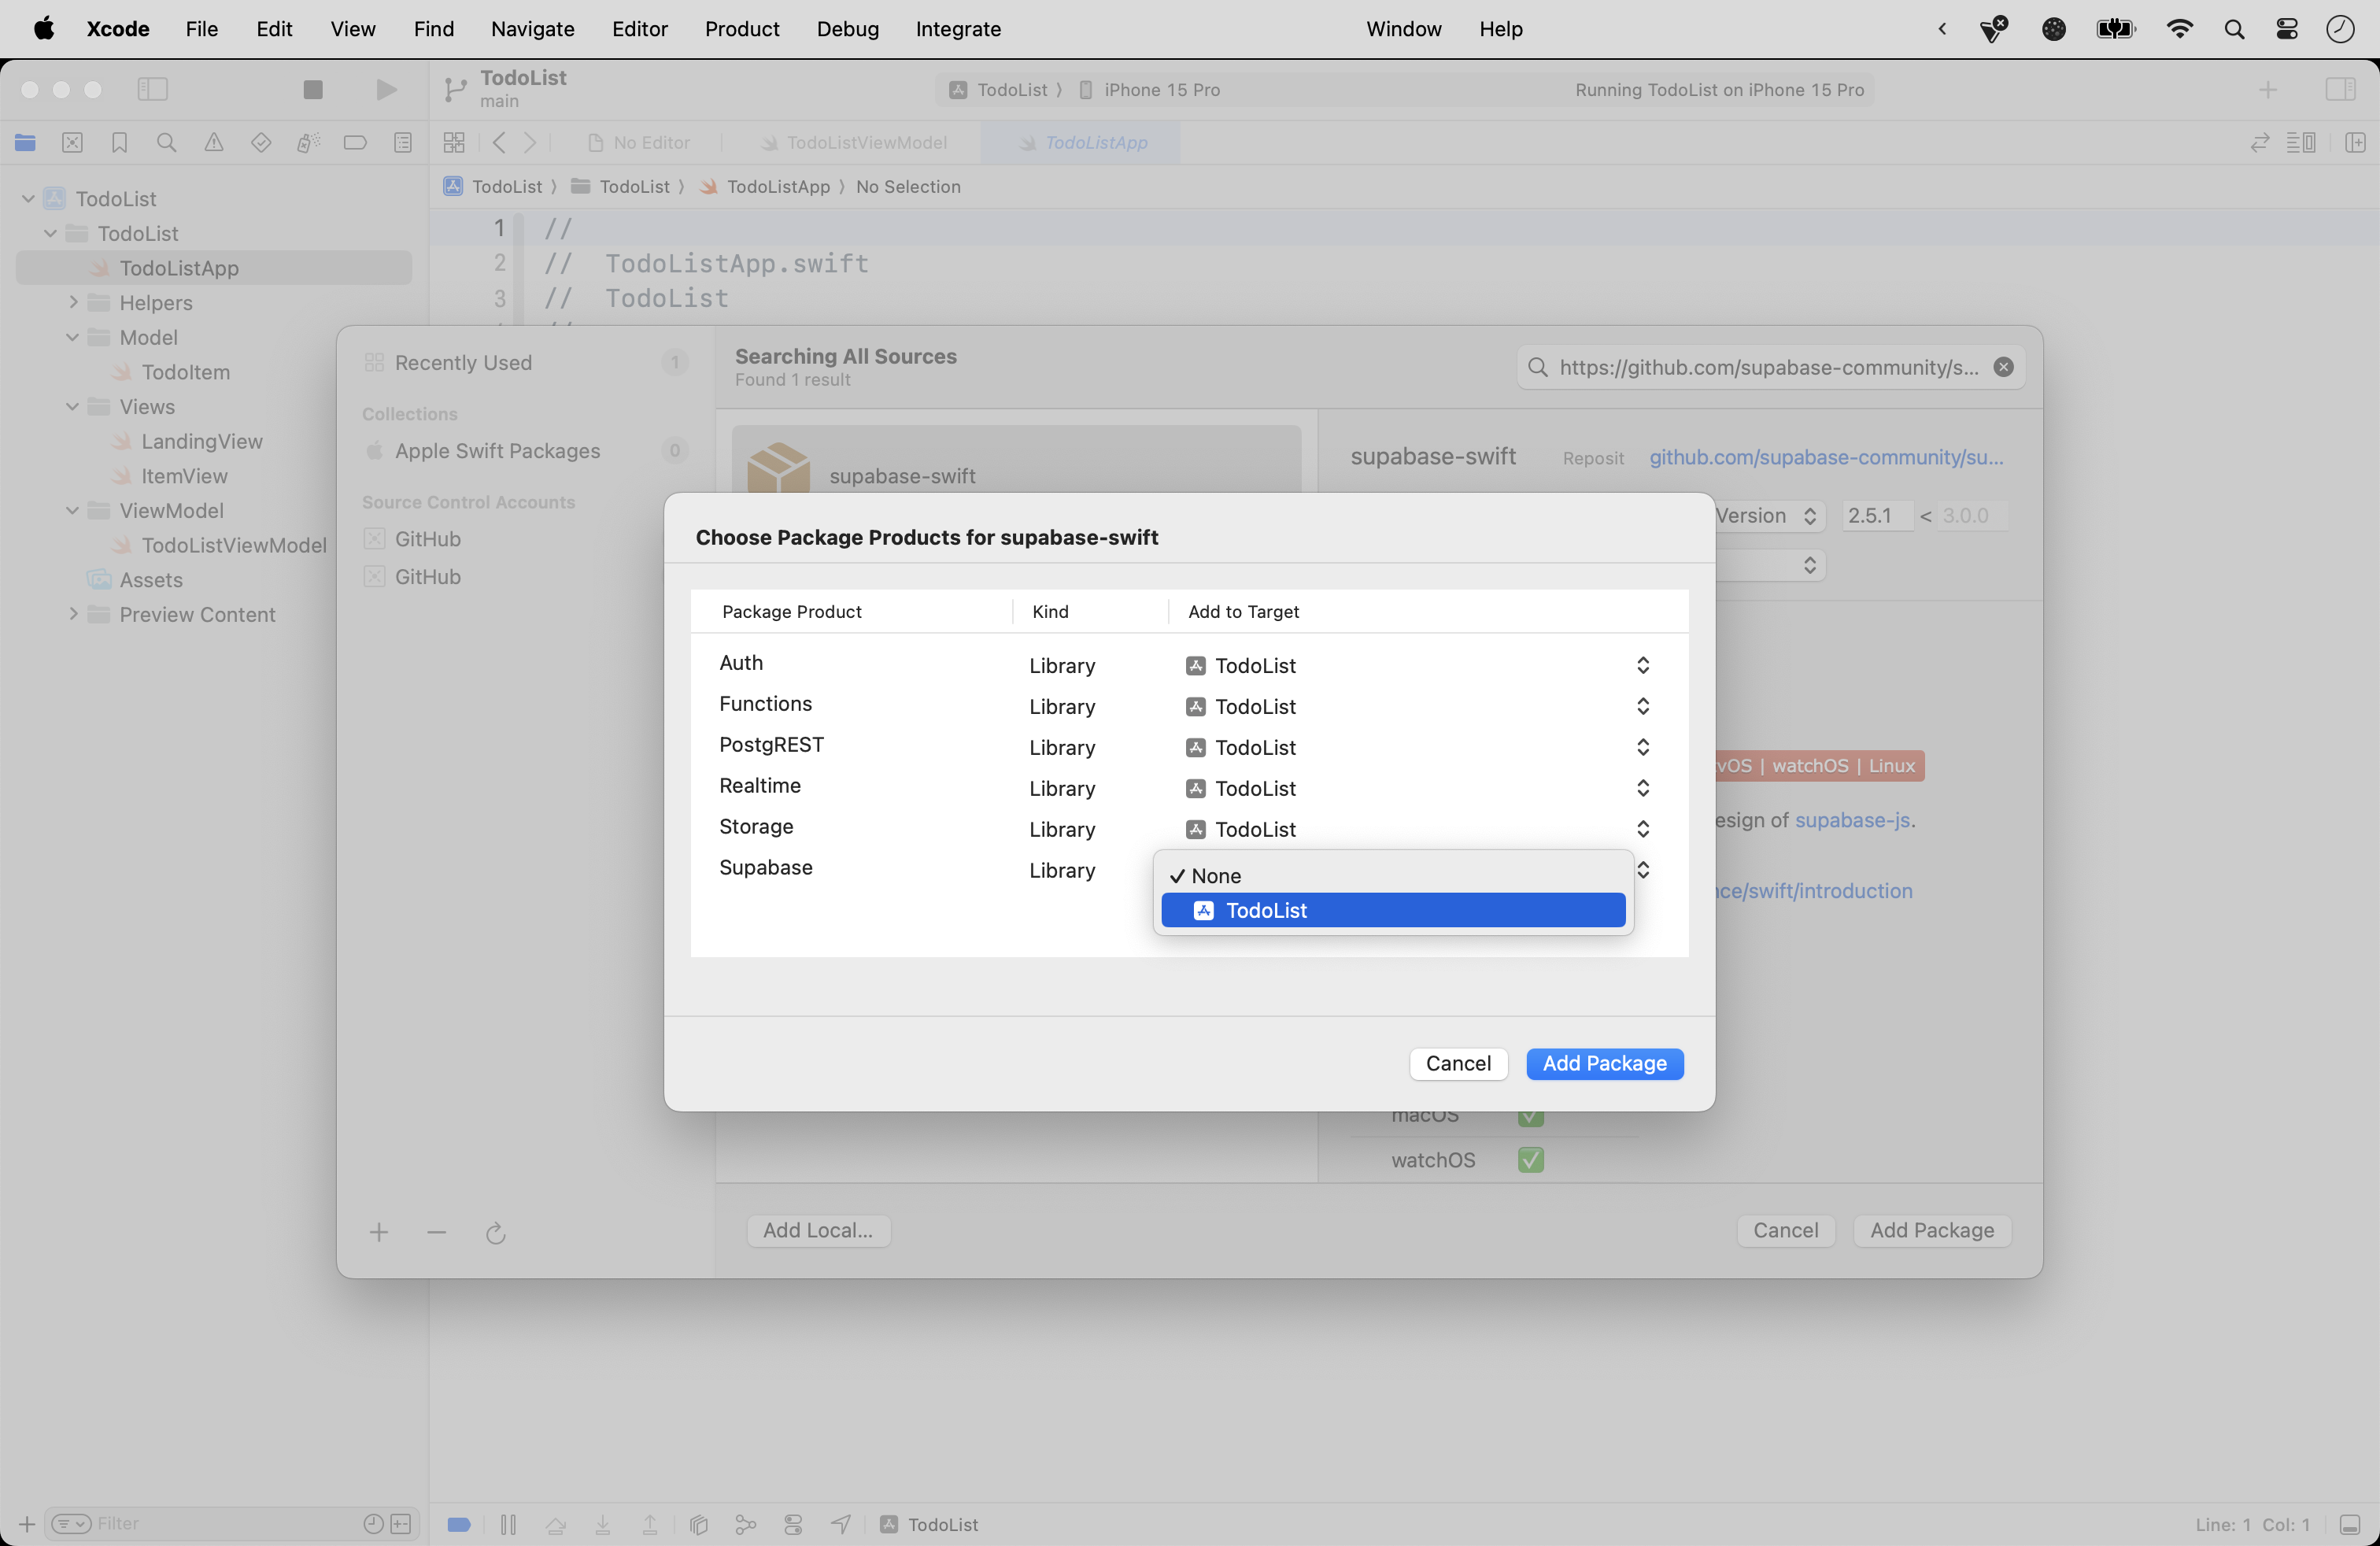
Finally, press the Add Package button:
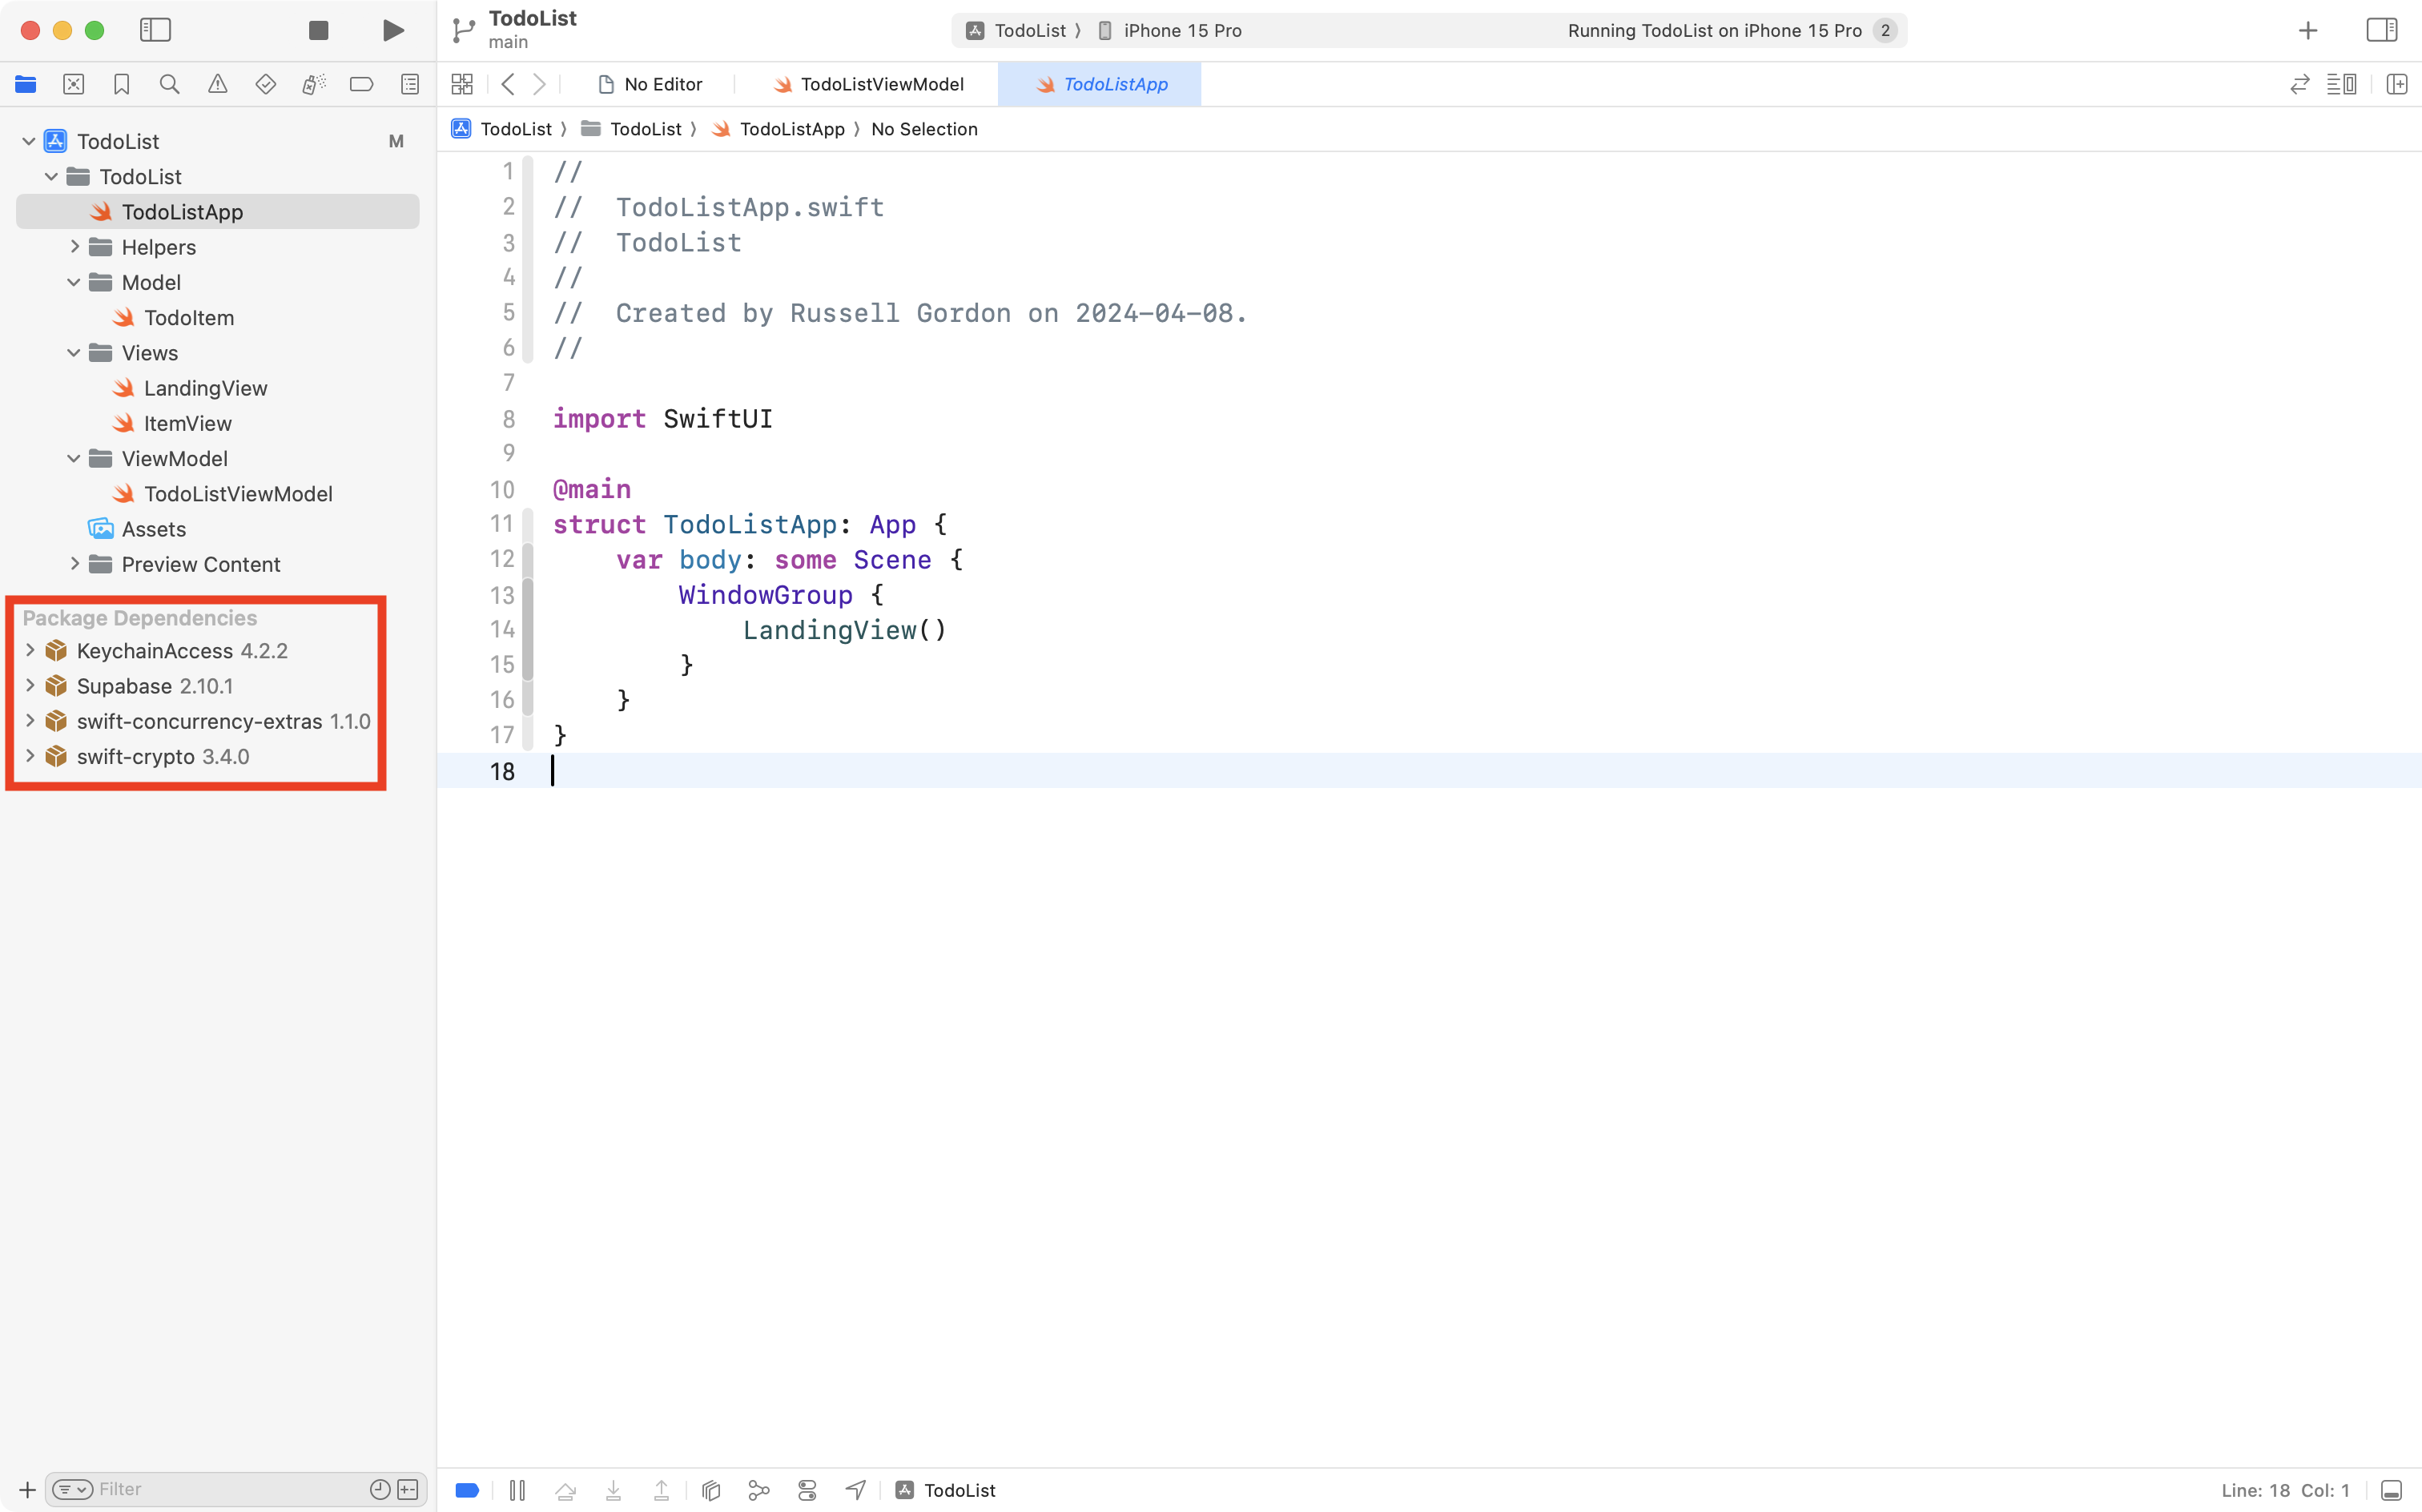
If all goes well you will see the frameworks that have been added in the lower left corner of the Xcode window:
This is a small but key step. Please go ahead and commit and push your work with this message:
Added the Supabase framework.
Documentation
The rest of this tutorial will walk you through how to begin using Supabase with a SwiftUI application.
Supabase is, however, an exceptionally well-documented framework:
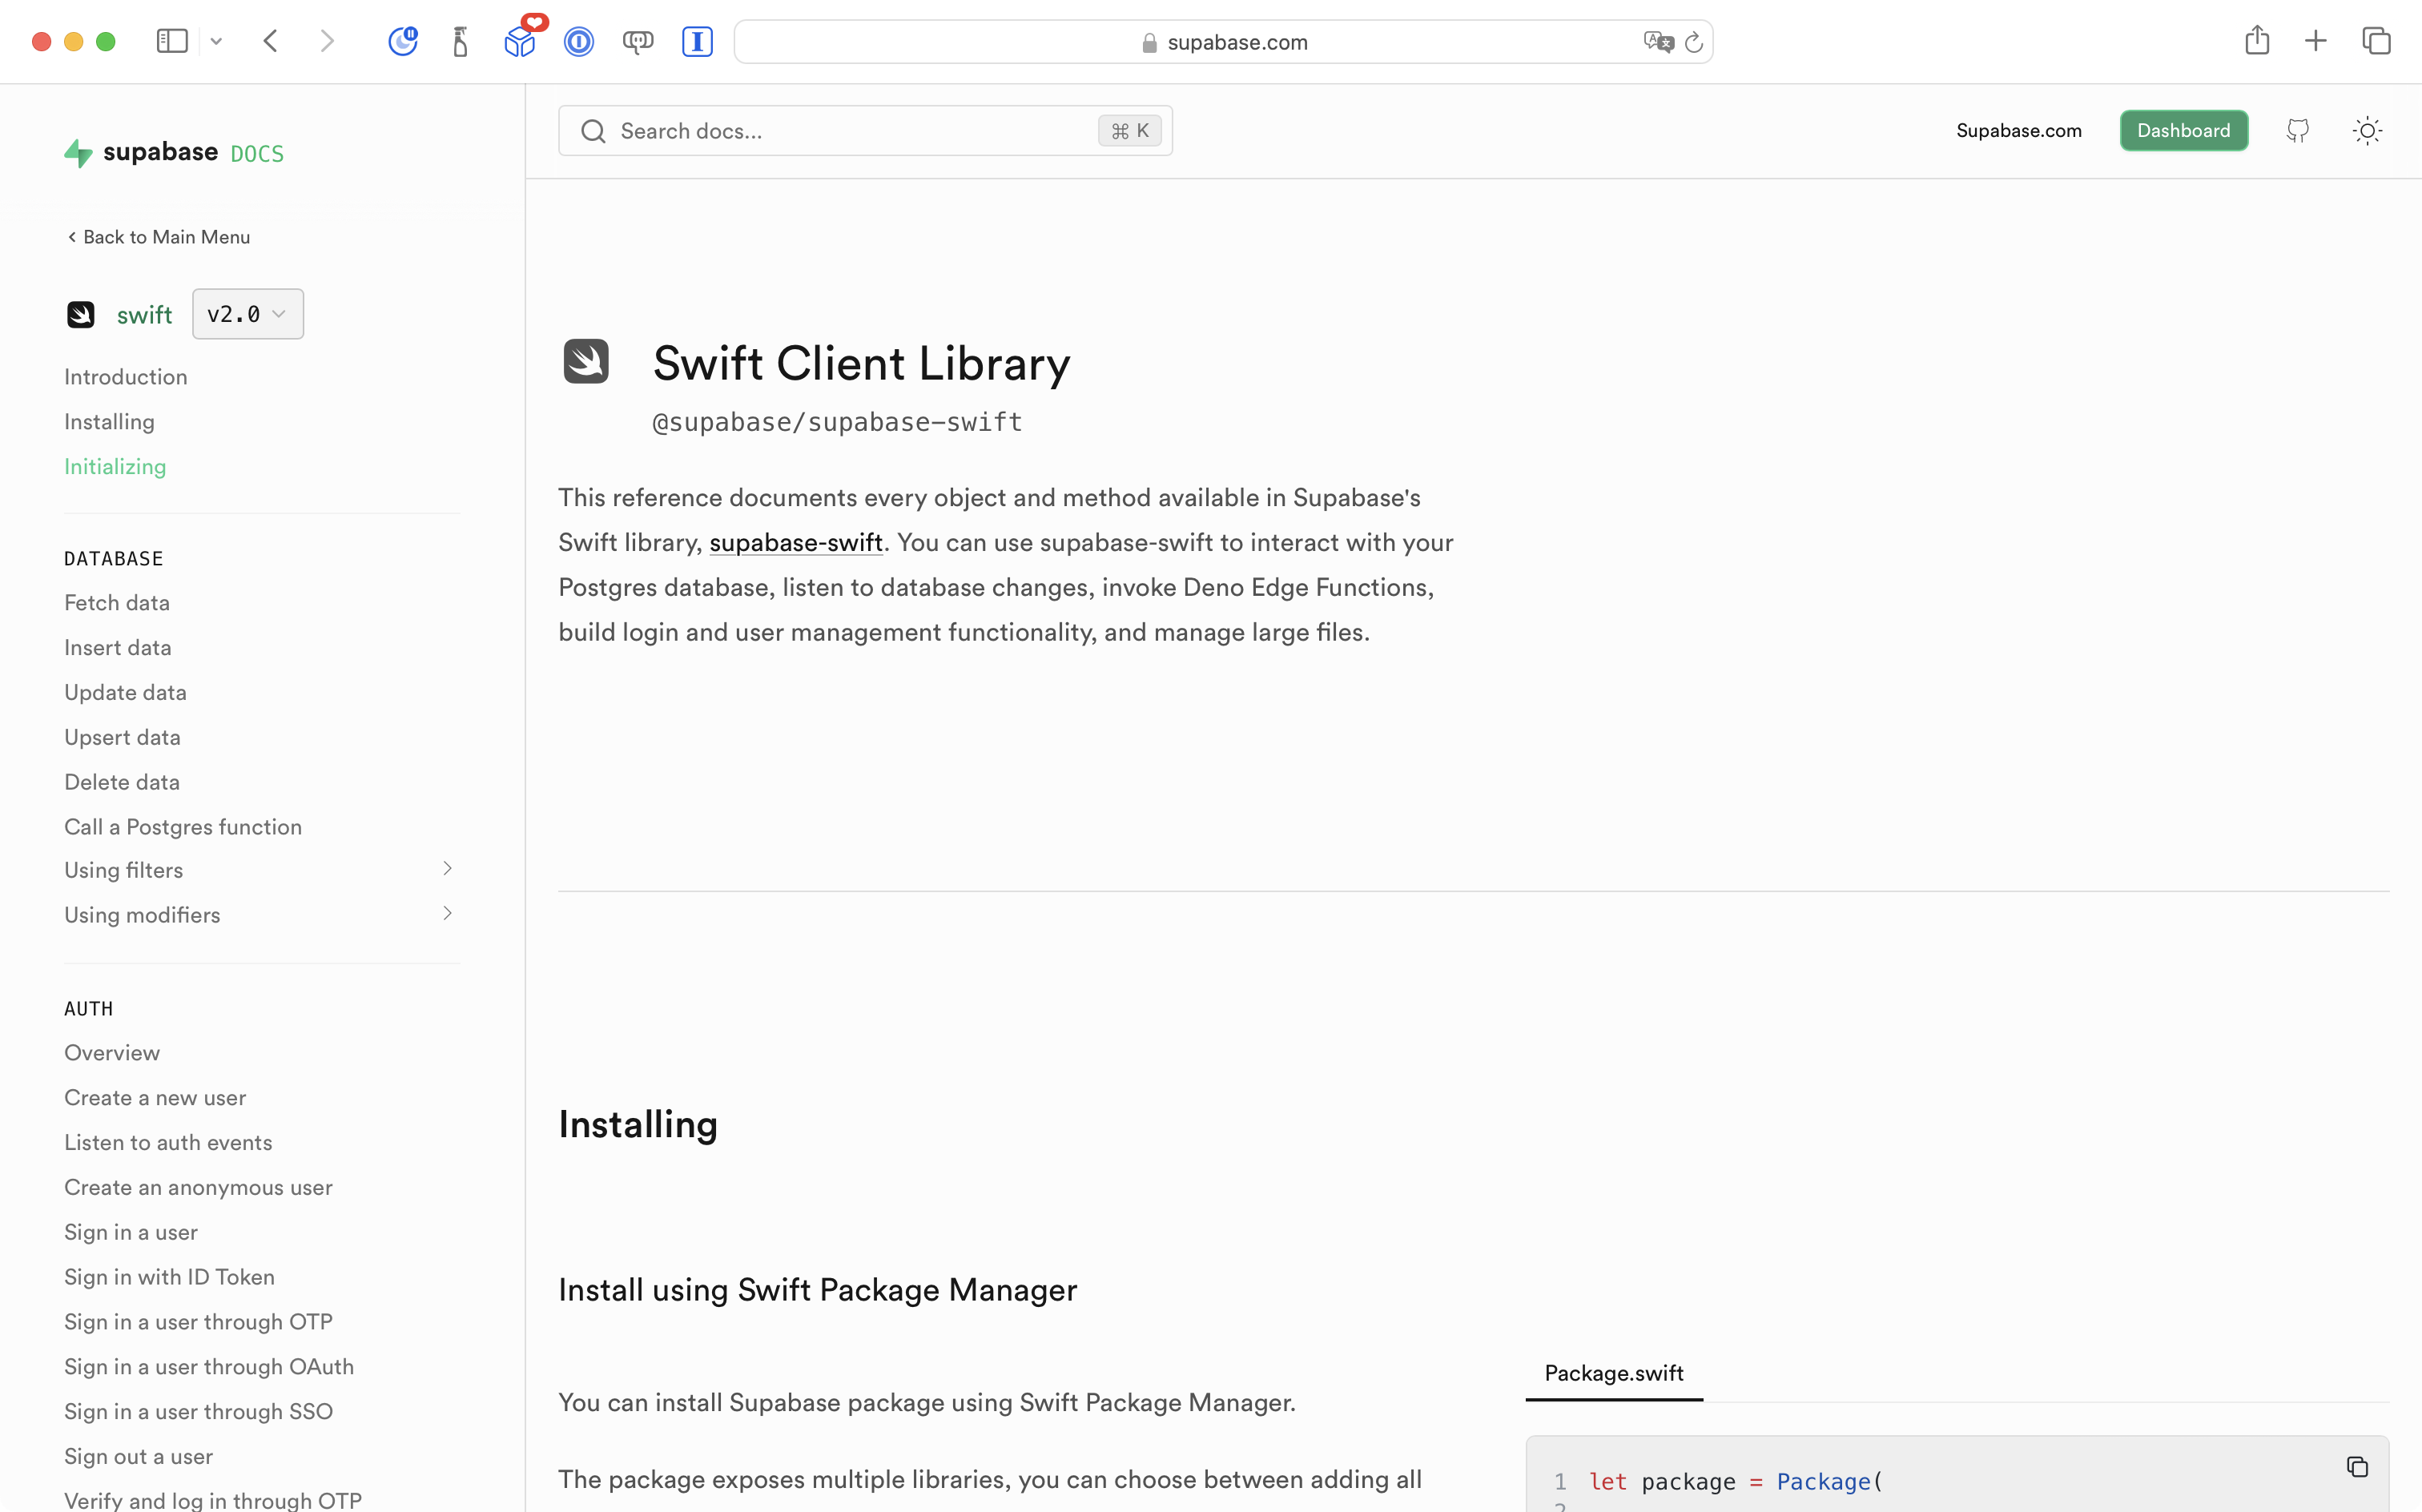
Please visit the documentation that can be found here, and add a bookmark for future reference.
App architecture
A tremendous benefit of separating concerns within an app is that when you make changes to how data is persisted the view layer never needs to know about it.
As a result, when we begin using Supabase to persist data for this app, no source code in the view layer needs to be modified. We will only be modifying the model and view model layers.
Here is the current overall architecture of our to-do list app:
flowchart LR

id1["<b>Model</b>\nDescribes data"] --> vm
subgraph vm["<b>View Model</b>"]
	direction TB
	id2["Manages the\nstate of data"]
	id2-.->id4
end
vm --> id3["<b>View(s)</b>\nPresent data"]
id3 --> vm
id4["Data is kept\n<em>only in memory</em>"]
We will be modifying the architecture so that it works as follows:
flowchart LR

id1["<b>Model</b>\nDescribes data"] --> vm
subgraph vm["<b>View Model</b>"]
	direction TB
	id2["Manages the\nstate of data"]
	id2-.->id4
	id4-.->id5
	id5-.->id4
end
vm --> id3["<b>View(s)</b>\nPresent data"]
id3 --> vm
id4["Data is kept\n<em>in memory</em>\nwhile app is running"]
id5["Data is persisted\n<em>in the cloud</em>"]
Load data from the cloud
Our first step will be to use the Supabase framework to essentially run this command in the cloud database and then show the results in our app:
SELECT *
FROM todos
Try running the app in the Simulator or on a device right now, and you will note that when it opens, there are no to-do items showing:
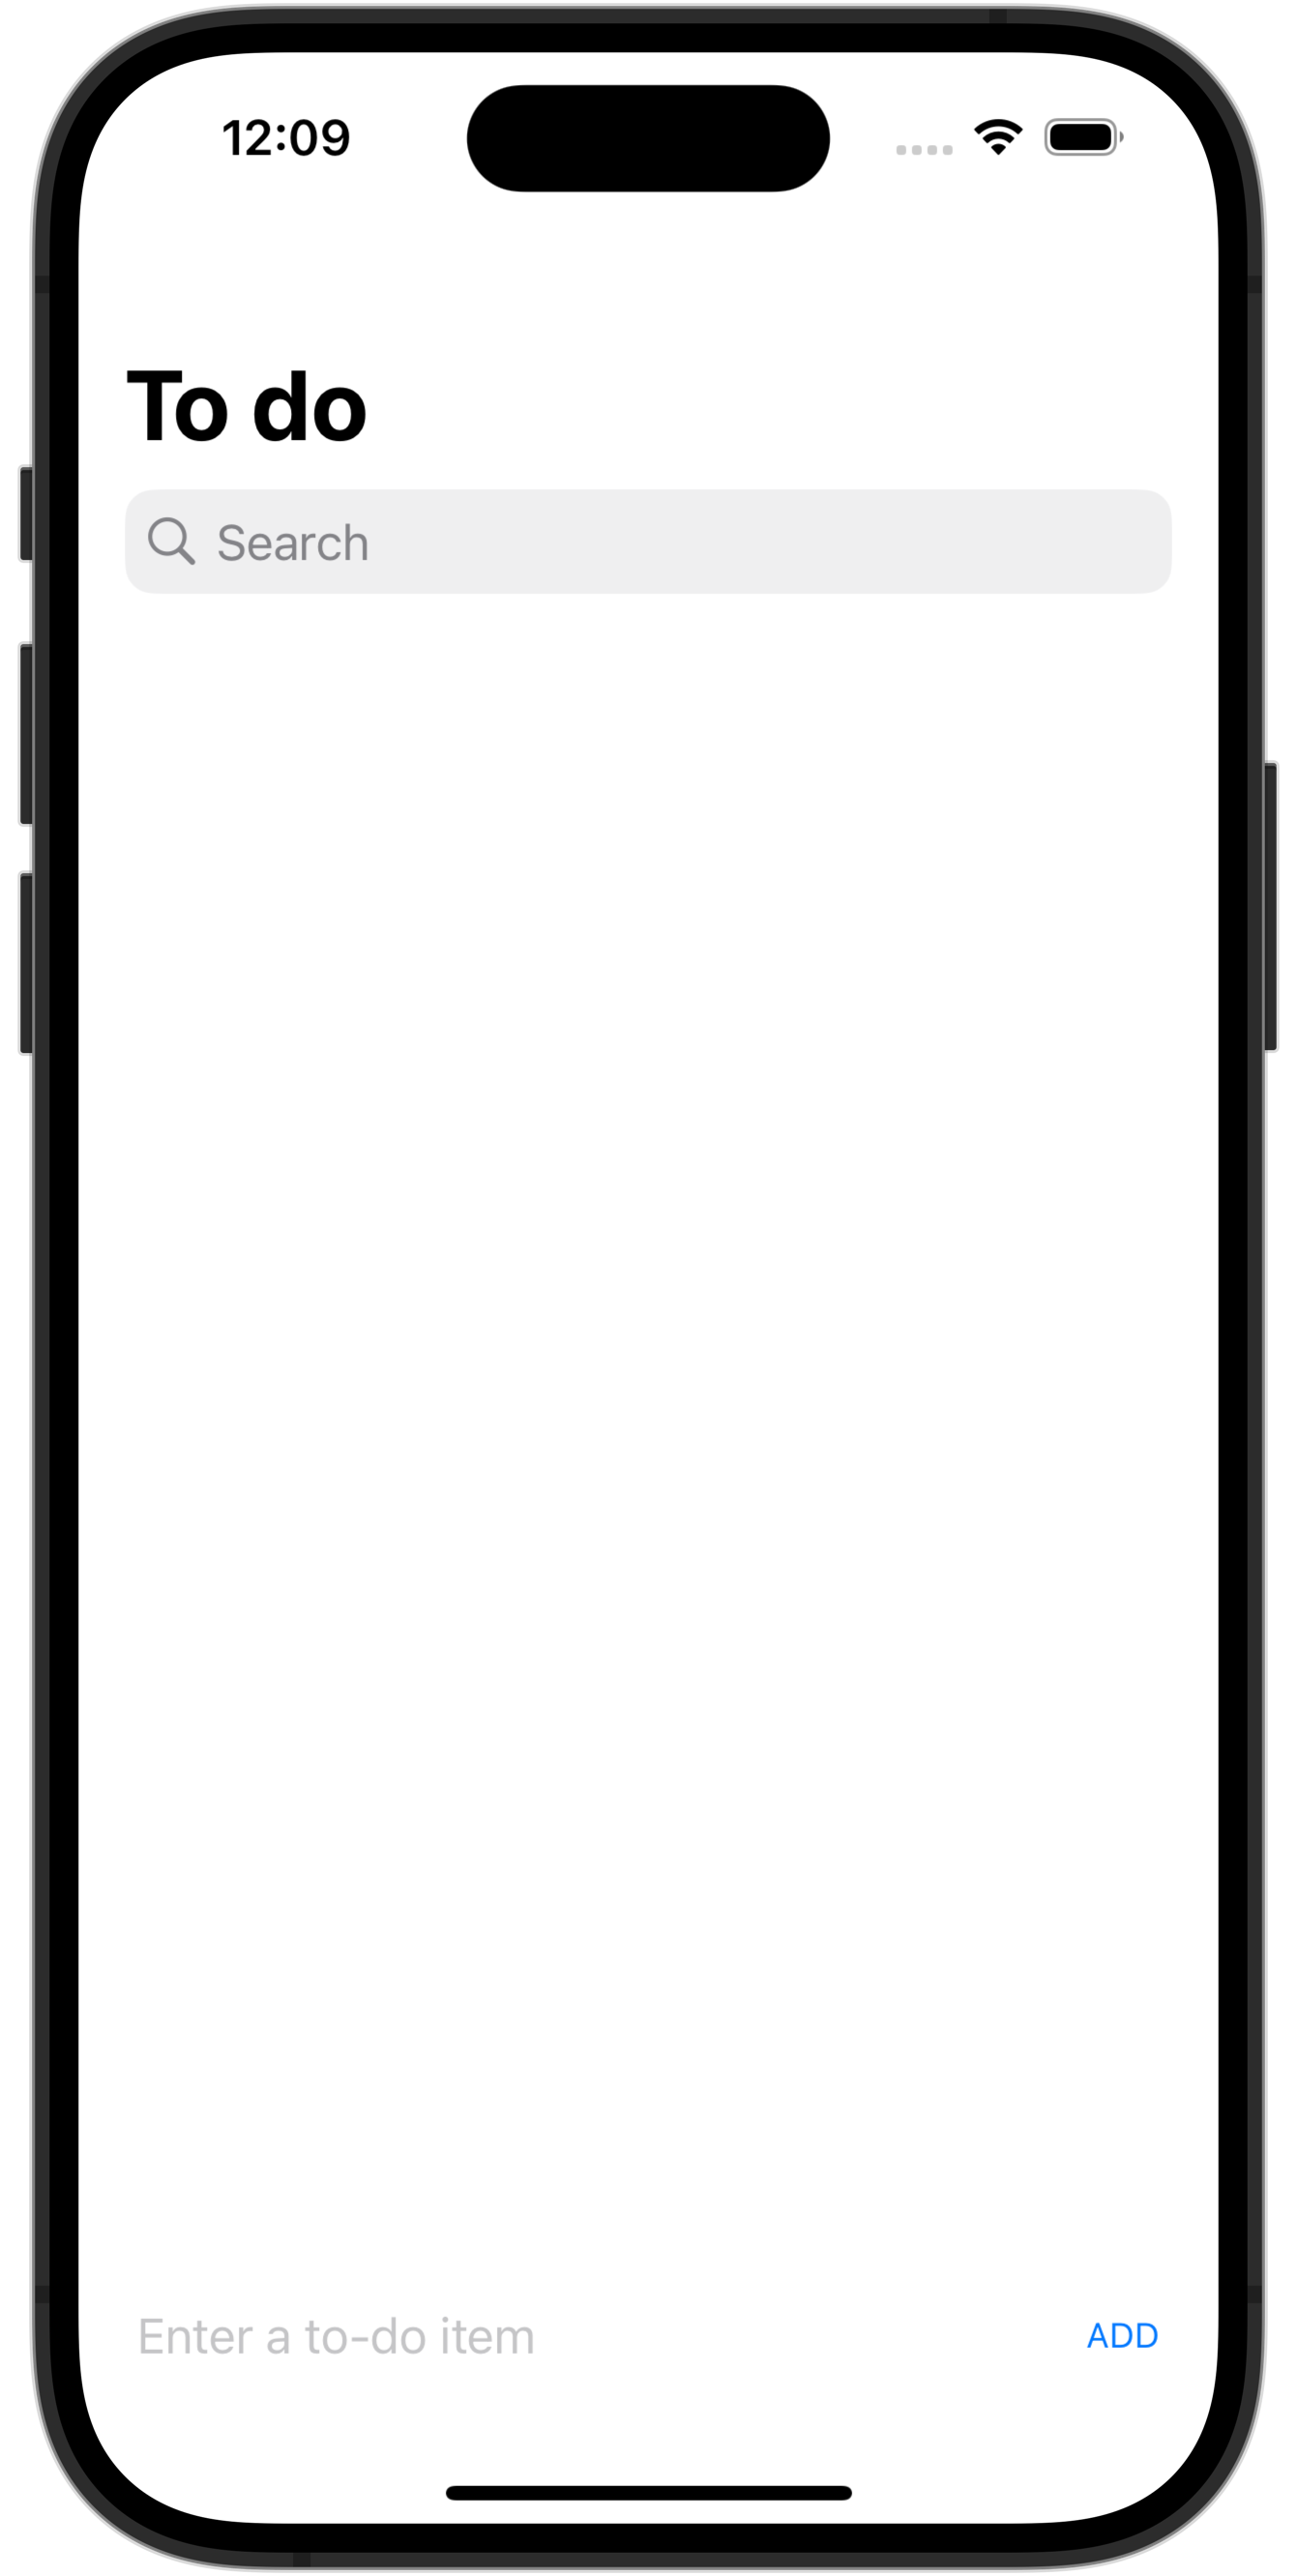
There are no to-do items because the data is being kept in memory only, and is not persisted at all right now. We just opened the app, so of course, there are no to-do items to show.
However, we know there are to-do items in our cloud-hosted database, so let’s get these loaded and showing up in the app.
Identifying your app to Supabase
The Supabase servers host databases for many different developers and projects.
When a SwiftUI application reaches out to a cloud-hosted database on Supabase, the Supabase servers need to know two things:
- What database the application is trying to connect to
- That the application is authorized to connect to that database
Recall that you were able to fetch the data from your database by running this command in the Terminal:
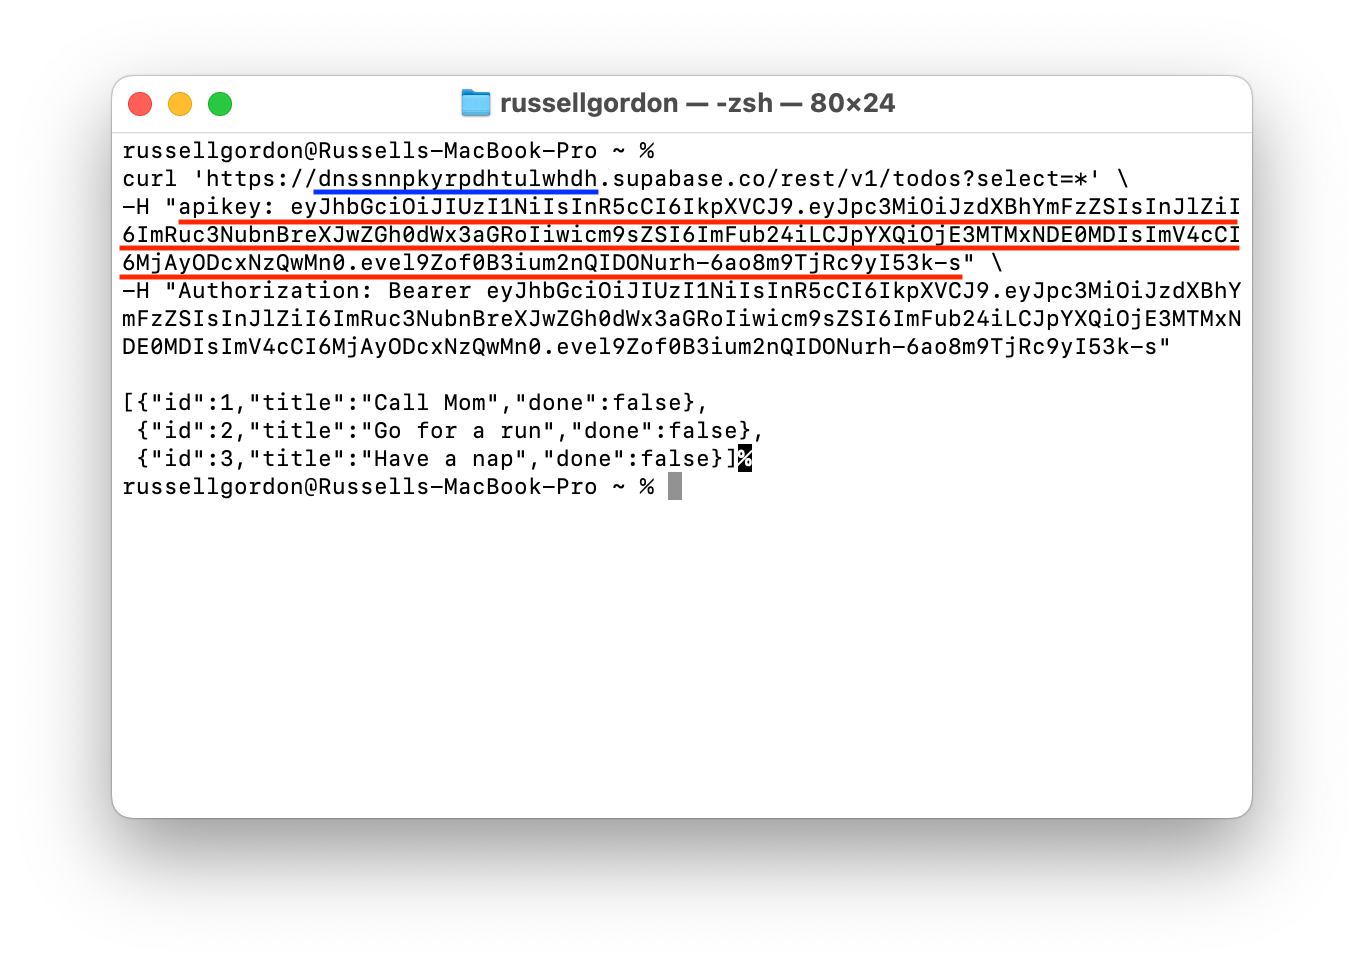
The part highlighted in blue is how the database to connect to is identified. Each Supabase project is assigned a different random identifier, which is used to form the URL, or address, that an app reaches out to so as to fetch data.
The part highlighted in red is how your app proves to the Supabase servers that it has permission to speak to the indicated cloud-hosted database.
So to identify our app to Supabase, we must create an instance of the SupabaseClient class and provide those two pieces of information.
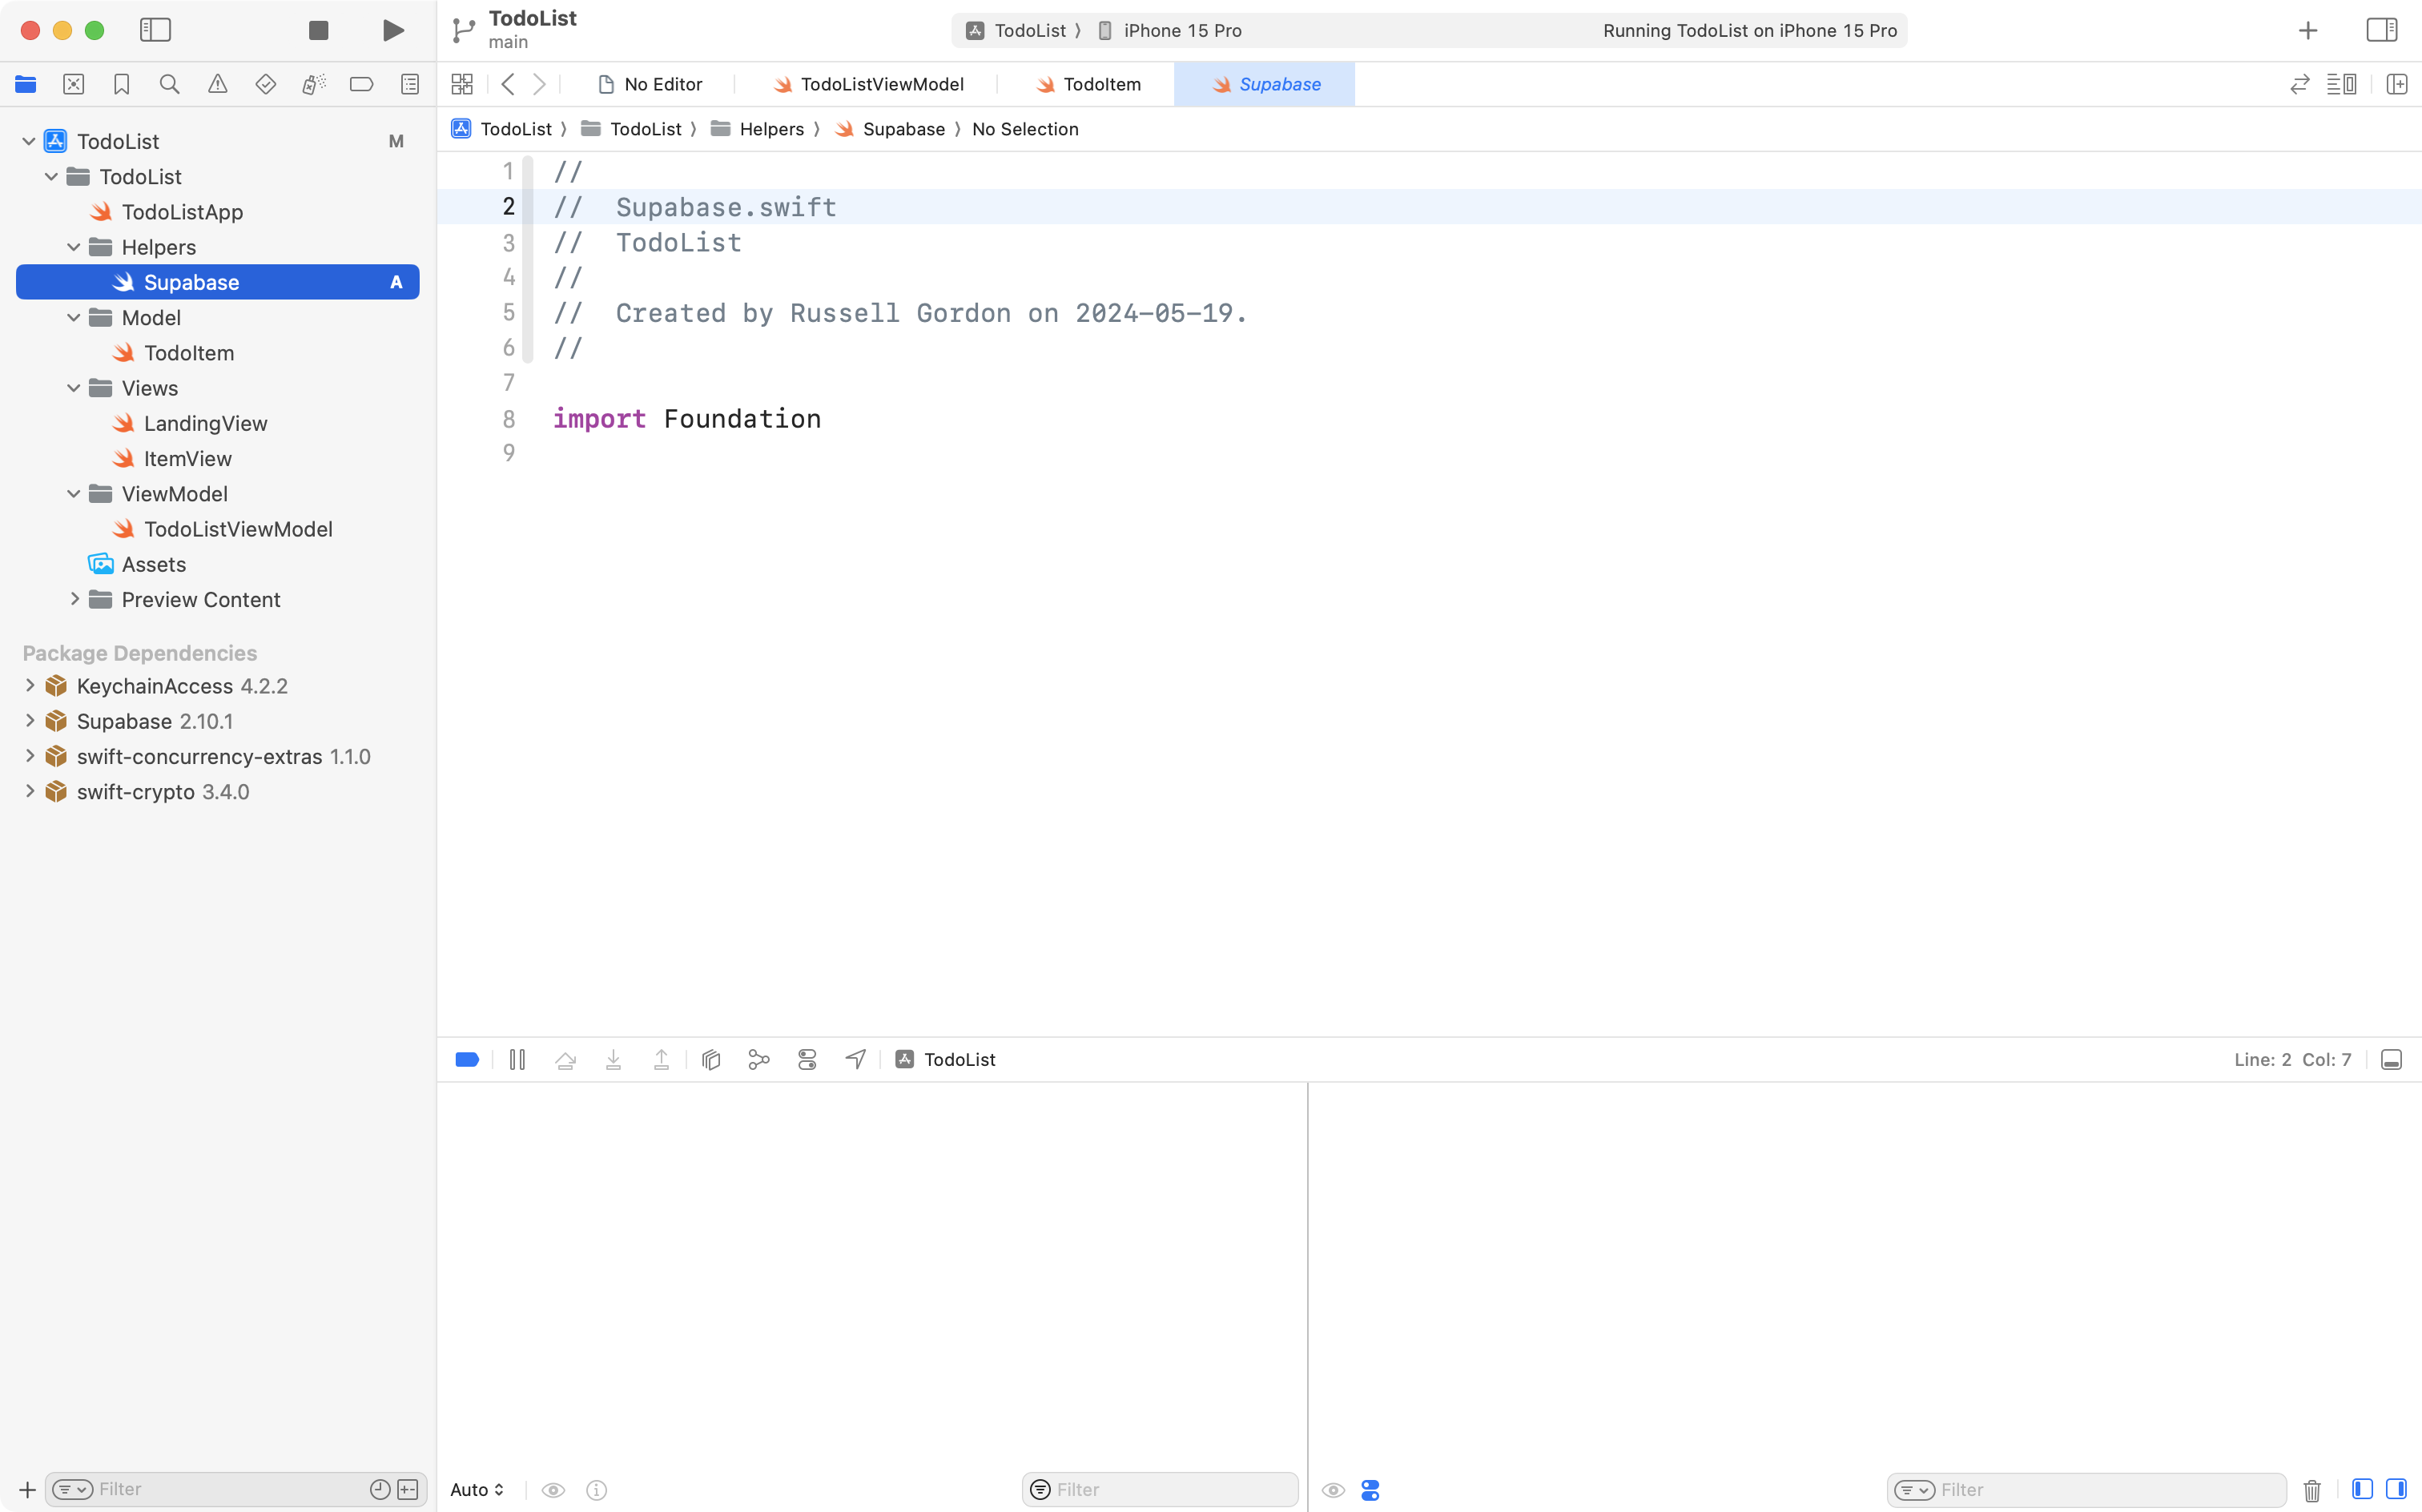
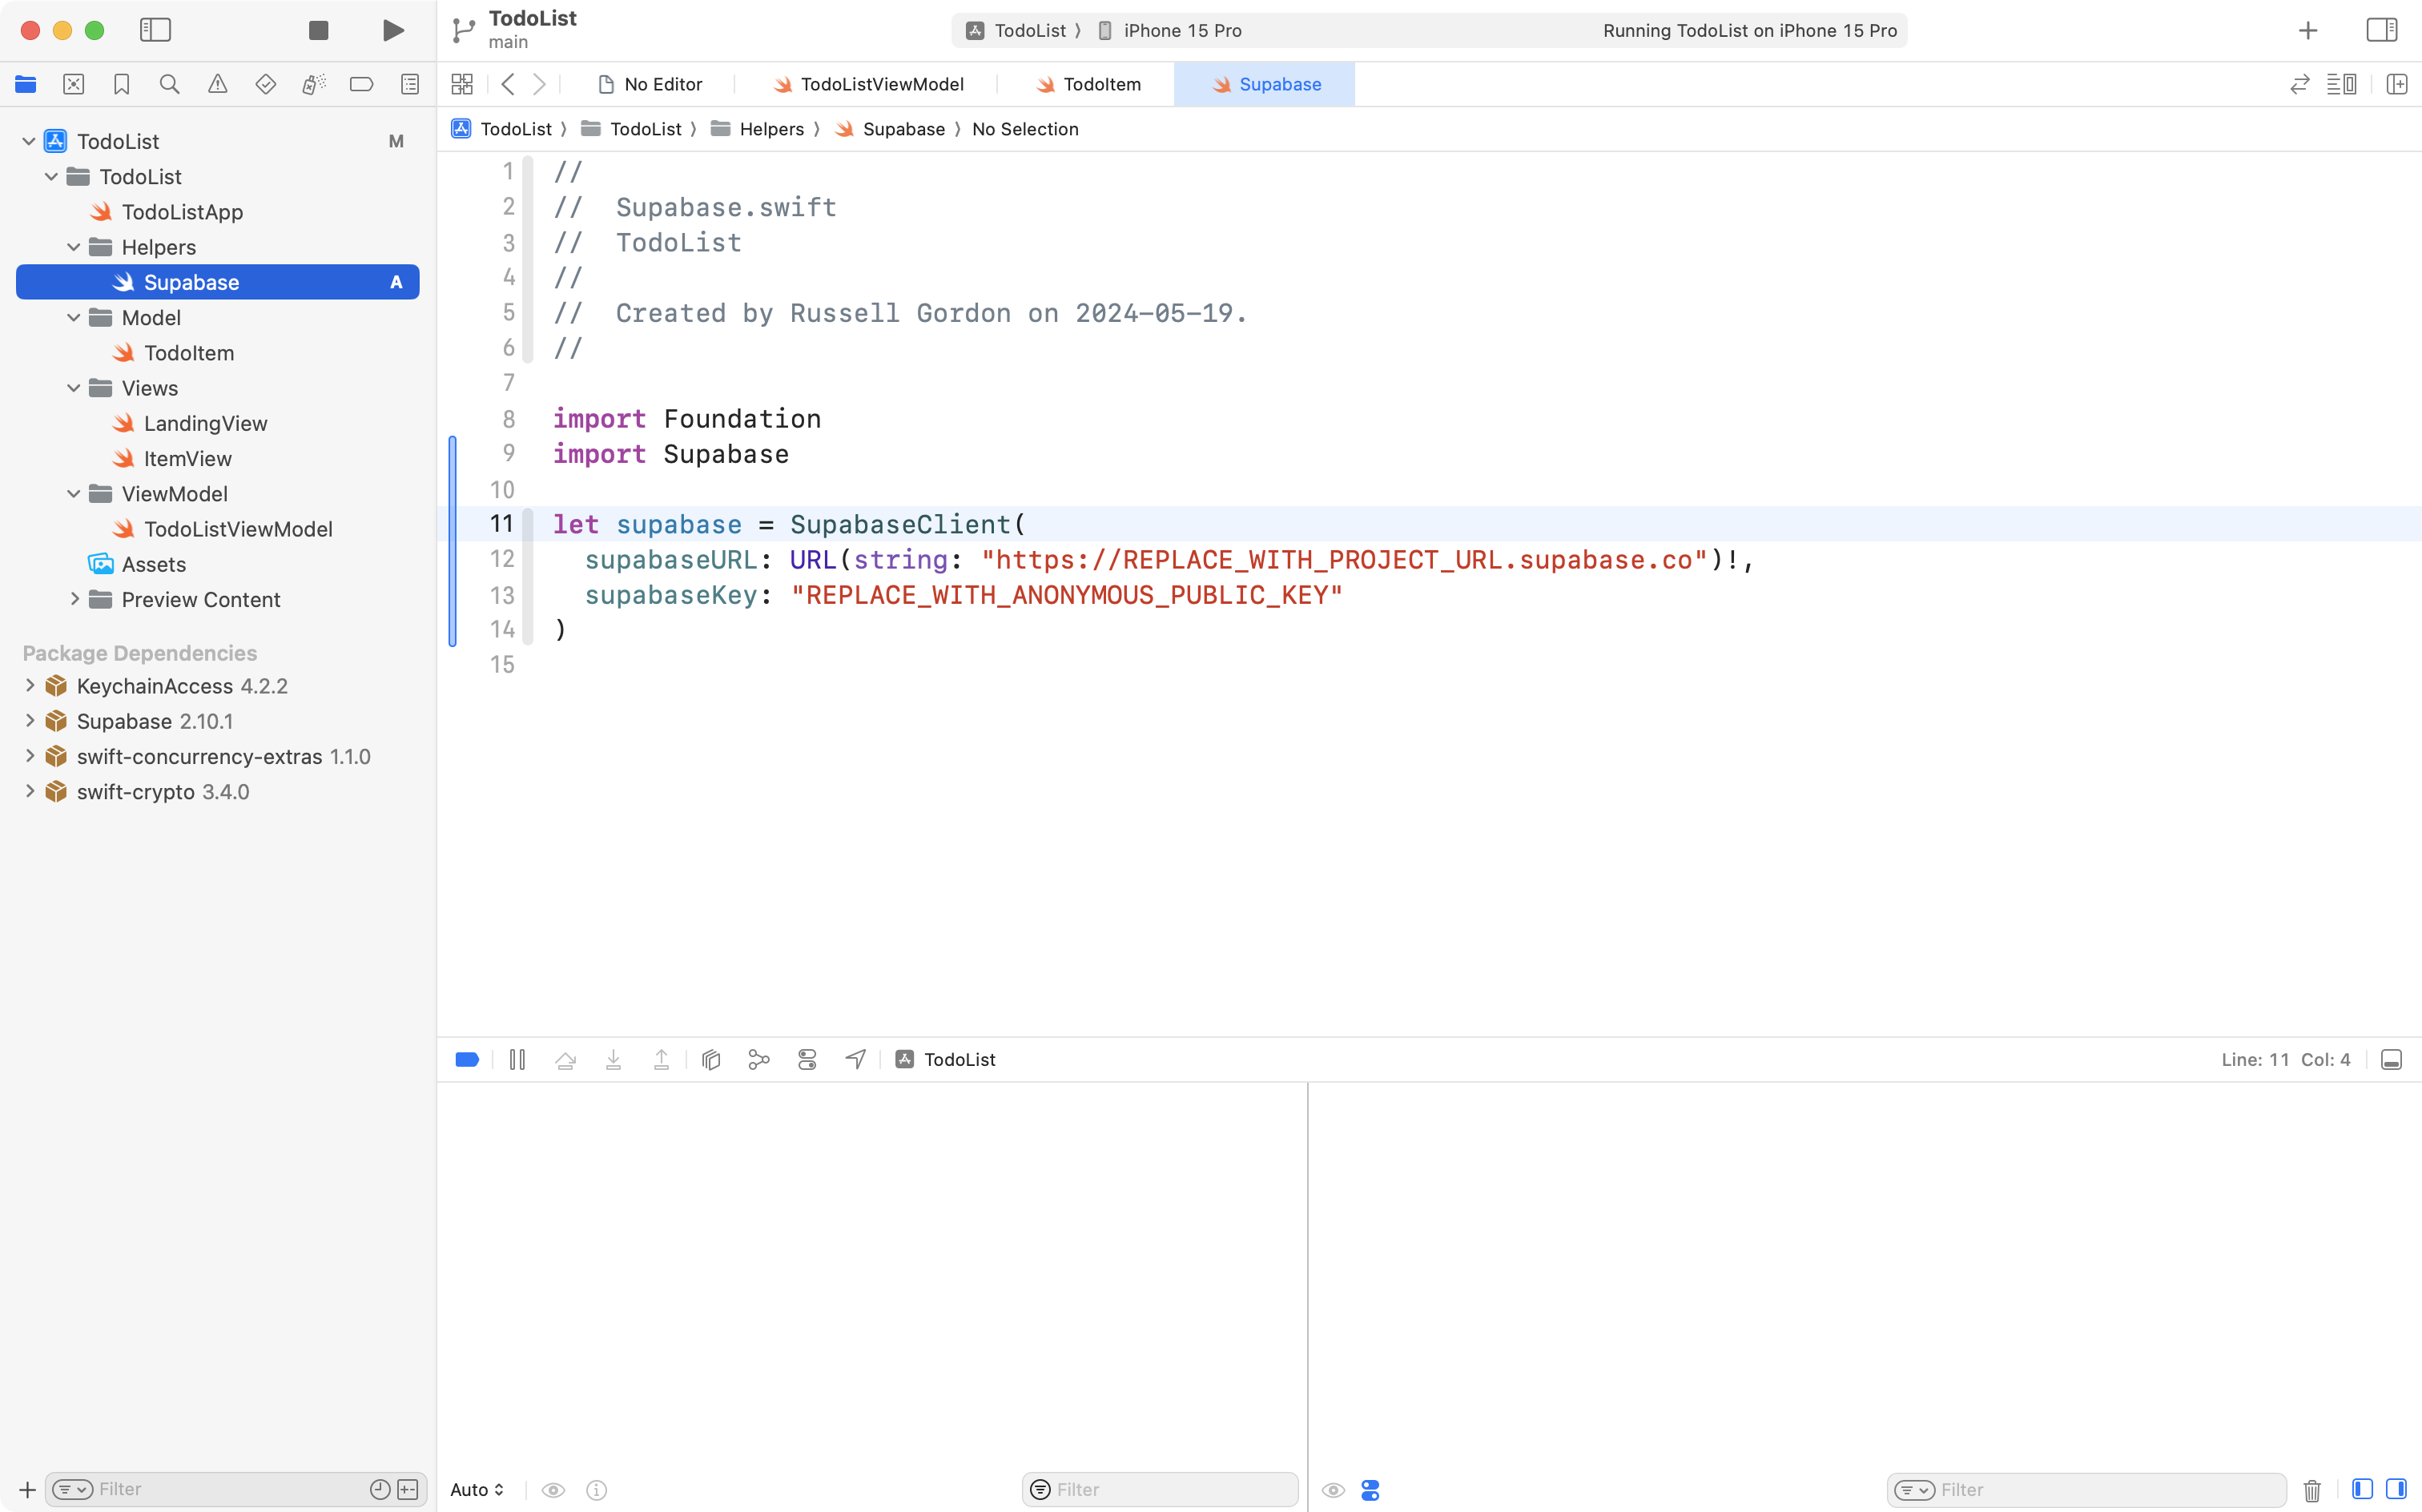
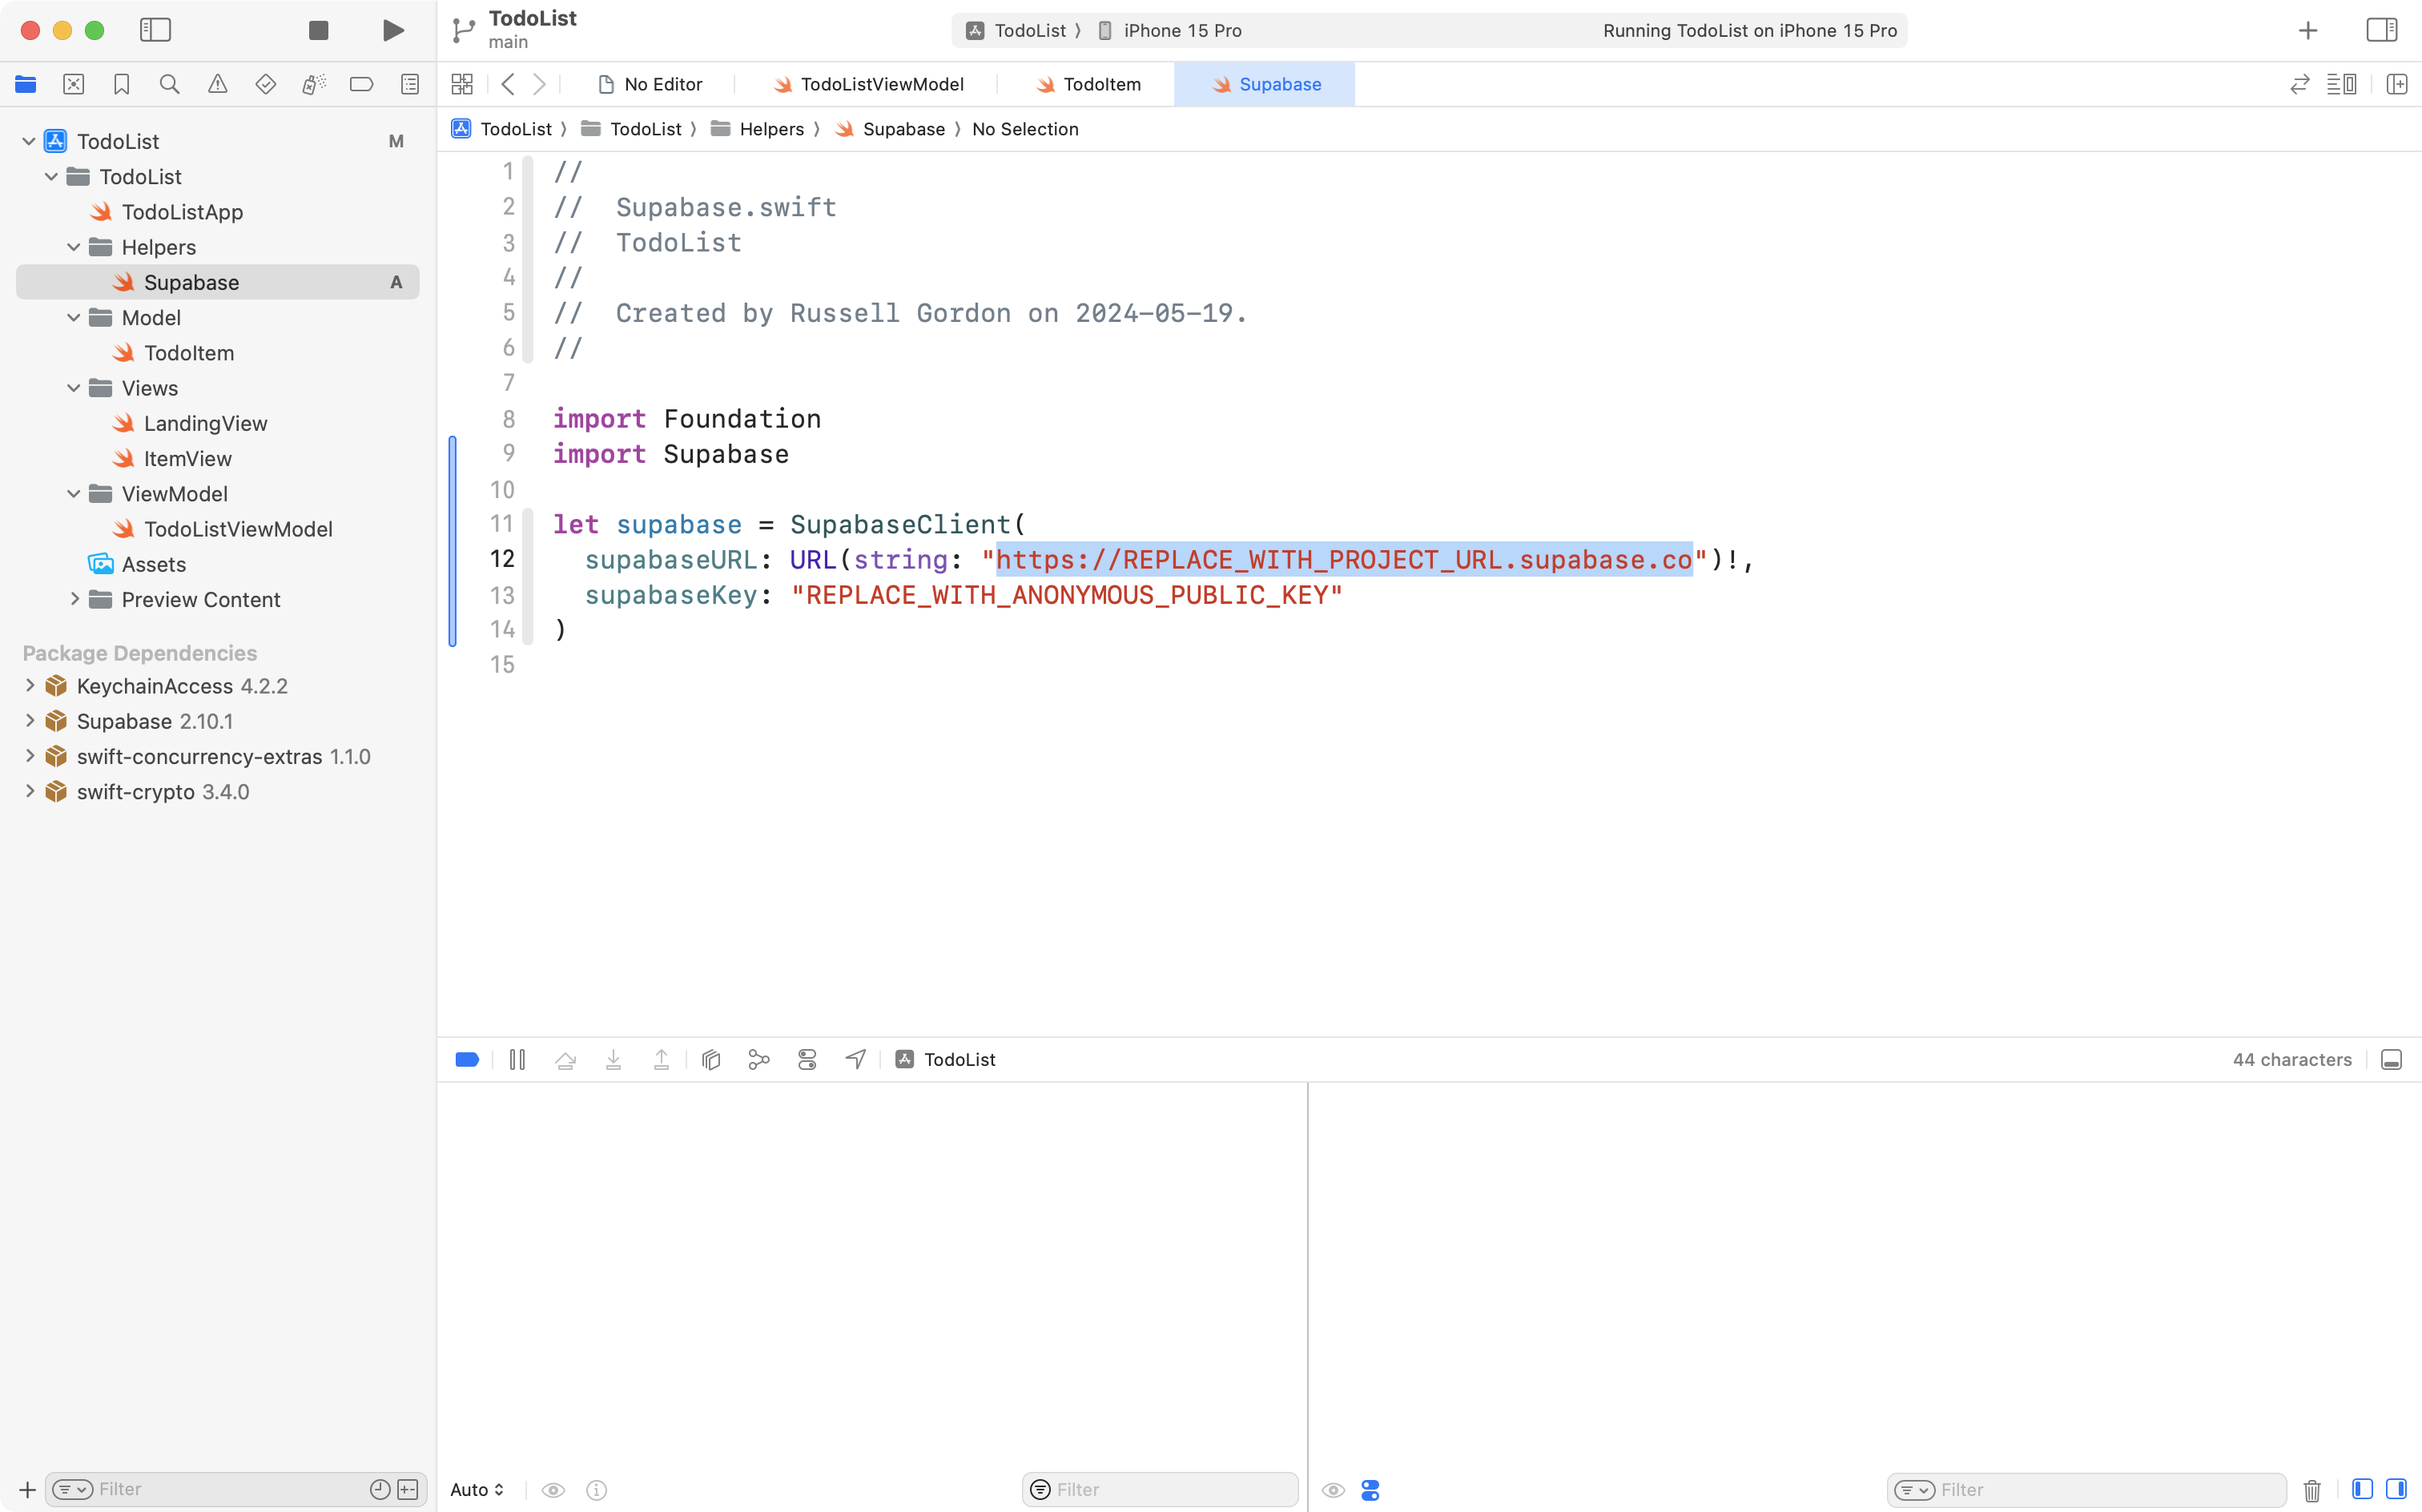
To do this, expand the Helpers group in Xcode and create a new Swift file named Supabase.swift, like this:
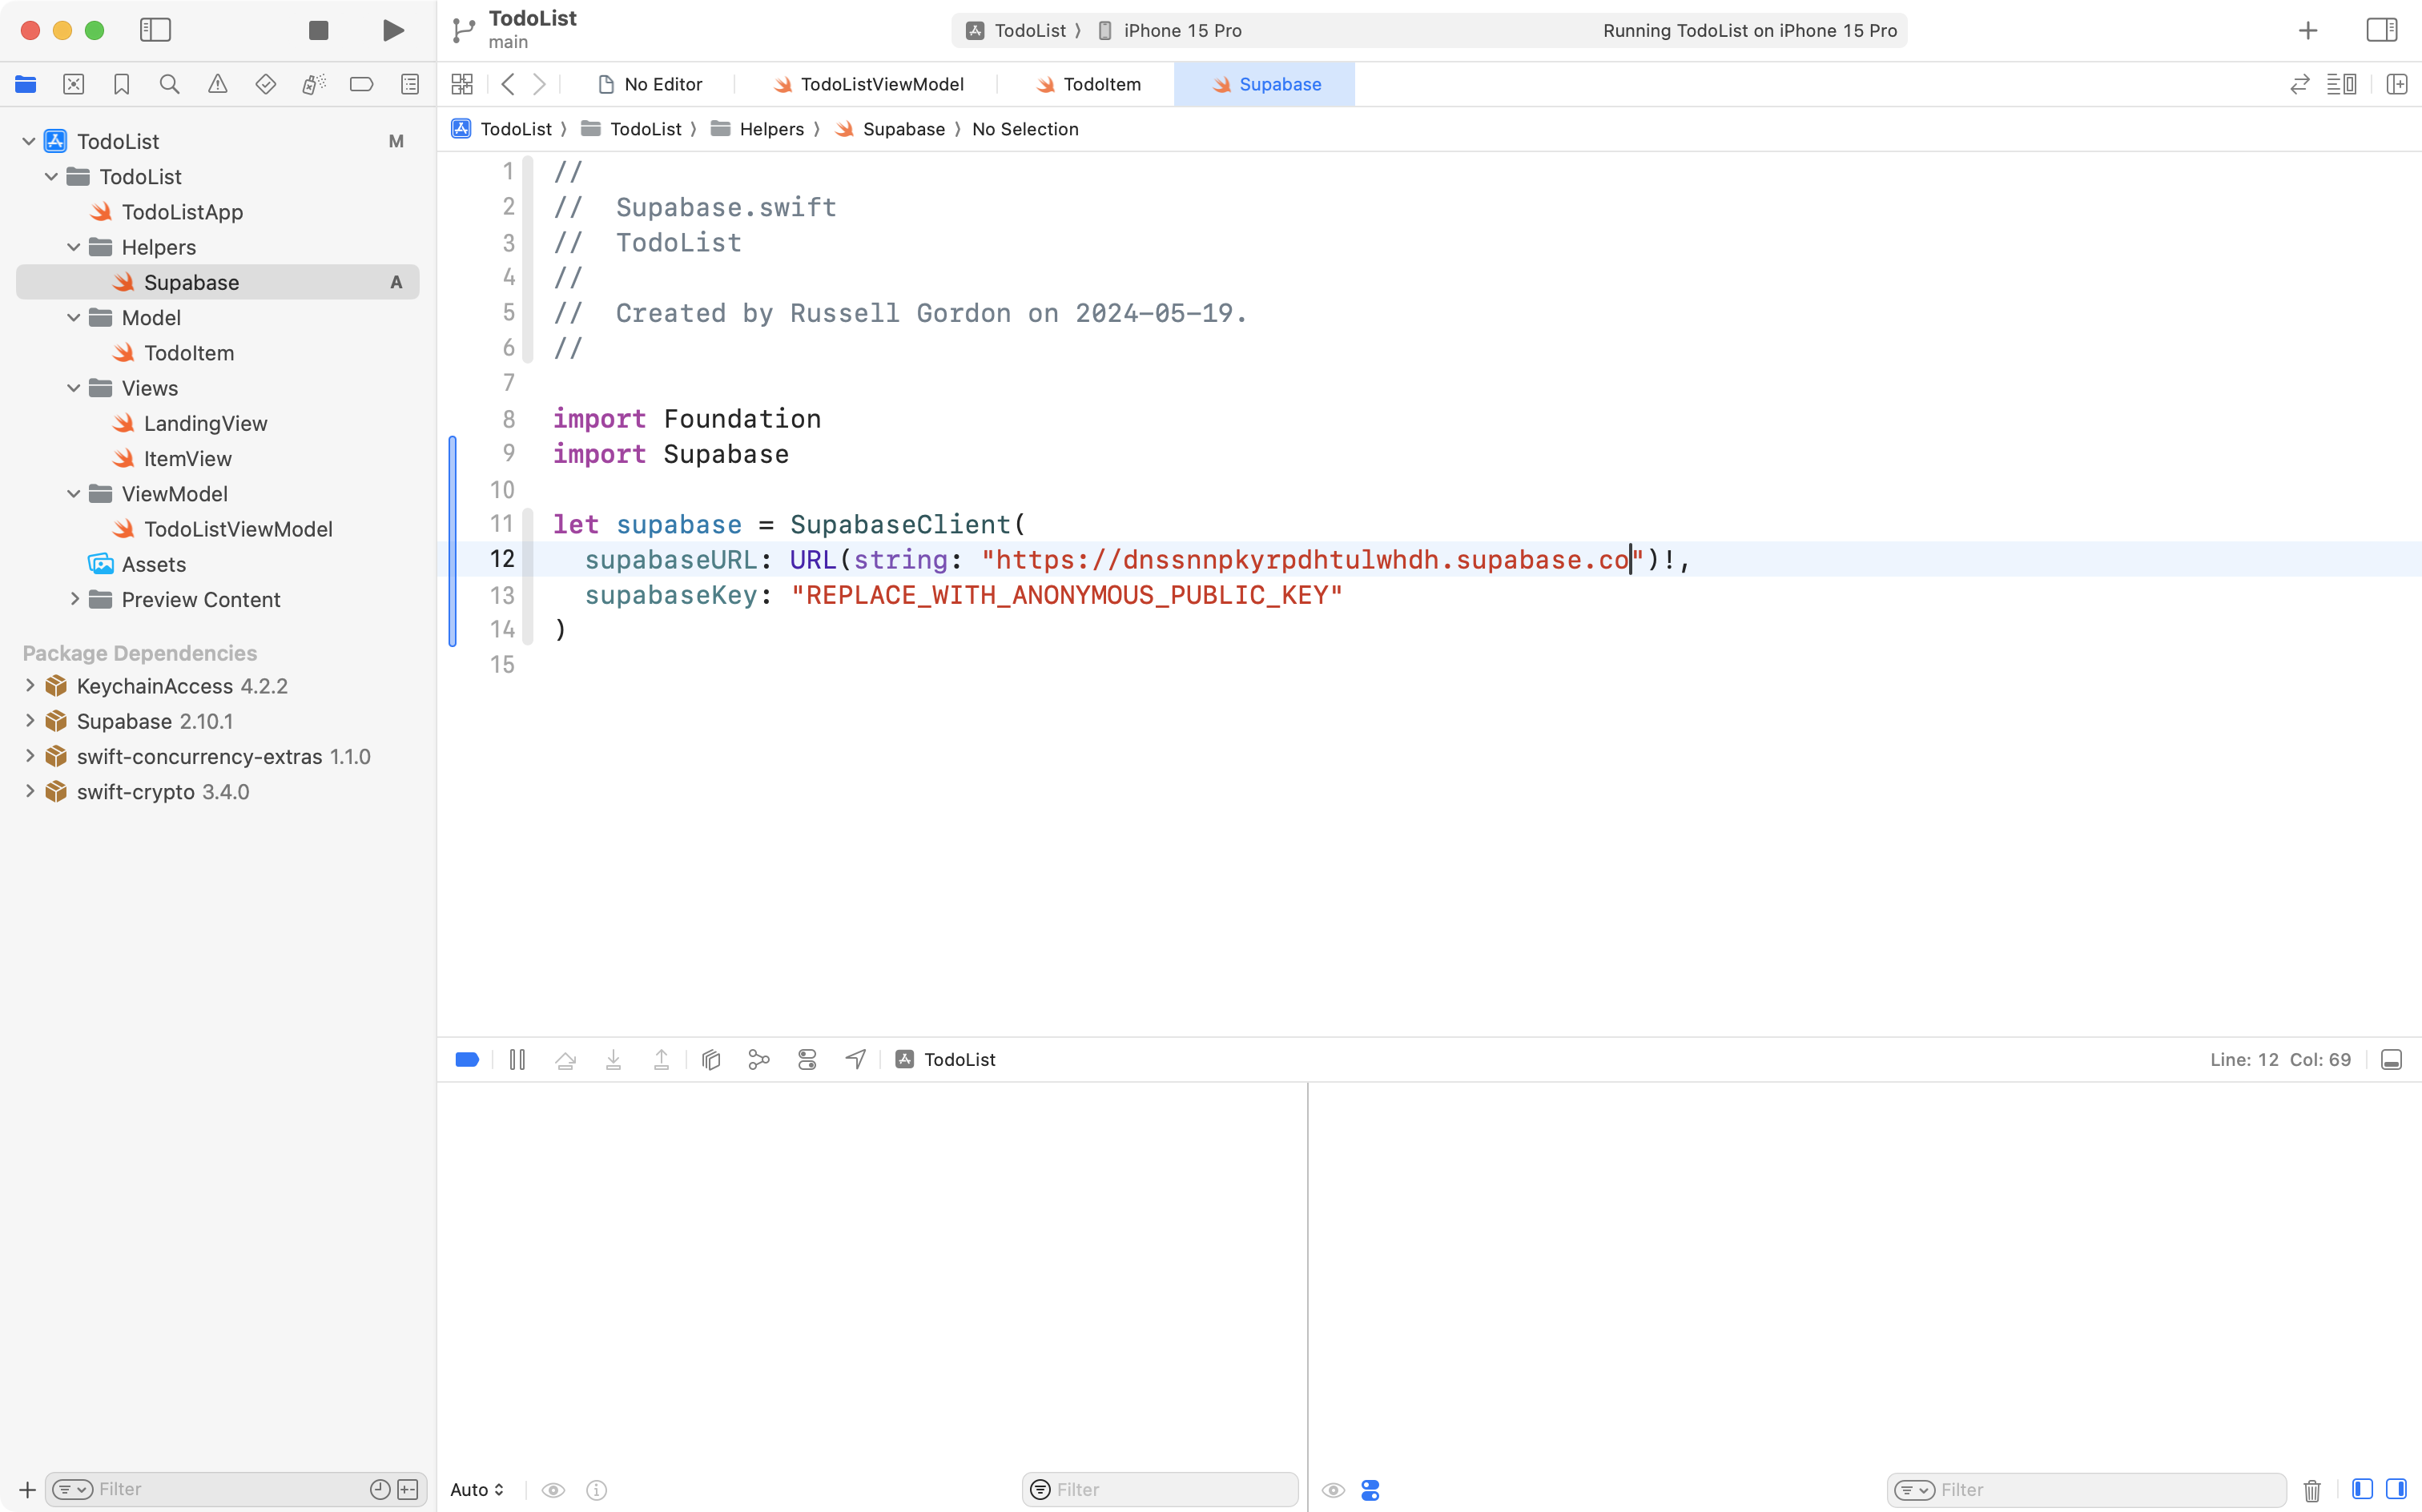
Then add the following code to that file:
import Supabase

let supabase = SupabaseClient(
  supabaseURL: URL(string: "https://REPLACE_WITH_PROJECT_URL.supabase.co")!,
  supabaseKey: "REPLACE_WITH_ANONYMOUS_PUBLIC_KEY"
)
… like this:
Now, in Supabase, open your project settings page by clicking the gear icon:
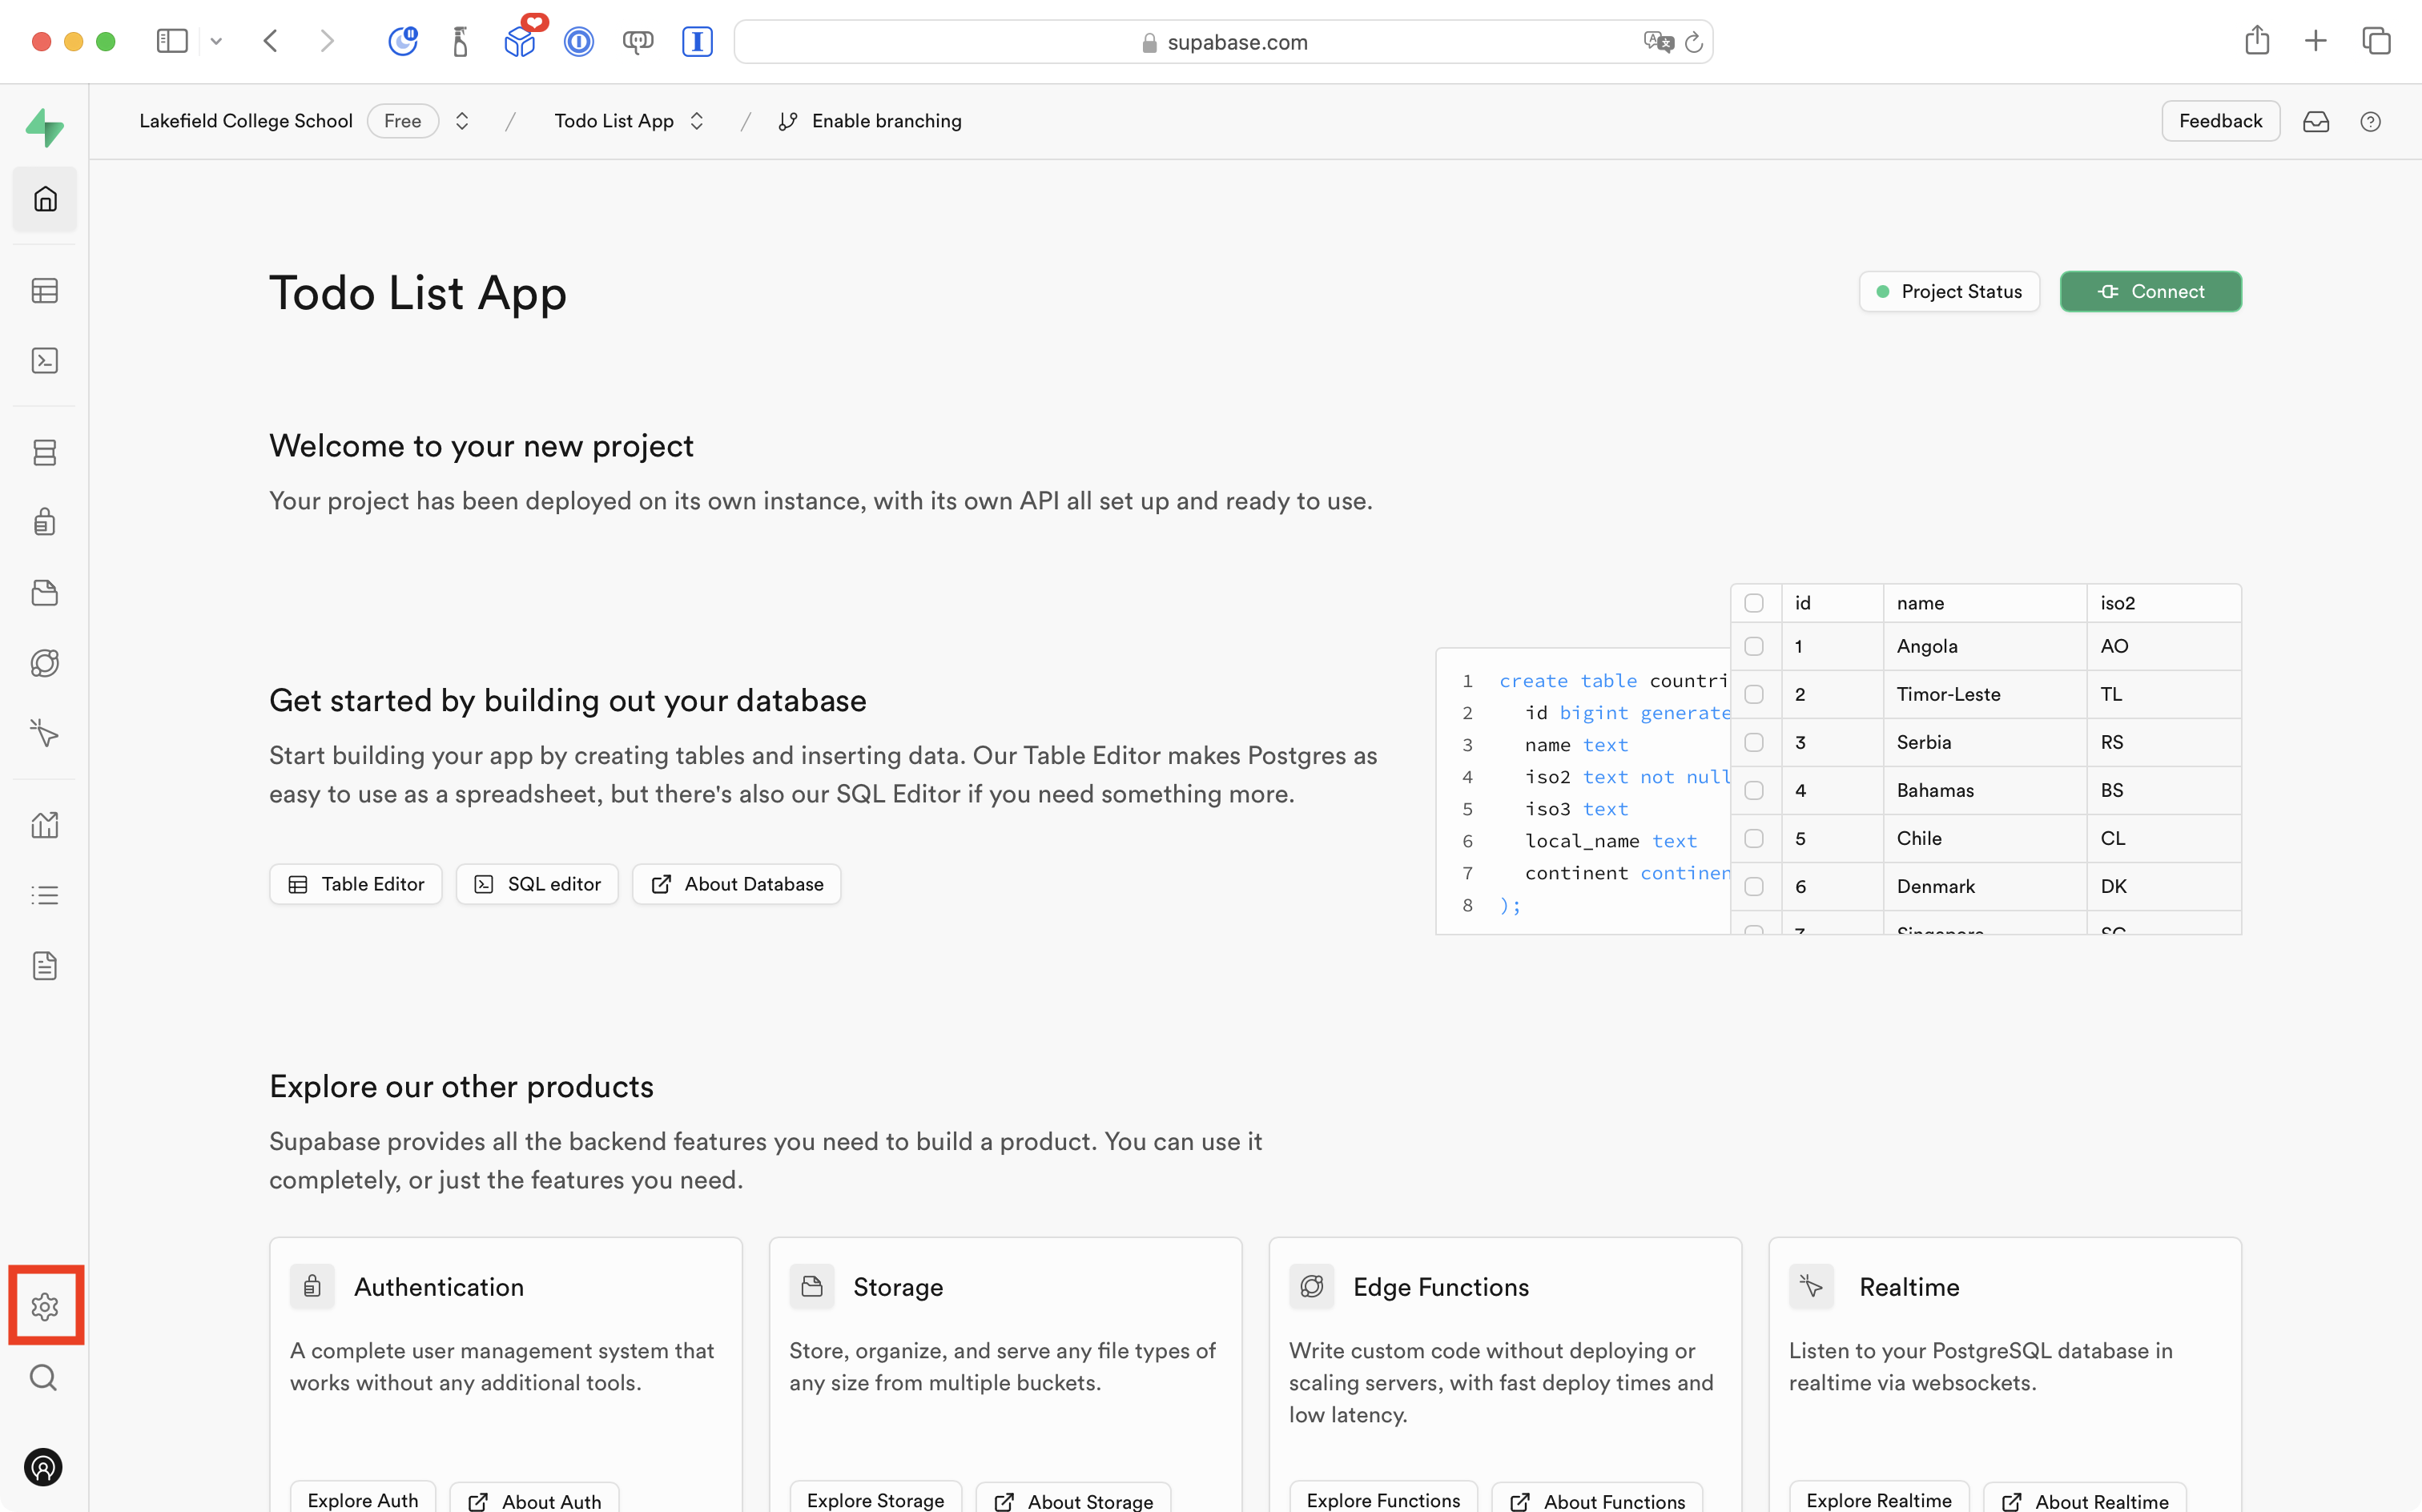
It will look like this:
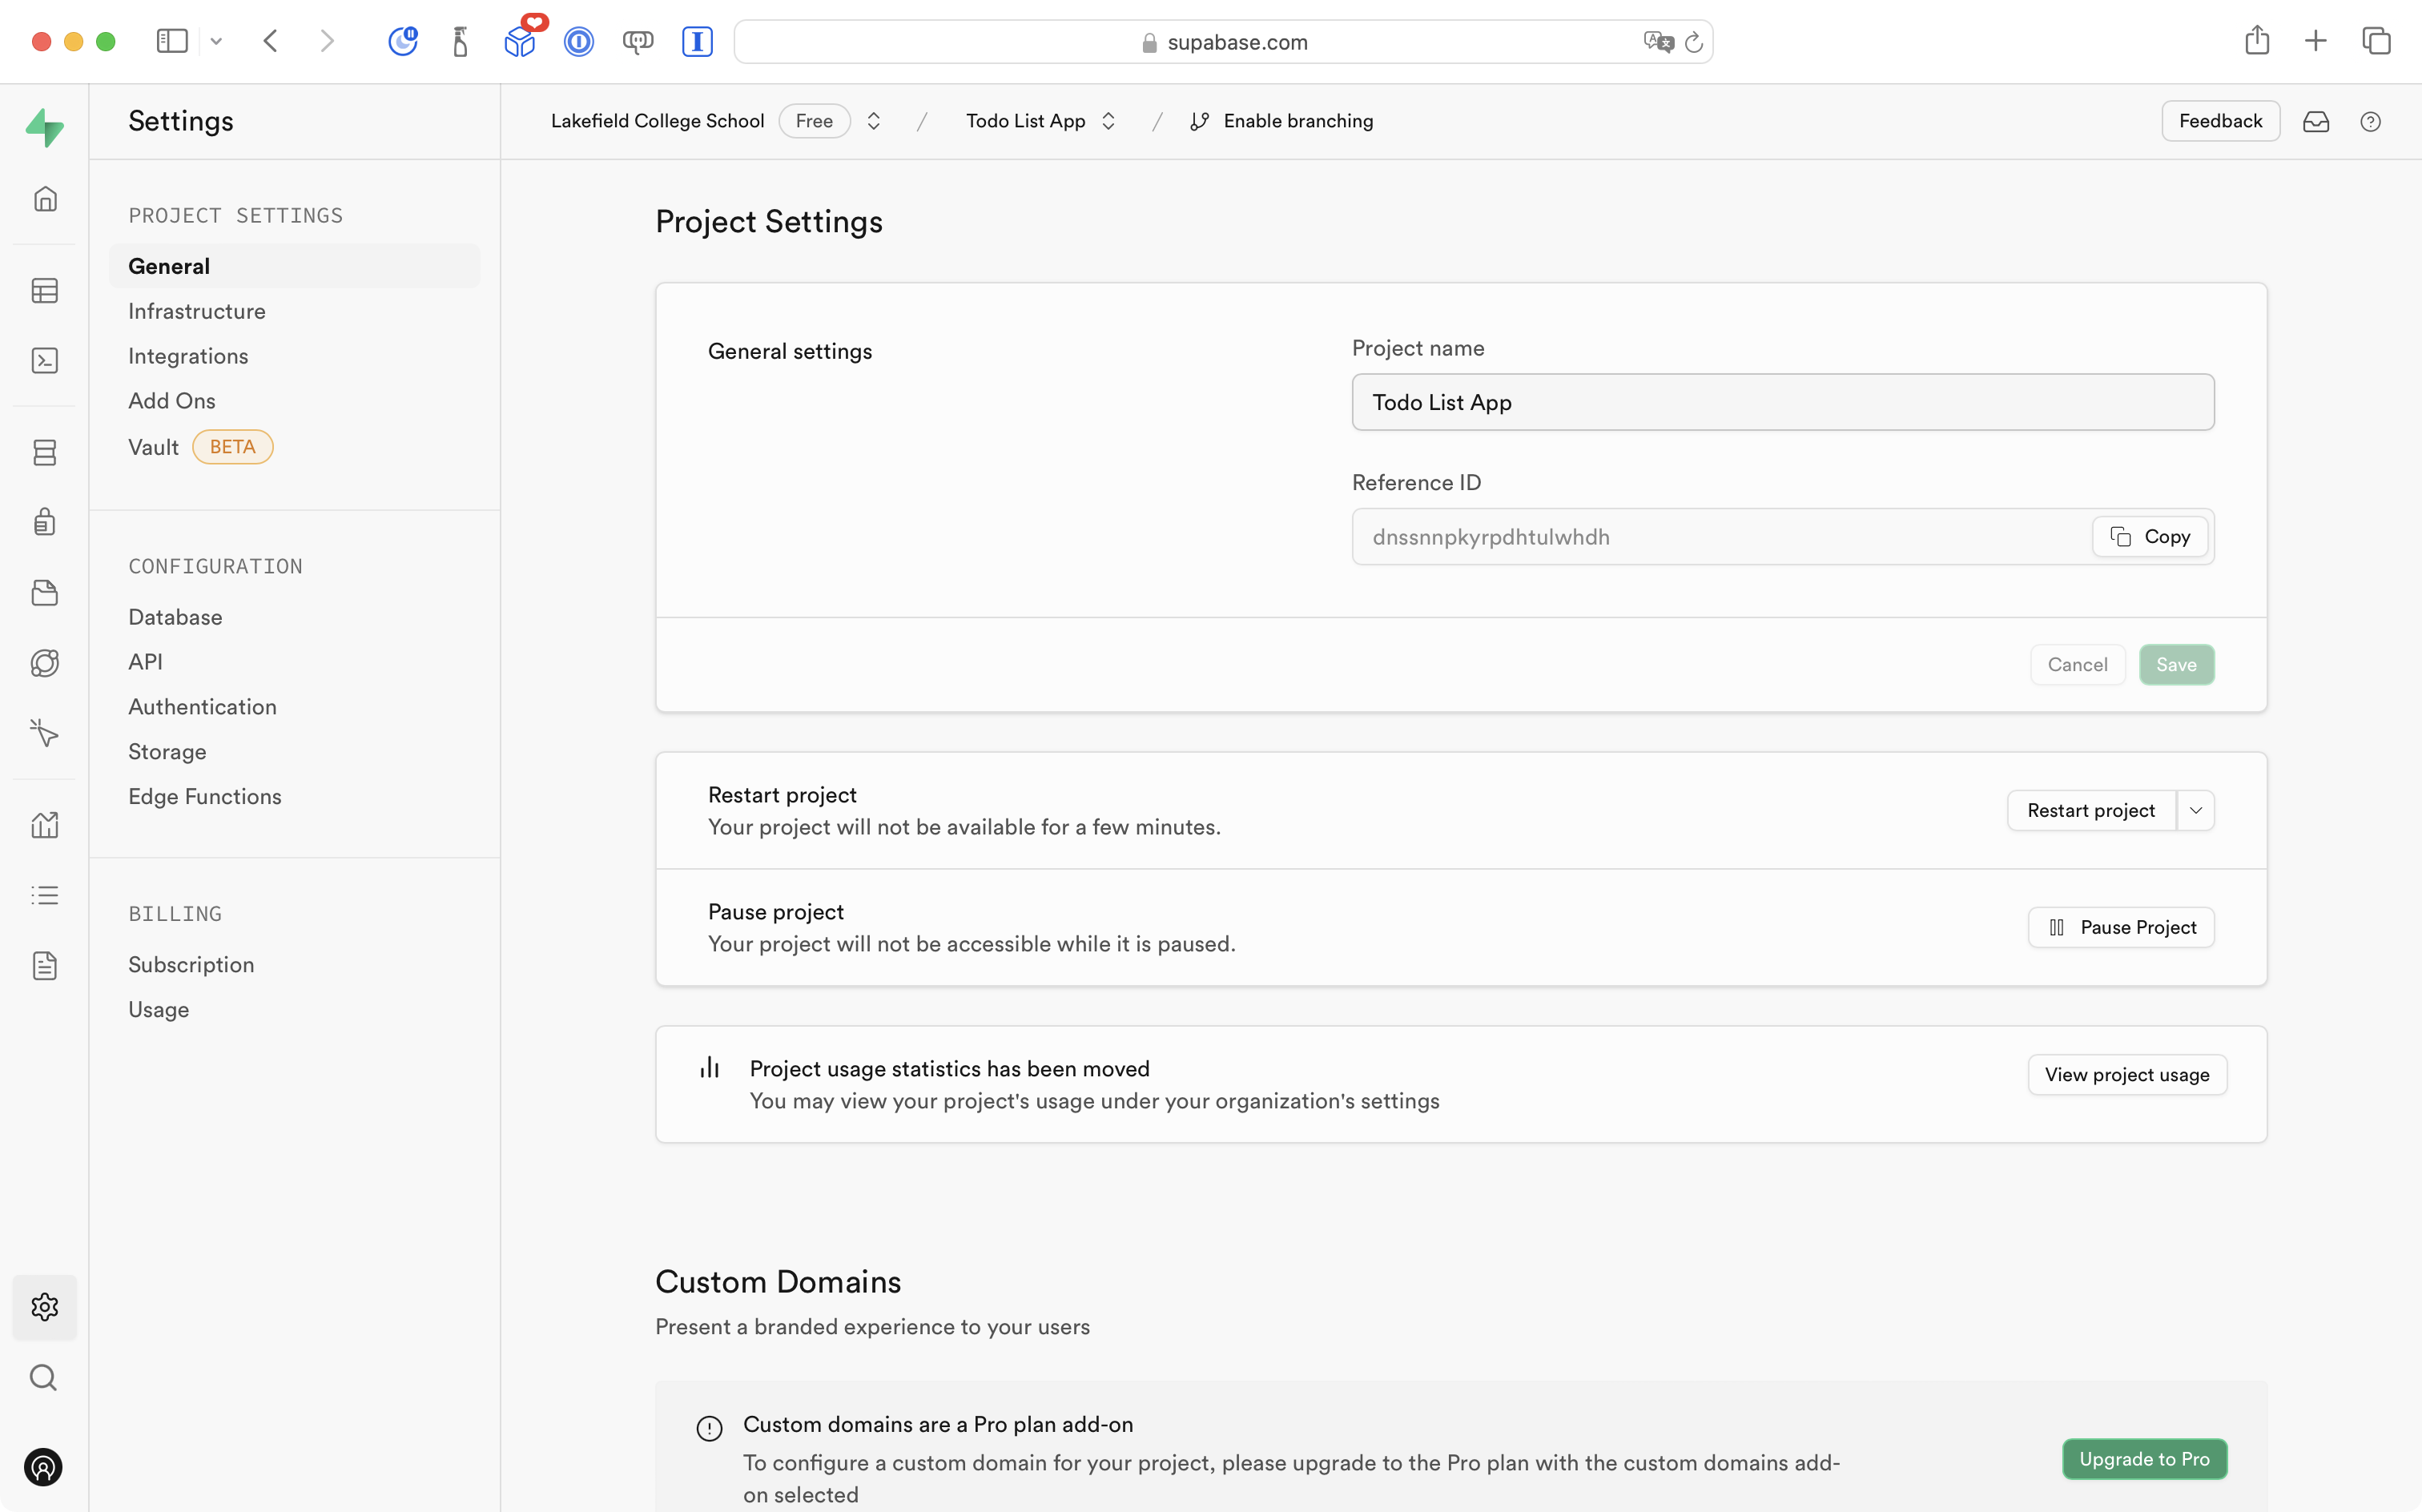
Then select the API link:
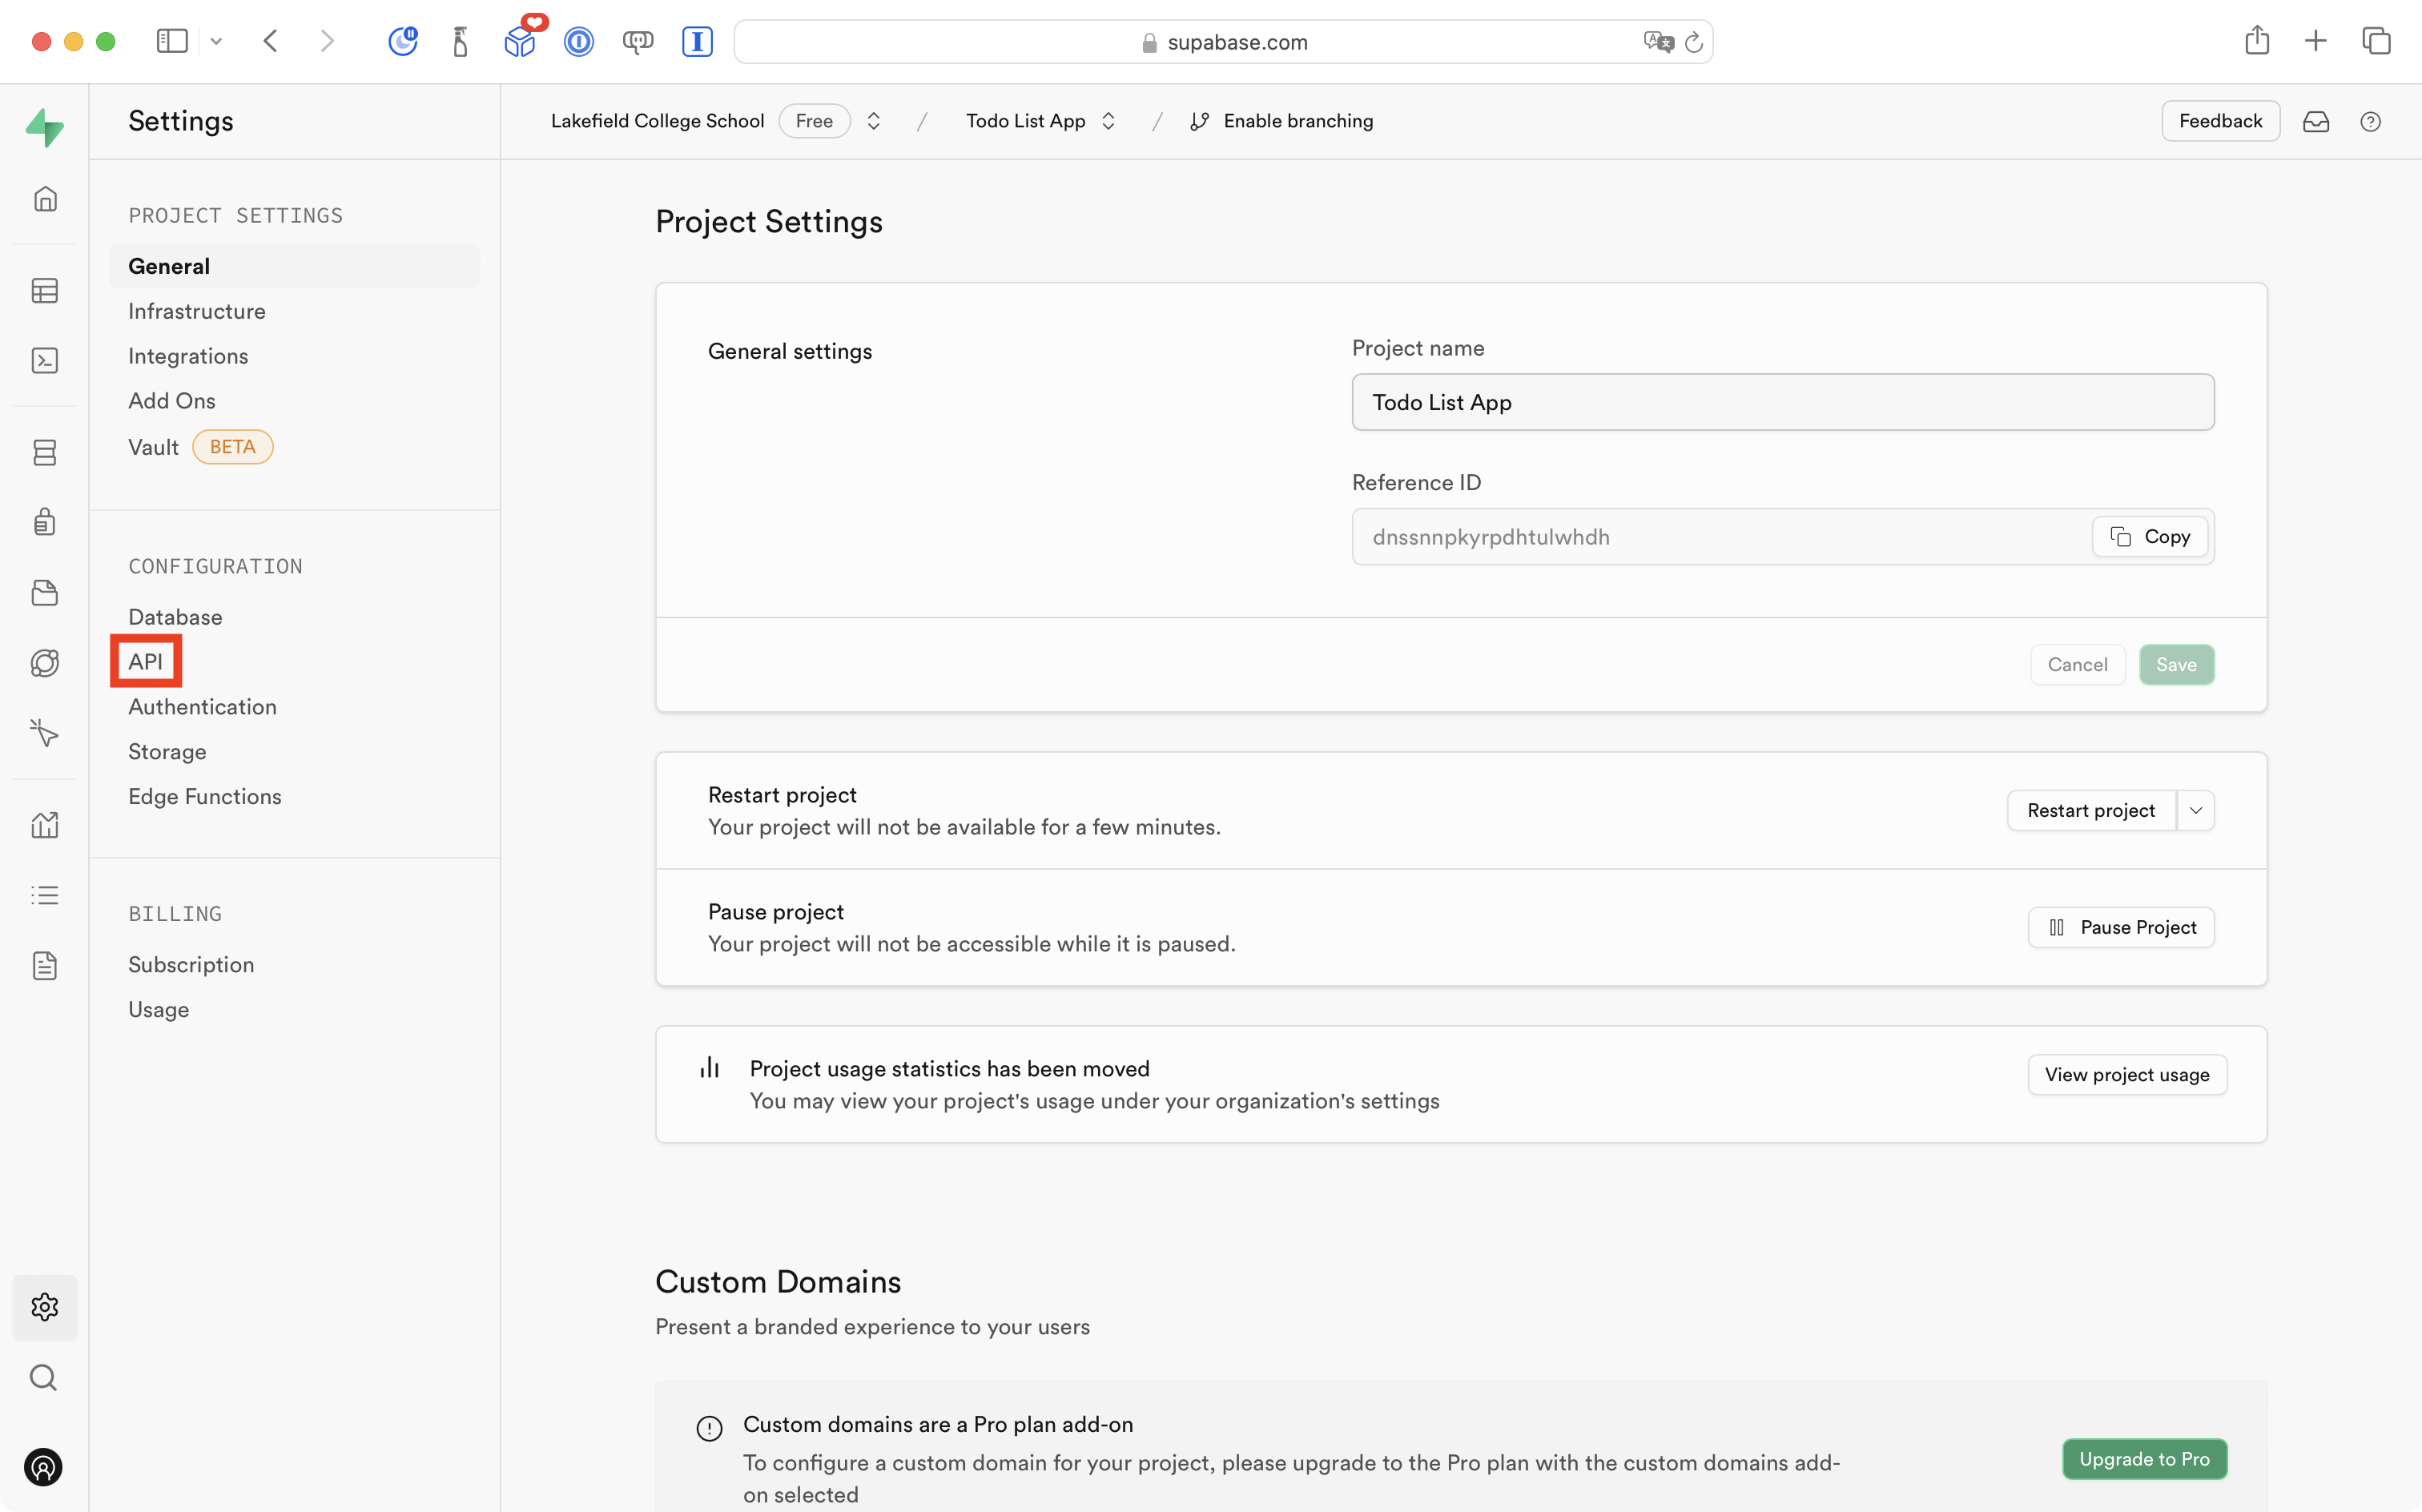
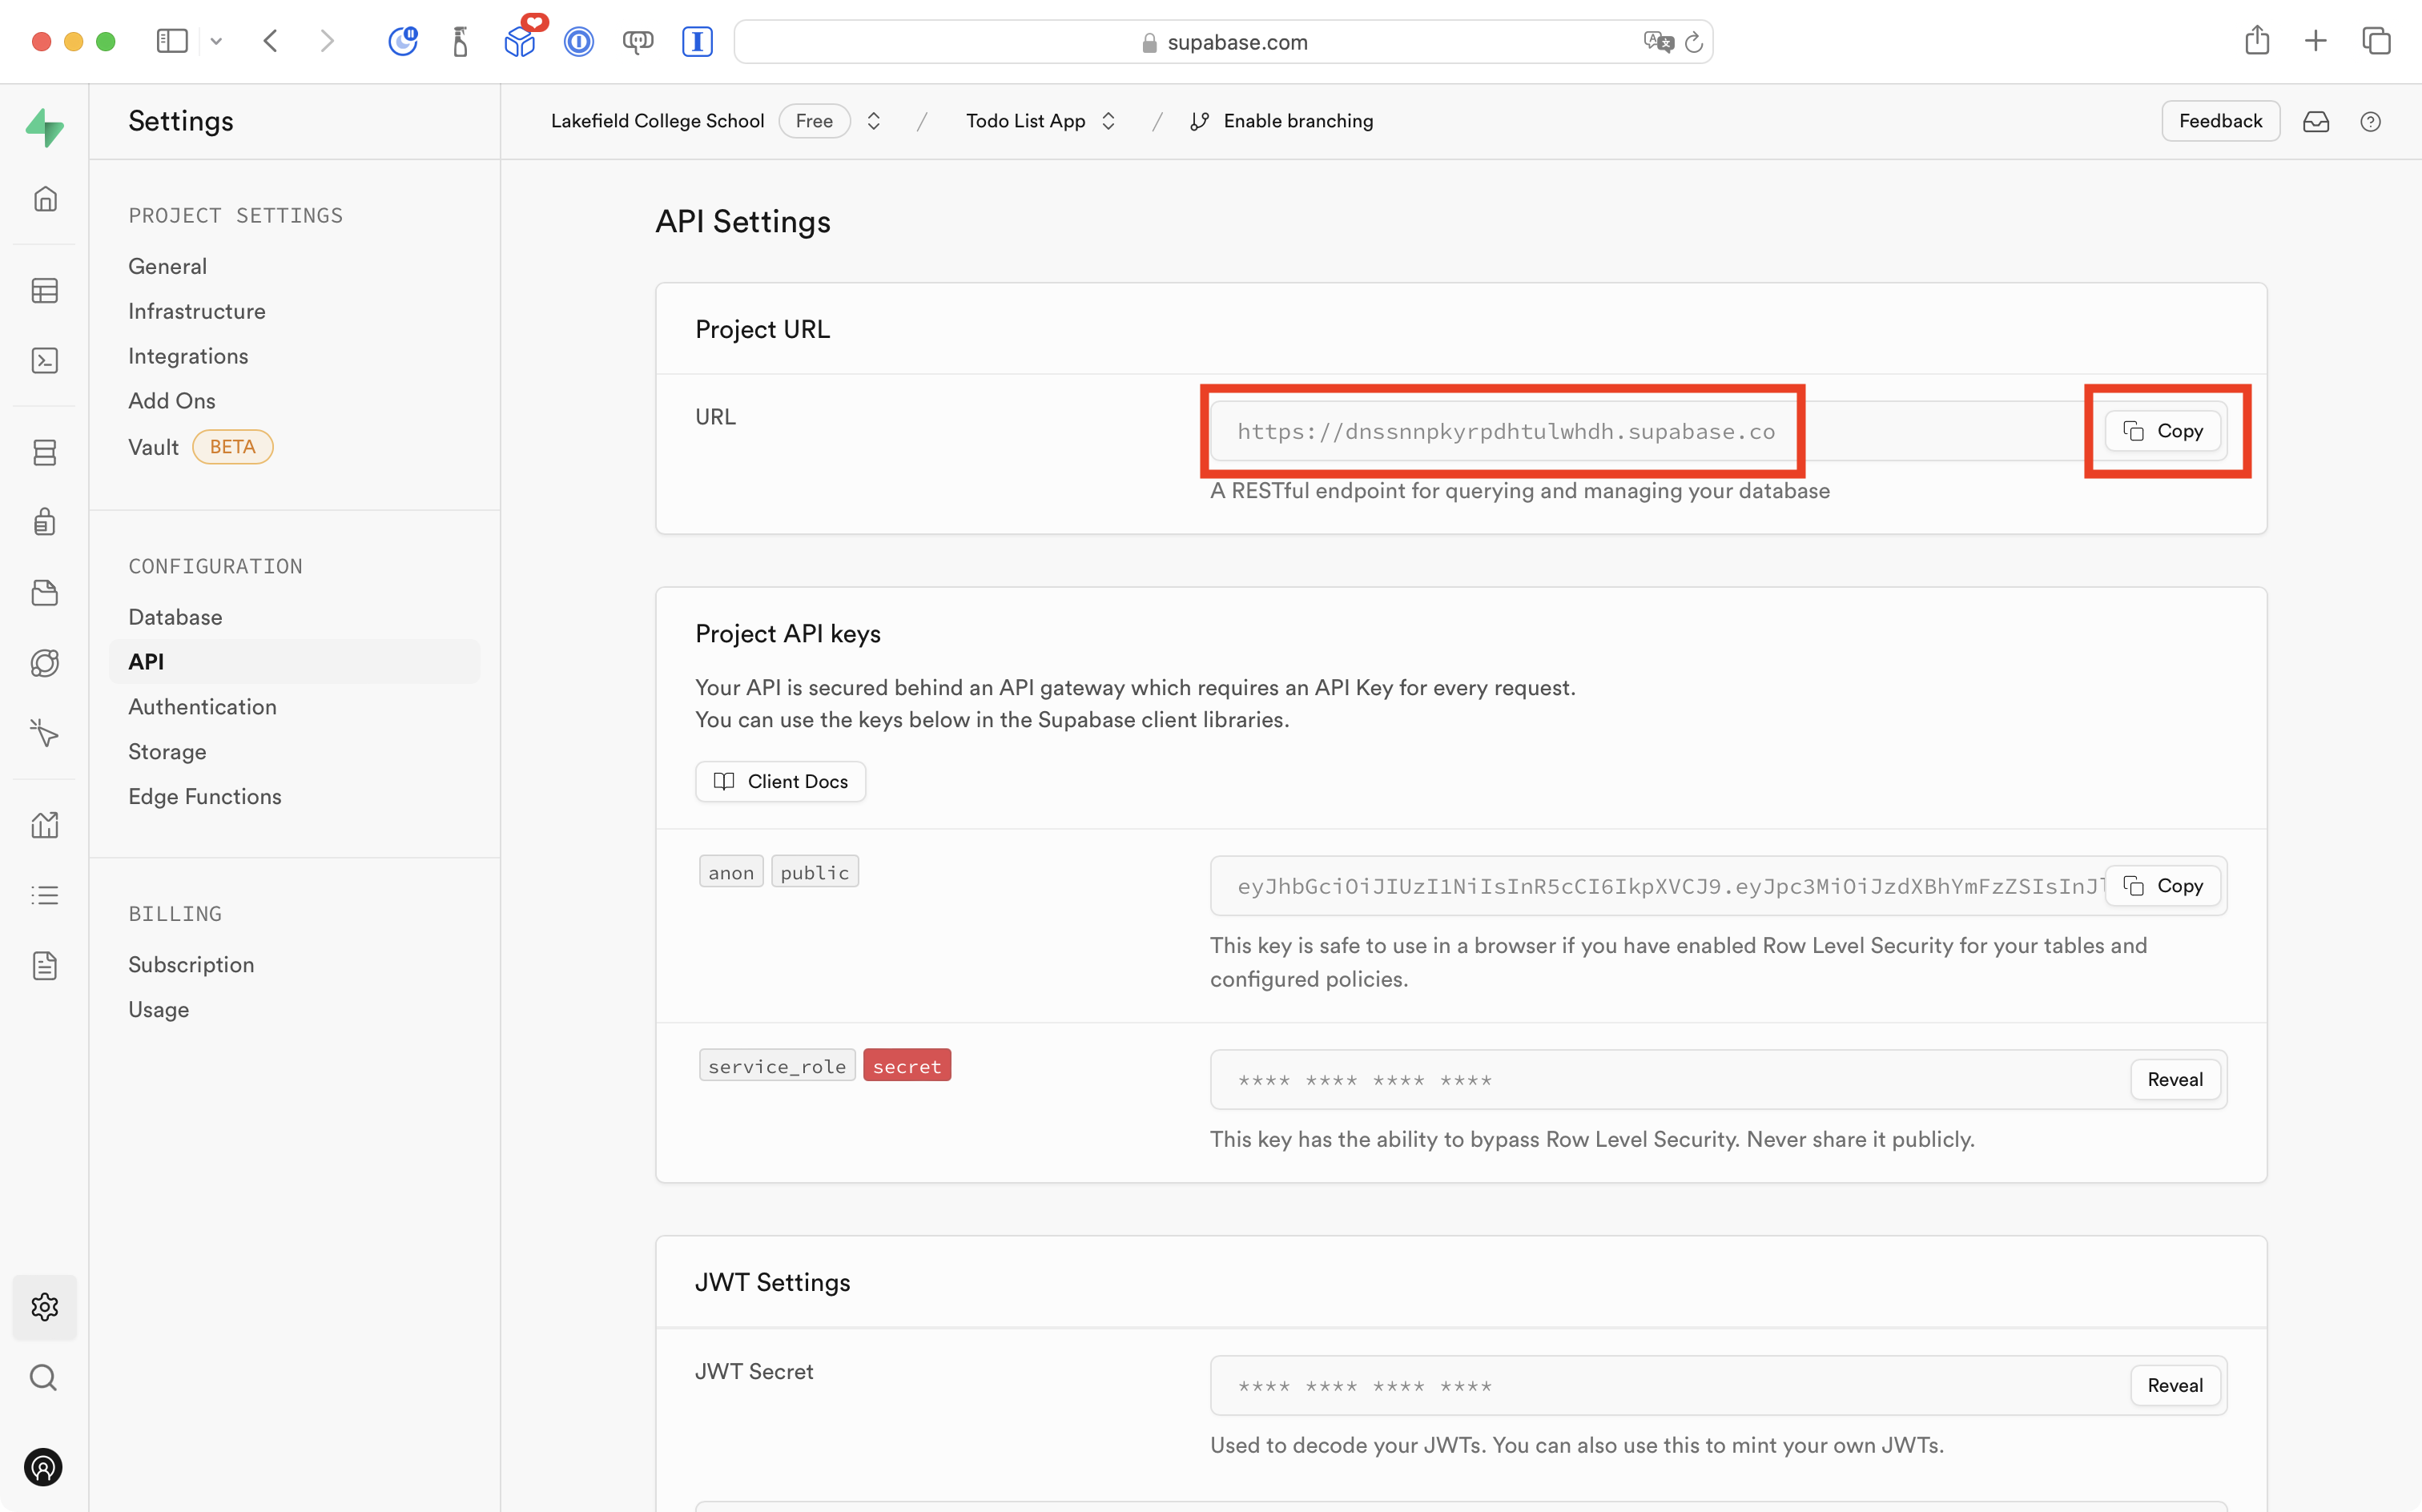
You will see a page like this:

The first piece of information you need is the URL – this is the unique identifier for your project at Supabase – press the Copy button to get this information into your clipboard:
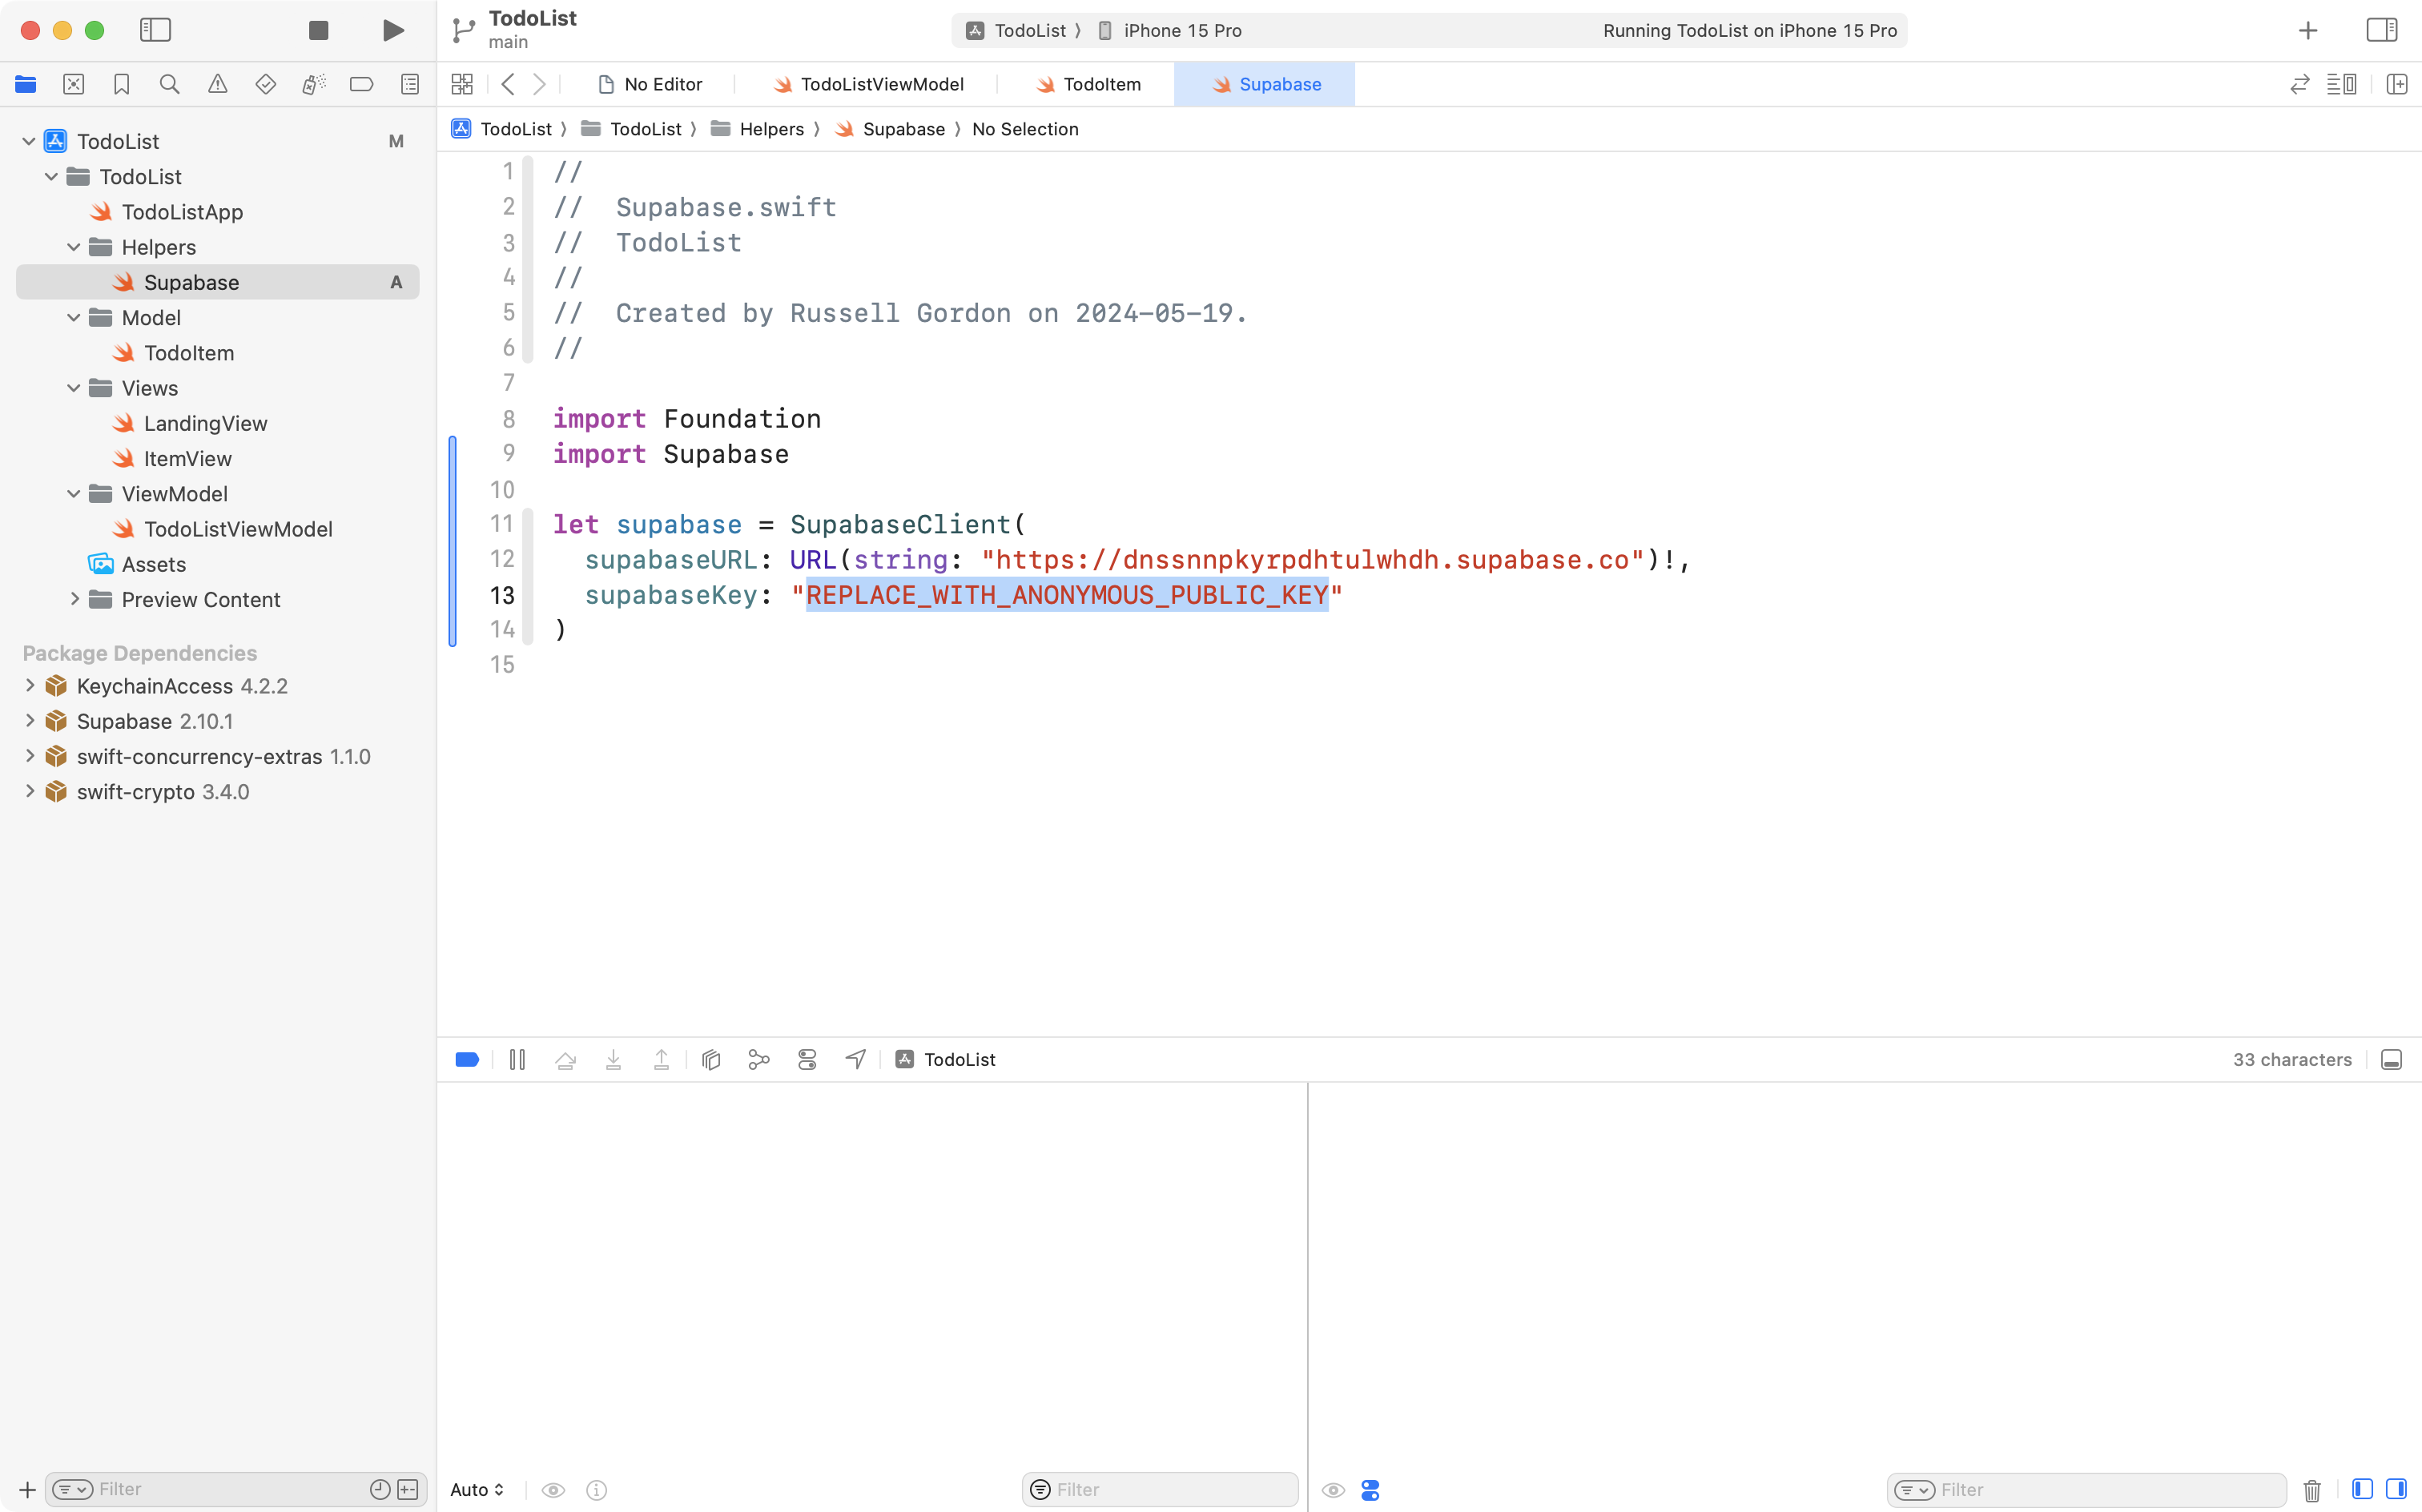
Highlight this part of the code in Supabase.swift:
… then press Command-V to paste your unique project URL in it’s place:
Next, highlight the anonymous public key – this is how your app proves to Supabase that it is authorized to connect to your database:
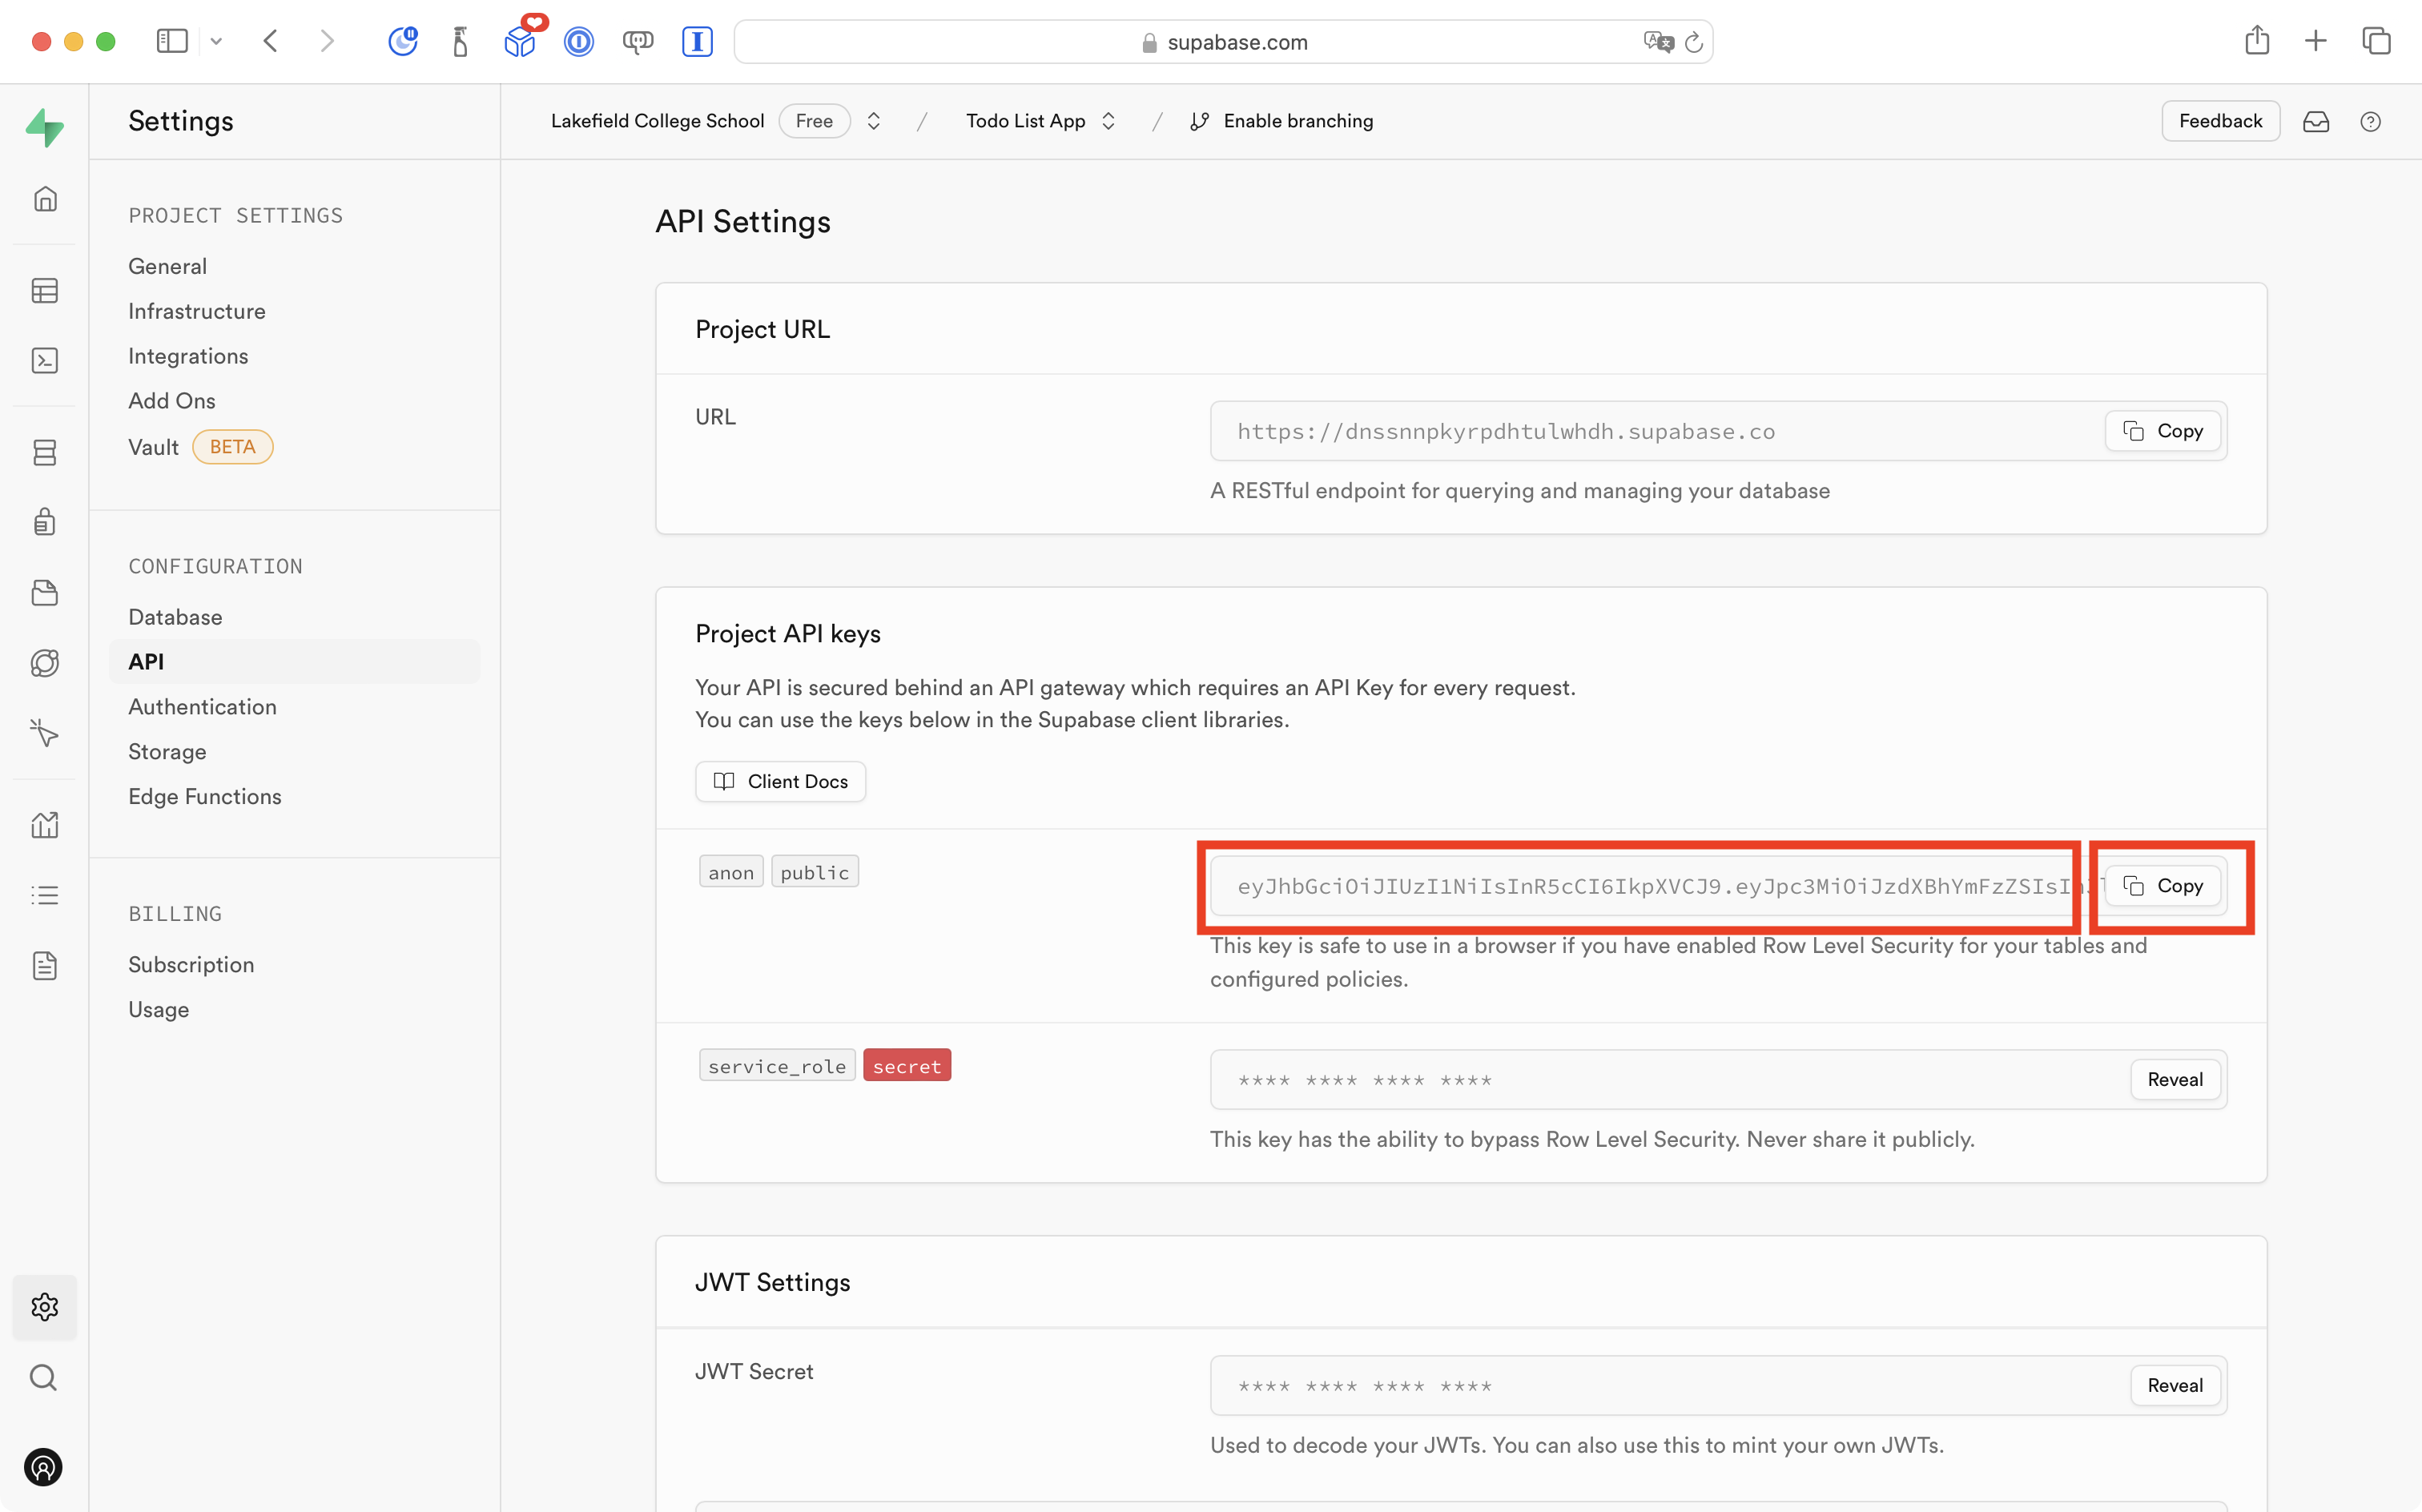
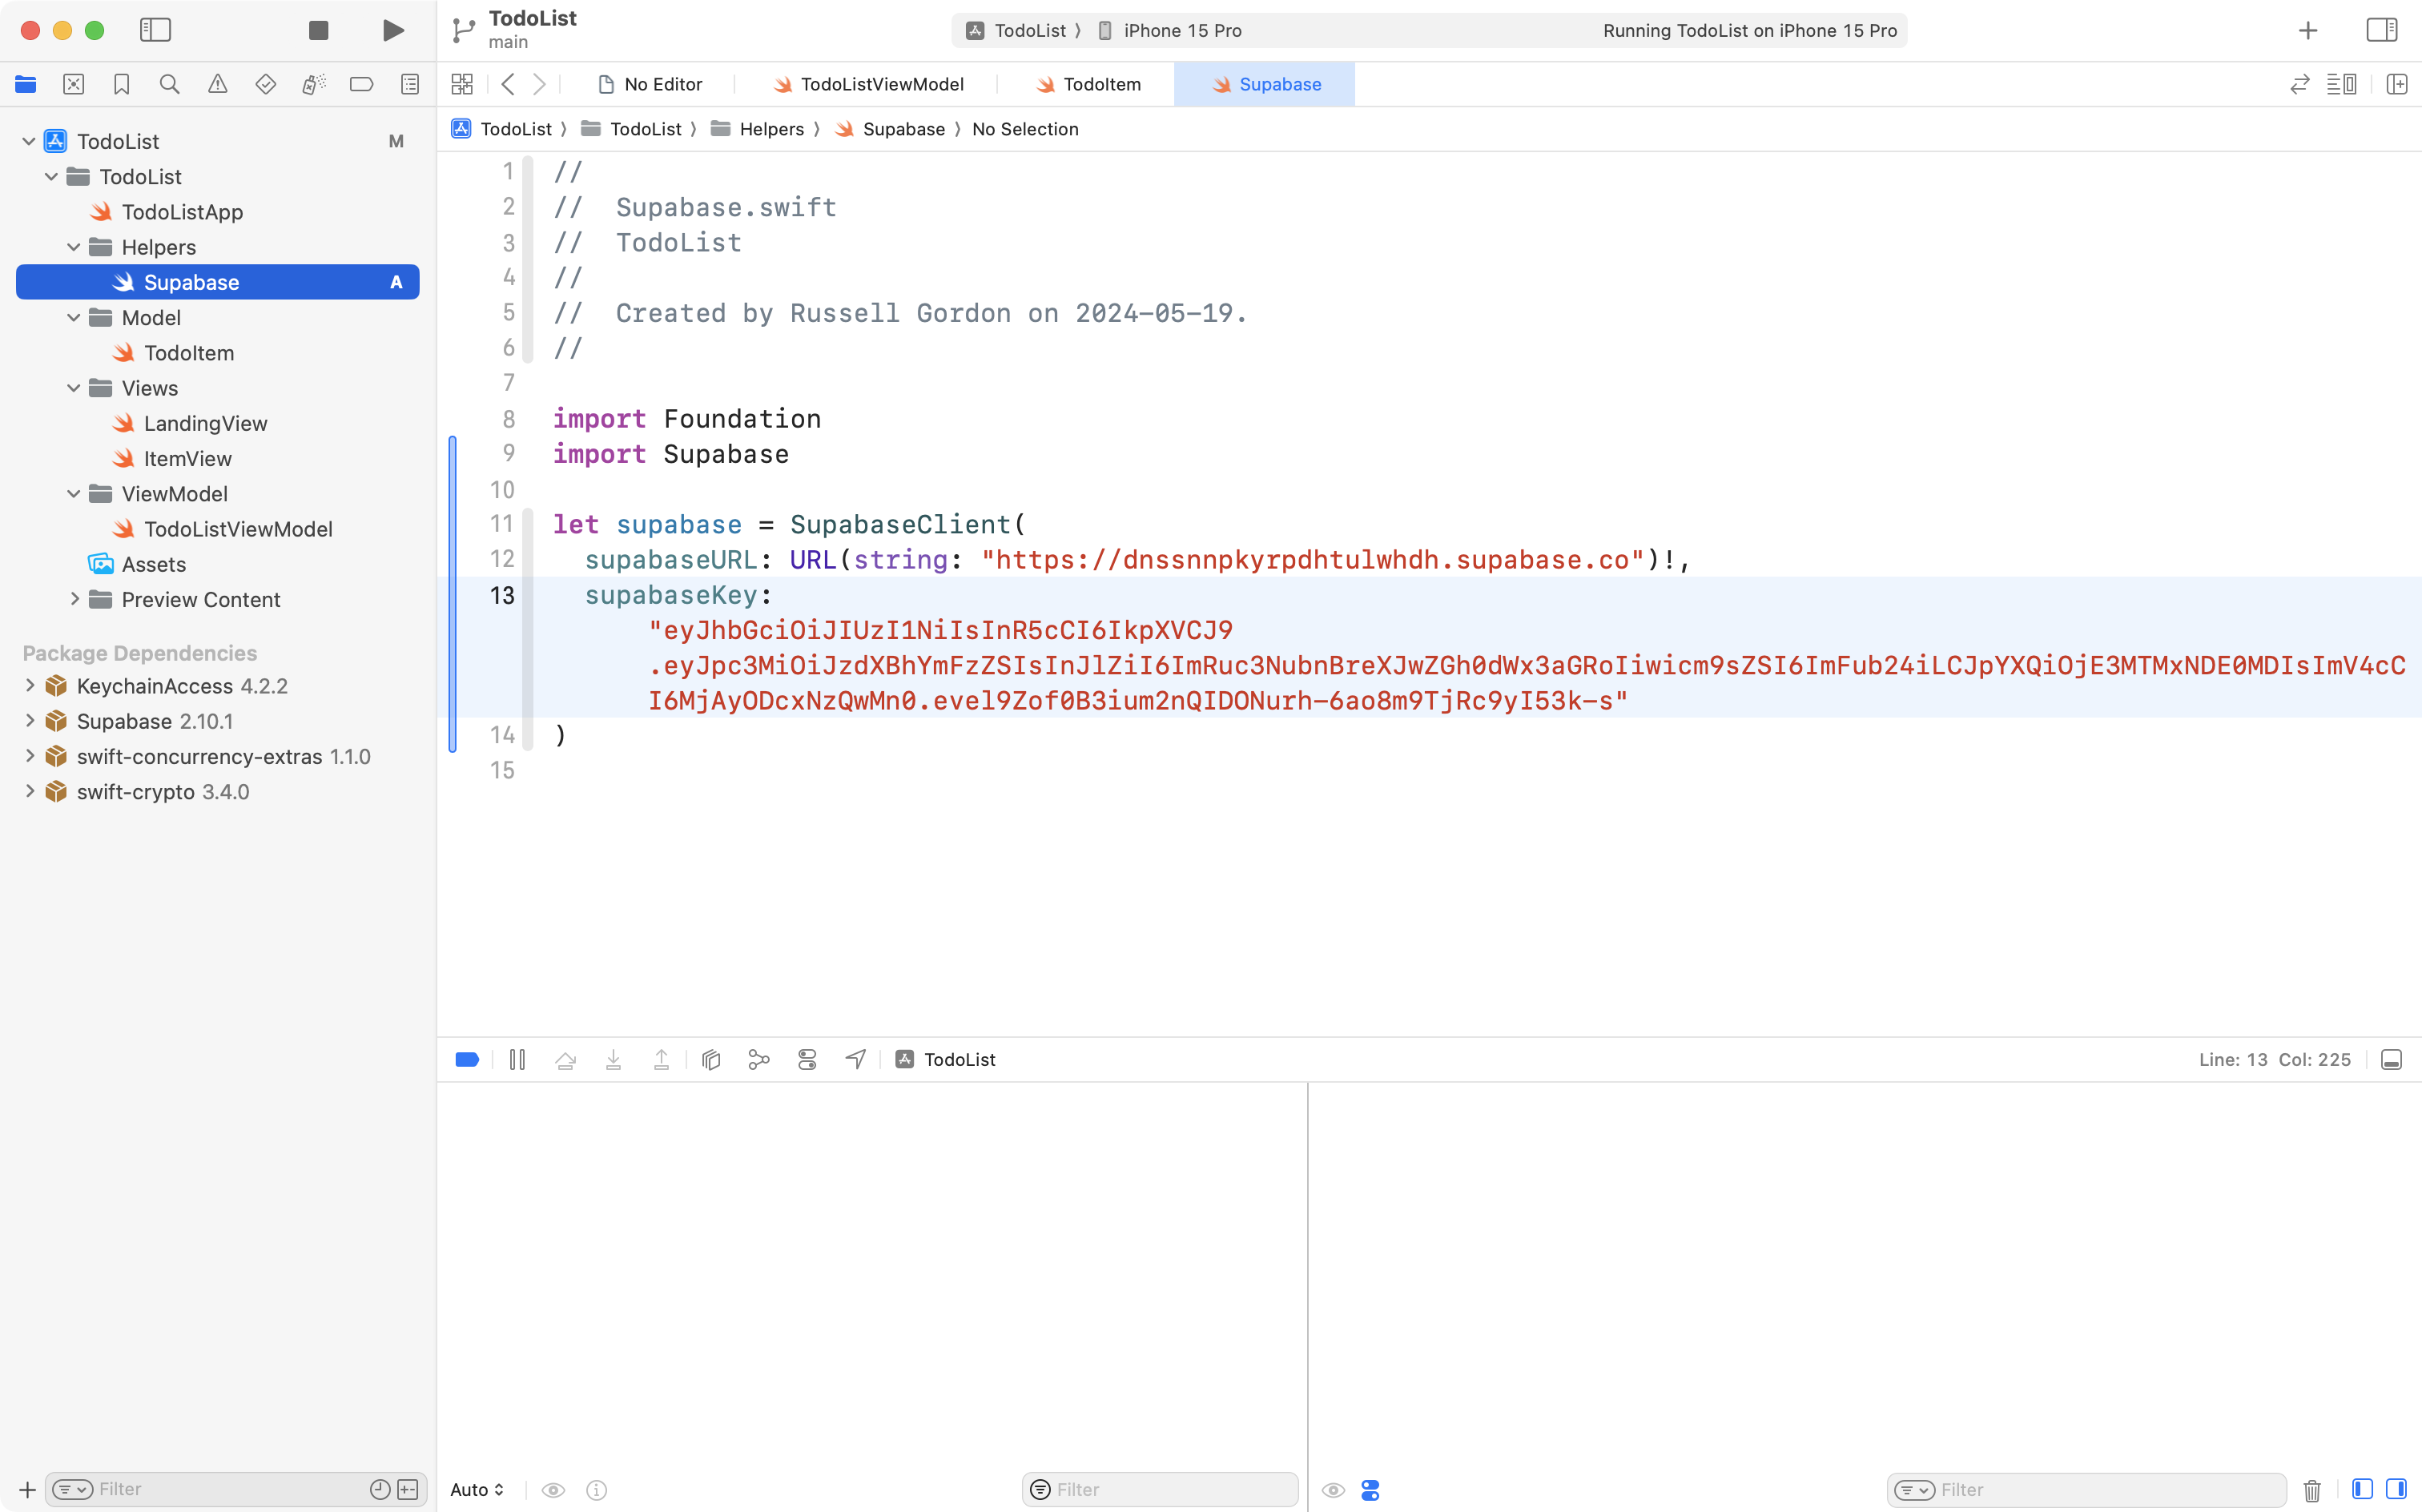
Press the Copy button to place the key in your clipboard, then highlight this code in Supabase.swift:
… then press Command-V to paste the key:
This is useful progress, so please commit and push your work with this message:
Added a helper file to identify our app to the Supabase servers.
Adjust the model
We must adjust the model, for two reasons.
First, we saw earlier that when asking Supabase for the information from our database, we get this JSON-formatted text as a response:
[{"id":1,"title":"Call Mom","done":false},
 {"id":2,"title":"Go for a run","done":false},
 {"id":3,"title":"Have a nap","done":false}]
Supabase will automatically convert that JSON-formatted information into Swift data structures for us. To allow this, we must mark the TodoItem structure as Codable. This just means that information can be decoded from JSON into instances of the TodoItem structure – and vice-versa – also encoded instances of the TodoItem structure into JSON (we will use this later on when sending data back to the Supabase servers).
So, please make this first edit to your TodoItem structure:
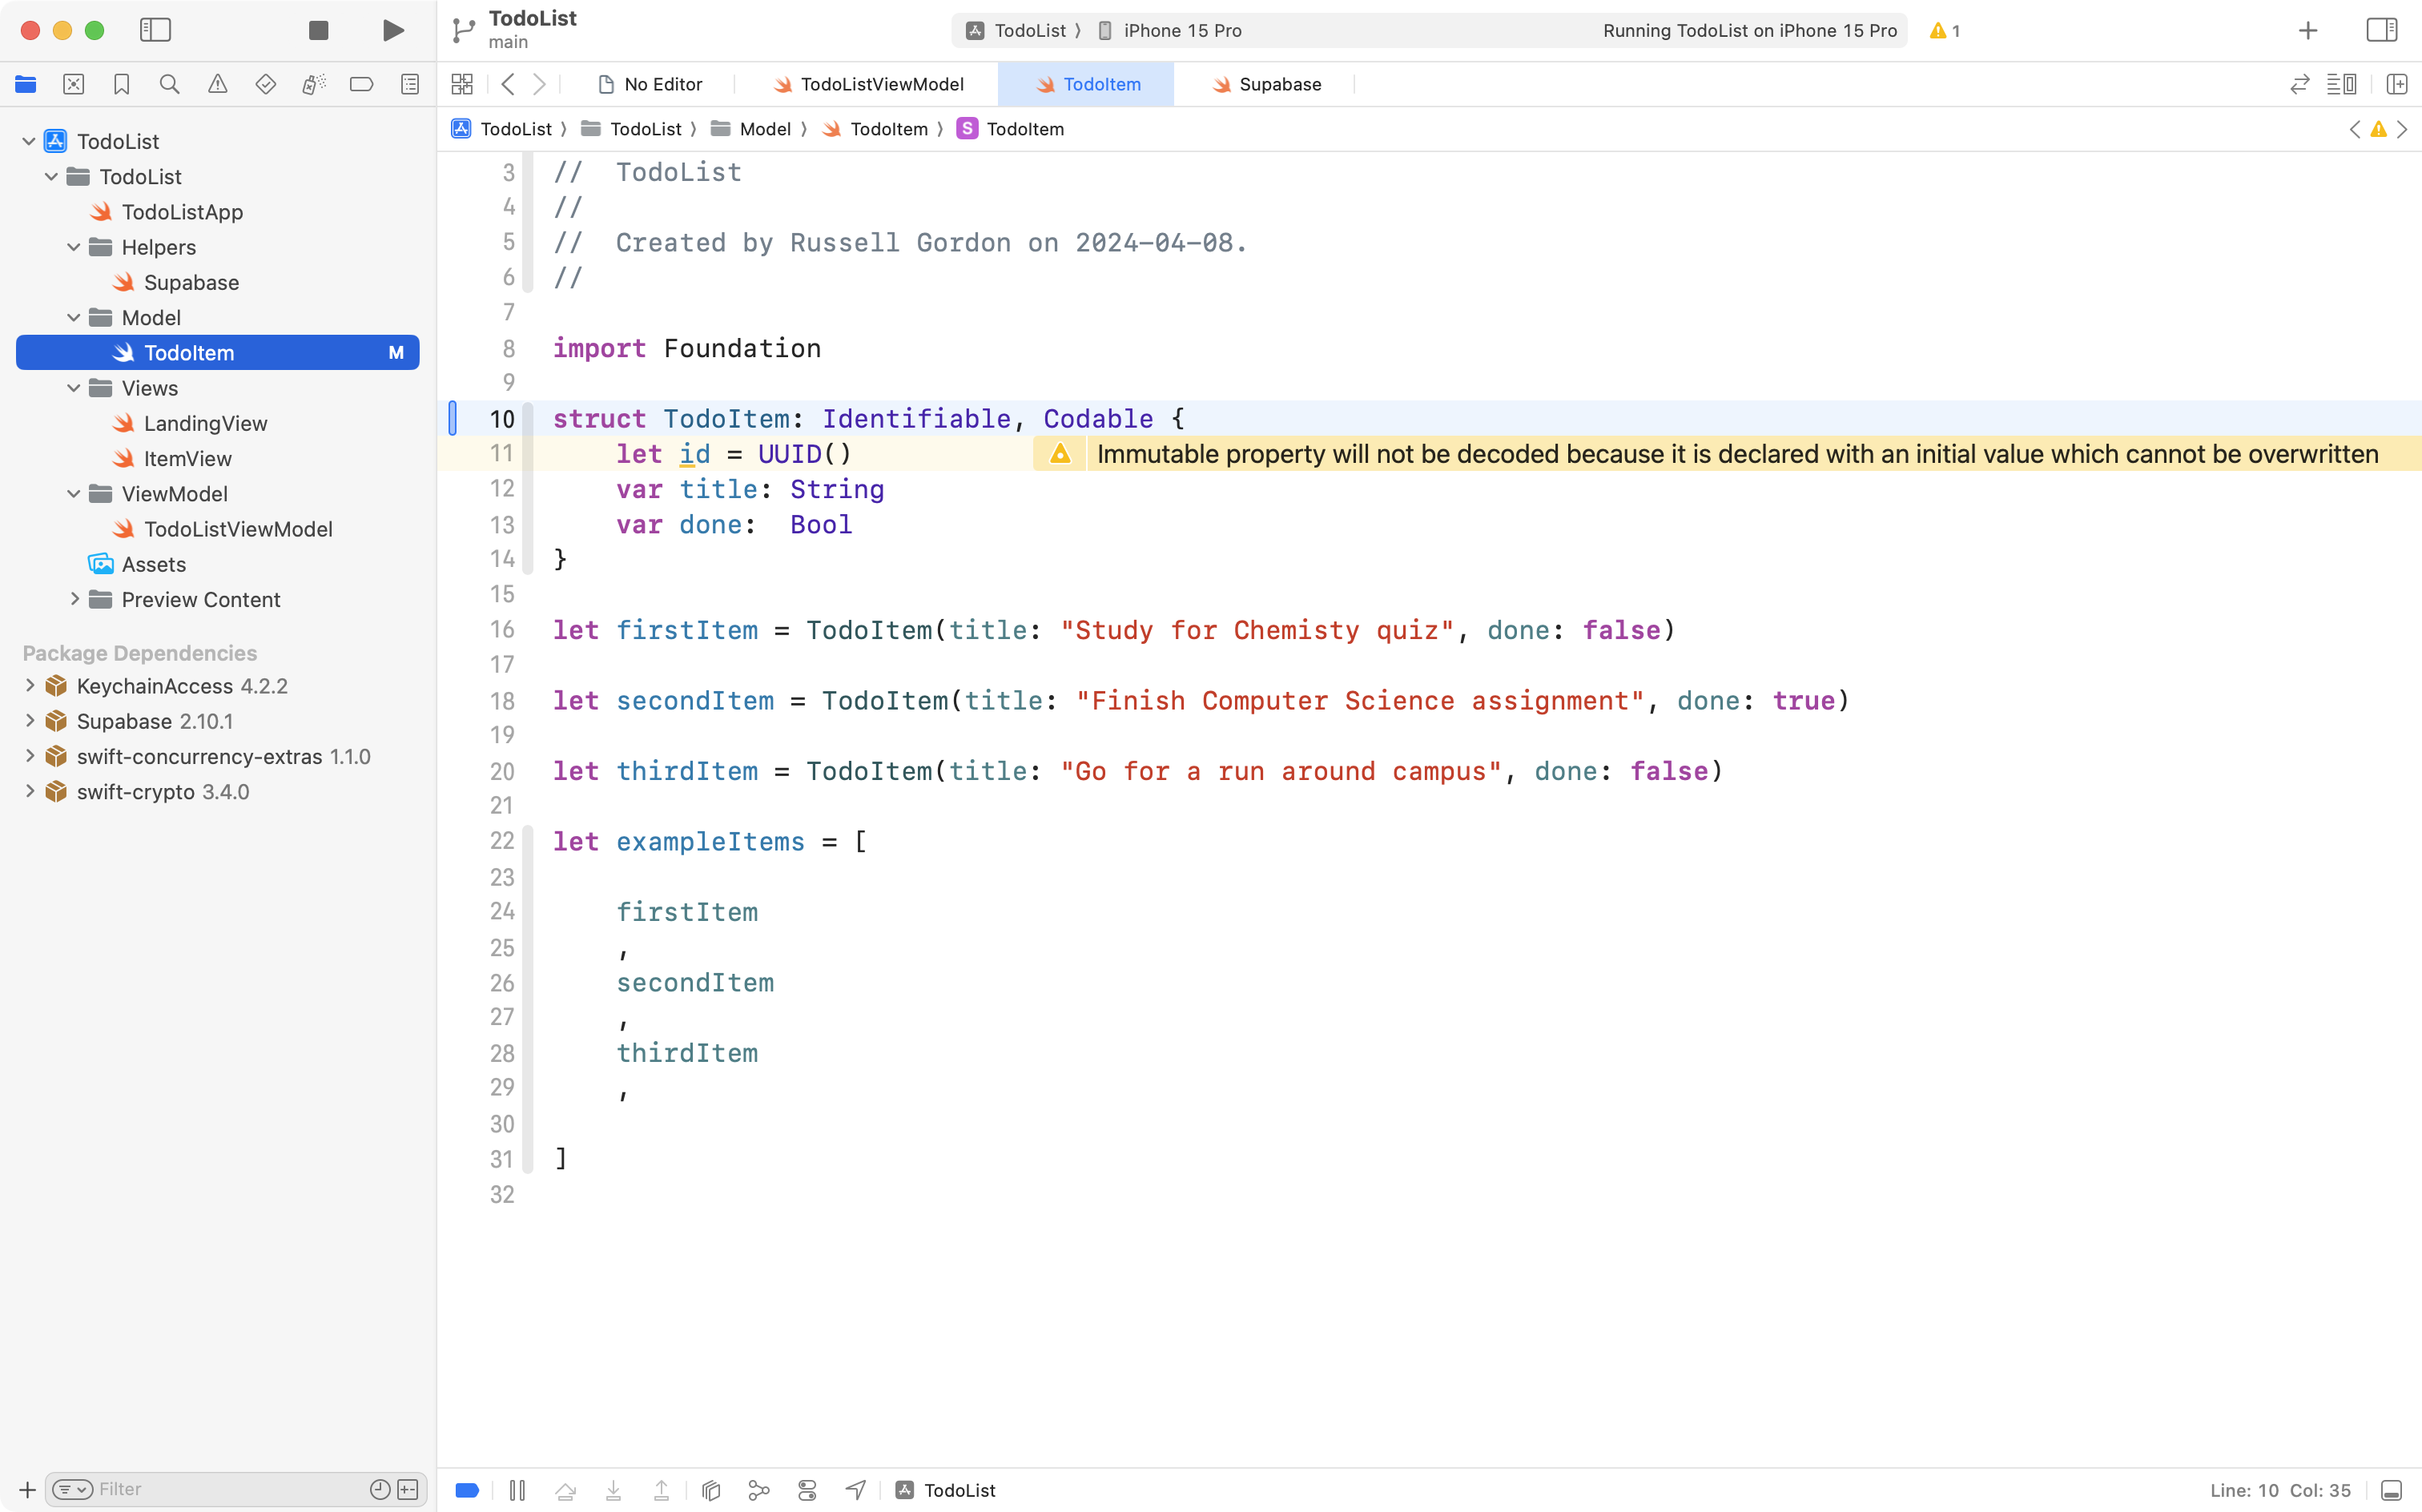
You are changing this line from:
struct TodoItem: Identifiable {…to:
struct TodoItem: Identifiable, Codable {This means the TodoItem structure now conforms to two protocols – Identifiable and Codable.
TIP
You can ignore the yellow warning message that appears. It will go away after our next edit.
Second, recall that in our database, each to-do item is uniquely identified by an integer value.
We must modify our TodoItem structure to reflect this.
So, please make the following change:
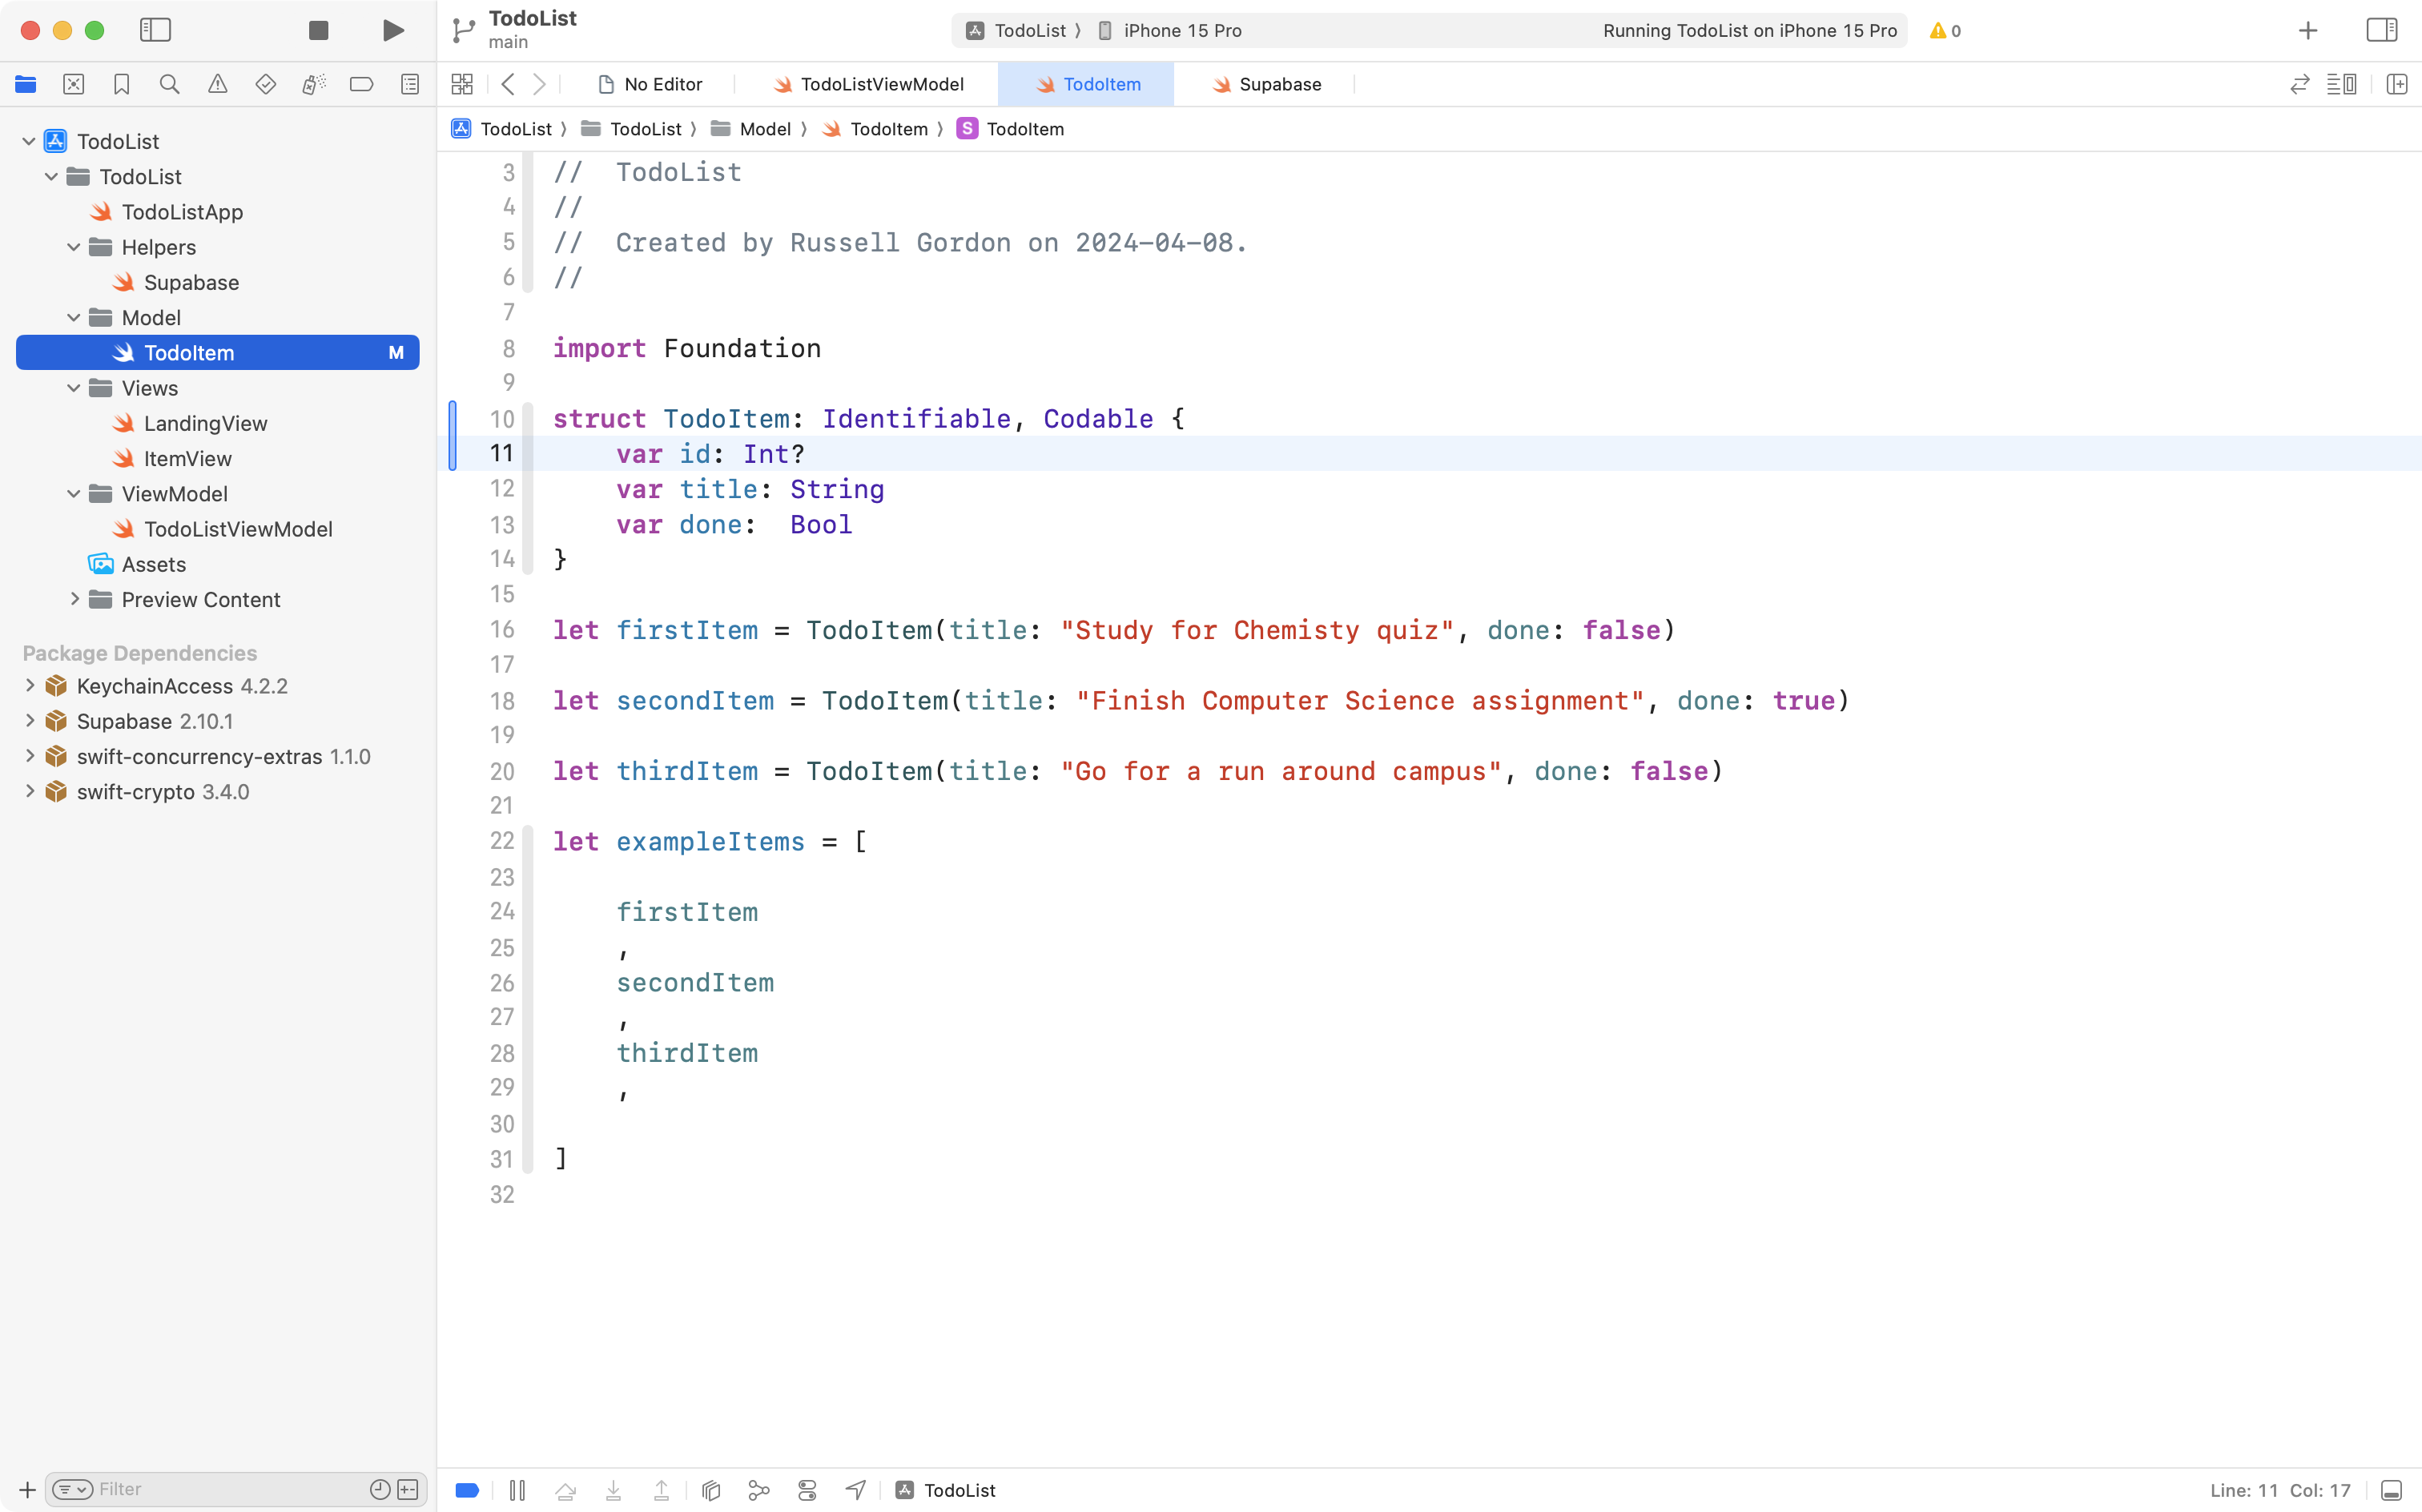
You are changing this line from:
let id = UUID()…to:
var id: Int?This means each to-do item in our app is uniquely identified by an integer, instead of a universally unique identifier.
NOTE
You will see a bit later on why we chose to make the data type an optional
Int.
Adjust the view model
Now we will adjust the view model to retrieve our to-do items from the cloud-hosted database.
Navigate to the TodoListViewModel file, and place your cursor at the start of the functions section, like this:

Then copy this code:
    func getTodos() async throws {

        do {
            let results: [TodoItem] = try await supabase
                .from("todos")
                .select()
                .execute()
                .value

            self.todos = results

        } catch {
            debugPrint(error)
        }

    }
… and paste it after the initializer but before the createToDo function, like this:
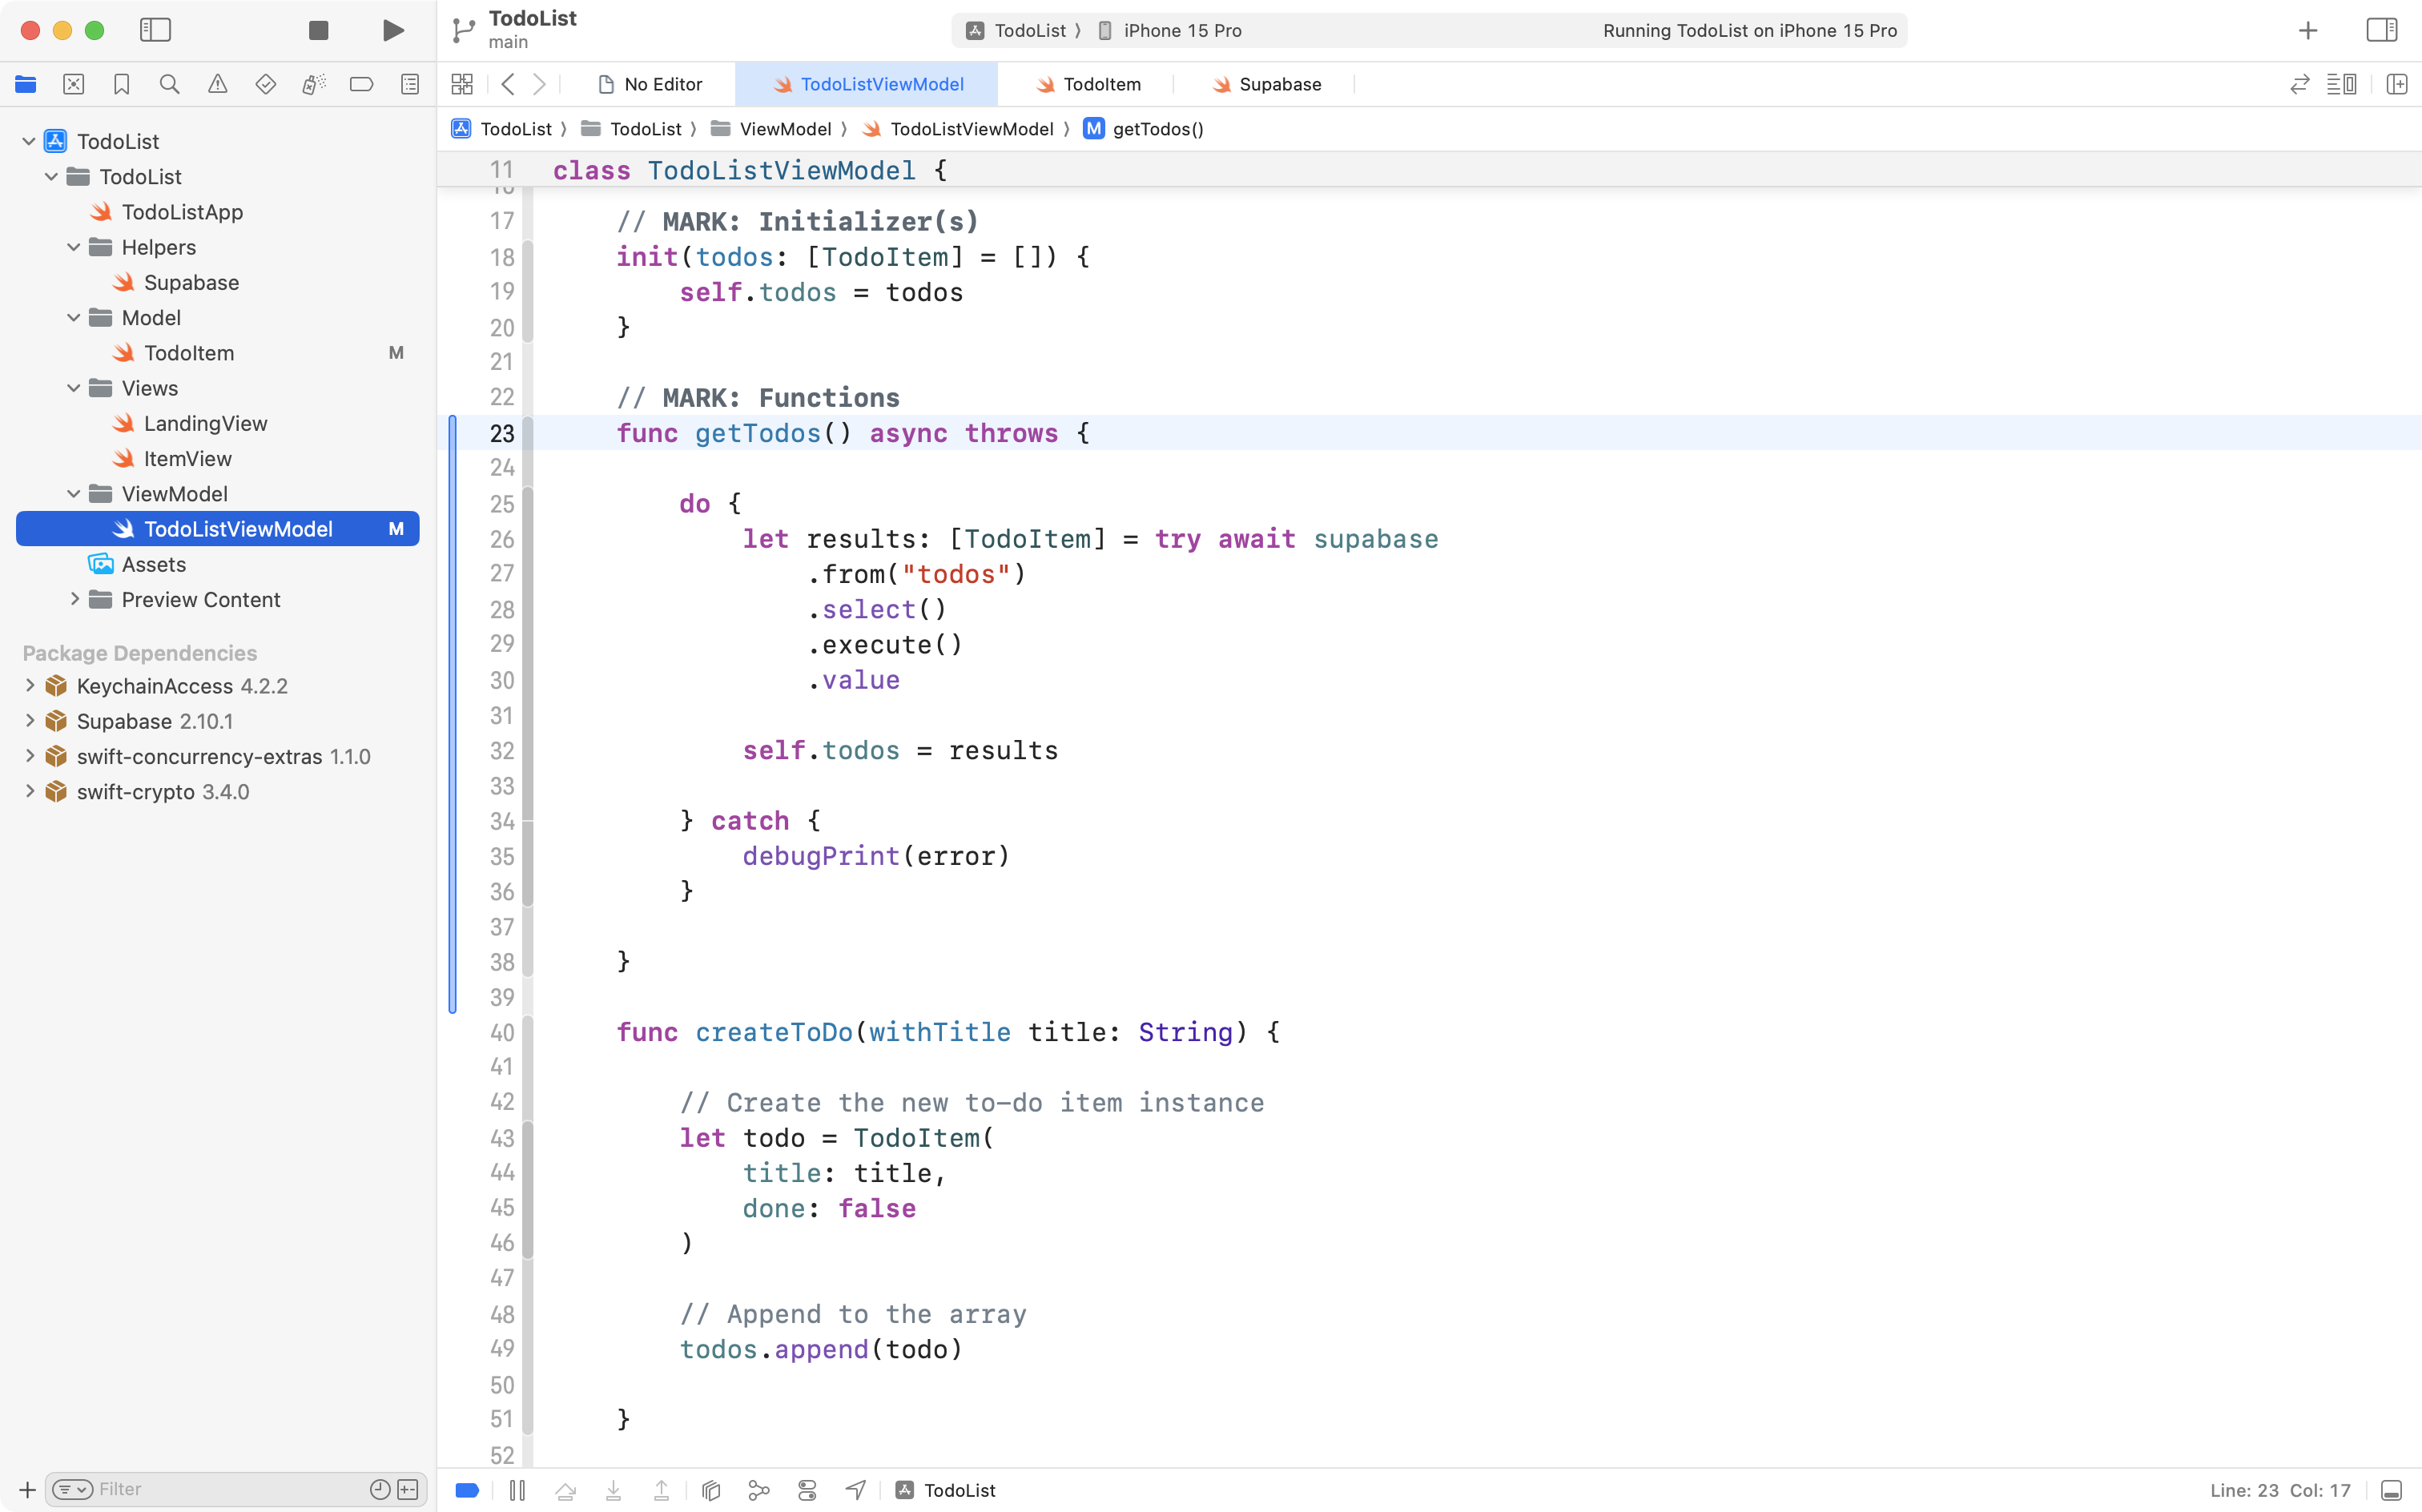
If needed, press Command-A and then Control-I to re-indent your code and keep it tidy.
There’s a lot going on here, so let’s break that down:
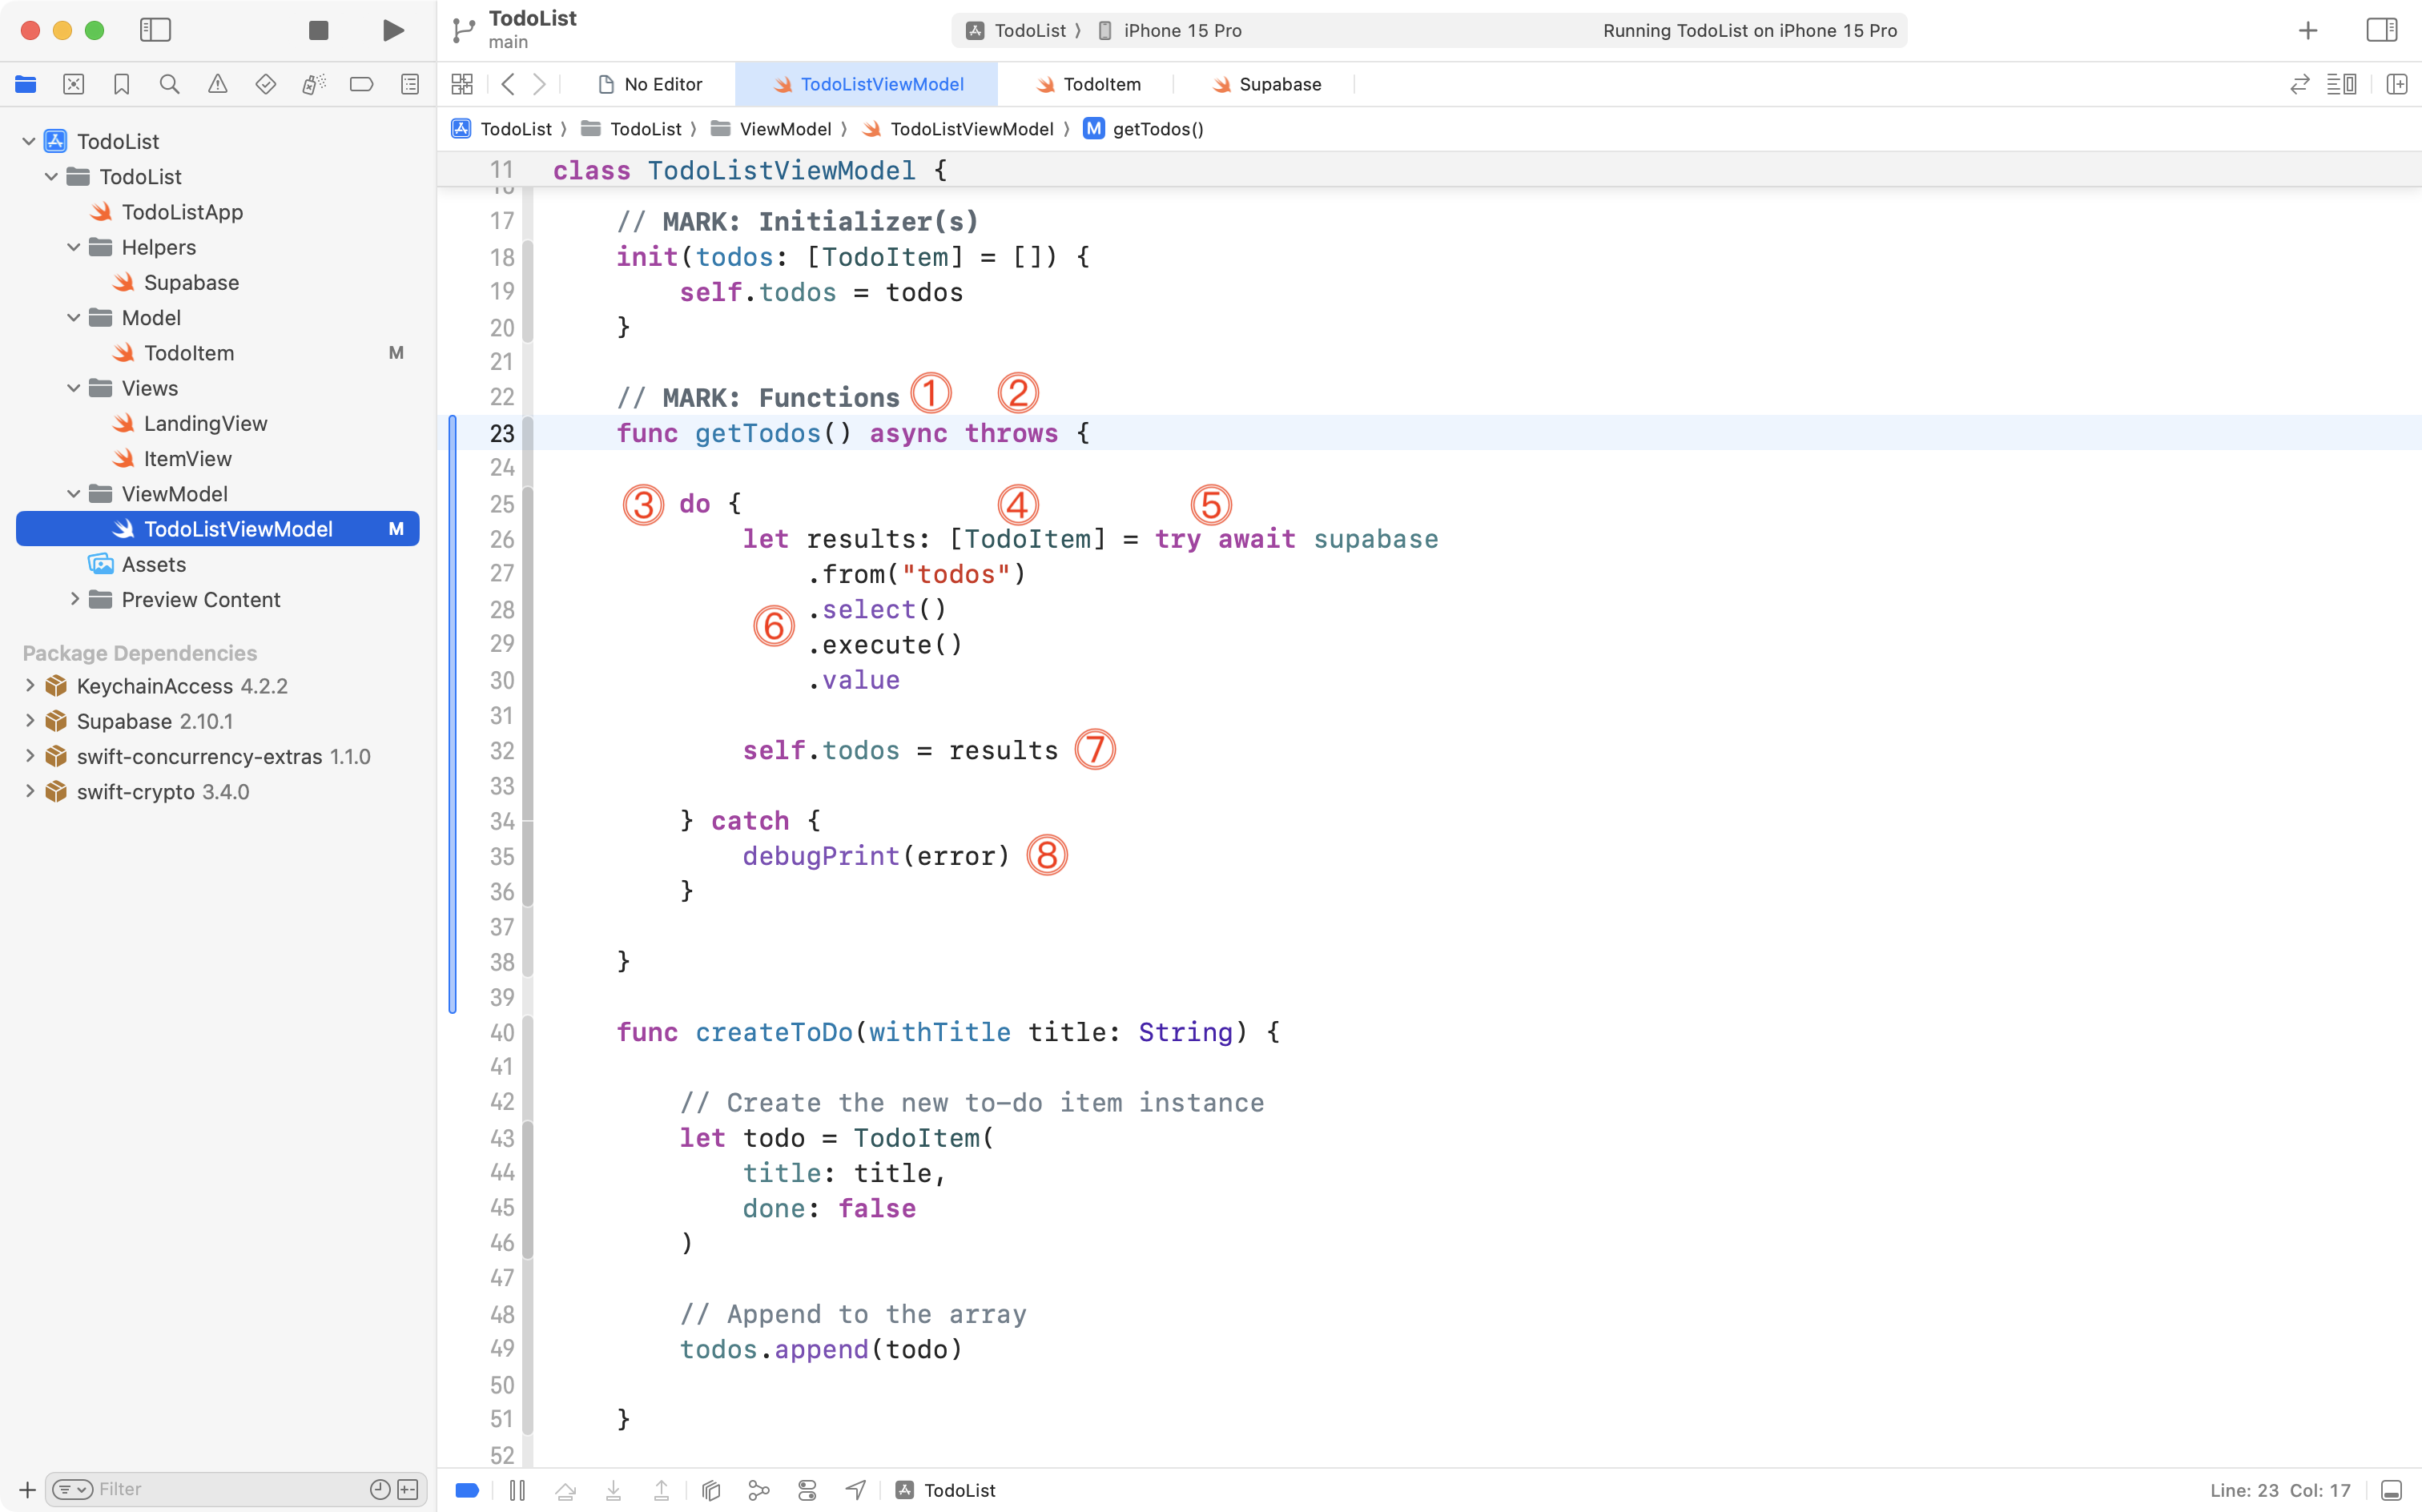
DISCUSSION
- The
asynckeyword marks thegetTodosfunction as asynchronous. This means the function is one that may potentially be run in parallel with other work our app is performing, such as keeping the user interface responsive to input from the user. Fetching data from the Supabase servers occurs over the web. That task can take a variable amount of time. While it occurs, if other work within our app can be handled by other processor core(s), we have an example of concurrency in action. Concurrency occurs when asynchronous tasks are run in parallel.- The
throwskeyword means this function can generate errors. Errors must either be handled within this function itself, or by the code that invokes (calls) this function.- A
doblock handles errors that might occur when invoking a function that can throw errors. If errors occur, they will be handled by thecatchblock below.- We create a local array of
TodoIteminstances; these will be created by the data being retrieved from the cloud-hosted database at Supabase.- Retrieving data from the cloud-hosted Supabase can generate errors, so the function must be invoked using the
trykeyword. The function provided by the Supabase framework to retrieve data runs asynchronously, so it must be invoked using theawaitkeyword. Antoine van der Lee describes it this way: “Await is waiting for a callback from their buddy, async.” Formally, it means our program waits for results from the Supabase framework and continues only after a result arrives.- From the
supabaseinstance of theSupabaseClientclass, we indicate that we want to select all data from thetodostable, execute that query, and obtain the results (decoded from their JSON representation – see earlier notes in this tutorial).- We assign the results to the
todosarray that is already a part of our view model.- If any errors occurred when the code in the
doblock was run, they will be caught here and an error message will be printed to, hopefully, identify what happened. These results are printed to the debugging console in Xcode, which we can view when running our app.
So, now we have a function that retrieves the data – but we need to invoke it.
Recall from our earlier lesson on structures vs. classes that the job of an initializer is to populate all the stored properties of a class with the information needed for a class to do it’s job.
So, we must make a small change to the initializer of the view model.
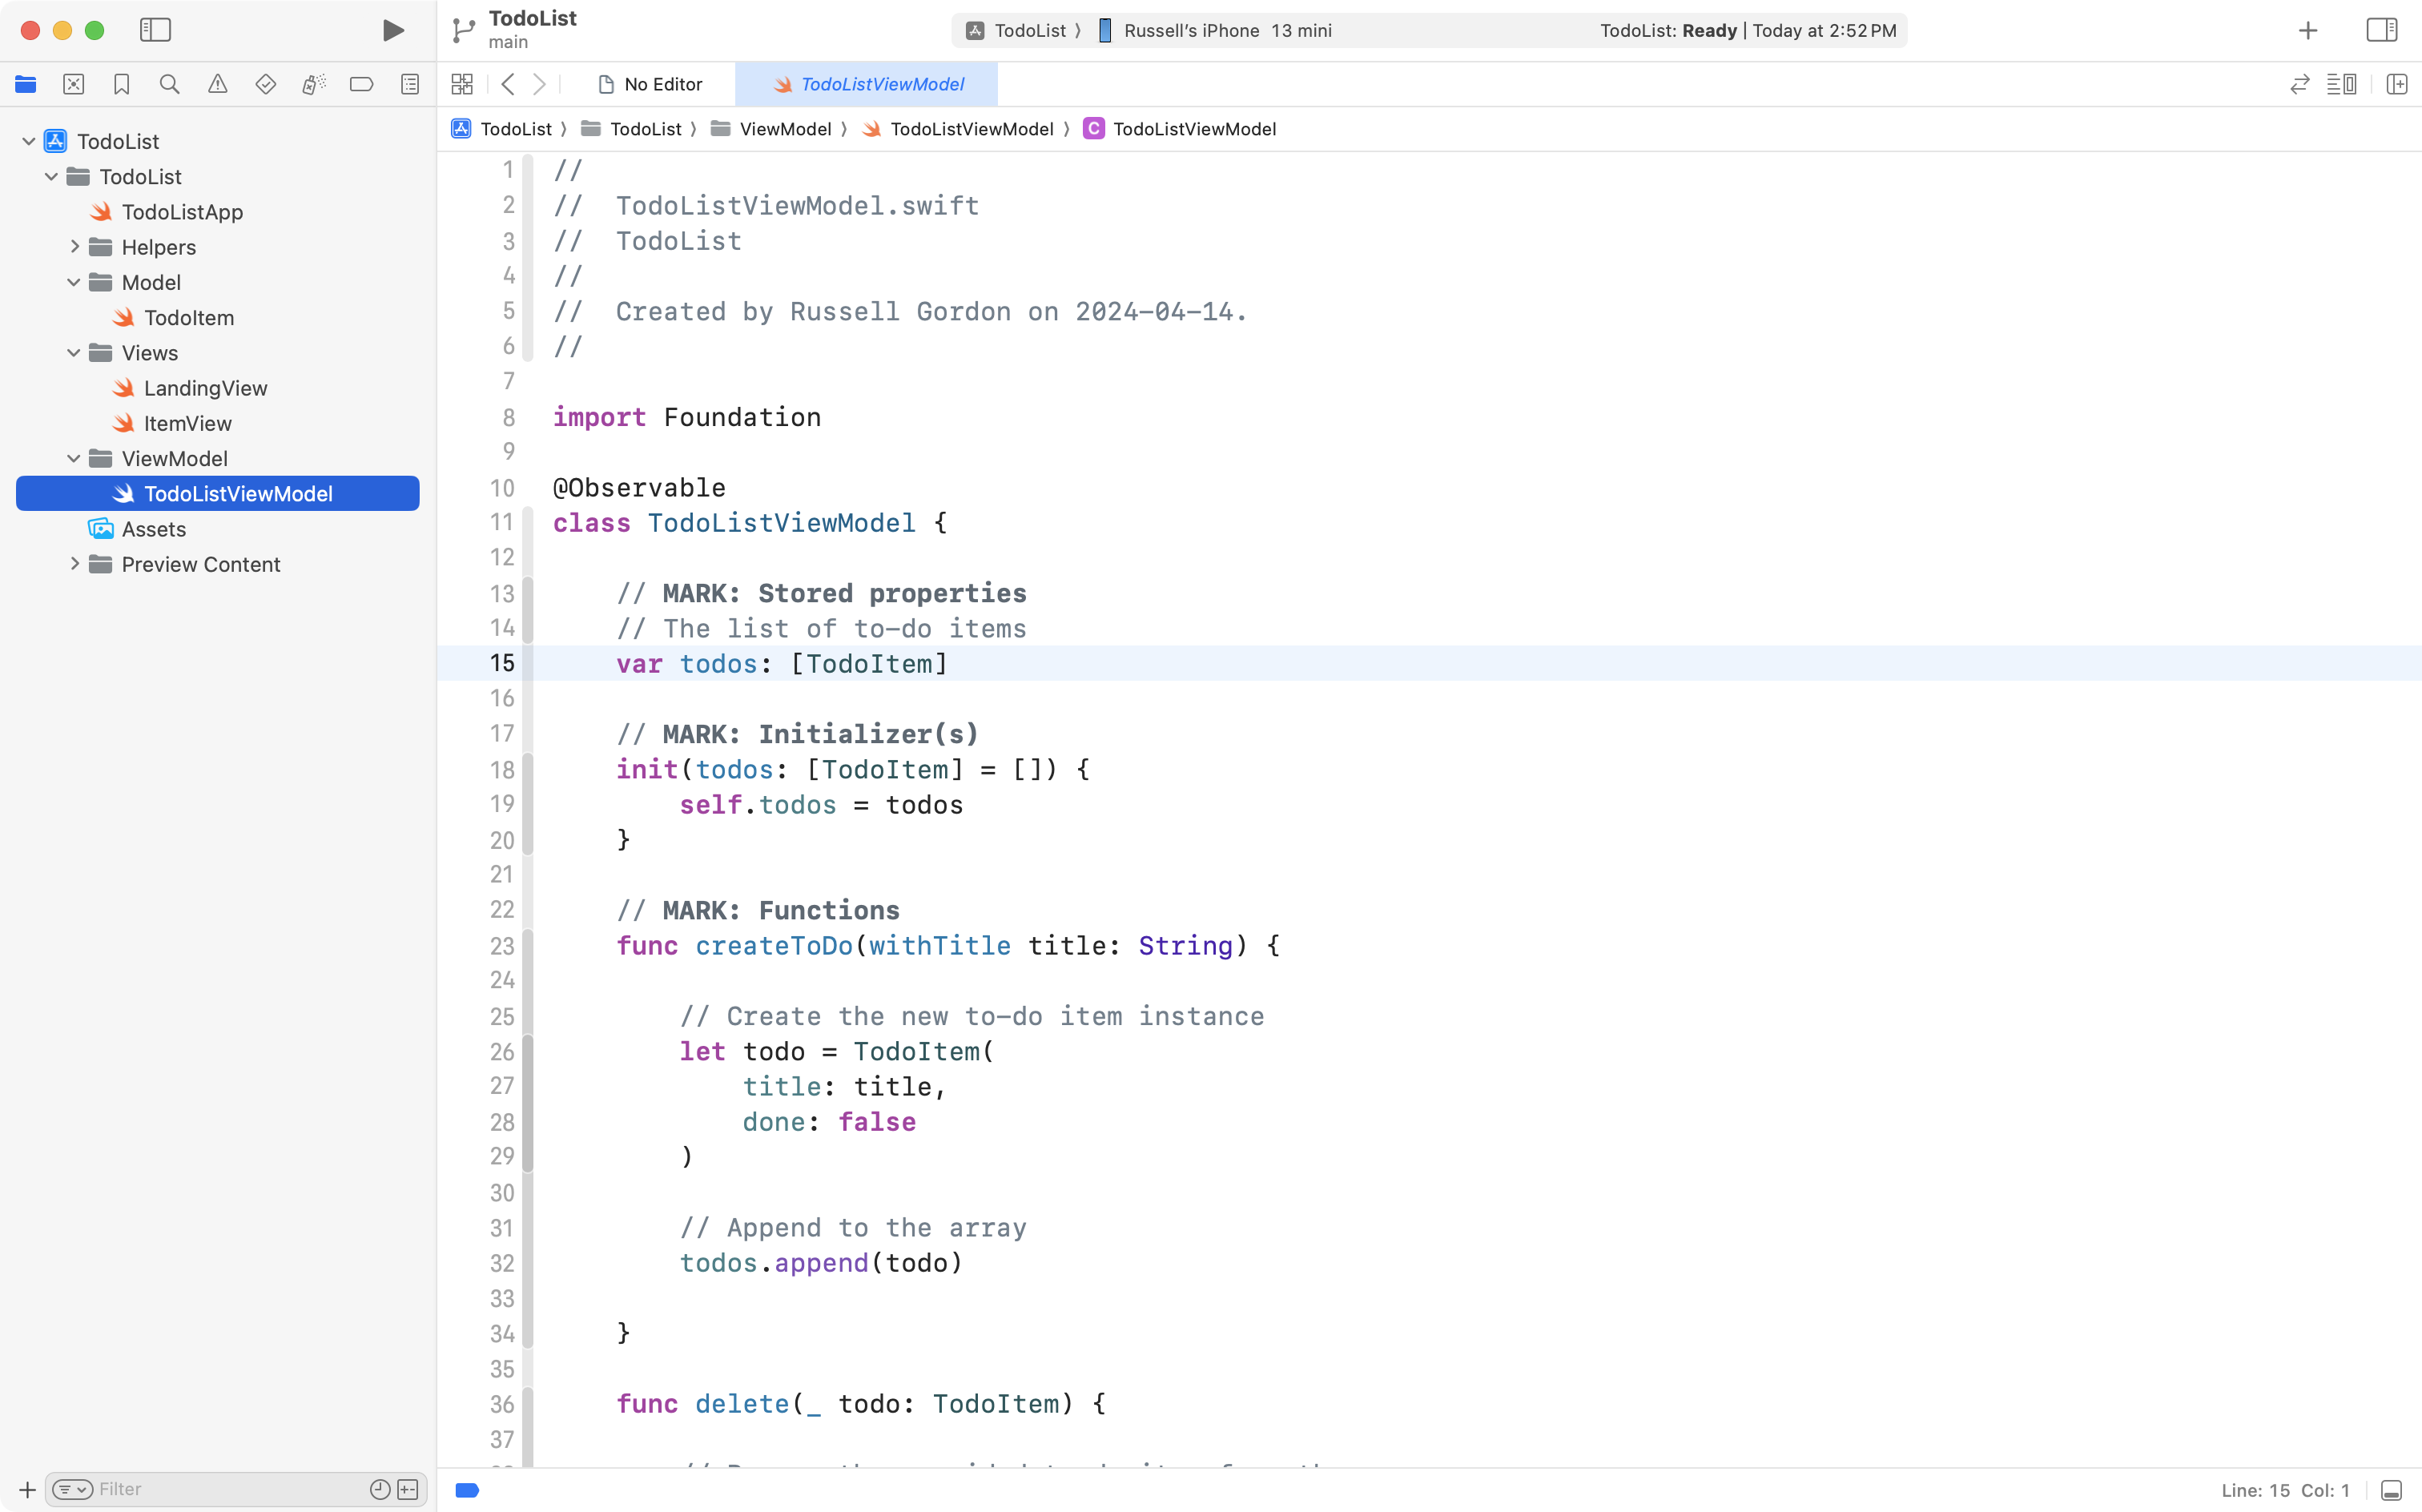
Scroll up to that part of the file:
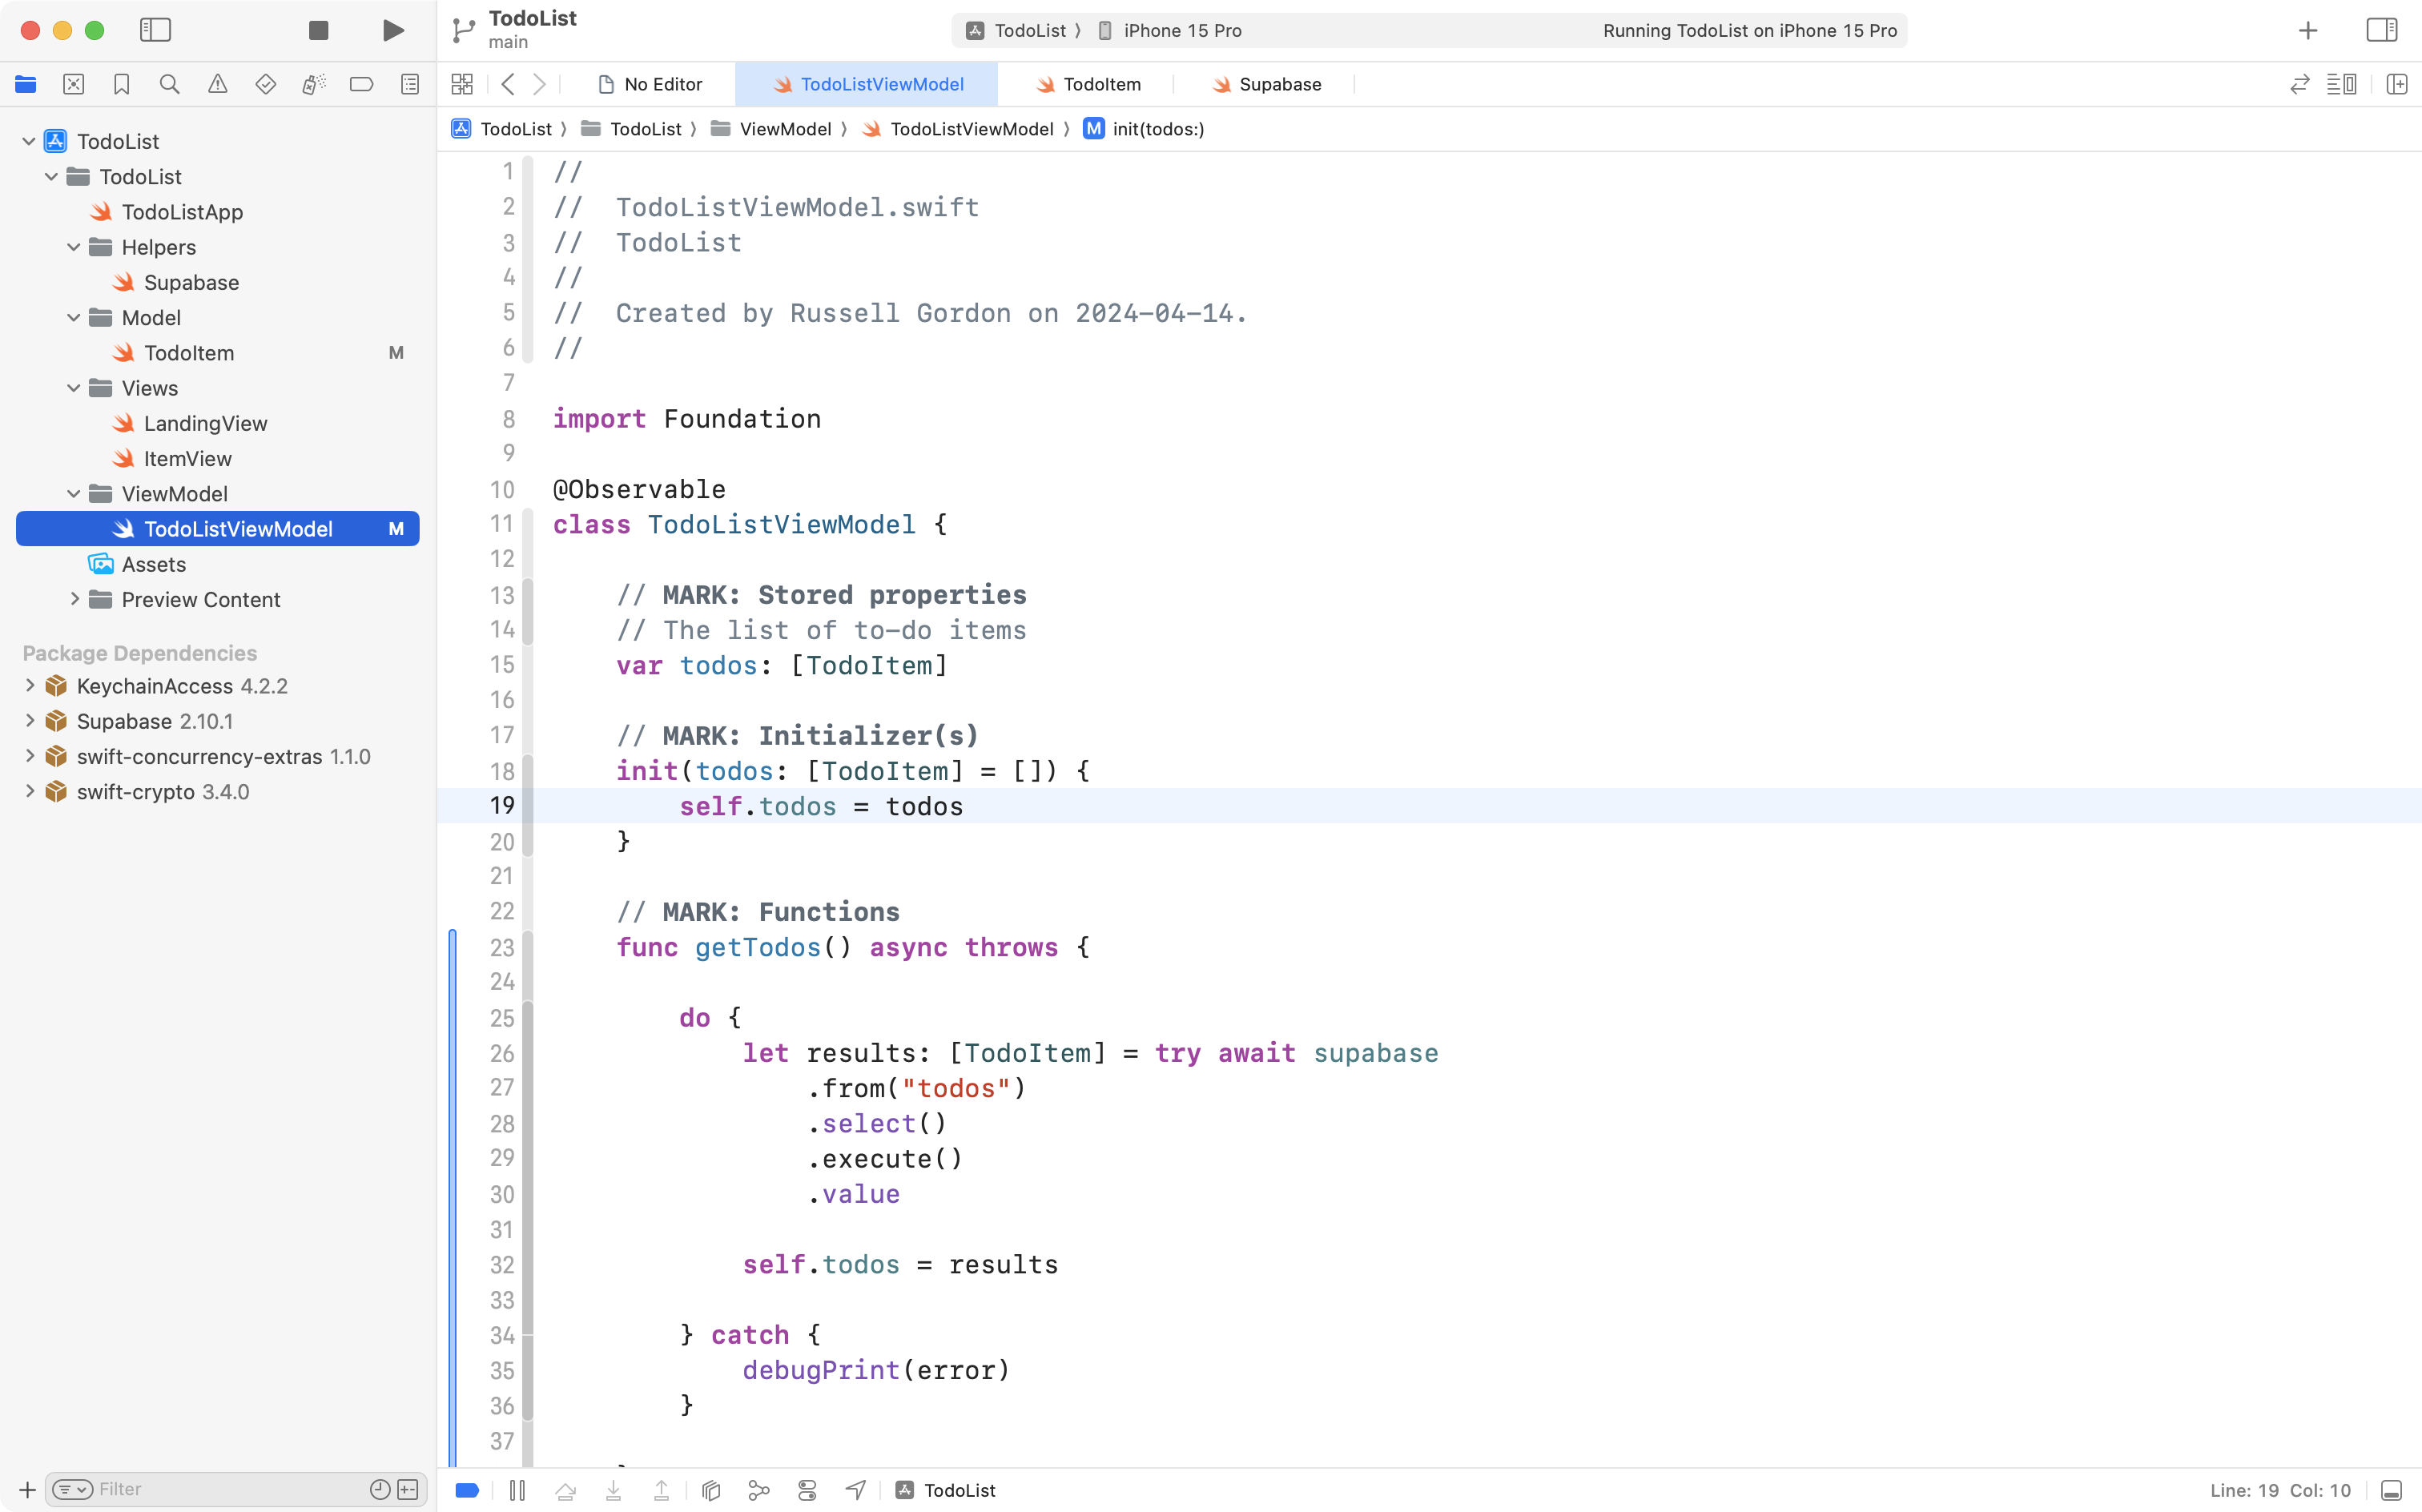
Immediately after line 19 shown in the screenshot above, add the following code:
        Task {
            try await getTodos()
        }
… like this:
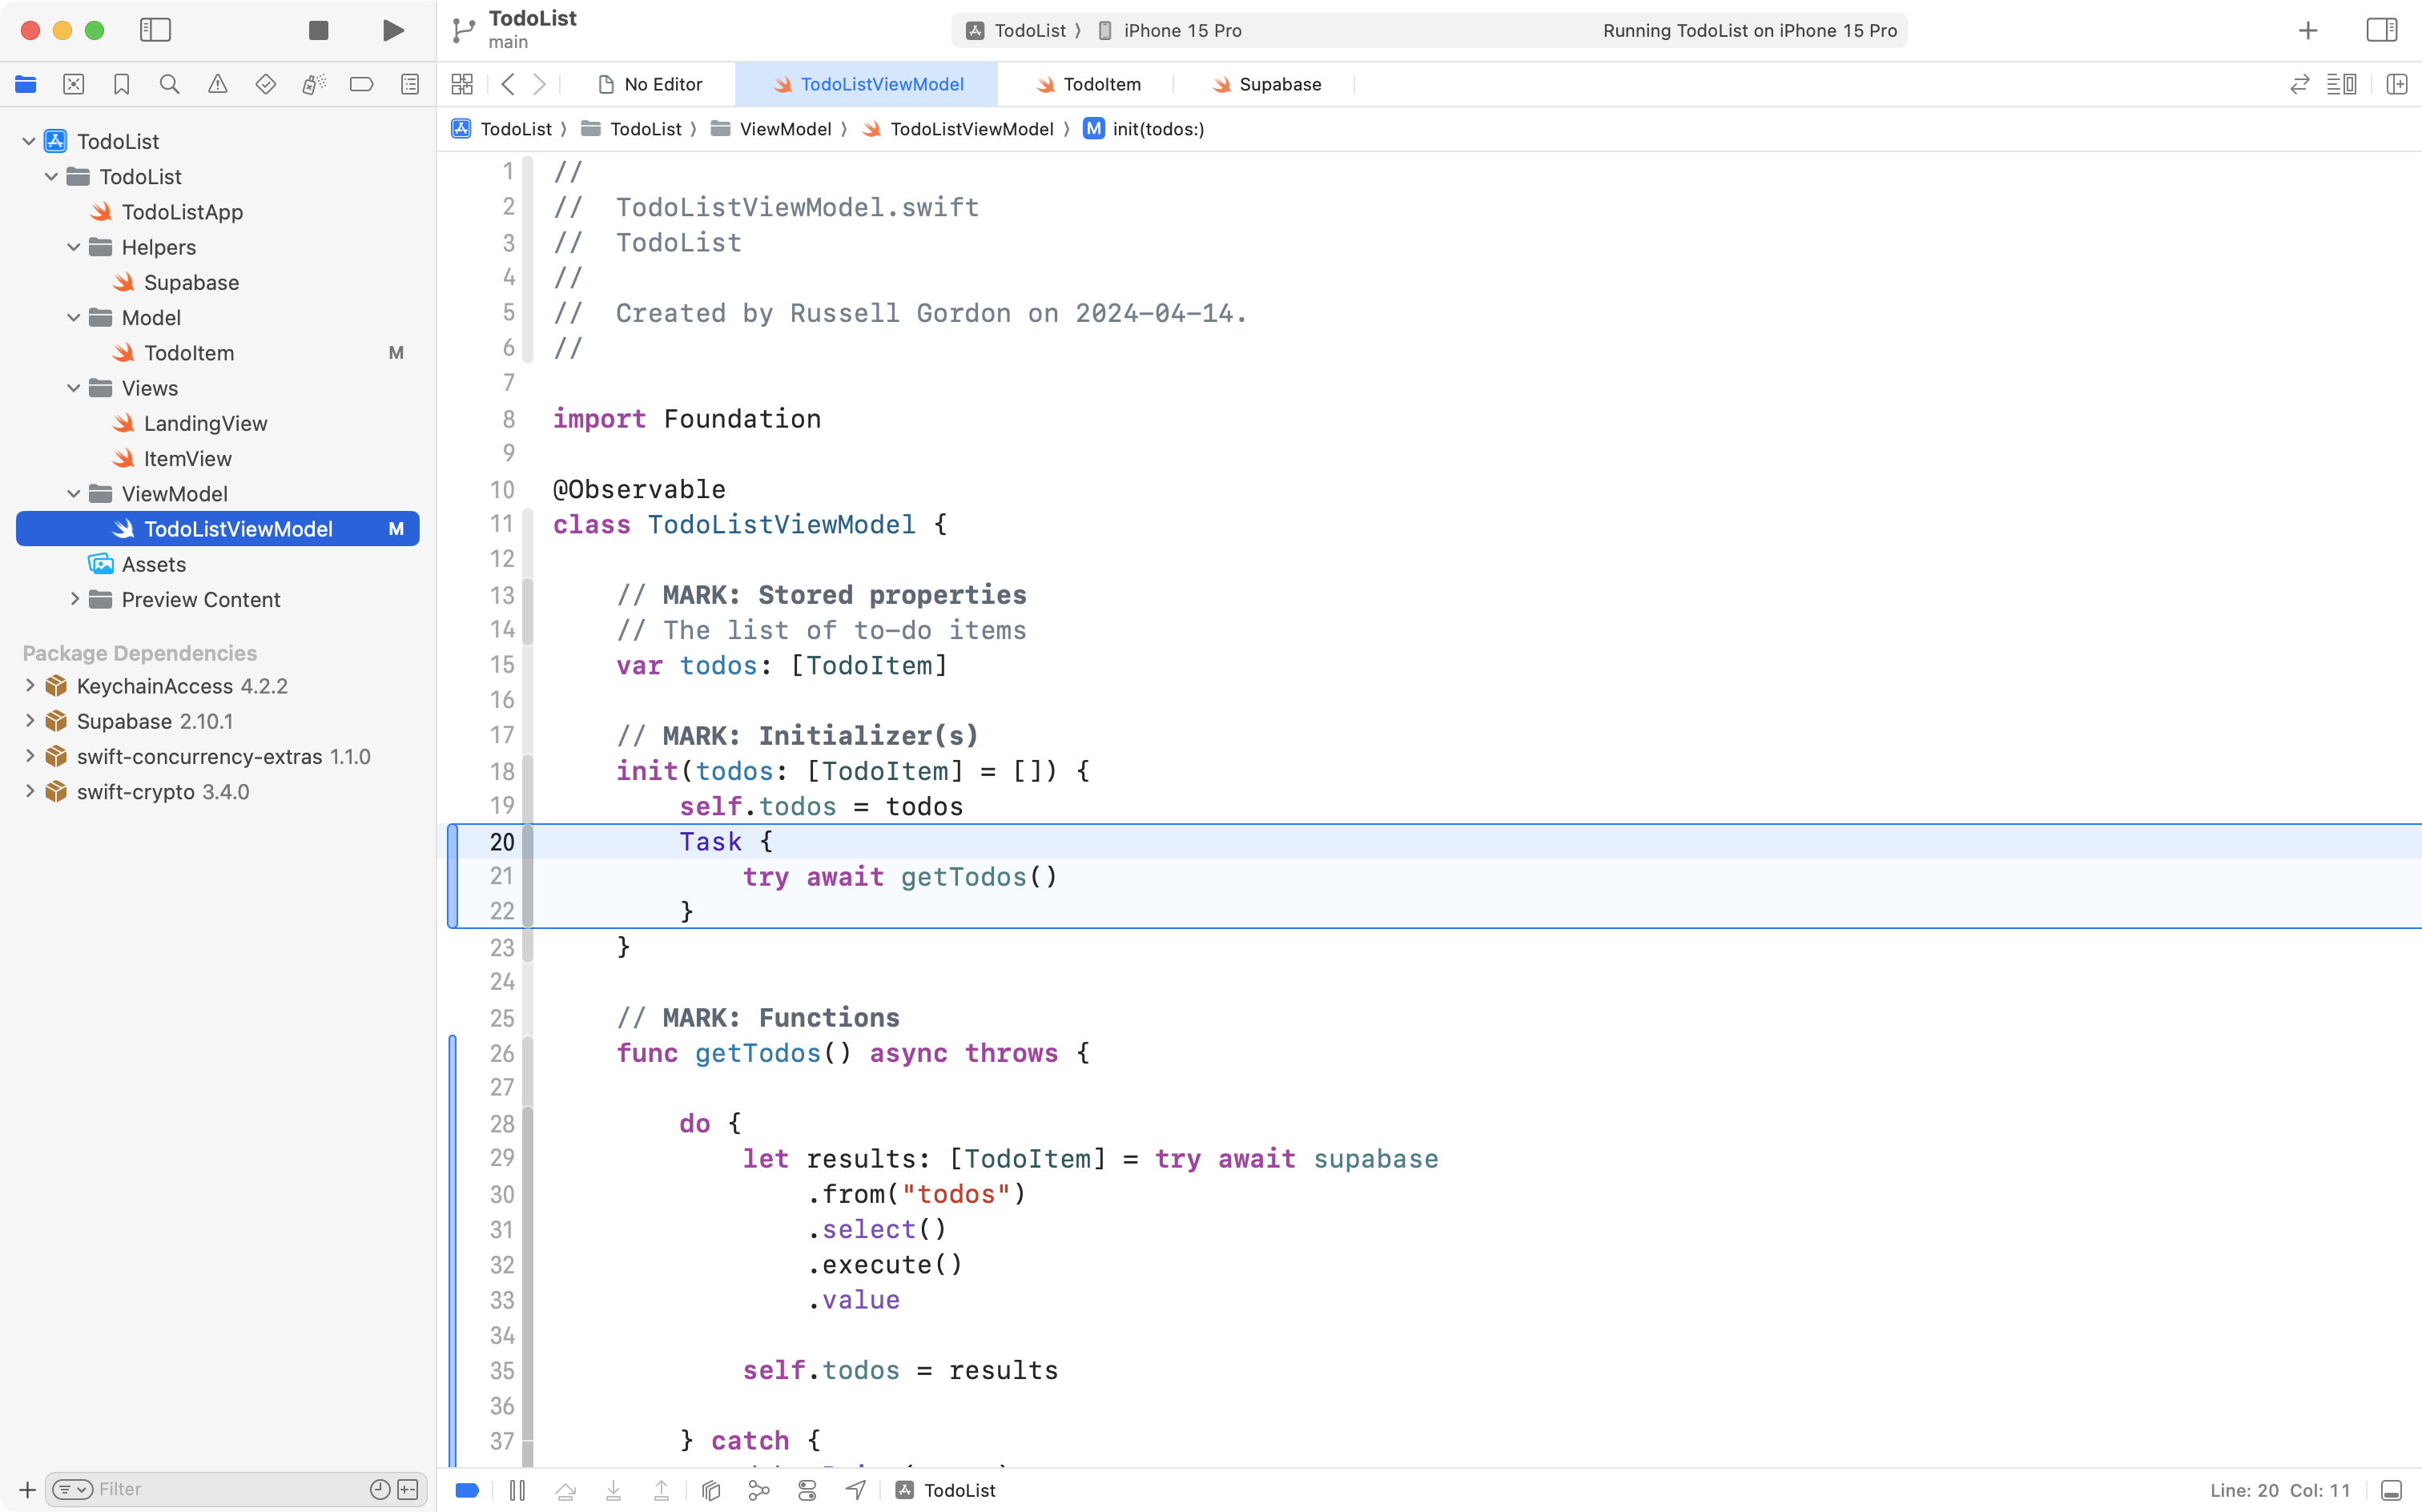
This creates a block of code that is run asynchronously. We invoke the getTodos function that was just authored to retrieve to-do items from the cloud-hosted database.
Try running the app now in the Simulator or on a device. You should see whatever to-do items that are in your database now shown inside the app instead:
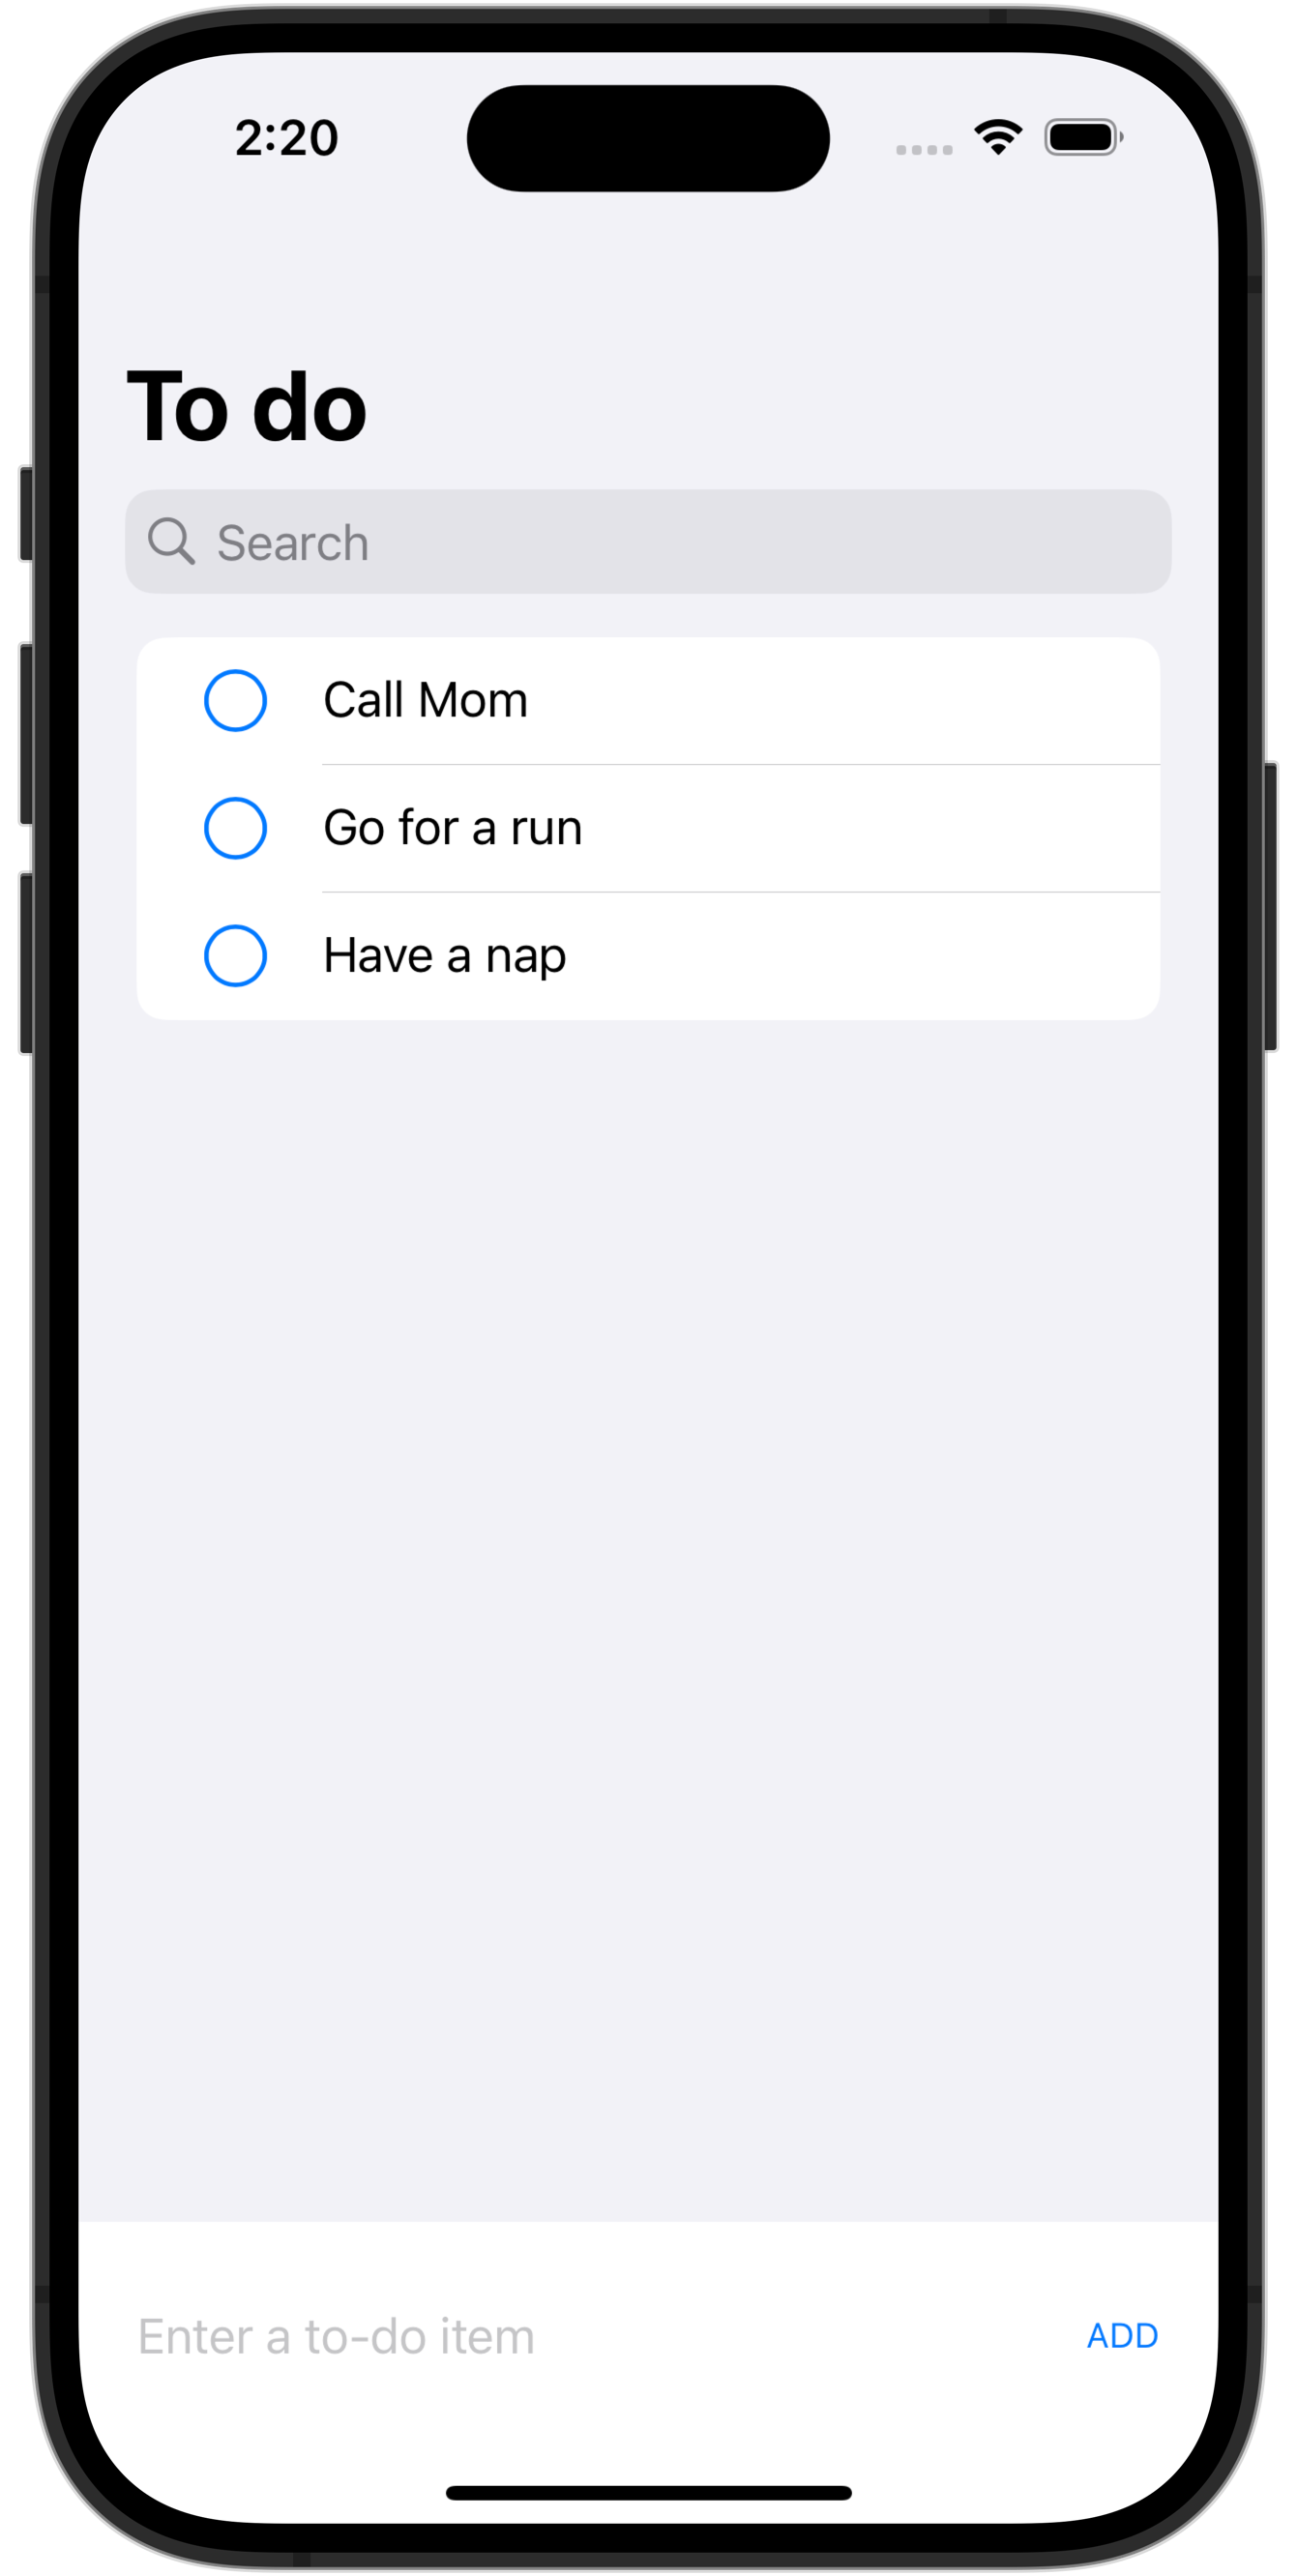
This is excellent progress that you don’t want to lose, so please commit and push your work with this message:
Adjusted view model to pull to-do items from the database hosted at Supabase.
Write data to the cloud
From here, further modifications to the view model are all that is required.
In this section of the tutorial we will author code to add a new to-do item.
This is equivalent to interacting directly with the database and running an INSERT INTO command, which is how a new row is added to a table.
For example:
INSERT INTO todos (title, done)
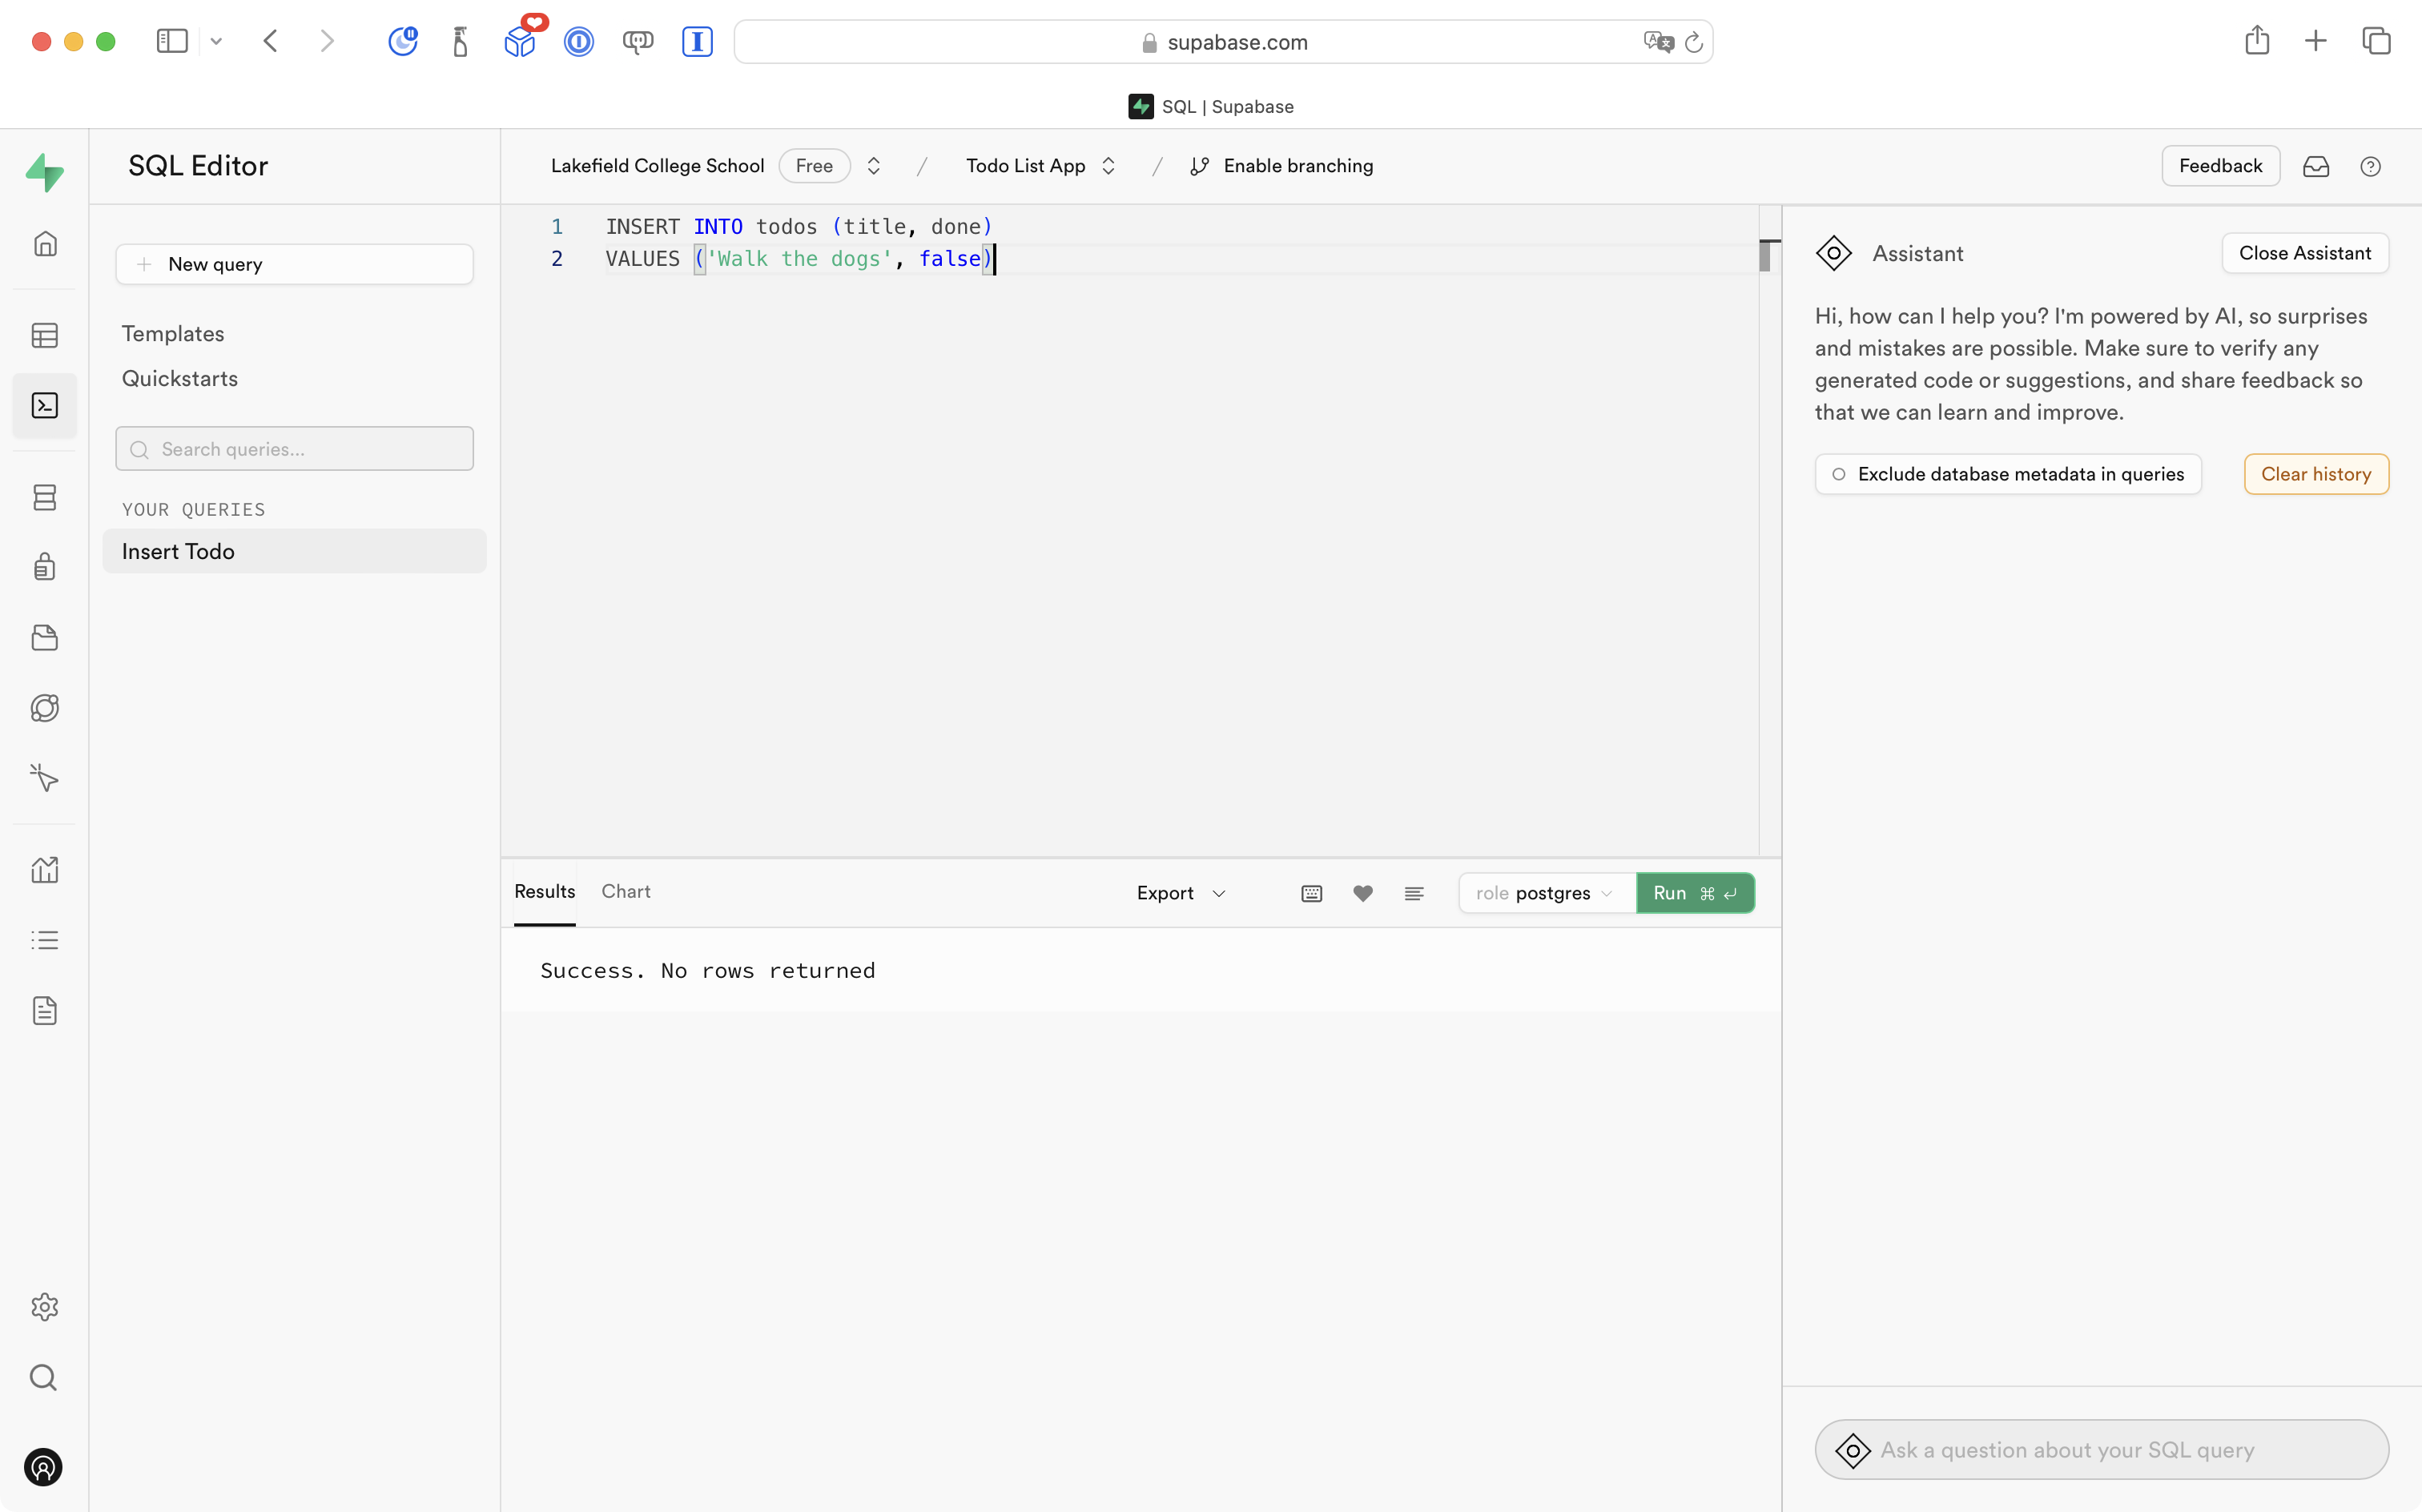
VALUES ('Walk the dogs', false)Using the SQL Editor
We can try this out directly within the Supabase SQL Editor, much like you experimented with running queries in the DB Browser app earlier this year.
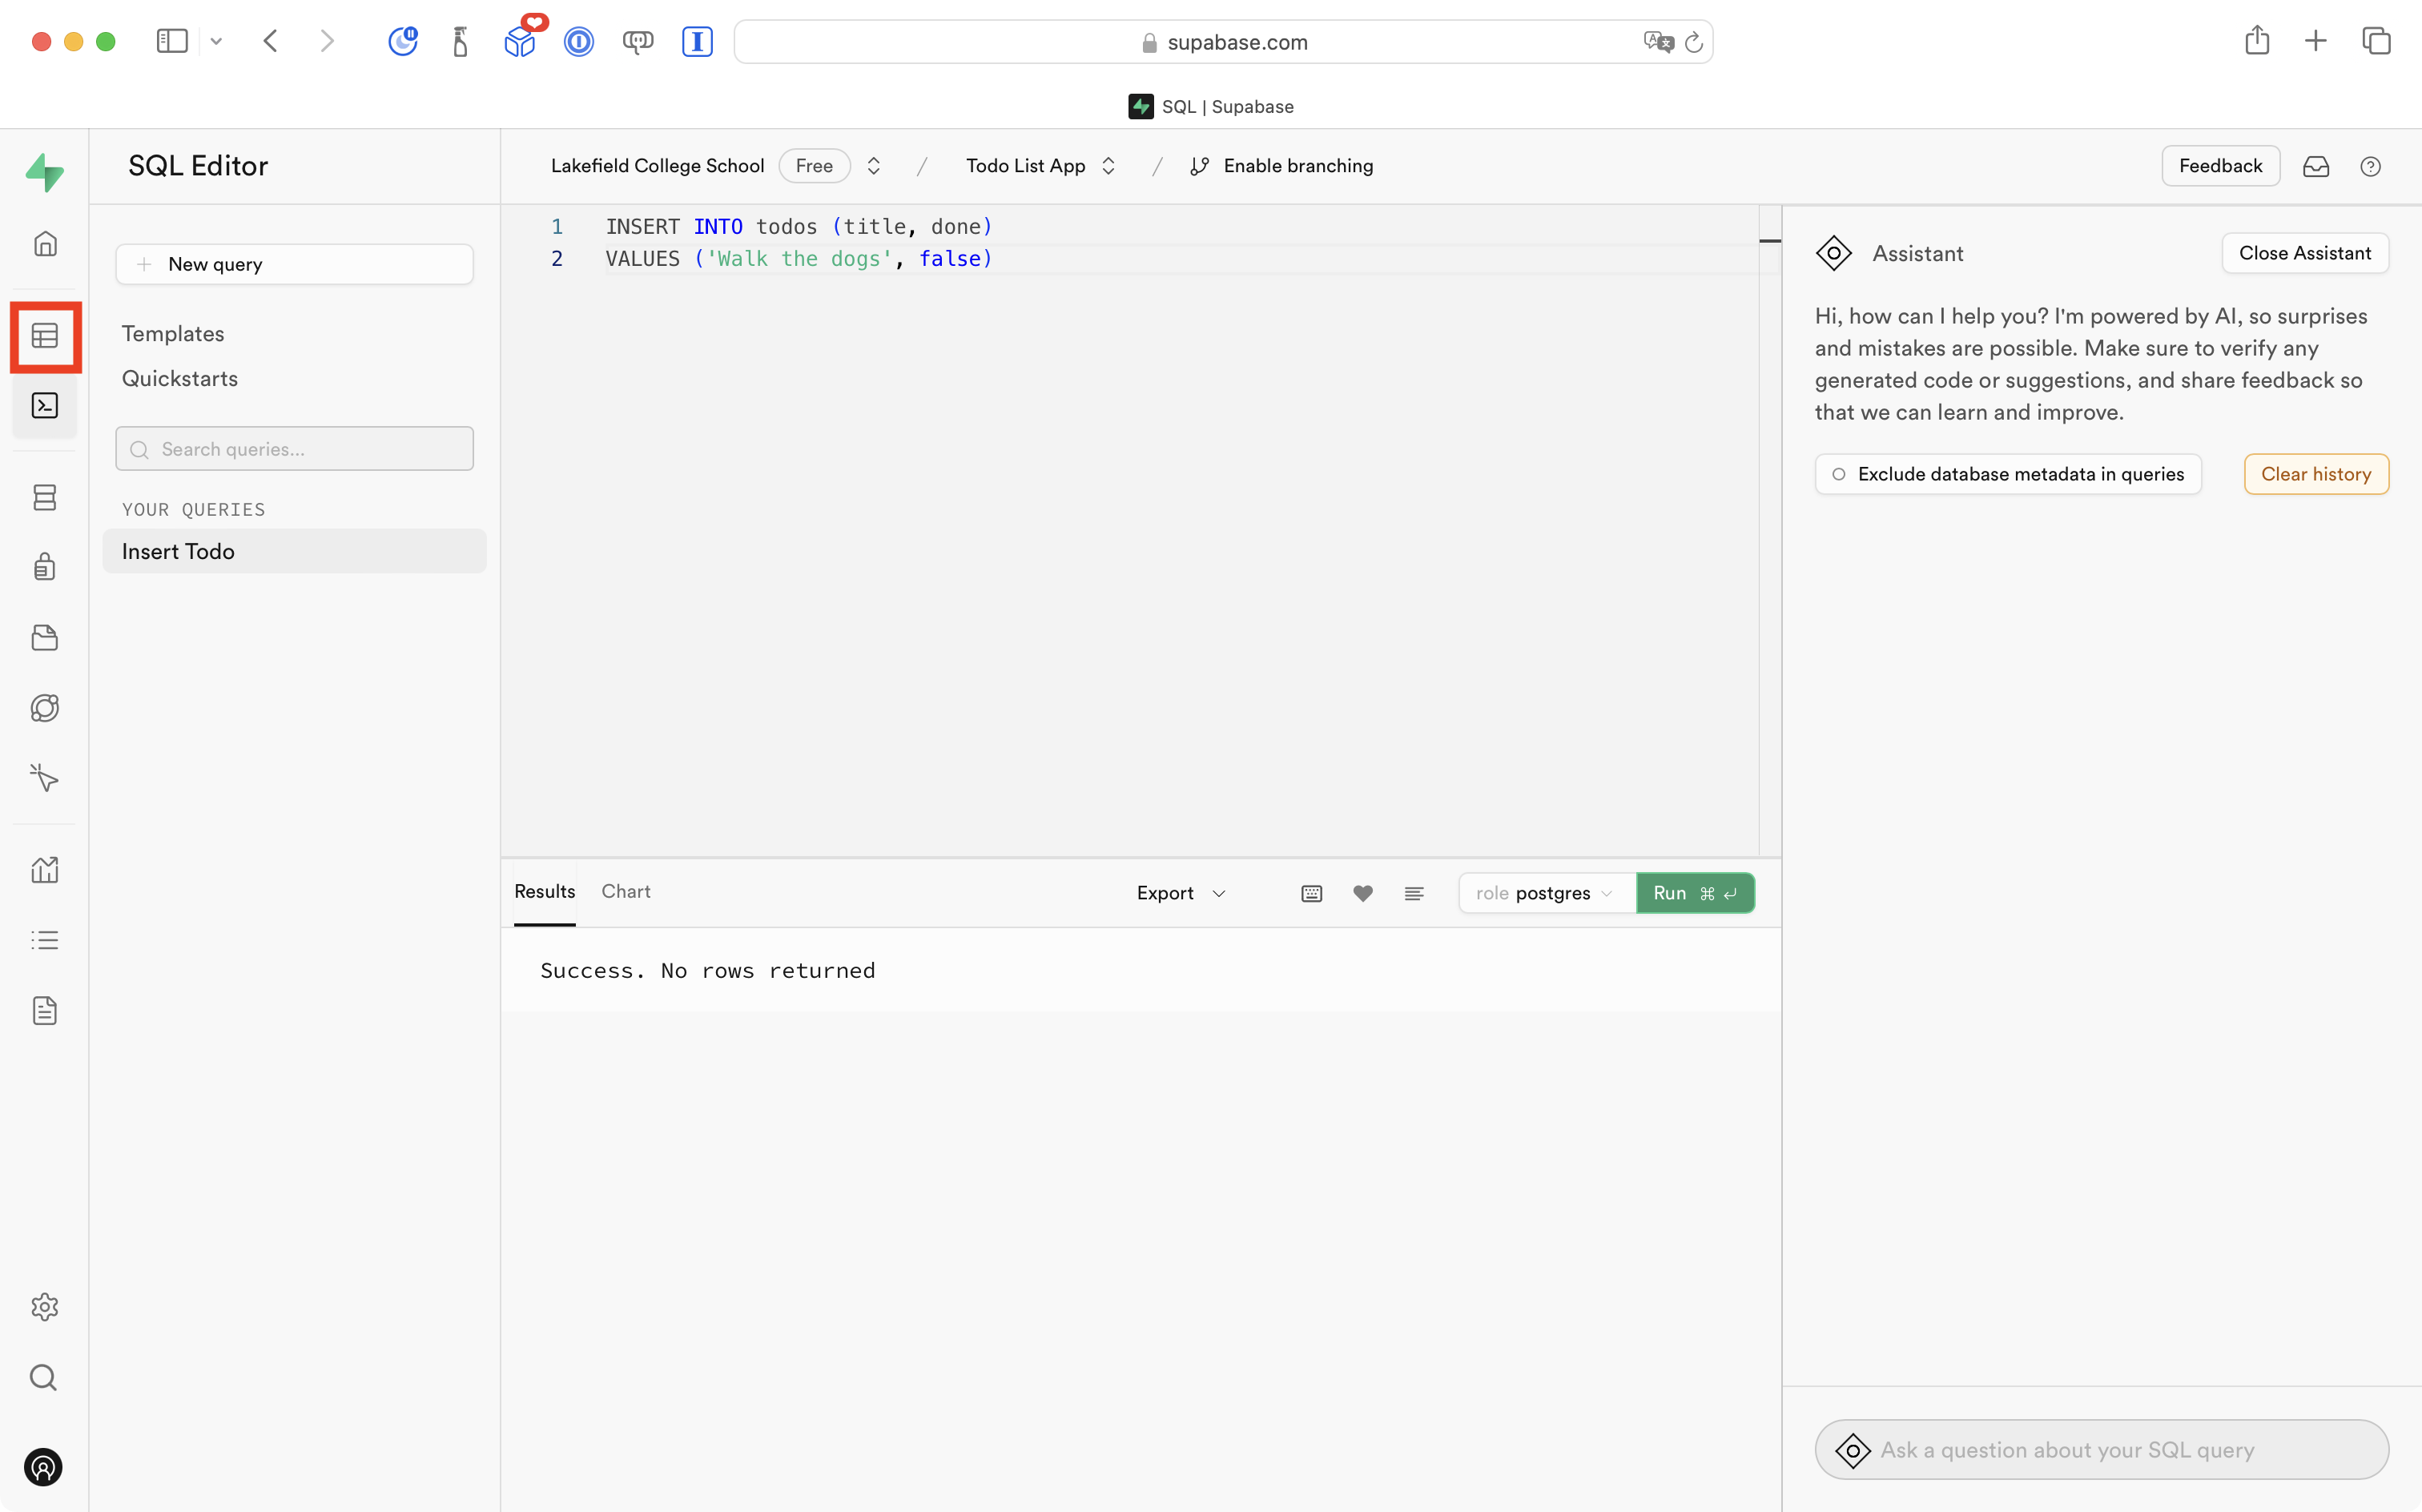
From the Supabase website, select the SQL Editor icon:
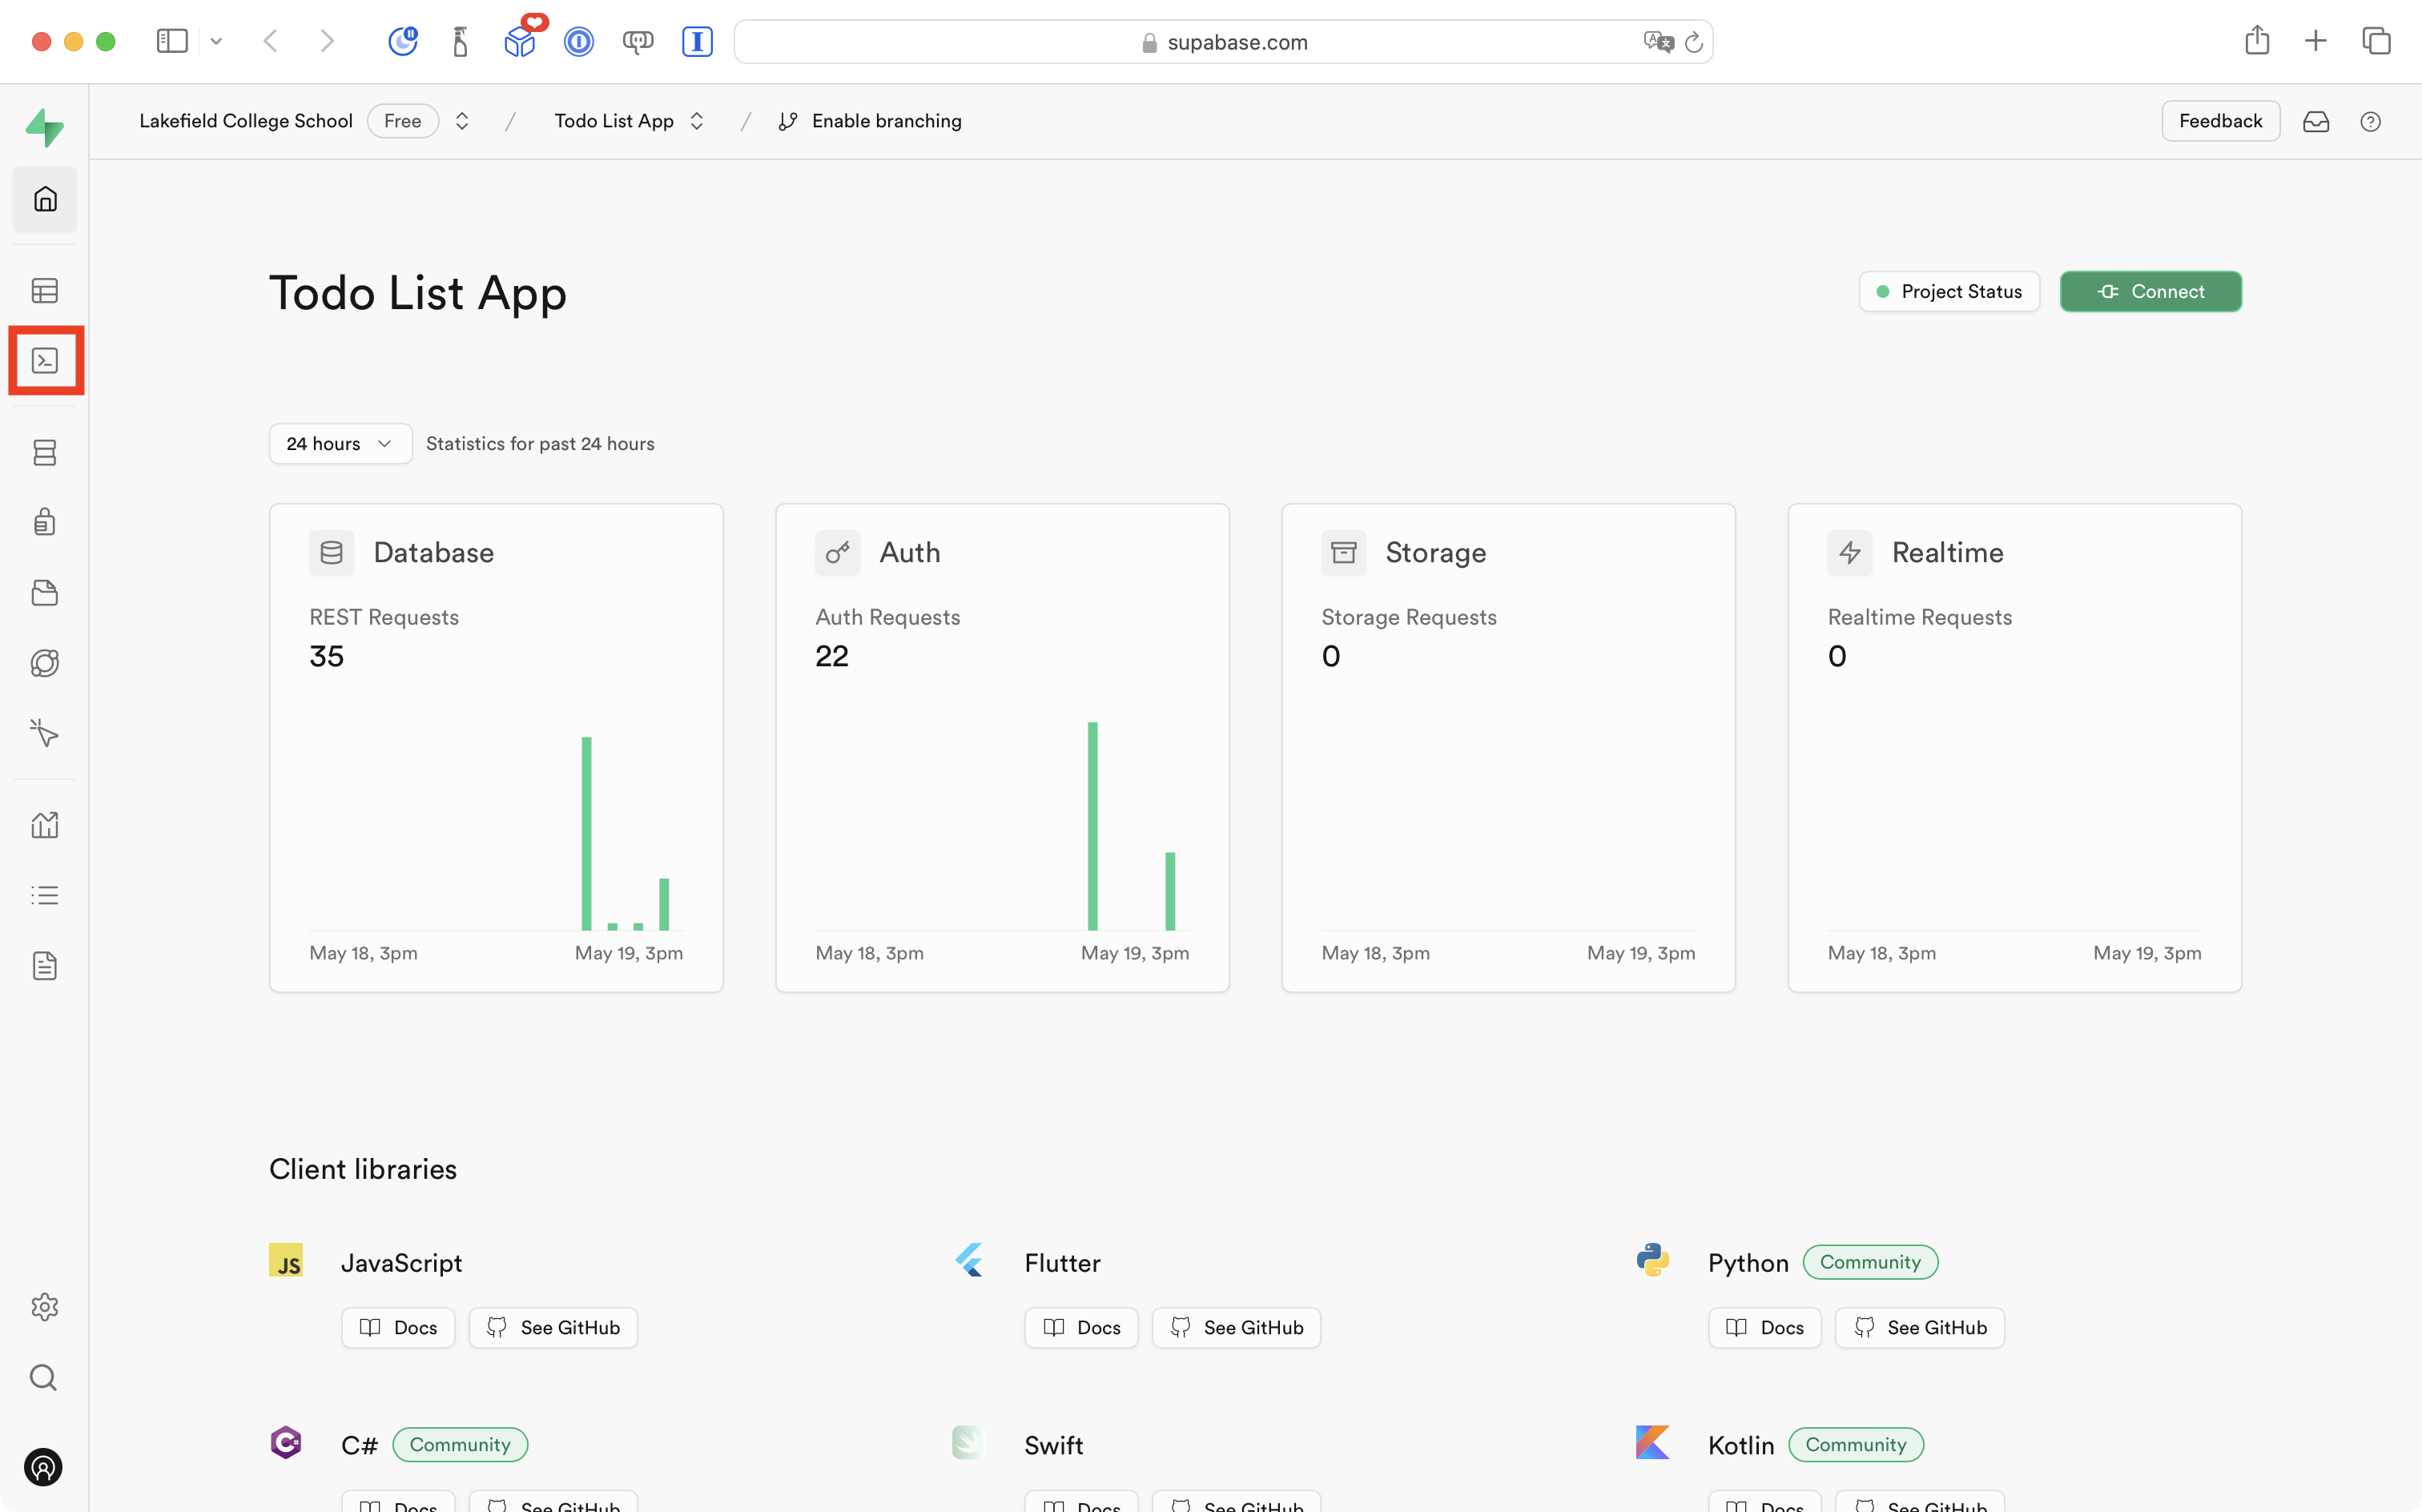
You will come to a page that looks like this:

If you cut and paste the query above in the top half of the interface, then press the green Run button, you should see results something like the following:
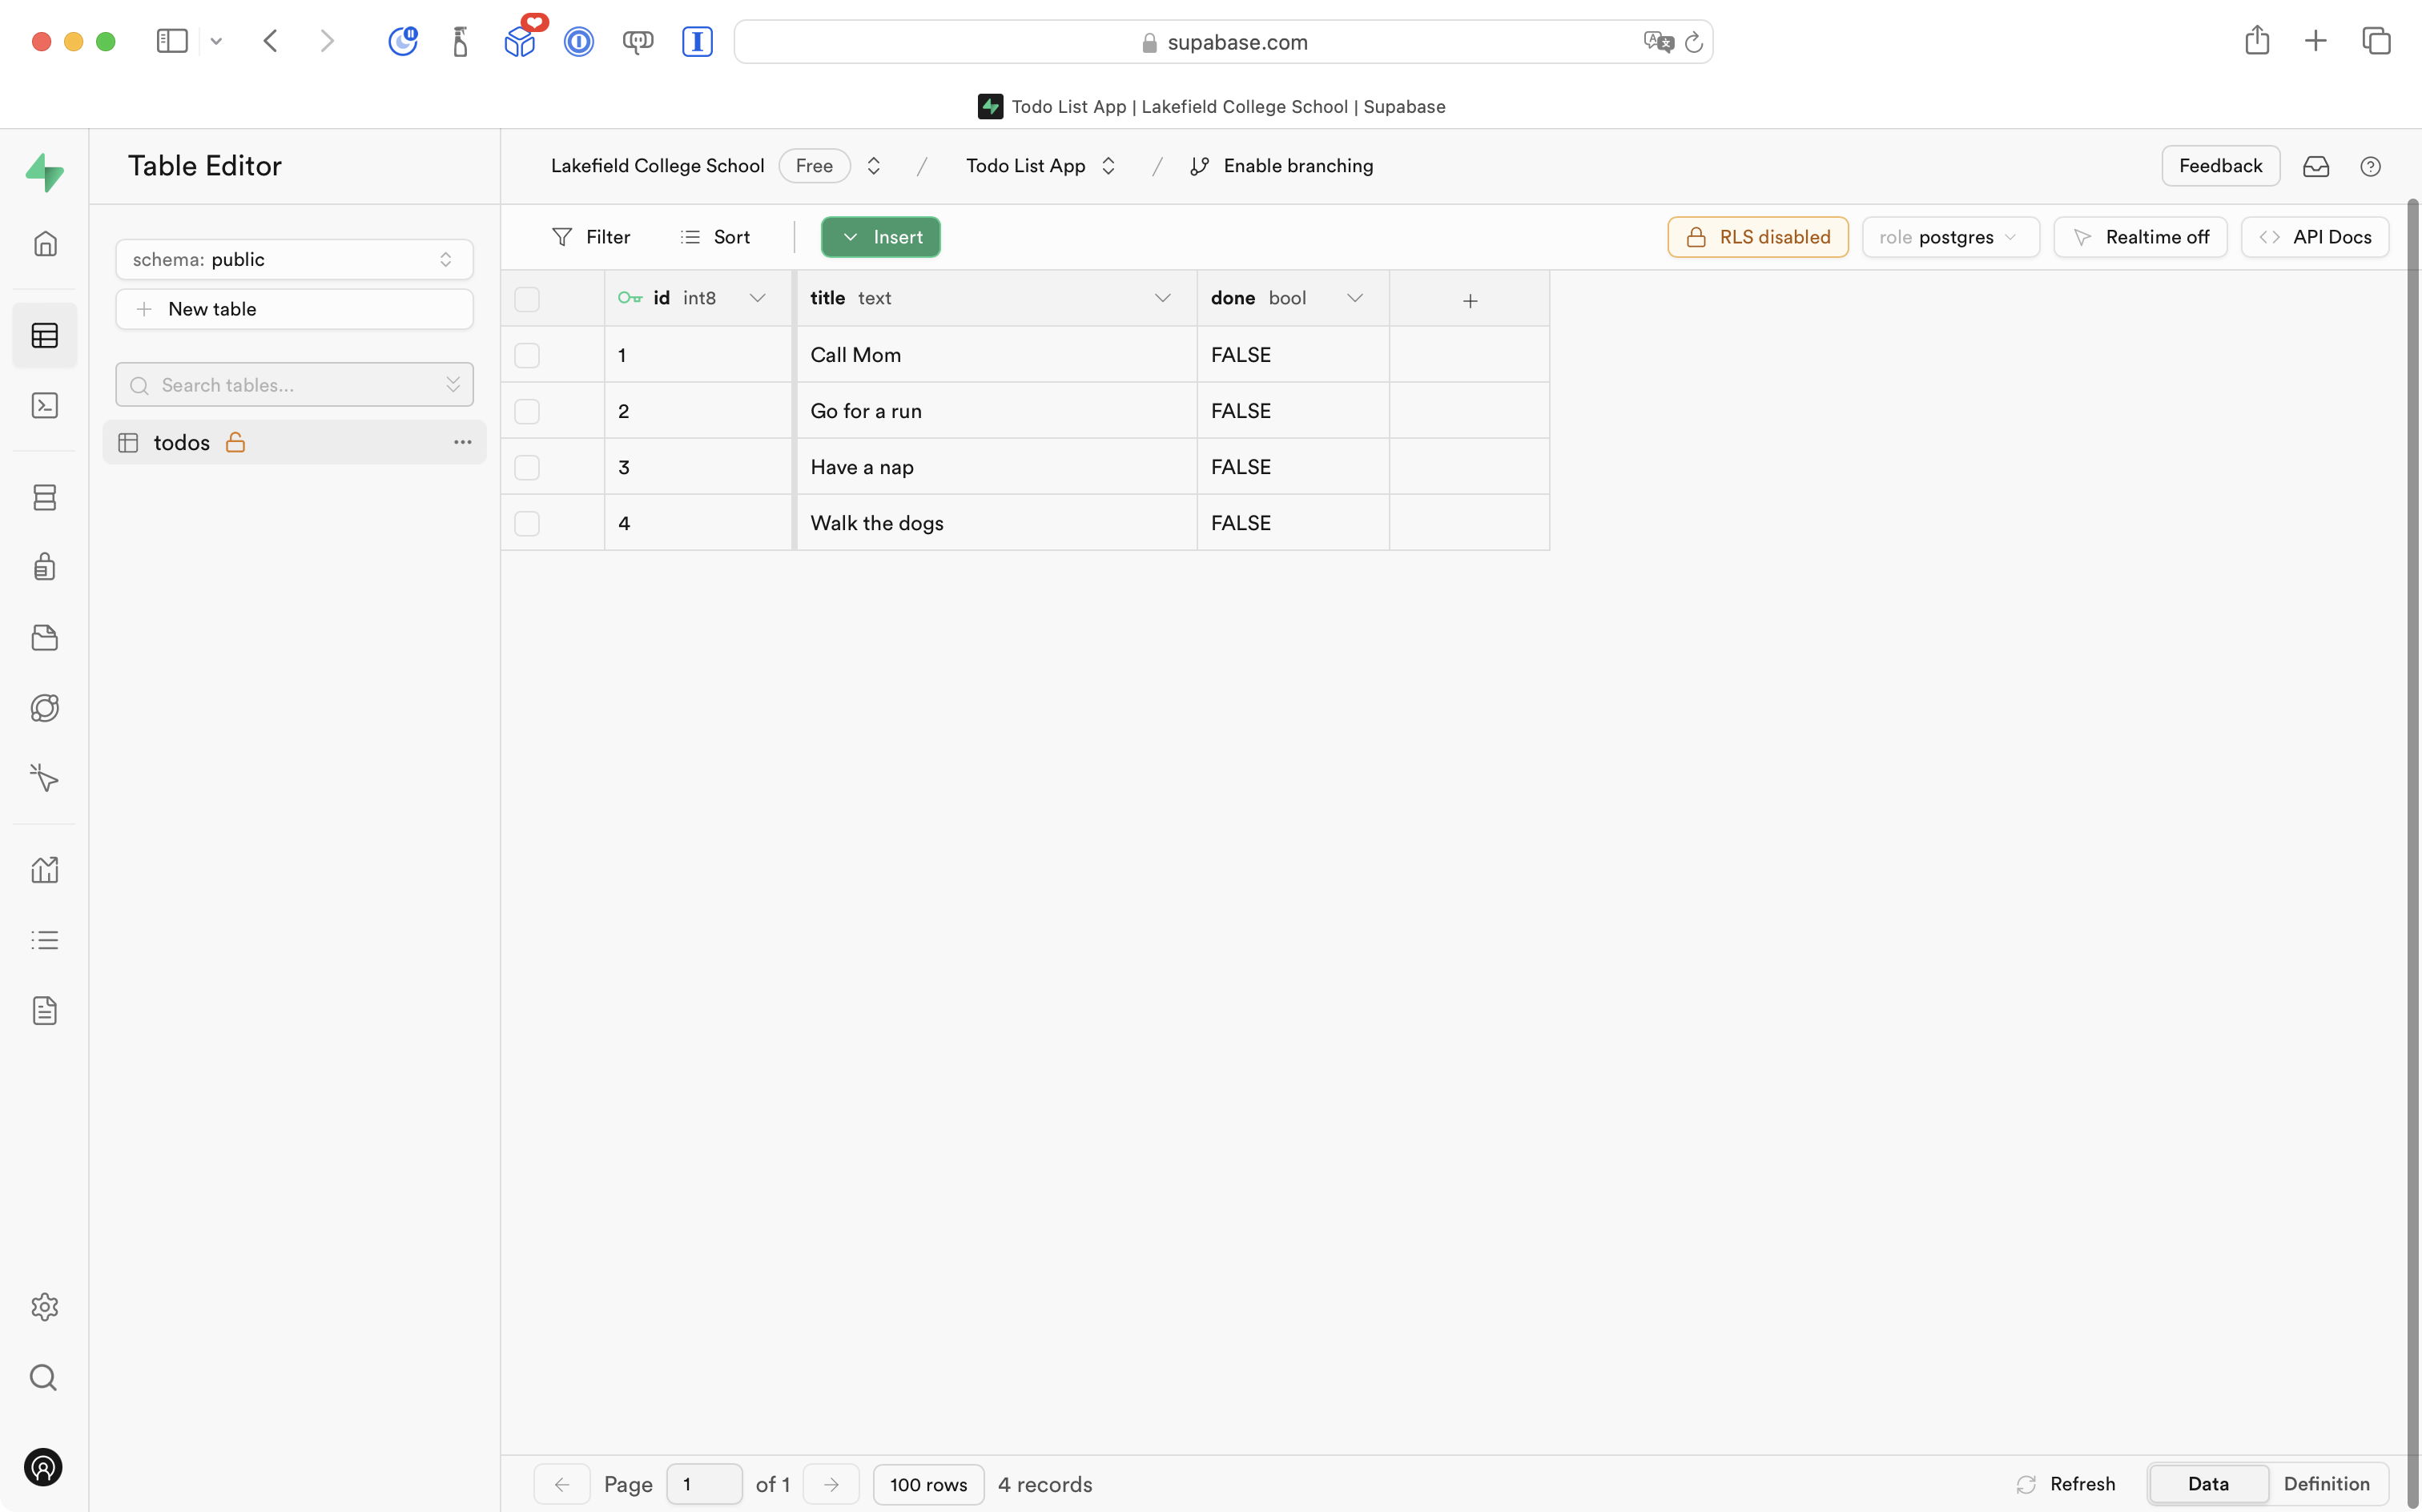
Verify that the query added data to the todos table by navigating to the Table Editor:
After selecting the todos table you should see the newly inserted data:
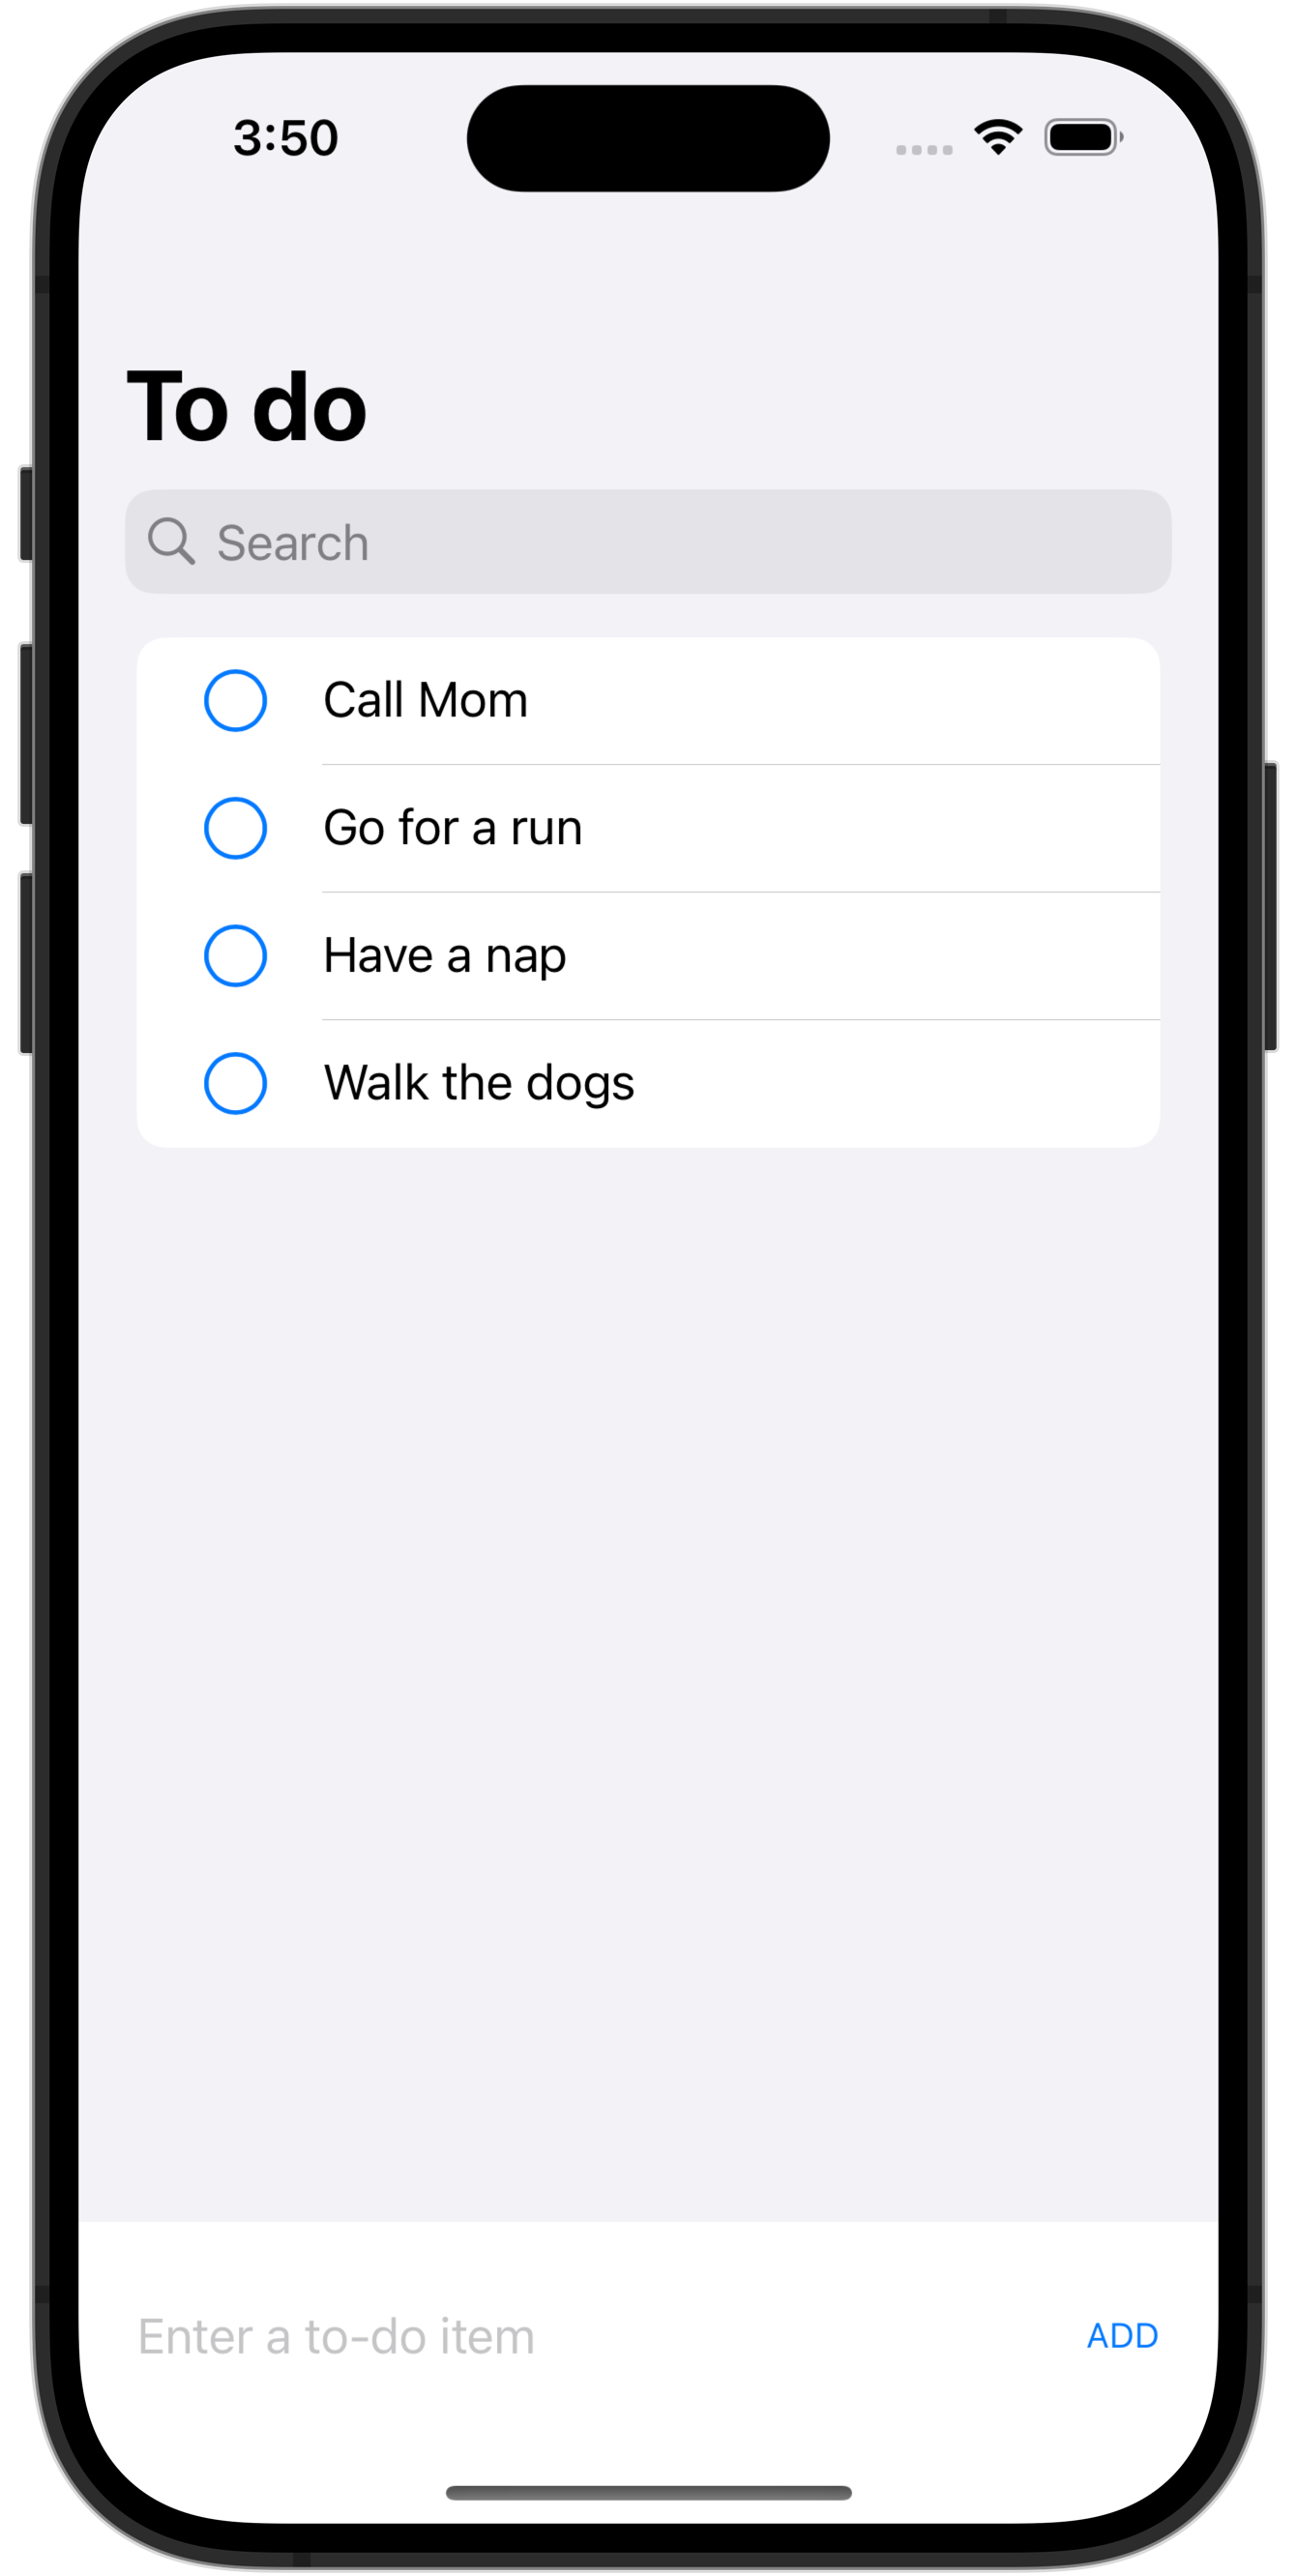
From the app
If you run your app again from Xcode, you should see the newly created to-do item:
Try adding a new to-do item, then force-quitting the app, then opening it again:
Note that the newly created to-do item is not persisted.
Look at the current code in the new model to understand why:

On line 46, a new to-do item is created.
On line 52, that to-do item is appended to the todos array in the view model.
The user interface updates to show this change, but if the app is closed, the new to-do item is lost.
From the view model, we must adjust the createToDo function so that it writes the new to-do item to the cloud-hosted database.
Copy this code into your clipboard:
func createToDo(withTitle title: String) {
// Create a unit of asynchronous work to add the to-do item
Task {
// Create the new to-do item instance
// NOTE: The id will be nil for now
let todo = TodoItem(
title: title,
done: false
)
// Write it to the database
do {
// Insert the new to-do item, and then immediately select
// it back out of the database
let newlyInsertedItem: TodoItem = try await supabase
.from("todos")
.insert(todo) // Insert the todo item created locally in memory
.select() // Select the item just inserted
.single() // Ensure just one row is returned
.execute() // Run the query
.value // Automatically decode the JSON into an instance of TodoItem
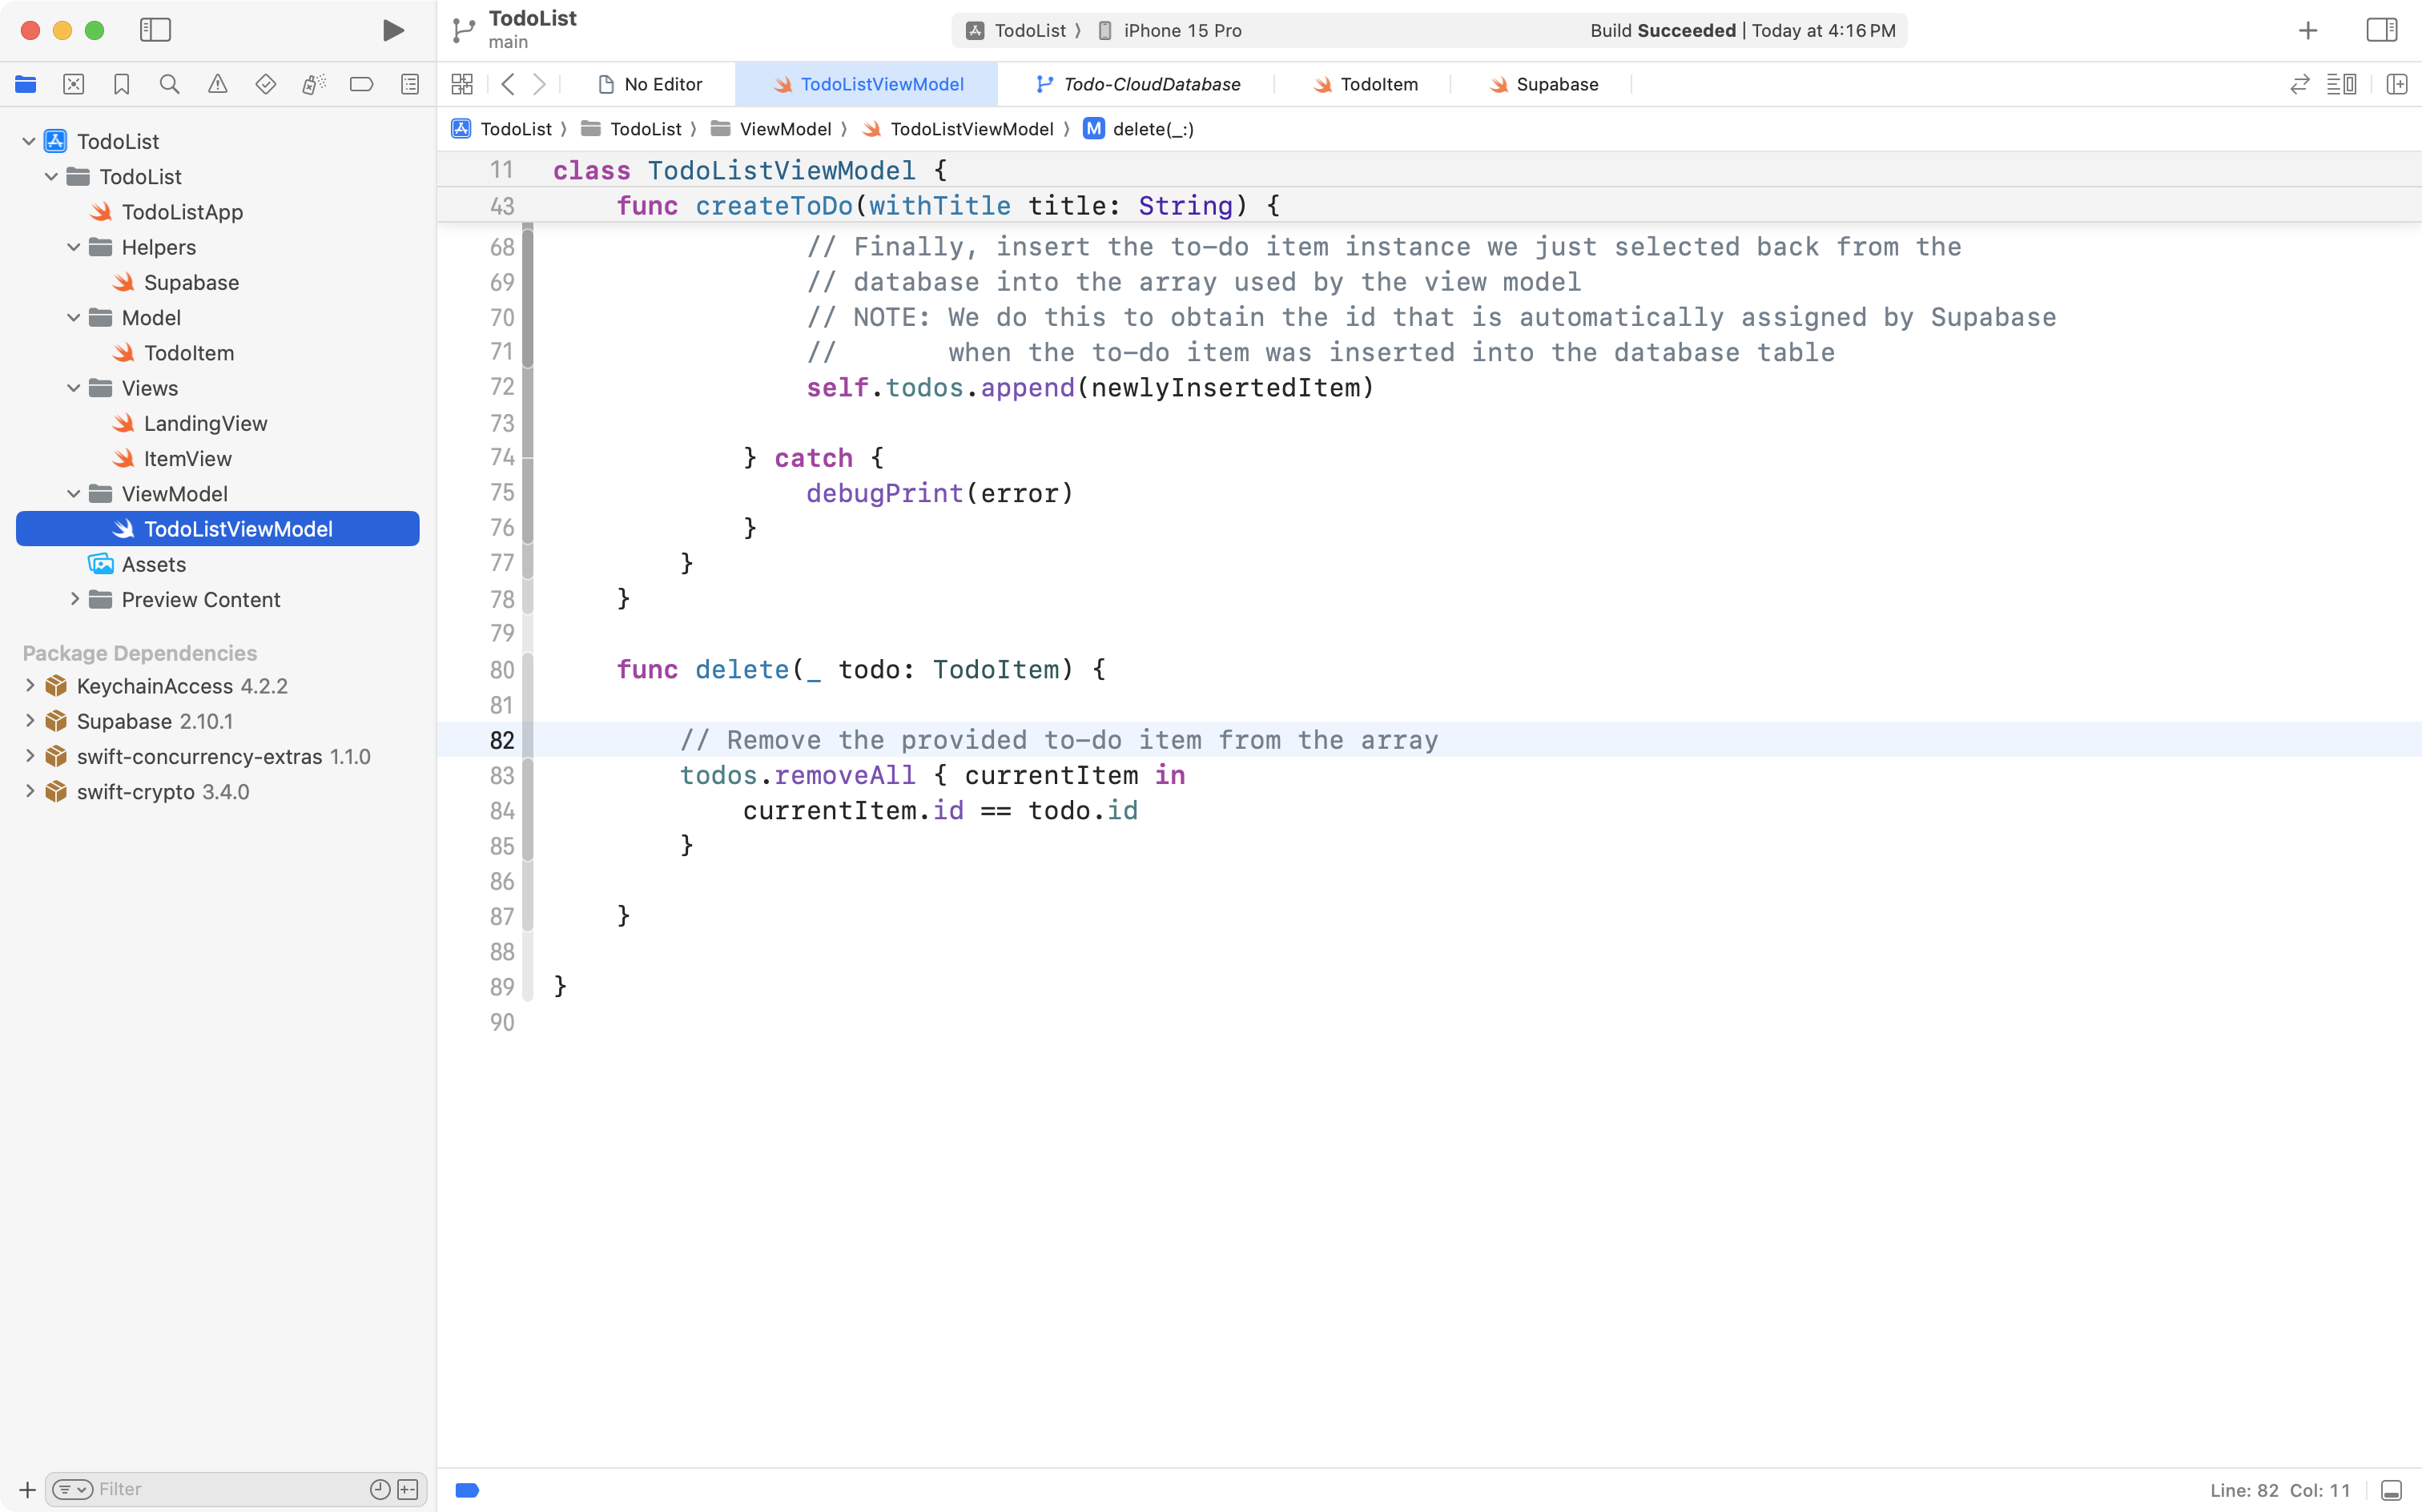
// Finally, insert the to-do item instance we just selected back from the
// database into the array used by the view model
// NOTE: We do this to obtain the id that is automatically assigned by Supabase
// when the to-do item was inserted into the database table
self.todos.append(newlyInsertedItem)
} catch {
debugPrint(error)
}
}
}Replace the existing createToDo function with that code, like this:
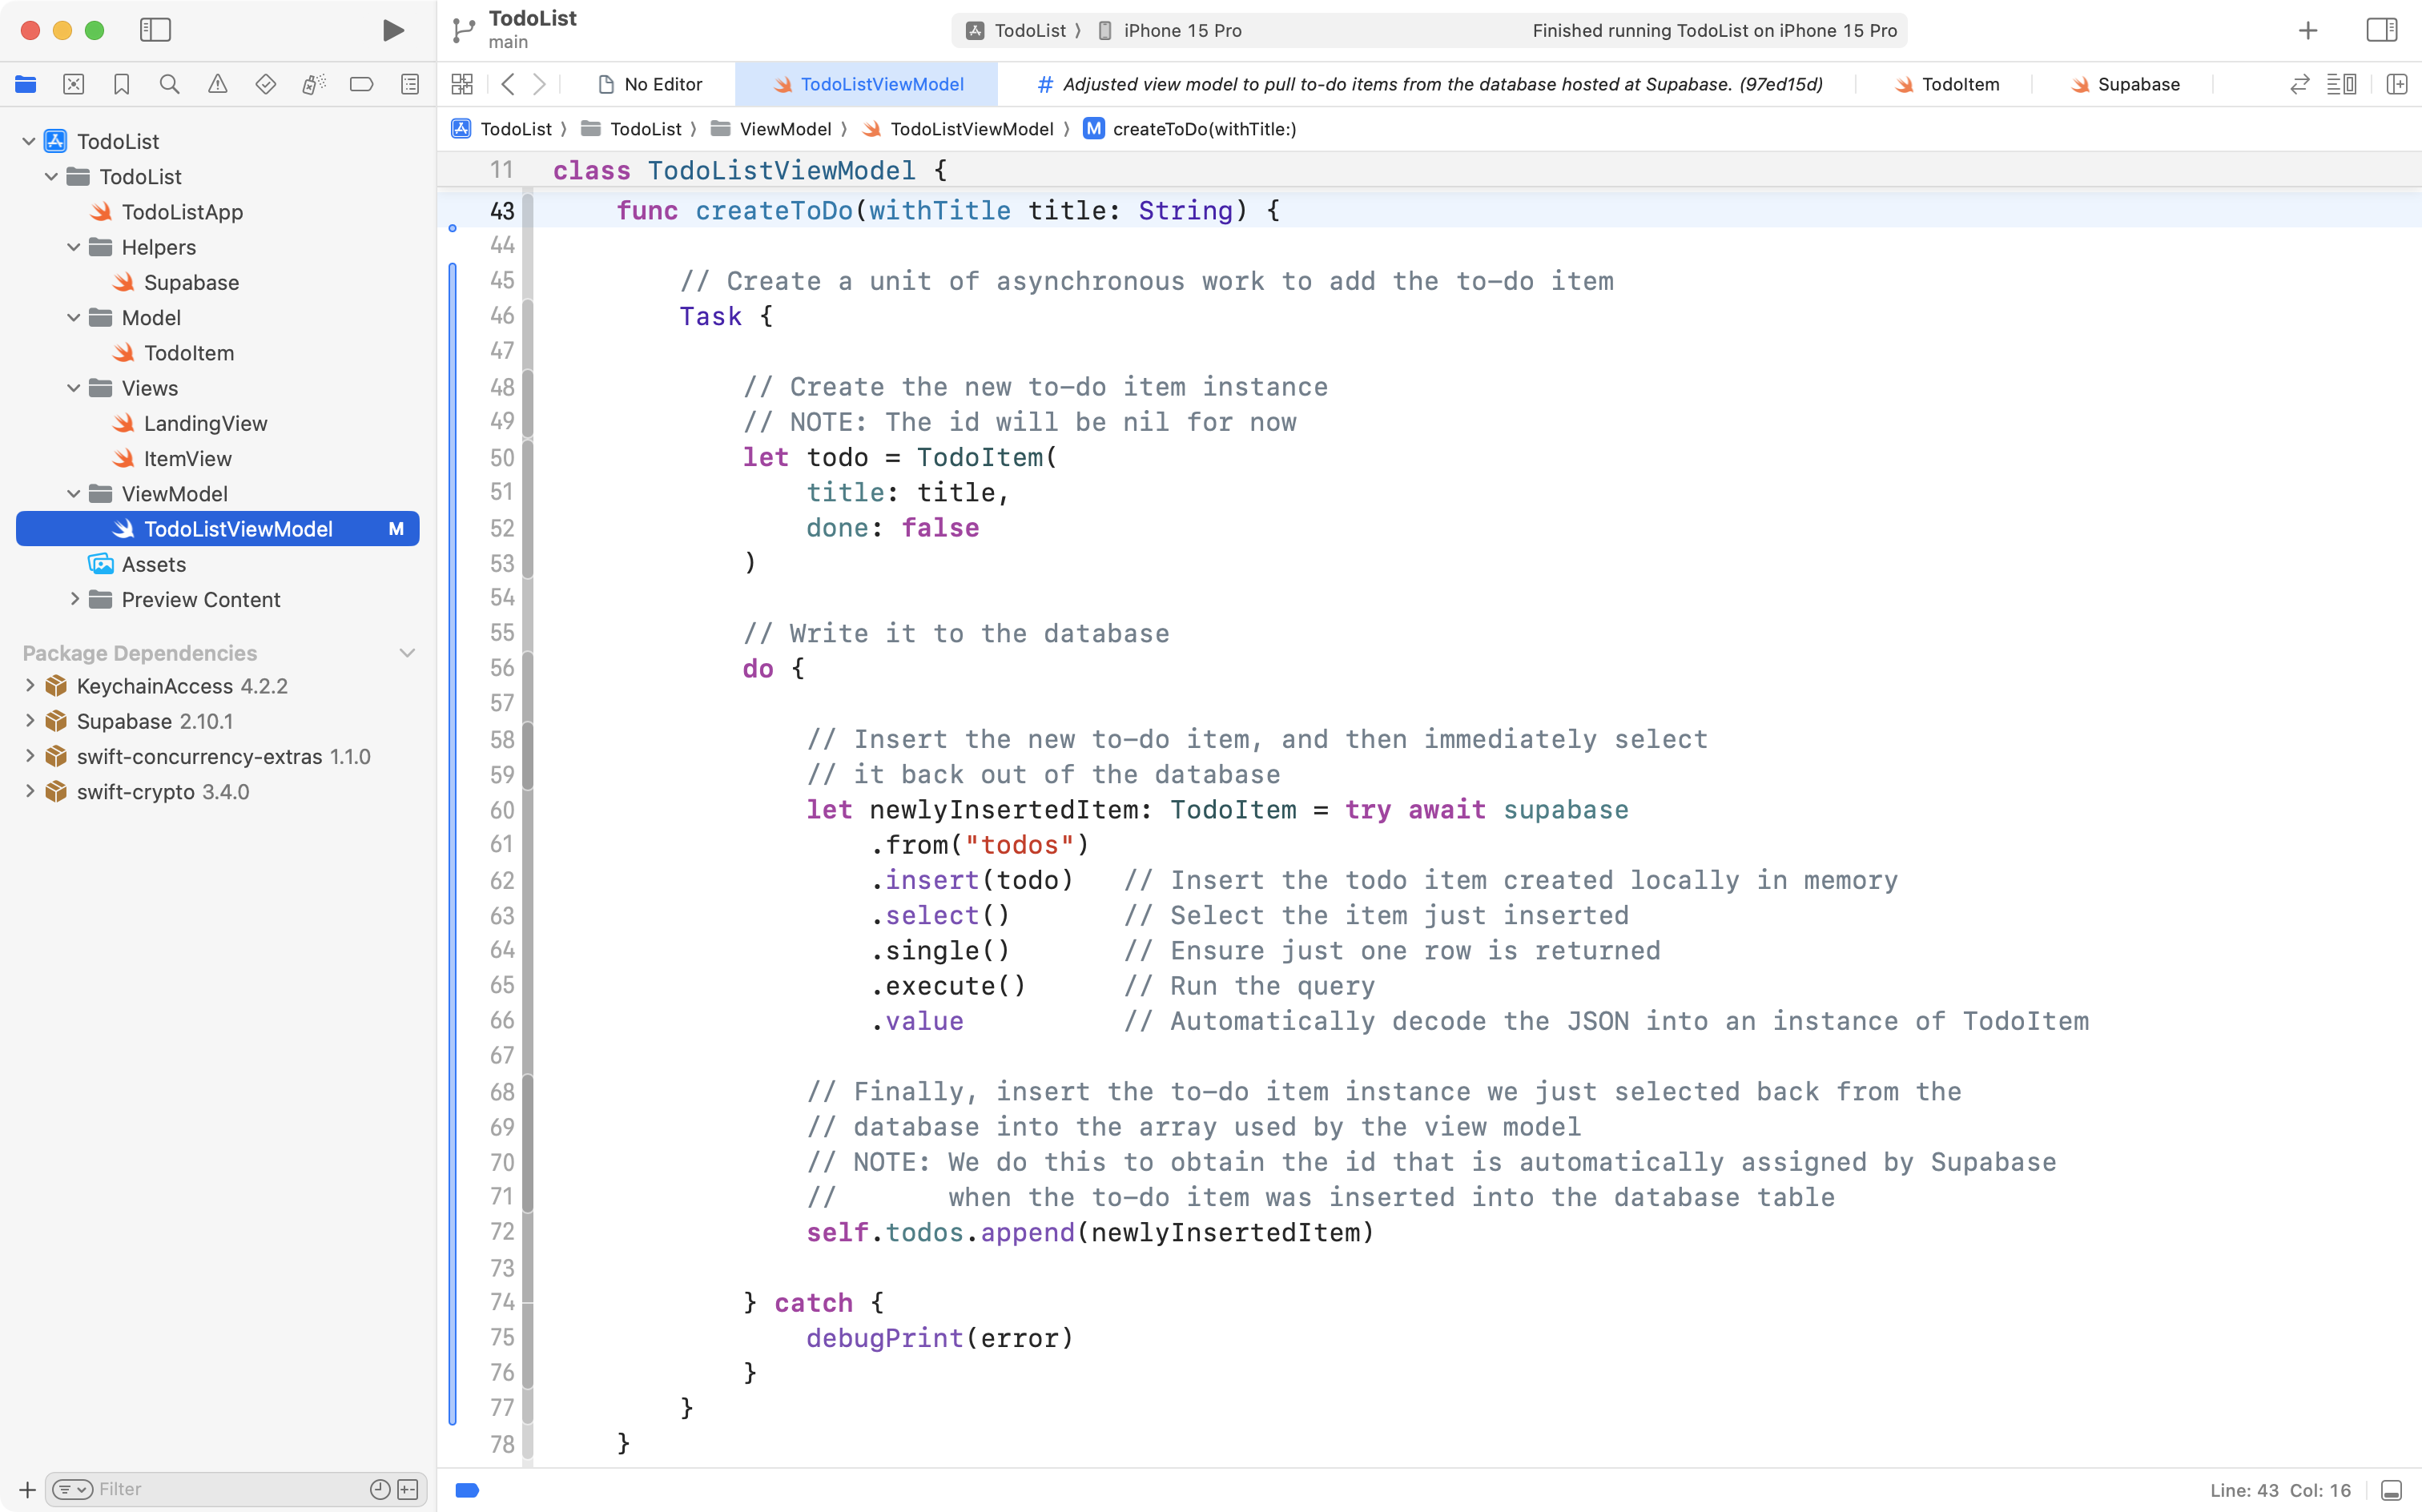
The comments in the code explain what is happening on each line.
Now try running the app again in the Simulator, and add a new to-do item.
Quit the app, and observe how the new to-do item has been persisted:

This is important progress that you don’t want to lose, so please commit and push your work with this message:
Adjusted the view model so that newly added to-do items are persisted.
Remove data from the cloud
In this section of the tutorial we will author code to delete a to-do item.
This is equivalent to interacting directly with the database and running a DELETE FROM command, which is how a row is removed from a table.
For example:
DELETE FROM todos
WHERE id = 7;
TIP
You can try this out directly on Supabase in the SQL Editor panel.
Be sure you do not forget the
WHEREclause – otherwise every row of data in the table will be deleted!
Before we continue, let’s review the overall architecture of the app:
flowchart LR

id1["<b>Model</b>\nDescribes data"] --> vm
subgraph vm["<b>View Model</b>"]
	direction TB
	id2["Manages the\nstate of data"]
	id2-.->id4
	id4-.->id5
	id5-.->id4
end
vm --> id3["<b>View(s)</b>\nPresent data"]
id3 --> vm
id4["Data is kept\n<em>in memory</em>\nwhile app is running"]
id5["Data is persisted\n<em>in the cloud</em>"]
Note how the view model must manage to-do items held in memory and keep the database up-to-date.
If you try deleting a to-do item, then quitting and re-opening the app, you will notice a problem:
The to-do item that was deleted appears again when the app is re-opened.
This occurs because the view model currently just removes the deleted to-do item from the array held in memory – it does not remove the to-do item from the database table held in the cloud:
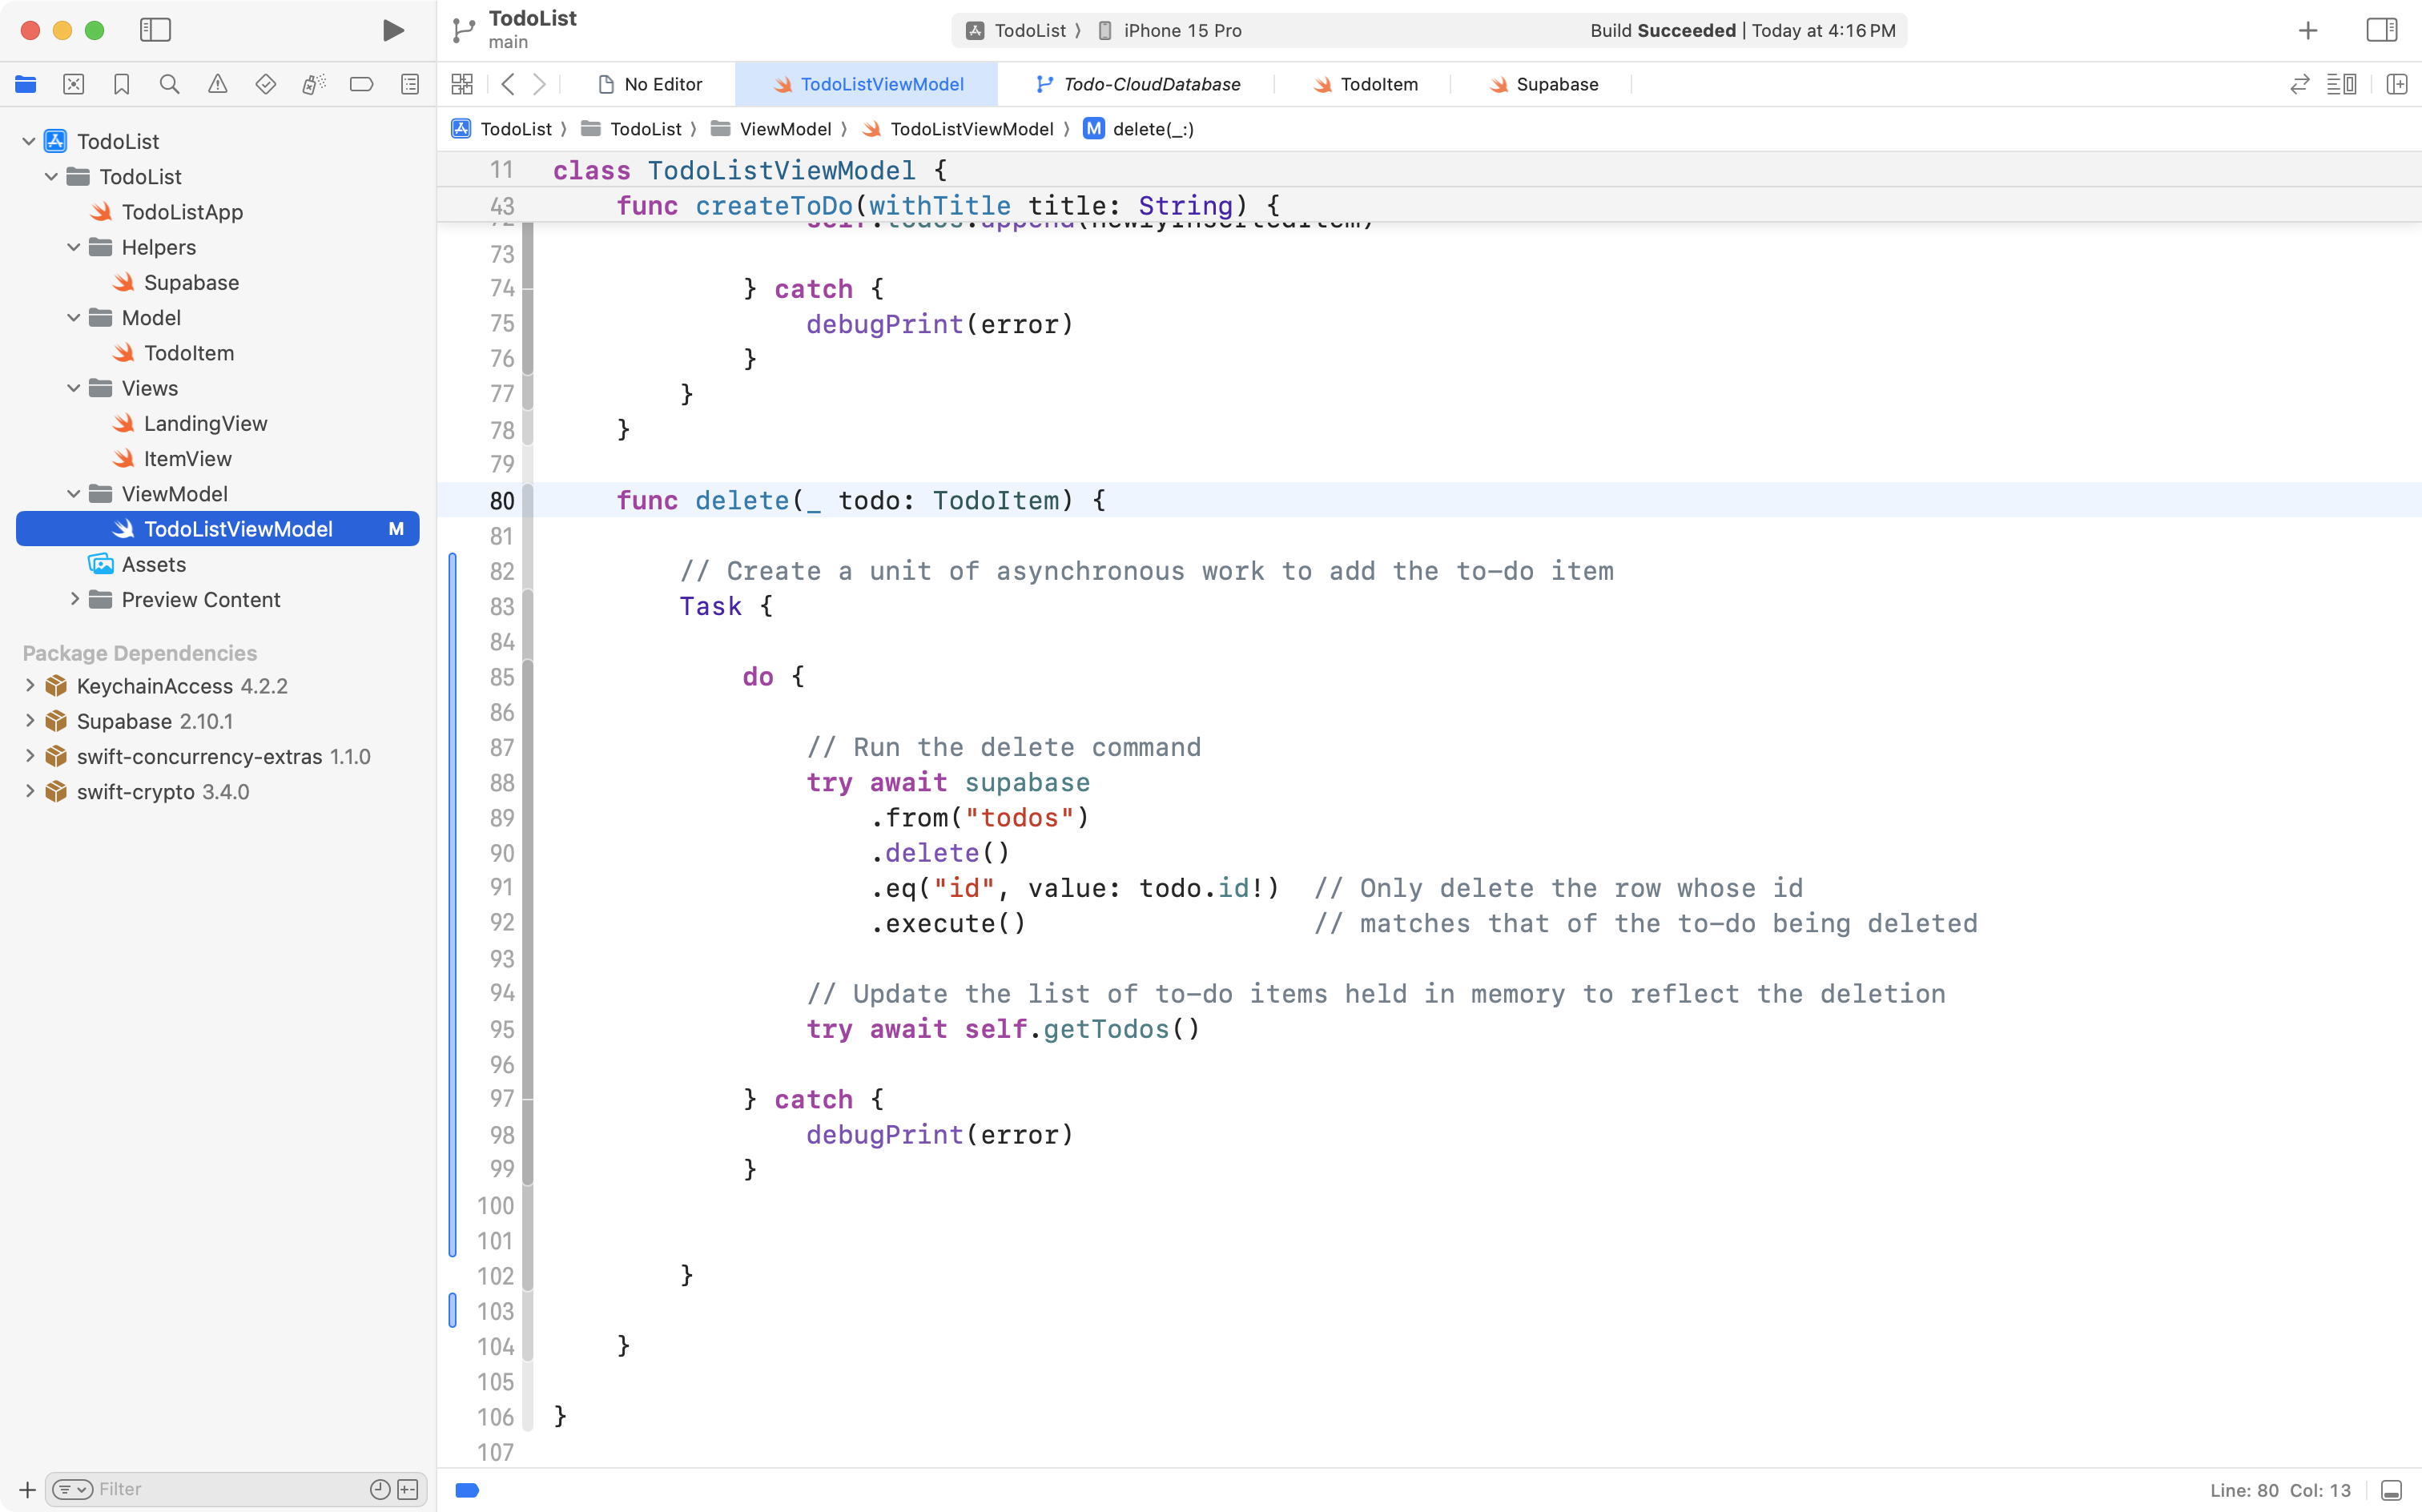
So, please copy this code into your clipboard:
func delete(_ todo: TodoItem) {

        // Create a unit of asynchronous work to add the to-do item
        Task {

            do {

                // Run the delete command
                try await supabase
                    .from("todos")
                    .delete()
                    .eq("id", value: todo.id!)  // Only delete the row whose id
                    .execute()                  // matches that of the to-do being deleted

                // Update the list of to-do items held in memory to reflect the deletion
                try await self.getTodos()

            } catch {
                debugPrint(error)
            }


        }

    }
Replace the existing delete function with that code, like this:
Then run your app again in the Simulator. This time, when you delete an item, then close and re-open the app, you will notice that the deletion is persisted.
This is key progress, so once again, please commit and push your work with this message:
Adjusted the view model so that deletions are persisted.
Update data in the cloud
There is one final issue to correct.
Run your app in the Simulator or on a device.
Try toggling the completion status of a few to-do items.
Also try changing the text of some to-do items.
Then force-quit the app, and re-open it.
You will notice that the changes are not persisted.
When the completion status of a to-do changes, or the text of a to-do item changes, we must also use the view model to persist these modifications in the database.
So, in this final section of the tutorial for today we will author code to delete a to-do item.
This is equivalent to interacting directly with the database and running an UPDATE command.
For example:
UPDATE todos
SET done = TRUE
WHERE id = 5;
TIP
You can try this out directly on Supabase in the SQL Editor panel.
Be sure you do not forget the
WHEREclause – otherwise every row of data in the table will be updated so that thedonevalue is set totrue!
Add the update function
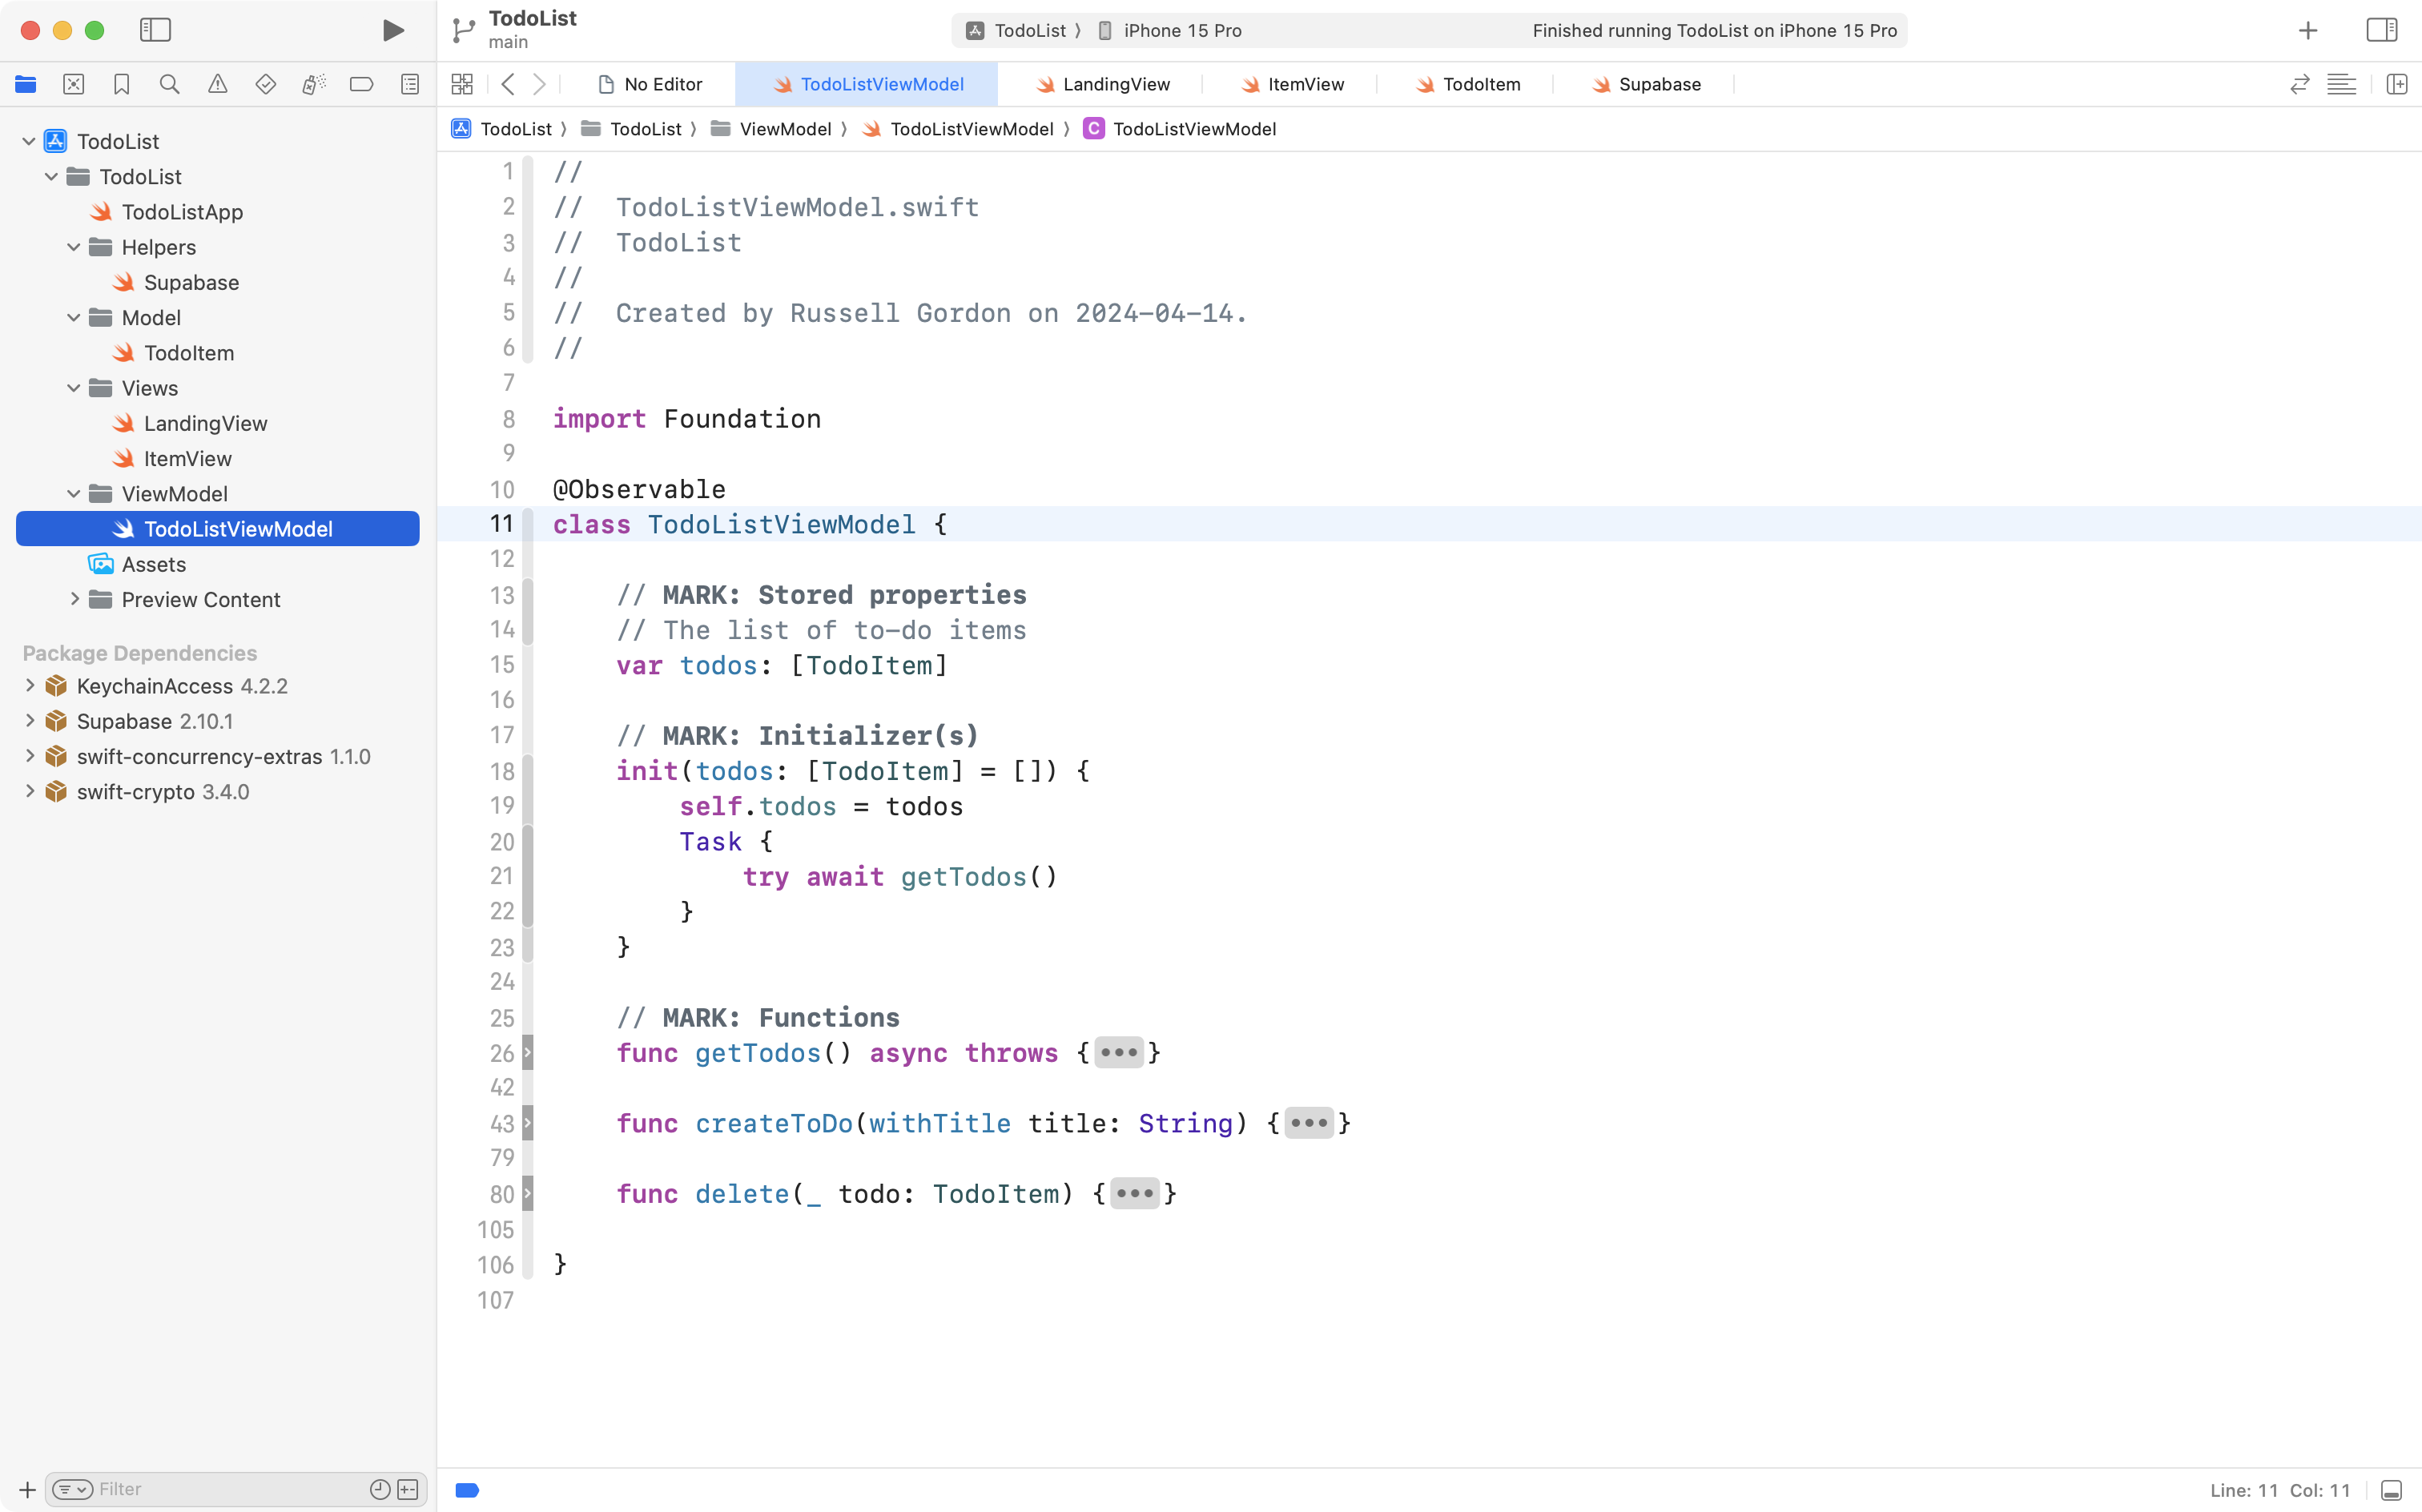
Navigate to the view model, which should now look like this, with the existing functions folded up:
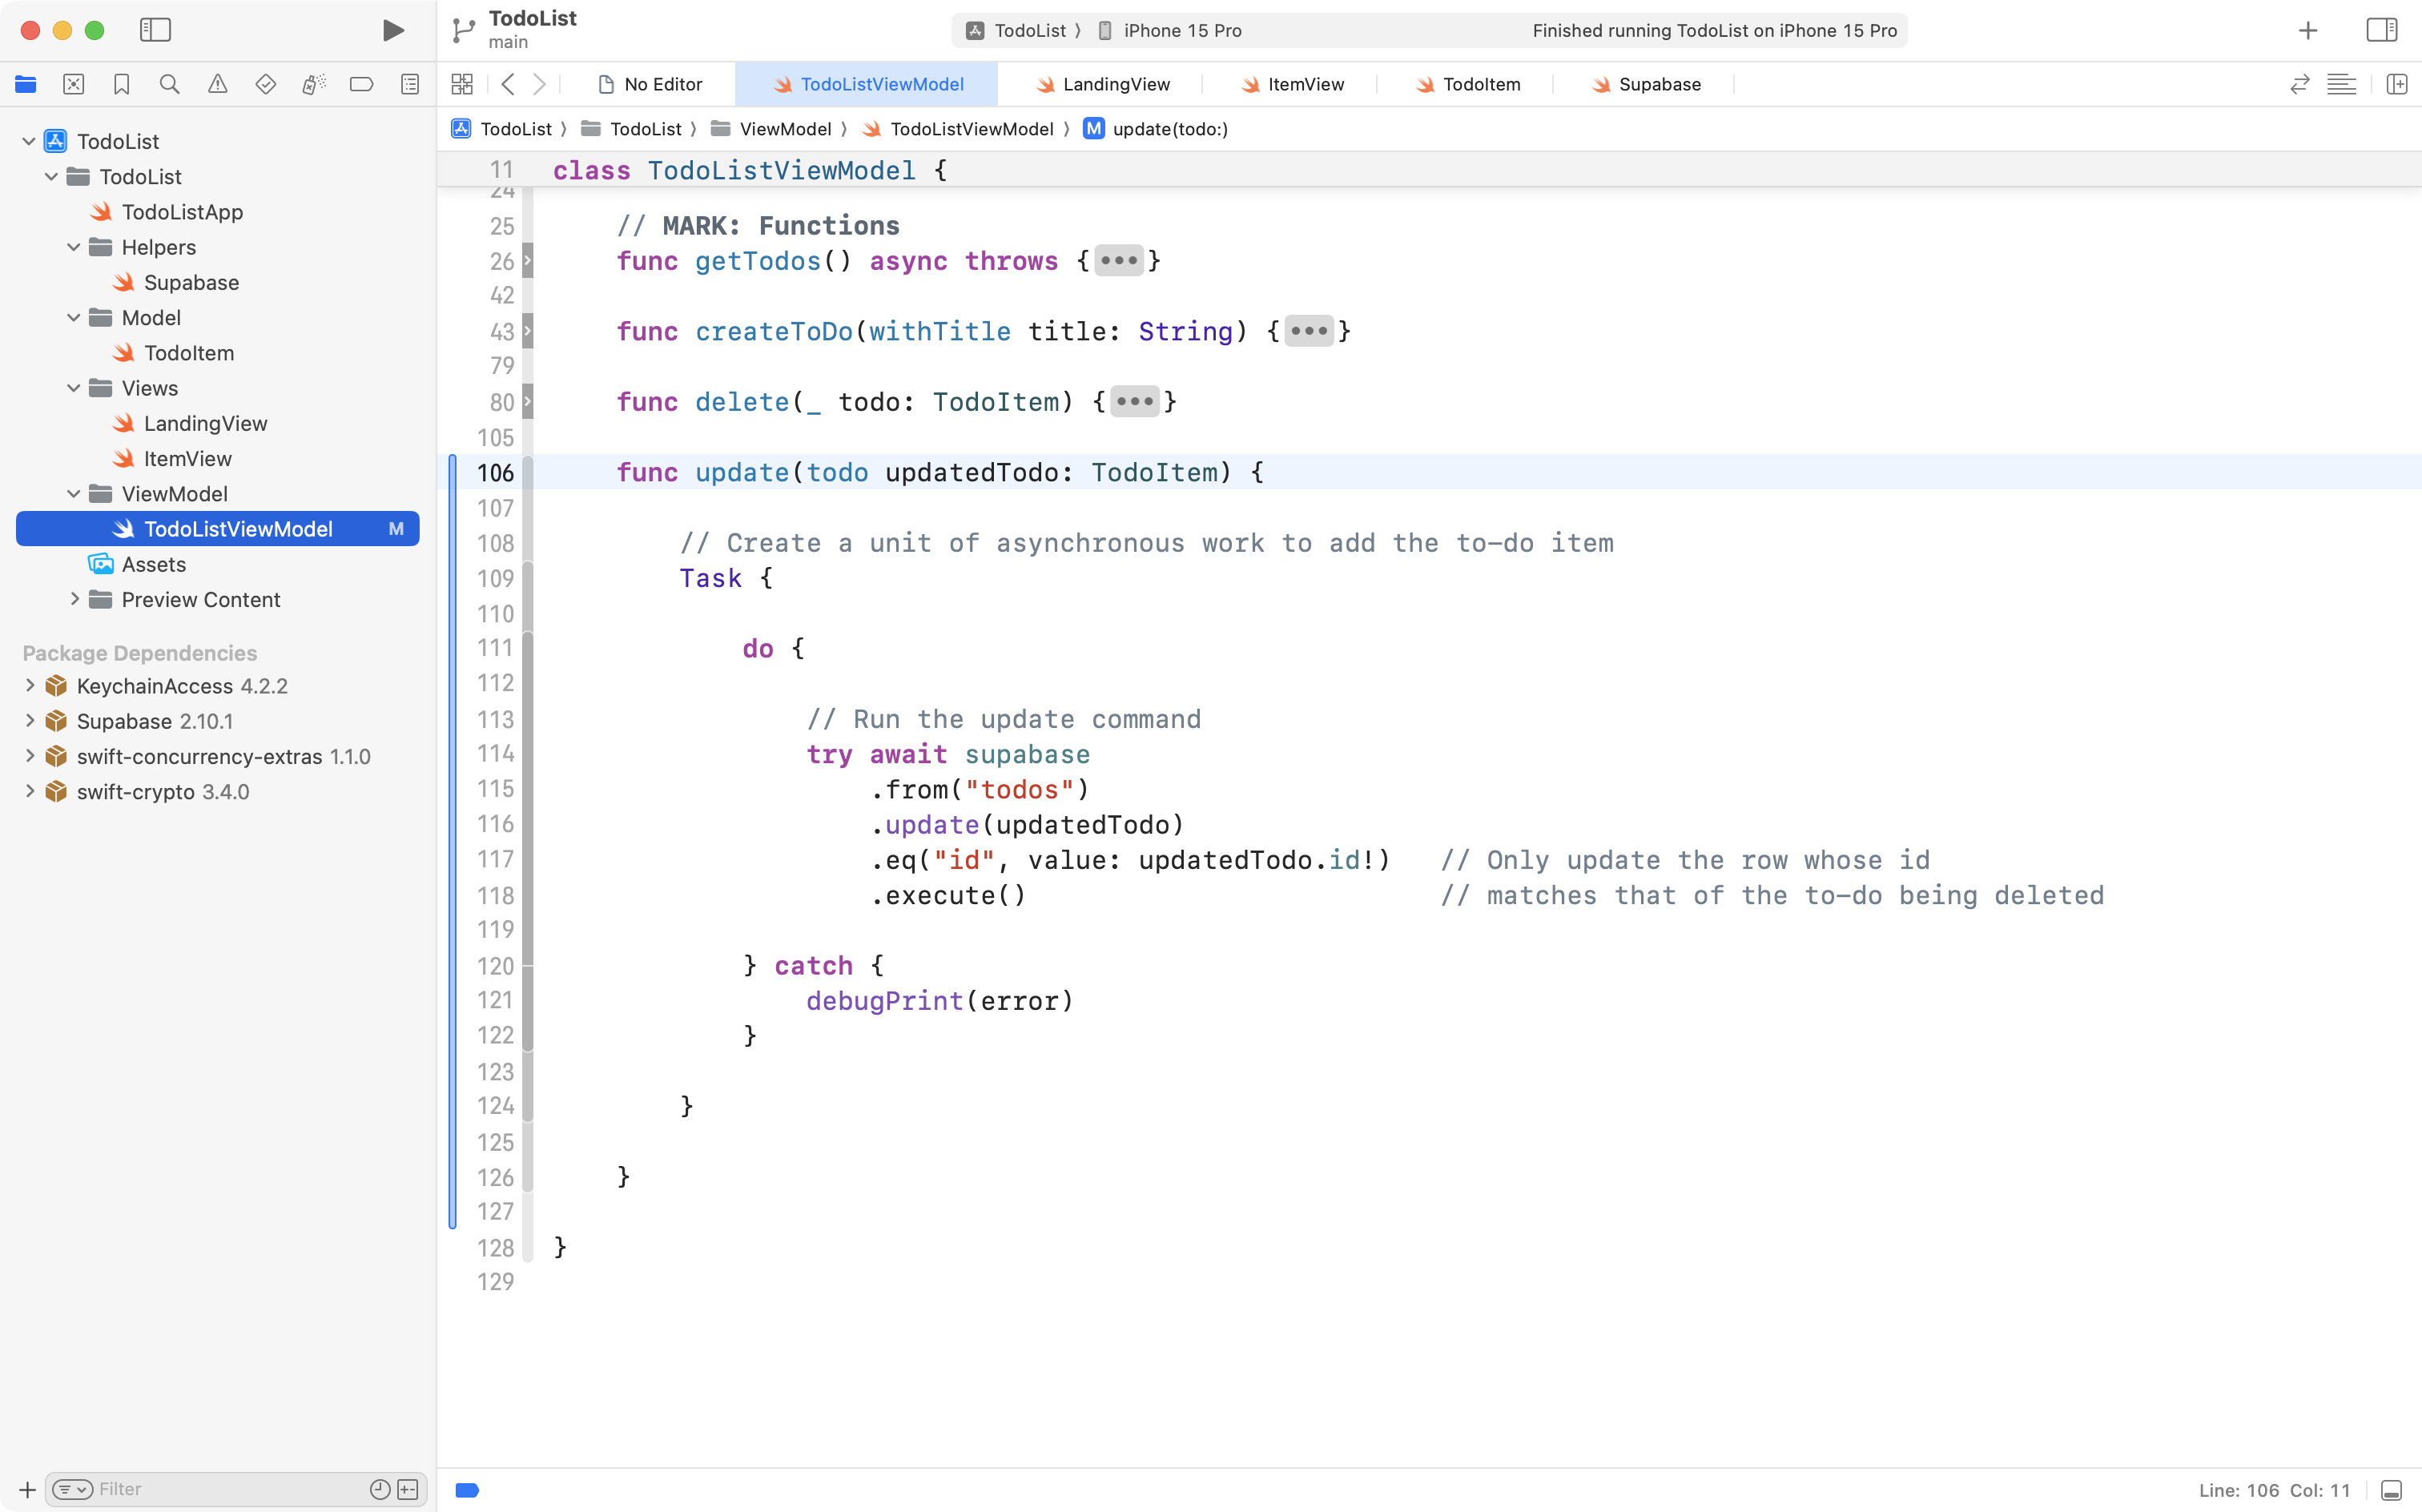
After the delete function, but before the end of the TodoListViewModel class, add the following code:
 func update(todo updatedTodo: TodoItem) {

        // Create a unit of asynchronous work to add the to-do item
        Task {

            do {

                // Run the update command
                try await supabase
                    .from("todos")
                    .update(updatedTodo)
                    .eq("id", value: updatedTodo.id!)   // Only update the row whose id
                    .execute()                          // matches that of the to-do being deleted

            } catch {
                debugPrint(error)
            }

        }

    }
… like this:
That gives the view model the ability to update to-do items, but, in this case, we need to add a bit of code to the views so that the update function on the view model can invoked when needed.
Sharing access to the view model
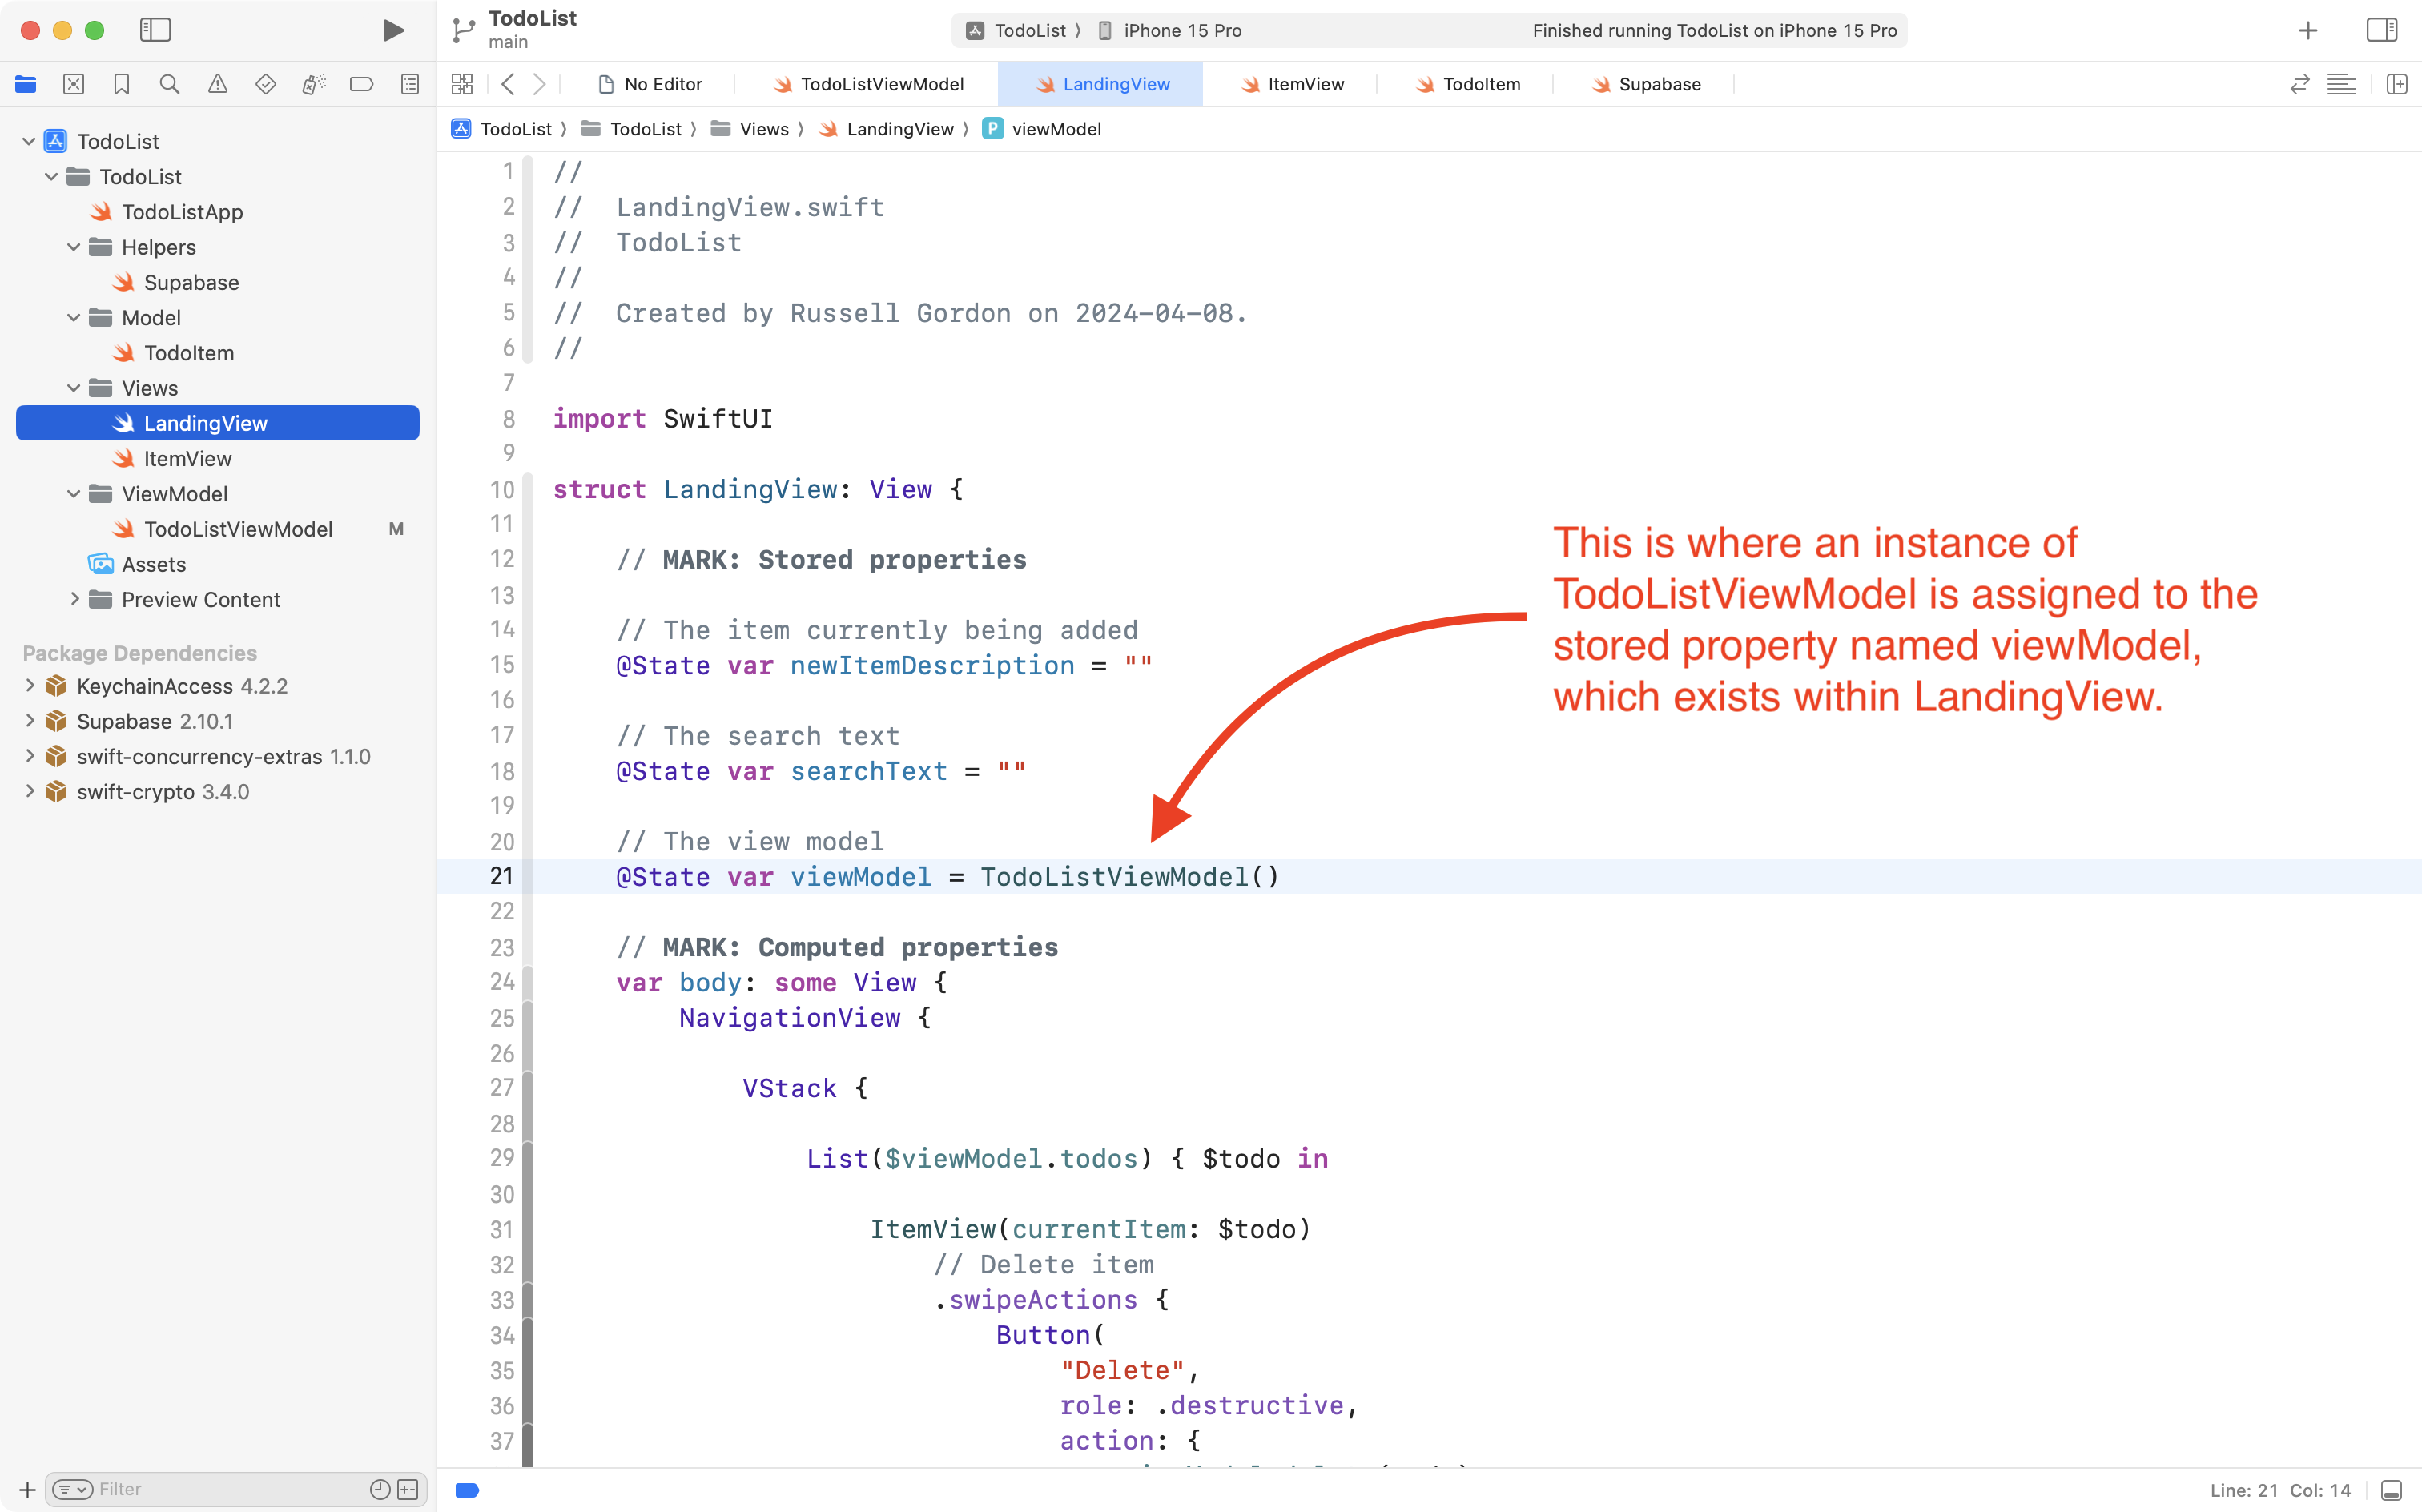
The source of truth for the view model – where the first and only instance of the TodoListViewModel class is created – exists in LandingView:
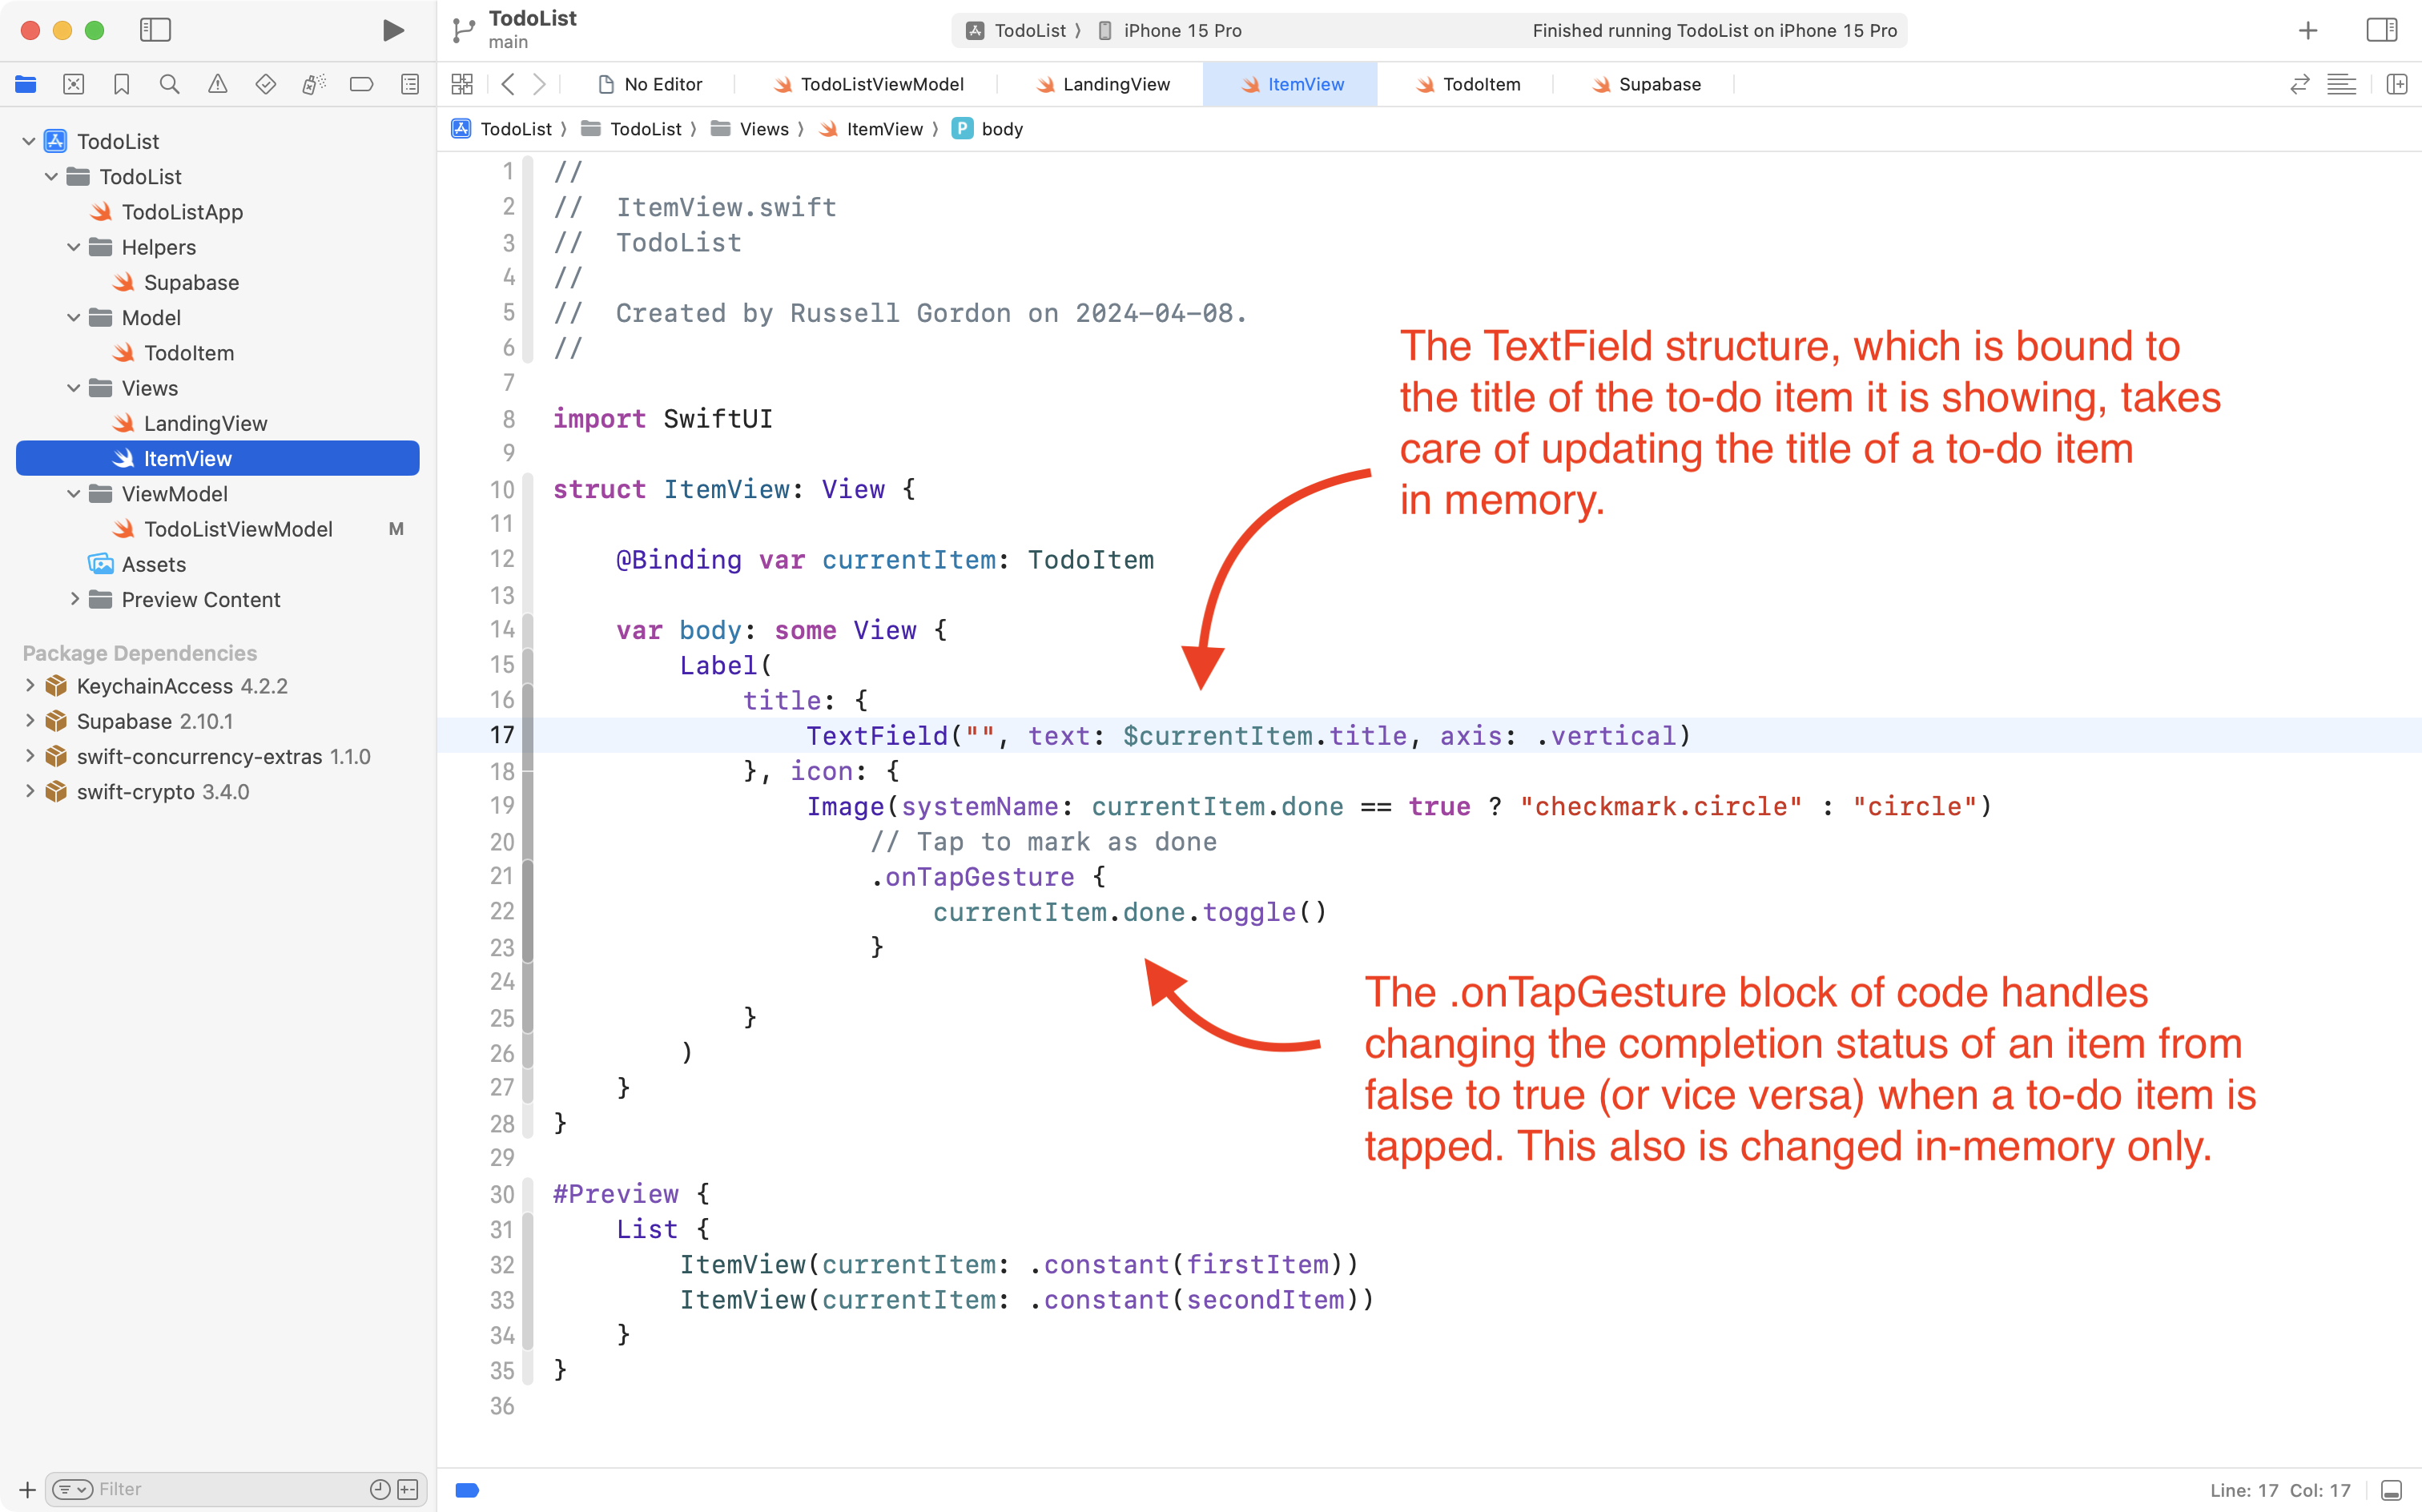
However, the code that handles modifications to a single to-do item exists in ItemView:
So, if the view model instance exists on LandingView, how do we get access to it from ItemView? So that we can update the database when a to-do item changes?
There are two options, and which one we choose depends on our needs and preferences, for the most part.
Using @Bindable
The first option is to directly pass a reference from the parent view to the child view, which in general, looks like this:
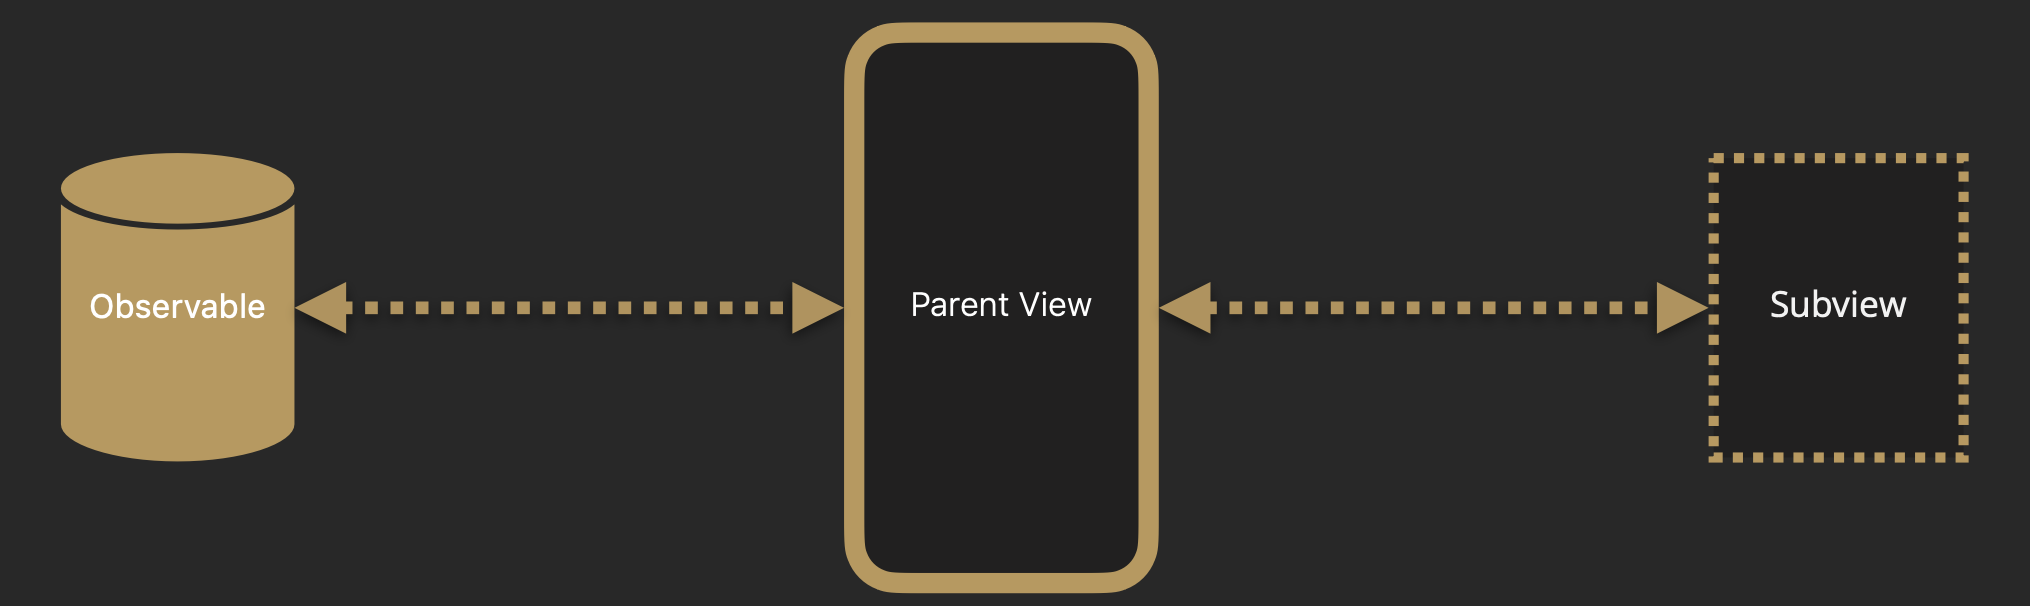
In this app in particular, directly passing a reference looks like this:
flowchart LR

id1[("<b>TodoListViewModel</b>\n<em>Observable class</em>")]
id2["<b>LandingView</b>\n<em>Parent View</em>\nCreates view model instance\n(source of truth)"]
id3["<b>ItemView</b>\n<em>Subview</em>\nReceives reference to view model\nfrom parent view"]
id1-.->id2
id2-.->id3
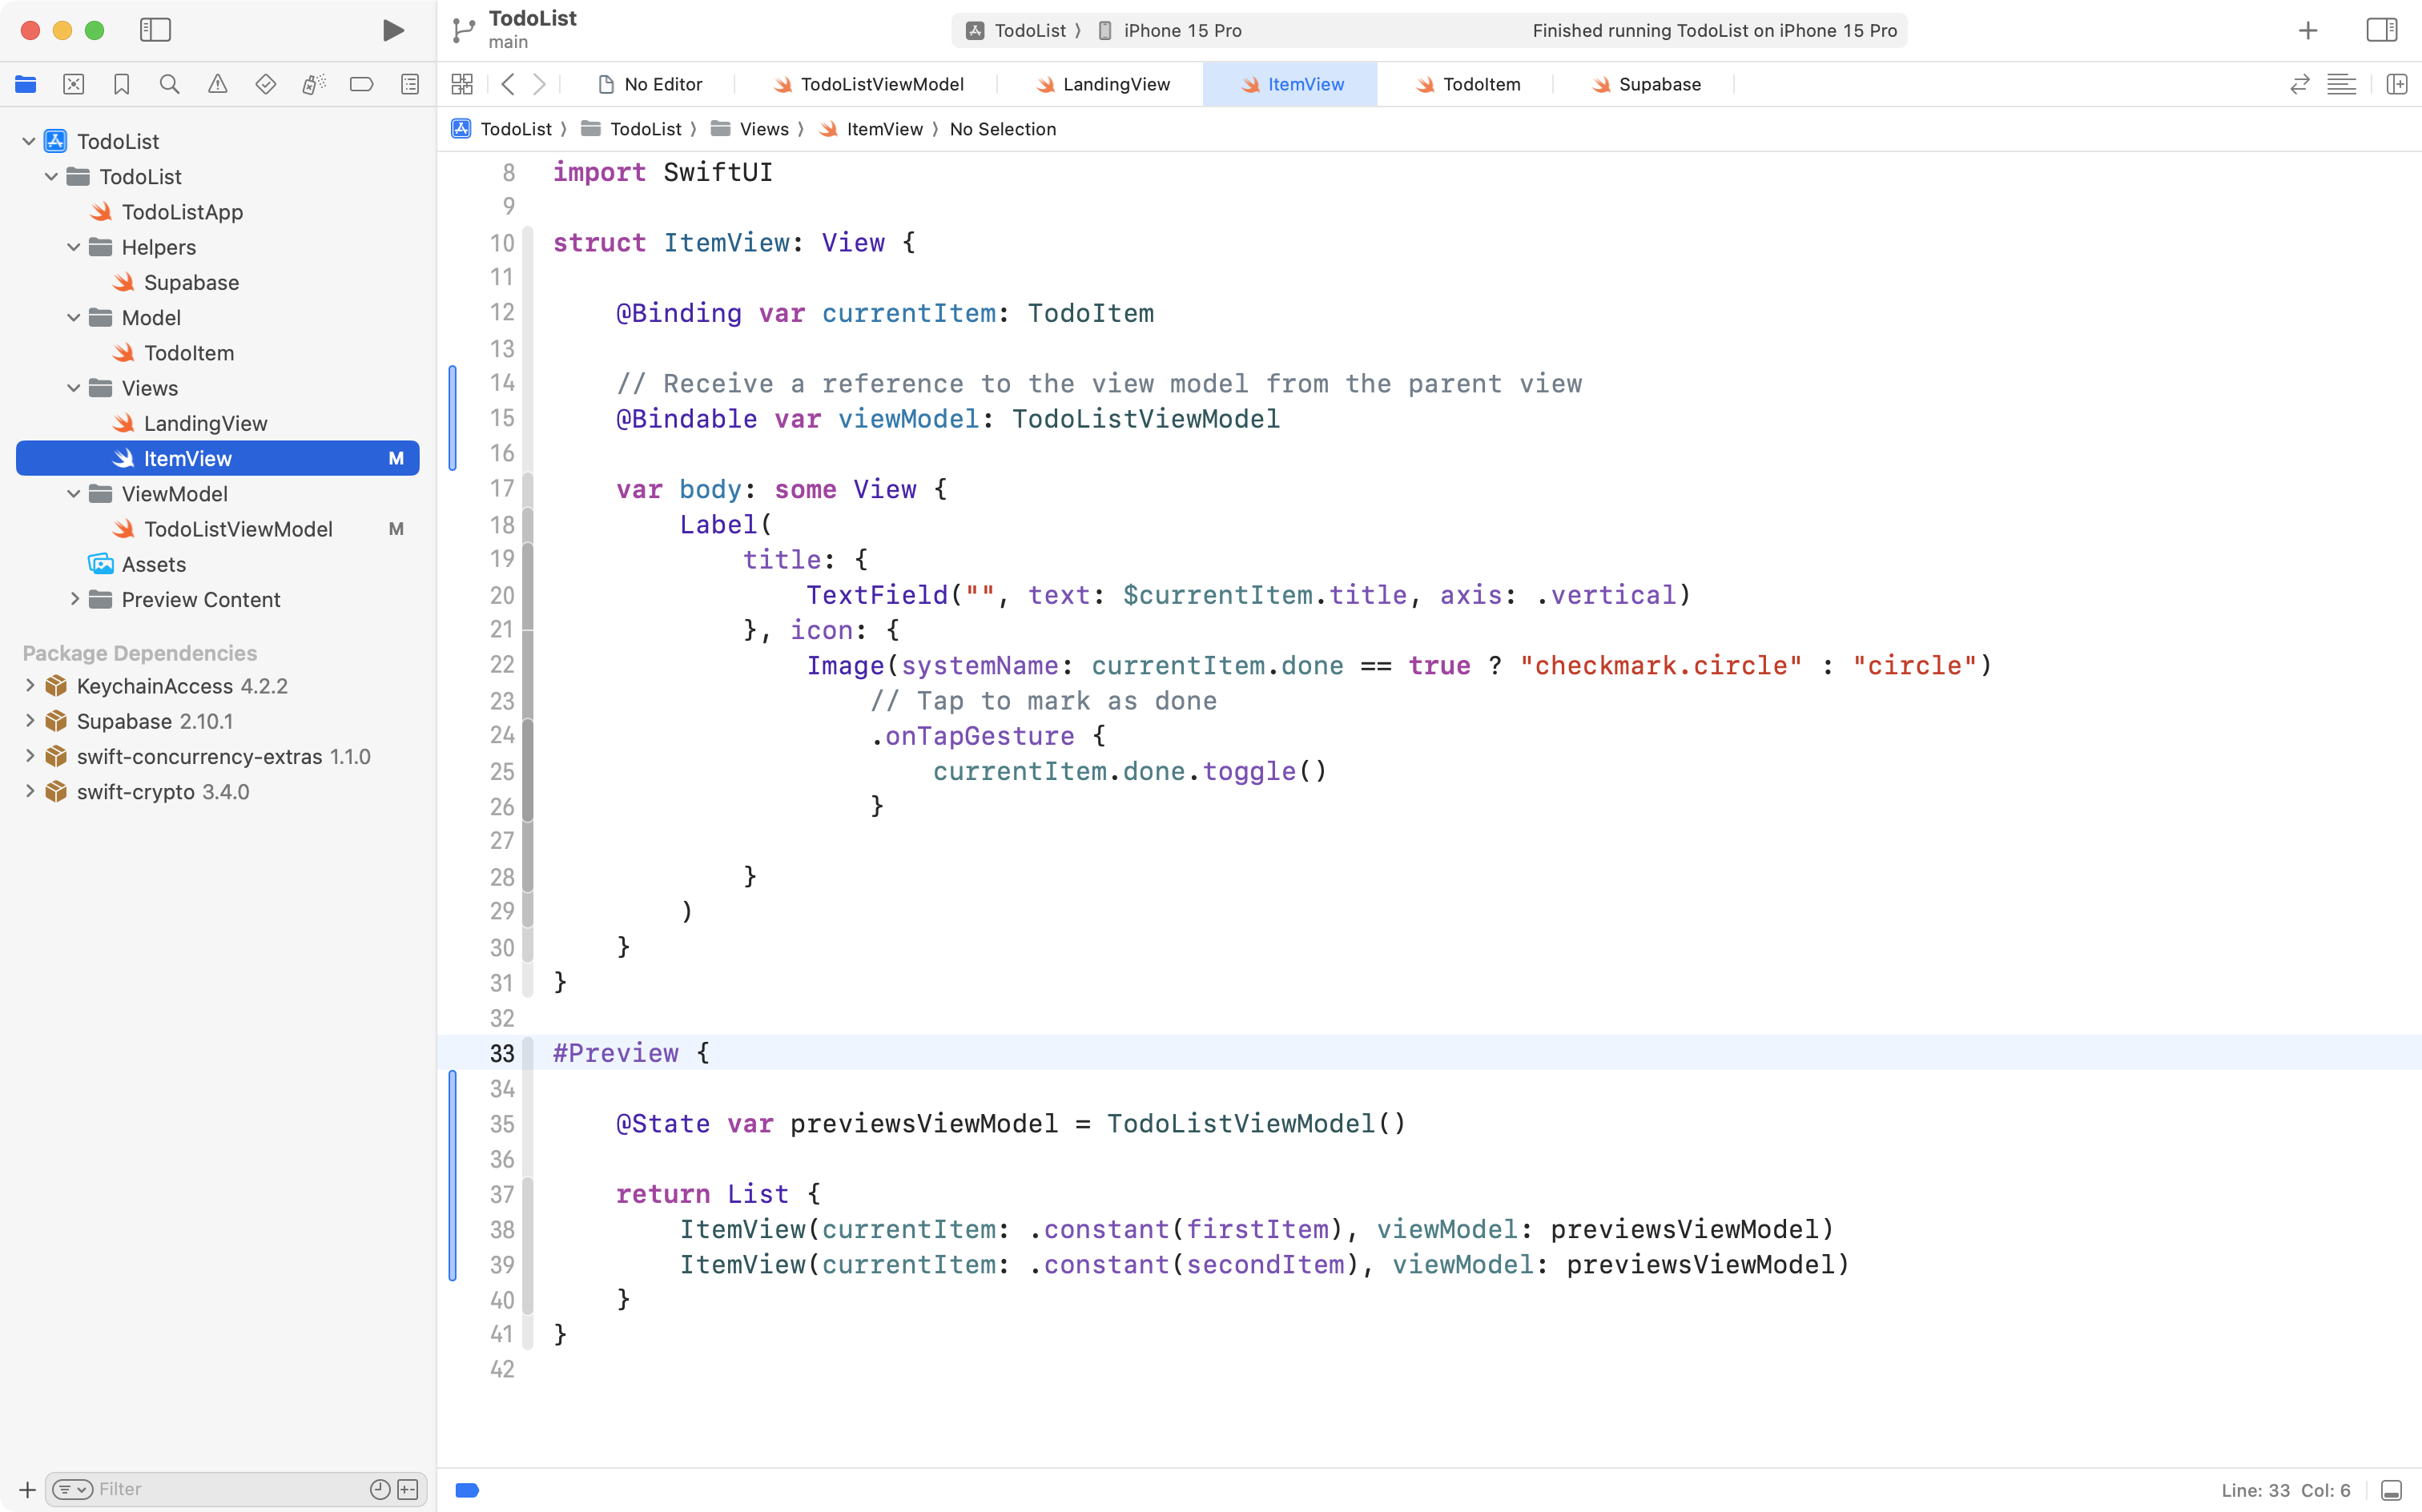
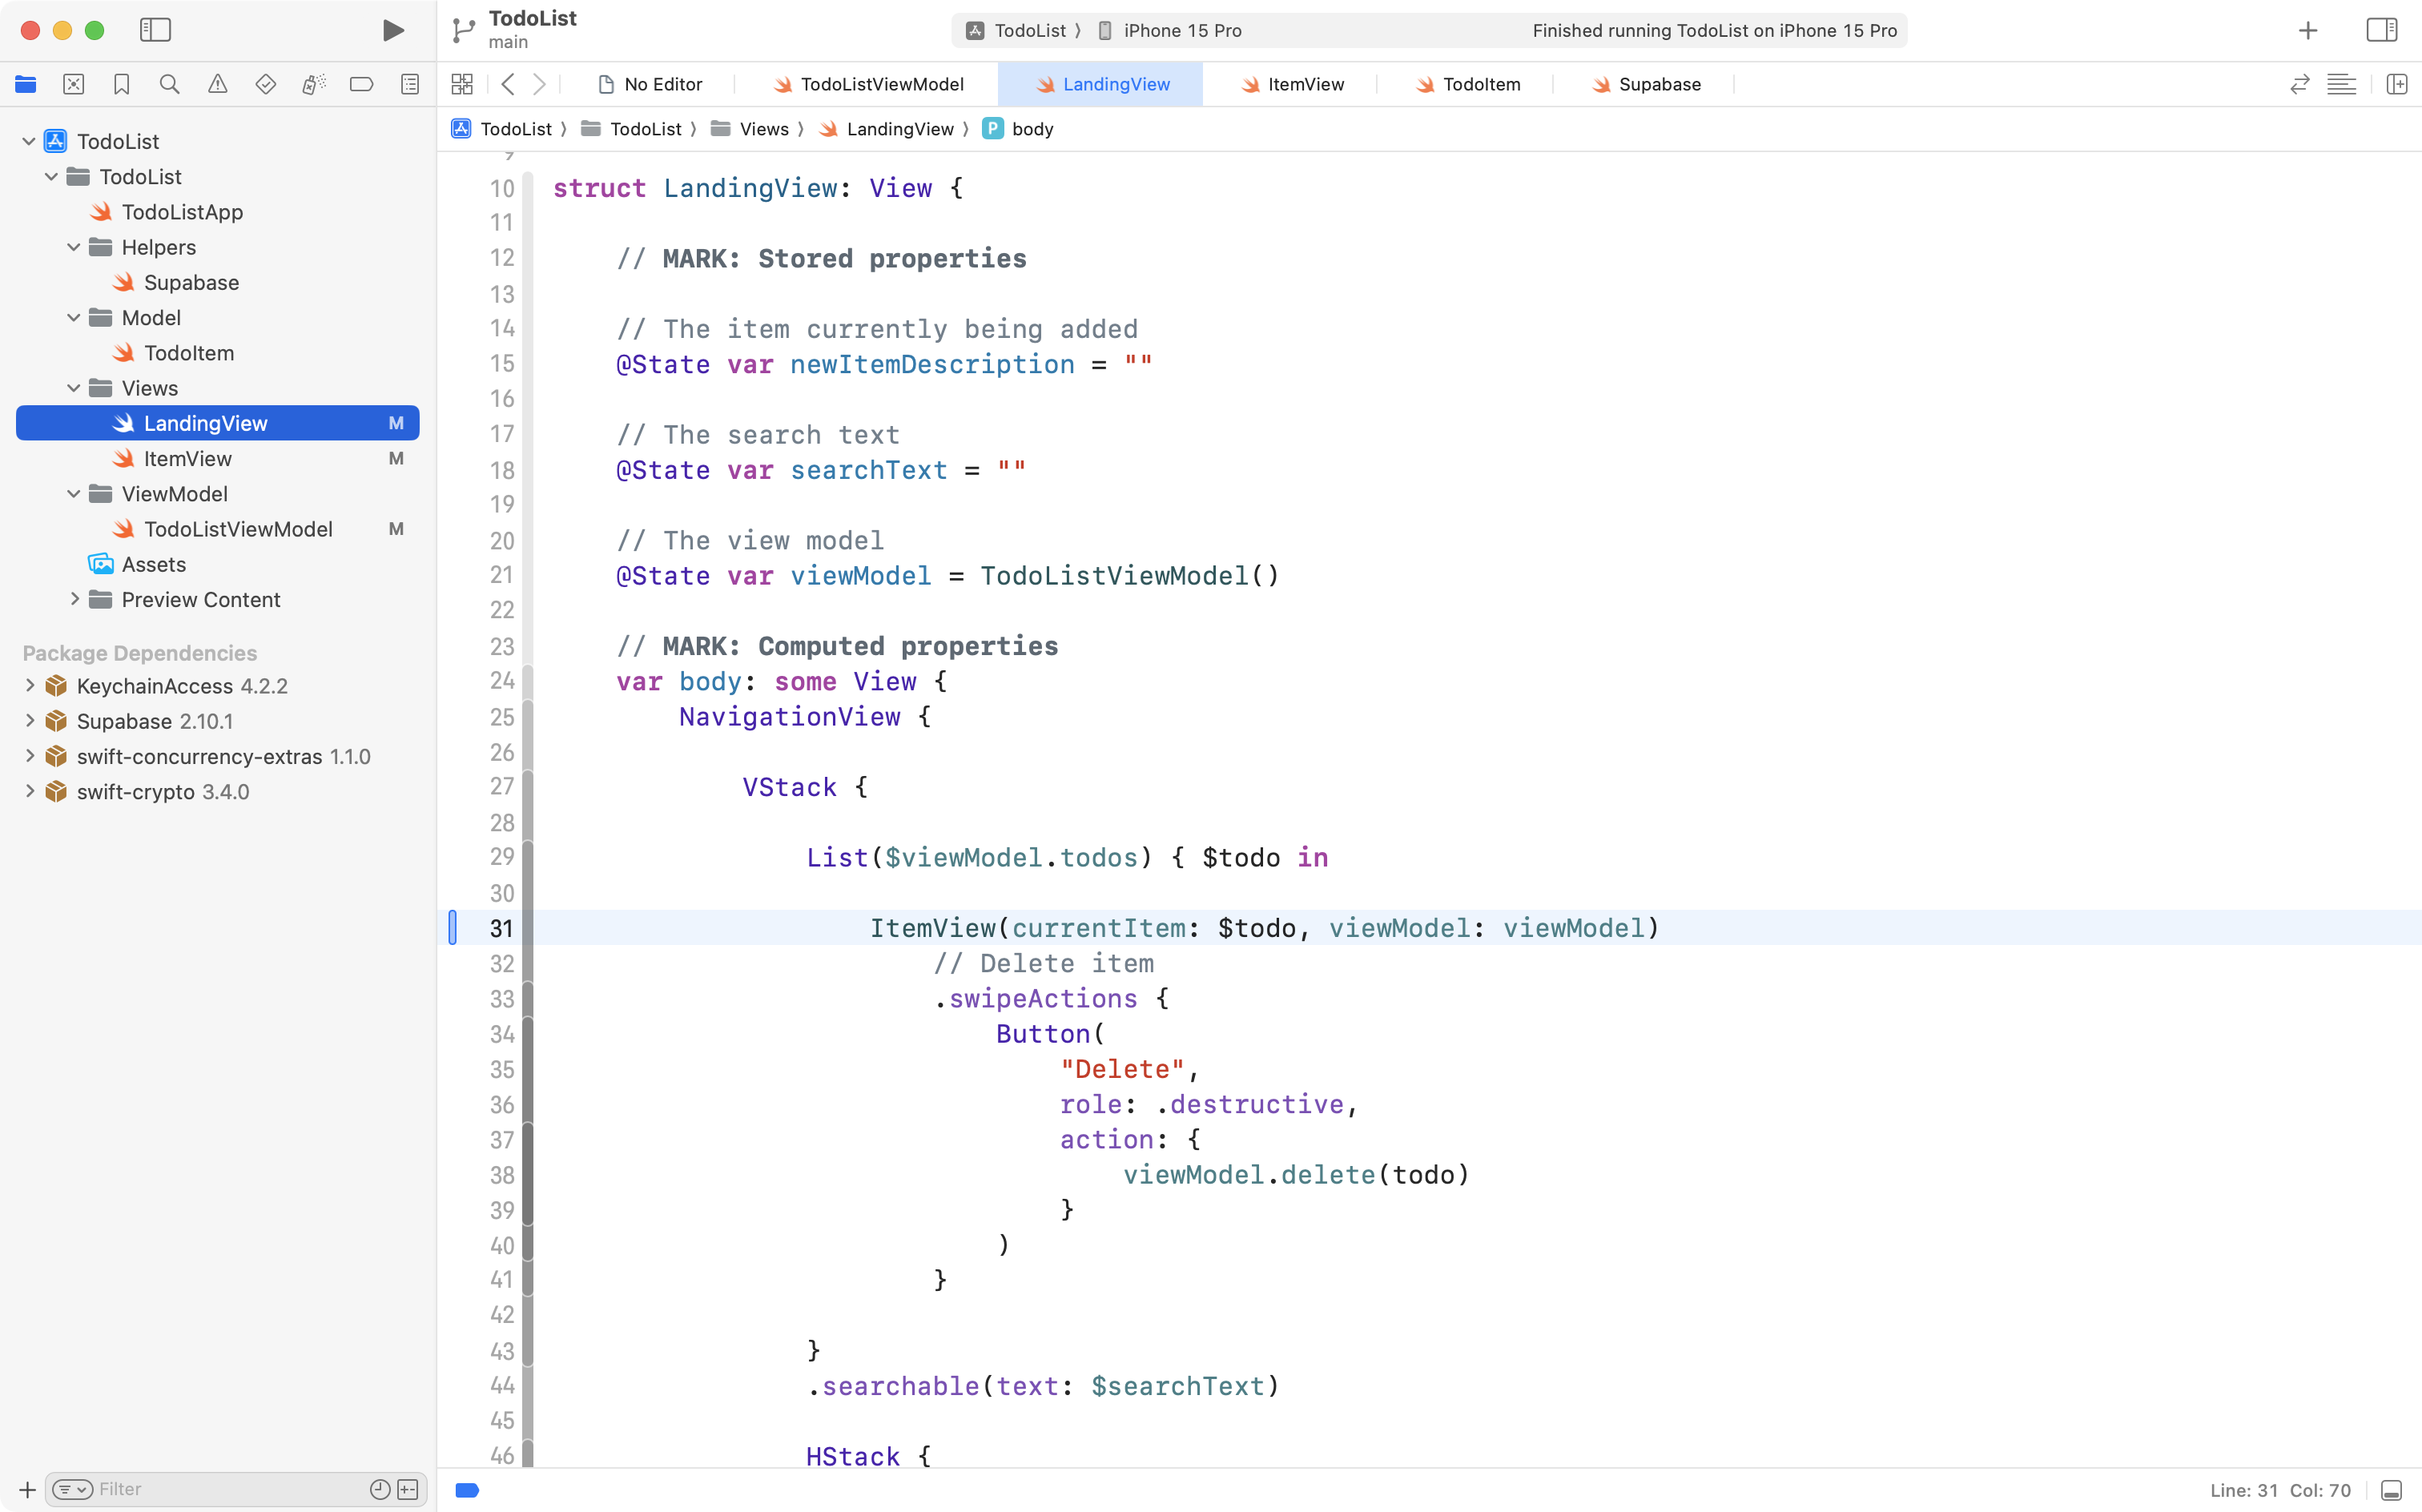
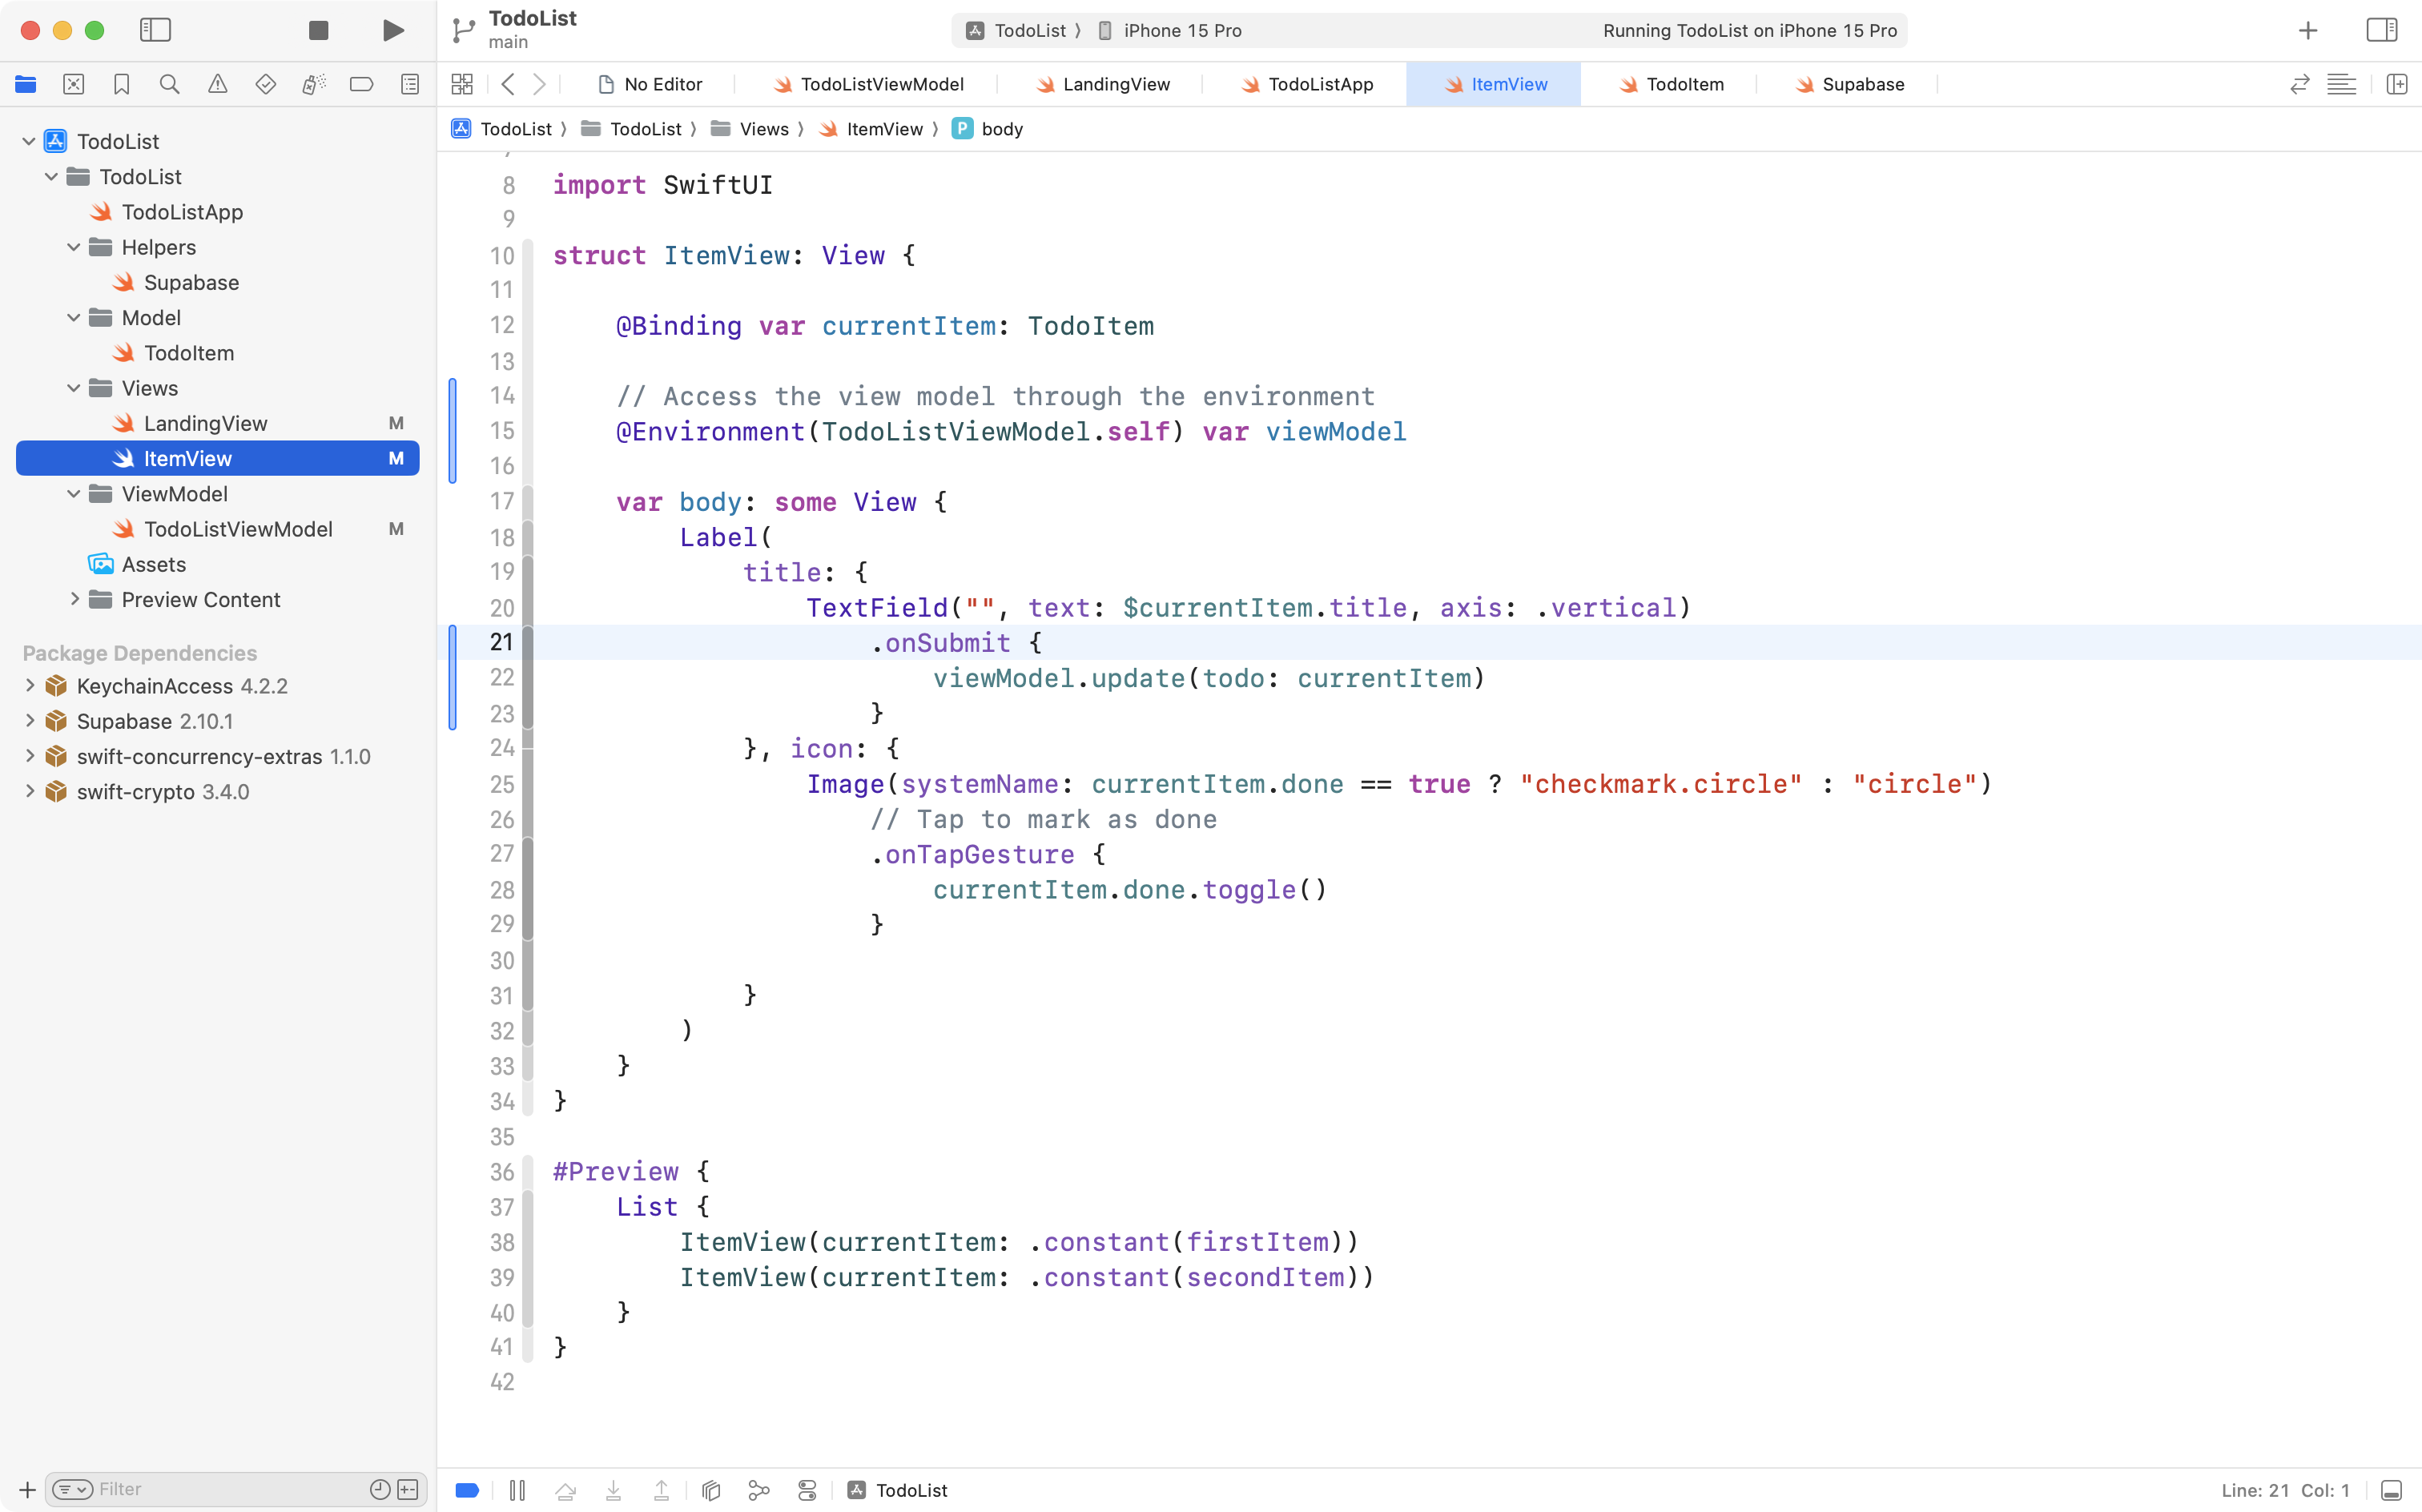
If we wanted to implement this approach, the first step is to adjust the subview, ItemView, like this:

Notice the new code on line 15.
viewModel is a stored property.
At all call sites for ItemView – where instances of ItemView are created – the new stored property adds another parameter for which an argument is expected to be provided.
That means adjusting the call sites for ItemView within it’s own preview as follows:
And then adjusting the call site from the parent view – see line 31:
When there are a very small number of subviews within an app, directly passing a reference using @Bindable is a reasonable approach.
TIP
You might be wondering – what is the difference between the property wrapper
@Bindingand the property wrapper we just used,@Bindable?
@Bindingis only used to access the source of truth for value types, like aString,Int,Bool, or a custom structure you have authored. For example,ItemViewuses@Bindingto access the current instance of a to-do item (see line 12 in the second screenshot above this note).
@Bindableis used to access the source of truth for reference types that conform to@Observable. TheTodoListViewModelclass is an example of this. To access the source of truth for the view model from the parent view, we use@Bindablehere in the subview,ItemView(see line 15 in the screenshot above).In short,
@Bindableis only used with@Observable– you can remember this because they both end with “able”.
Using @Environment
The second option for accessing a view model from views within an app is to do so through the environment.
TIP
We first learned about the environment in part 3 of this tutorial series, when using SwiftData to persist information.
If you insert the view model instance into the environment from a root view, all subviews will have access to it through the environment.
In general, that looks like this:
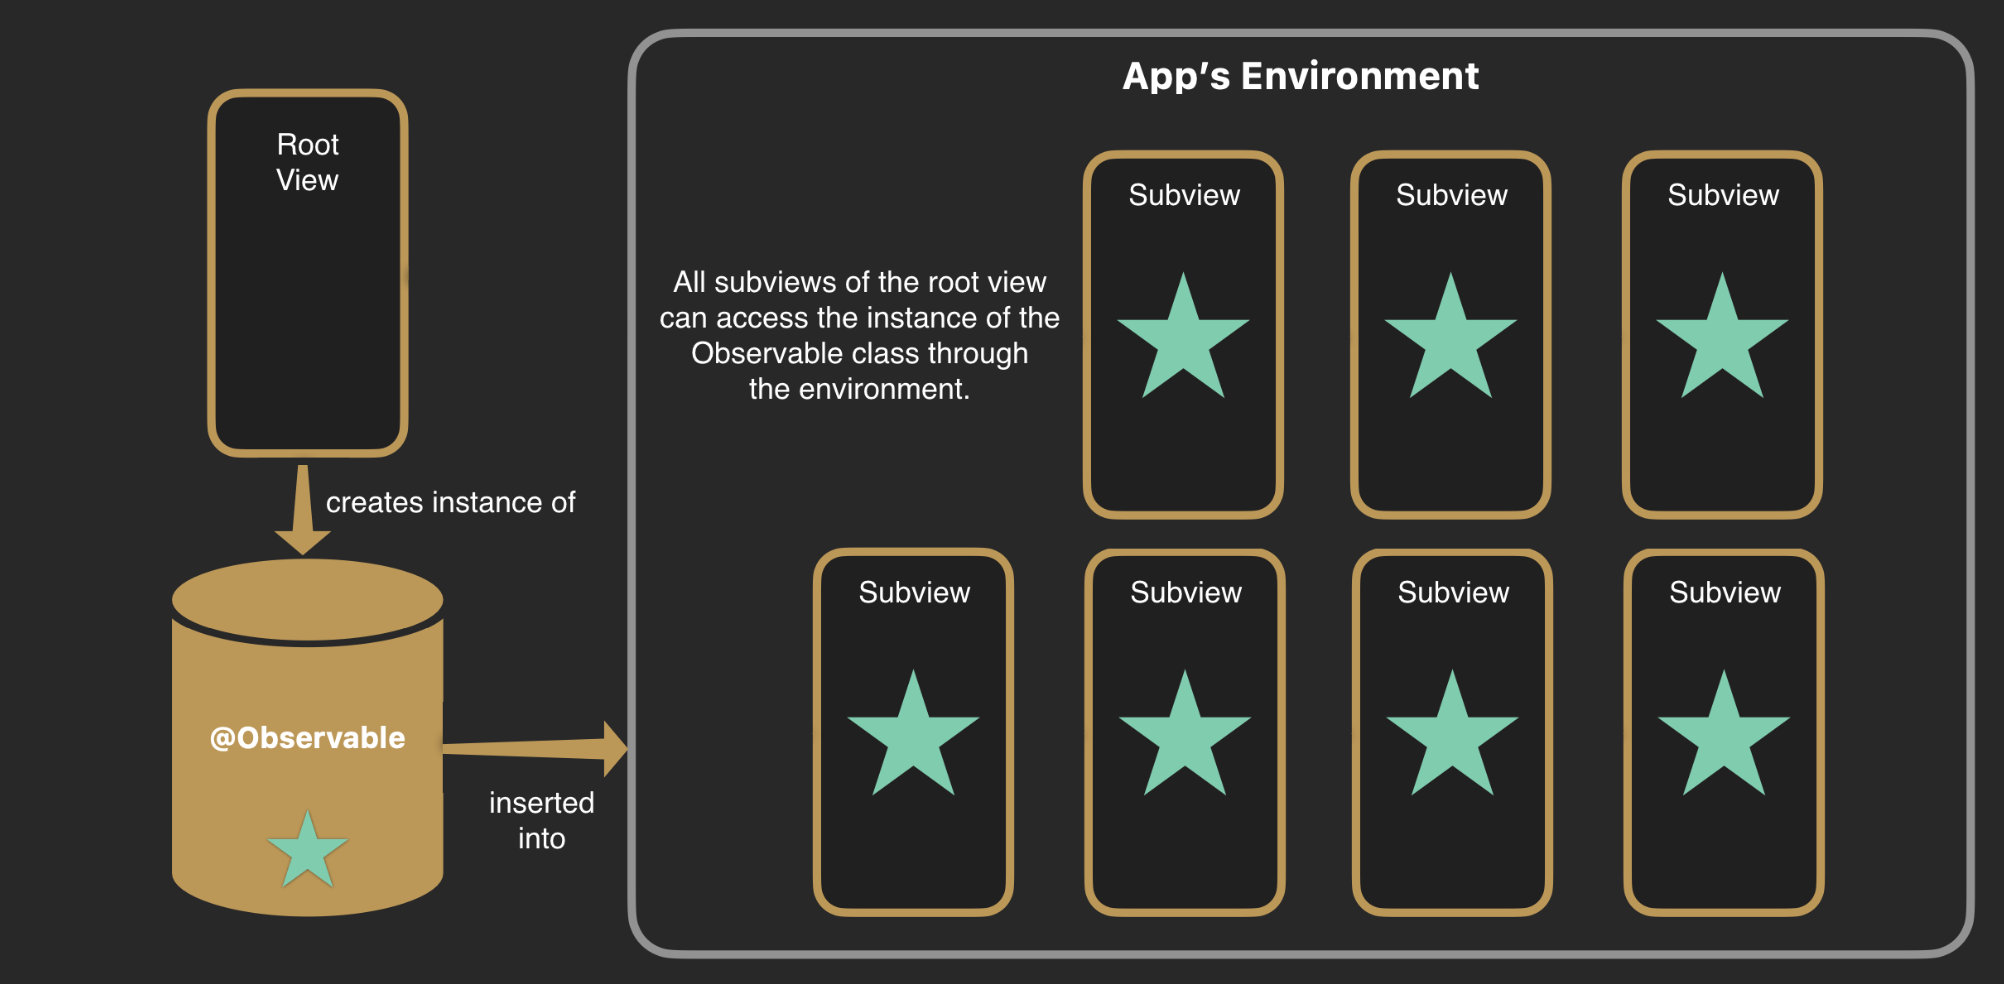
In this app in particular, that looks like this:
flowchart LR
subgraph aep[" "]
	direction TB
	id1["<b>LandingView</b>"]
	id2[("<b>TodoListViewModel</b>\n<em>Observable class</em>")]
end
subgraph ae["<b>App's Environment</b>"]
	direction LR
	id3["<b>ItemView</b>"]
	id4["<b>ItemView</b>"]
	id5["<b>ItemView</b>"]
	id6["<b>ItemView</b>"]
	id7["<b>ItemView</b>"]
end
id1-.creates instance of.->id2
aep-- inserted into -->ae
id3~~~id4
id4~~~id5
id6~~~id7
id3~~~|All subviews\ncan access\nthe view model|id3
NOTE
The number of actual
ItemViewinstances will vary, of course, depending on how many to-do items there currently are.
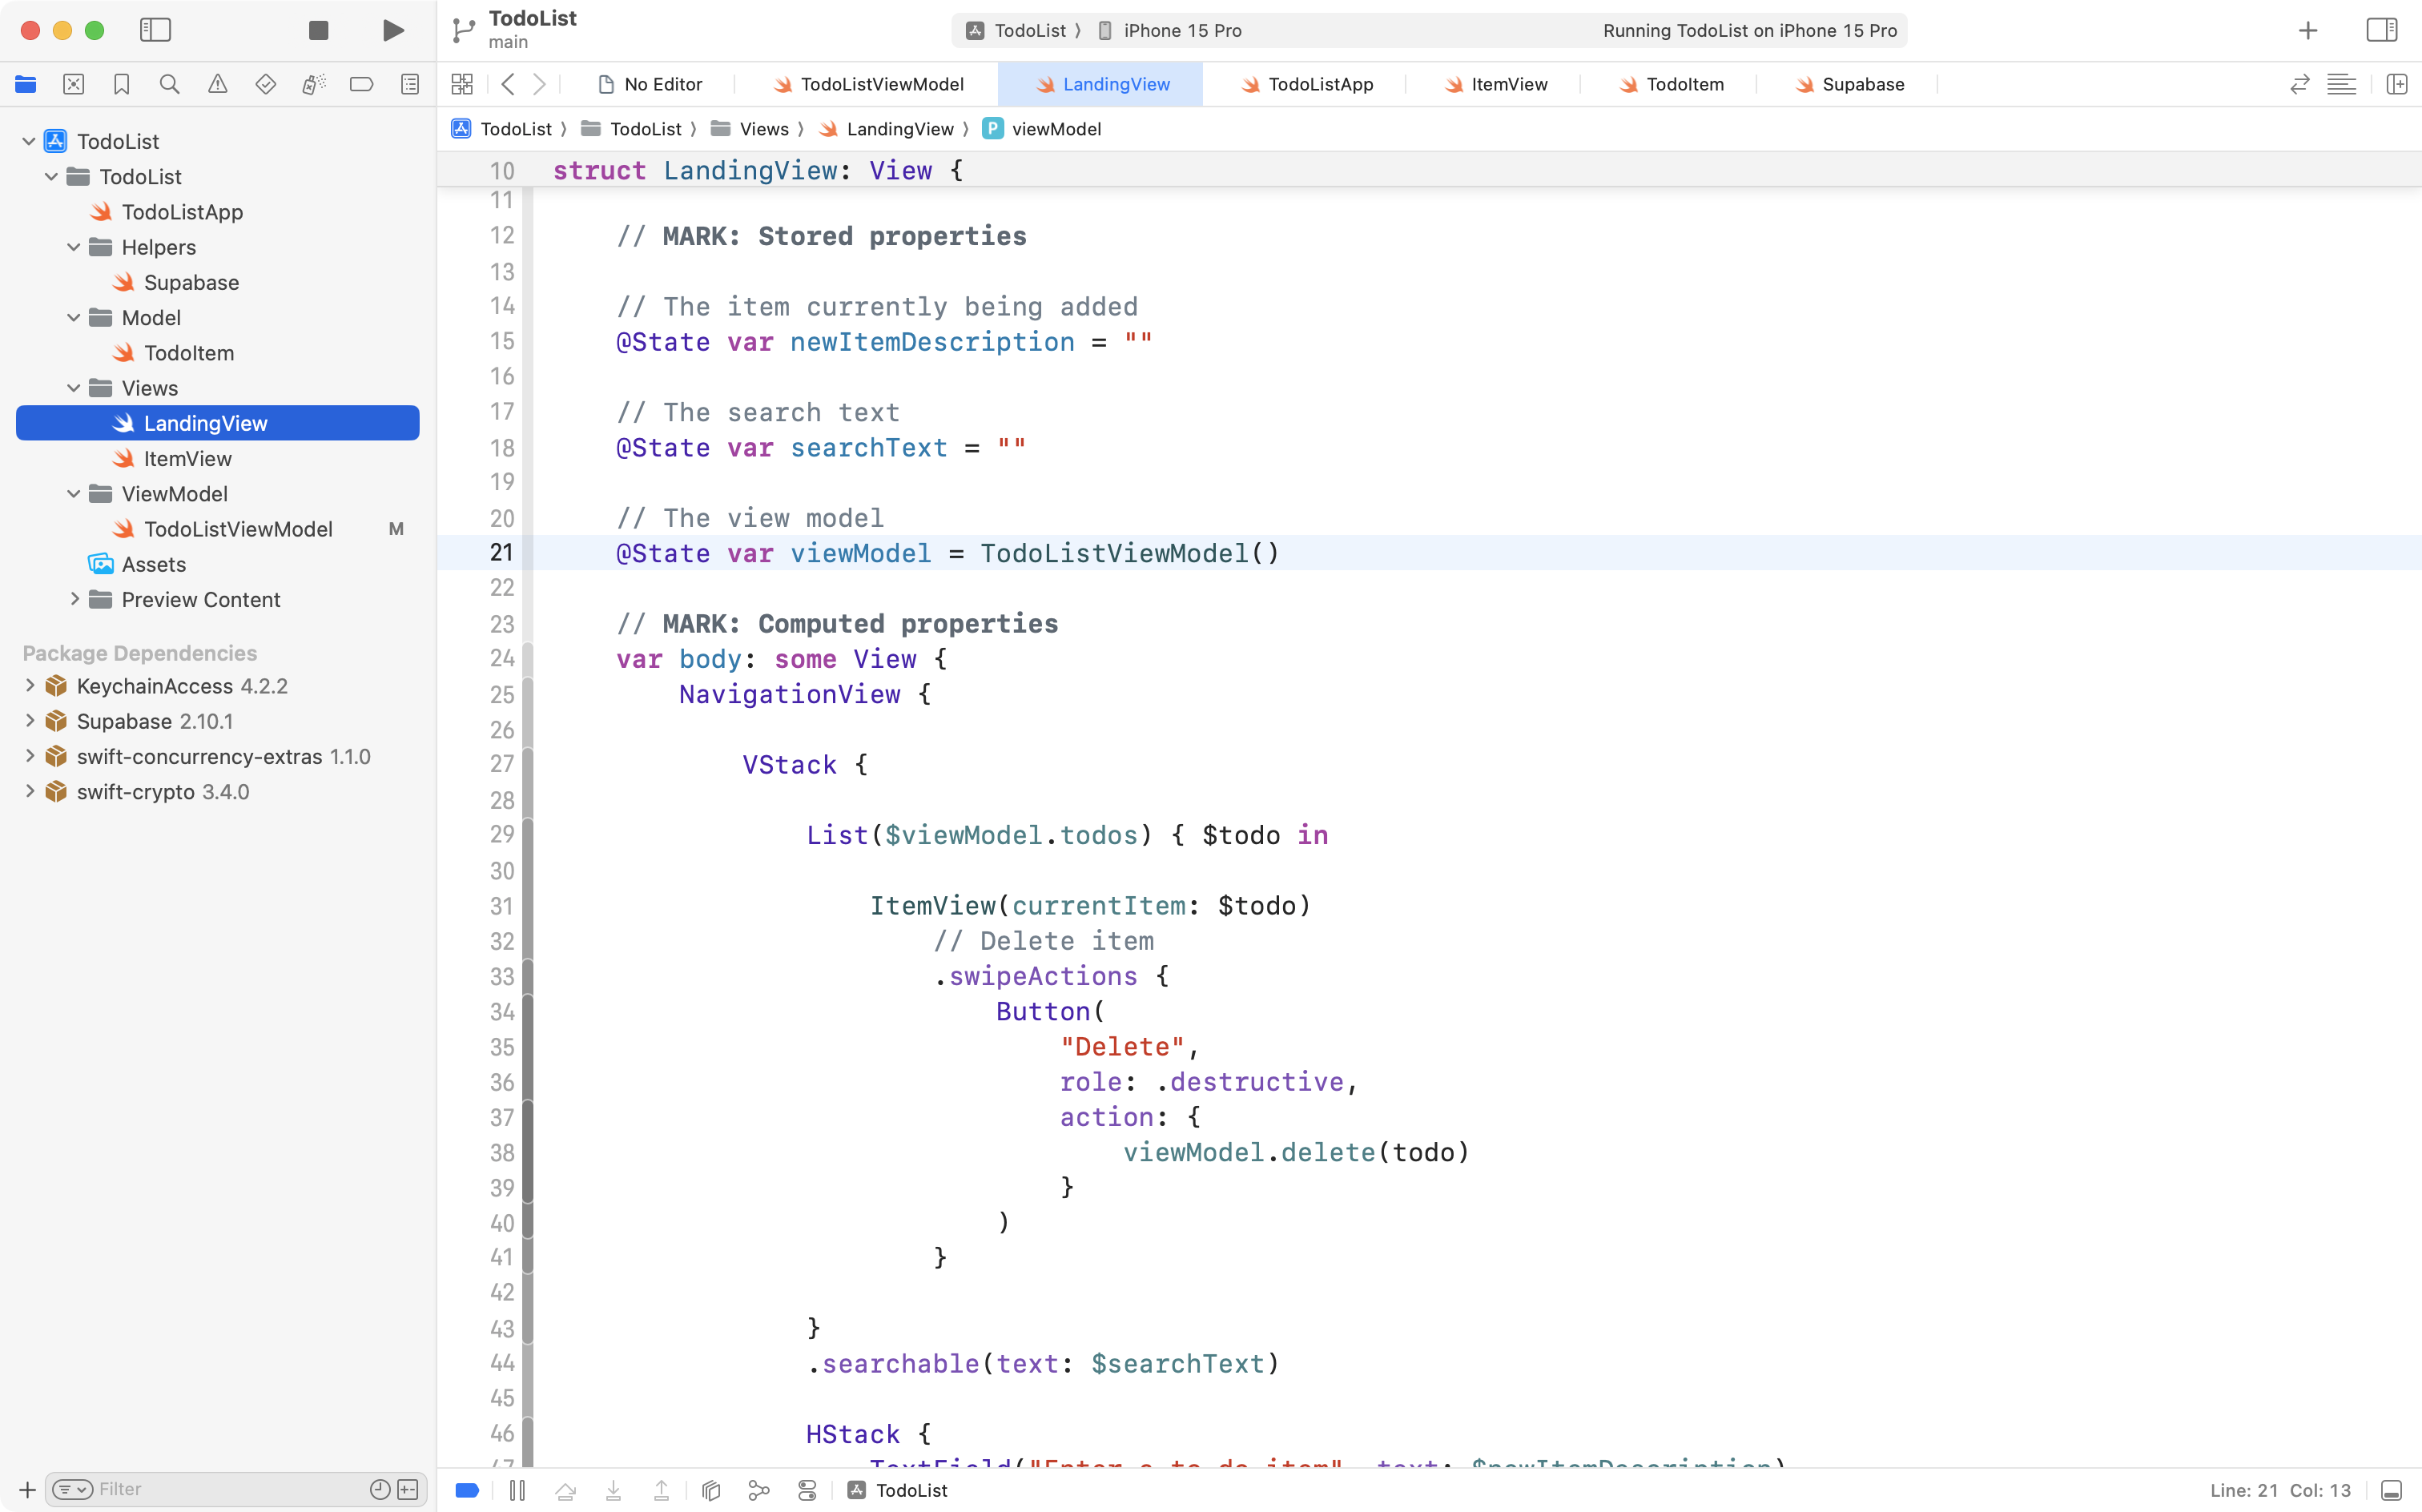
In the to-do list app, we can put the view model into the environment, and access it from subviews, as follows.
First, note that as shown above in the diagram, LandingView already creates the source of truth, our single instance of the view model, on line 21:
Now, use code folding to fold up the NavigationView inside the body property, like this:
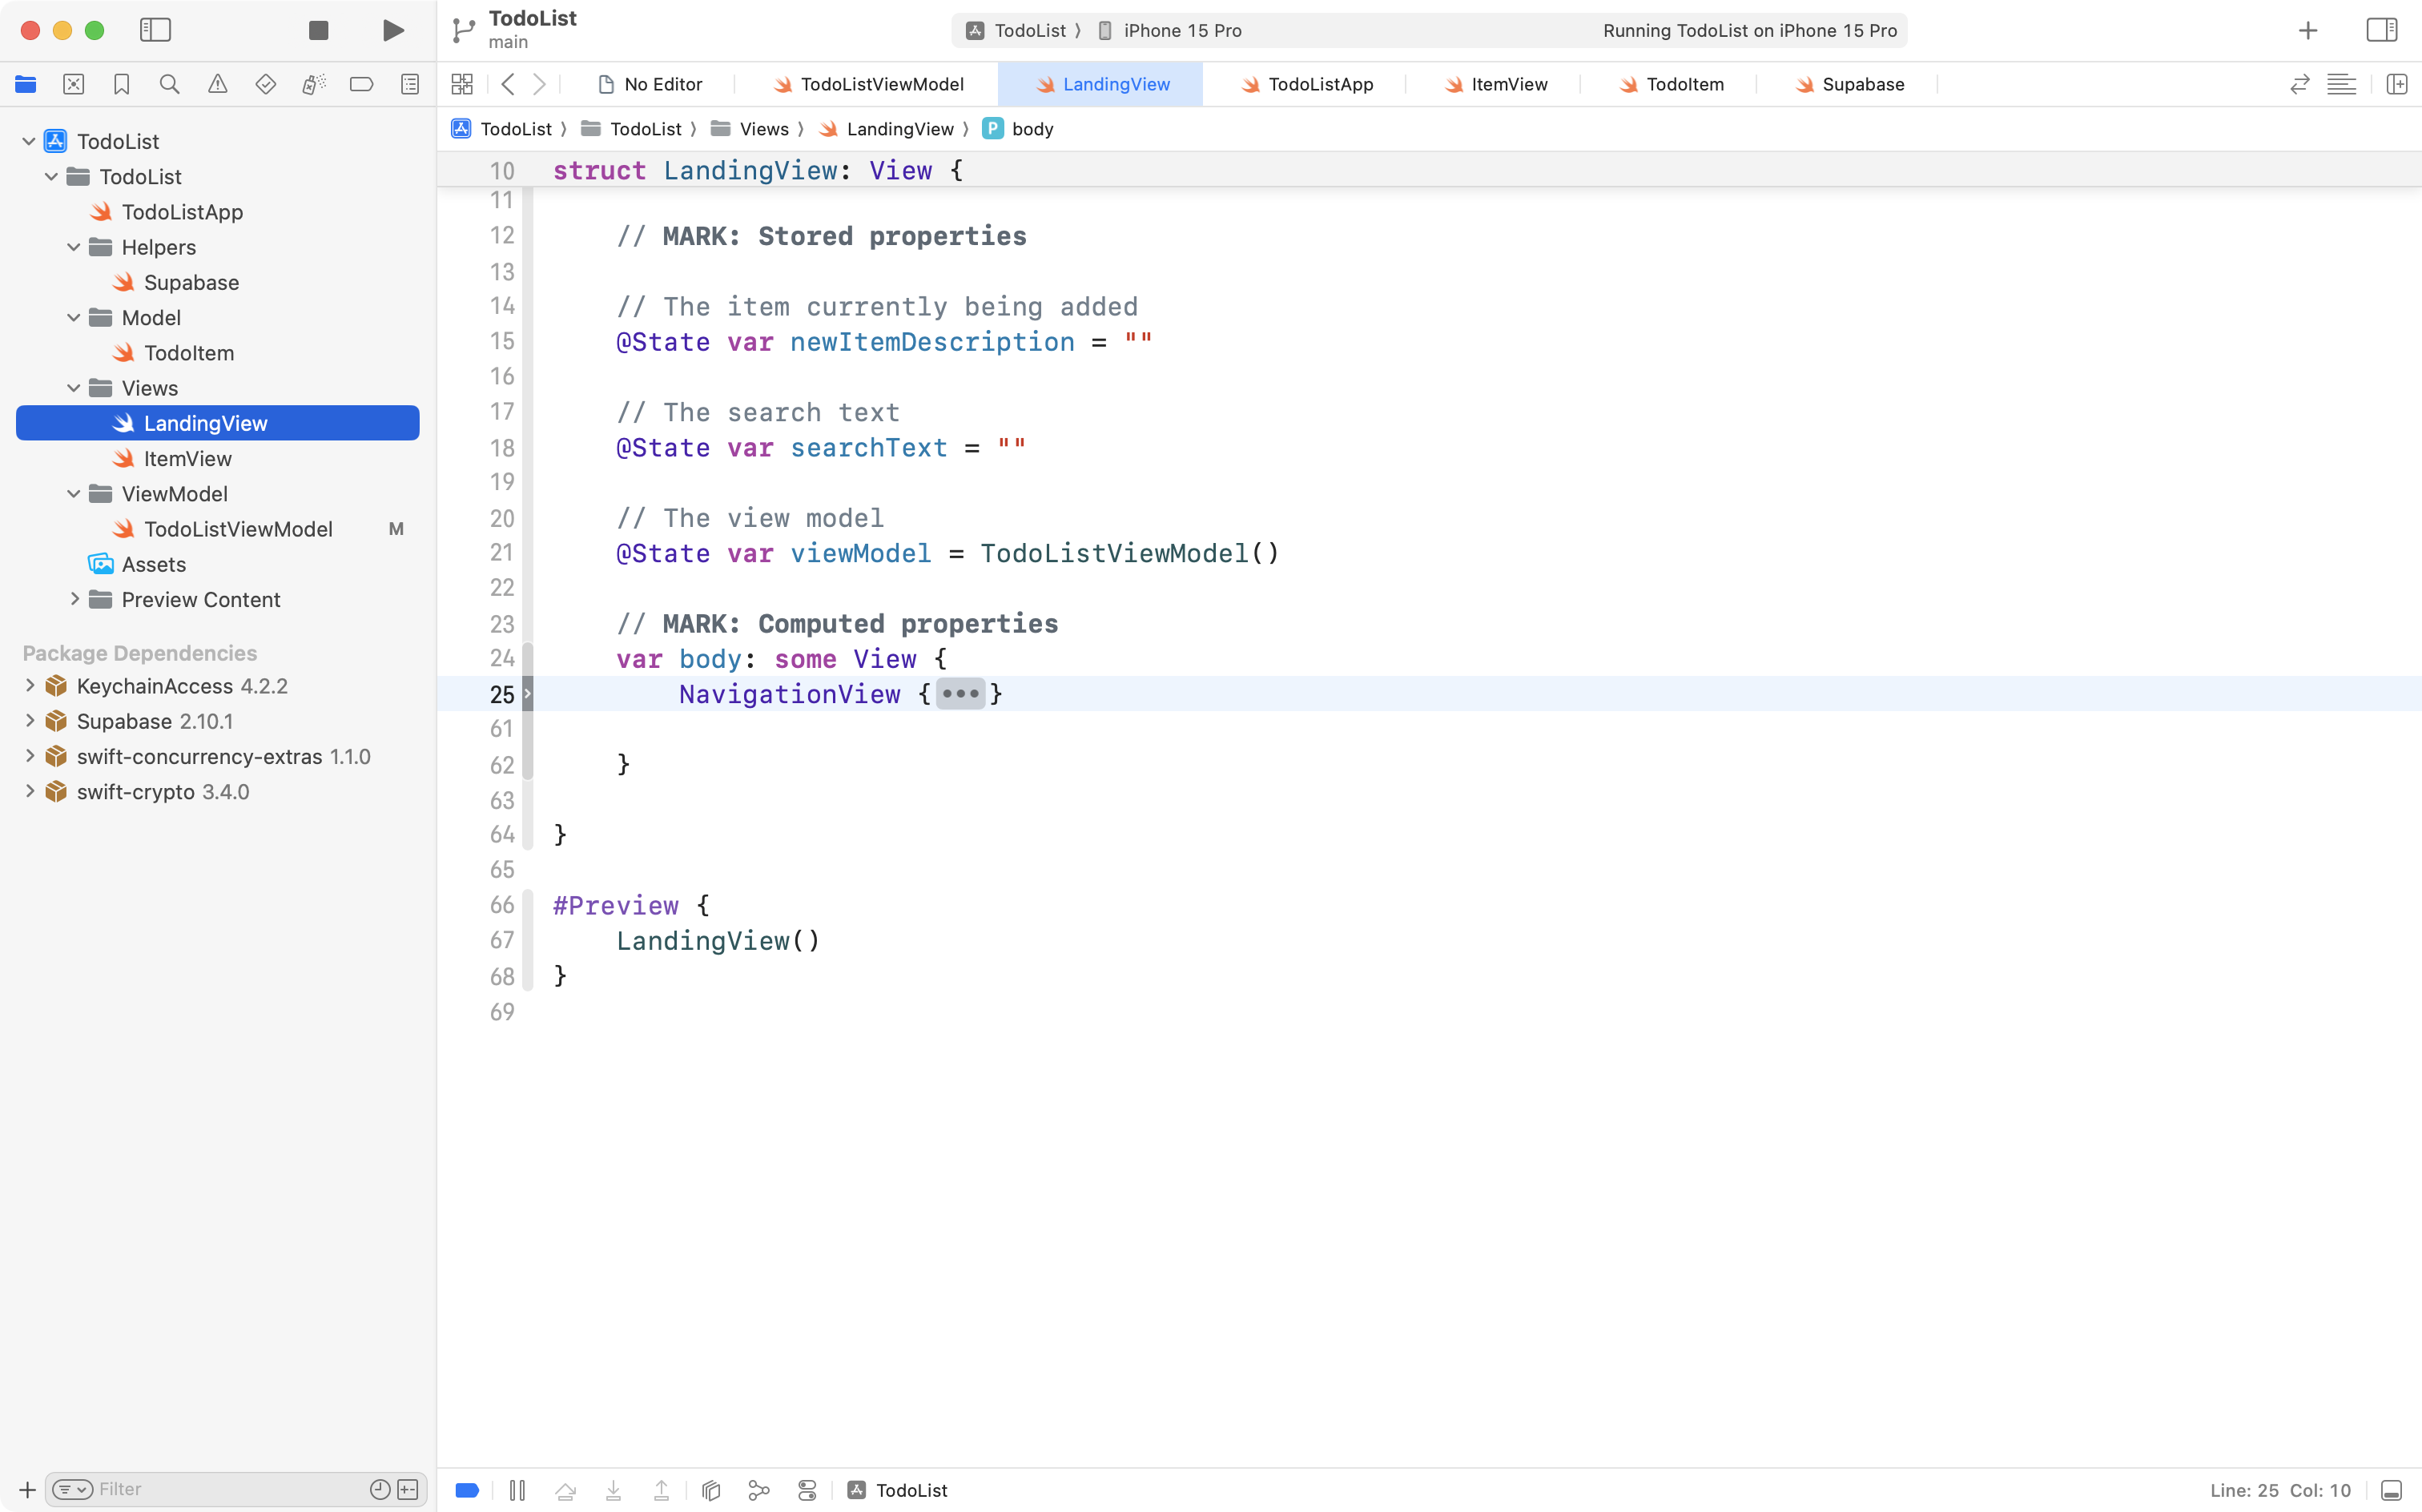
Insert the view model instance into the environment by attaching this view modifier to the NavigationView:

This means that any view created within the scope of the NavigationView can reach into the environment and access the instance of the view model. Note that this includes ItemView.
Now, switch to ItemView, and add this code to reach into the environment and gain access to the view model:

The advantage of accessing the view model through the environment is that call sites do not need to be updated. This can be convenient when there are many different subviews within an app that need access to the view model.
Actually use the update function
Before continuing, choose which of the options above – using @Bindable or @Environment – you want to employ. Make the necessary changes.
Now that you have access to the view model inside ItemView, you need to use it.
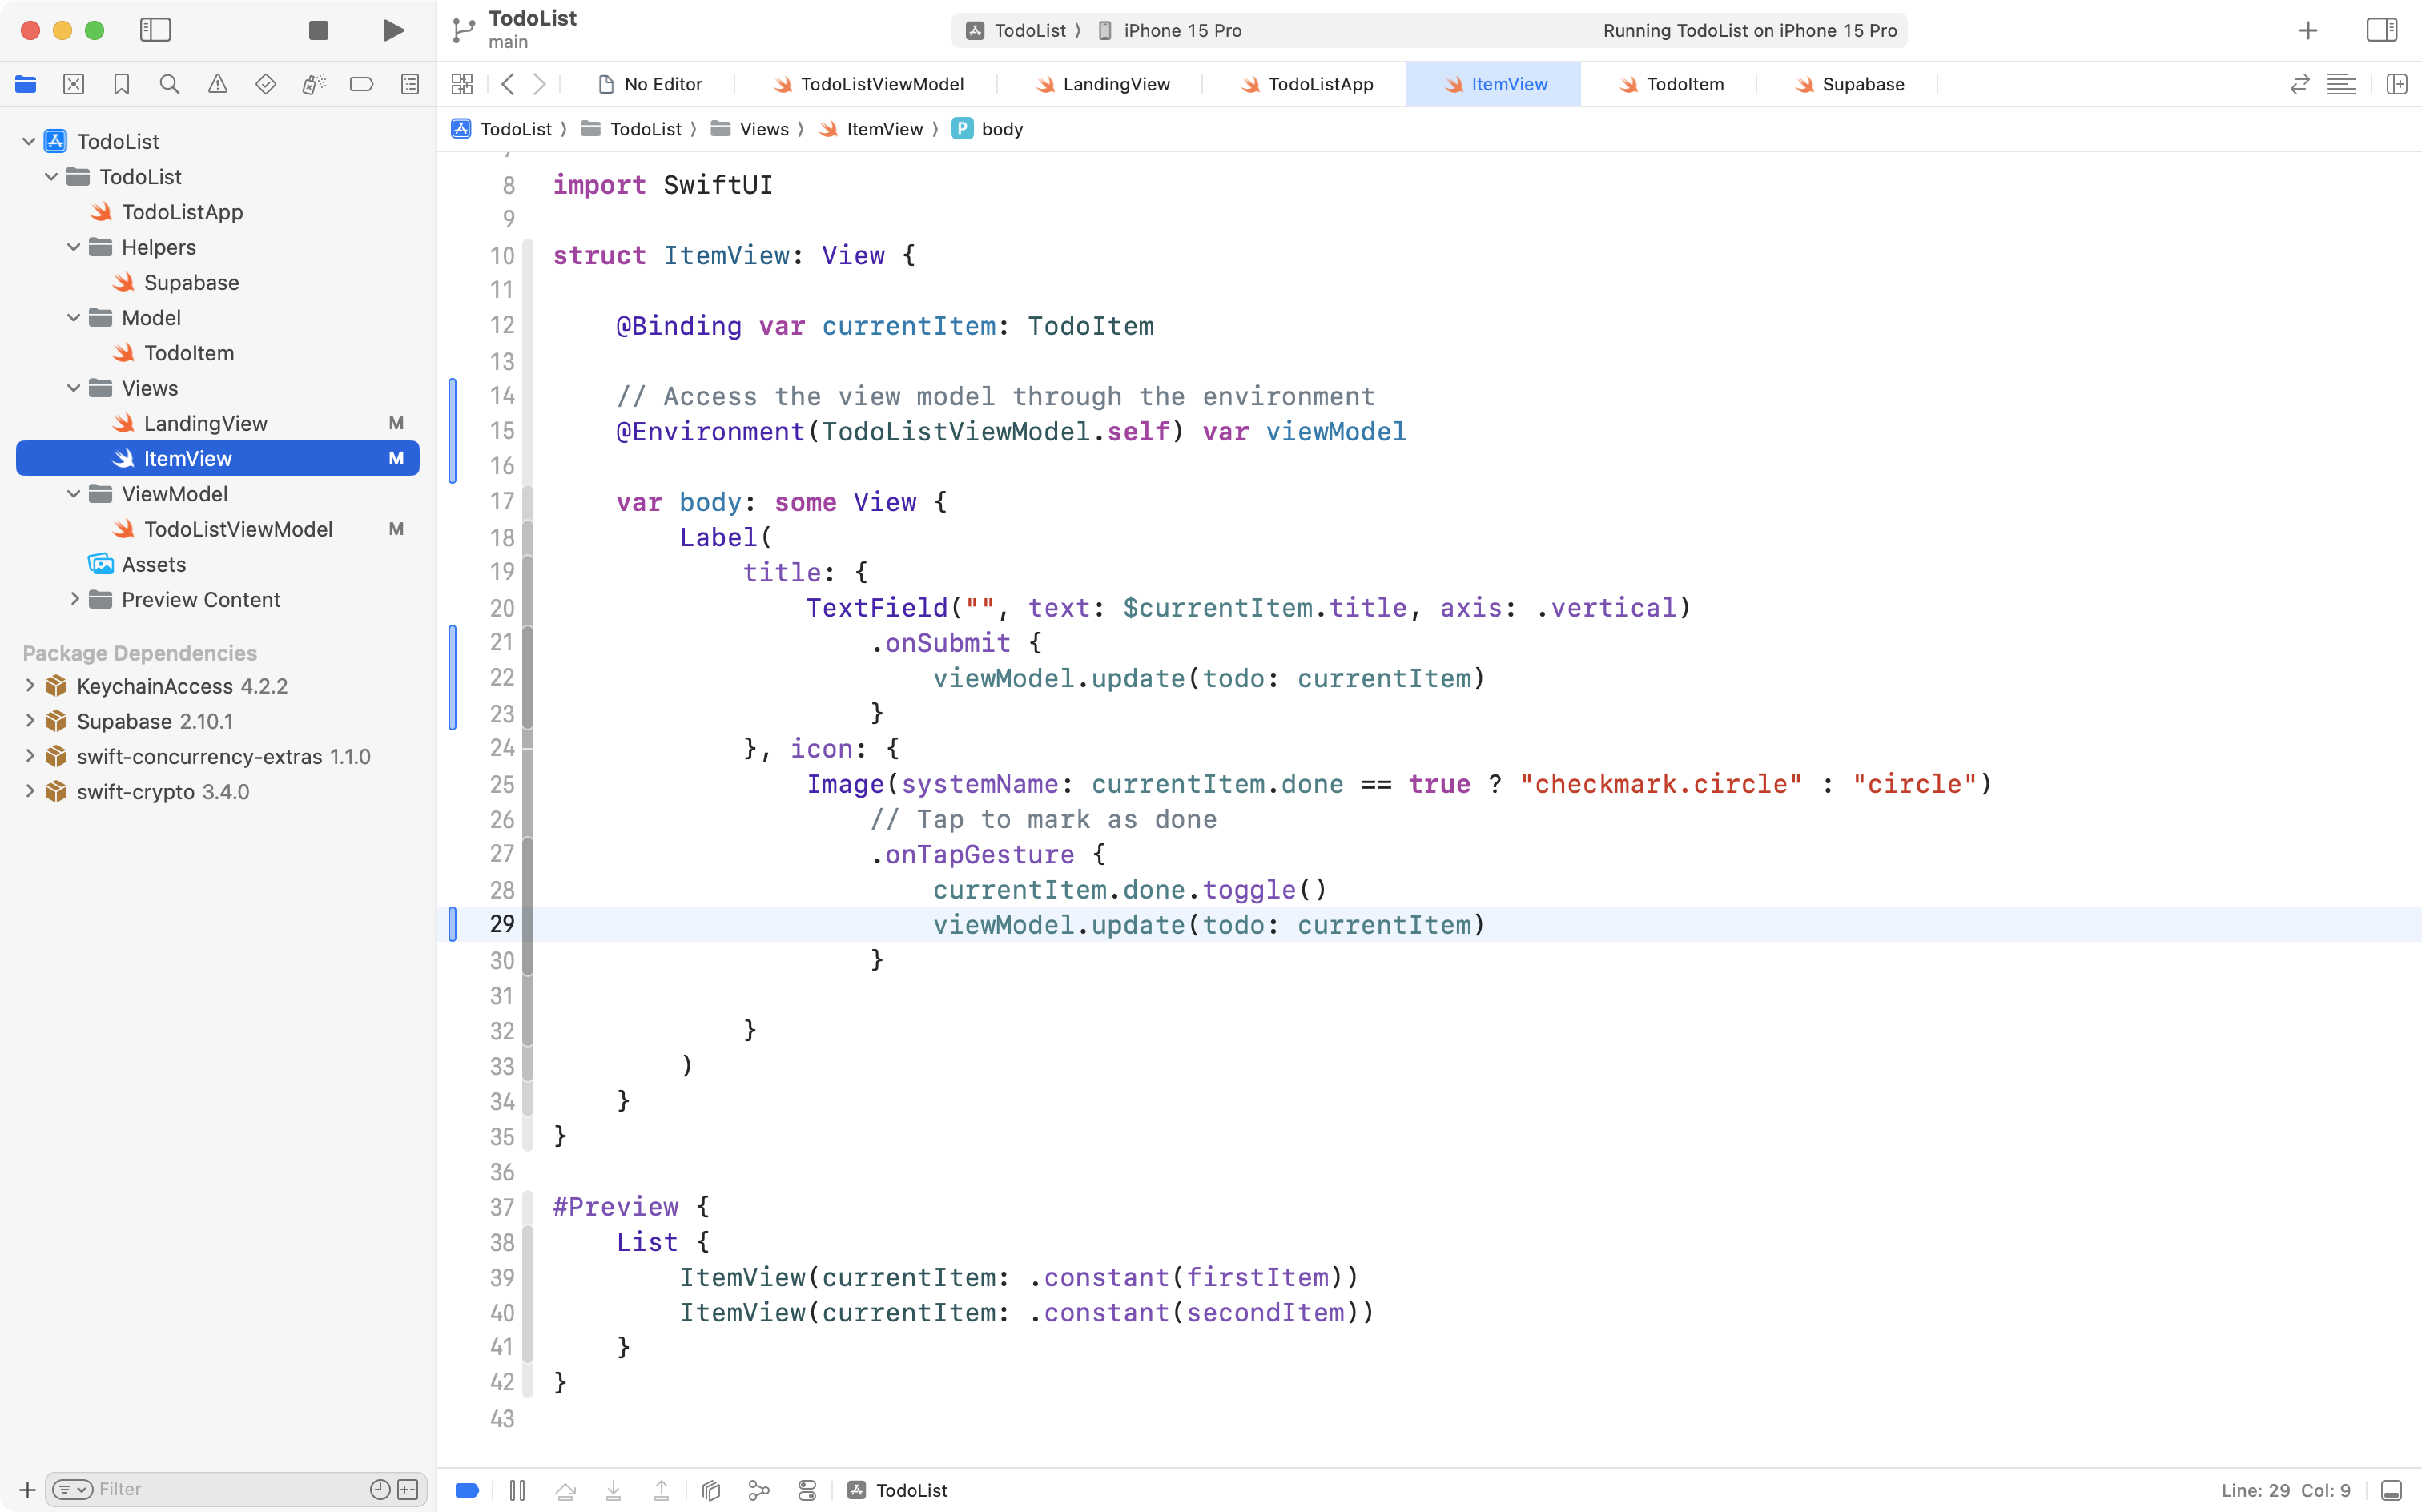
When the text field is modified and changes are submitted by the user, the text field must call the update function on the view model to ensure changes are persisted. Make this change, shown on lines 21 to 23 here:
Finally, when the completion status of a to-do item changes, we must also call the update function on the view model. Make this final change, shown on line 29 below:
Now try running your app. Make changes to the completion status or the text of to-do items. Quit the app and re-open it. Notice that changes are persisted!
This is key progress, so please commit and push your work using this message:
Added an update function and made view model accessible to subviews so that changes to to-do items are persisted.
Fix sort order
When you tested the last set of changes, you might have noticed that the order of to-do items changed.
This can be fixed very easily, by specifying a sort order when refreshing the list of to-do items. We will sort the to-do items by the id value assigned to them. As such, to-do items are sorted in the order they were created.
This is equivalent to the following SQL statement:
SELECT *
FROM todos
ORDER BY id ASC
Switch to the view model and add a single line of code to the getTodos function:
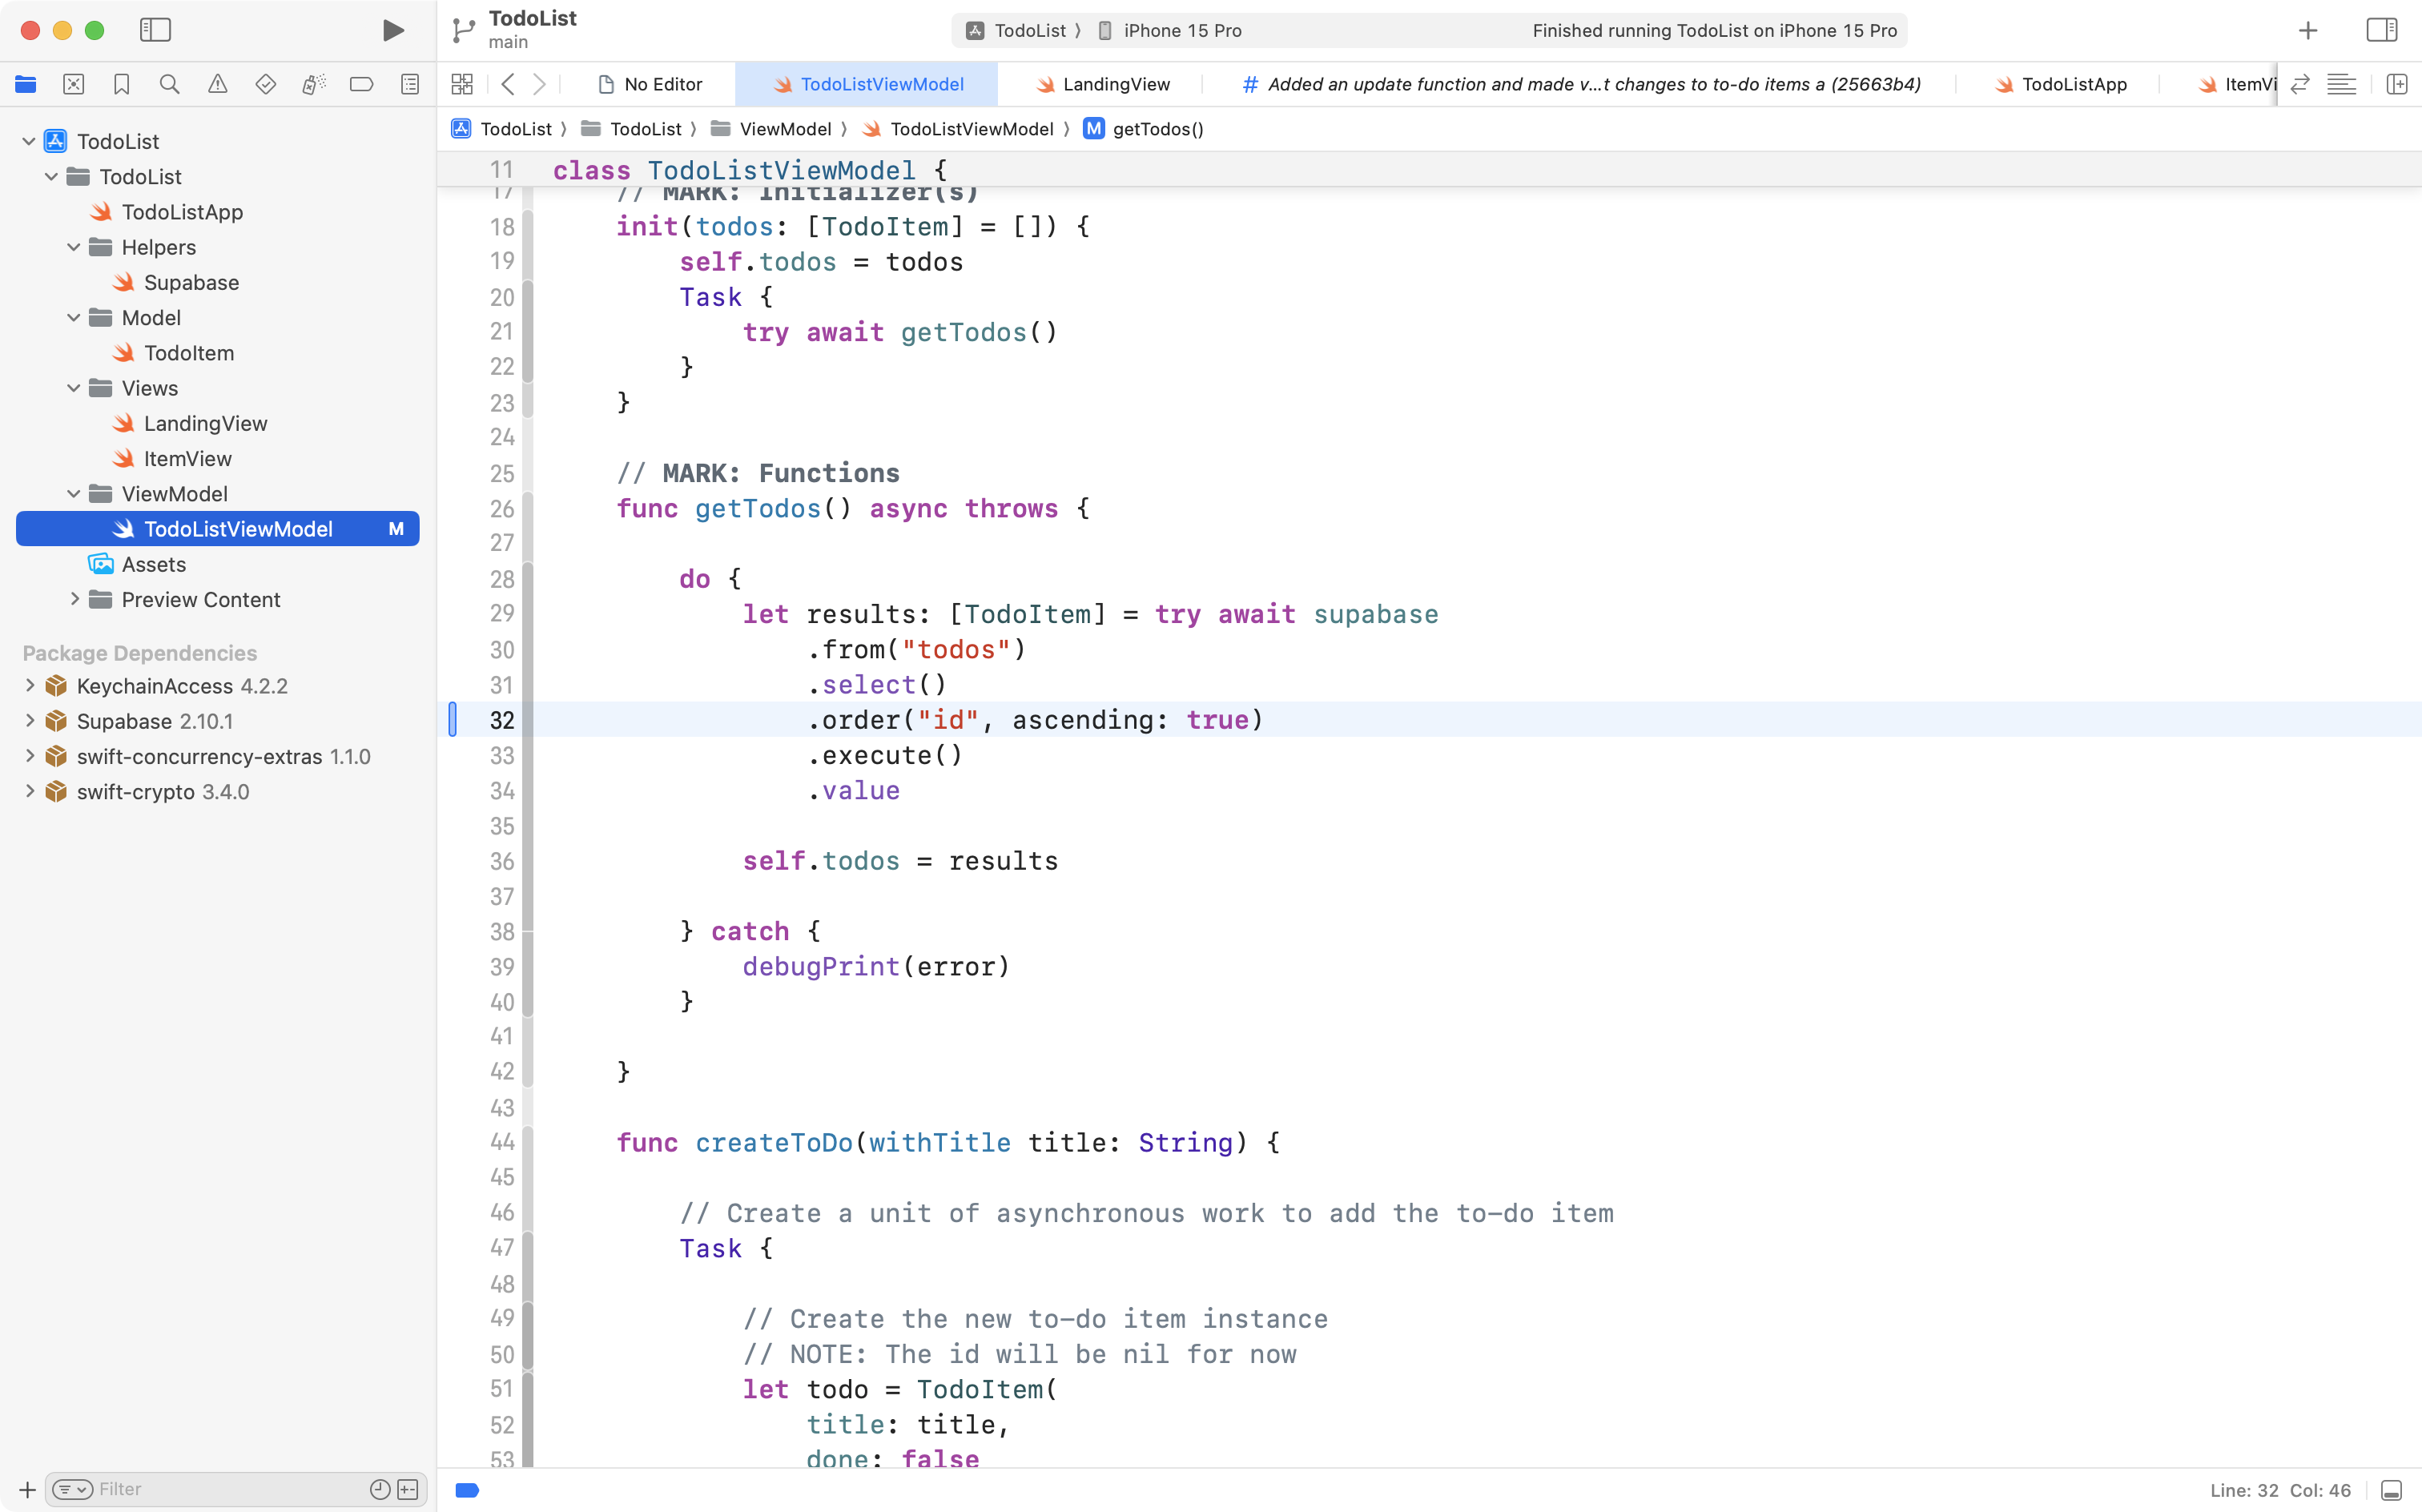
Now run the app and make changes to the to-do list items. Note that the order of the to-do items does not change.
Commit and push your work with this message:
Specified the sort order so that to-do item positions in the list do not change when to-do items are modified.