Introduction to Interactive Apps
In this lesson you will learn how to build a simple interactive application using SwiftUI.
A small extension to what you already know about structures is all that you need to make an interactive app.
Structures
You have learned how to author structures that describe a variety of things we interact with each day.
Recap of syntax
Here are some examples of structures…
A person:
struct Person {

	let name: String
	var heightInCentimetres: Double

	var heightInMetres: Double {
		return heightInCentimetres / 100
	}

}
A container to hold liquids:
struct Bottle {

	let manufacturer: String
	var volumeInLitres: Double

	var volumeInMillilitres: Double {
		return volumeInLitres / 1000
	}

}
Part of a user interface, also known as a view:
struct ListItem: View {

    let title: String
    var subtitle: String

    var body: some View {

        VStack {
            HStack {
                Text(title)
                    .font(.headline)
                Spacer()
            }
            HStack {
                Text(subtitle)
                Spacer()
            }
        }
        .padding()

    }

}
Each of the structures shown above have two stored properties and one computed property.
As a convention, in a structure, we will always list stored properties first and then computed properties.
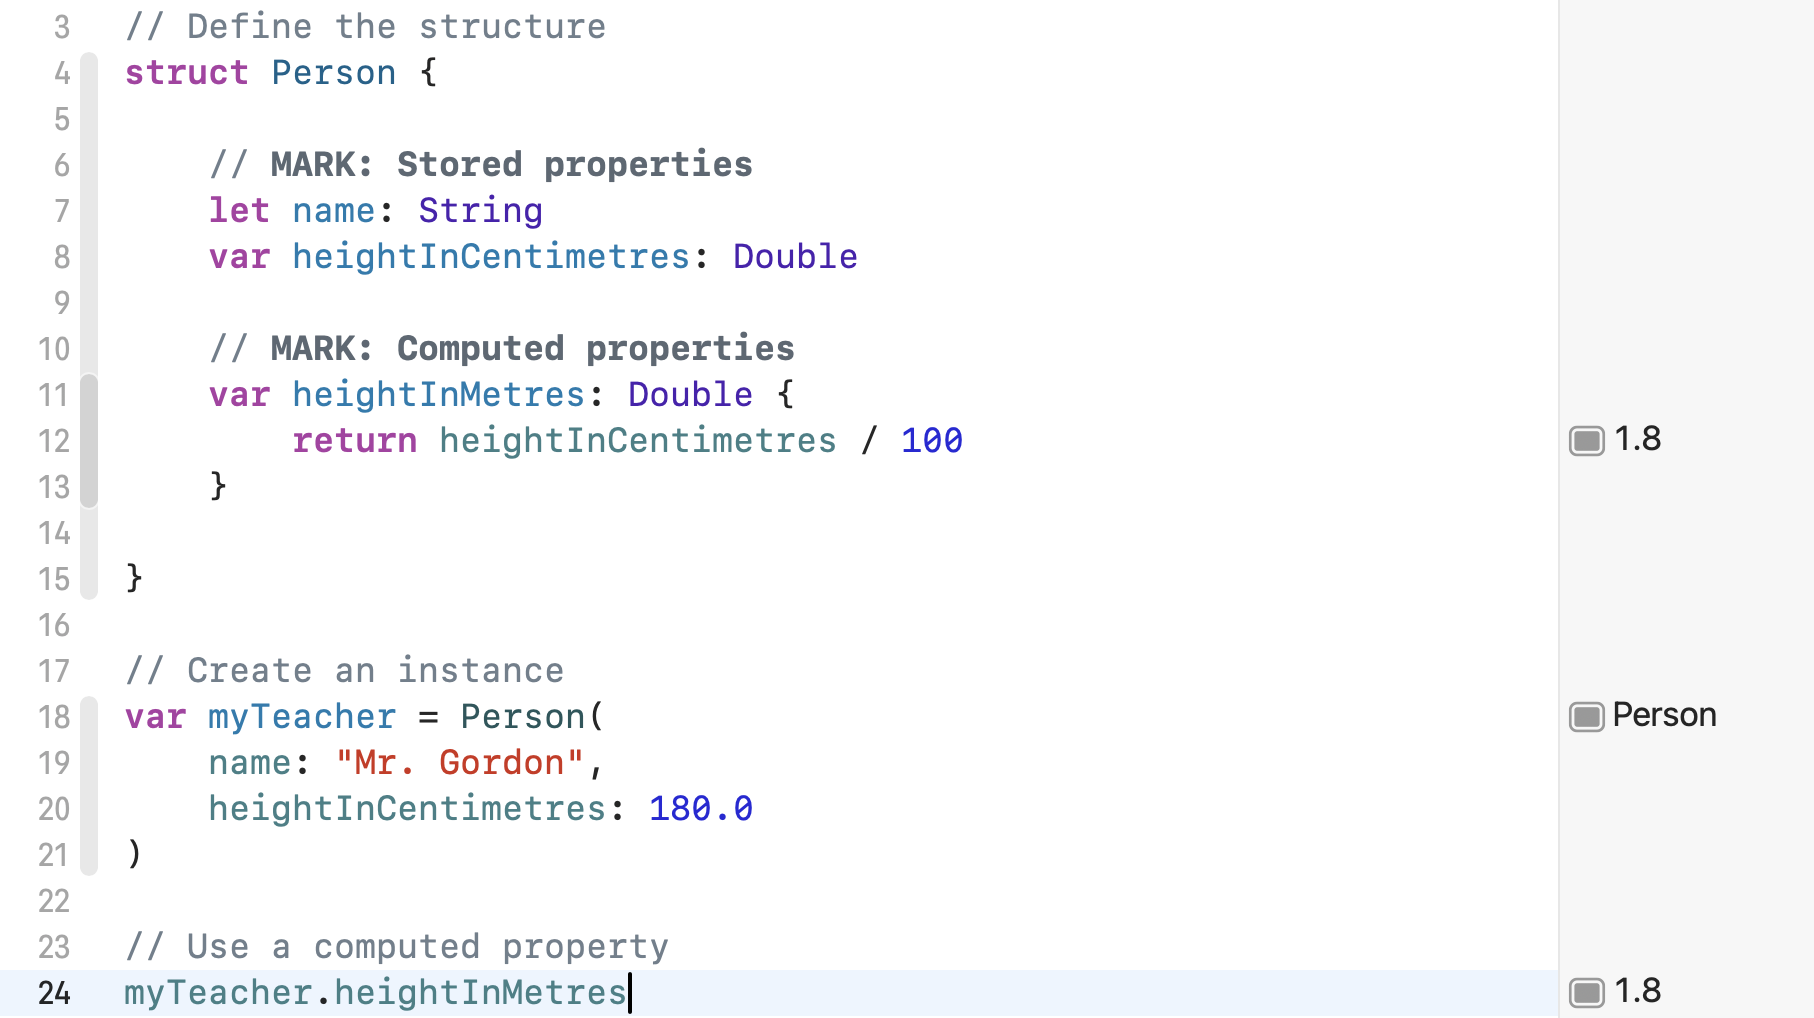
Going forward, it is a good idea to mark which properties are stored properties and which properties are computed properties, using short comments.
Like this:
struct Person {

	// MARK: Stored properties
	let name: String
	var heightInCentimetres: Double

	// MARK: Computed properties
	var heightInMetres: Double {
		return heightInCentimetres / 100
	}

}
A container to hold liquids:
struct Bottle {

	// MARK: Stored properties
	let manufacturer: String
	var volumeInLitres: Double

	// MARK: Computed properties
	var volumeInMillilitres: Double {
		return volumeInLitres / 1000
	}

}
A user interface element:
struct ListItem: View {

    // MARK: Stored properties
    let title: String
    var subtitle: String

    // MARK: Computed properties
    var body: some View {

        VStack {
            HStack {
                Text(title)
                    .font(.headline)
                Spacer()
            }
            HStack {
                Text(subtitle)
                Spacer()
            }
        }
        .padding()

    }

}
Stored vs. computed properties
Stored properties become questions – or parameters – that we must answer – provide arguments for – when we create an instance of a structure.
For example:
var myTeacher = Person(
	name: "Mr. Gordon",
	heightInCentimetres: 180.0
)
Here, the parameters are:
nameheightInCentimetres
The arguments are:
Mr. Gordon180.0
The values we provide with these arguments are kept in each stored property. We see this when we run code within a Playground:

And of course, we do not need to provide arguments for computed properties.
Instead, the computer calculates the output of computed properties for us.
For example:
Structures that are views work the same way.
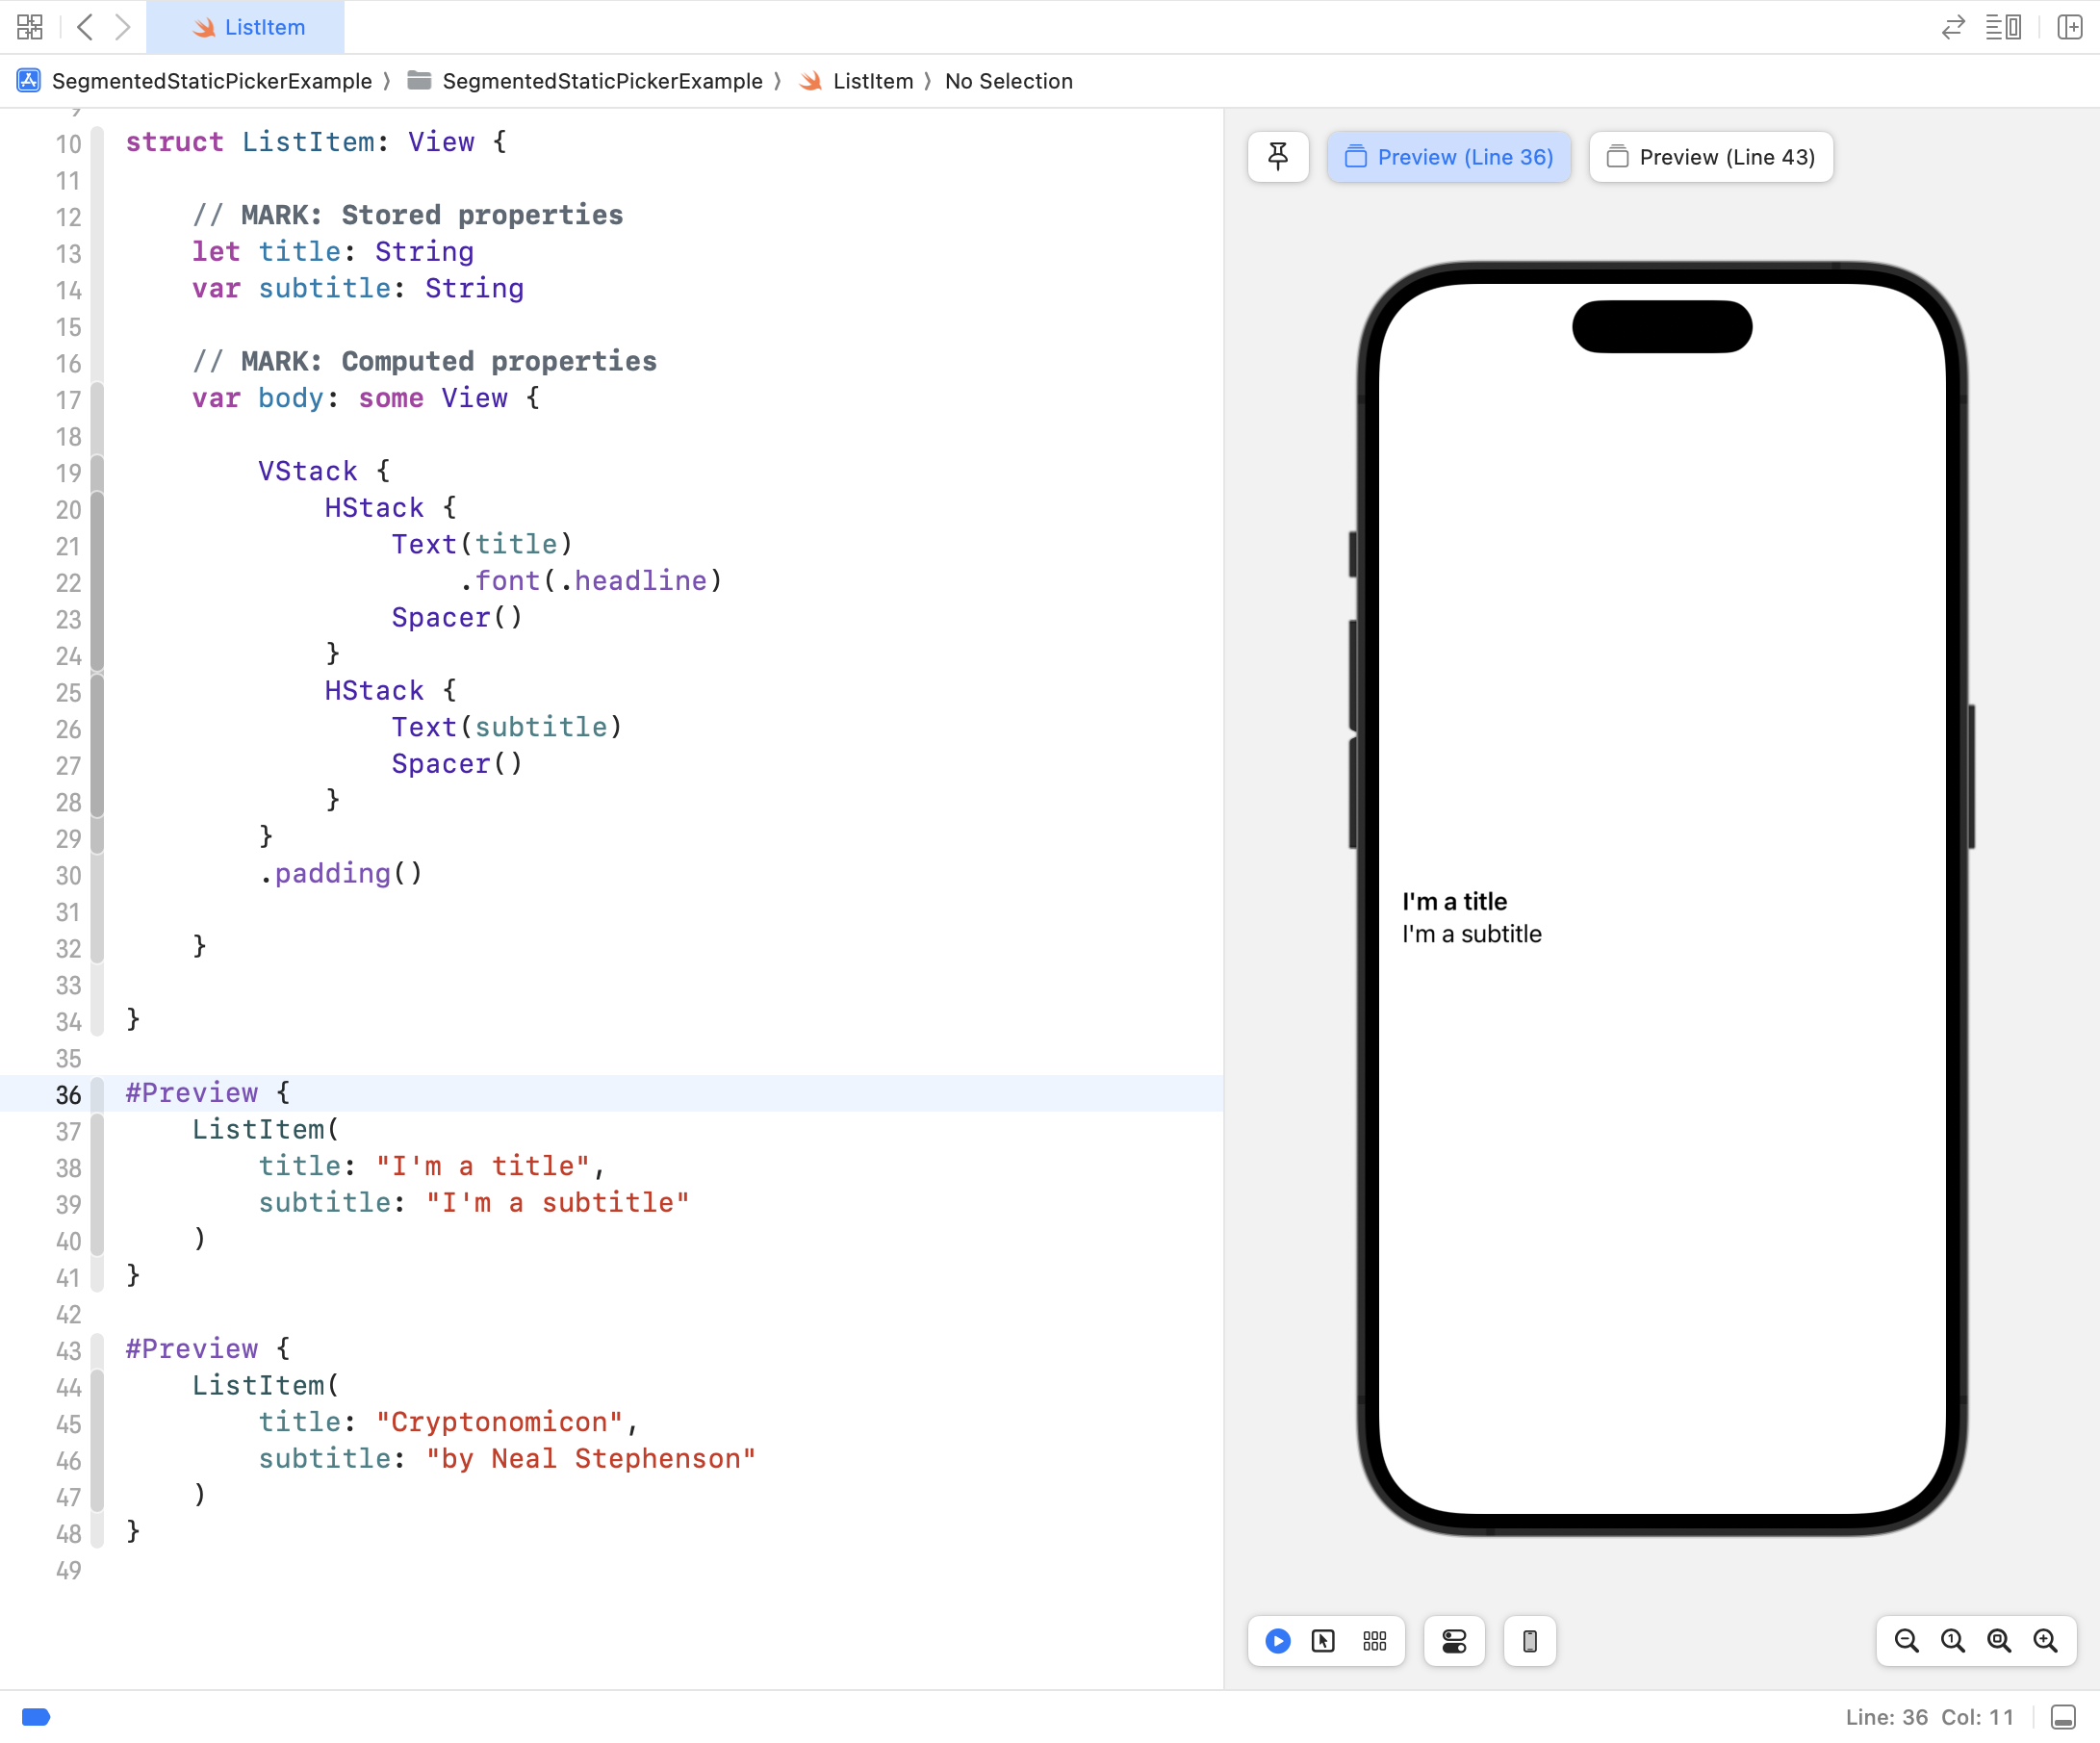
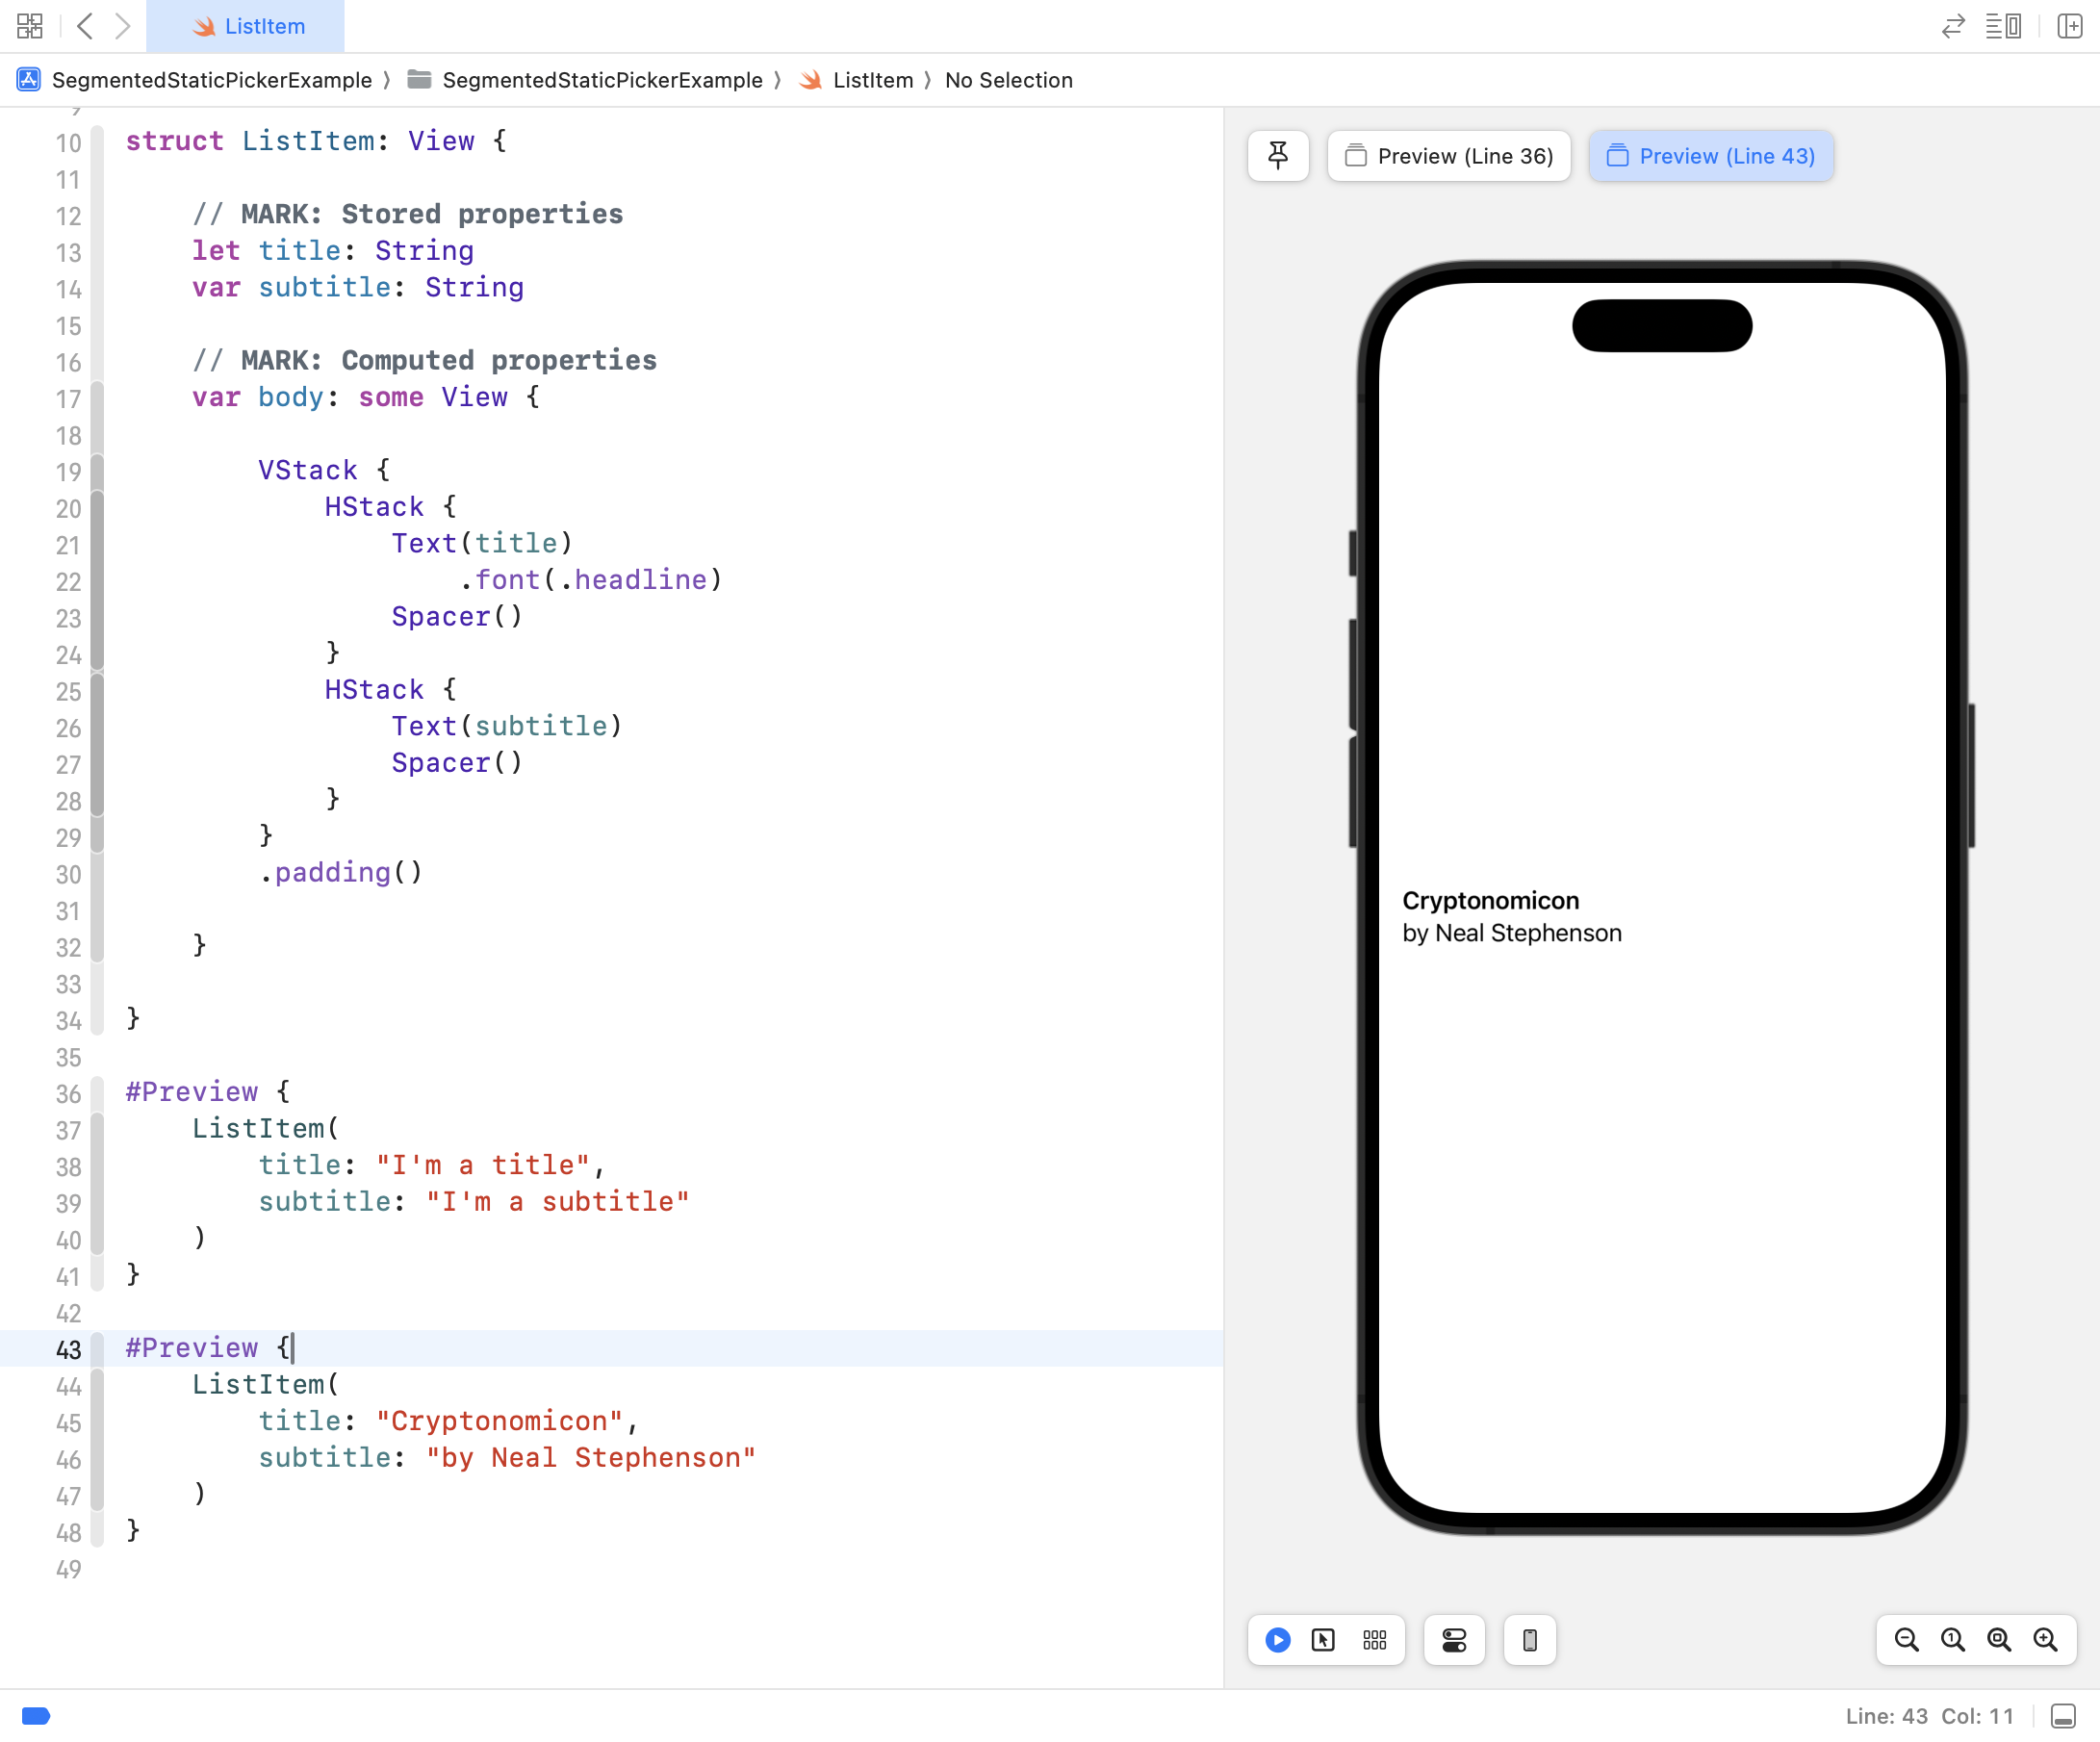
Here is the ListItem structure, with different arguments passed for the instances shown in each preview.
This results in different visual output from the computed property named body.
Here is the output from the first instance of ListItem, shown in the first preview:
Here is the output from the second instance of ListItem, shown in the second preview:
Property wrappers
Let’s say we want to make a simple app that shows the square of a given number.
It will work like this:
To create this app, all we need is a structure.
One piece of information is a stored property – the base.
One piece of information is a computed property – the squared value.
Let’s build this app step by step.
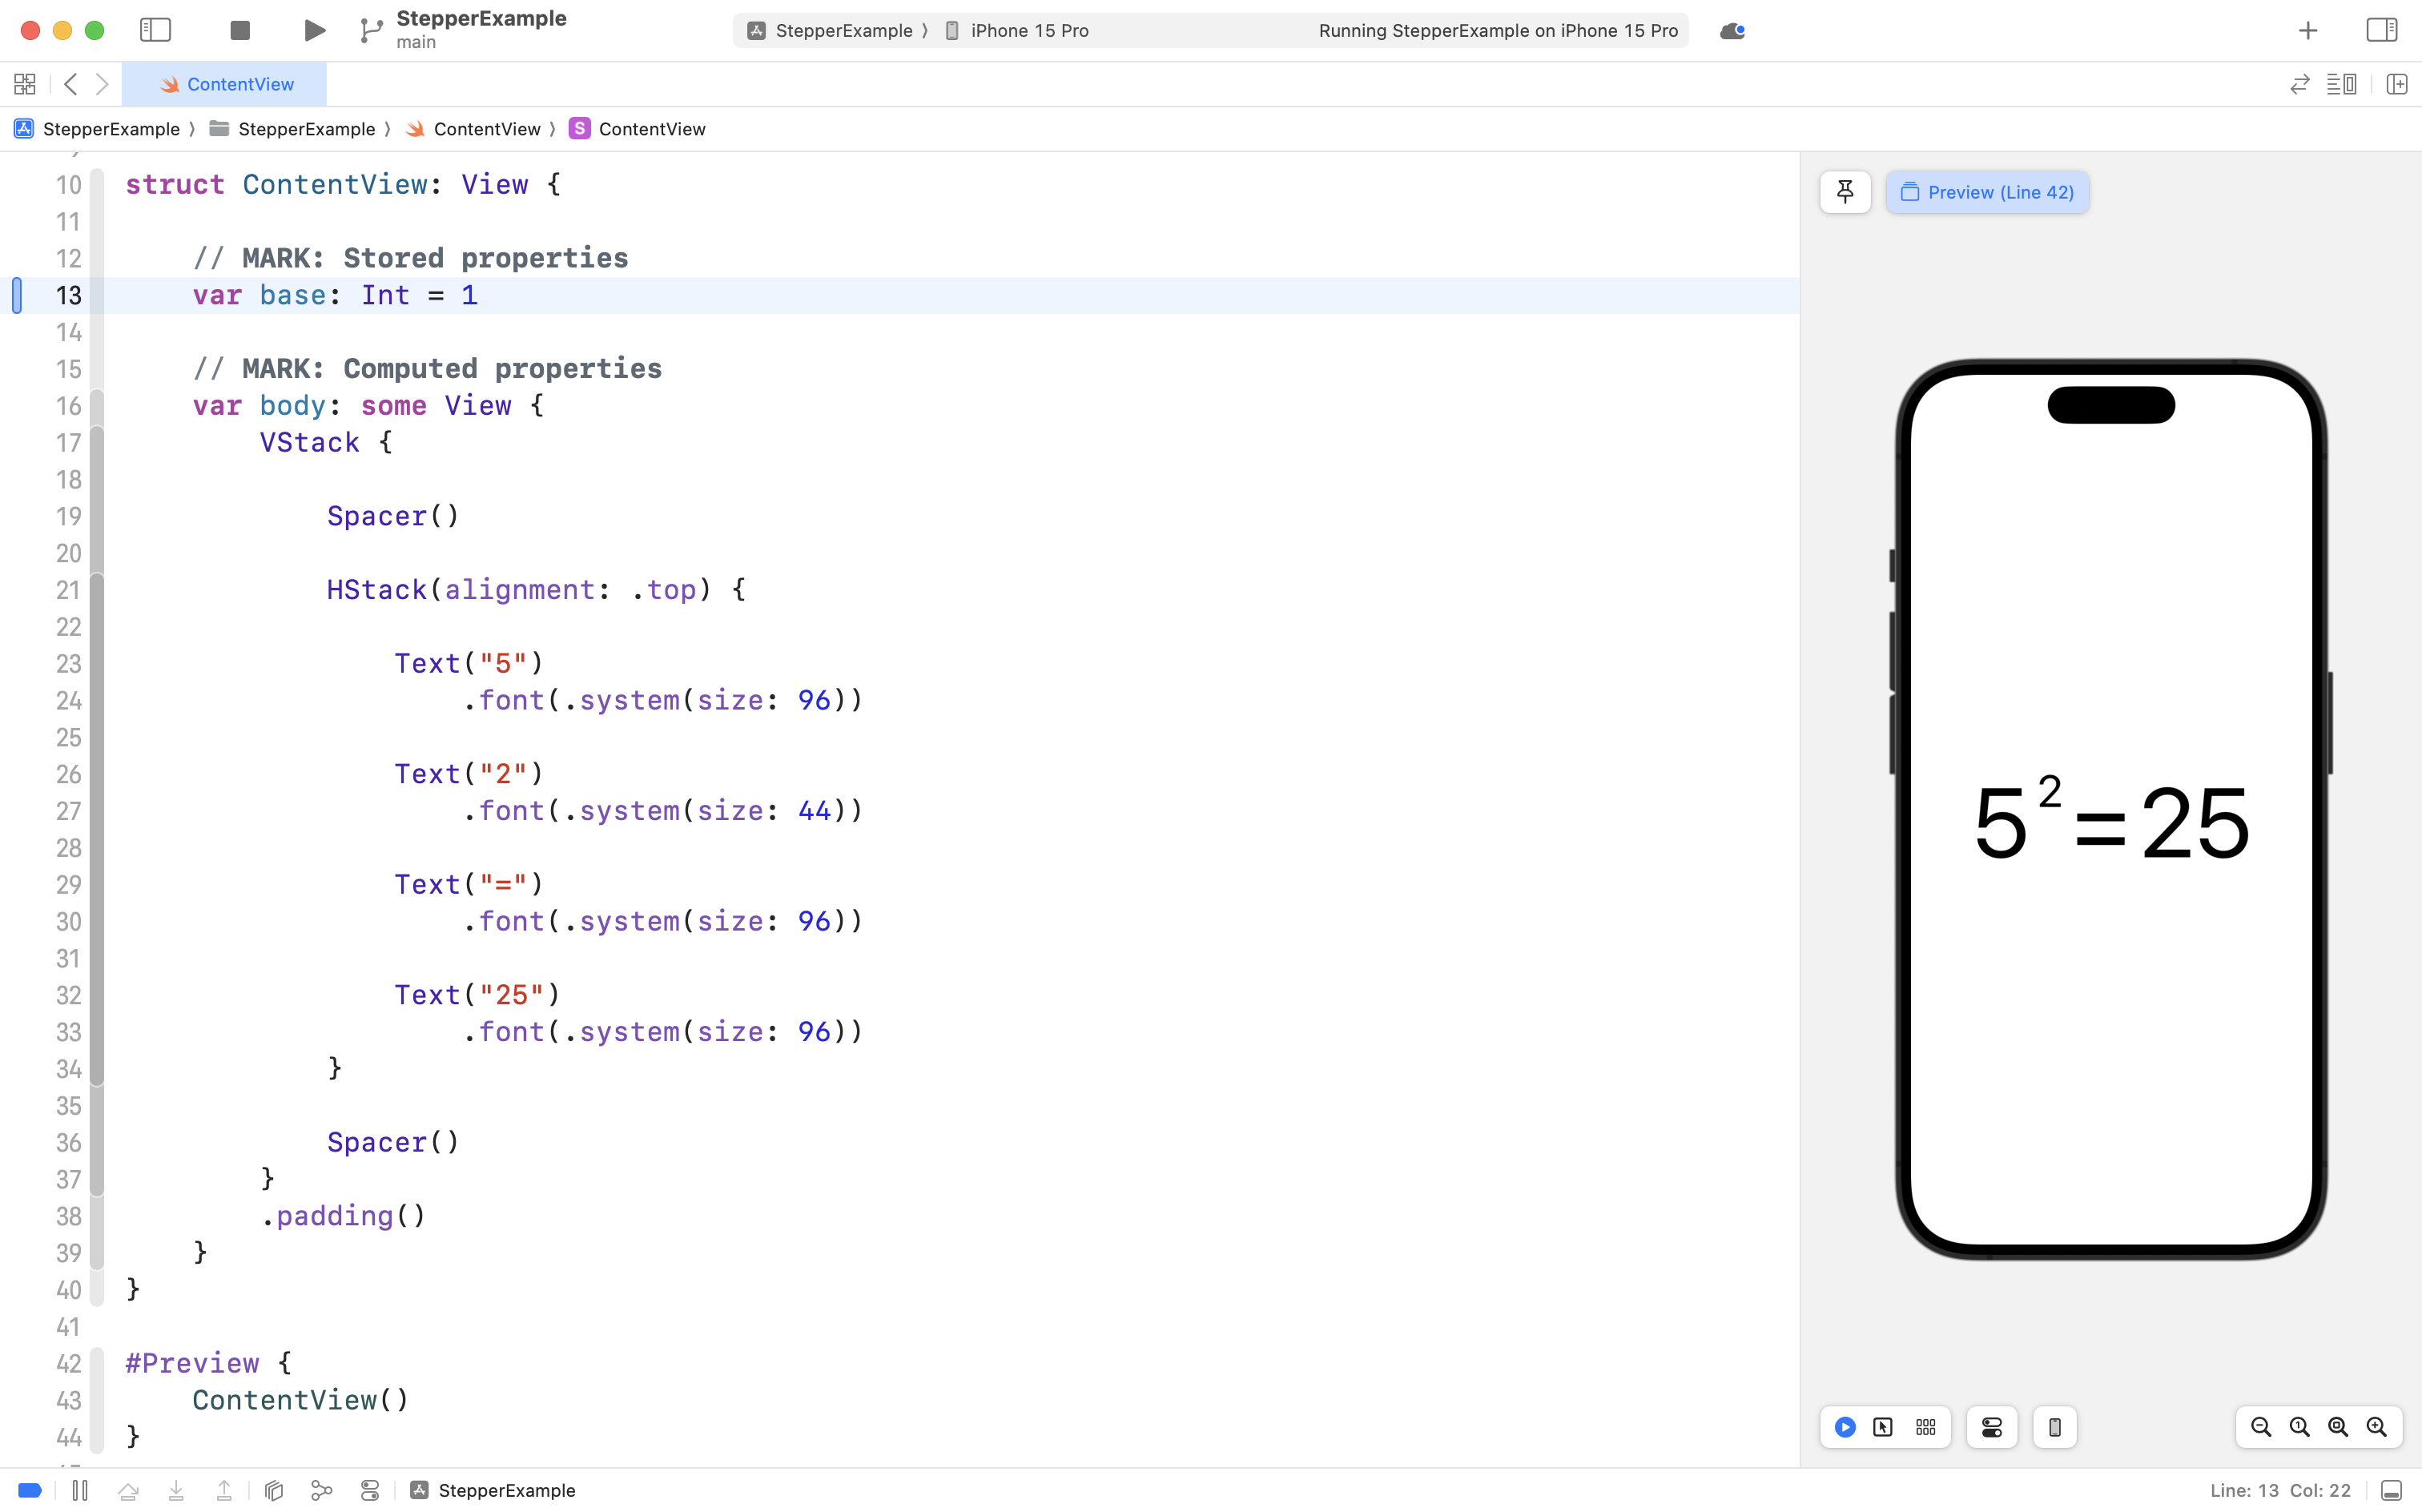
First, we’ll make a static layout, with a specific example of a number being squared:
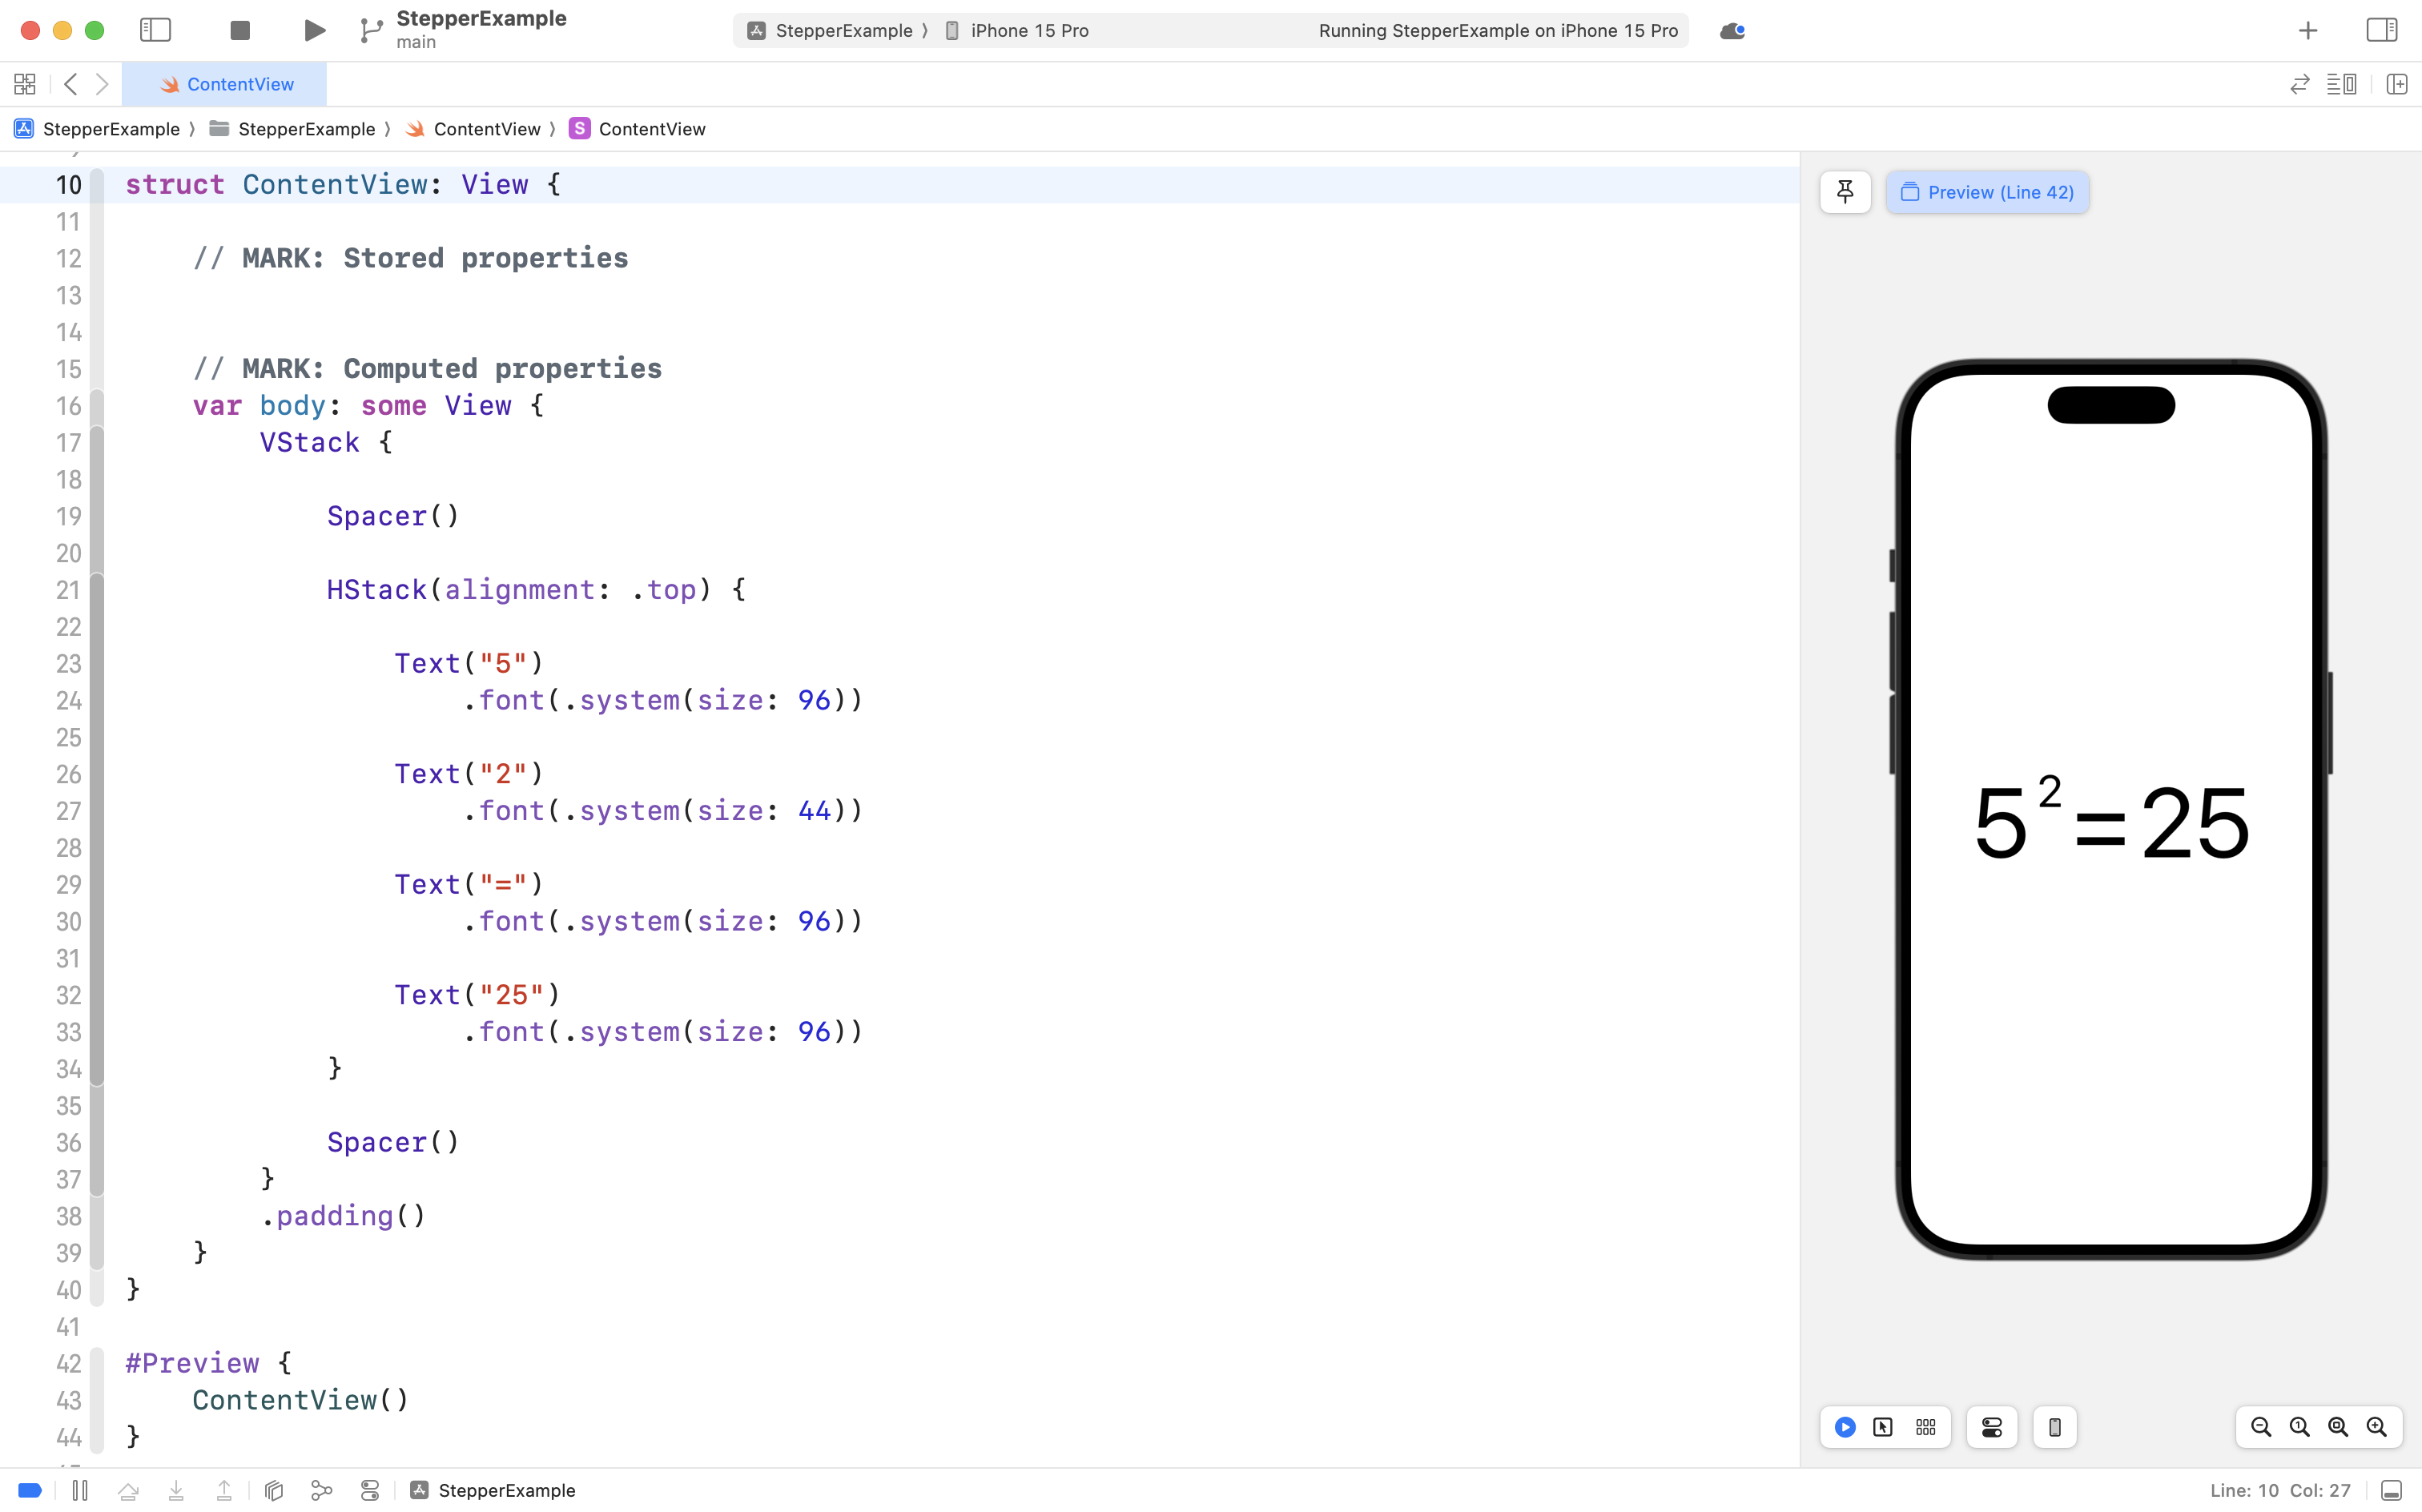
Here we have several text views, stacks, and spacers to express the general layout we want to build.
Please now create a new iOS project named StepperExample.
Then, feel free to copy the code provided here to get started:
//
//  ContentView.swift
//  StepperExample
//

import SwiftUI

struct ContentView: View {

    // MARK: Stored properties


    // MARK: Computed properties
    var body: some View {
        VStack {

            Spacer()

            HStack(alignment: .top) {

                Text("5")
                    .font(.system(size: 96))

                Text("2")
                    .font(.system(size: 44))

                Text("=")
                    .font(.system(size: 96))

                Text("25")
                    .font(.system(size: 96))
            }

            Spacer()
        }
        .padding()
    }
}

#Preview {
    ContentView()
}
After adding that code, go ahead and commit your work with this message:
Created the initial static layout.
As you can see, there are currently no stored properties, and just one computed property, body, which describes the user interface.
We need to store some information – some state – to allow the user to control what the base of the power is.
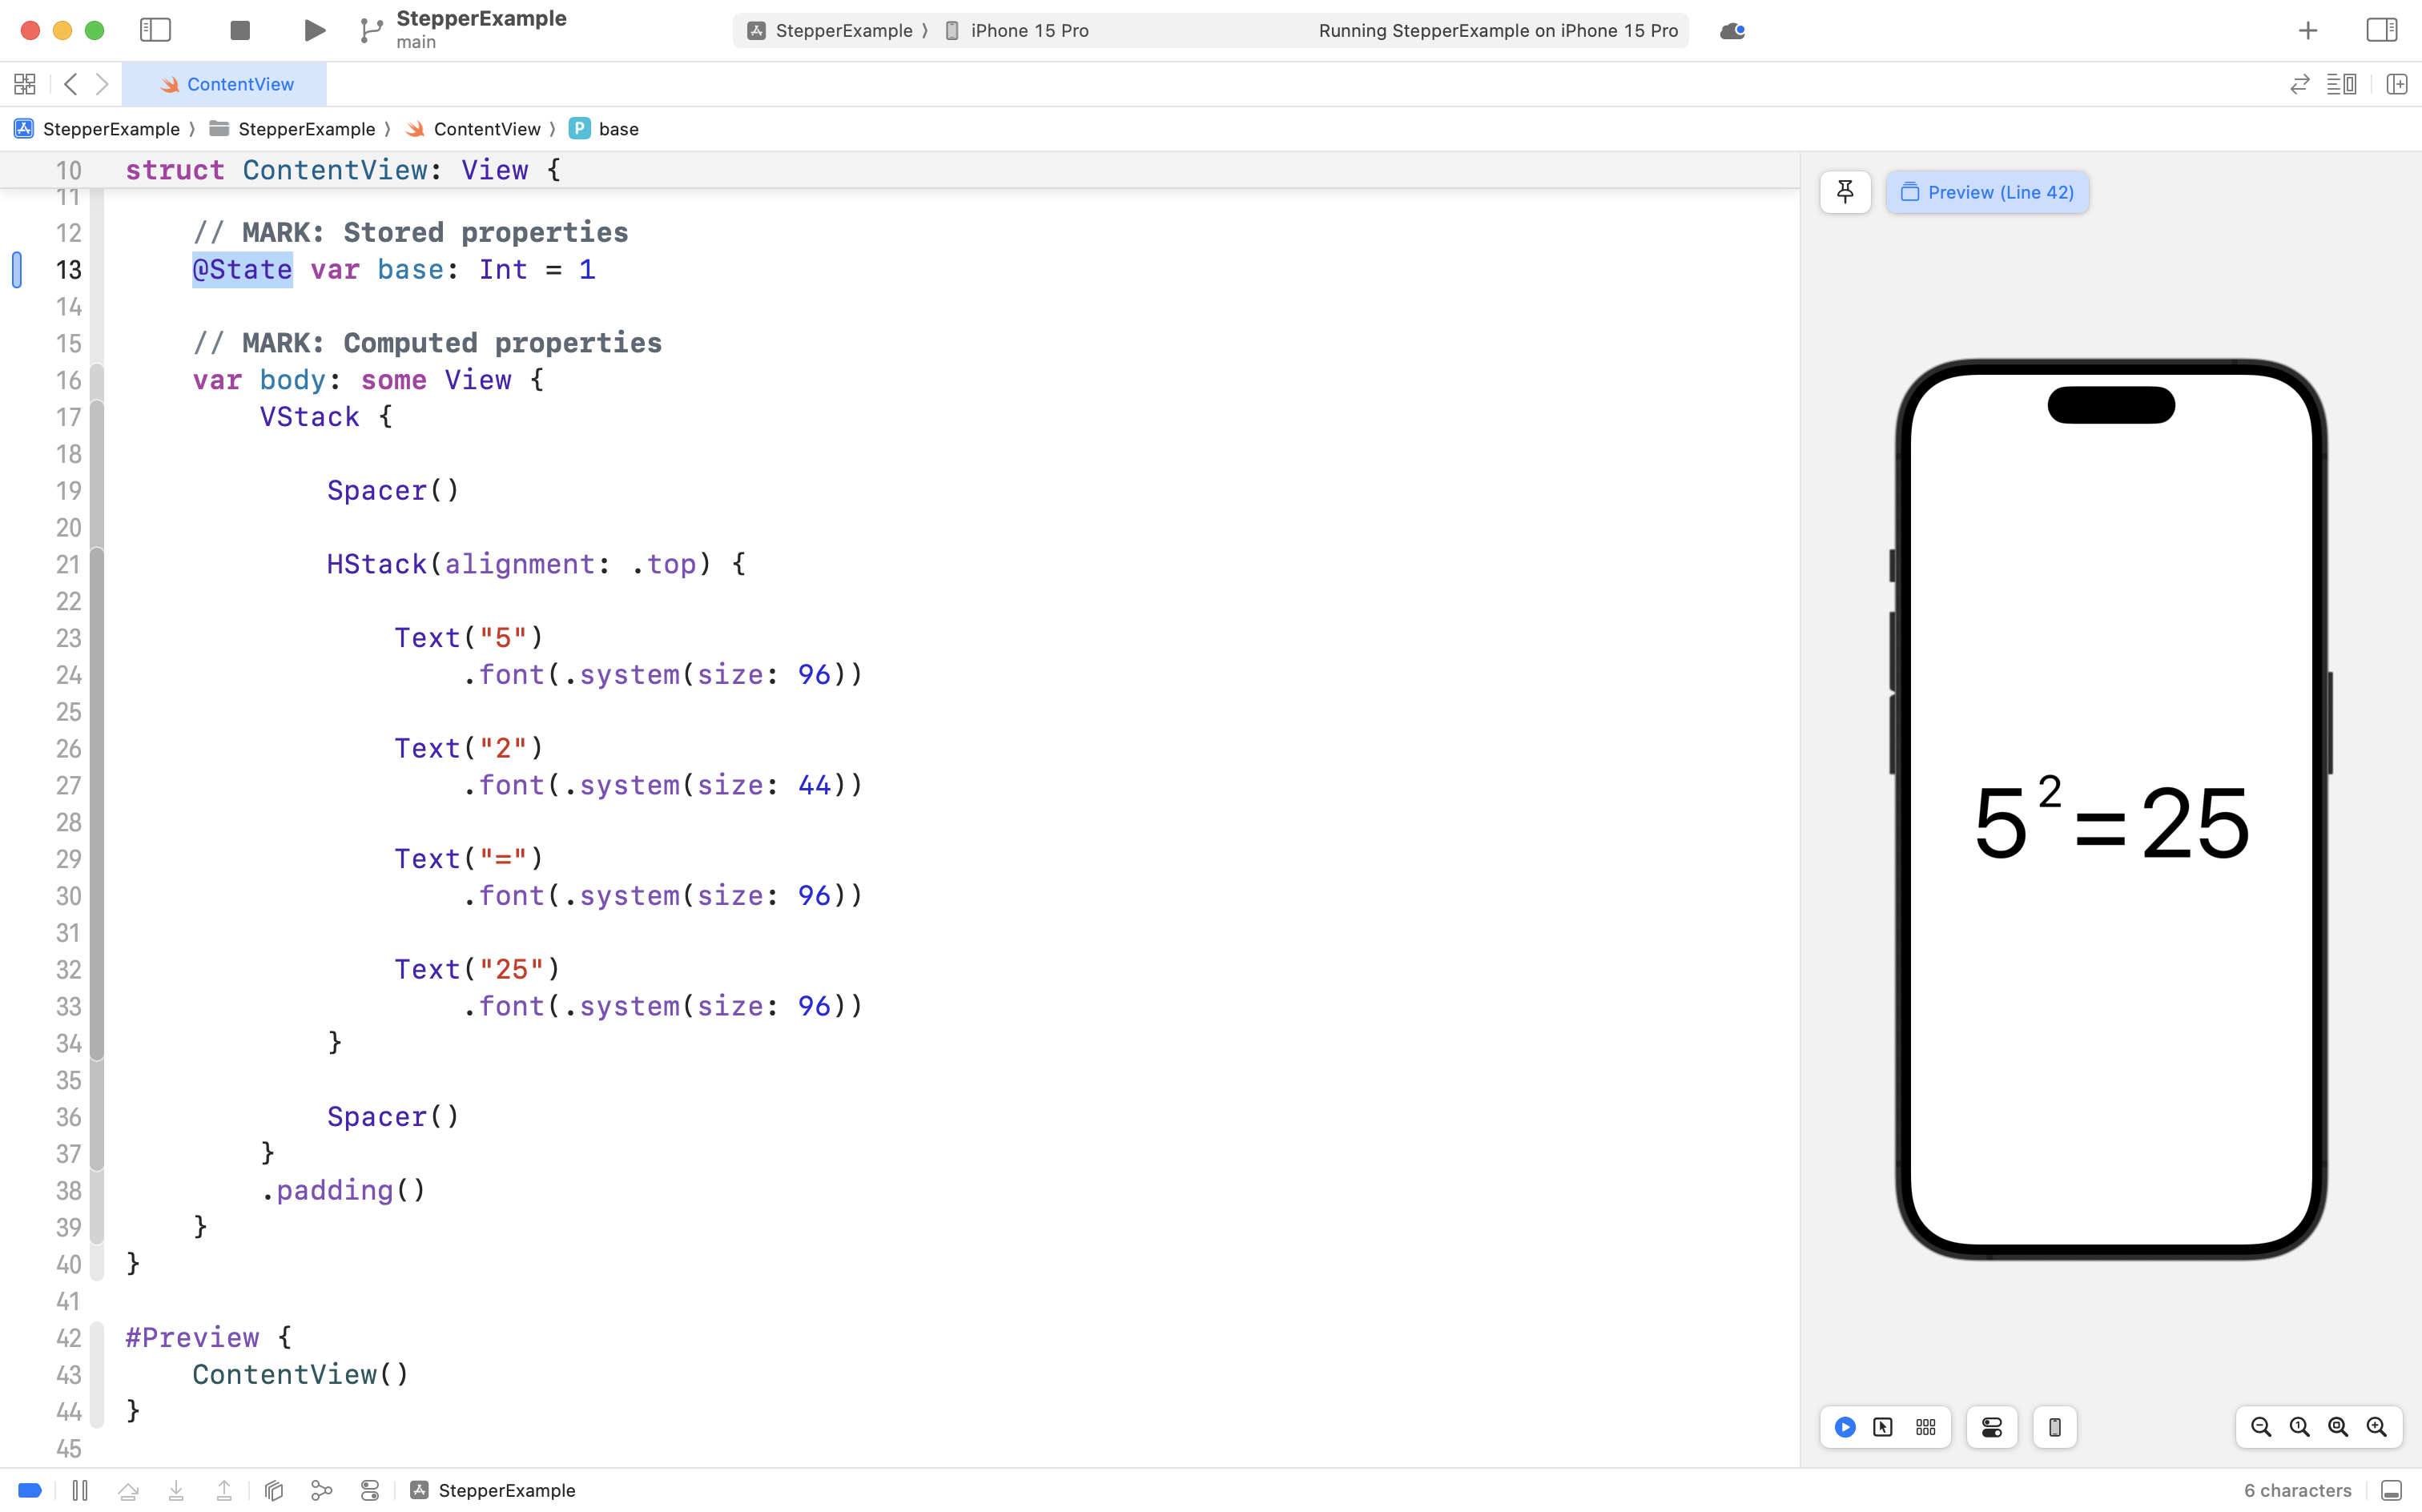
Add this stored property to your view now:
Note that since we provide a default value of 1 for that stored property, we do not need to provide an argument to populate the stored property, when creating the instance of ContentView from within the #Preview section of our code:
#Preview {
    ContentView()
}
We have made the base stored property a variable, which means it’s value can change:
var base: Int = 1However, we also need to use a property wrapper called @State, like this:
@State var base: Int = 1What does @State do?
It tells SwiftUI that when a property’s value does change, the user interface should be updated automatically. That’s really important.
@State before a property in a structure ensures SwiftUI will update the user interface when that property’s value changes.
So, please add the property wrapper to your code now:
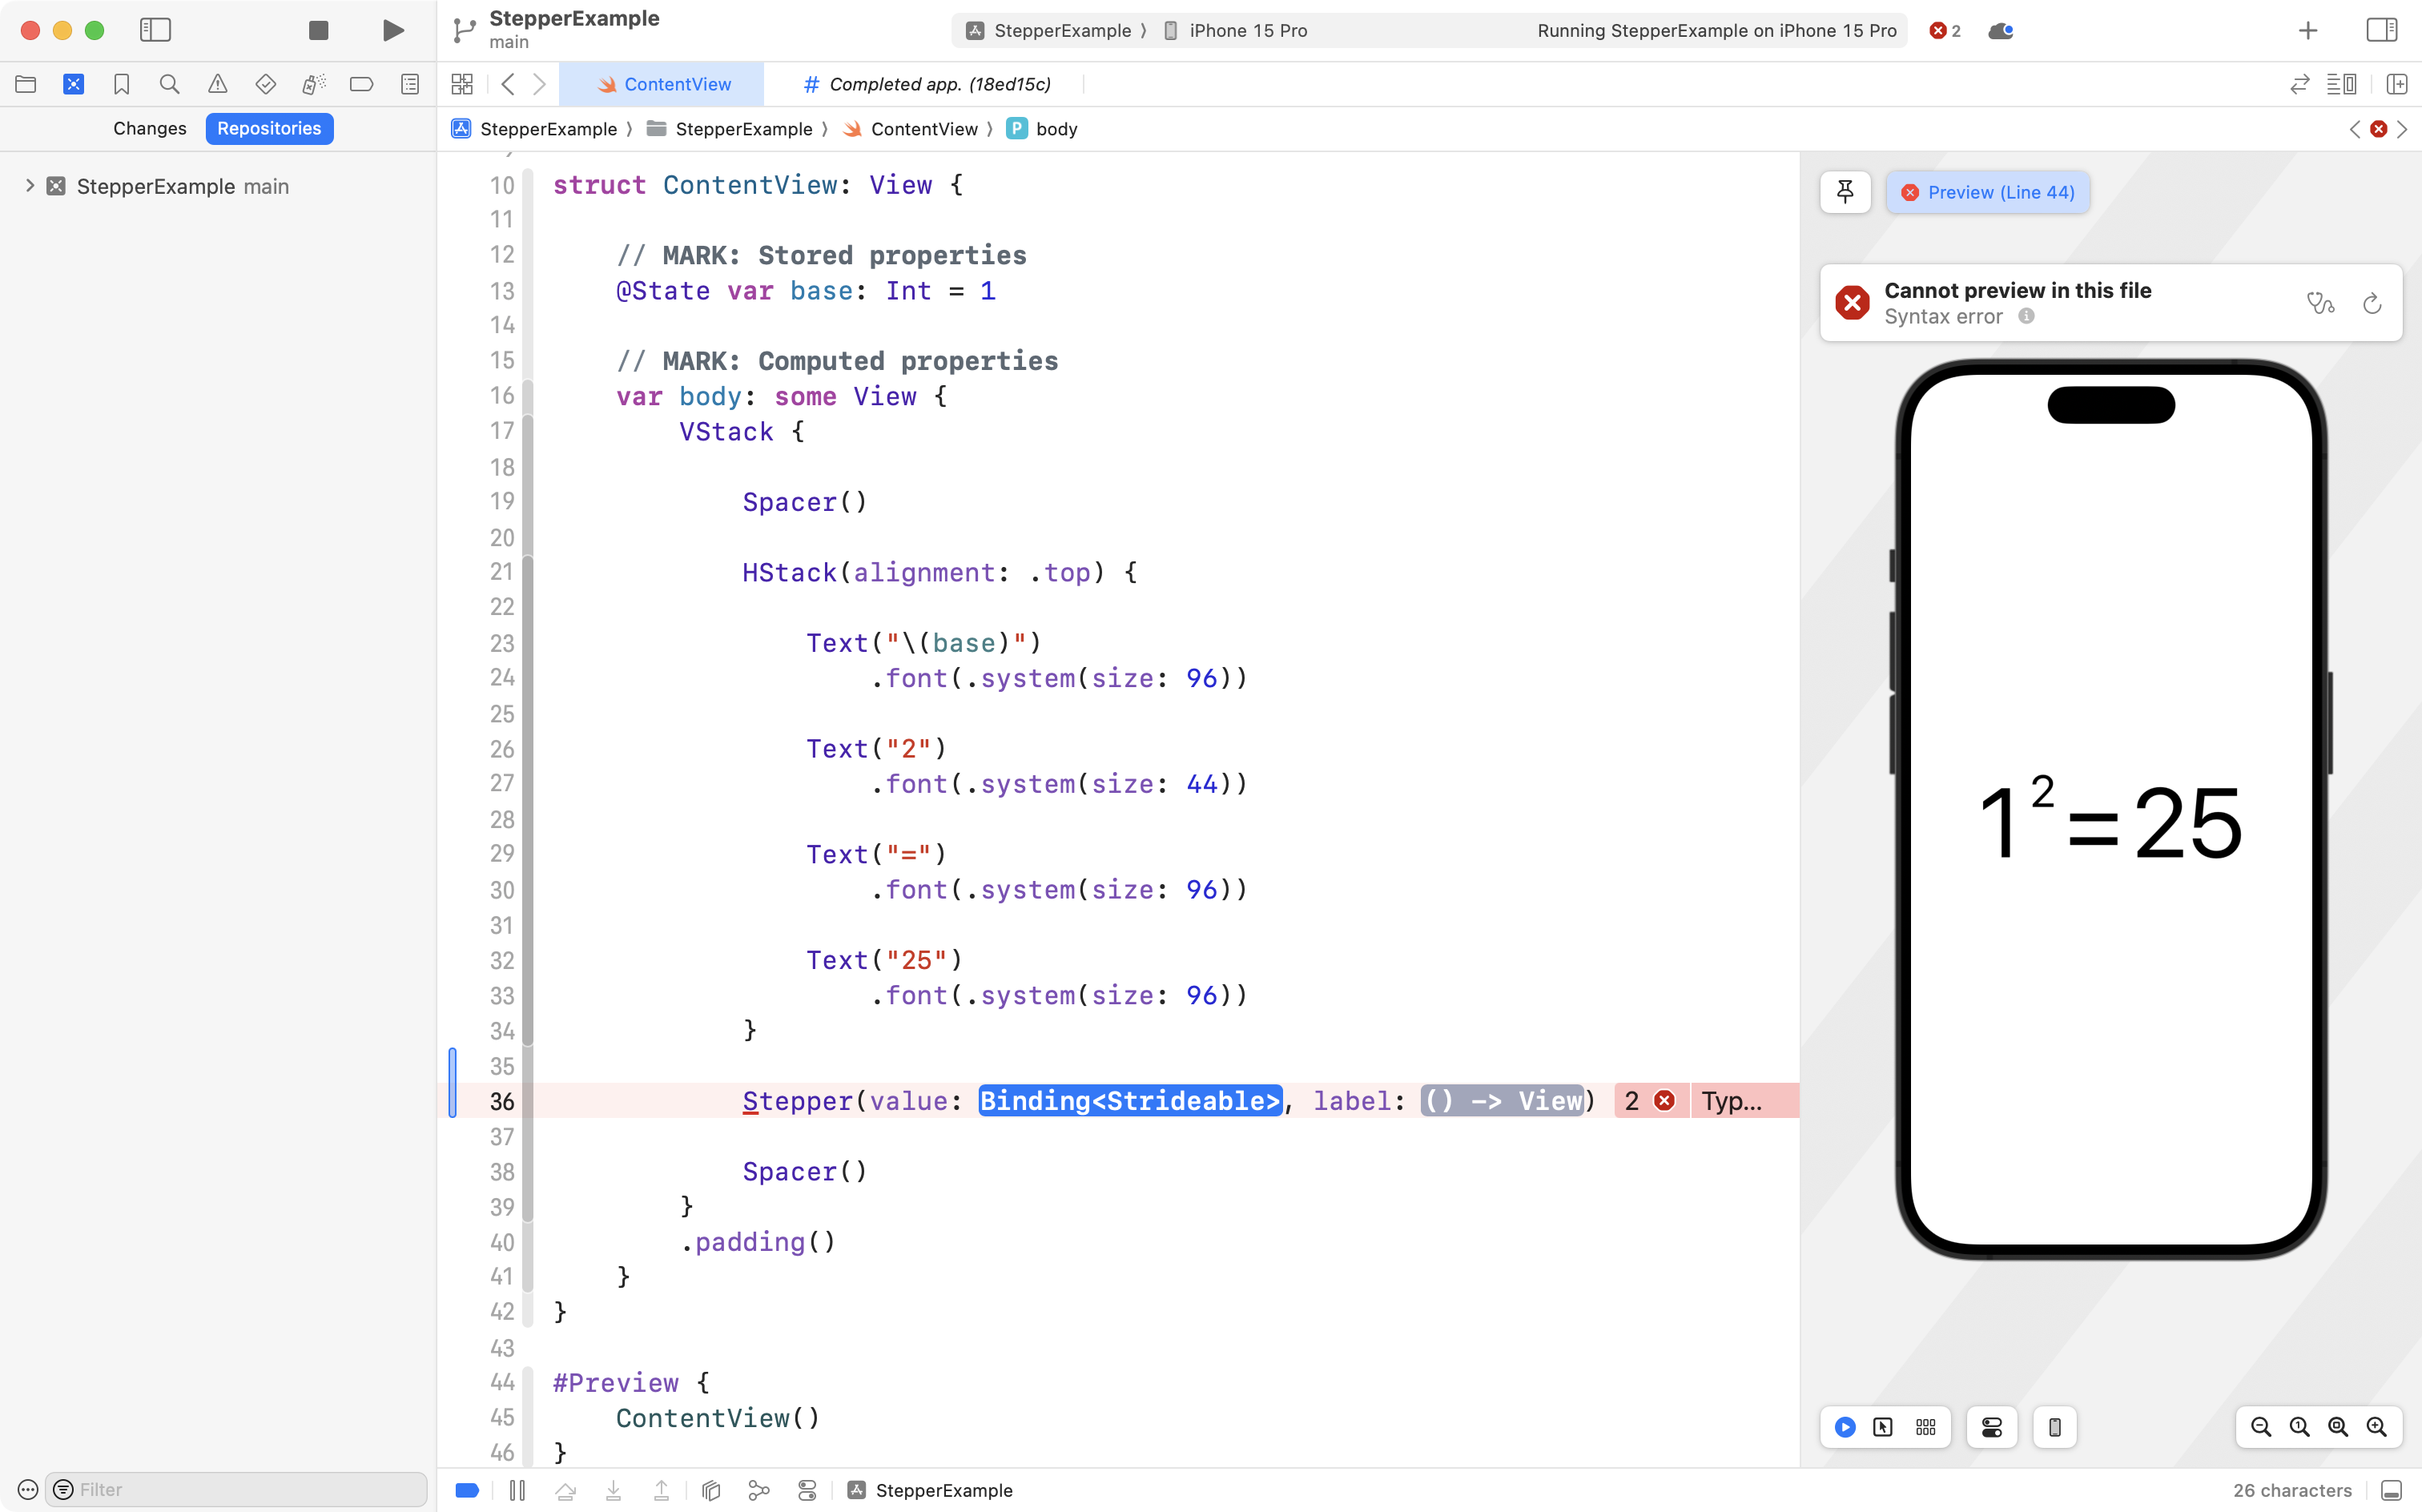
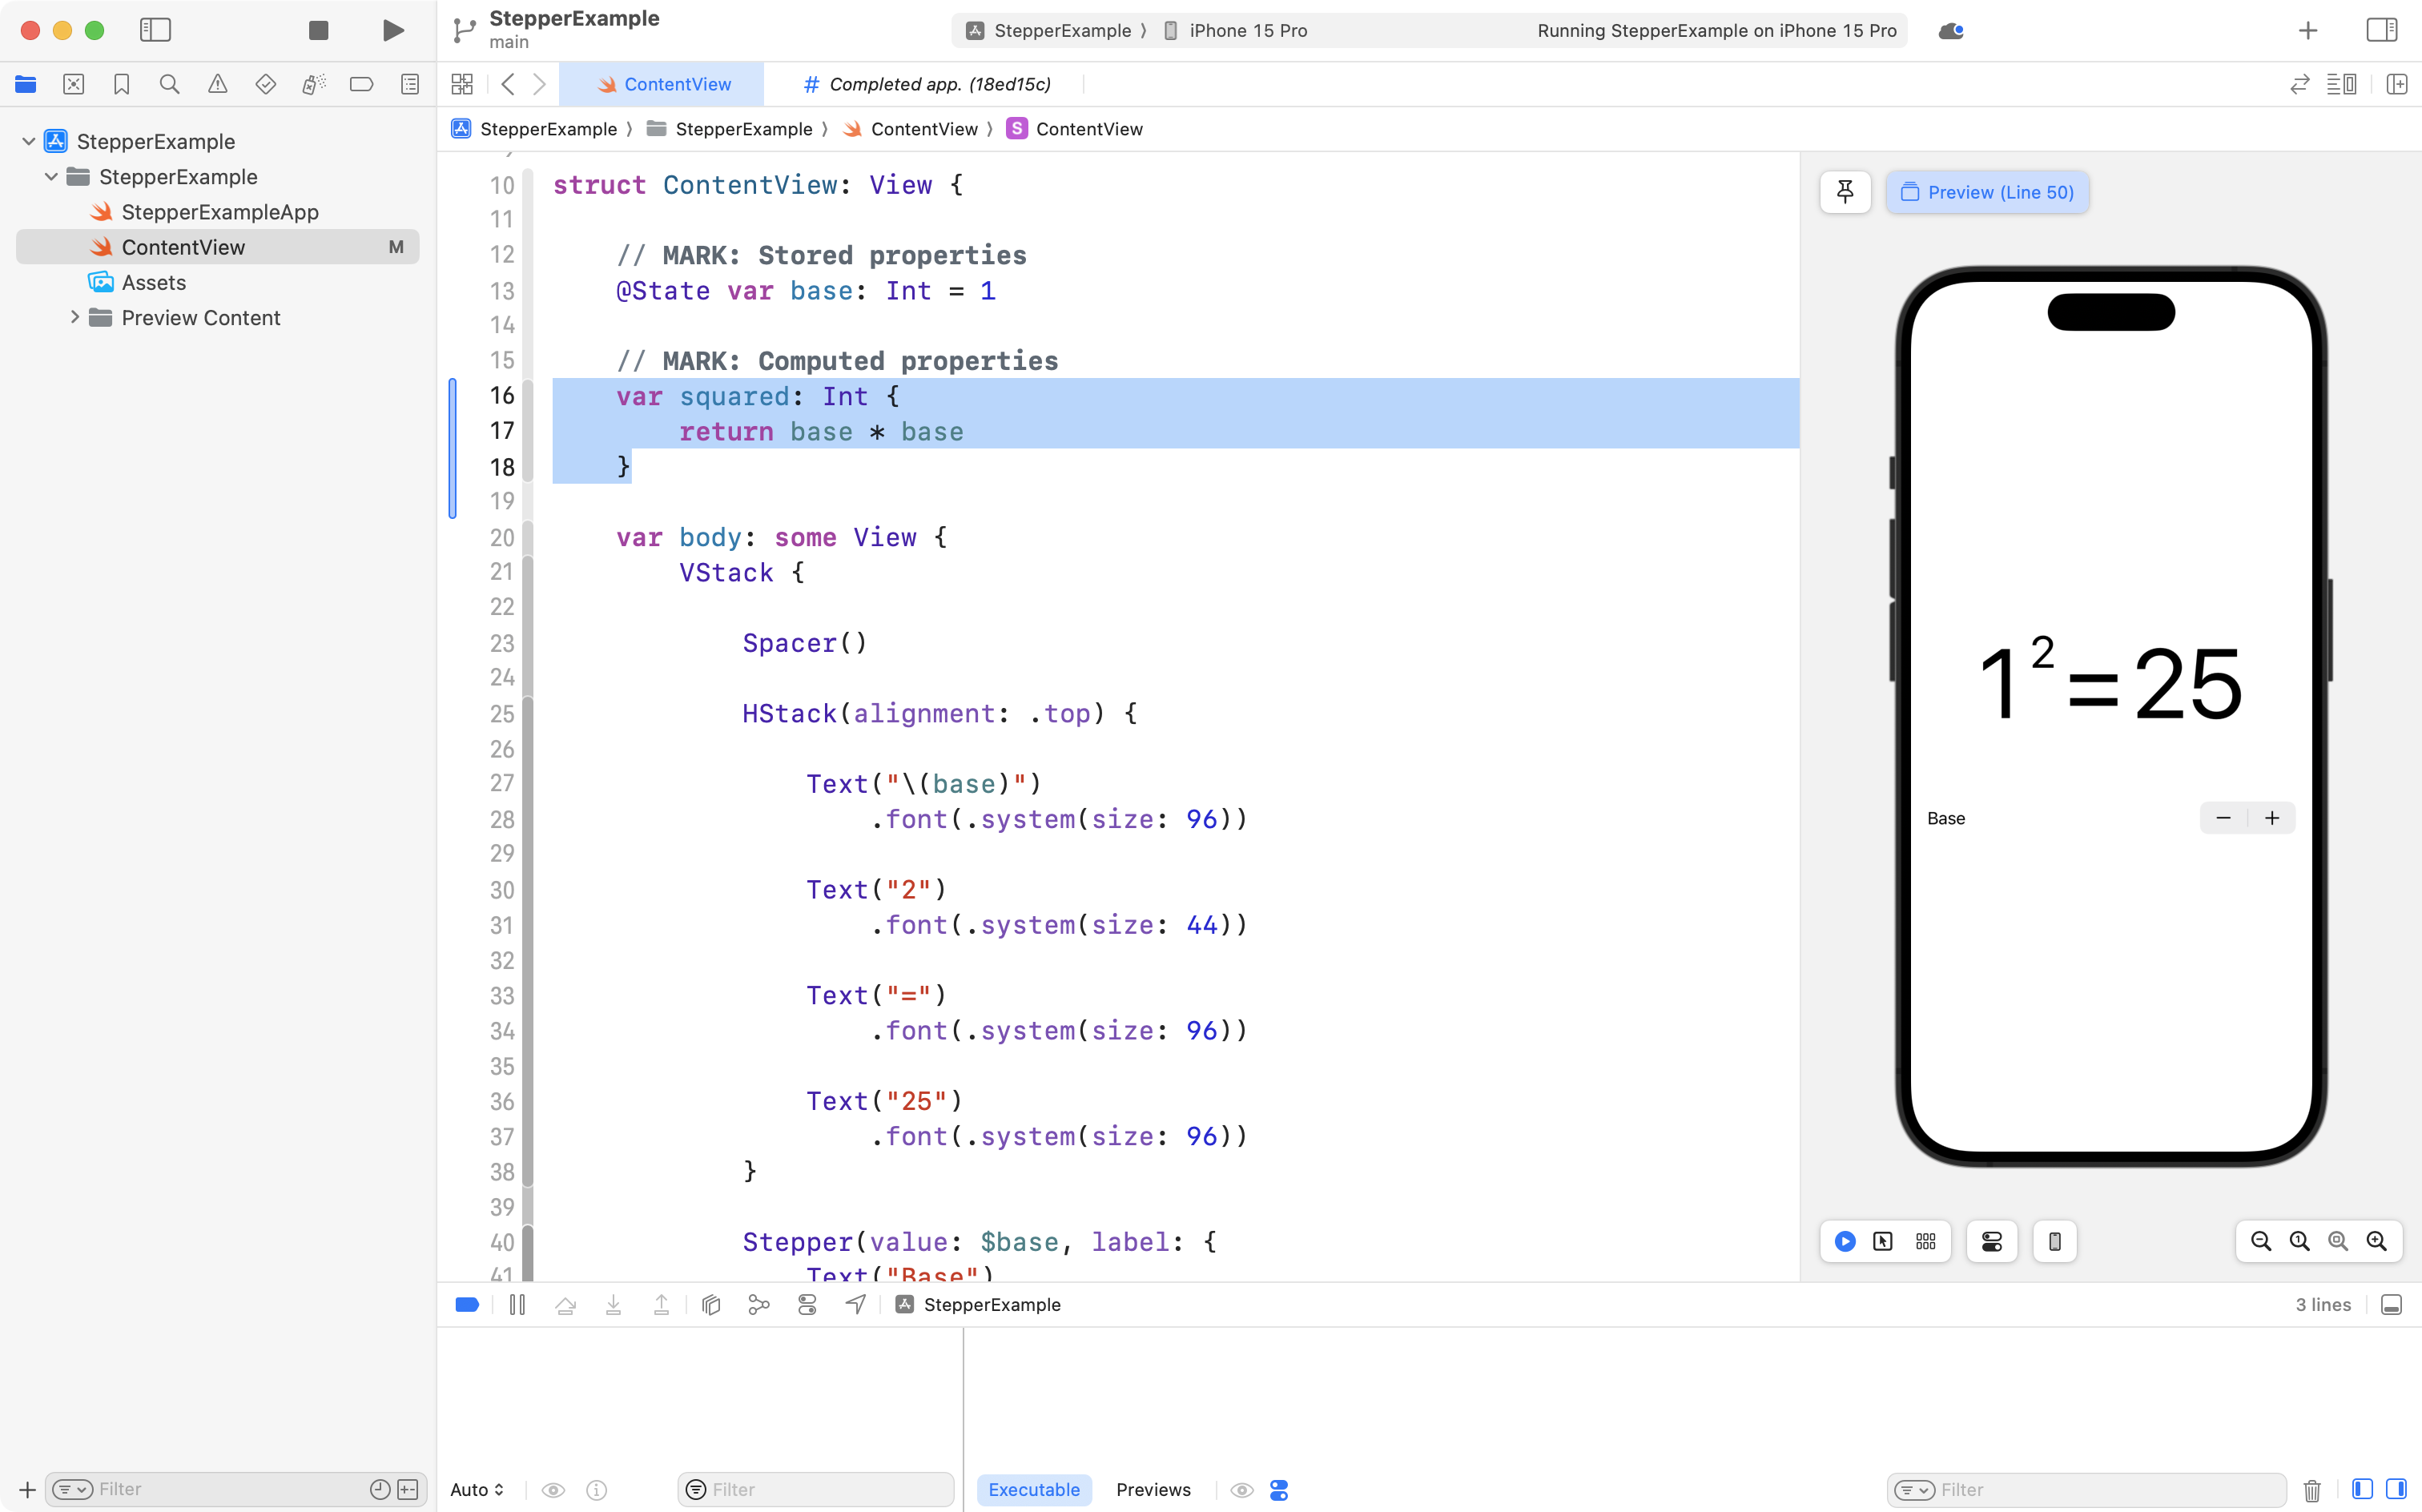
Finally, let’s make a change to our code, so the value of the base stored property is actually used in our layout. Remember – old code is shown in grey – new code is shown in light blue:

Of course, this now means that our user interface presents incorrect information, since , but we will fix that soon.
Go ahead and commit your work with this message:
Added a stored property to hold the base of the power selected by the user.
Bindings to a control
So now we have a stored property named base and when it changes, the user interface will be automatically updated by SwiftUI.
How do we let the user actually change the property, though?
That’s what a control and a binding are for.
We will add a stepper control to our project. A stepper is useful for allowing the user to provide integer input; they can increase or decrease a value by tapping + or -.
Use the auto-complete to begin adding a stepper below the HStack:
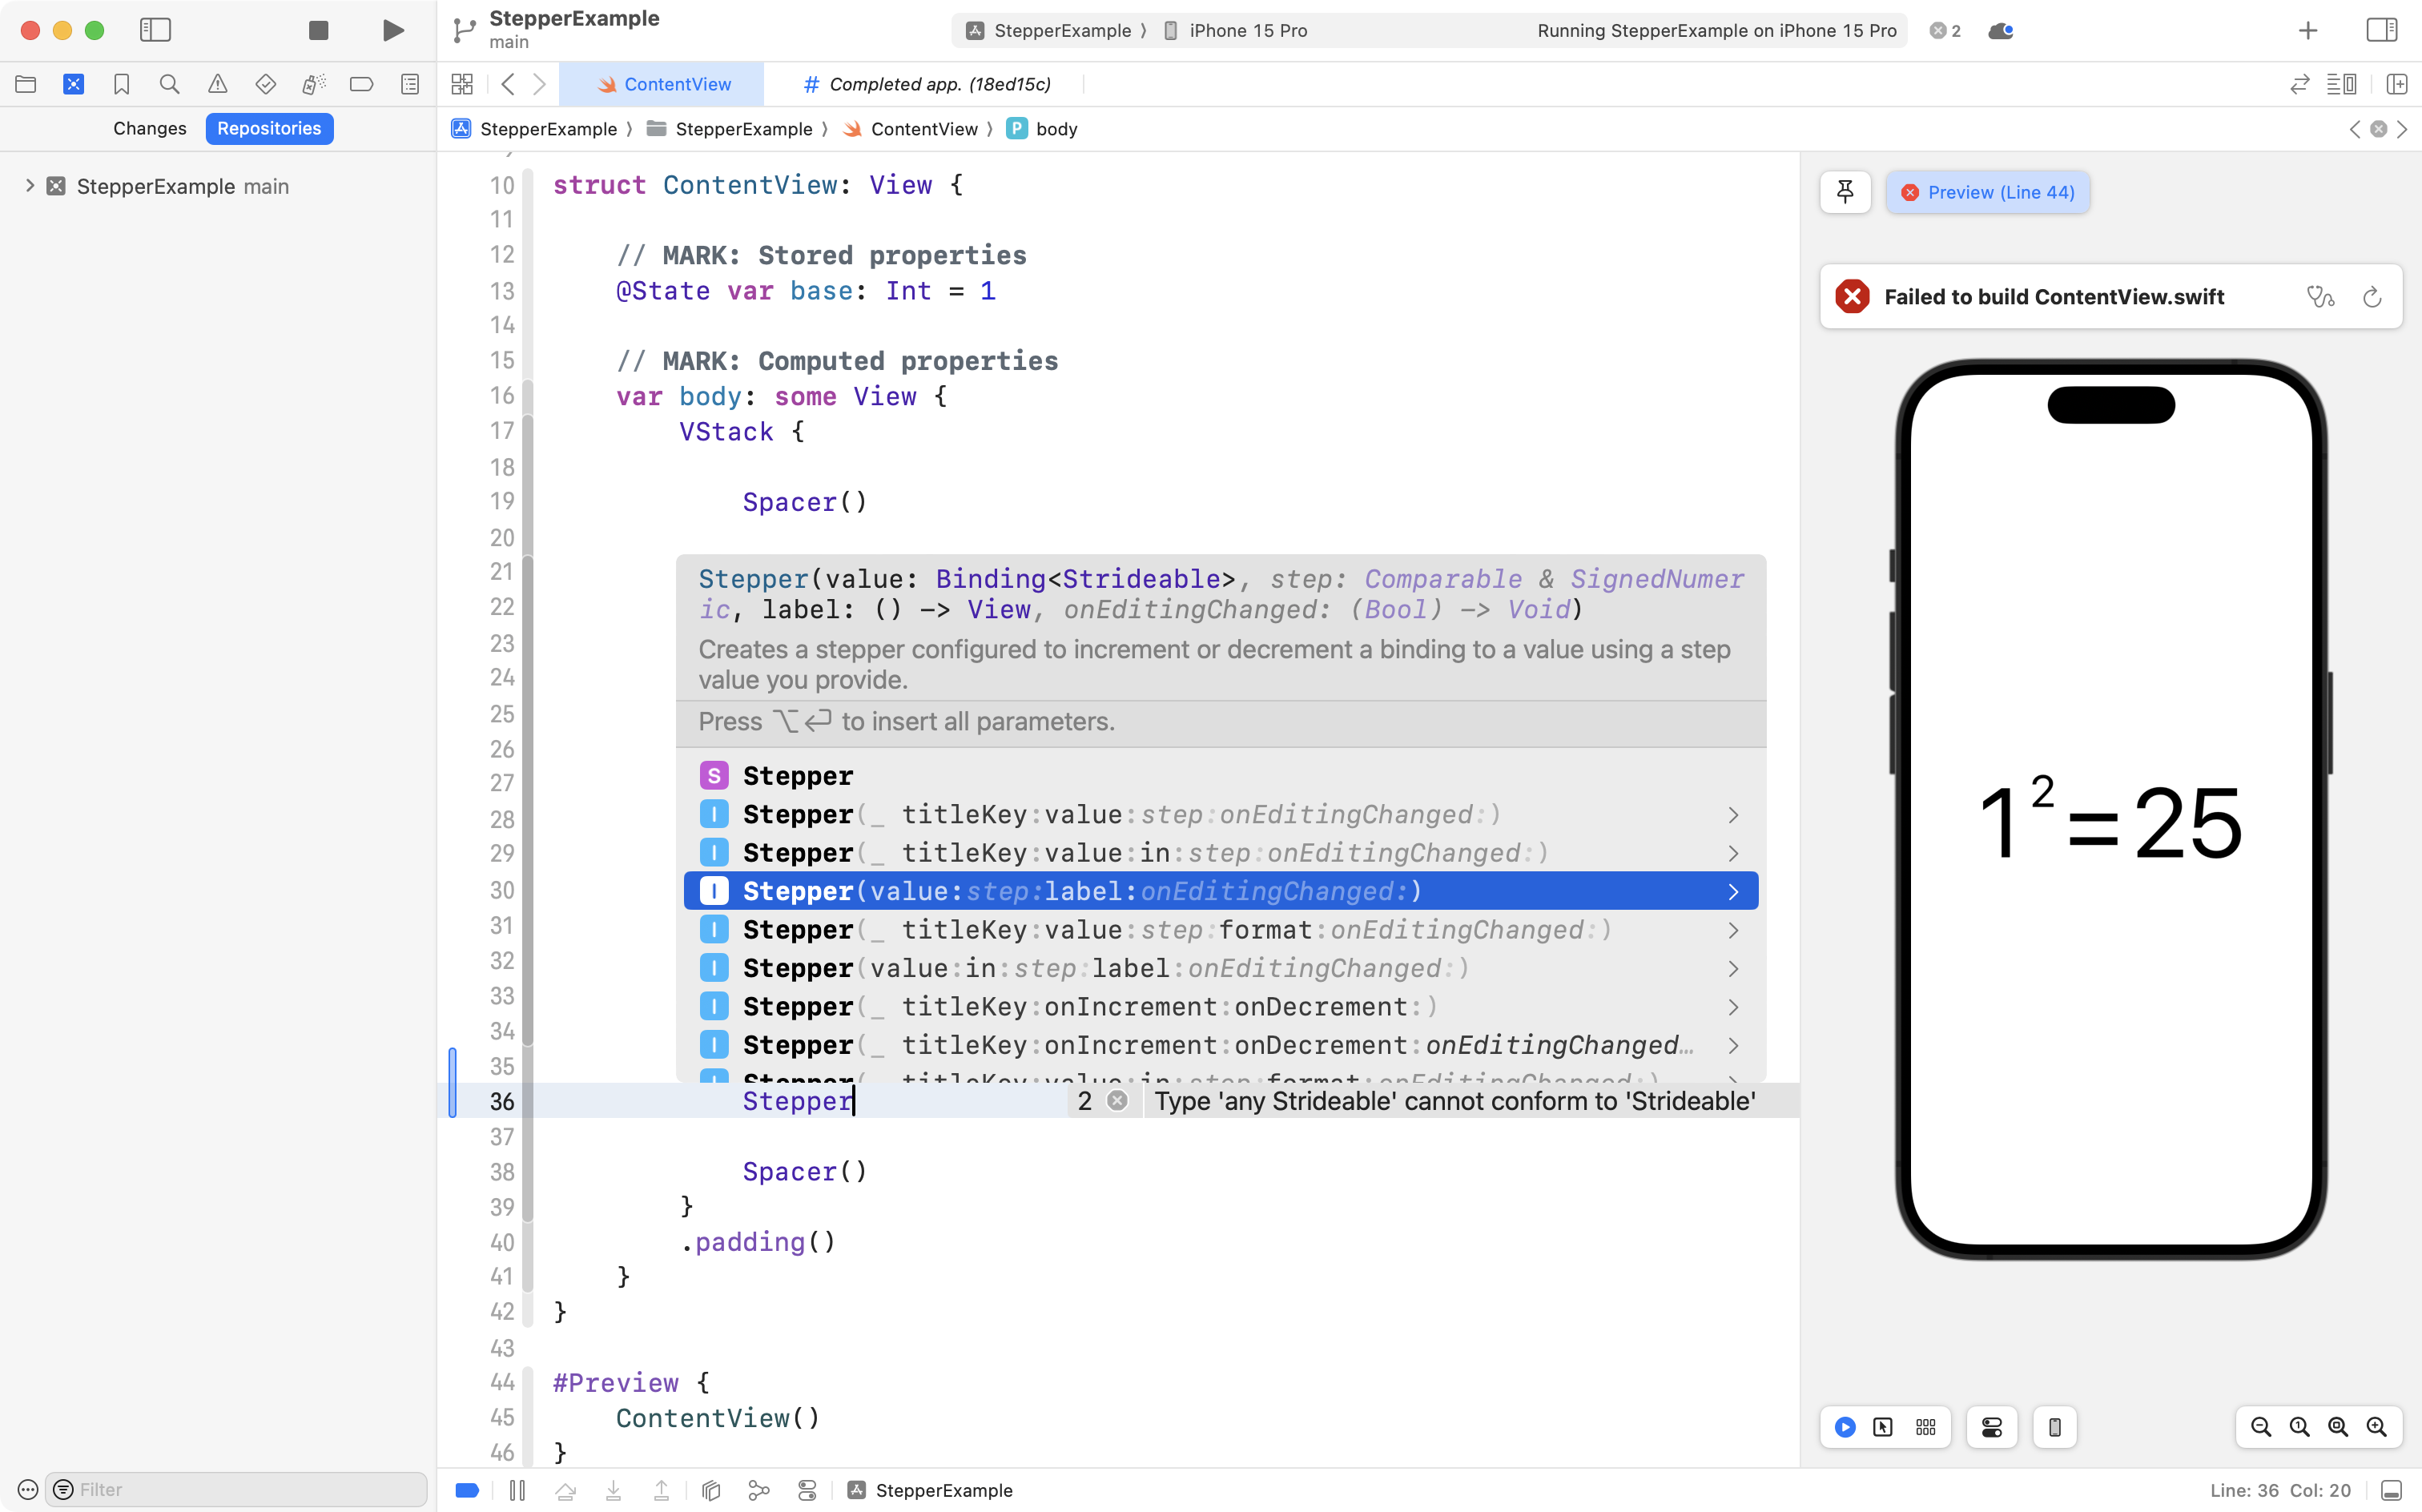
There are many ways to make a stepper, but choose the option shown.
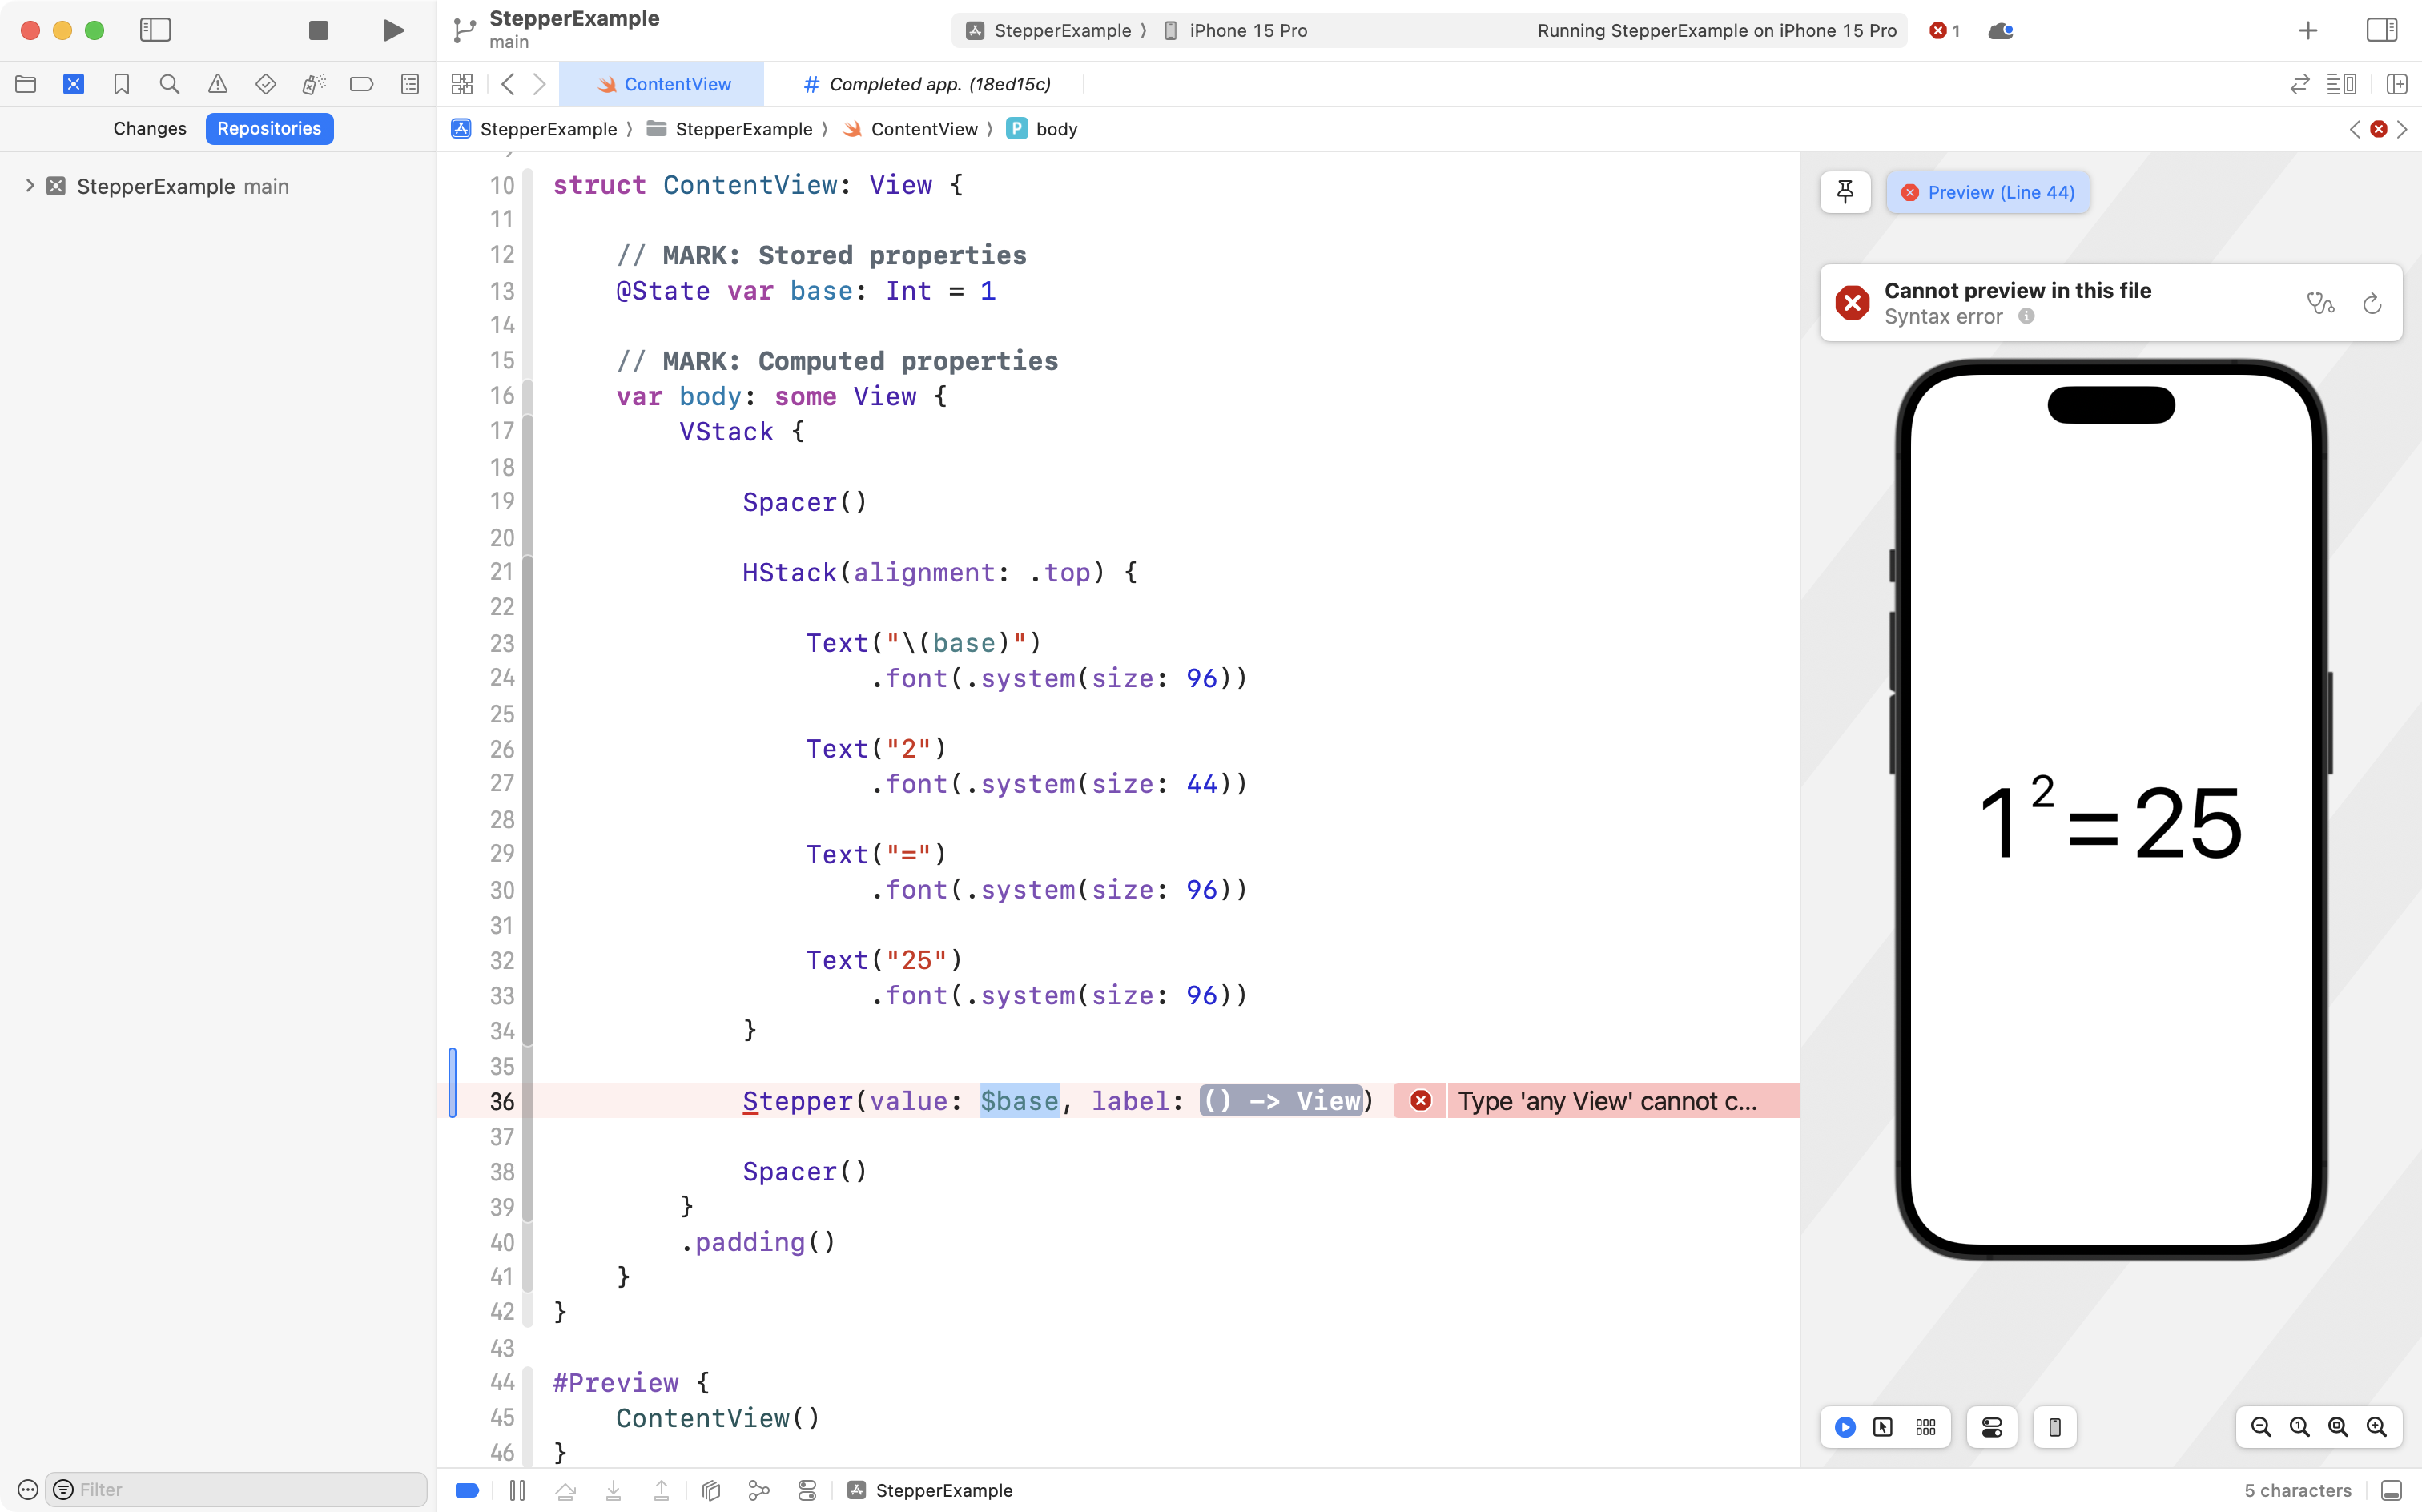
You will end up with this code:
Errors appear because we have not replaced the placeholders.
Let’s do that now.
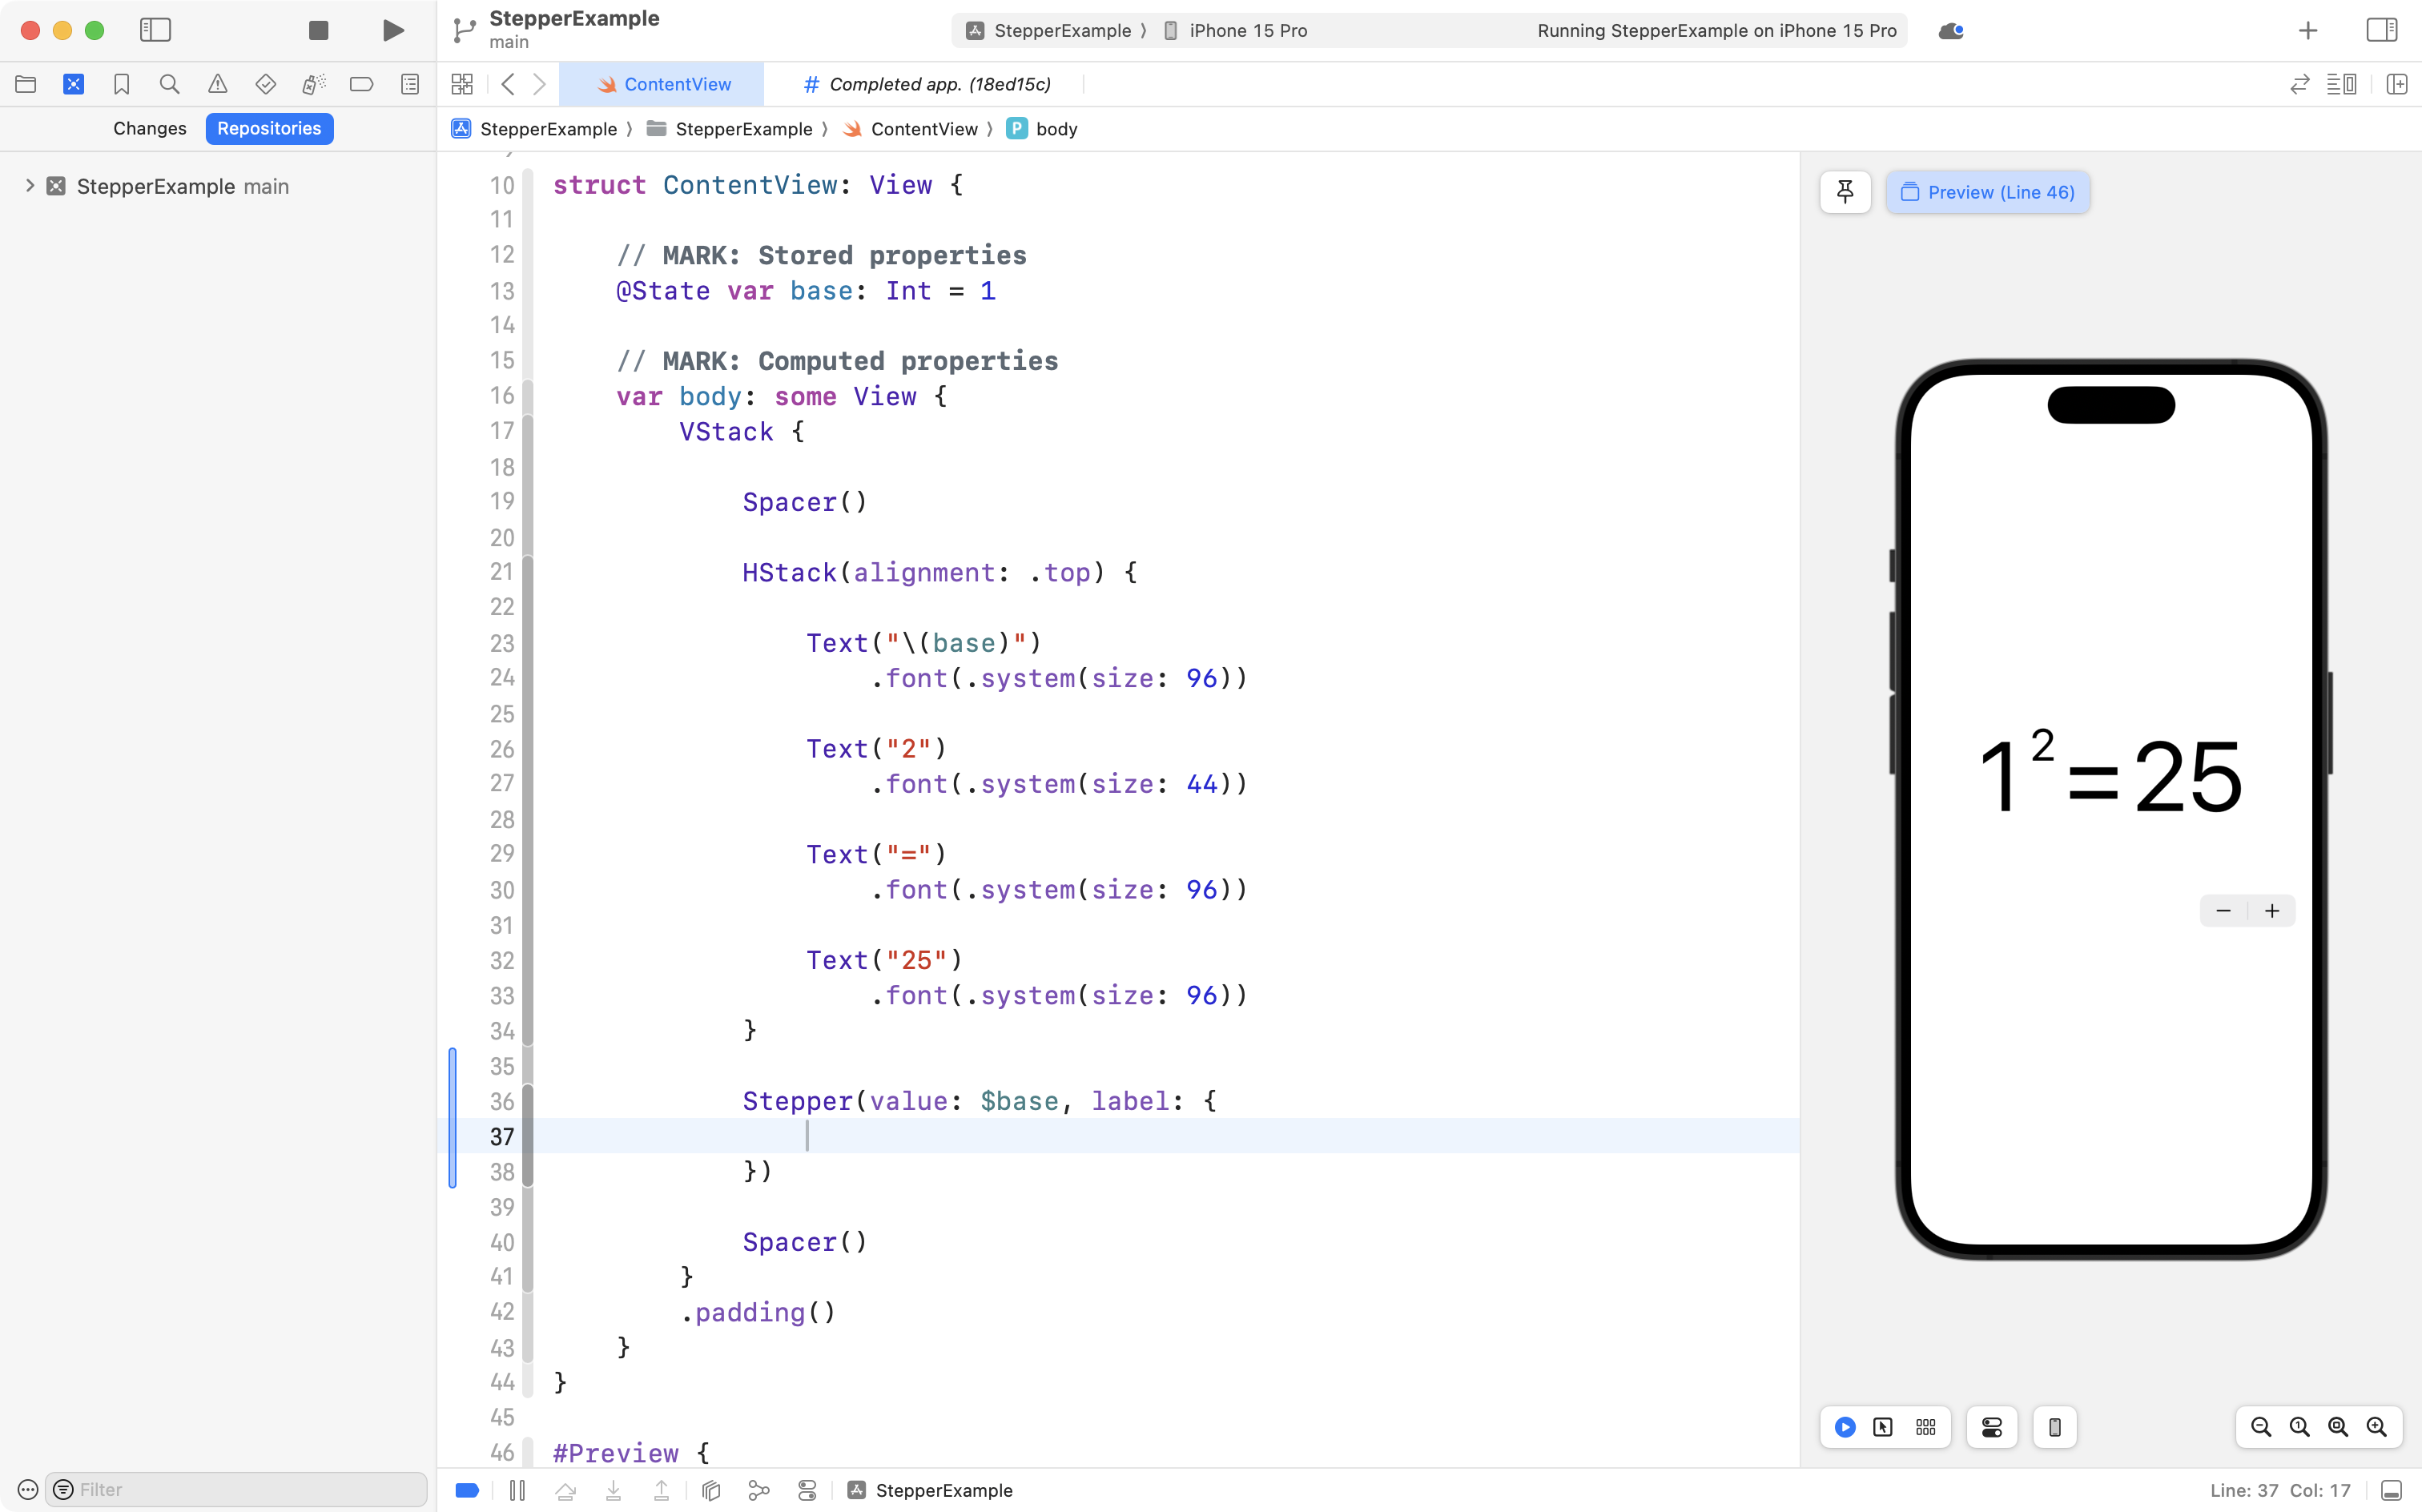
For the first placeholder, replace it with $base:
For the second placeholder, begin by typing a { and then press the Return key on your keyboard so you get this:
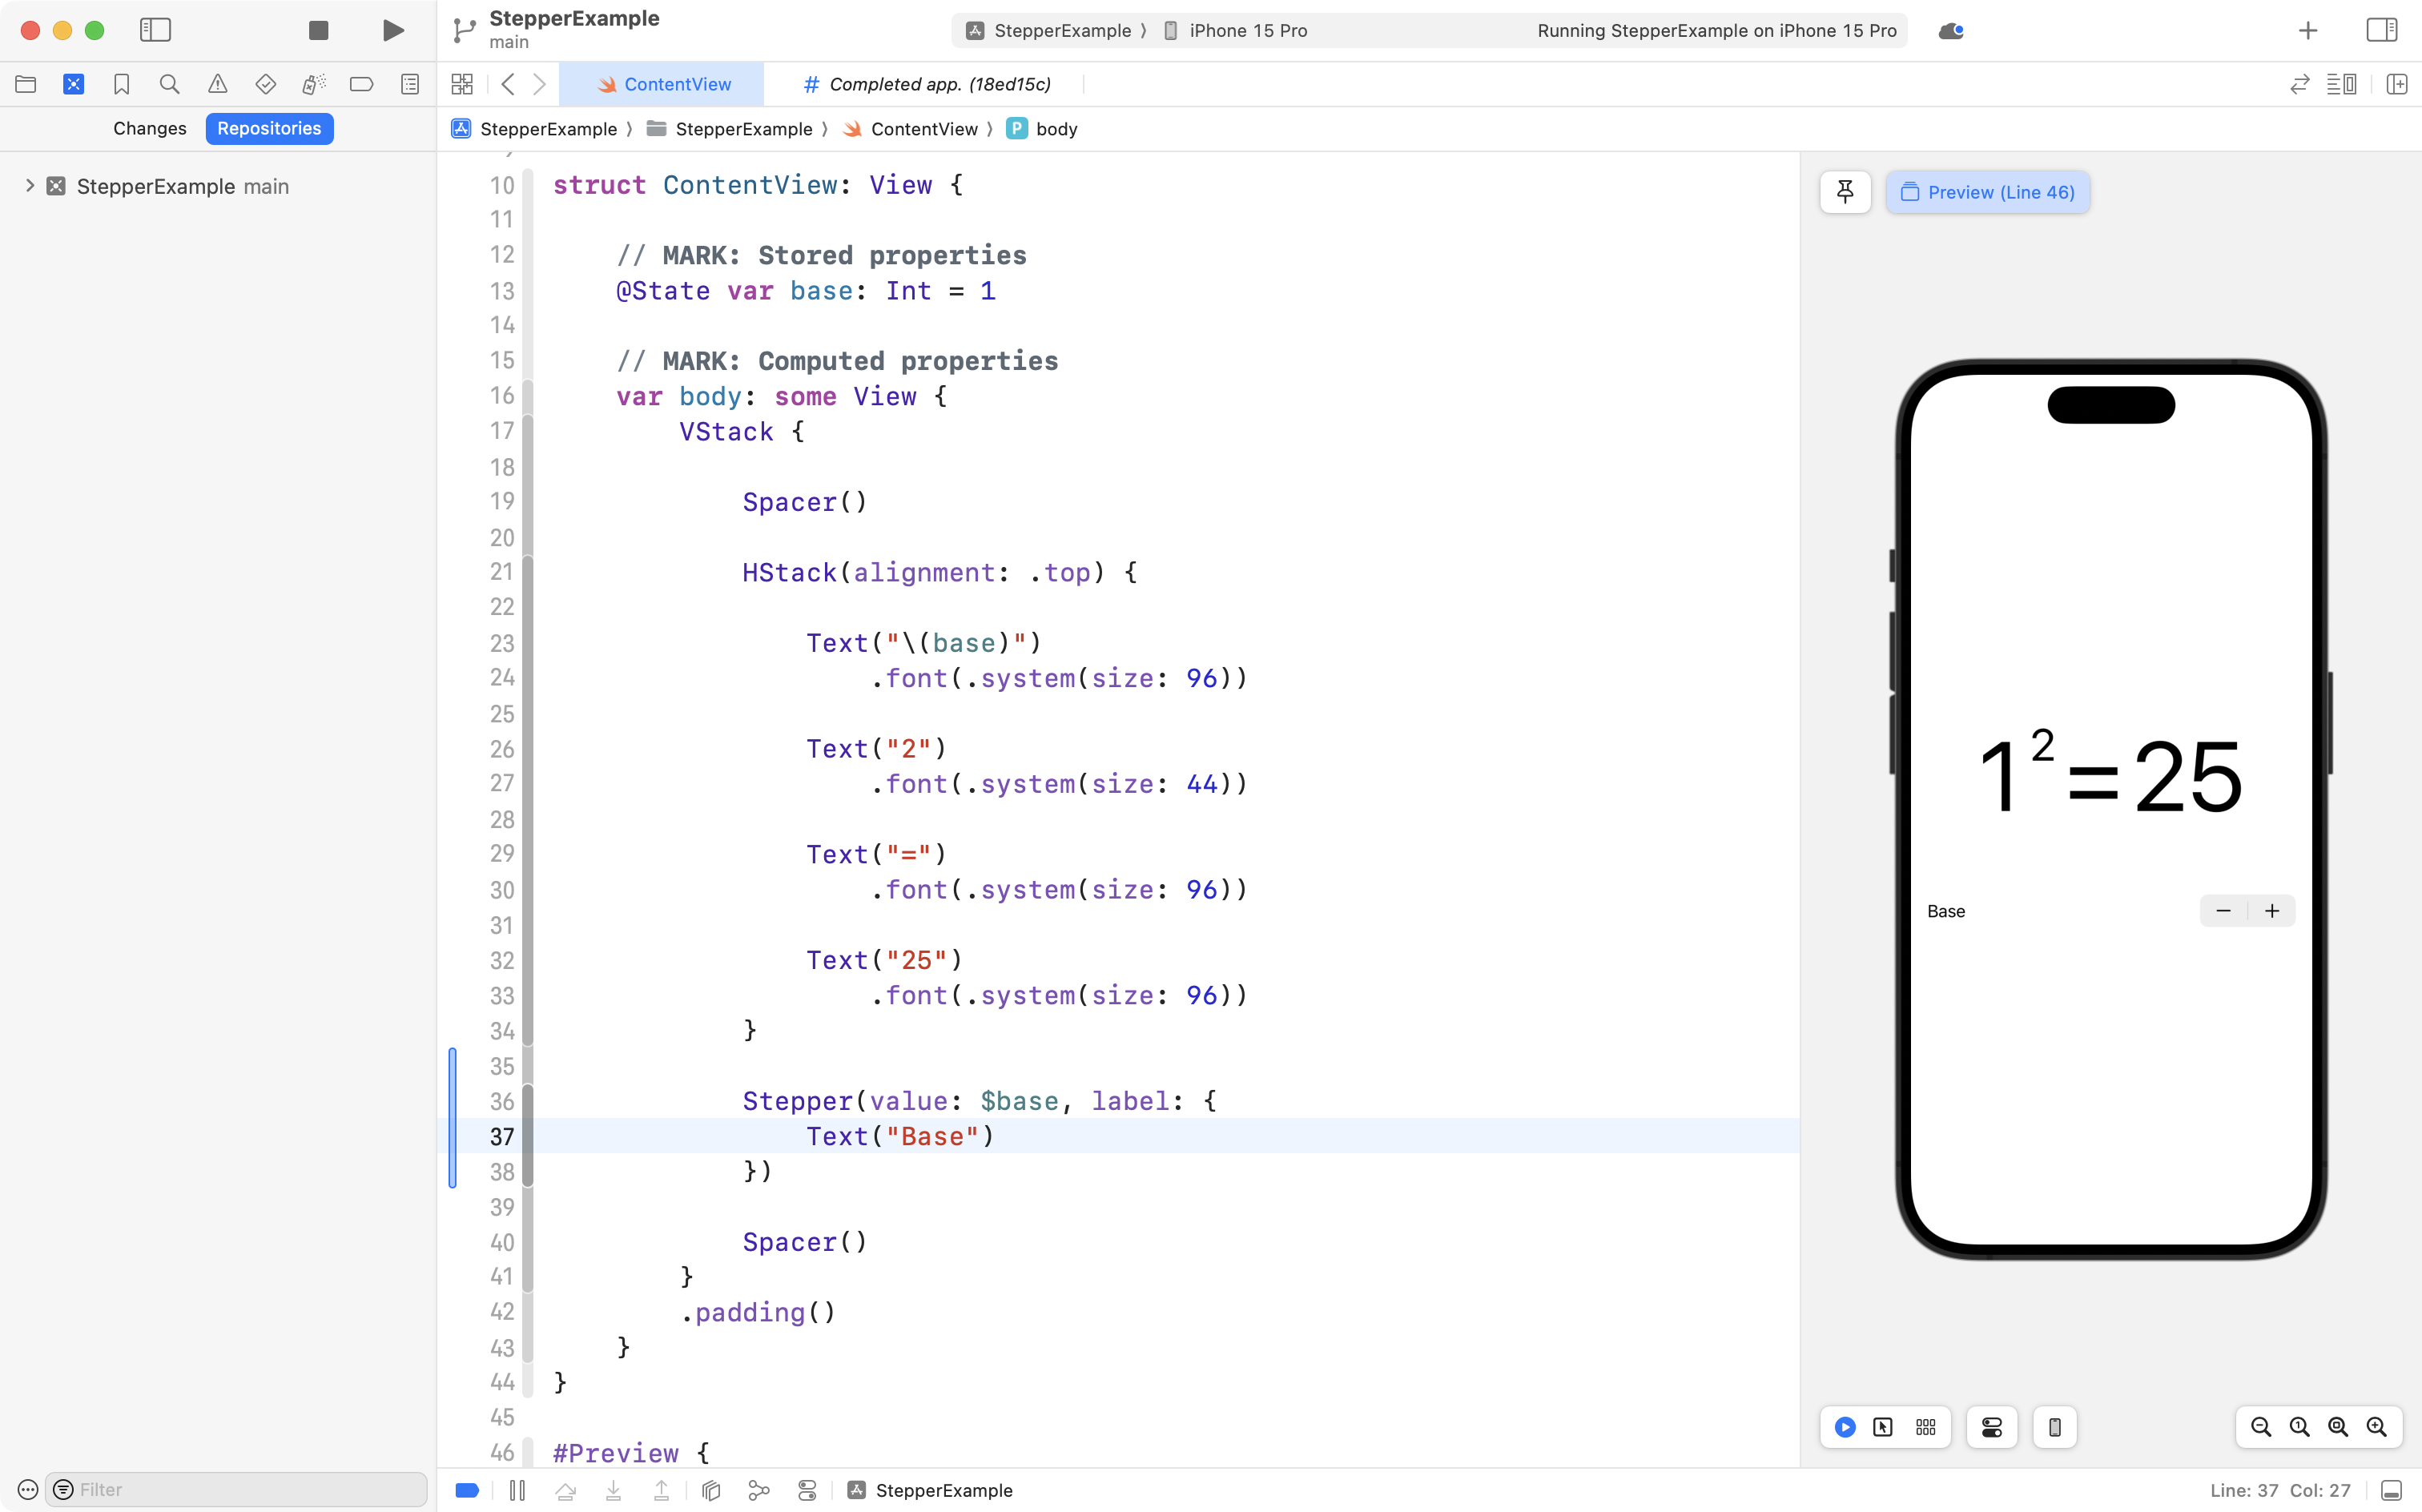
Finally, inside the { } brackets, add a Text view – this will be a label for the stepper, telling the user what value is being adjusted when they press the + or - buttons:
Now, let’s break down in detail what is happening there:
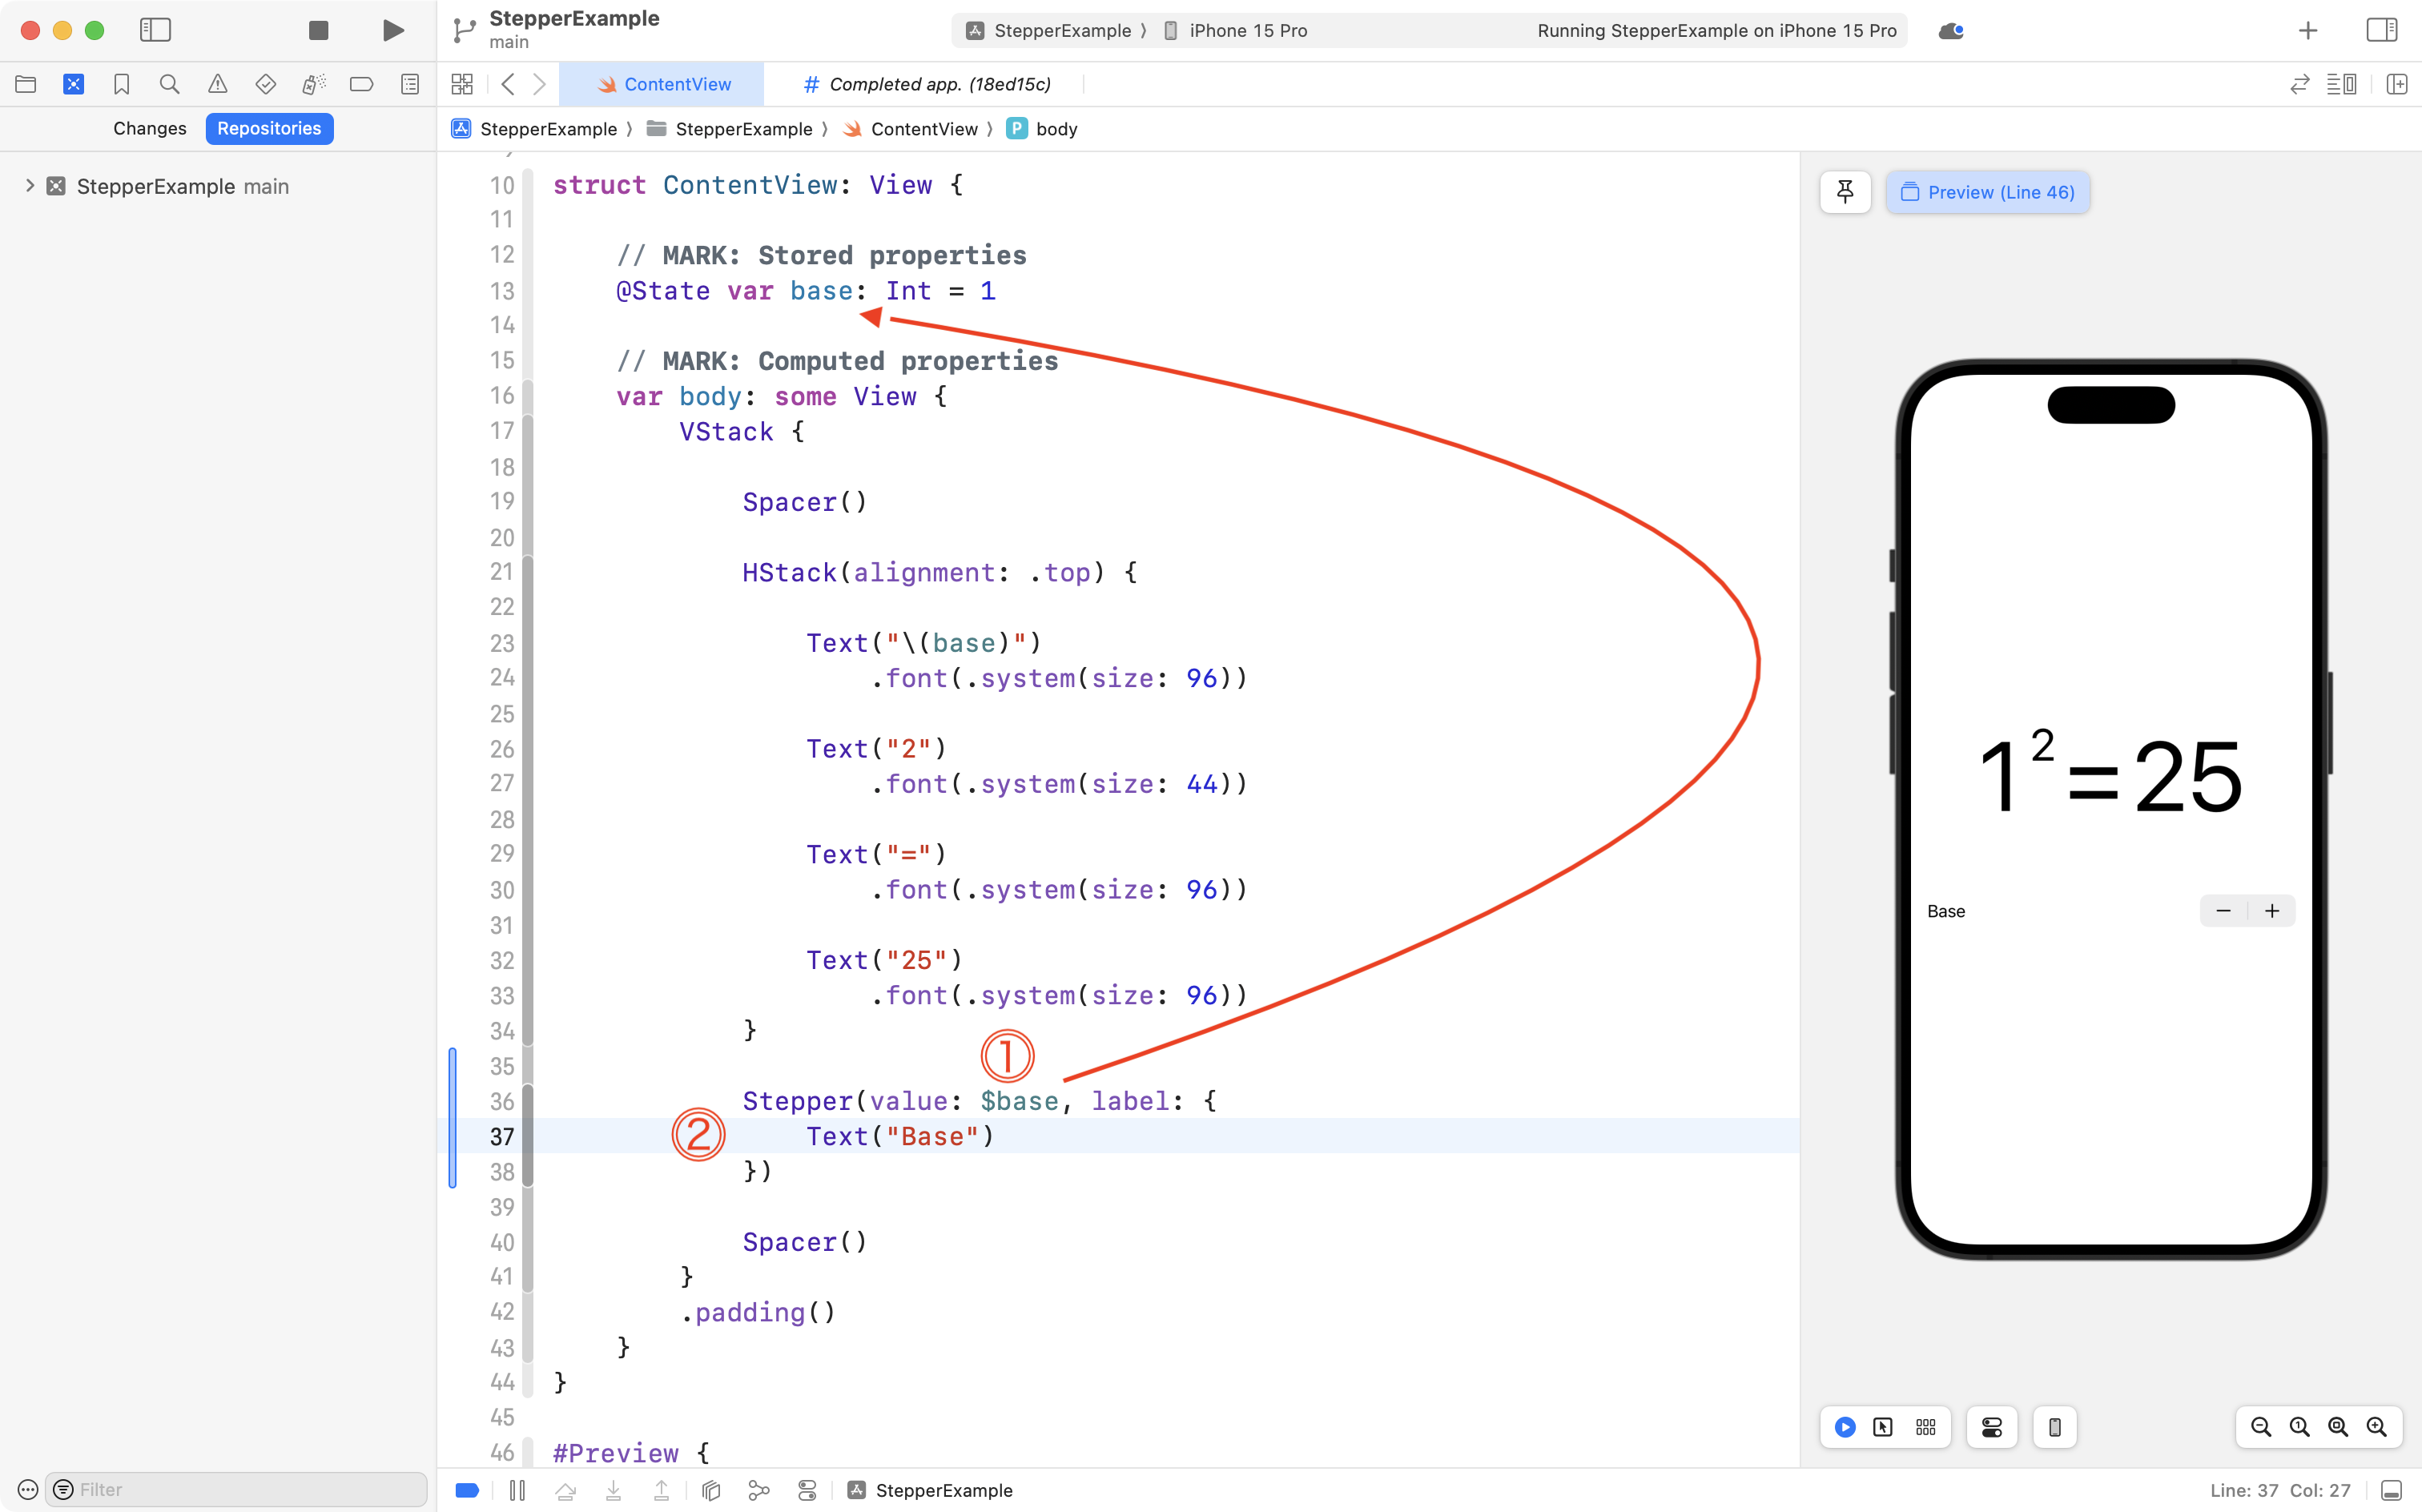
DISCUSSION
In the
Stepper, for thevalueparameter, we pass an argument of$base.The
$is special syntax that means this is a binding.What is a binding? It means the stepper is bound, or directly connected to, the
basestored property, in this example.So, as the stepper’s controls are tapped by the user, the value of the
basestored property is changed.And, since we marked that stored property with
@State, the user interface will automatically be updated.For the
labelparameter, we pass a code block that starts with a{and ends with a}. This type of code block is also called a closure.Inside the closure that is passed as the argument for the
labelparameter, we provide aTextview.The
Textview inside the closure provides the visual output that we see beside the stepper control. In this case, it is simply text that says “Base”.
If you try the app now, as the stepper is tapped, the text view that shows the base is updated automatically – that happens because of the @State property wrapper:
At this point, we should commit our work with the following message:
Added a stepper control that is bound to the "base" stored property. The user can now click to change the base in the app's interface.
String interpolation
We have one final step to complete.
The app does not currently show the correct square of a given base – instead, it shows 25 – that part of the layout is still static (meaning constant, or unchanging).
Let’s fix that now.
We have a stored property that the user can change using a stepper control.
That’s our input.
We want to process the input, and show output.
This is a great place to use a computed property for the processing part, and string interpolation for the output part.
First, add the following computed property to your structure:
The new computed property is called squared and it will update whenever the value of base changes – again, thanks to the @State property wrapper.
Finally, we need to show the output from the squared computed property.
You might think that we could just do what is shown below – note that old code is in grey – new code is in light blue:

However, that generates an error message.
A Text view is designed to show, well, text – that is – a String.
However, the data type of the squared computed property is an Int.
This is where string interpolation helps us.
Make the following change – note that old code is in grey – new code is in light blue:
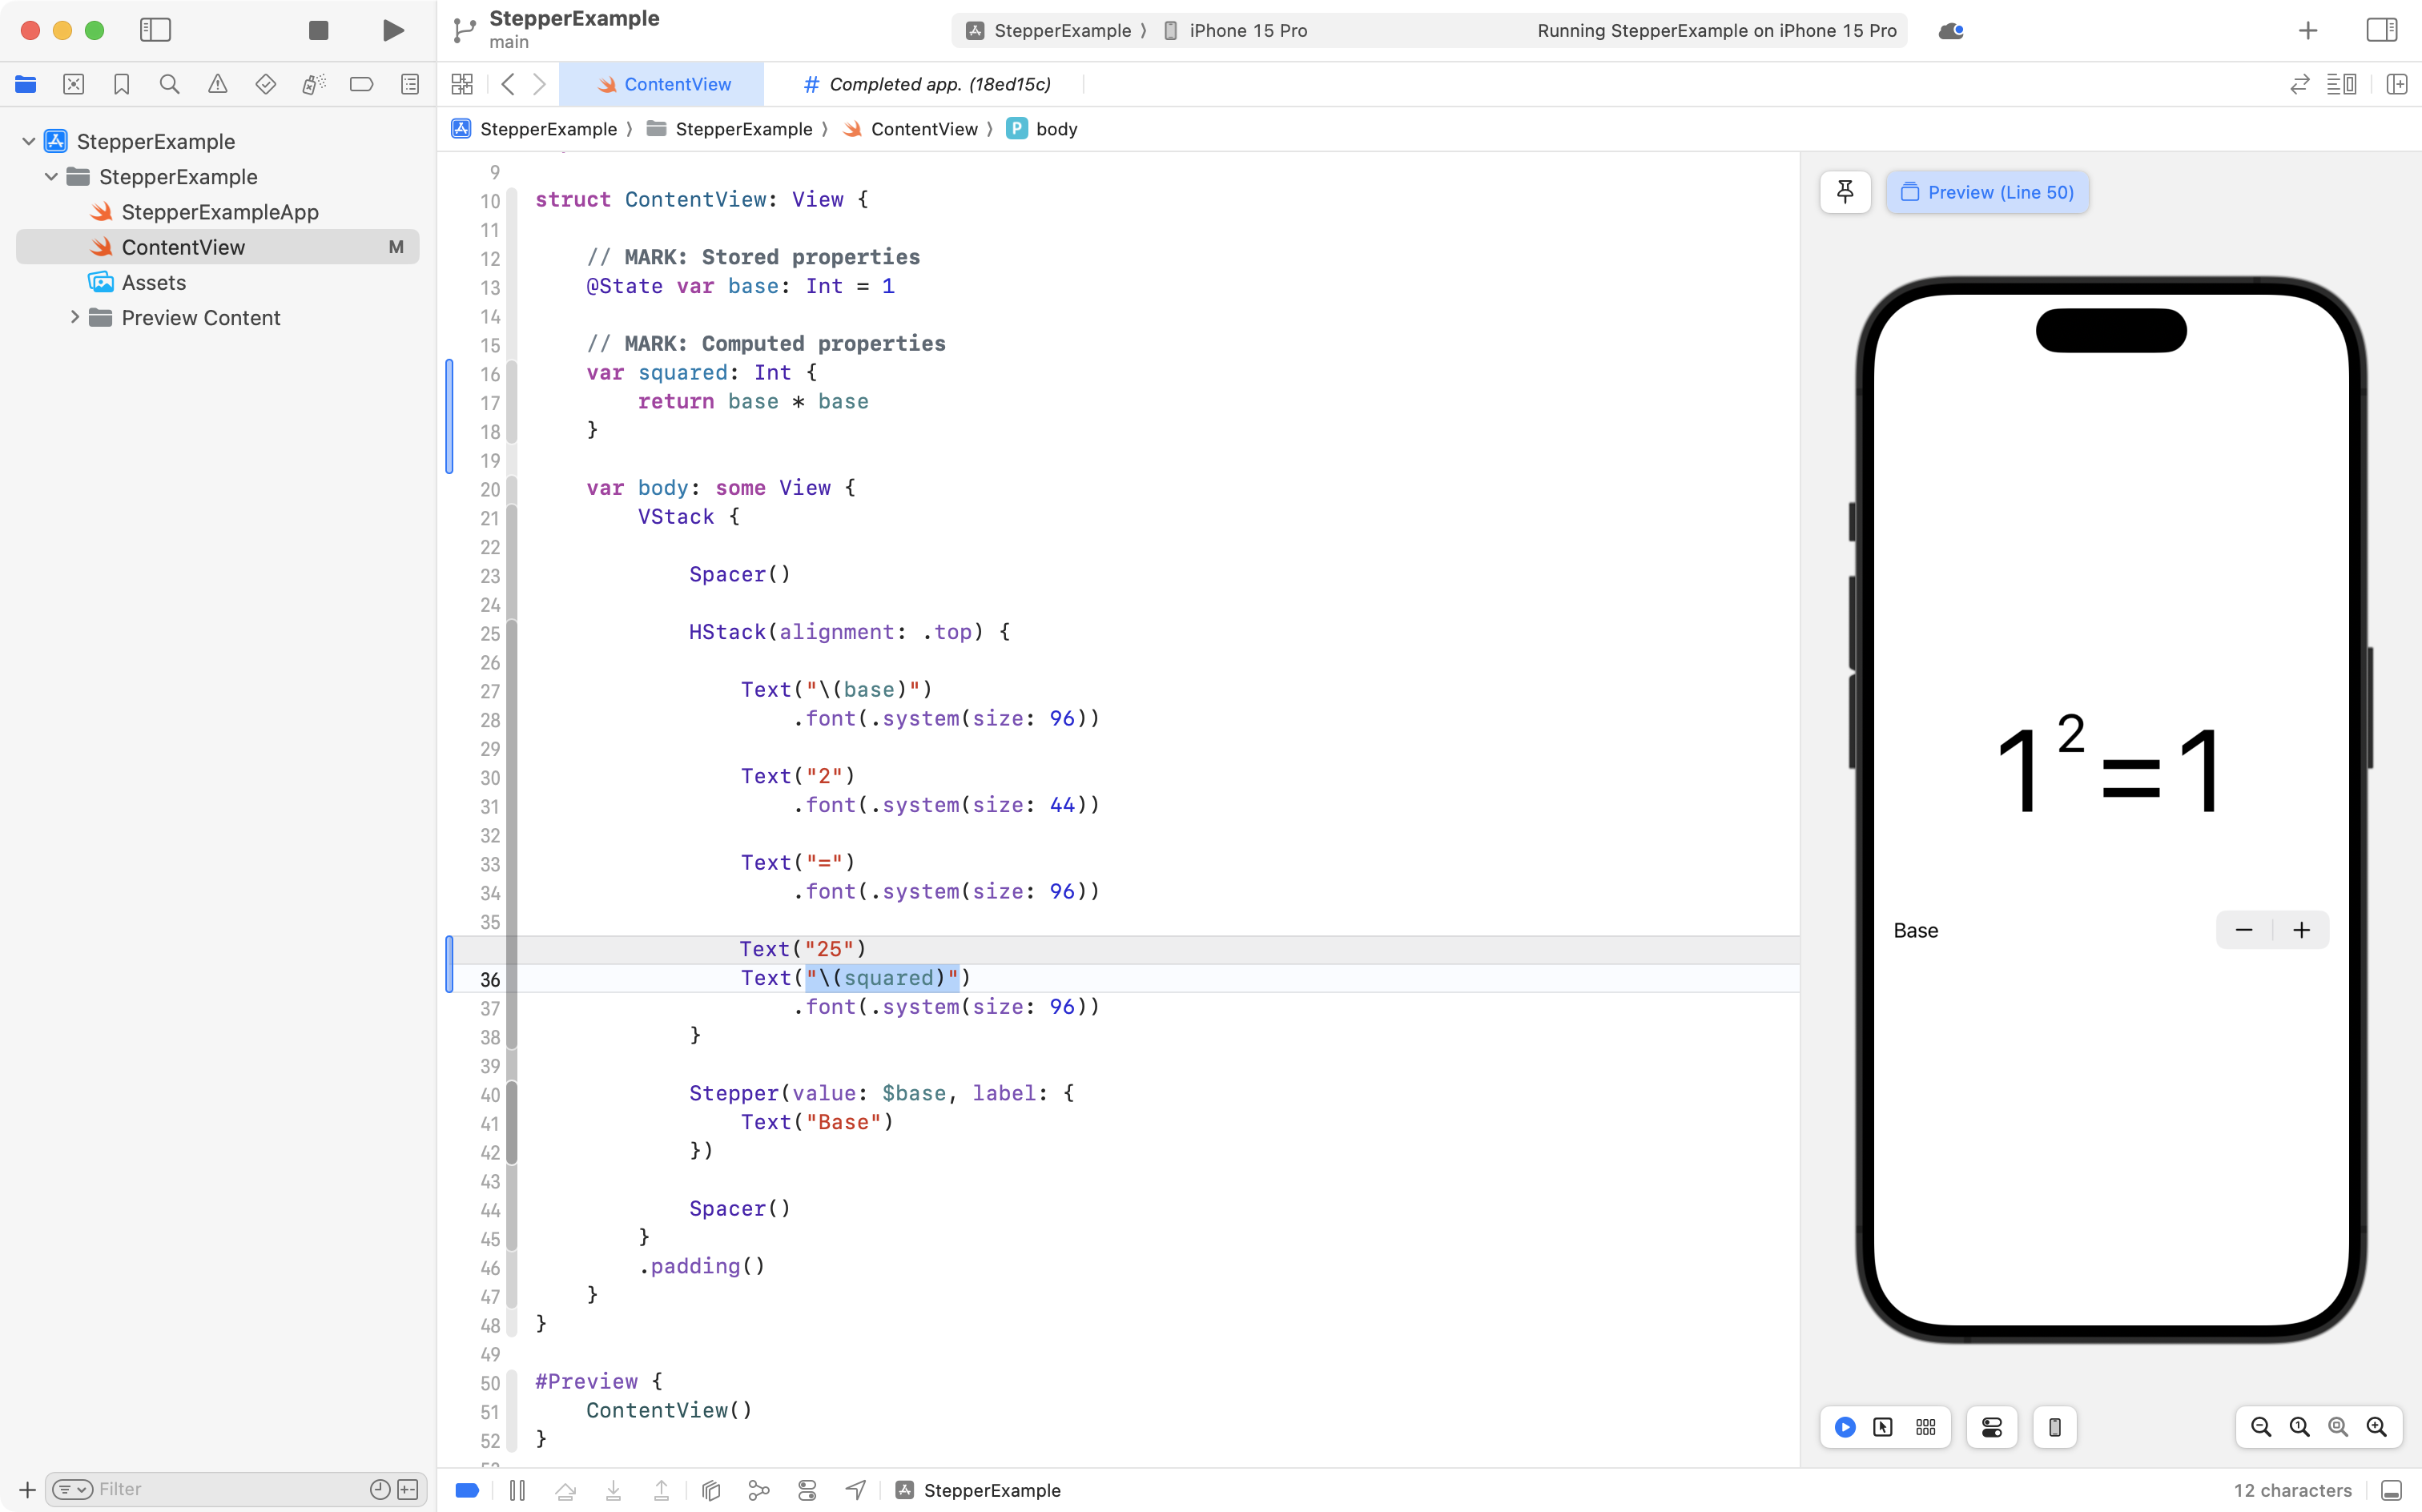
By adding this code:
Text("\(squared)")… we are asking the Text view to show a string, because of the " " marks.
However, the syntax \( ) is where how we tell Swift to take whatever we put between the brackets – and change it into a string.
That is called string interpolation.
So when we say: \(squared) we are asking Swift to convert the squared computed property that is an Int into a String.
NOTE
Changing an
Intinto aStringin this manner only works inside a string literal – that is – in between" "marks.
Now, if you try the app – it works!
RECAP
The stepper changes the
basestored property via the$basebinding.Since
baseis marked with@Statethe user interface automatically updates.The
squaredcomputed property automatically updates whenbasechanges.
Commit and push your work with this message:
Finished the app by adding a computed property and using string interpolation.
Exercises
Fix the presentation
In the program at this point in time, a logical error of sorts exists.
If you use the stepper to reduce the base of the power to a value that is less than zero, it presents a mathematically incorrect statement:
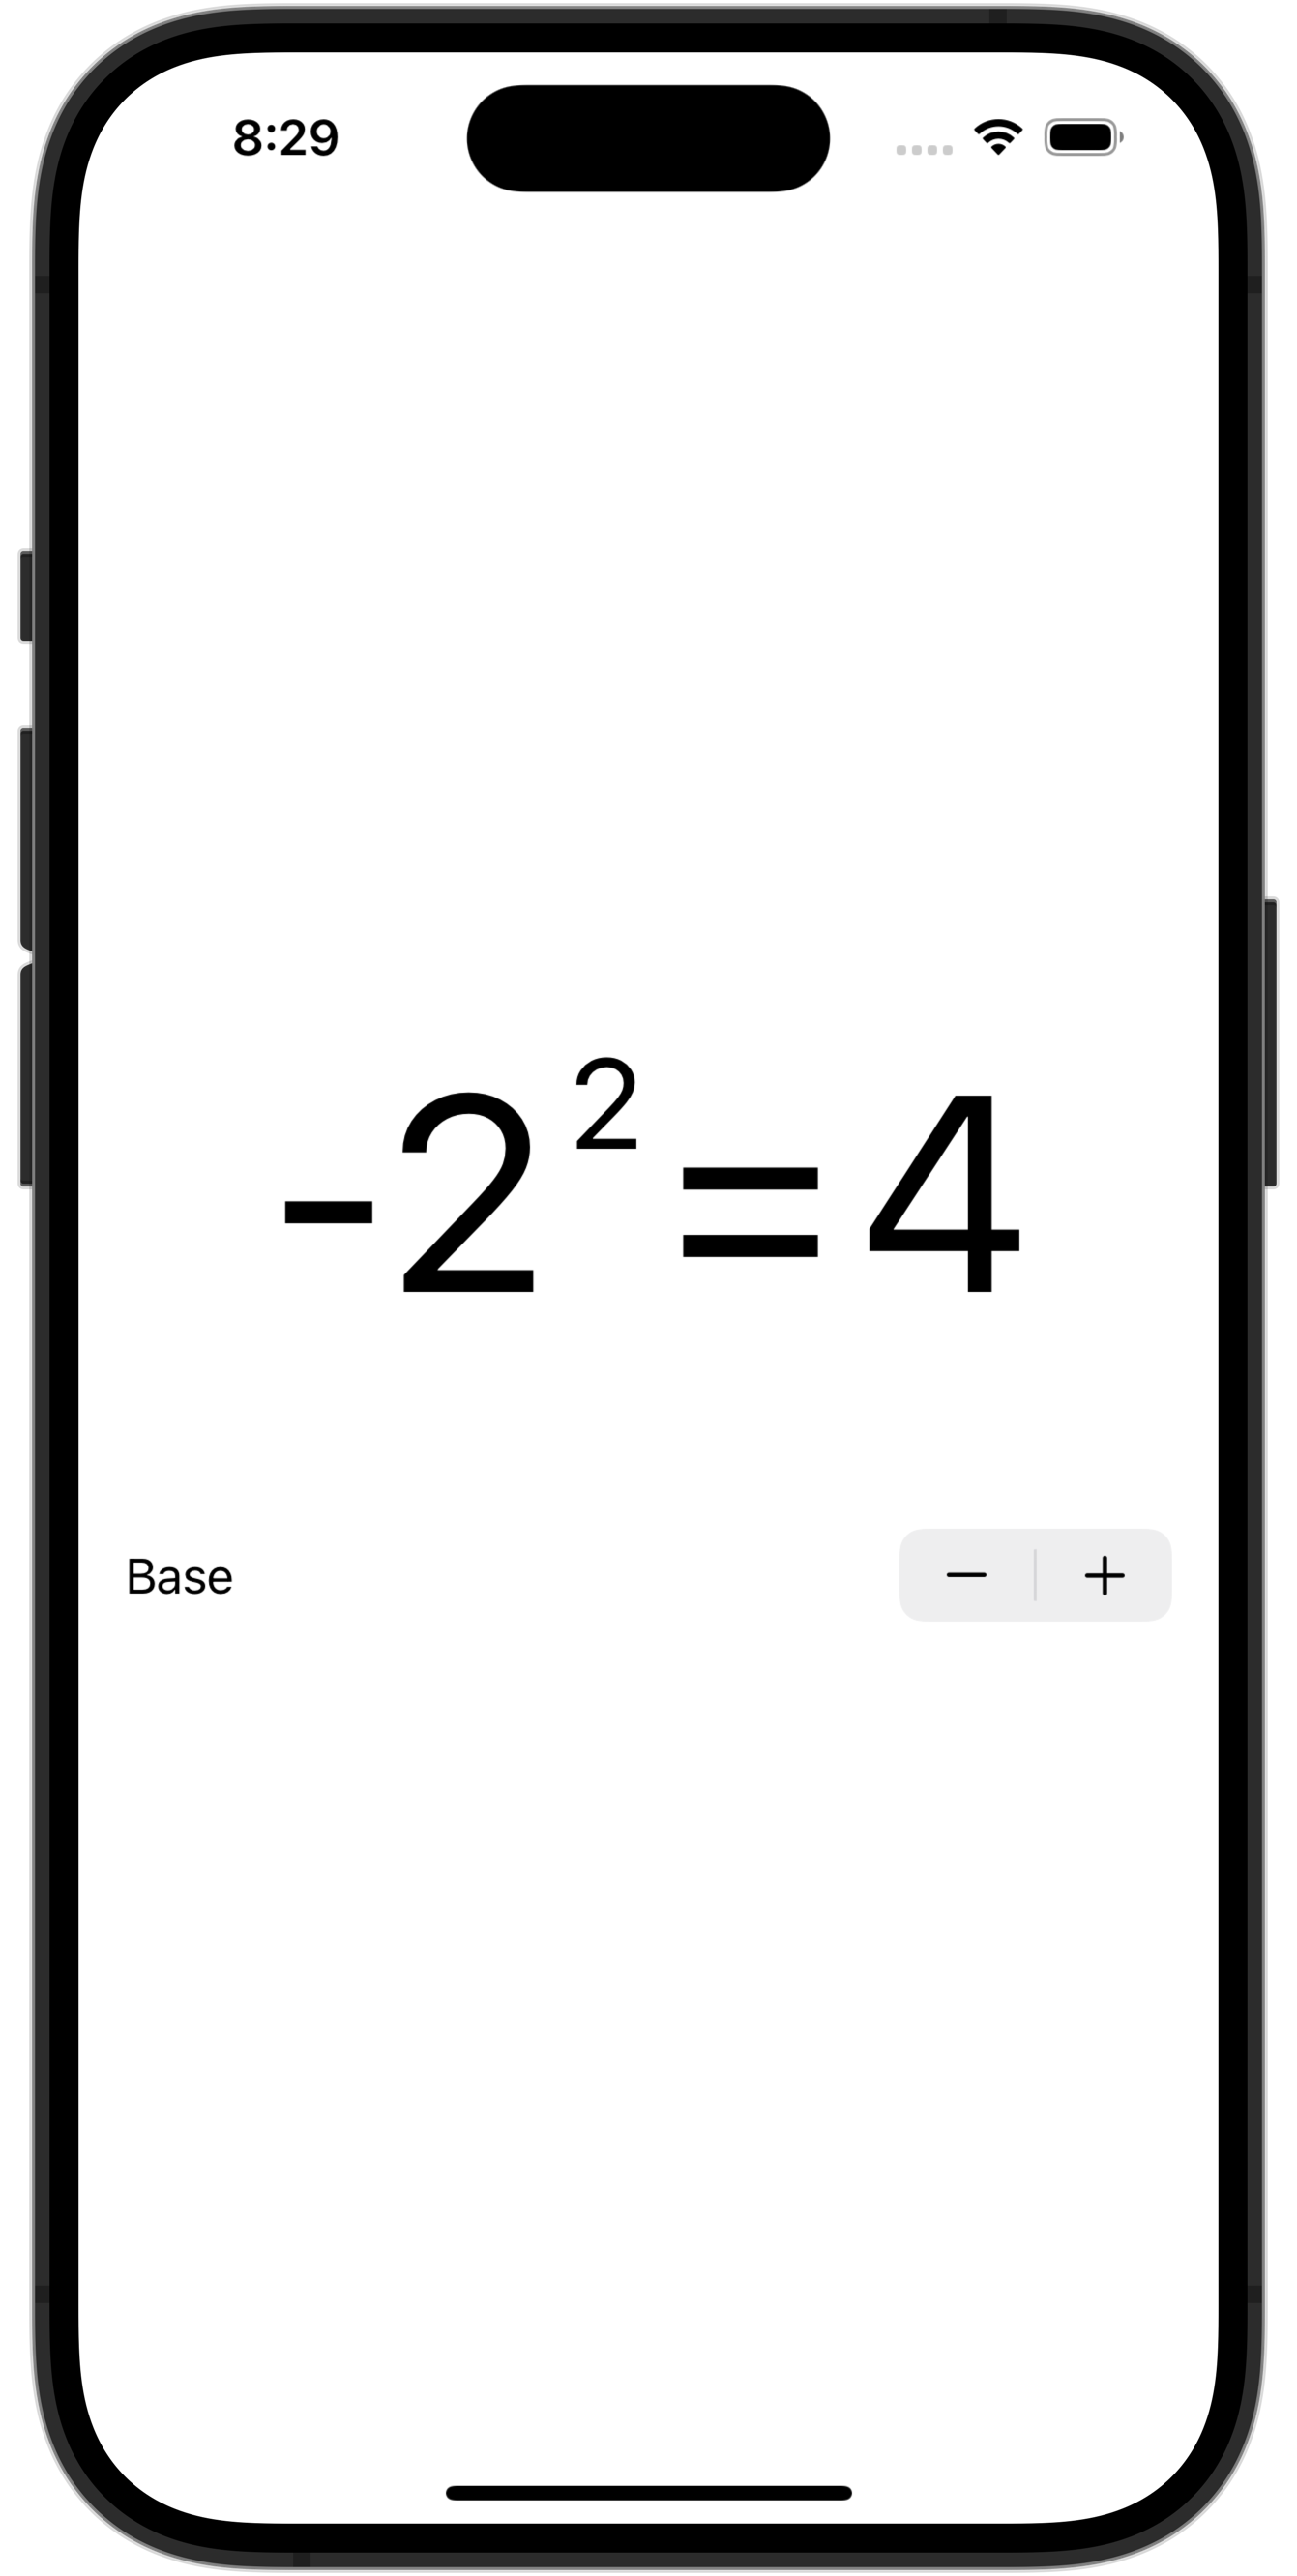
Of course, but since the base in the latter expression is only .
That is:
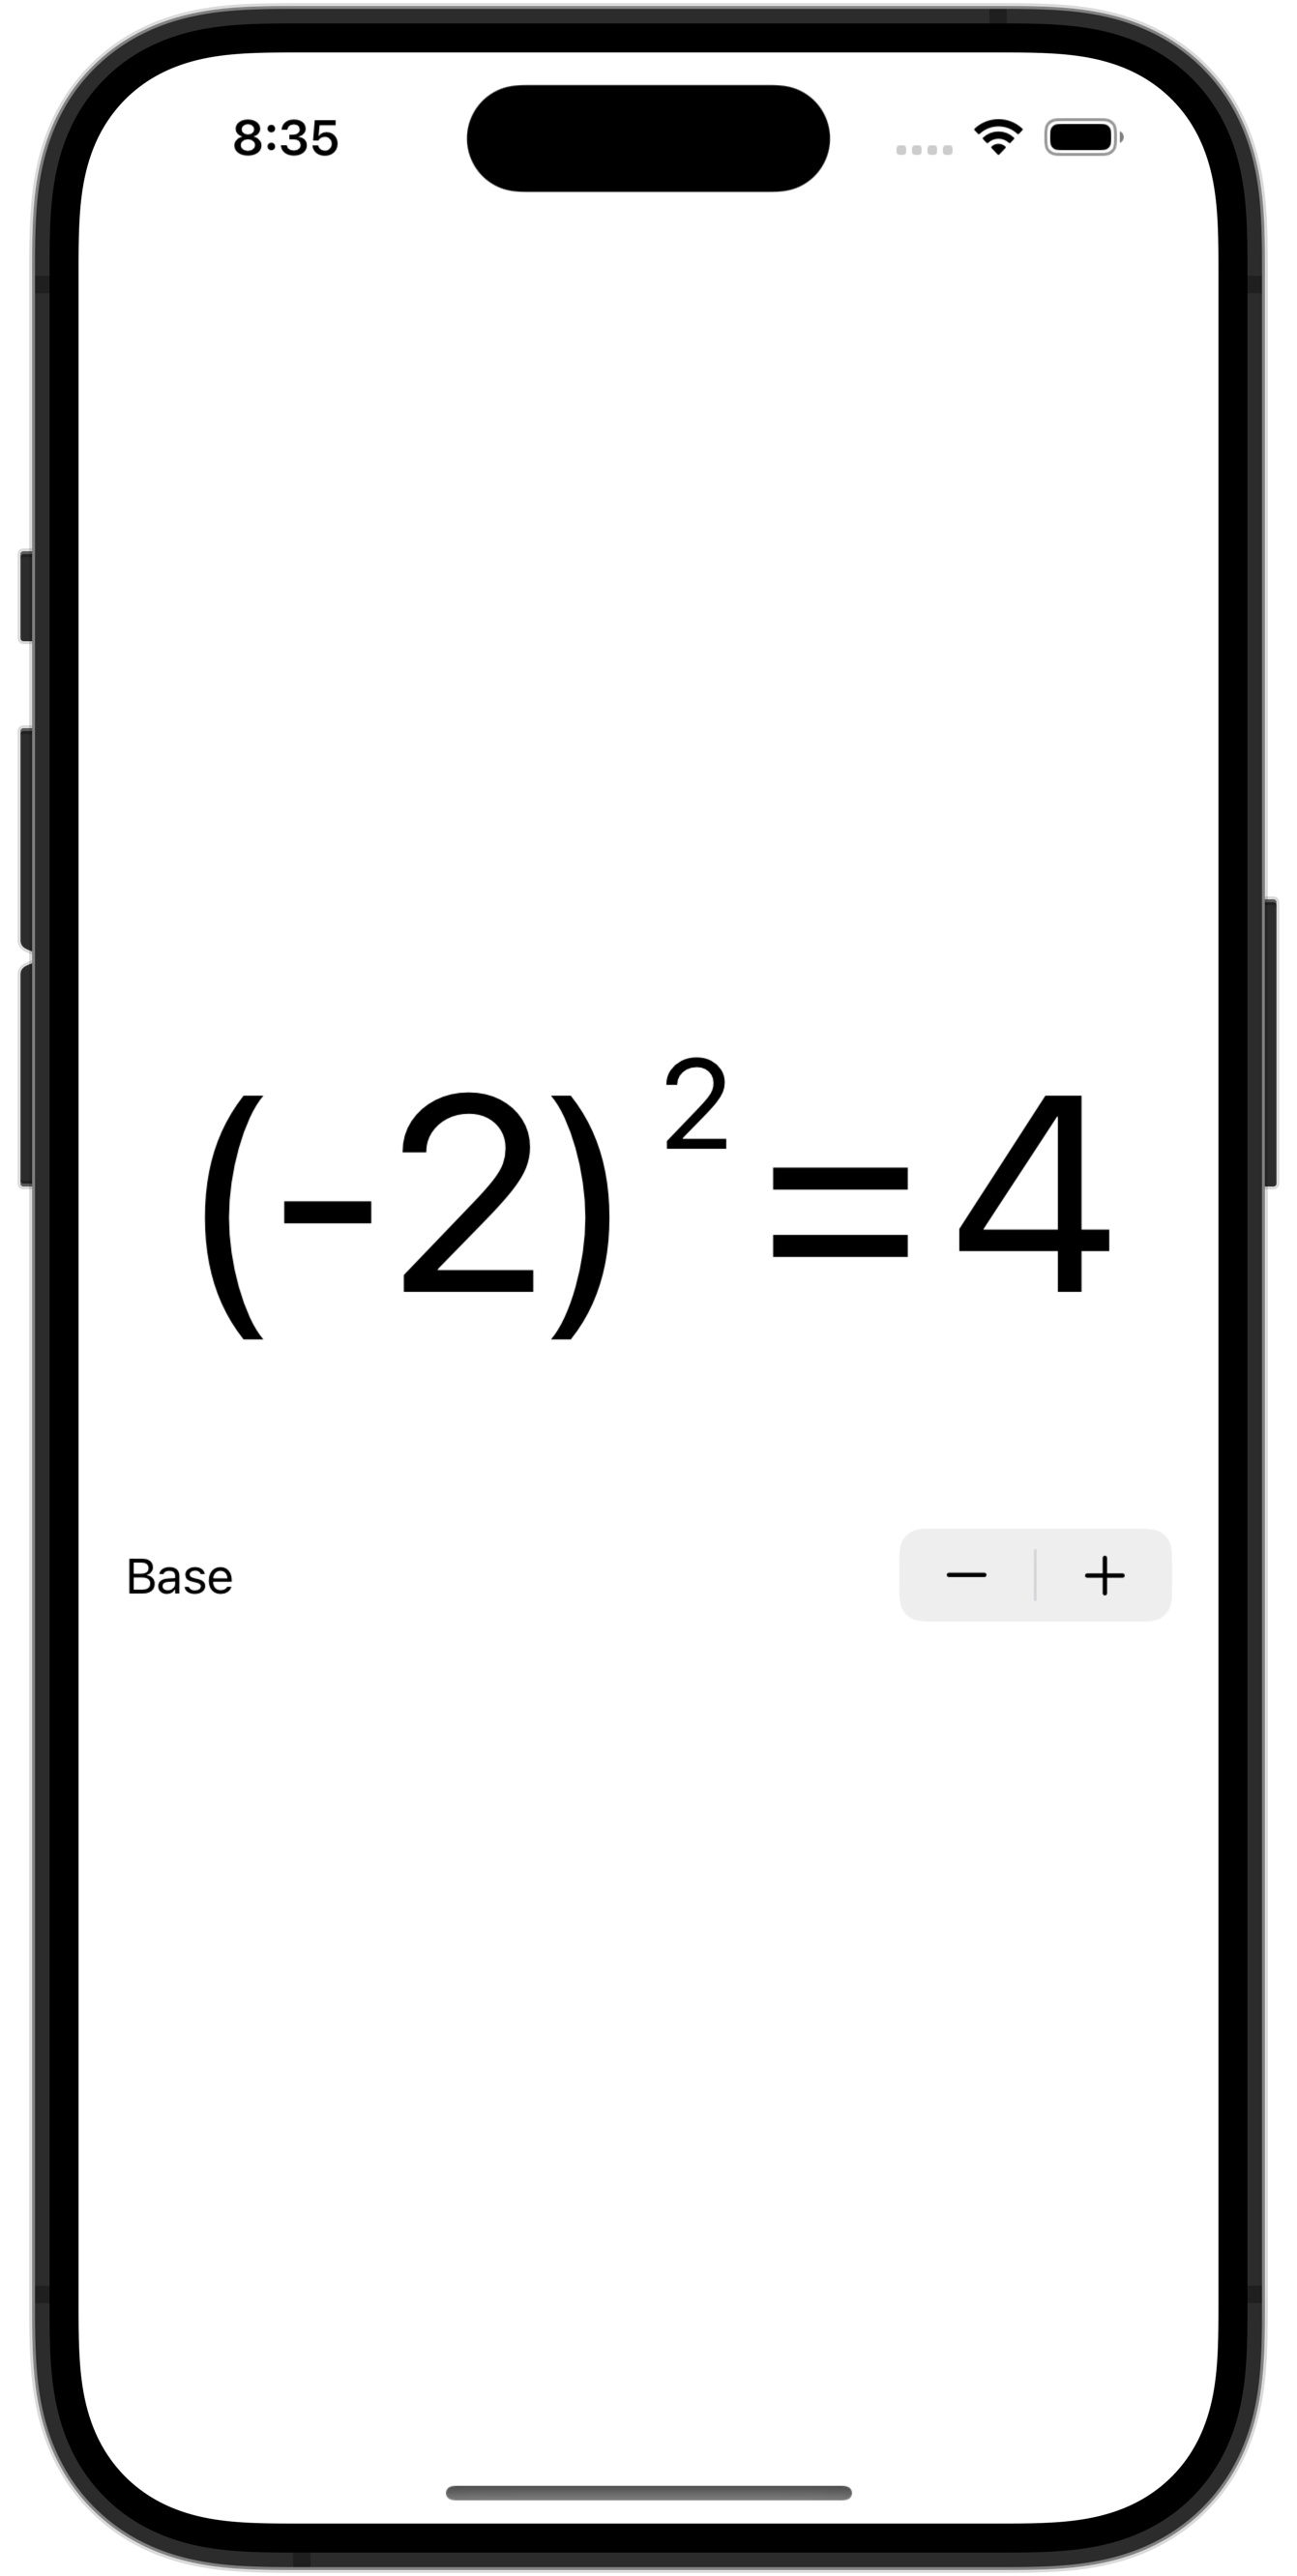
Fix the user interface in this app so that it presents mathematically correct statements at all times, like this:
Finding sums
Using your newfound knowledge, write an app that calculates the sum of two numbers, like this:
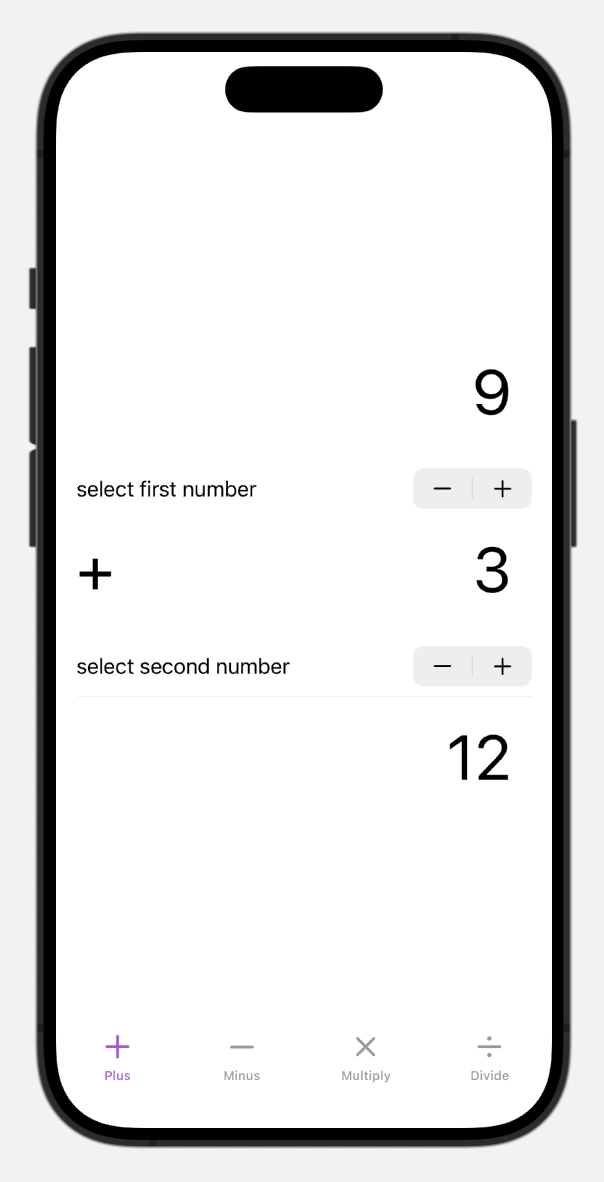
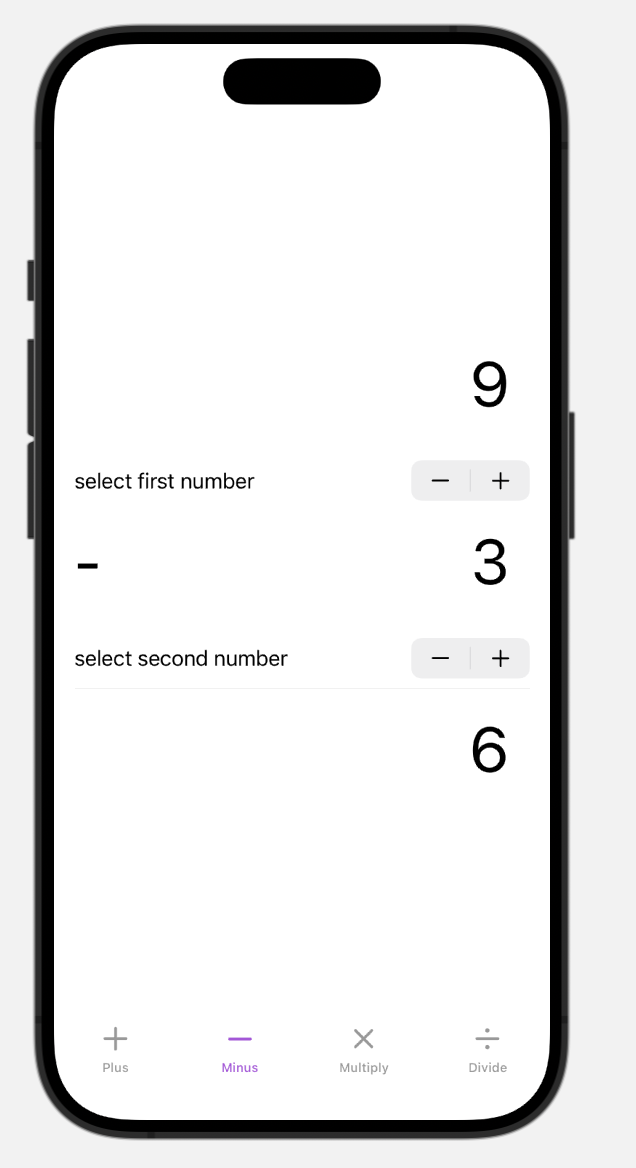
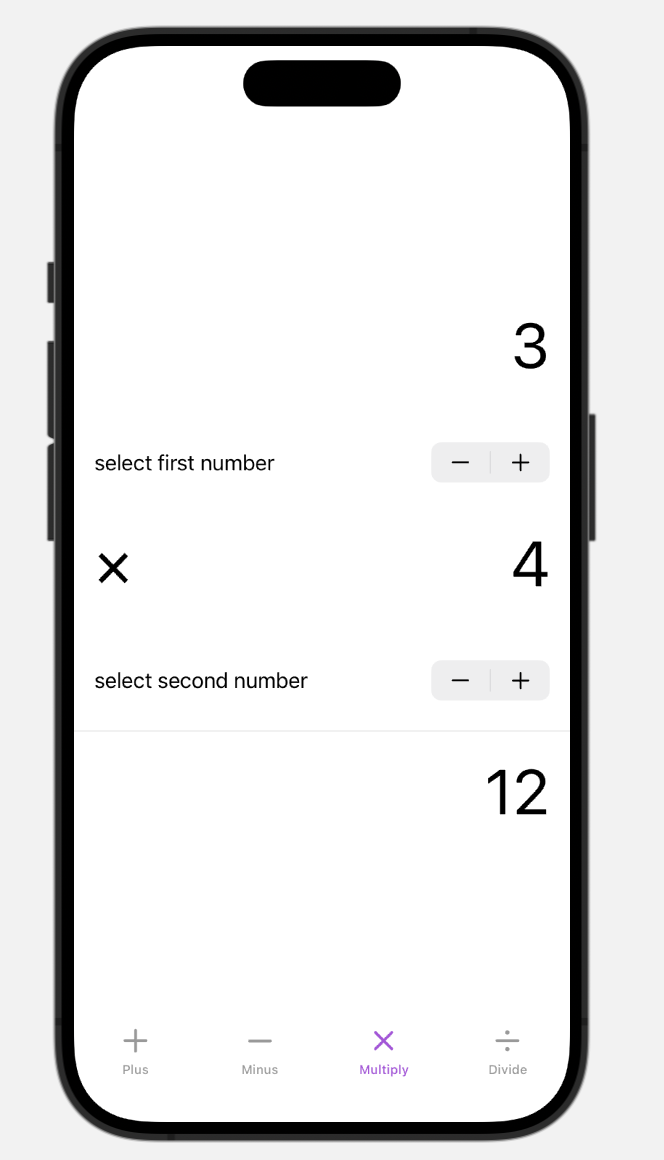
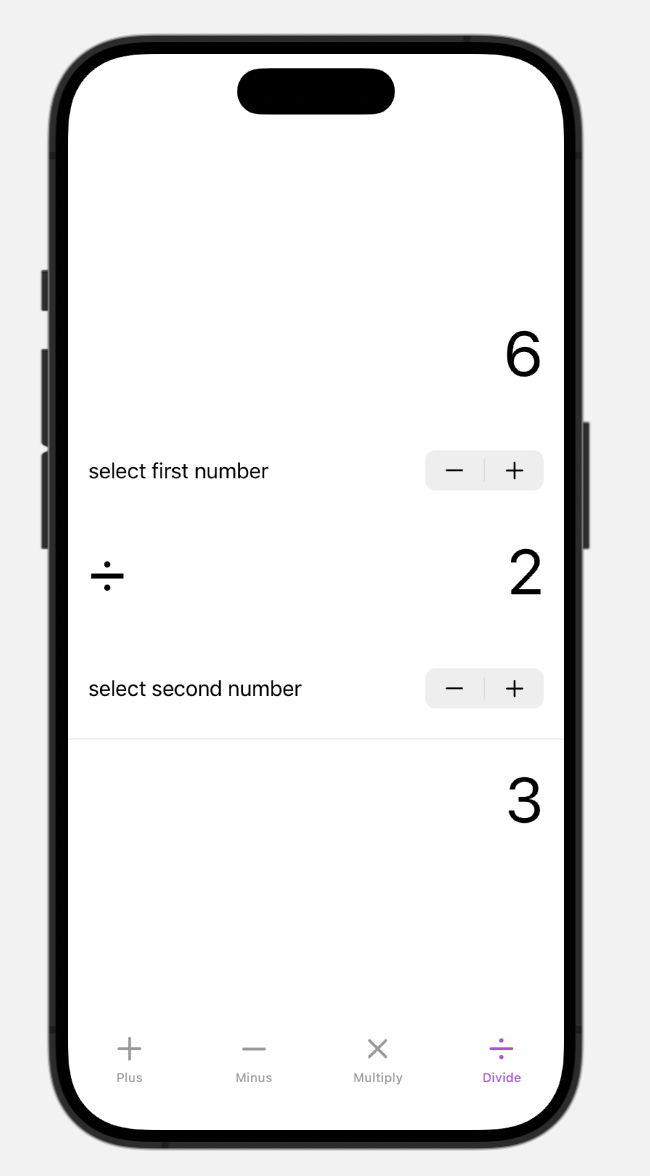
Finding differences, products, and quotients
If you wish to demonstrate even greater understanding of the concepts at hand, add additional views to your app to allow for subtraction, multiplication, and division of two numbers: