Introduction
Many of us have been fortunate enough to travel at least a little bit, whether that be locally within Ontario or in more far-flung locations around the world.
Say that you wish to author an app named Landmarks to keep track of the notable locations you have personally travelled to and want to remember:
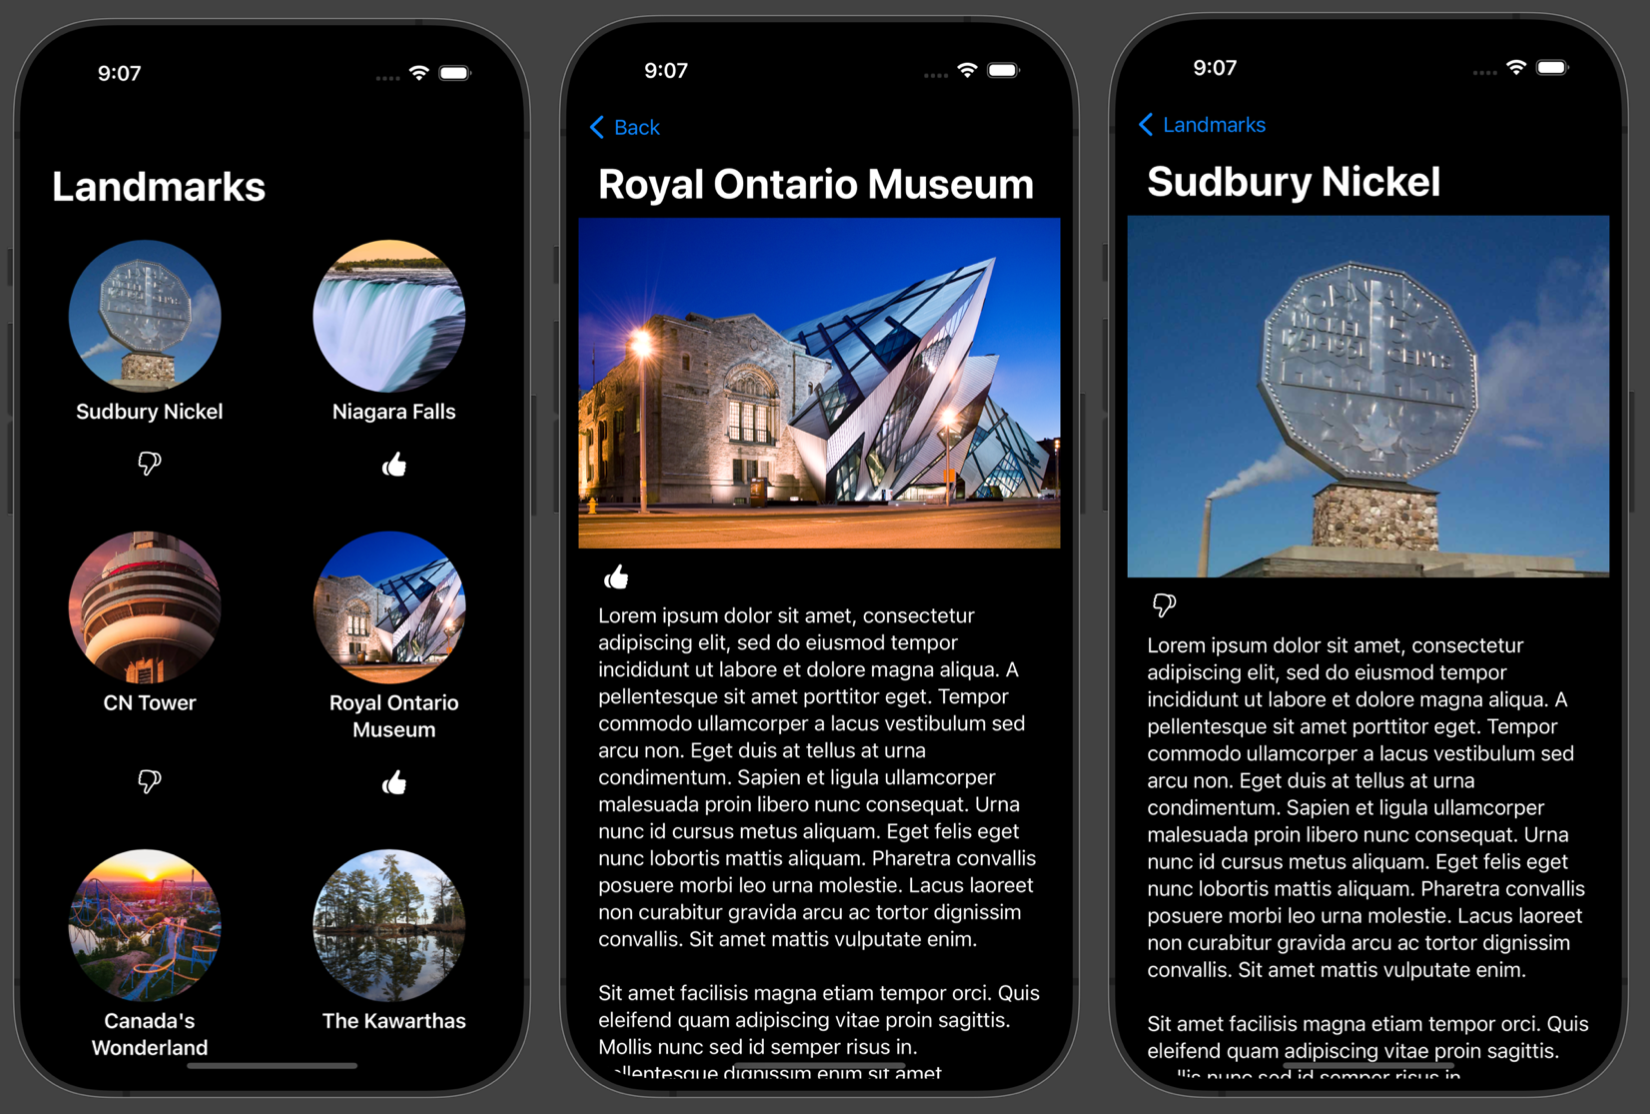
Landmarks might be places you want to visit again, or places you want to avoid because they were not enjoyable for some reason.
This lesson will walk you through the process of authoring this app from start to finish, recapping how we can use a list (also known as an array) and the concept of separation of concerns to keep the views – the user interface code – distinct from the model – the data kept within our app.
In this way, we avoid repeating ourselves. Remember:
D.R.Y. Don’t Repeat Yourself!
Additionally, to spruce the app up a bit, you will learn how to use a LazyVGrid to create a more interesting scrollable gallery of landmarks.
Create the project
Let’s get started by creating a new iOS project named Landmarks.
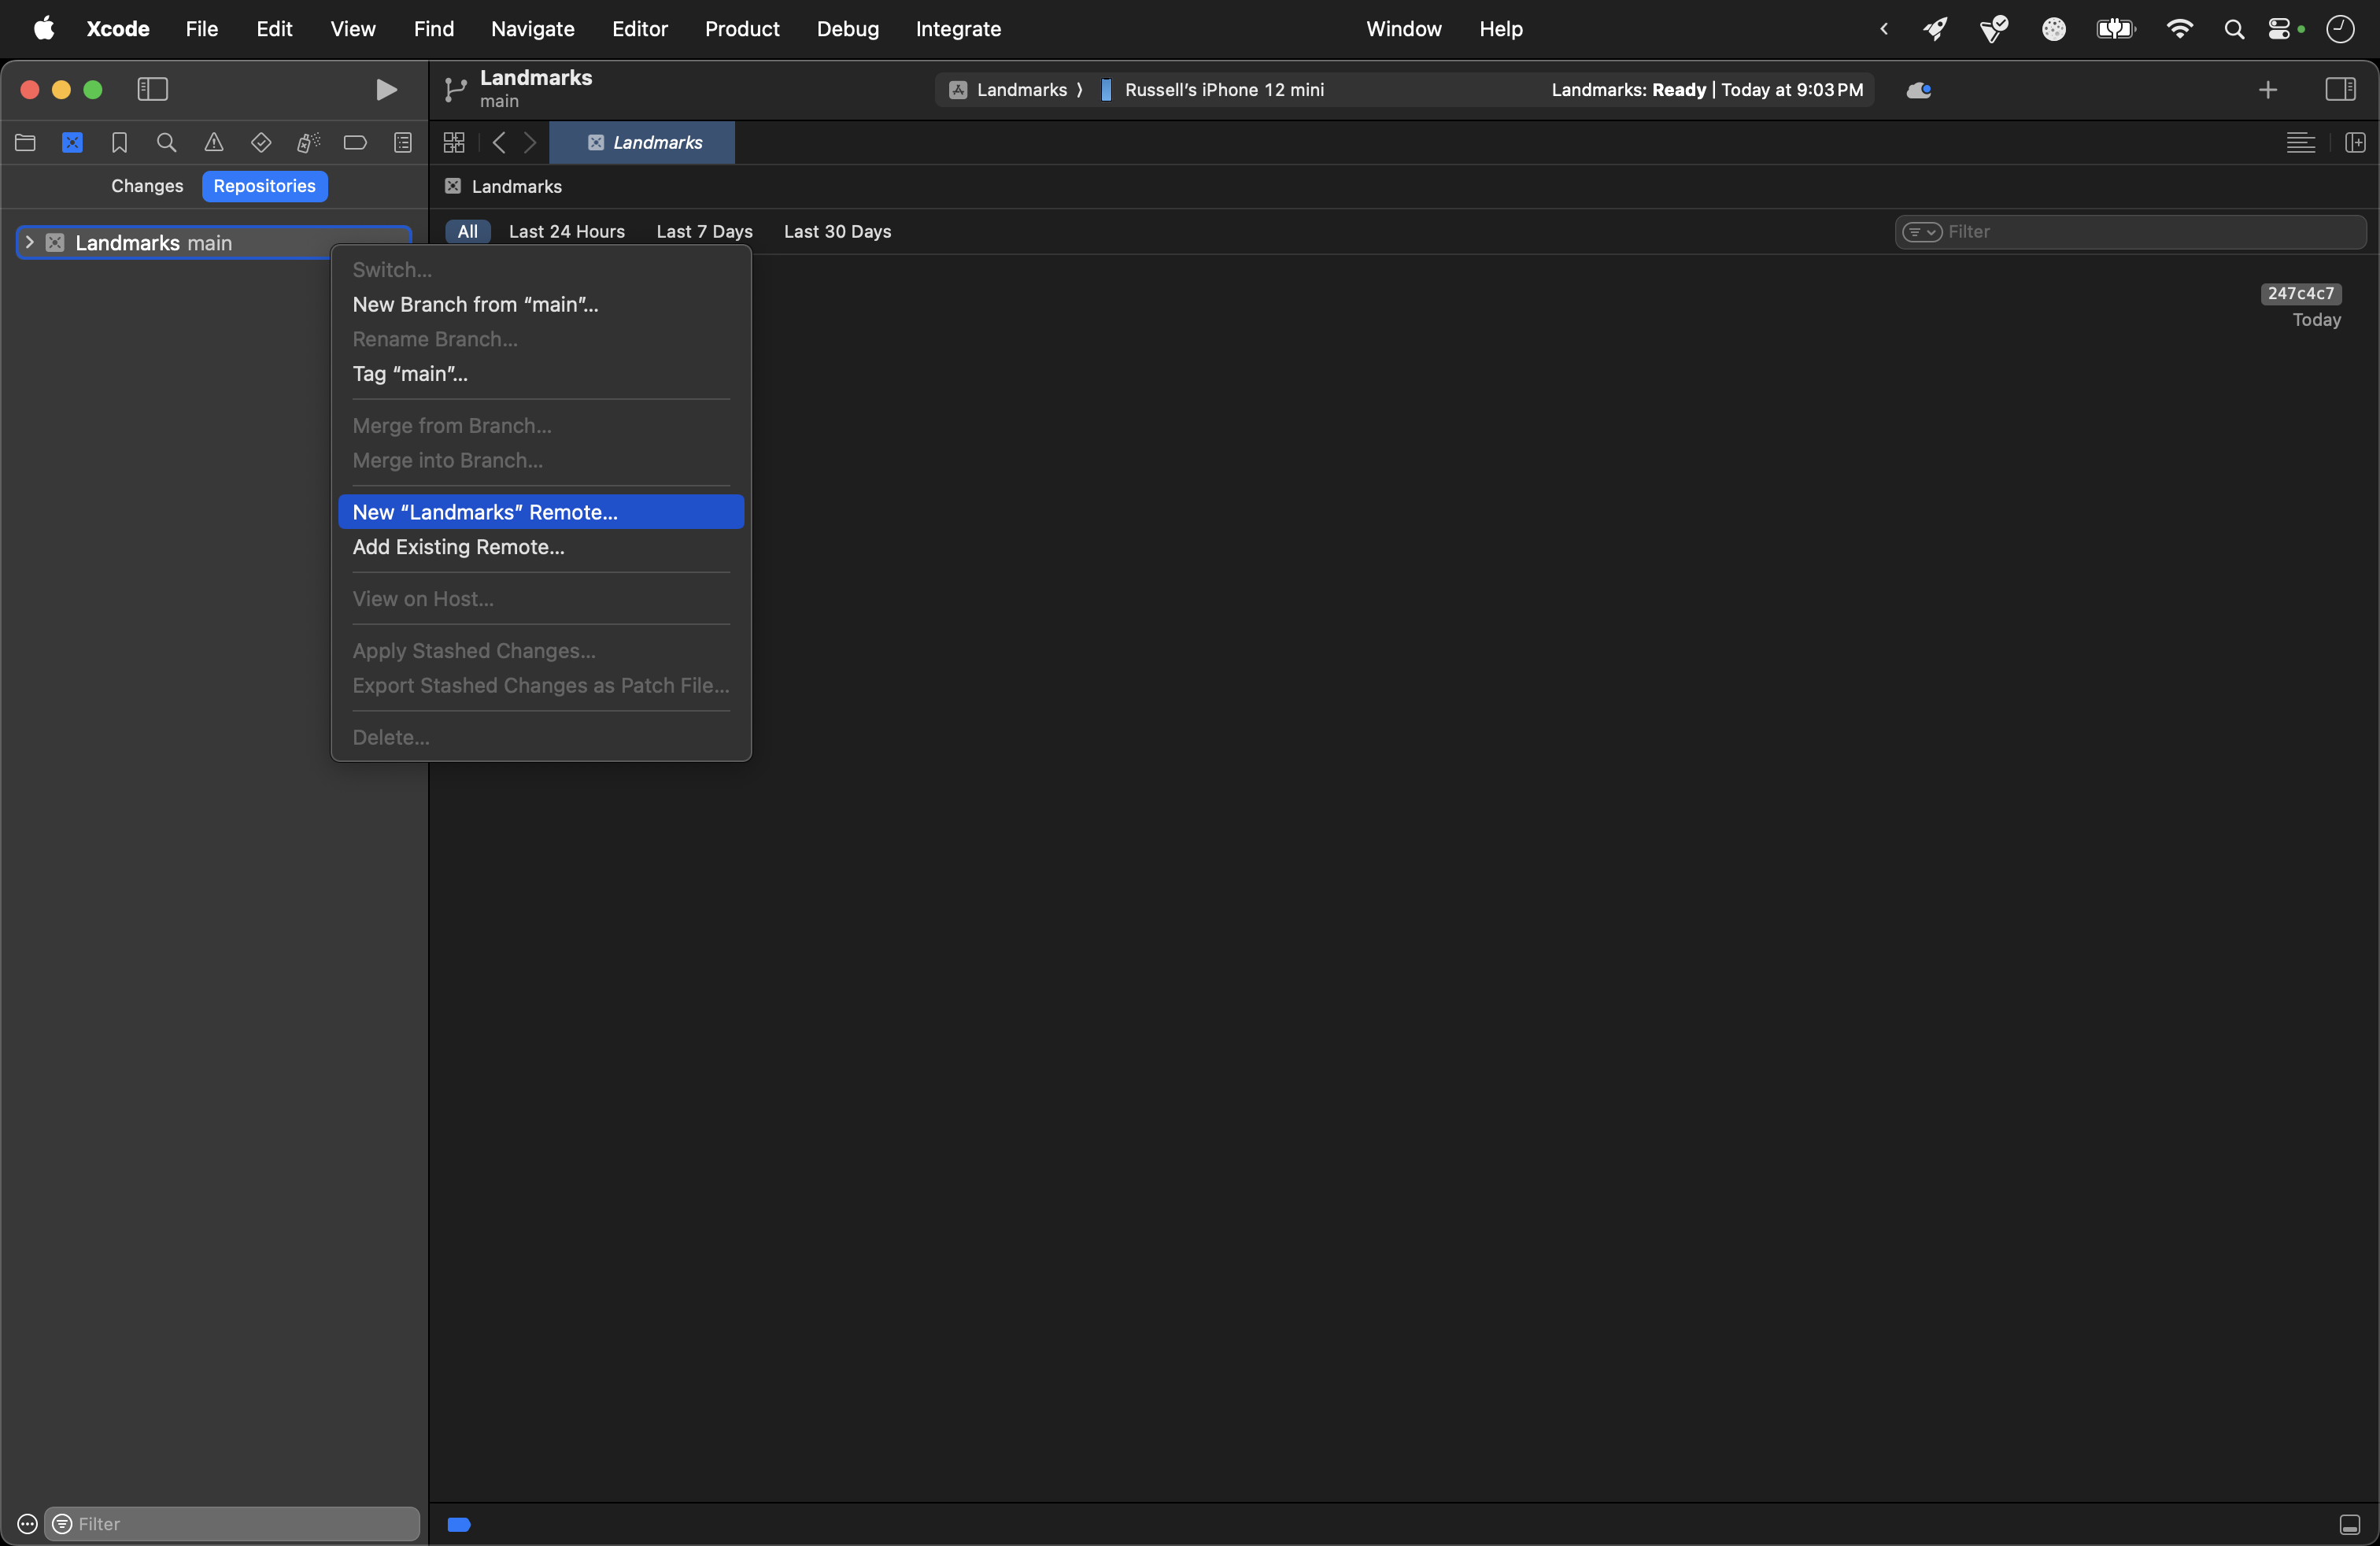
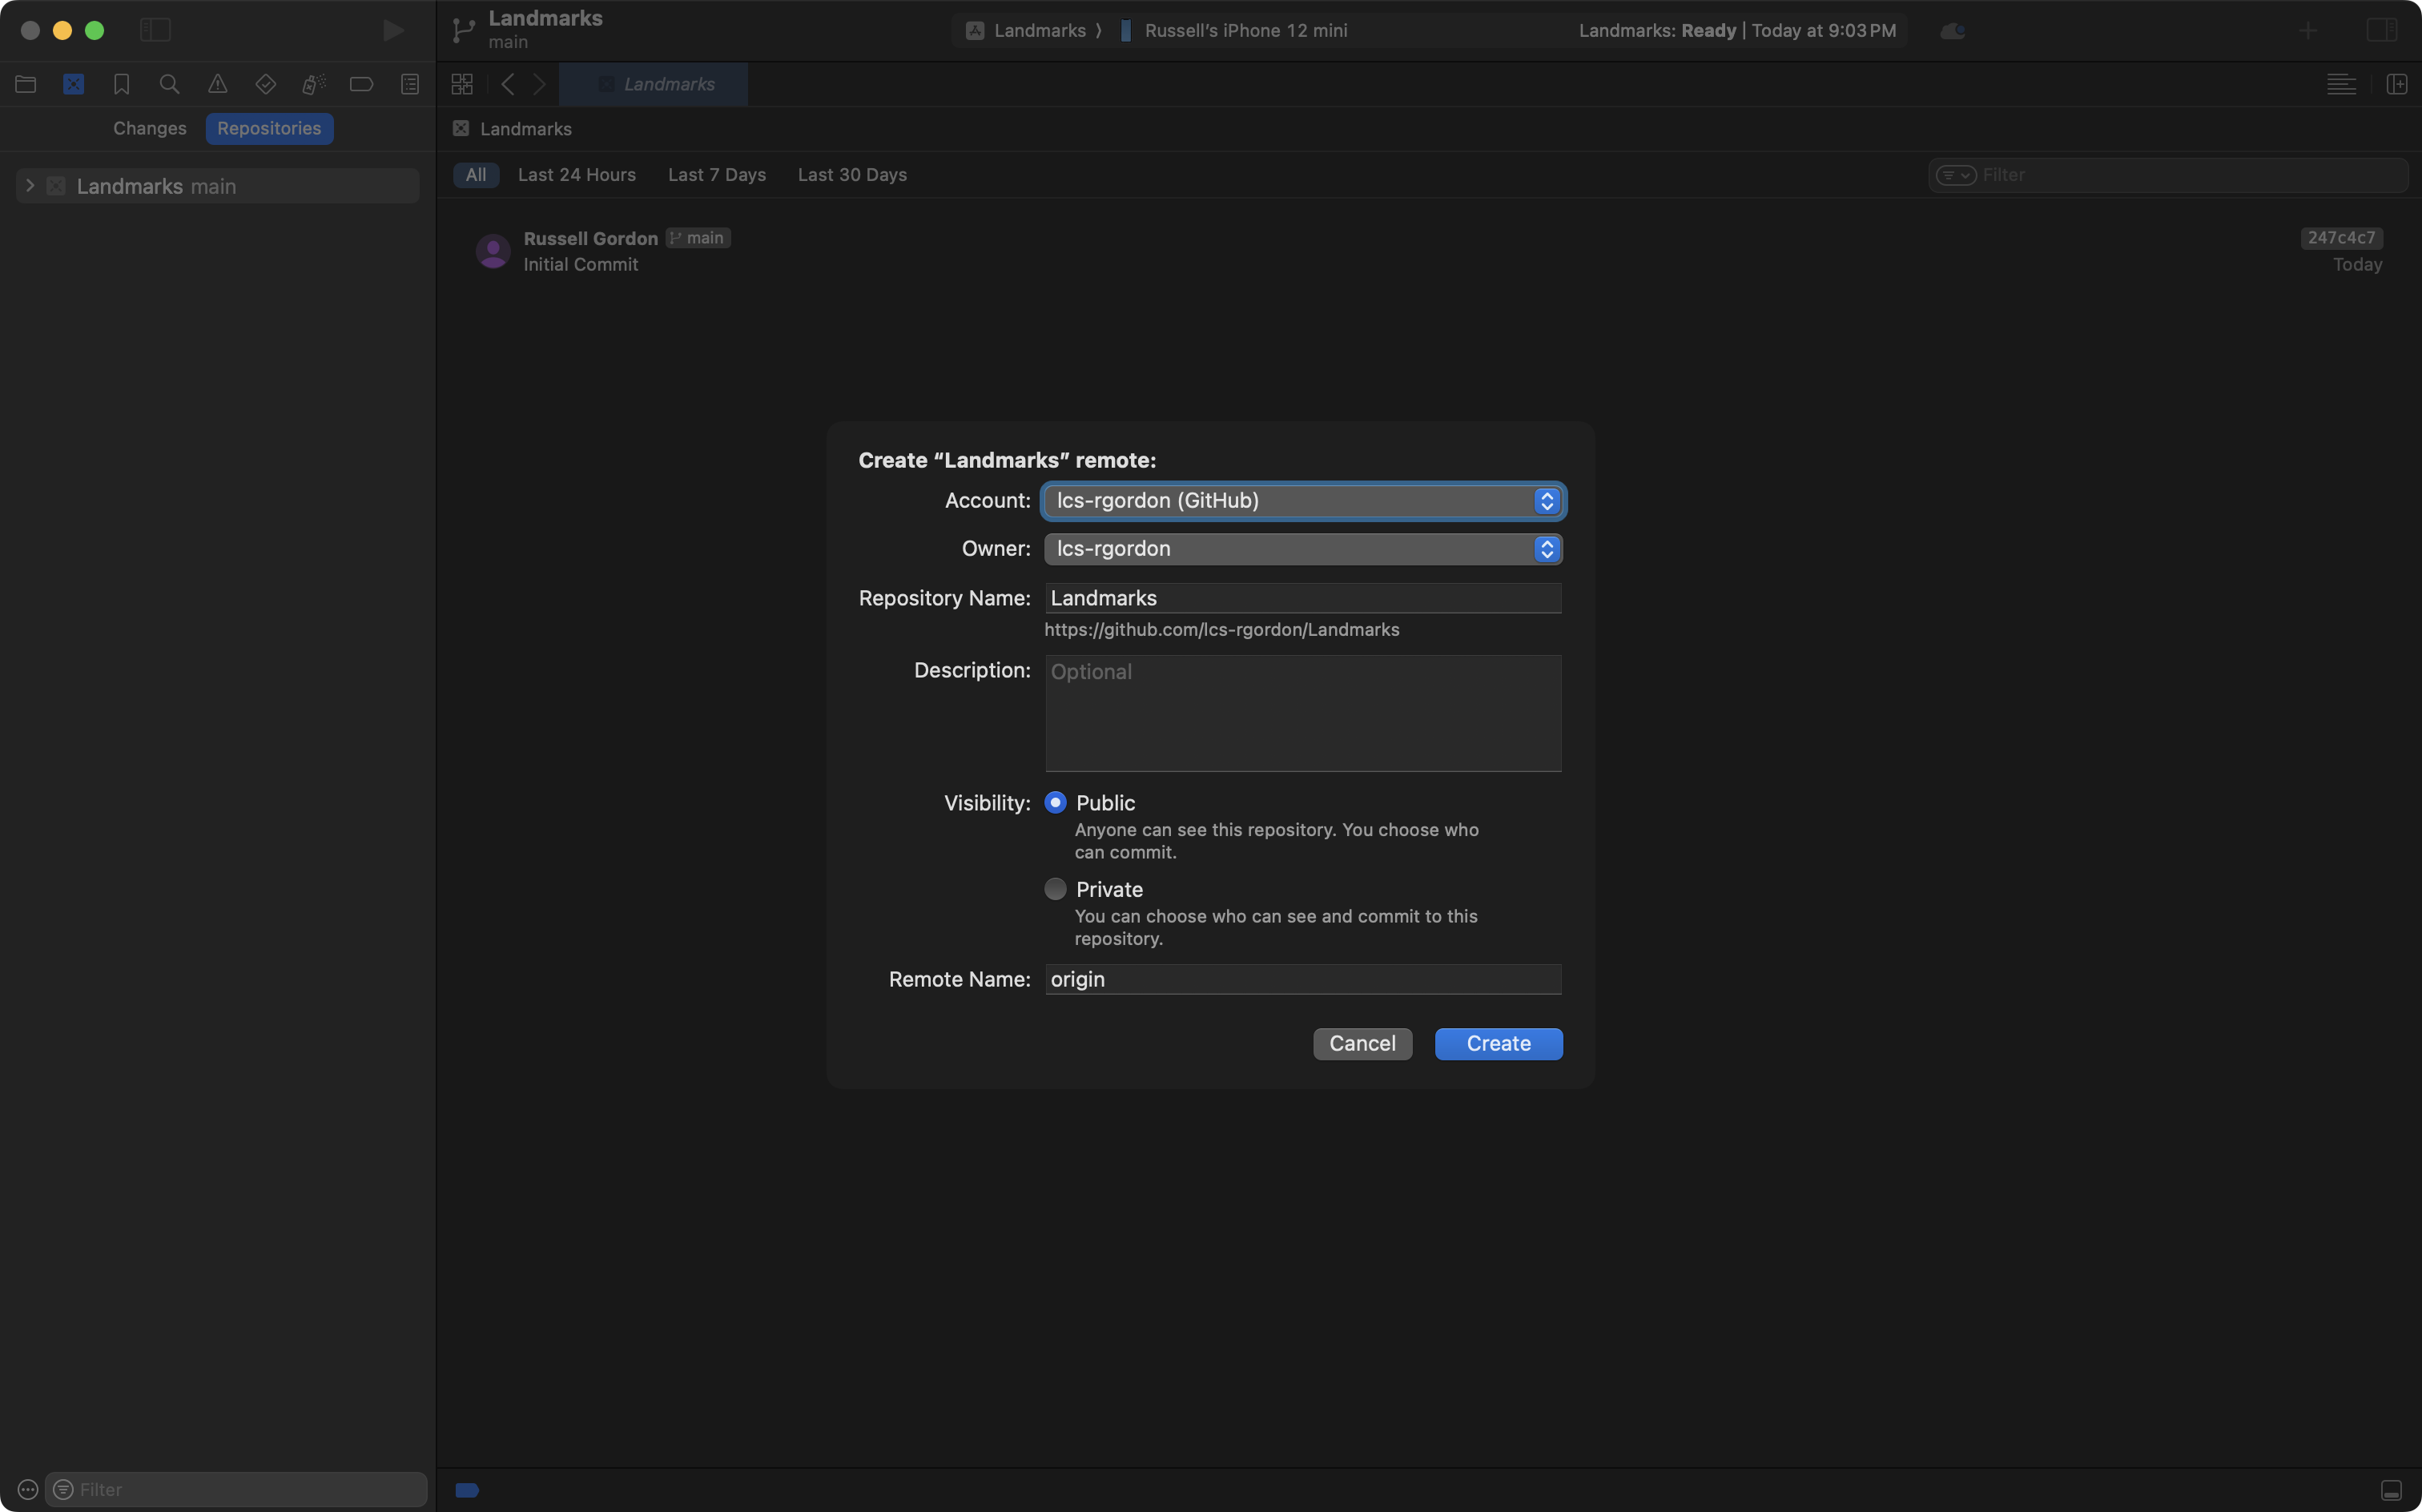
As soon as you have created the project, remember to create a remote:
Build the detail view
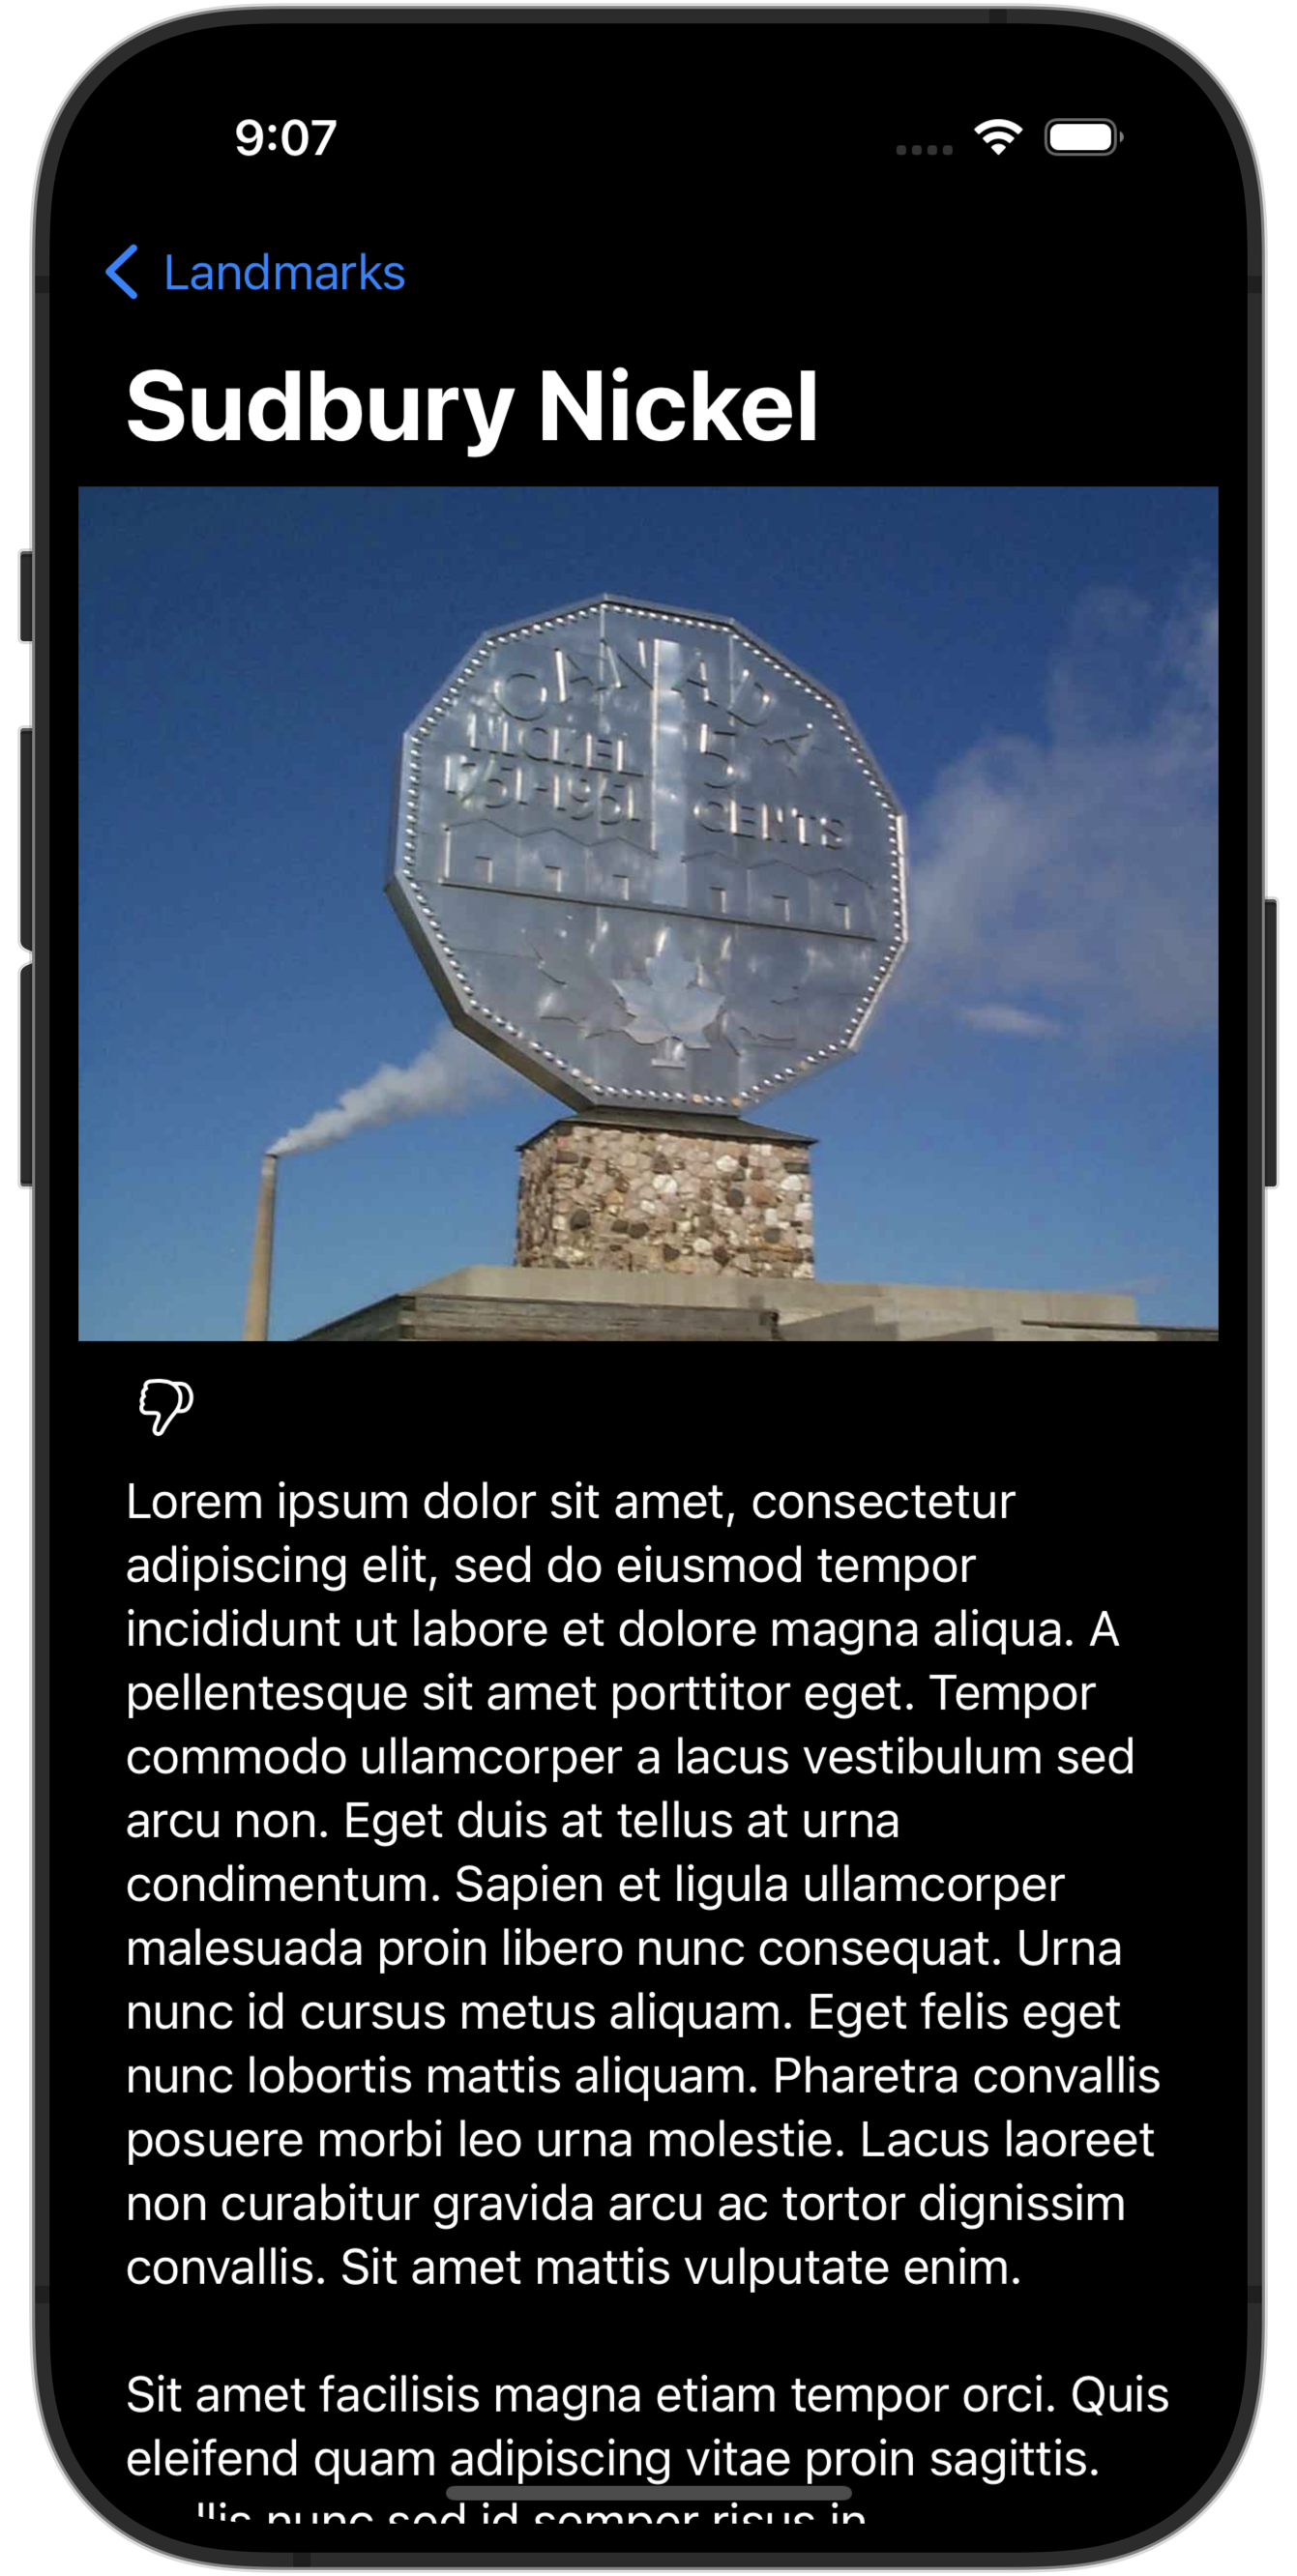
When you navigate down a level in an app to read more about something, app developers commonly refer to the interface you arrive at as a detail view:
Let’s build this view out now.
Organize
We’ll begin by organizing the project.
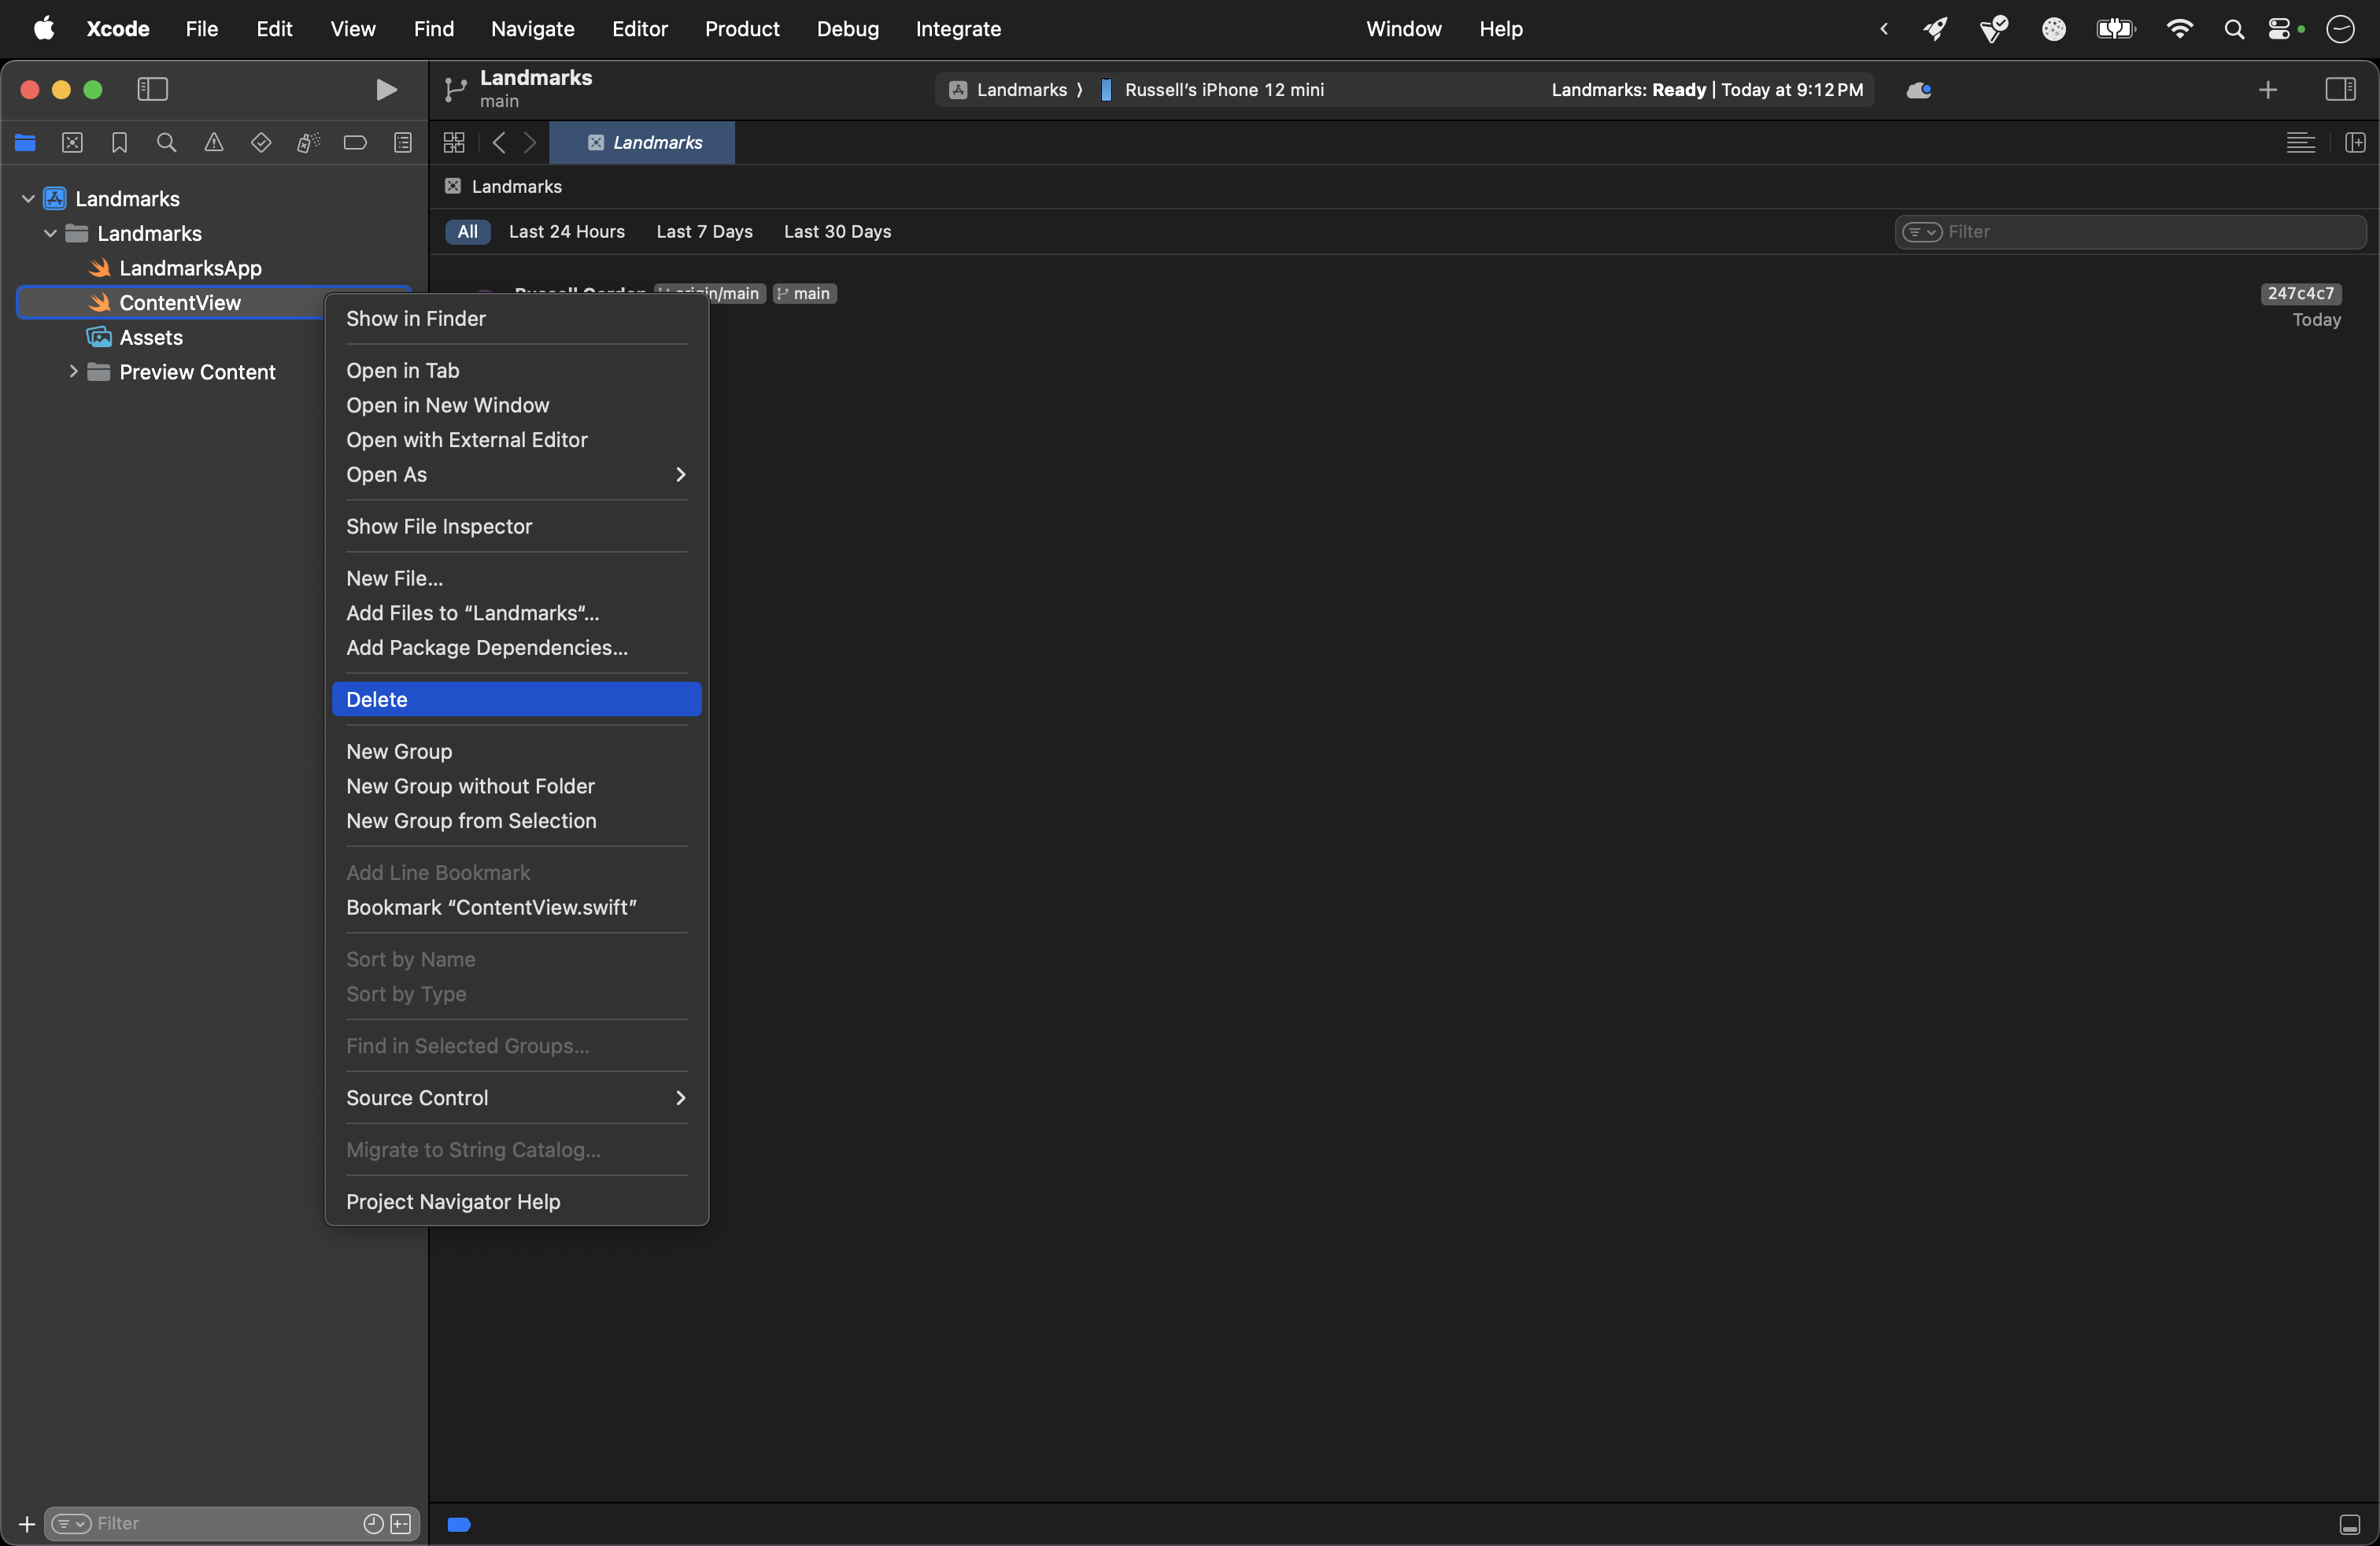
First delete ContentView. This is a generic name and using this within our projects should be avoided going forward:
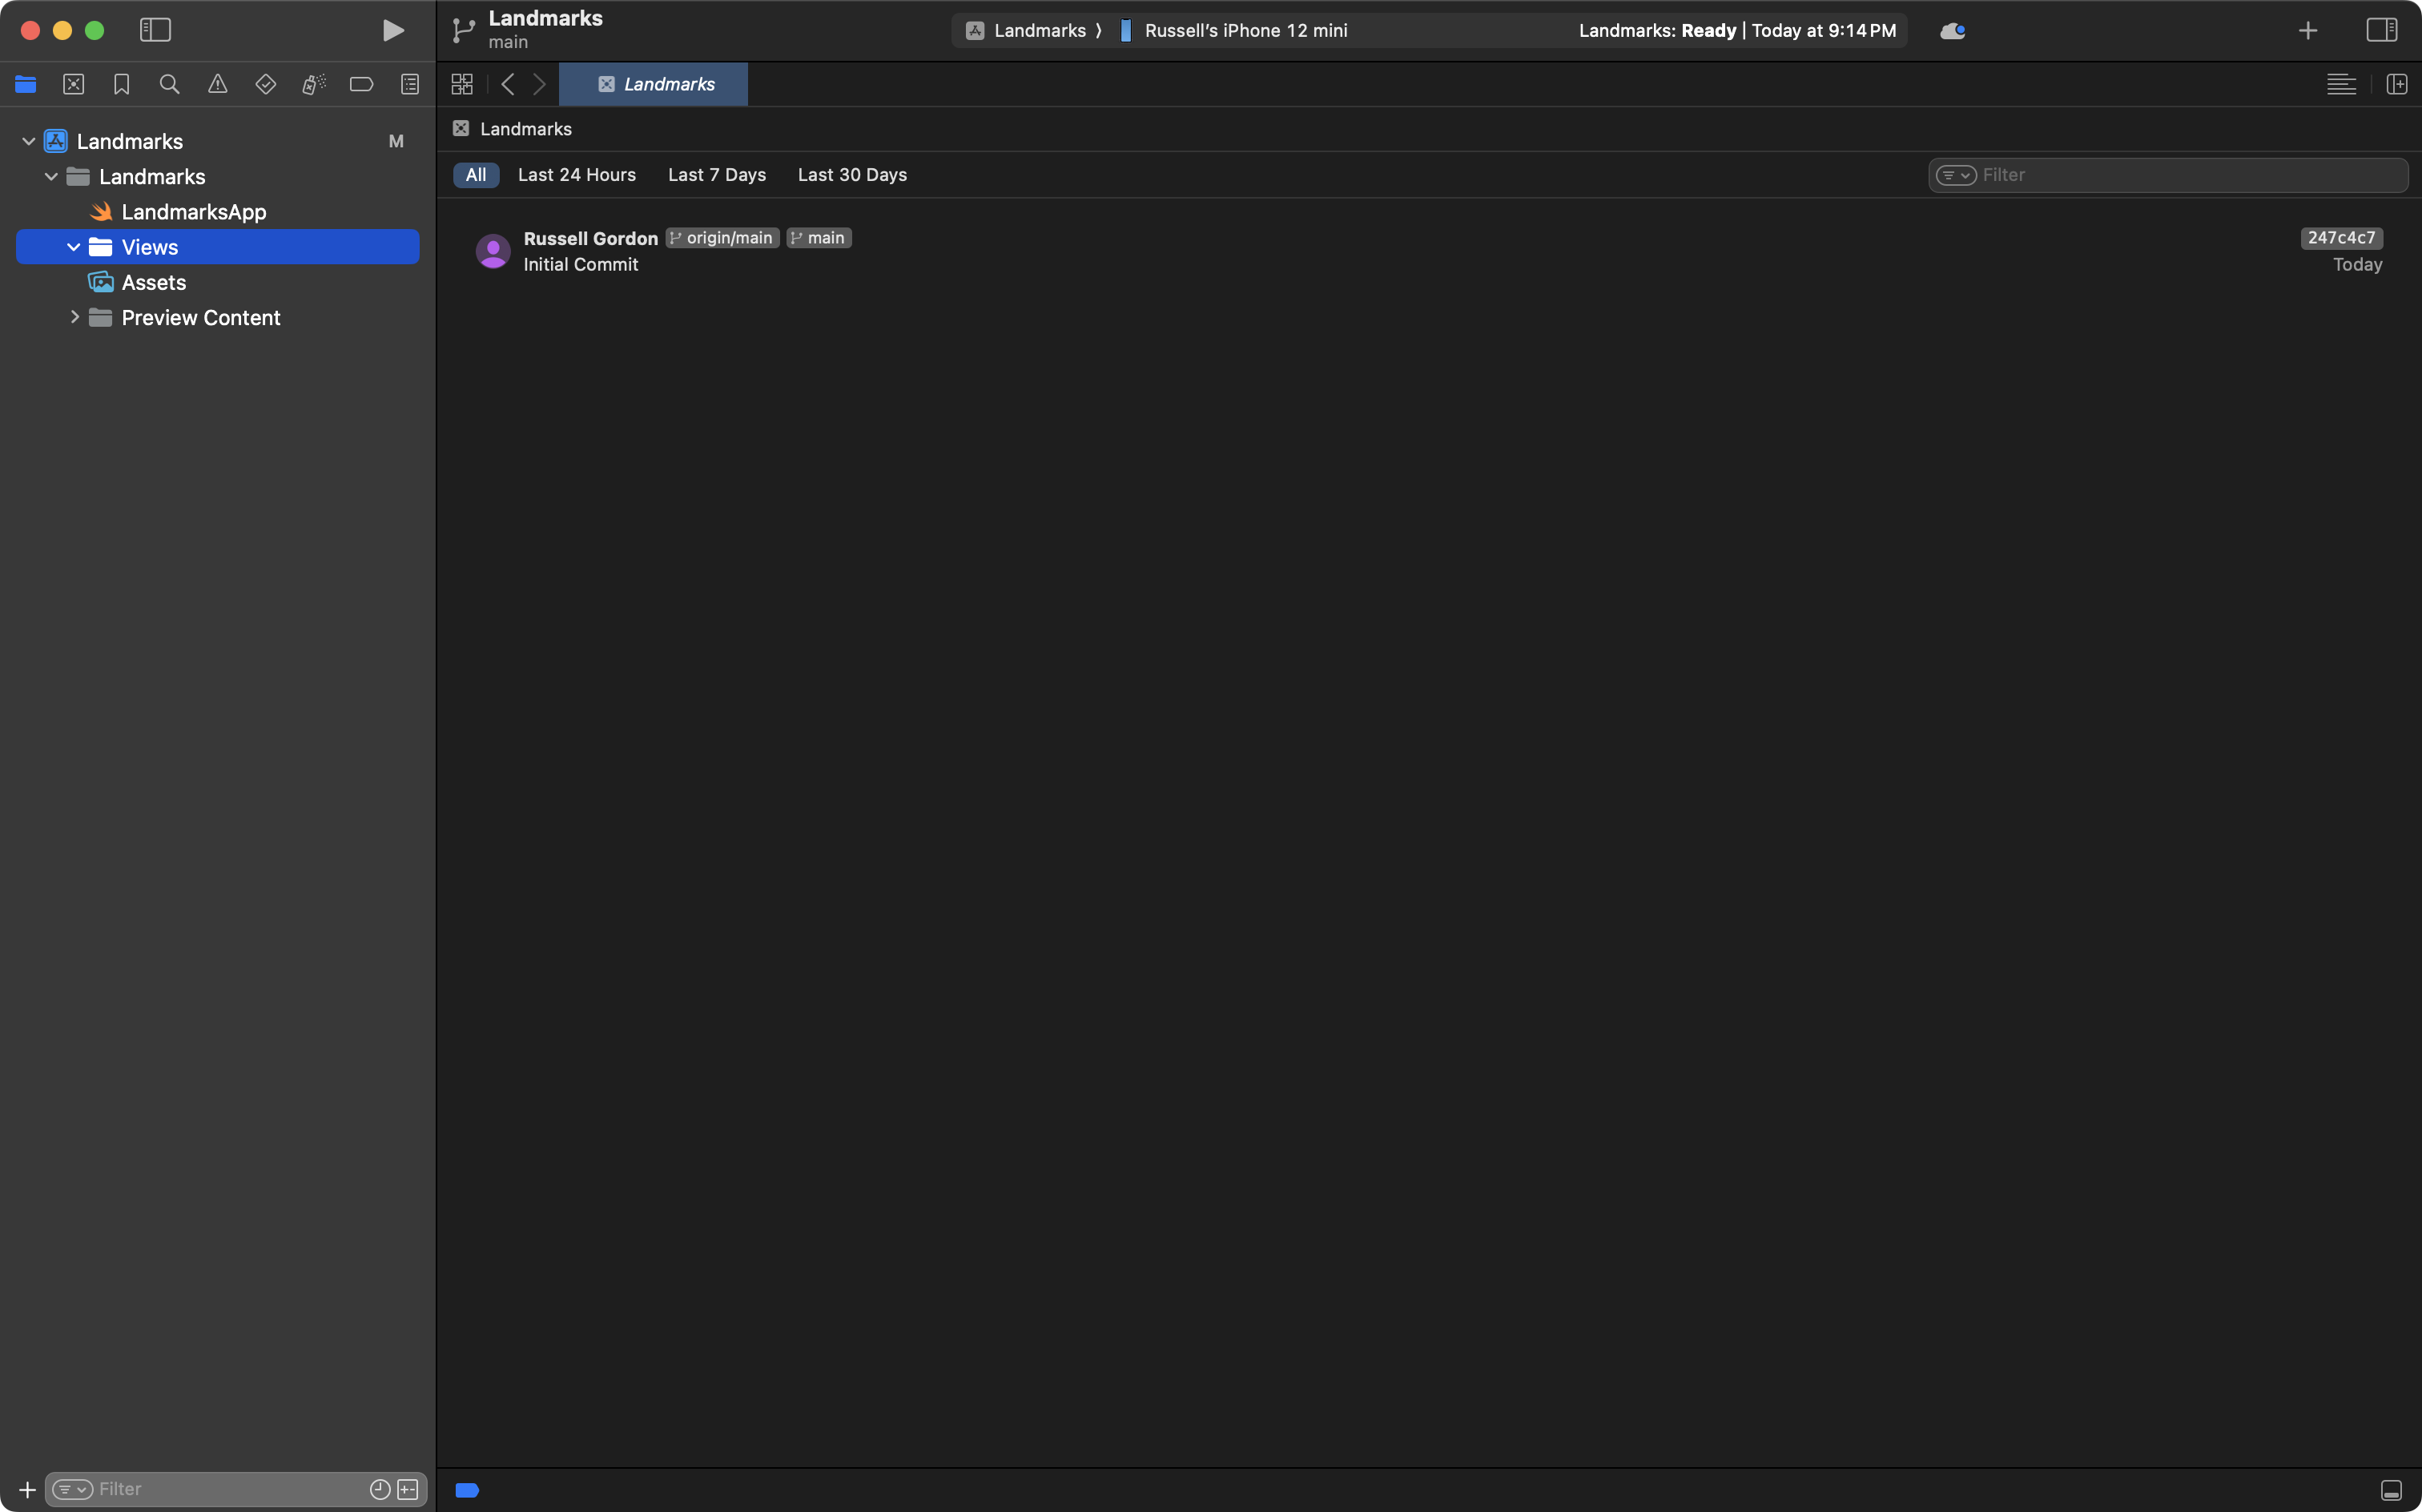
Next create a group named Views:
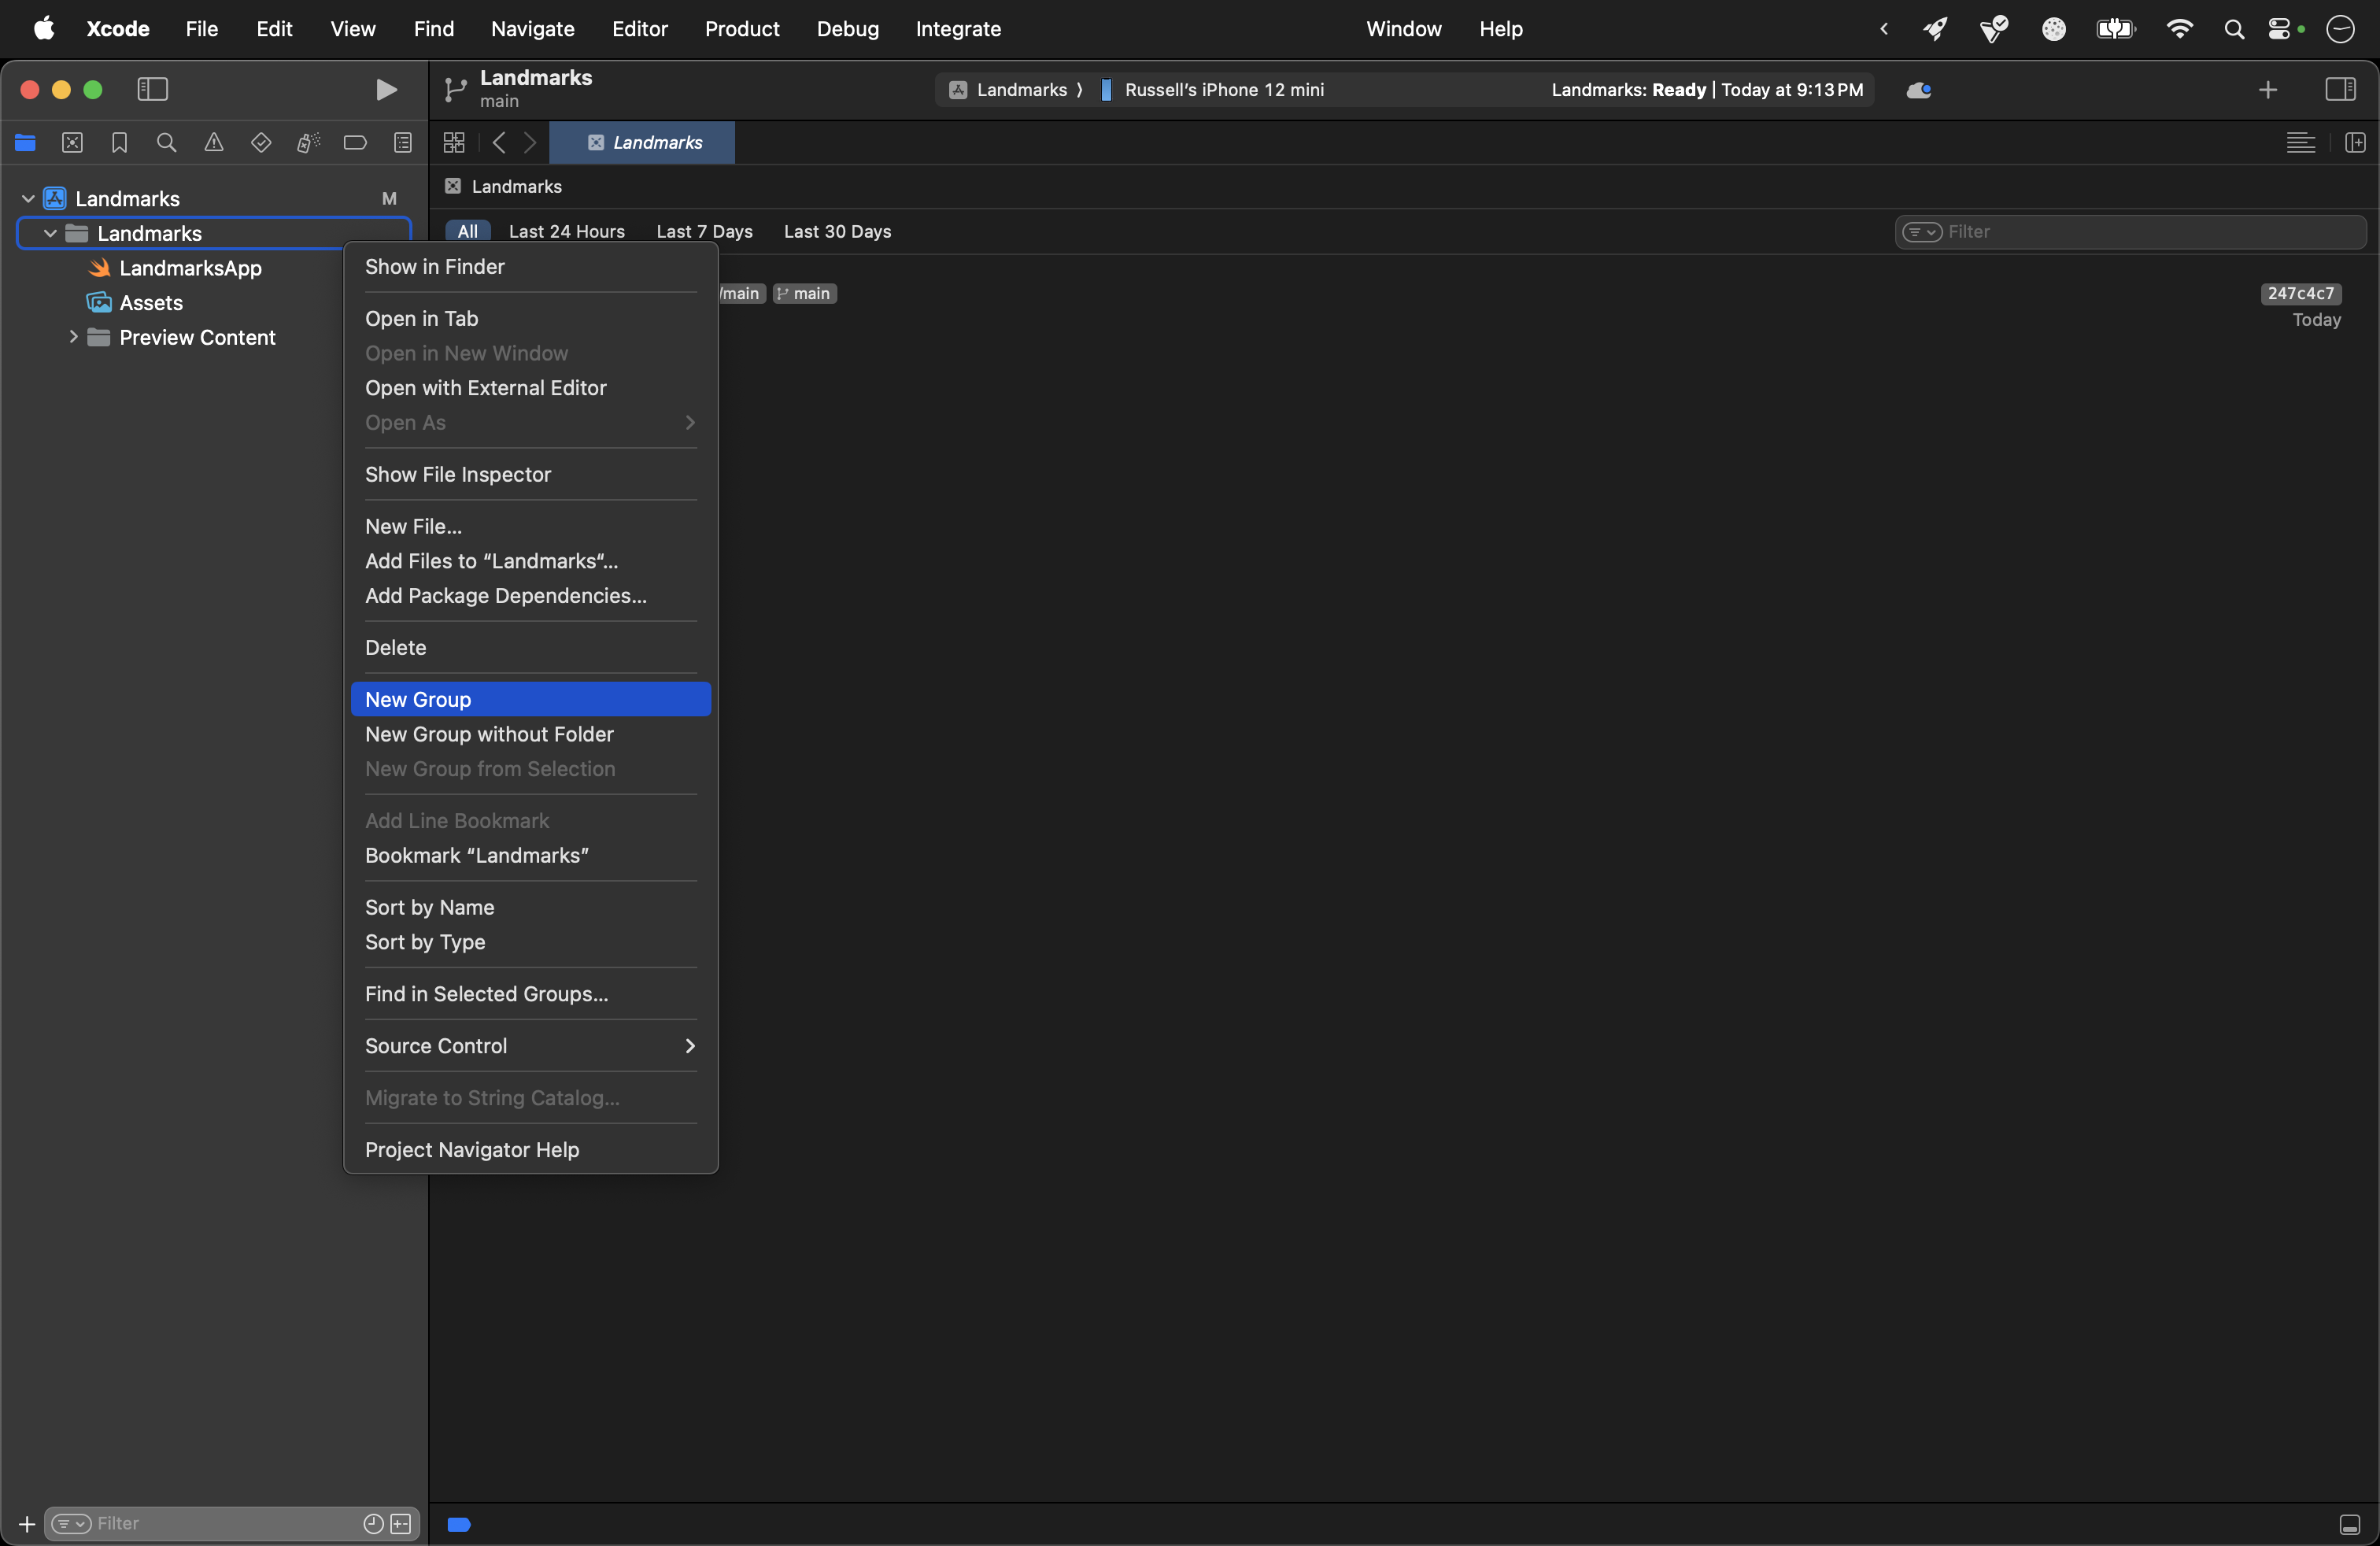
… like this:
Then create a new SwiftUI View file named DetailView inside the Views group:

Finally, in the app entry point file:

… have an instance of DetailView be created instead:
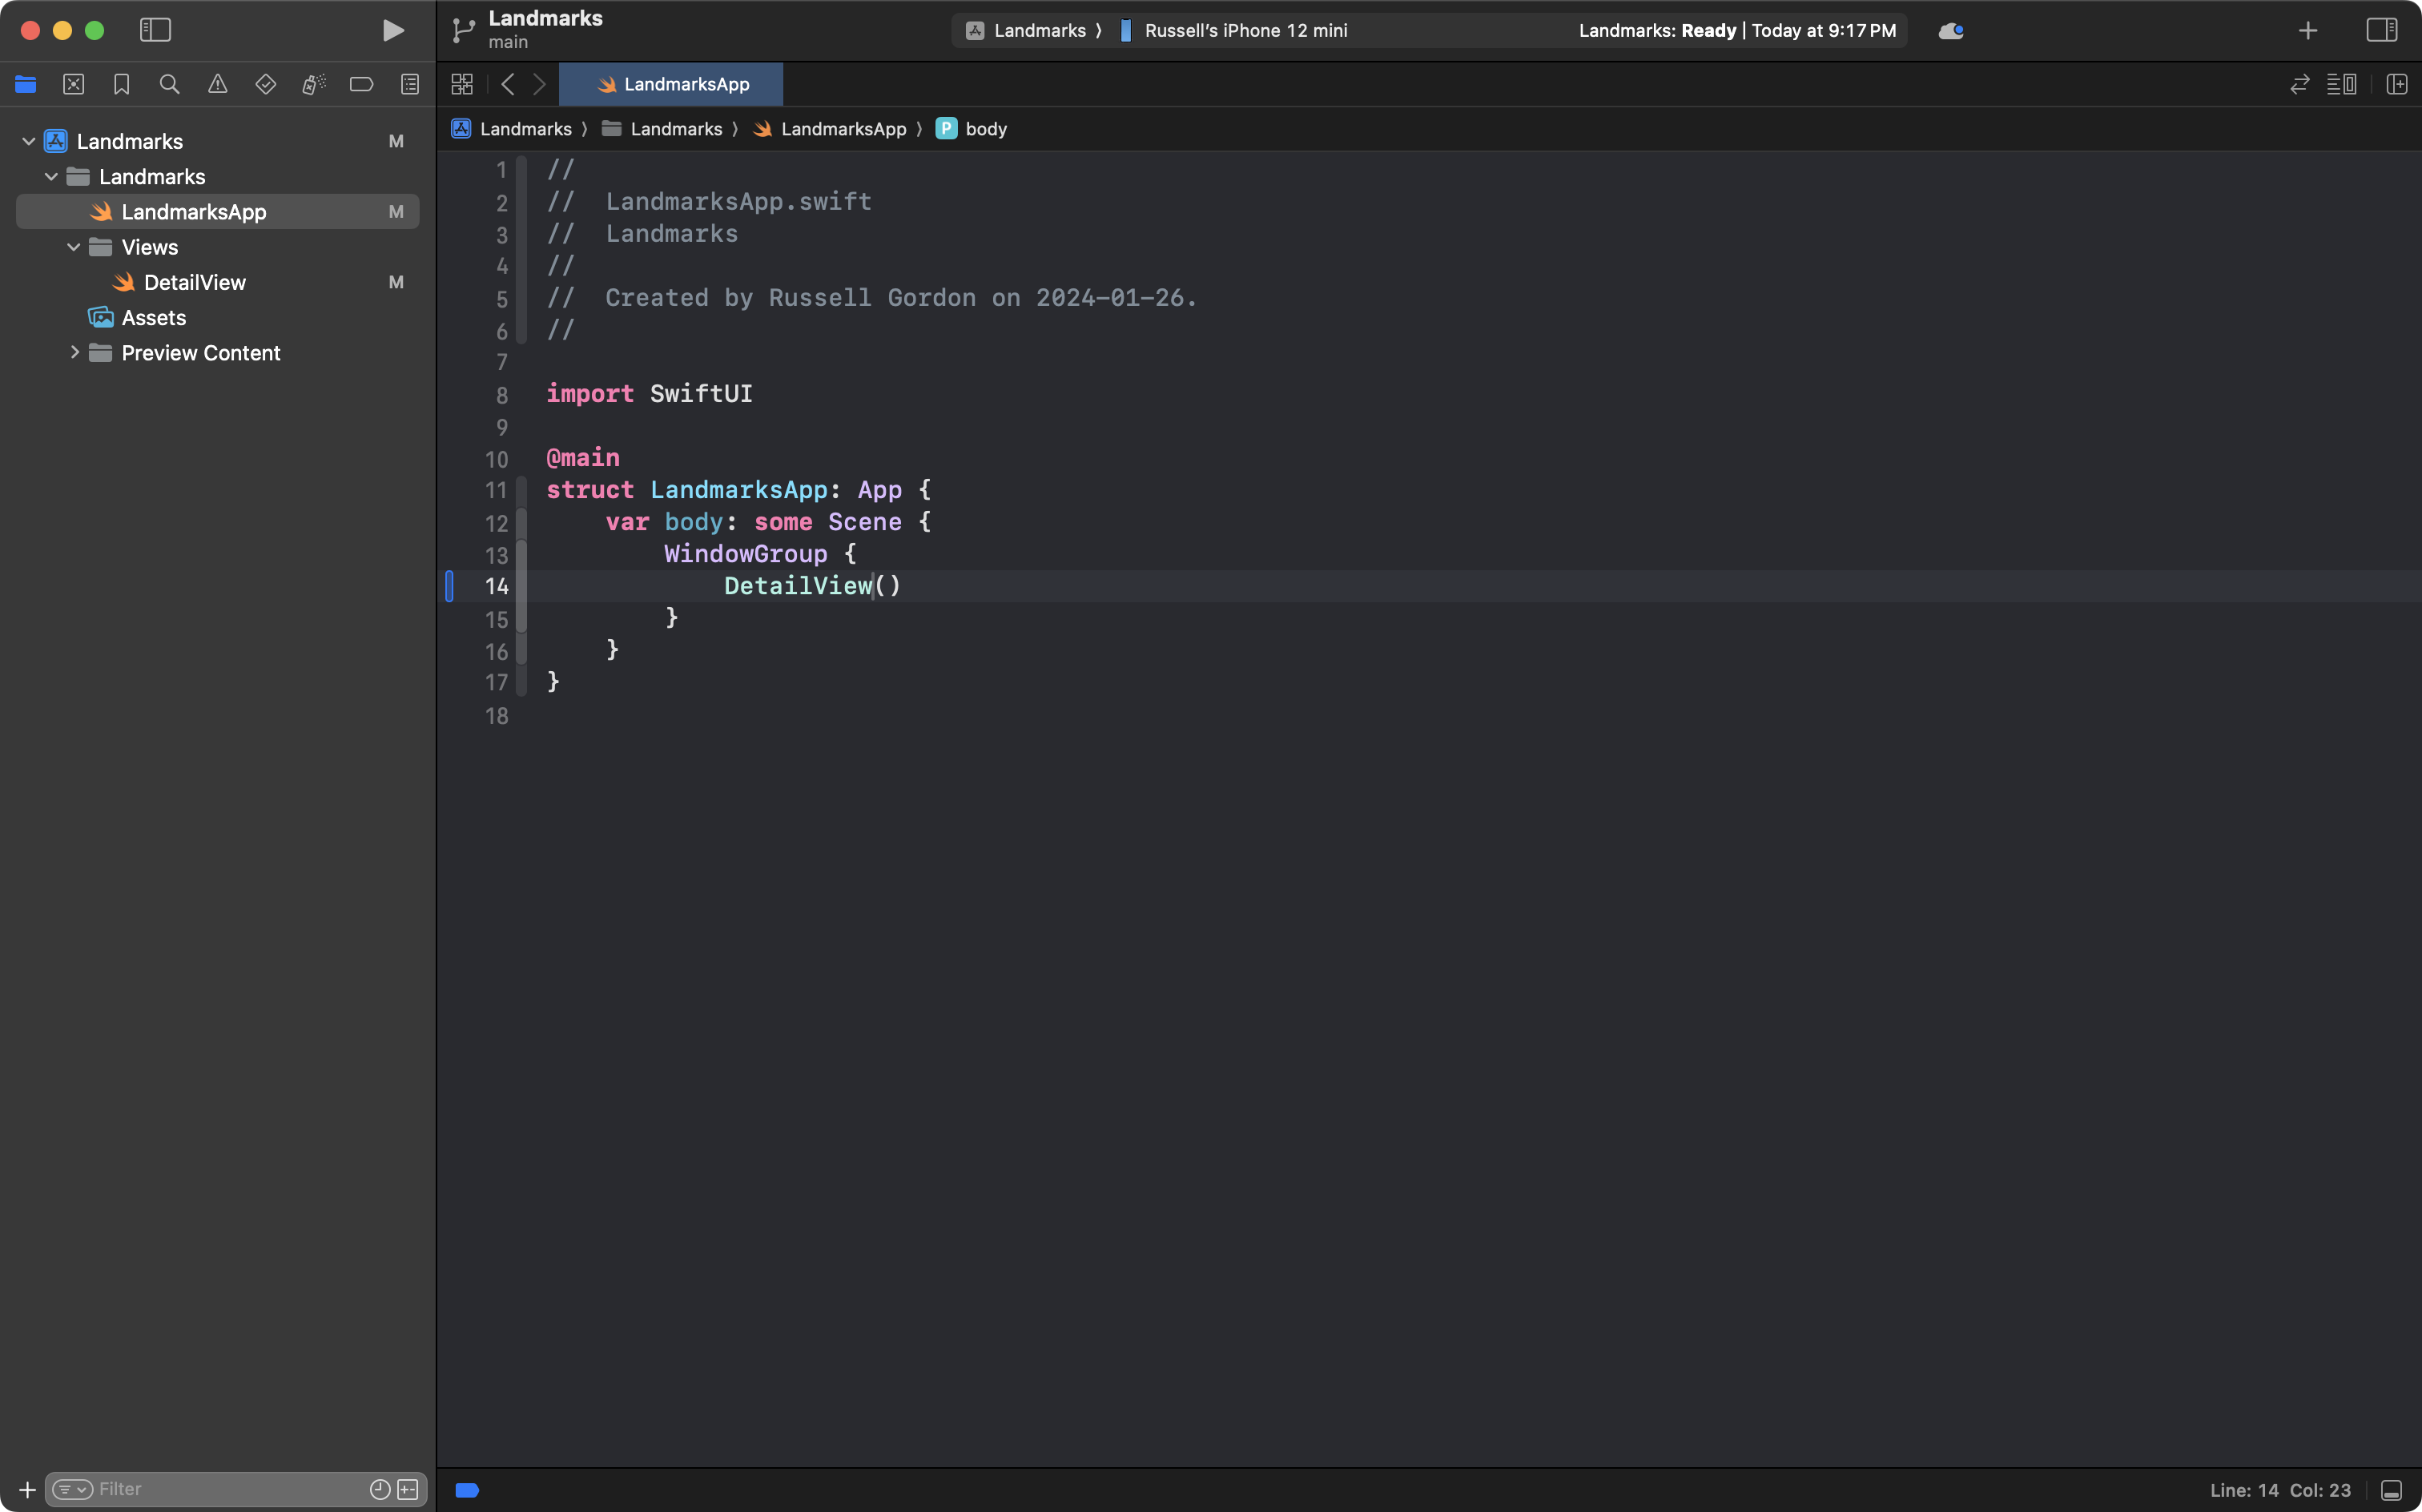
This resolves the error we created when deleting ContentView.
Commit and push your work at this point with the message:
Created detail view and organized project by creating Views group.
Build
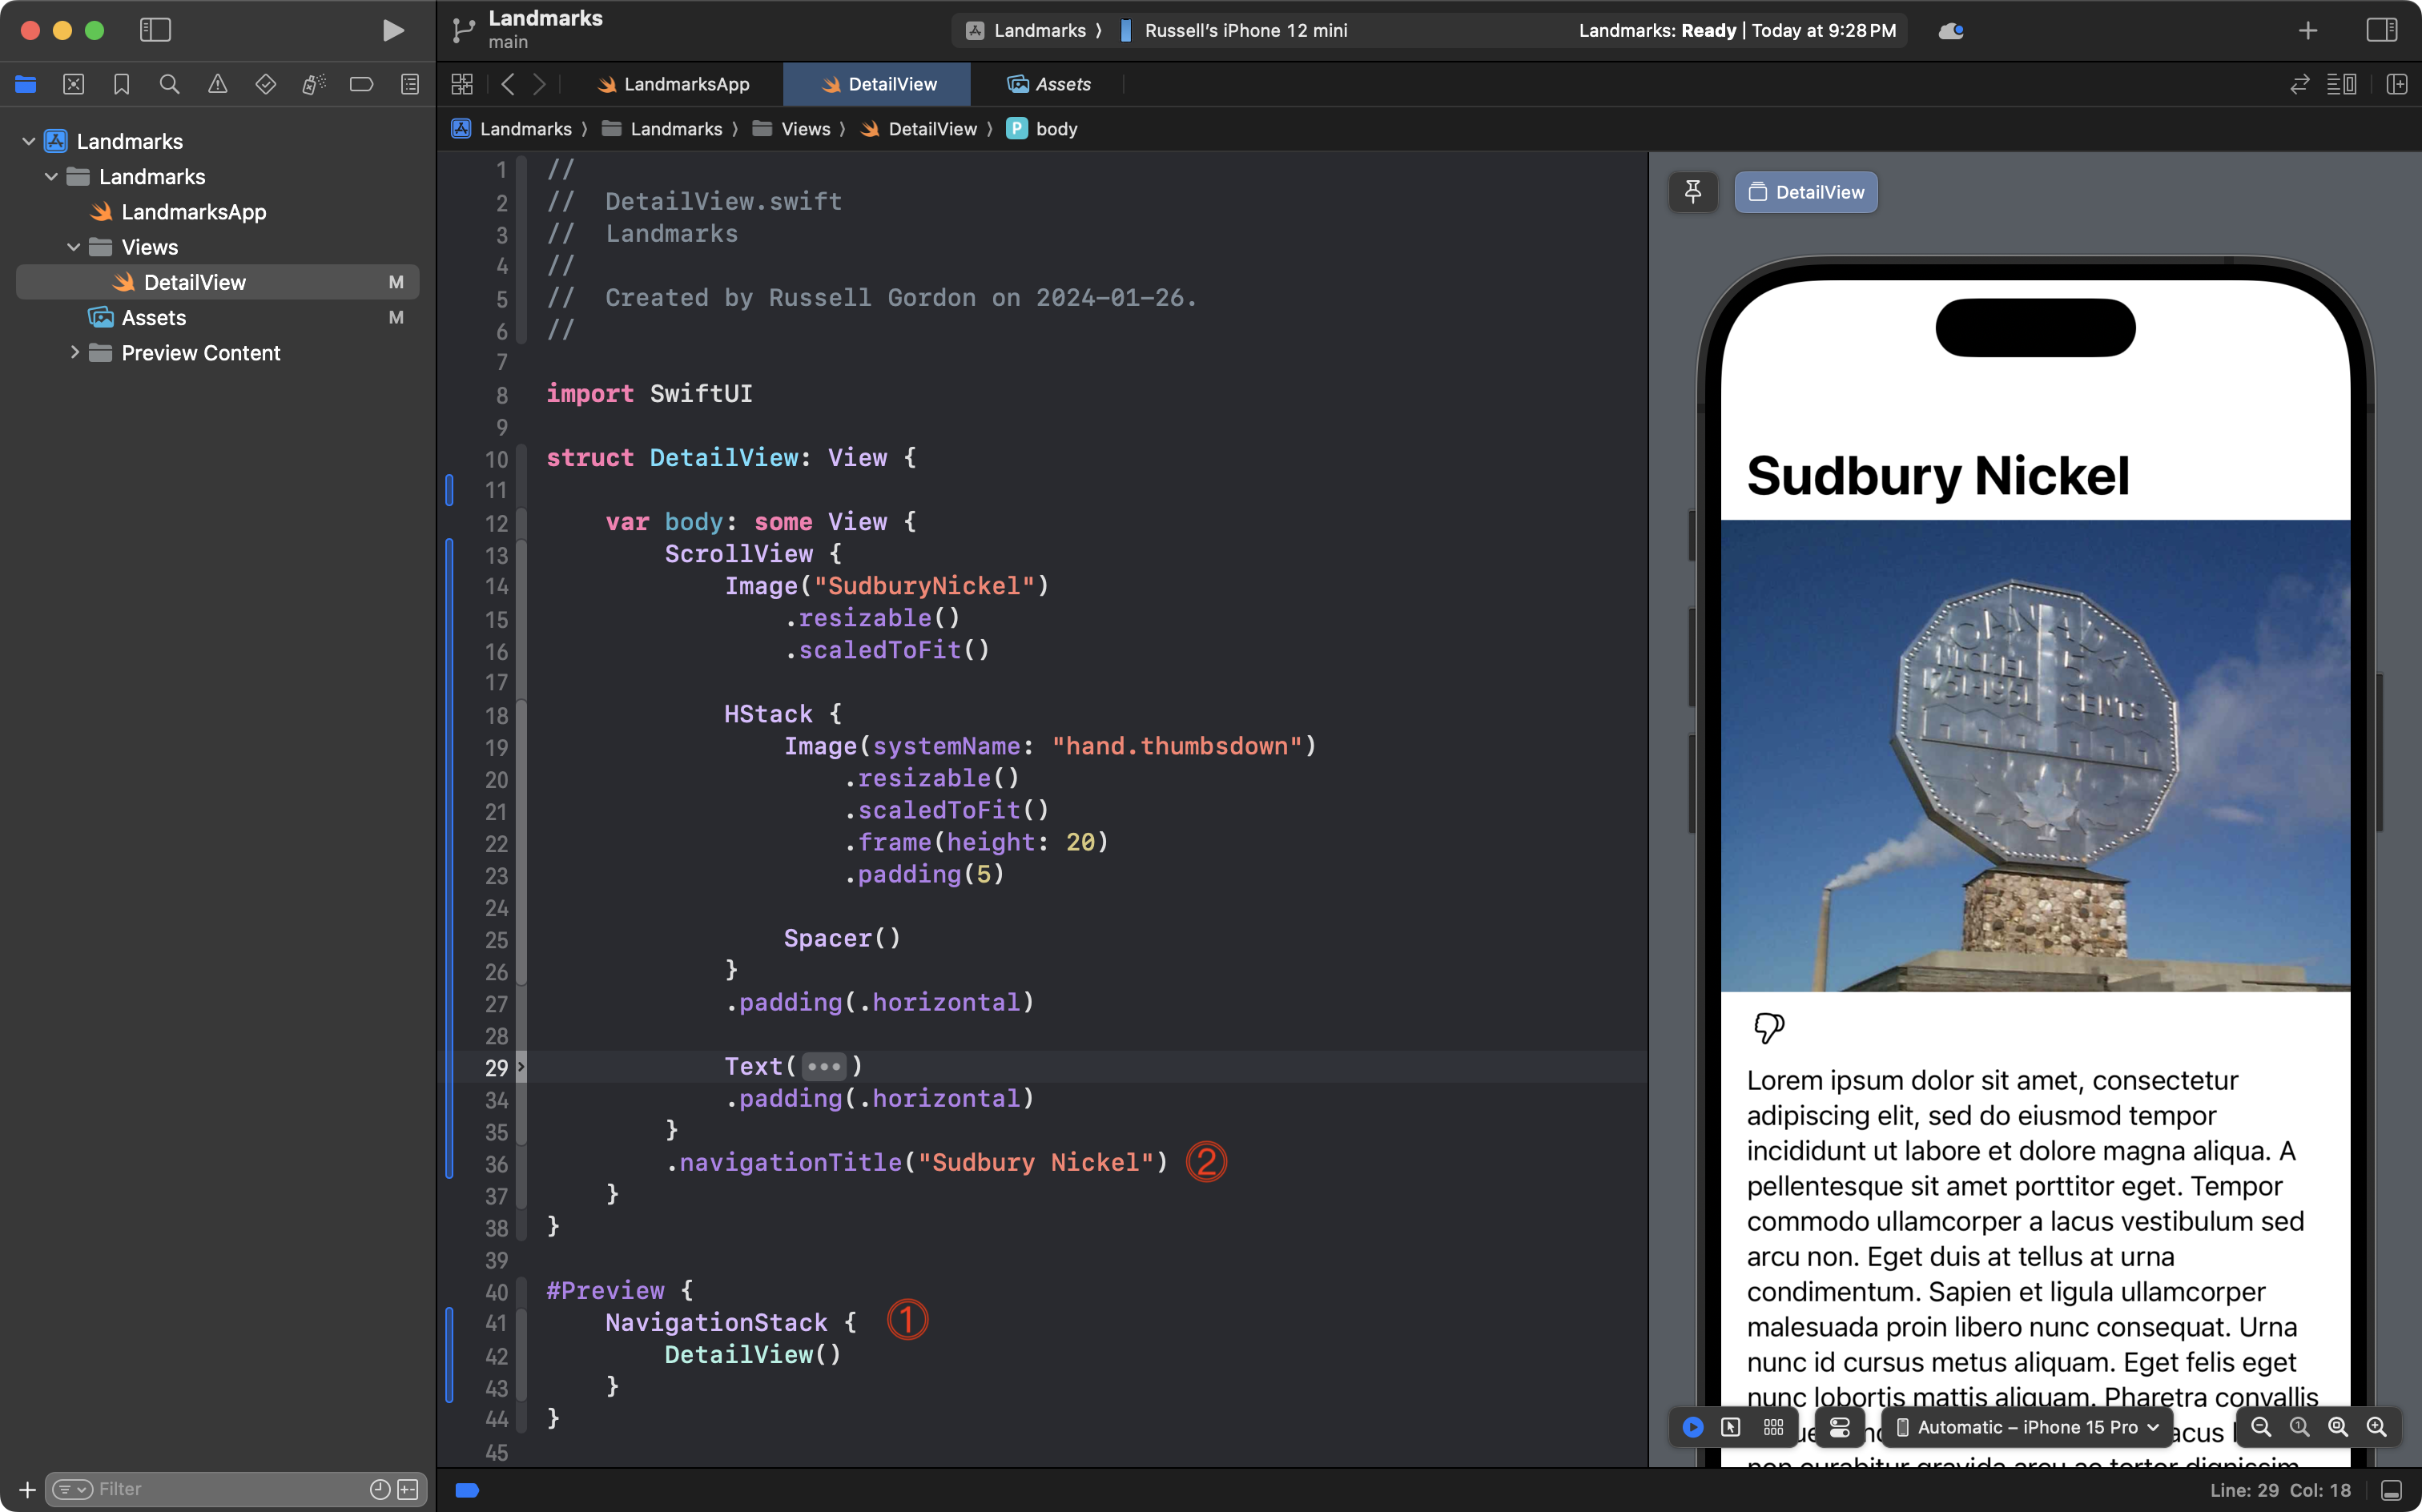
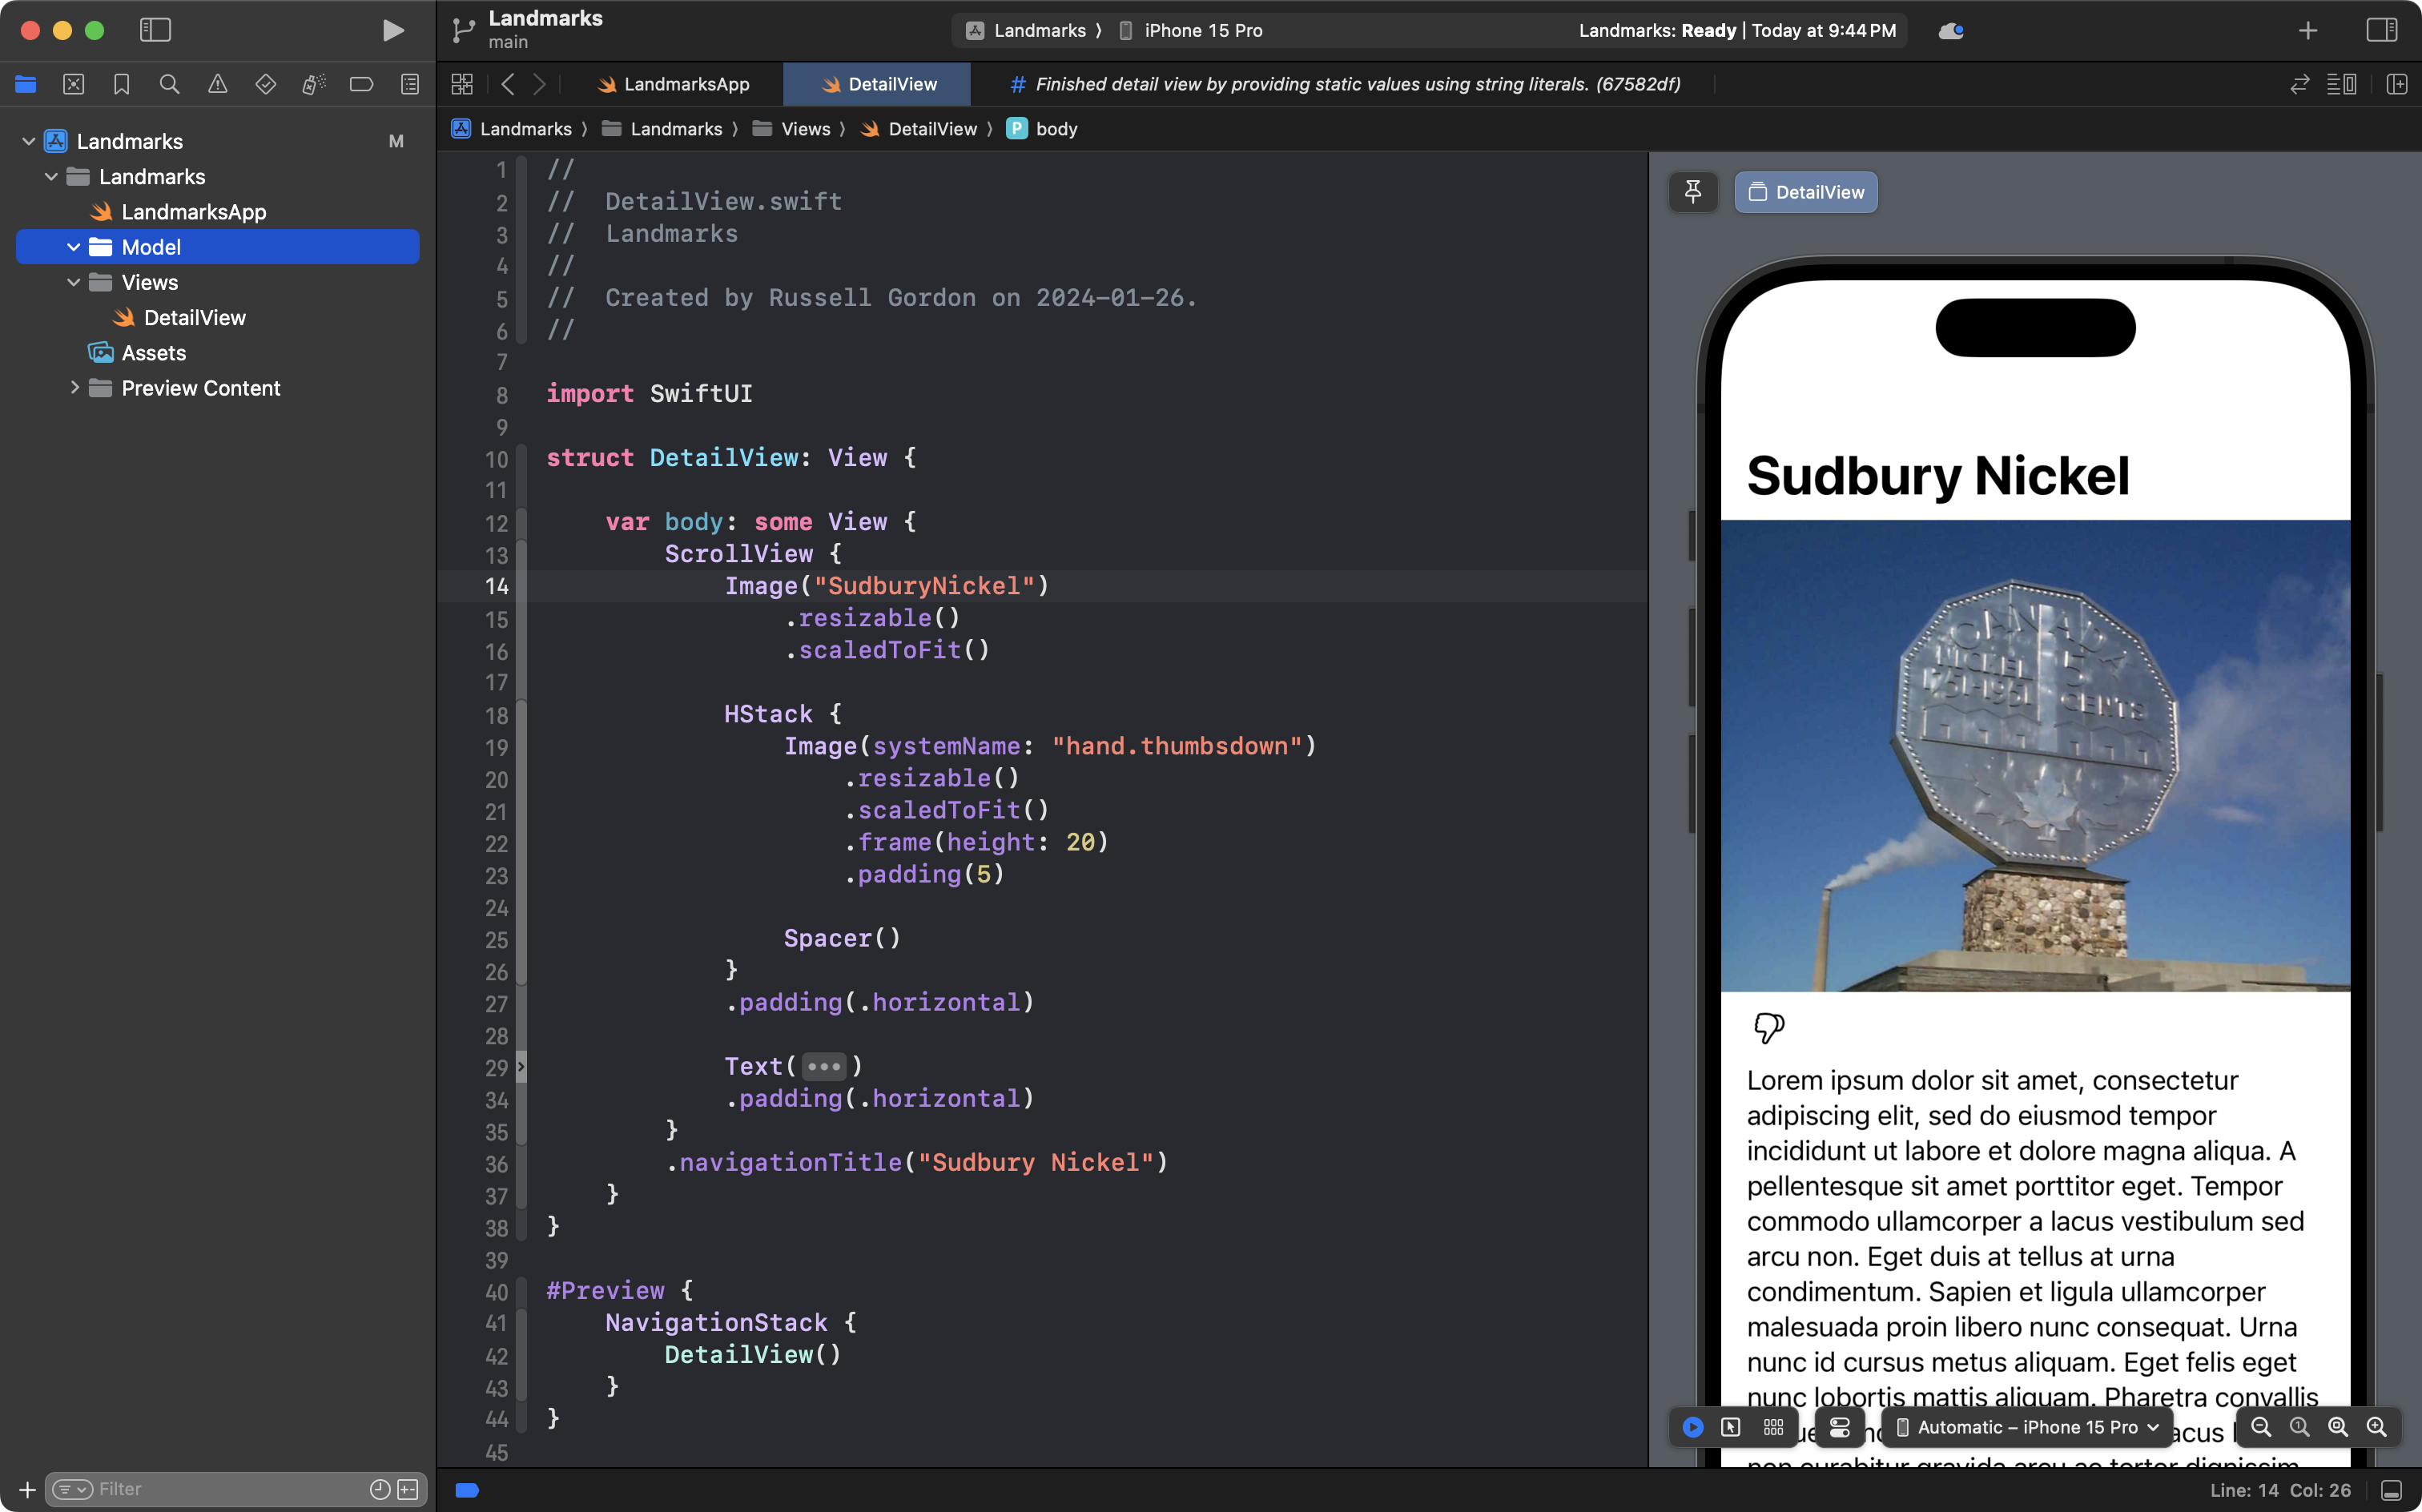
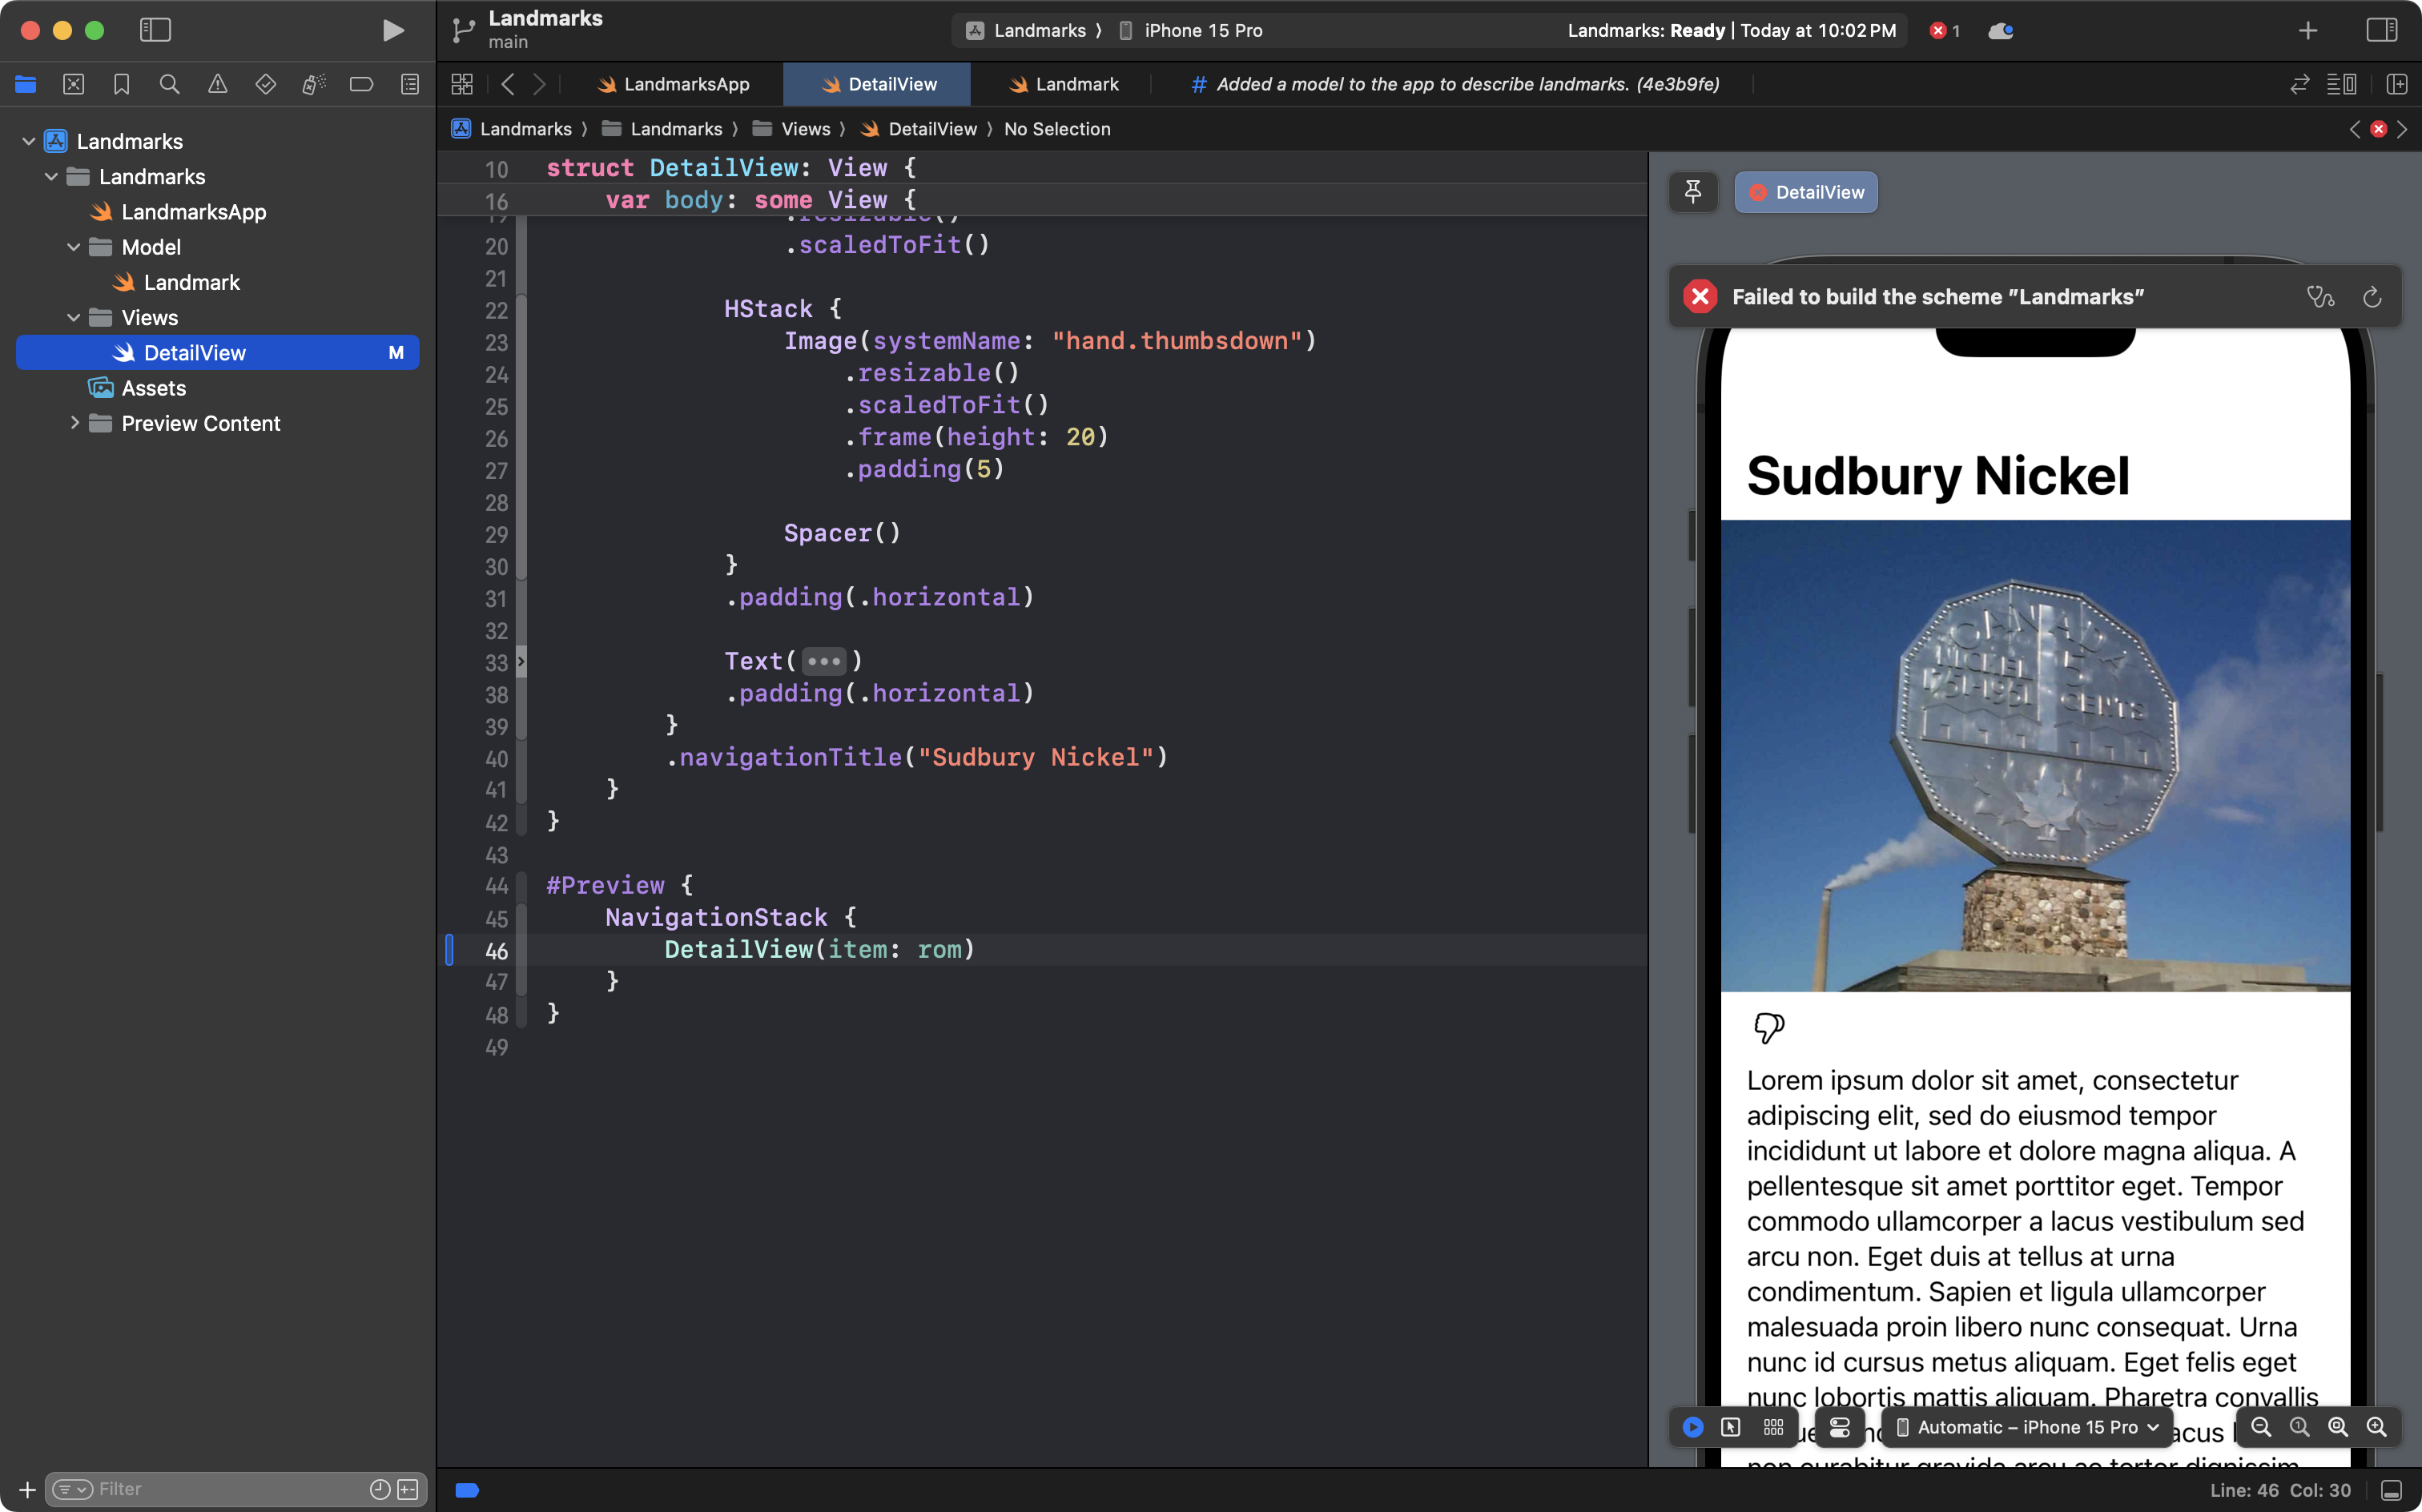
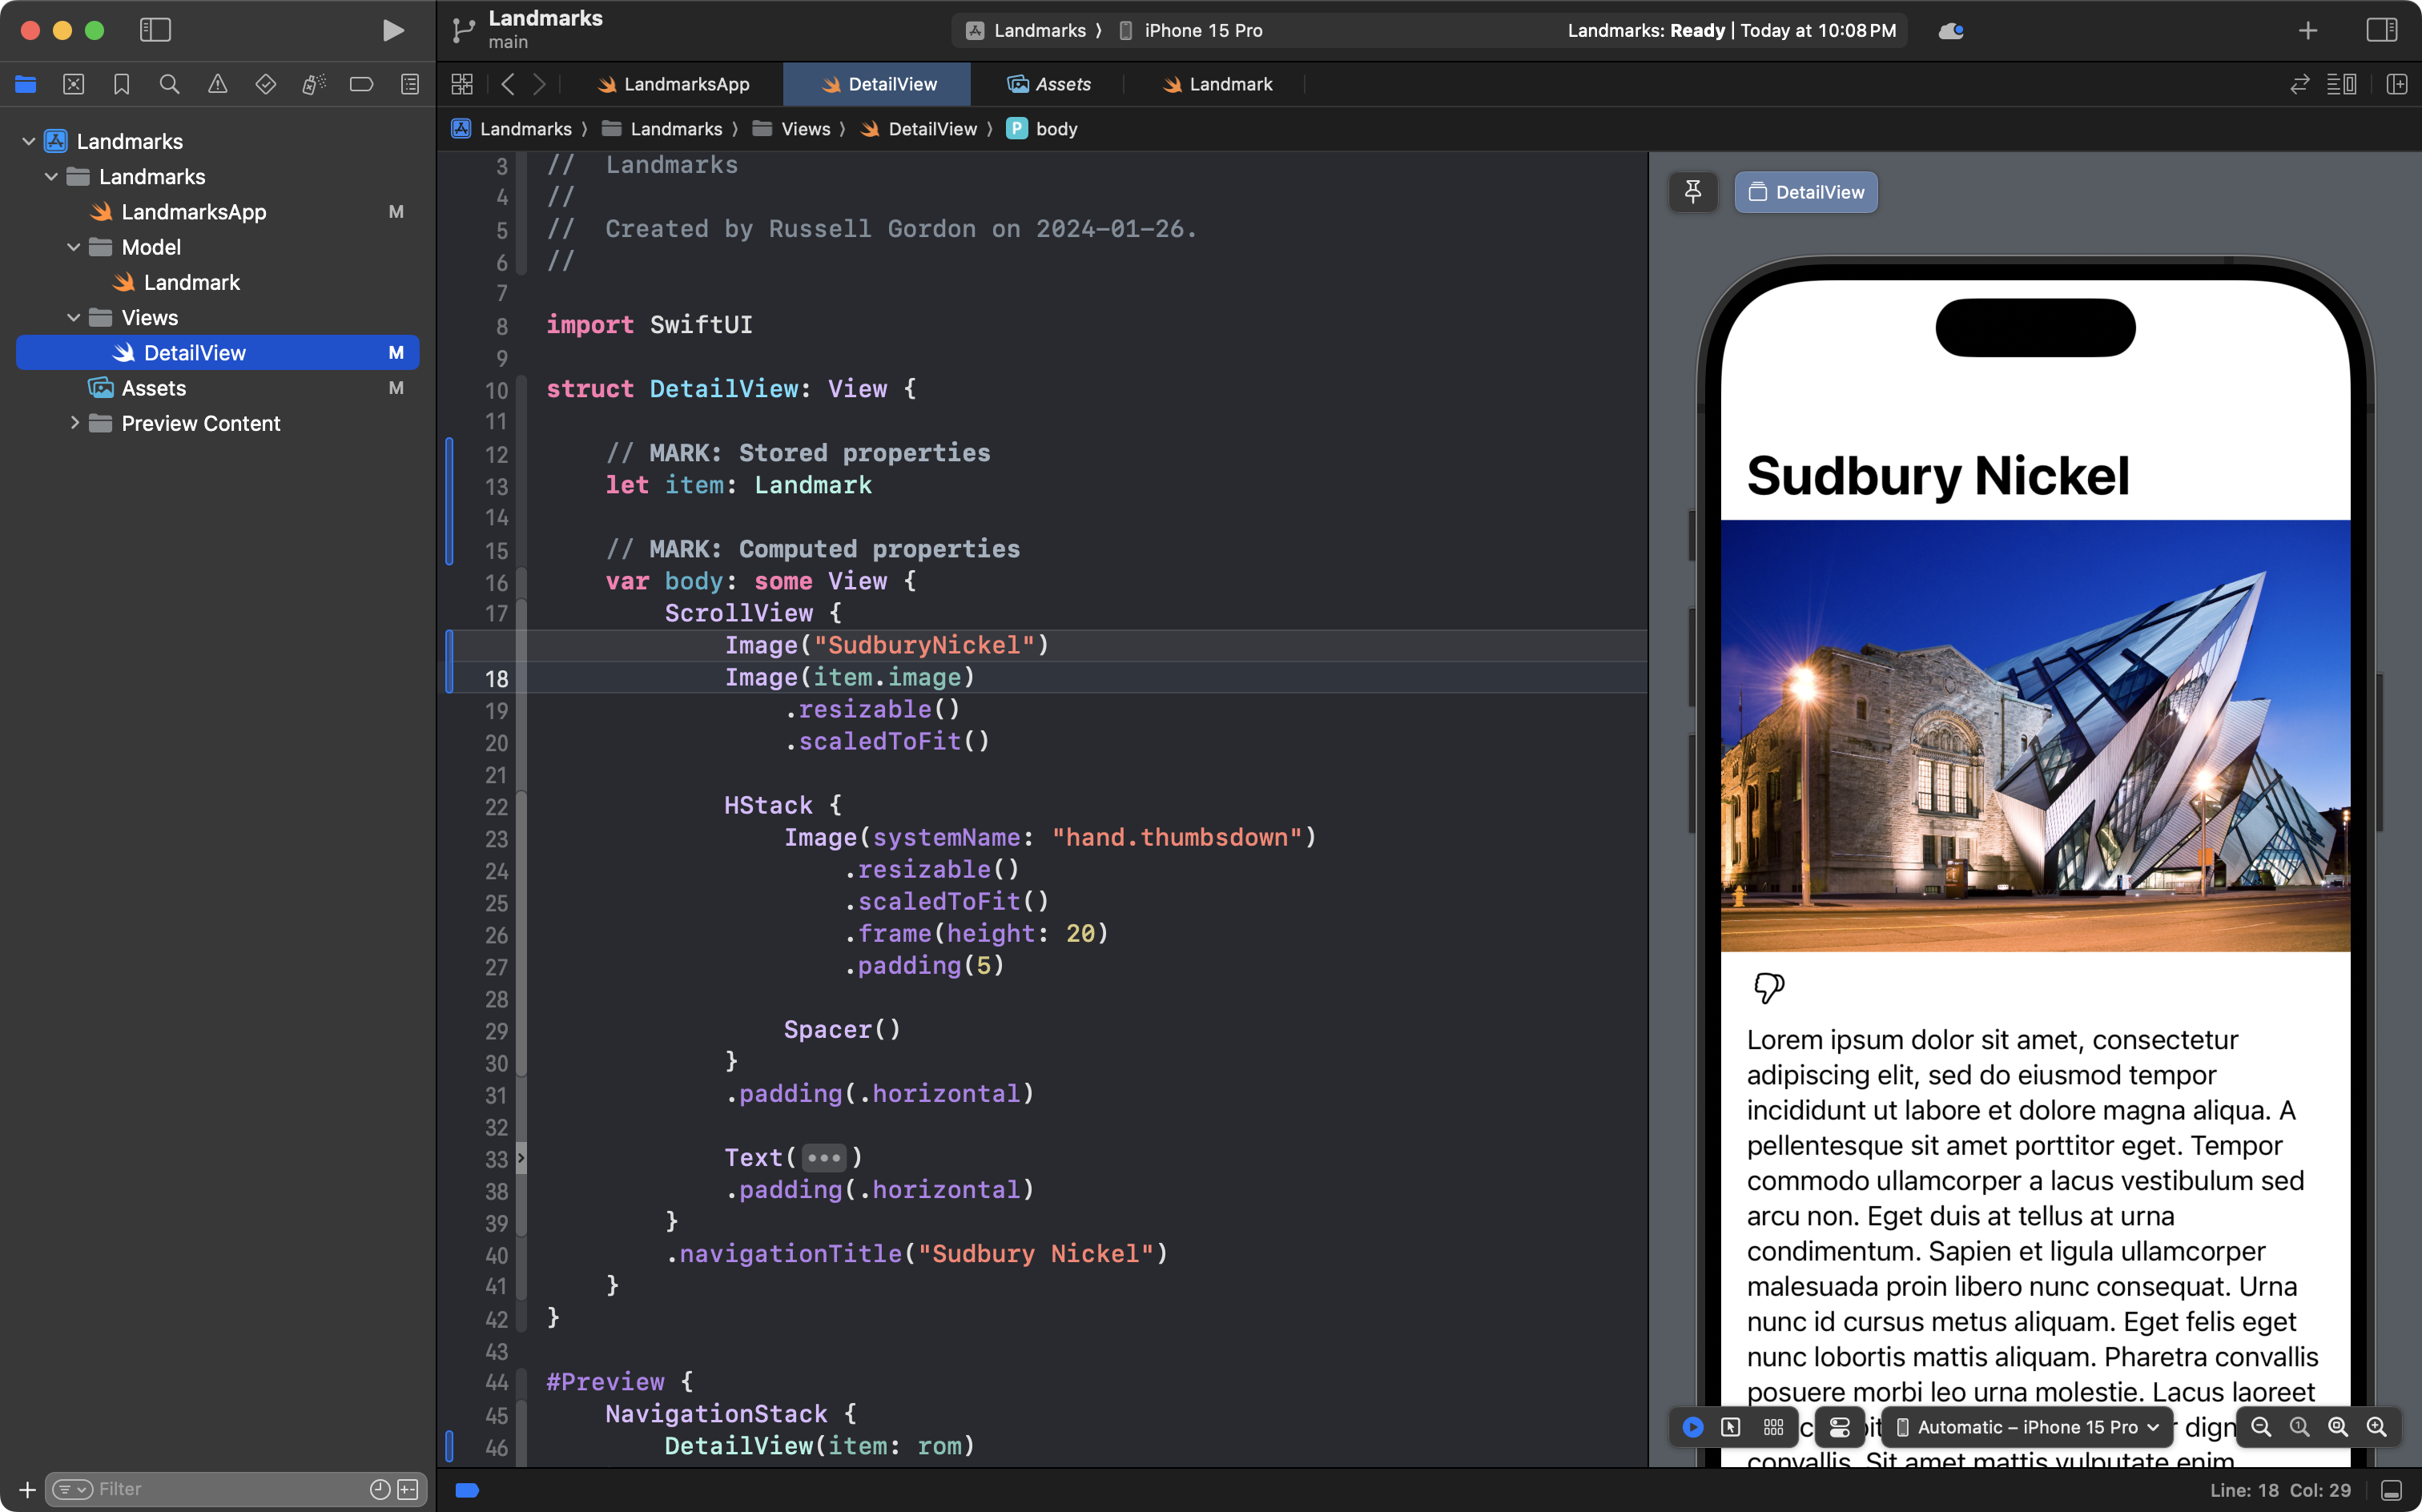
The interface we want to create can be achieved using a ScrollView, which acts like a VStack but provides infinite vertical space for things like a large amount of text:
When you first build an interface, a good place to start is simply with a static layout – where you hard-code values inside string literals:

NOTE
Everything you see that is highlighted in red in the screenshot above is a string literal.
The focus of this lesson is not to practice building interfaces from scratch – you’ve had plenty of practice with that – so please feel free to copy and paste this code into your DetailView file:
import SwiftUI
struct DetailView: View {
var body: some View {
ScrollView {
Image("SudburyNickel")
.resizable()
.scaledToFit()
HStack {
Image(systemName: "hand.thumbsdown")
.resizable()
.scaledToFit()
.frame(height: 20)
.padding(5)
Spacer()
}
.padding(.horizontal)
Text("""
Lorem ipsum dolor sit amet, consectetur adipiscing elit, sed do eiusmod tempor incididunt ut labore et dolore magna aliqua. A pellentesque sit amet porttitor eget. Tempor commodo ullamcorper a lacus vestibulum sed arcu non. Eget duis at tellus at urna condimentum. Sapien et ligula ullamcorper malesuada proin libero nunc consequat. Urna nunc id cursus metus aliquam. Eget felis eget nunc lobortis mattis aliquam. Pharetra convallis posuere morbi leo urna molestie. Lacus laoreet non curabitur gravida arcu ac tortor dignissim convallis. Sit amet mattis vulputate enim.
Sit amet facilisis magna etiam tempor orci. Quis eleifend quam adipiscing vitae proin sagittis. Mollis nunc sed id semper risus in. Pellentesque dignissim enim sit amet venenatis. Laoreet suspendisse interdum consectetur libero id faucibus nisl tincidunt eget. Eu volutpat odio facilisis mauris. Purus gravida quis blandit turpis cursus in hac habitasse platea. Nibh tortor id aliquet lectus proin nibh nisl condimentum. Fringilla ut morbi tincidunt augue interdum velit euismod. Sed ullamcorper morbi tincidunt ornare massa eget egestas.
""")
.padding(.horizontal)
}
.navigationTitle("Sudbury Nickel")
}
}
#Preview {
NavigationStack {
DetailView()
}
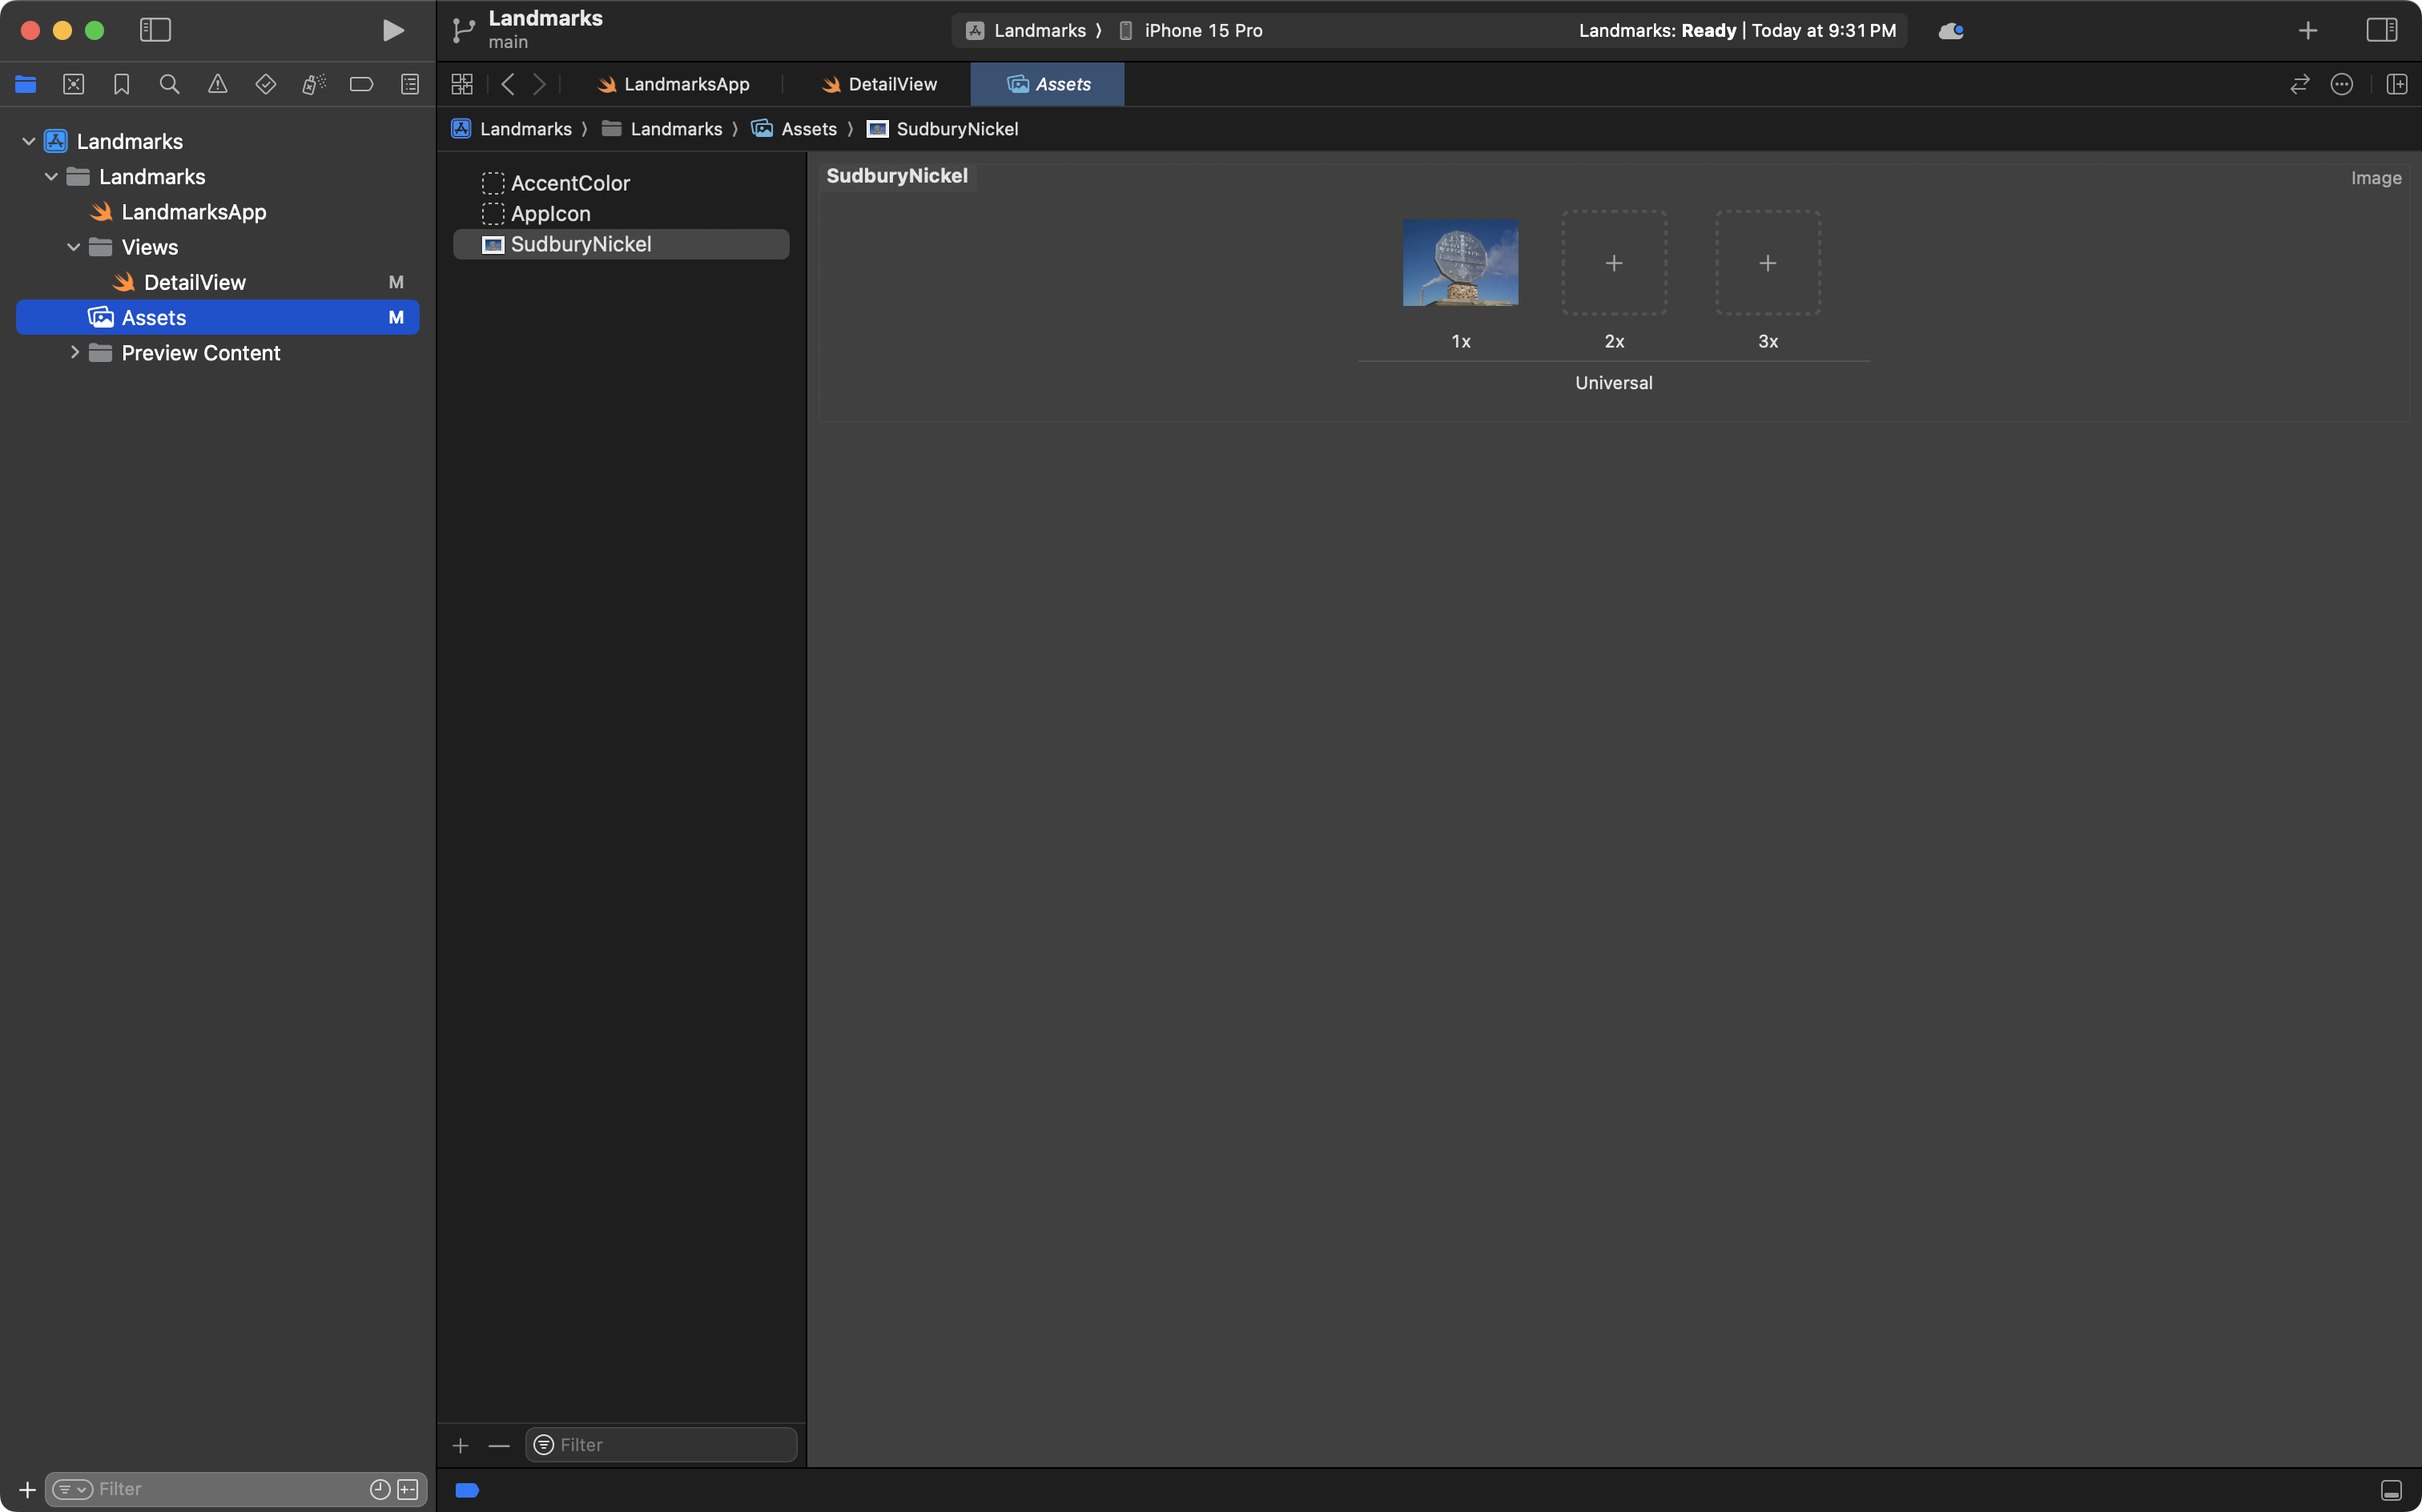
}To see the same results, you will need to download this image to your computer:

… and then add the image to your Assets catalog in Xcode:
A couple of observations:
DetailViewwithin the preview is created within aNavigationStack.- We do this so that we can see the navigation title within the preview.
Commit and push your work at this point with the message:
Finished detail view by providing static values using string literals.
Build the model
Of course, we want to show many landmarks, not just one.
It would be extremely inefficient to make a copy of DetailView for each landmark we want to keep track of in our app.
So, we must build a model to keep track of the data within our app.
This will allow us to apply abstraction to DetailView so that it can display any landmark, not just the information we have currently hard-coded into it.
What we must do is imagine a second location that we want to keep track of:
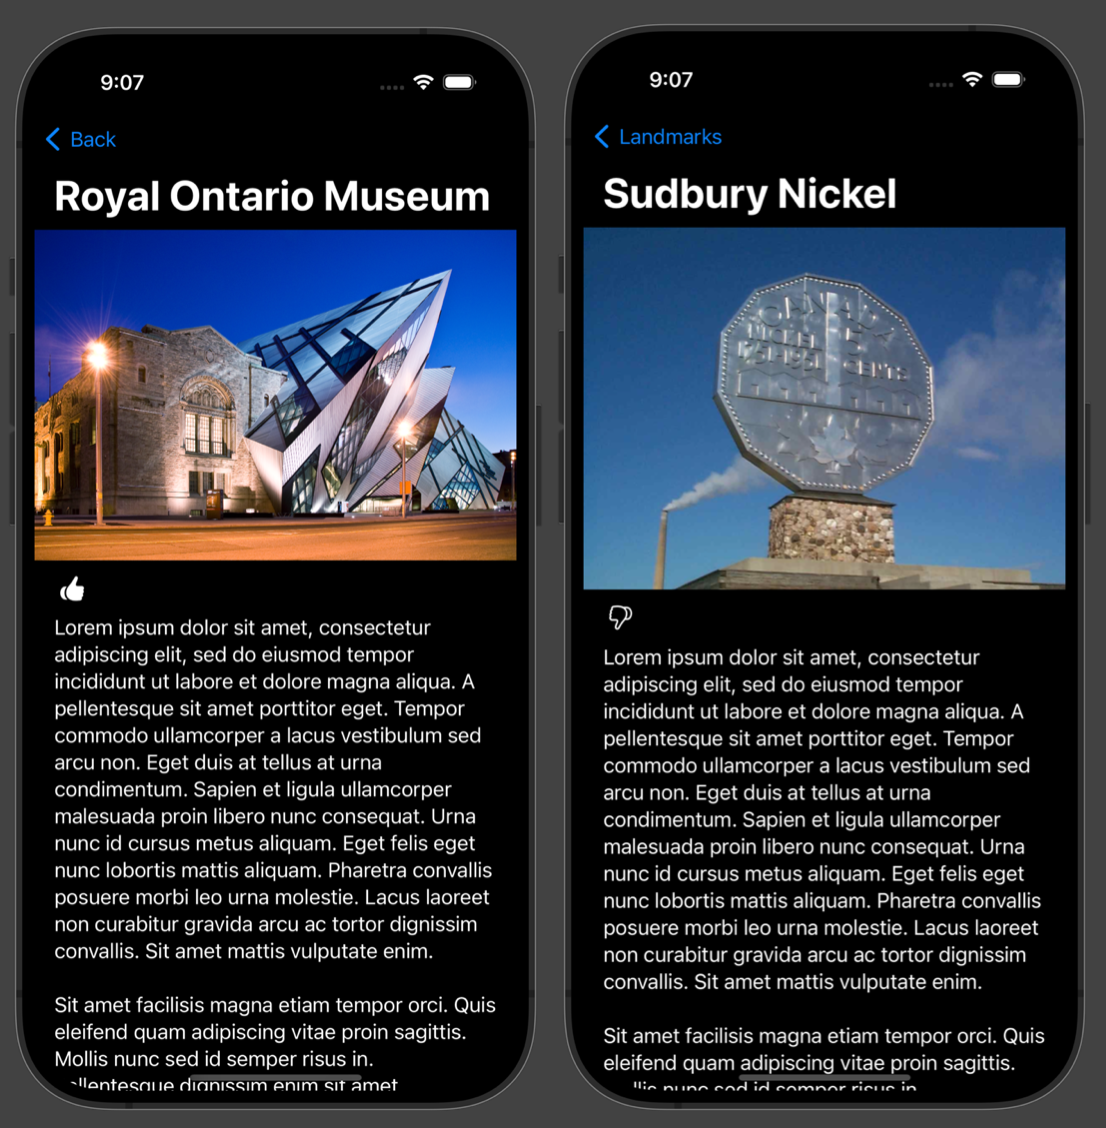
Now, between these two screenshots, we can identify four pieces of information that will change from one landmark to the next:
- the landmark name
- the image
- whether we like the landmark or not
- the description
NOTE
In the screenshot above, we are using placeholder text for each landmark. In a real app, we would have something different to say about each landmark we are keeping track of.
So, our next step is to create another group within our project named Model (singular):

… like this:
Inside the Model group, please create a new Swift file named Landmark:
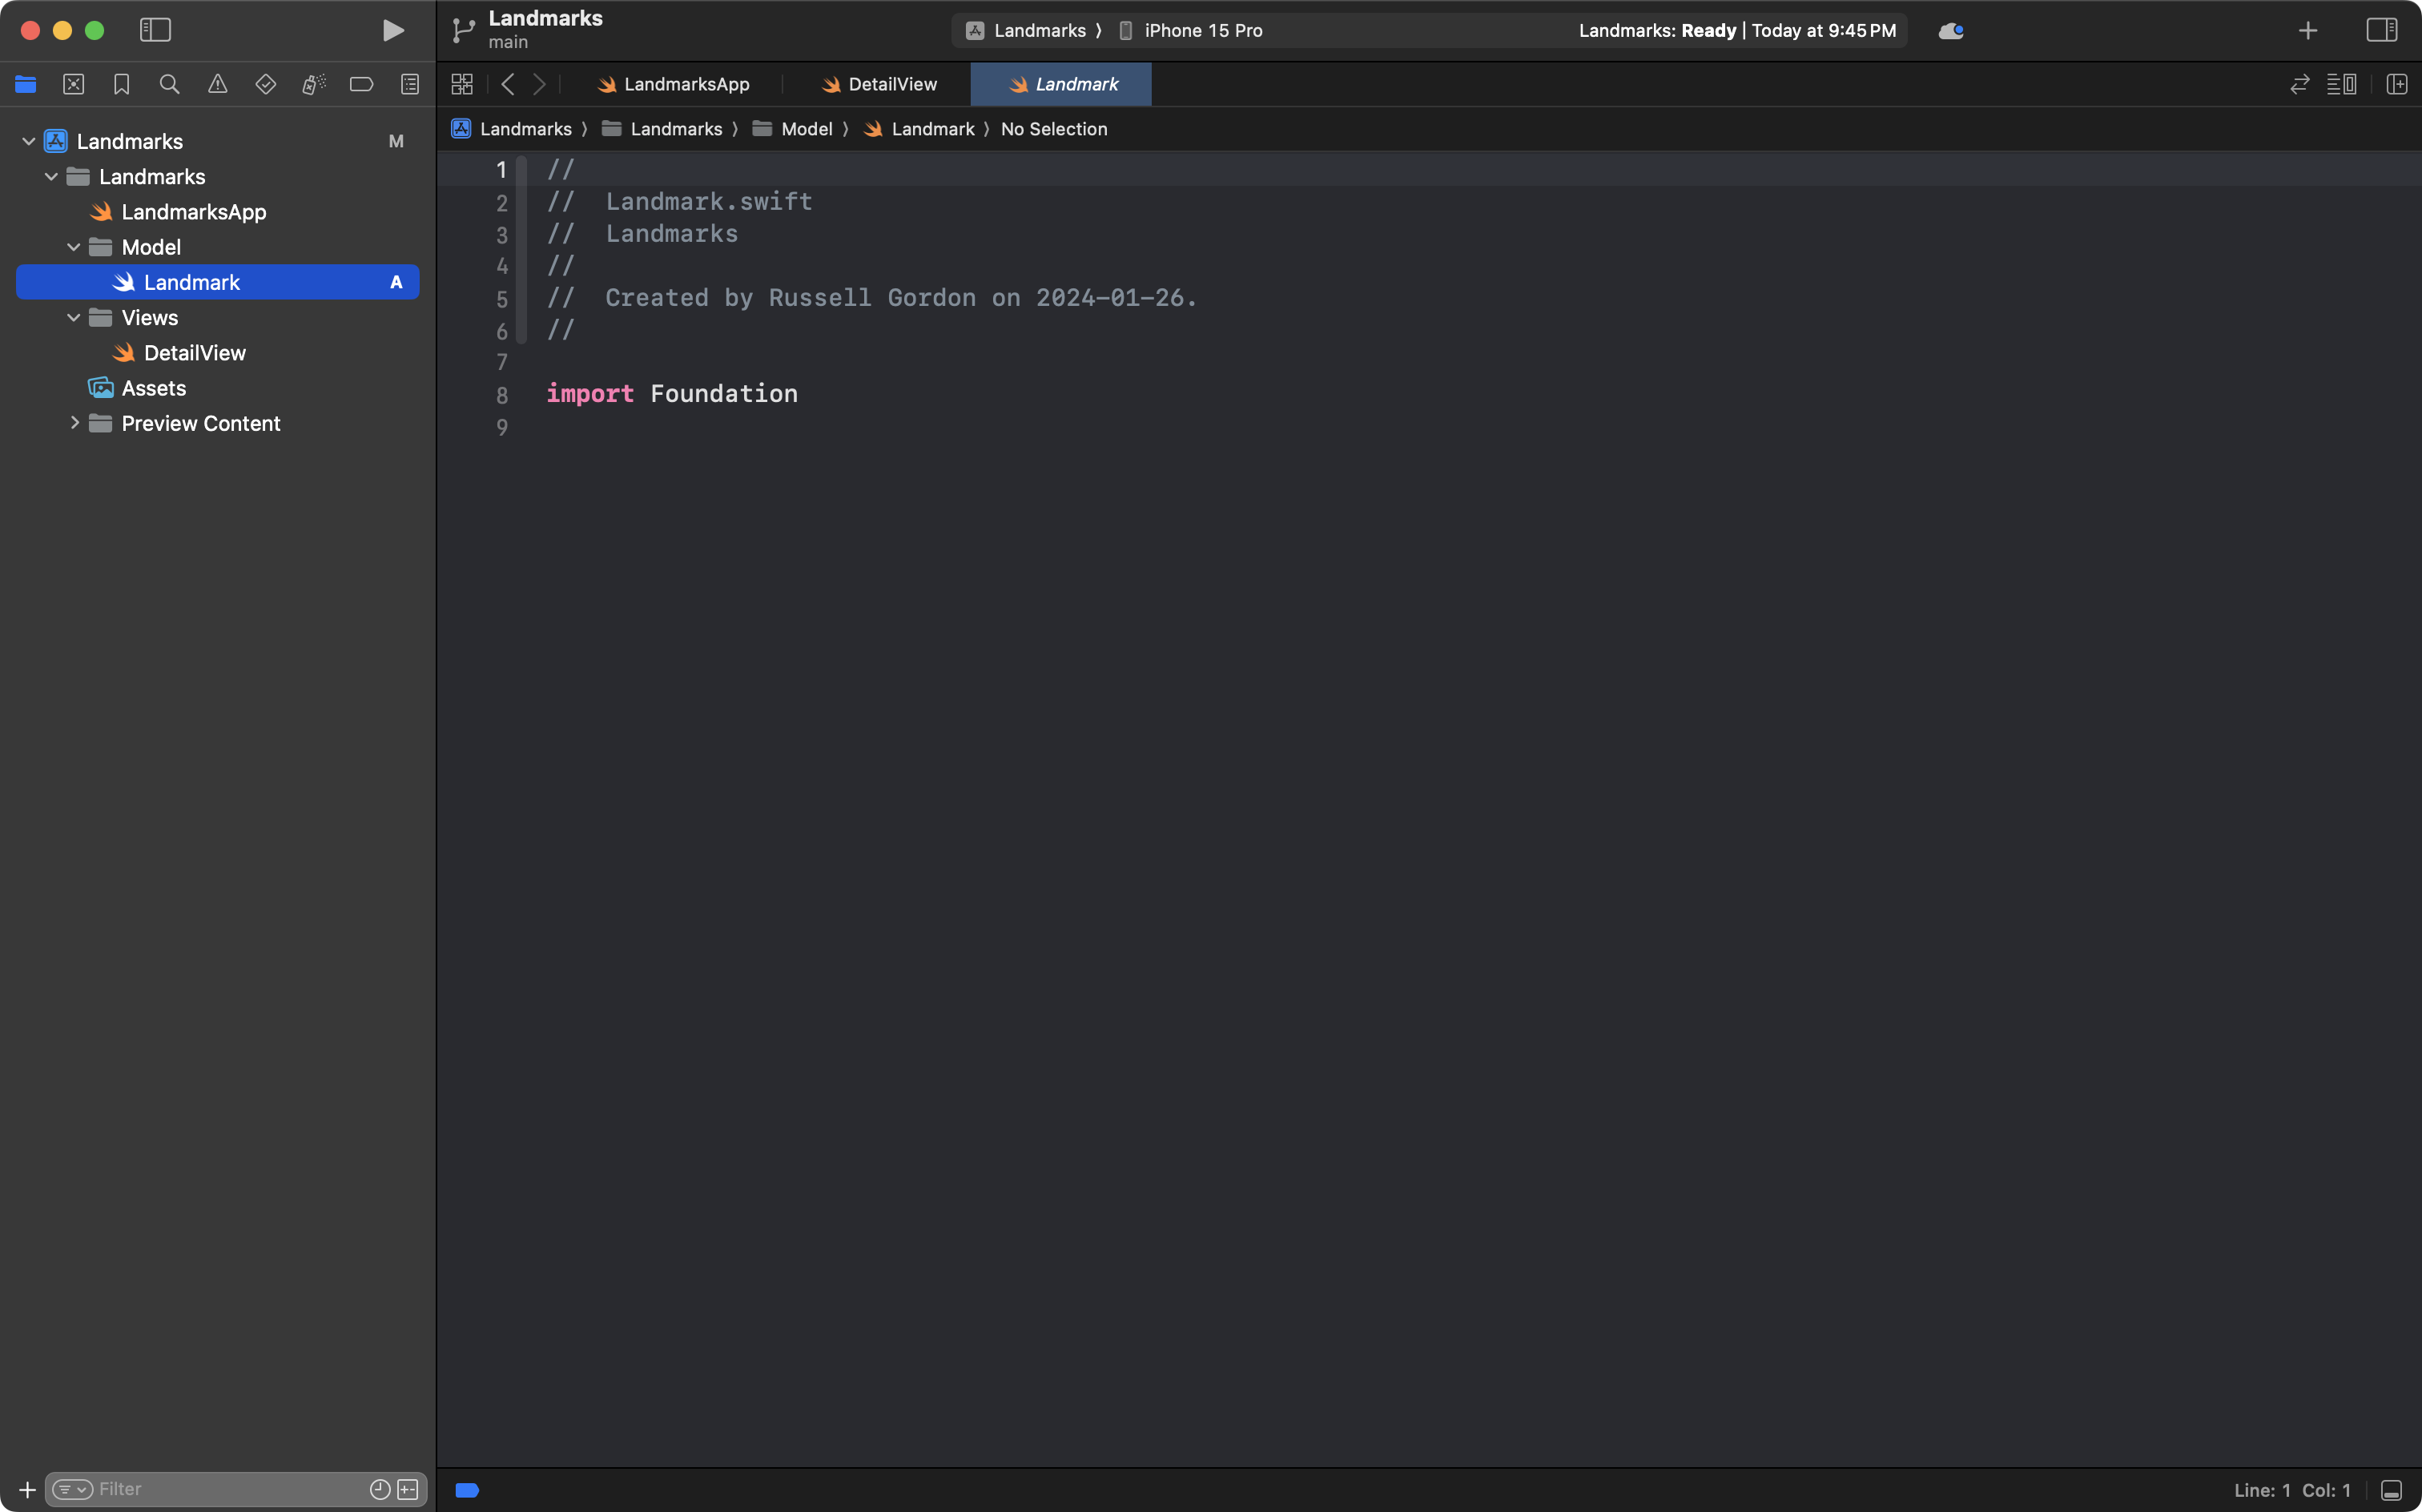
And once again, the purpose of this tutorial at the moment is not to have you spend time typing – so please feel free to copy this code into your new Landmark file, so your file looks like this:

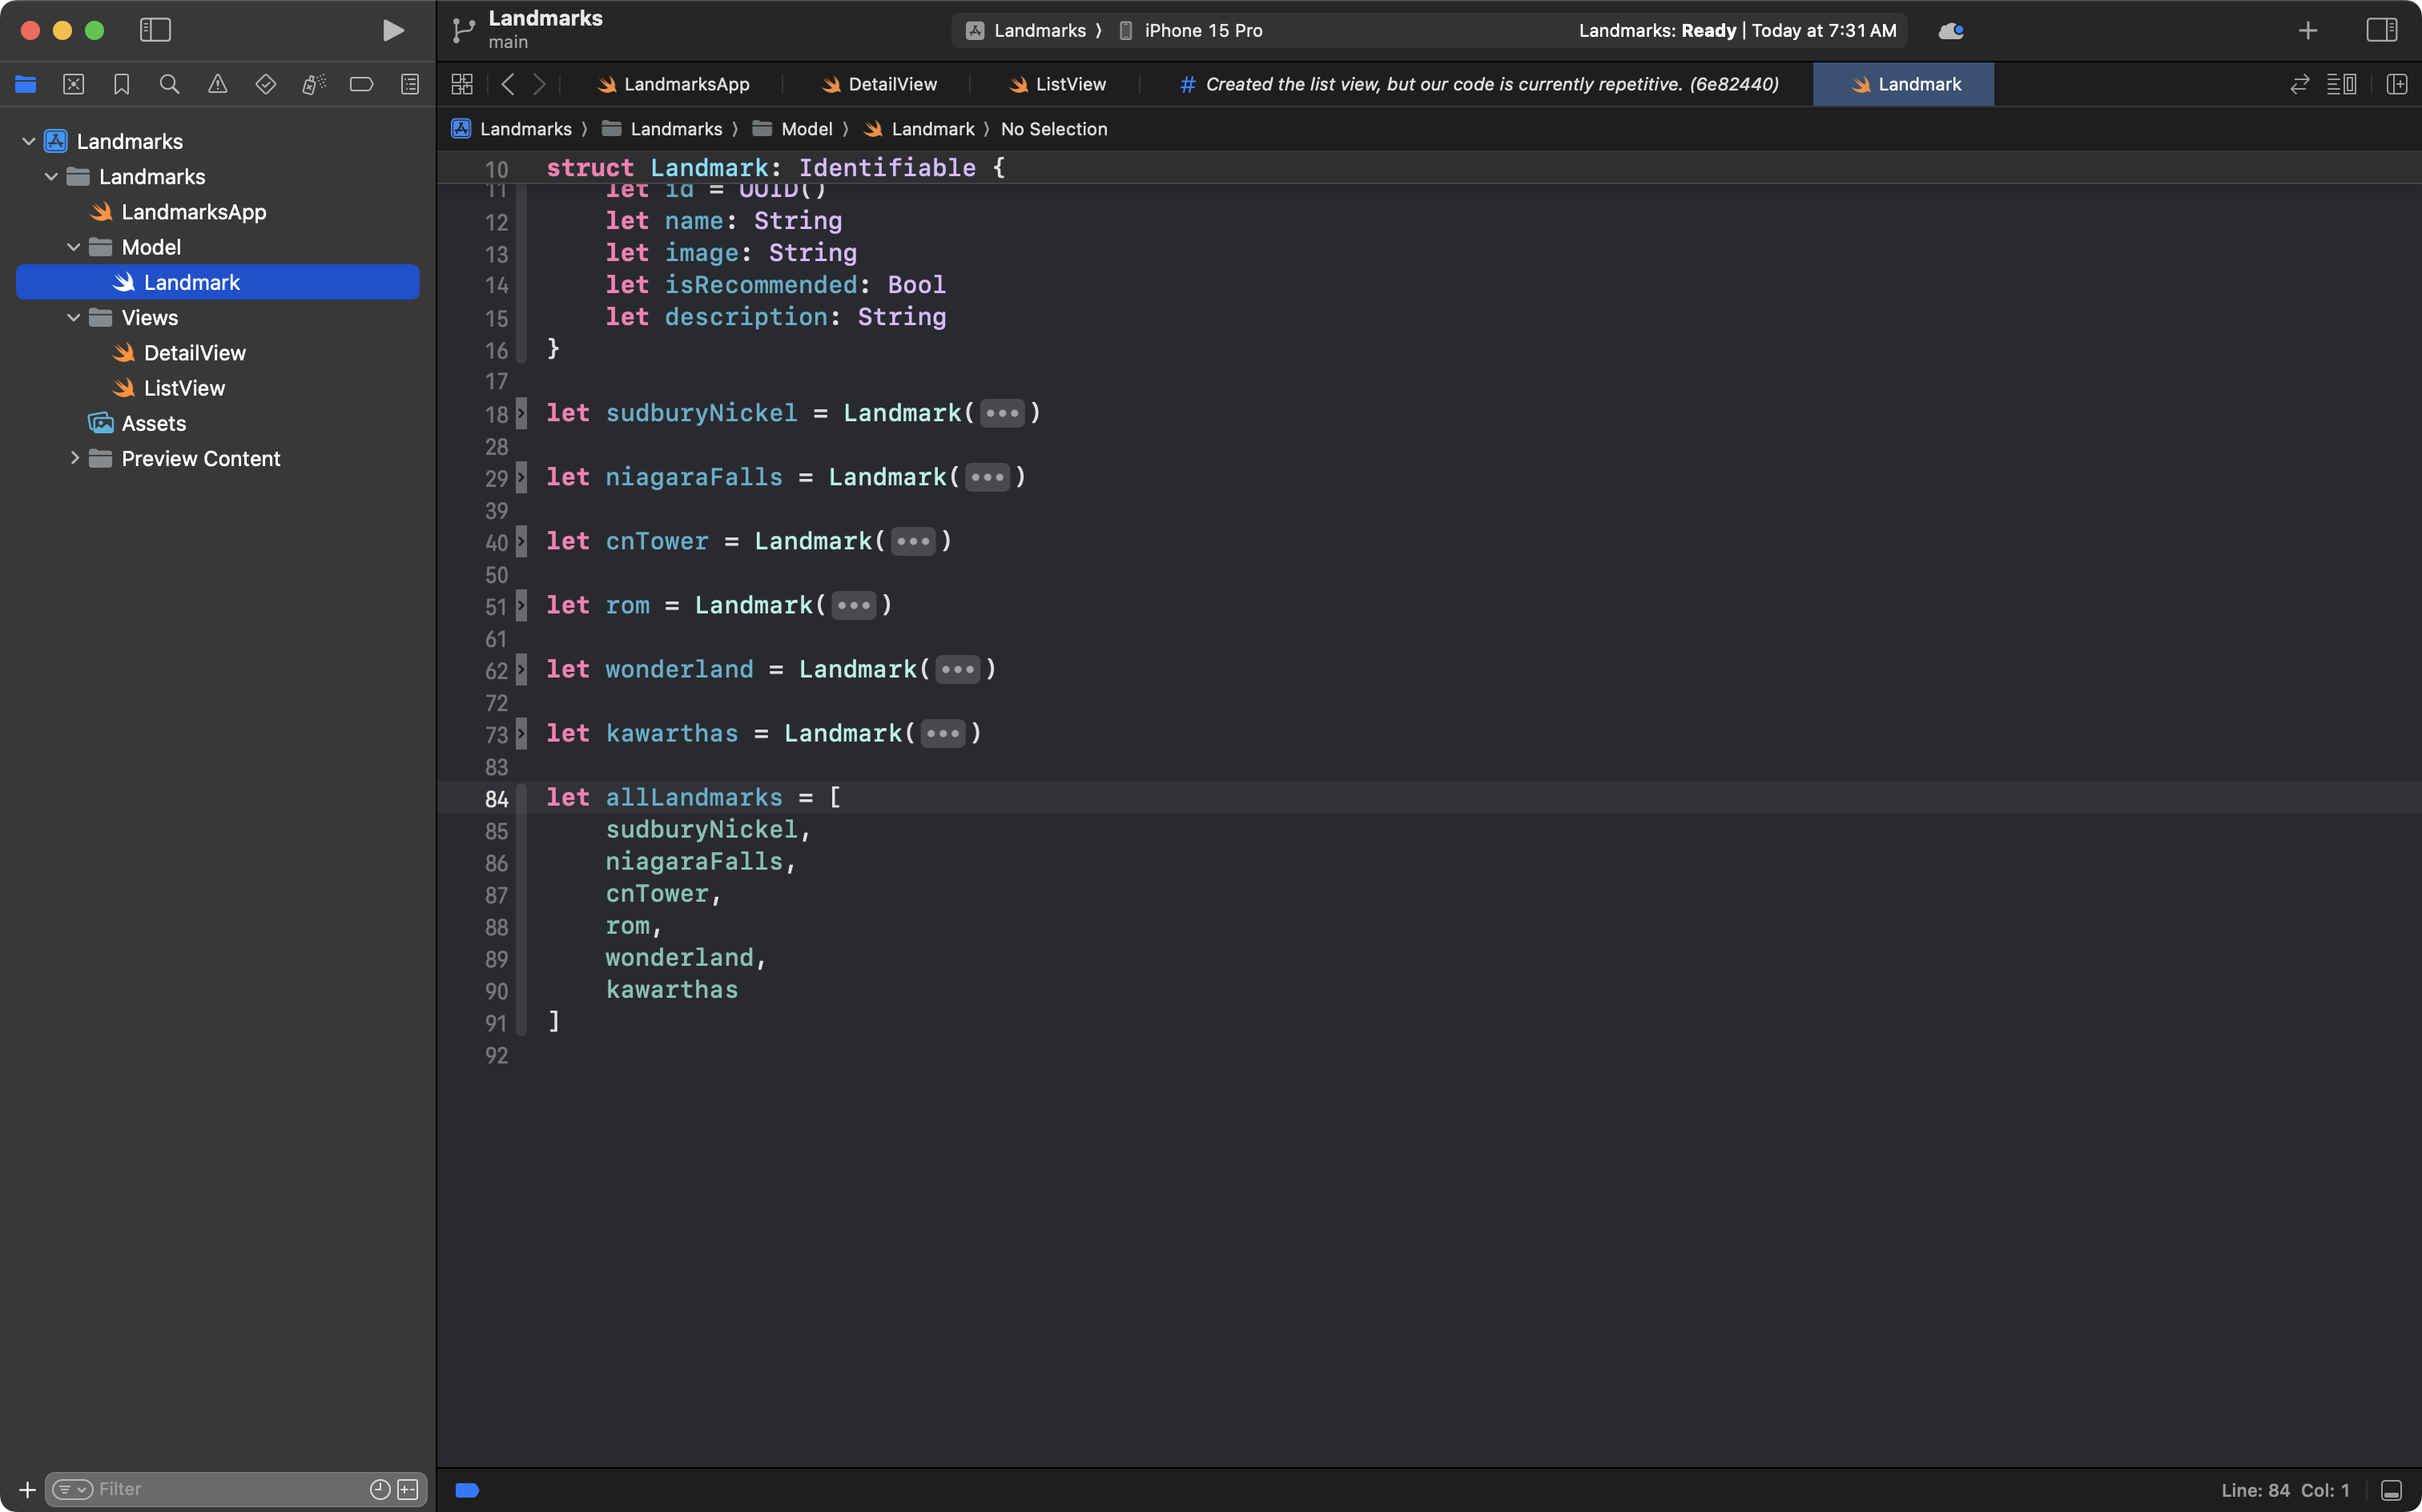
After code-folding the parts of the file where instances of the structure are created, your file would look like this:
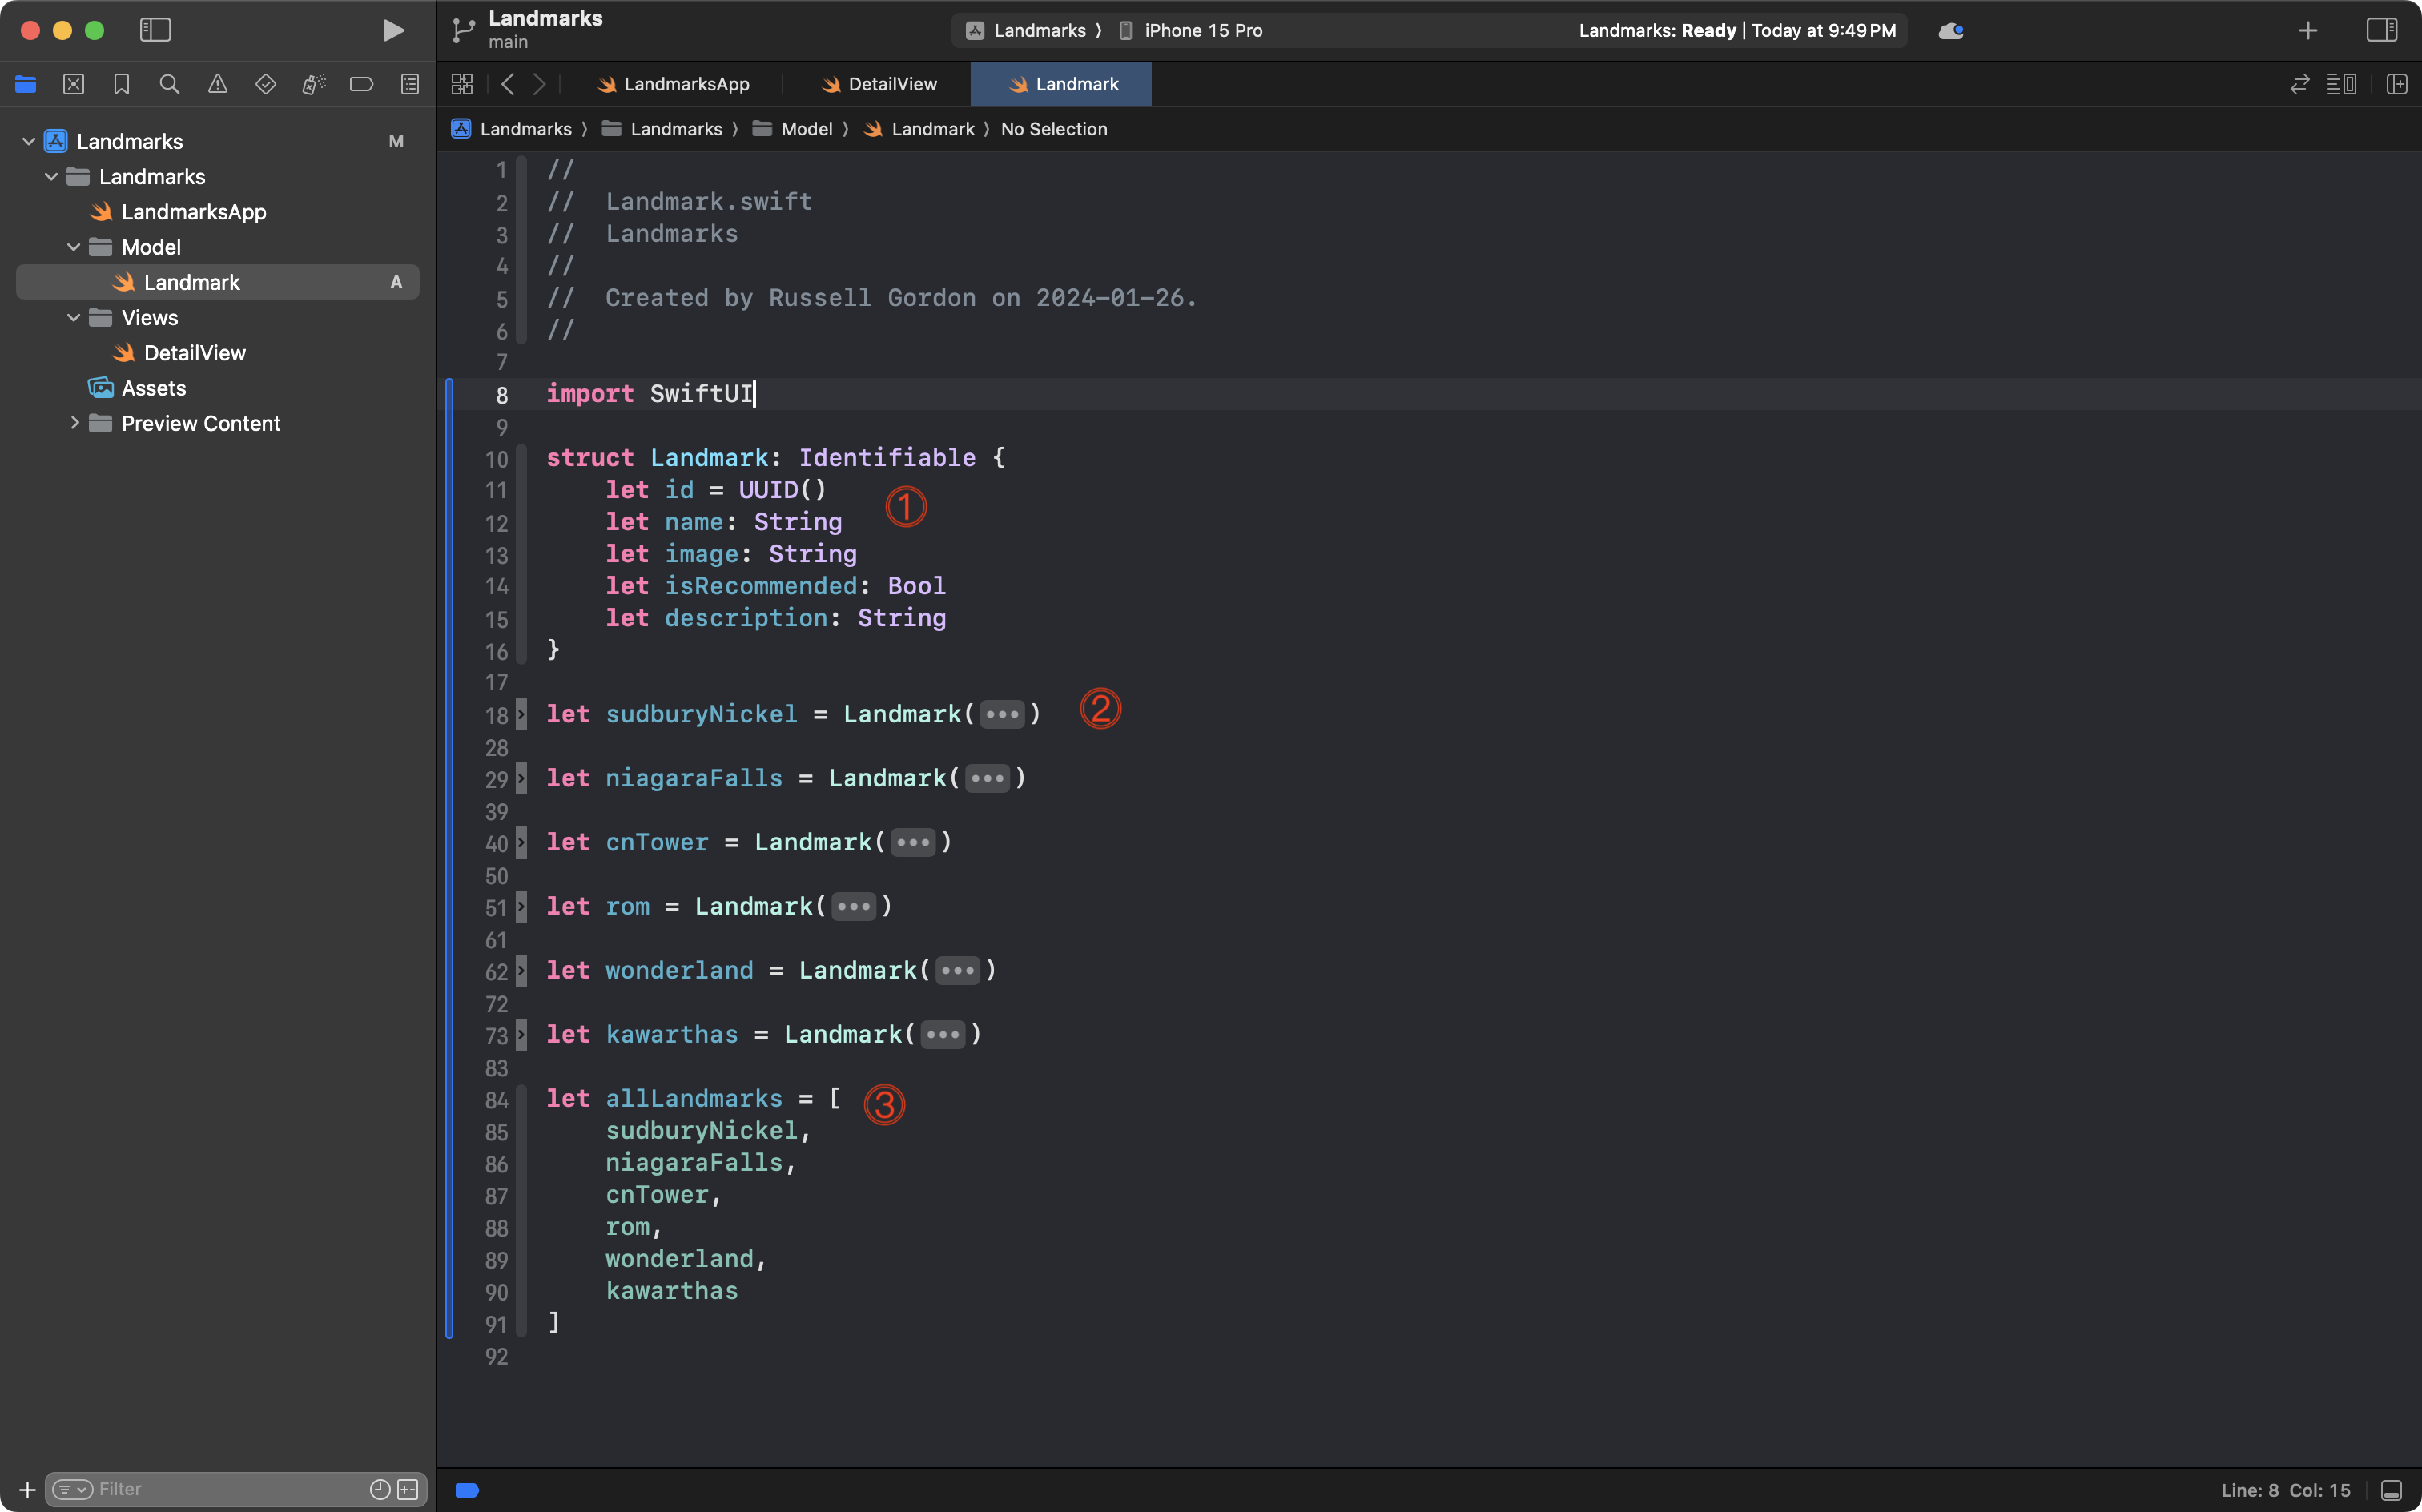
Let’s examine what we see here.
- We define a structure named
Landmark. It contains four stored properties that we need to provide values for when creating instances ofLandmark. It contains one property,id, which is automatically populated with a universally unique identifier. We makeLandmarkconform to theIdentifiableprotocol so that we can use instances of this structure in a scrollable list. - We create several instances – six, in this case – of the structure. This holds the data we will display within our app. We can create as many instances as we wish.
- We add all the instances of the
Landmarkstructure into an array namedallLandmarks. This will let us build a scrollable list, and later, a scrollable gallery, without having repetitive code.
Commit and push your work now with this message:
Added a model to the app to describe landmarks.
Apply abstraction to the detail view
Now we should return to our detail view:

We want to make this work with any of the data we have just added to our model.
So, make the following initial edits:

By making these edits, we tell Swift that in order to create an instance of DetailView and show the user interface, an instance of the Landmark structure we just defined must be provided.
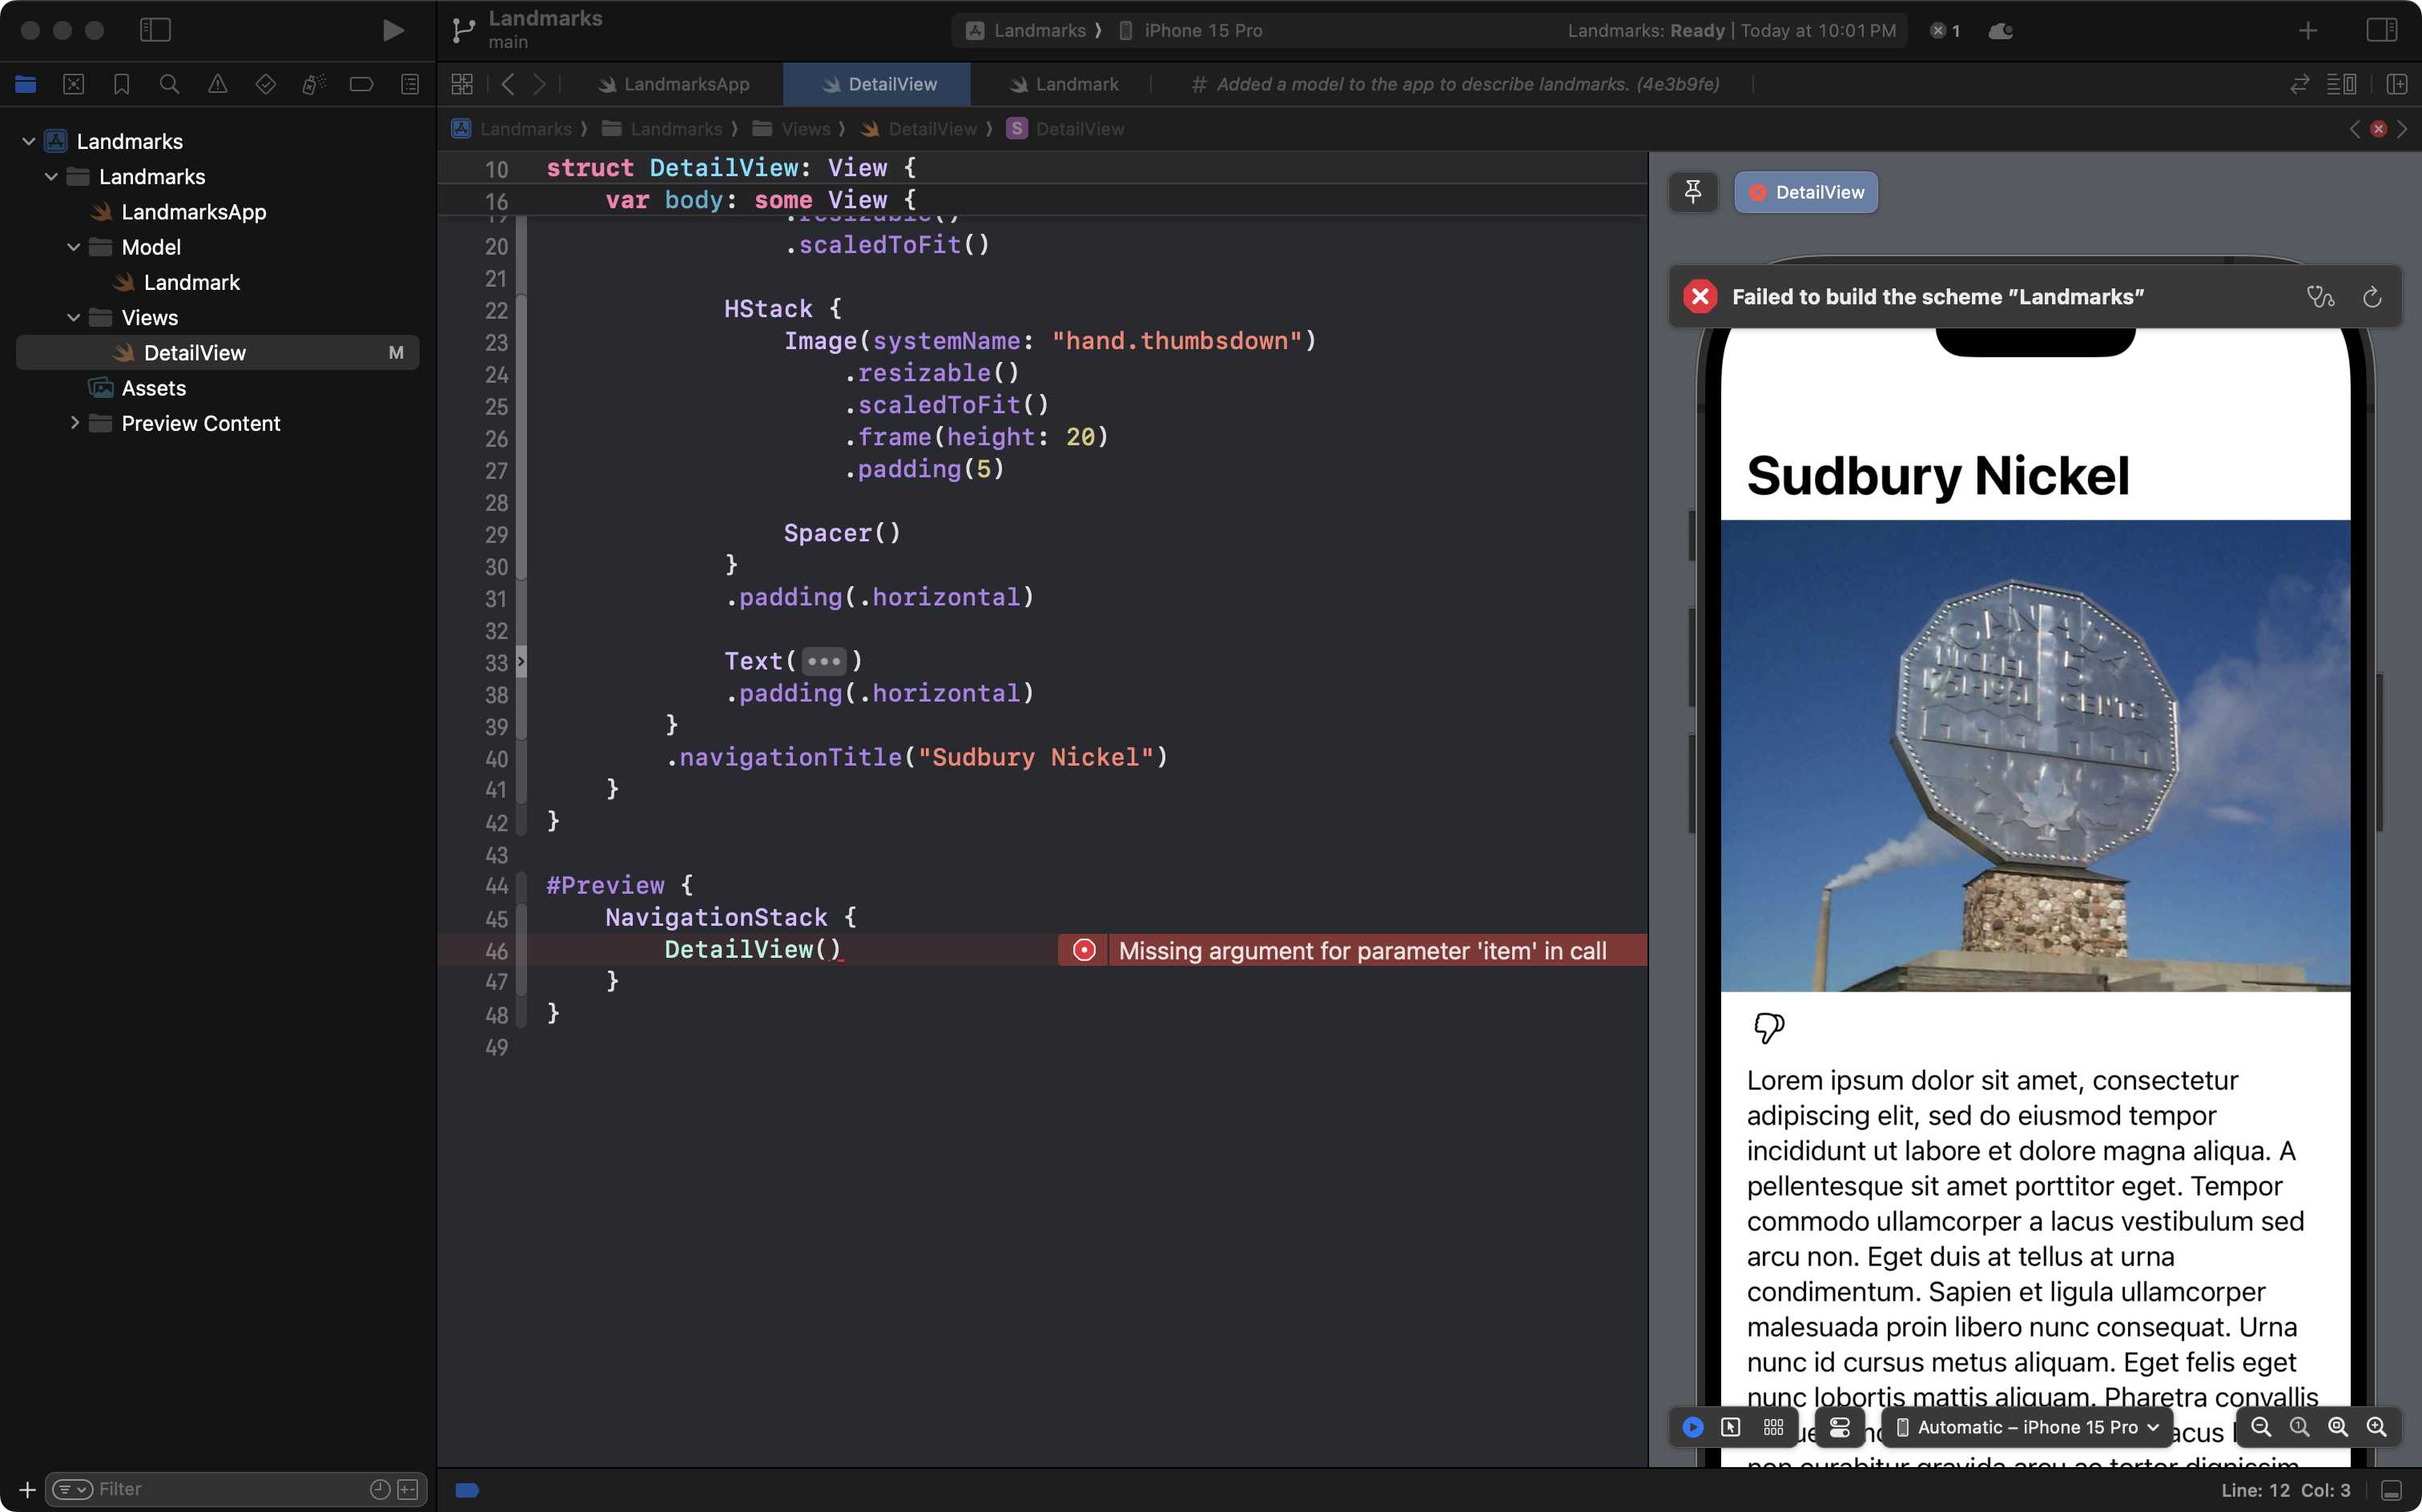
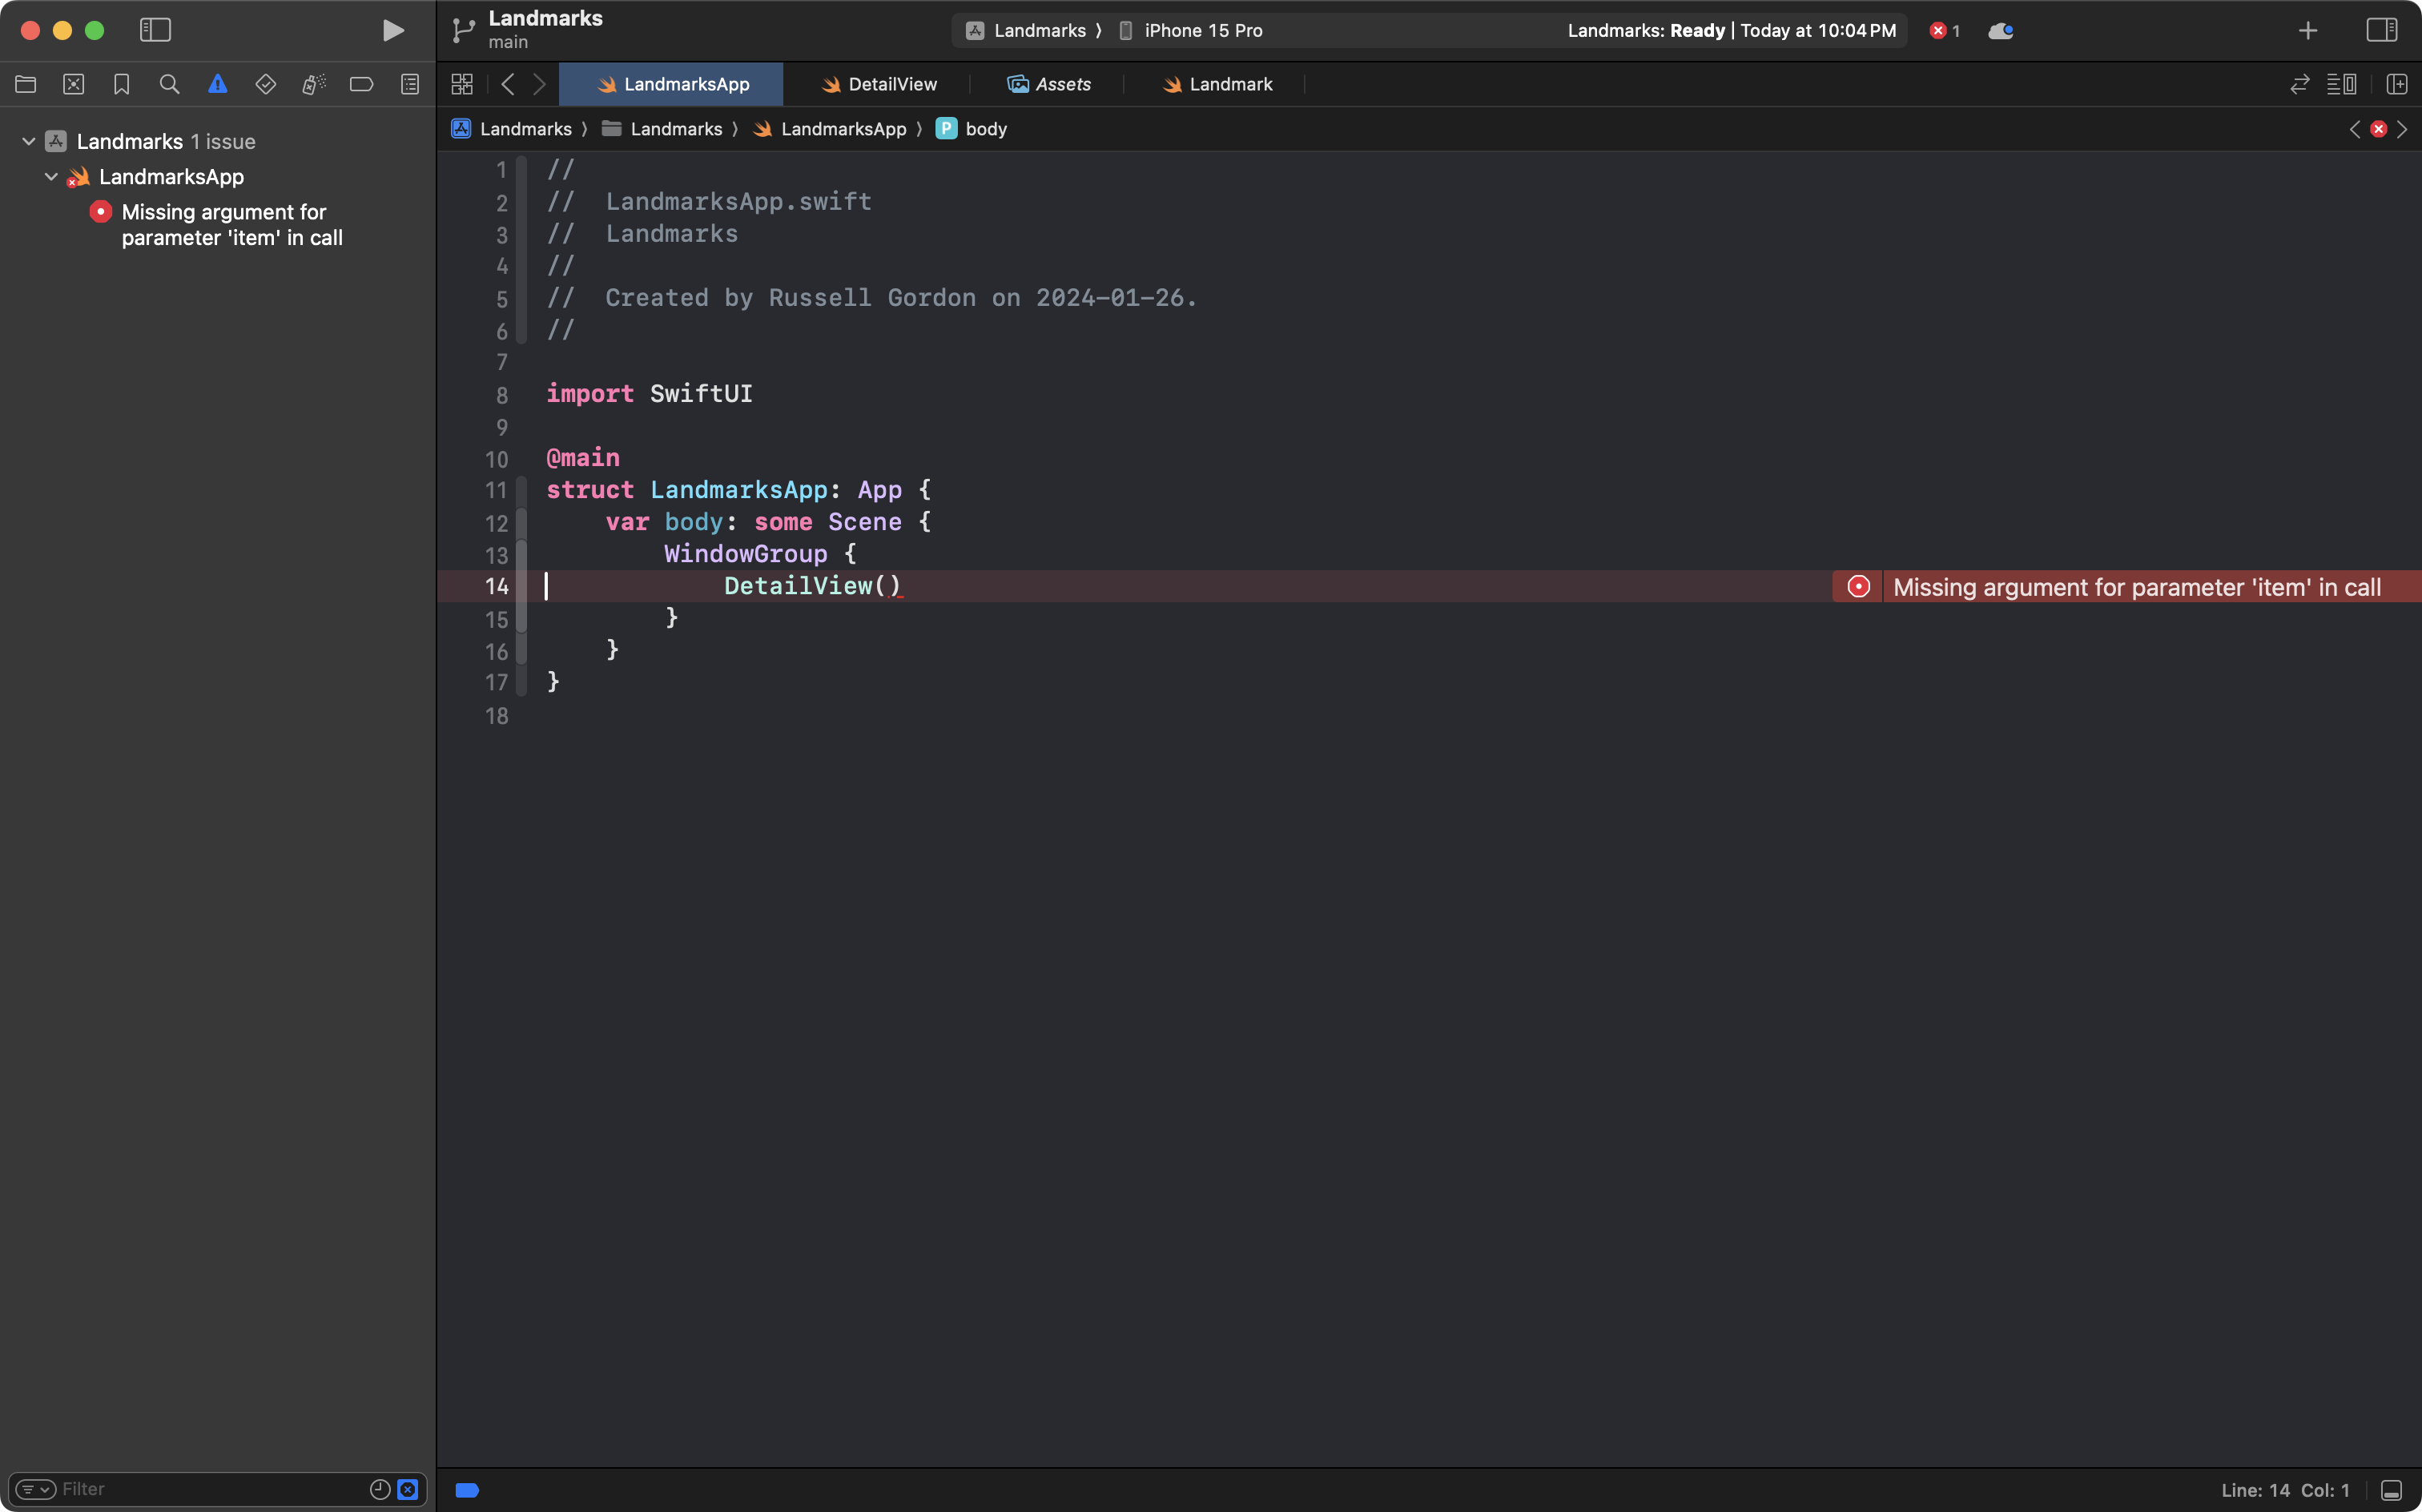
Of course, this creates an error, because our preview is currently trying to create DetailView without providing an instance of Landmark:
Correct this by making the following edit:
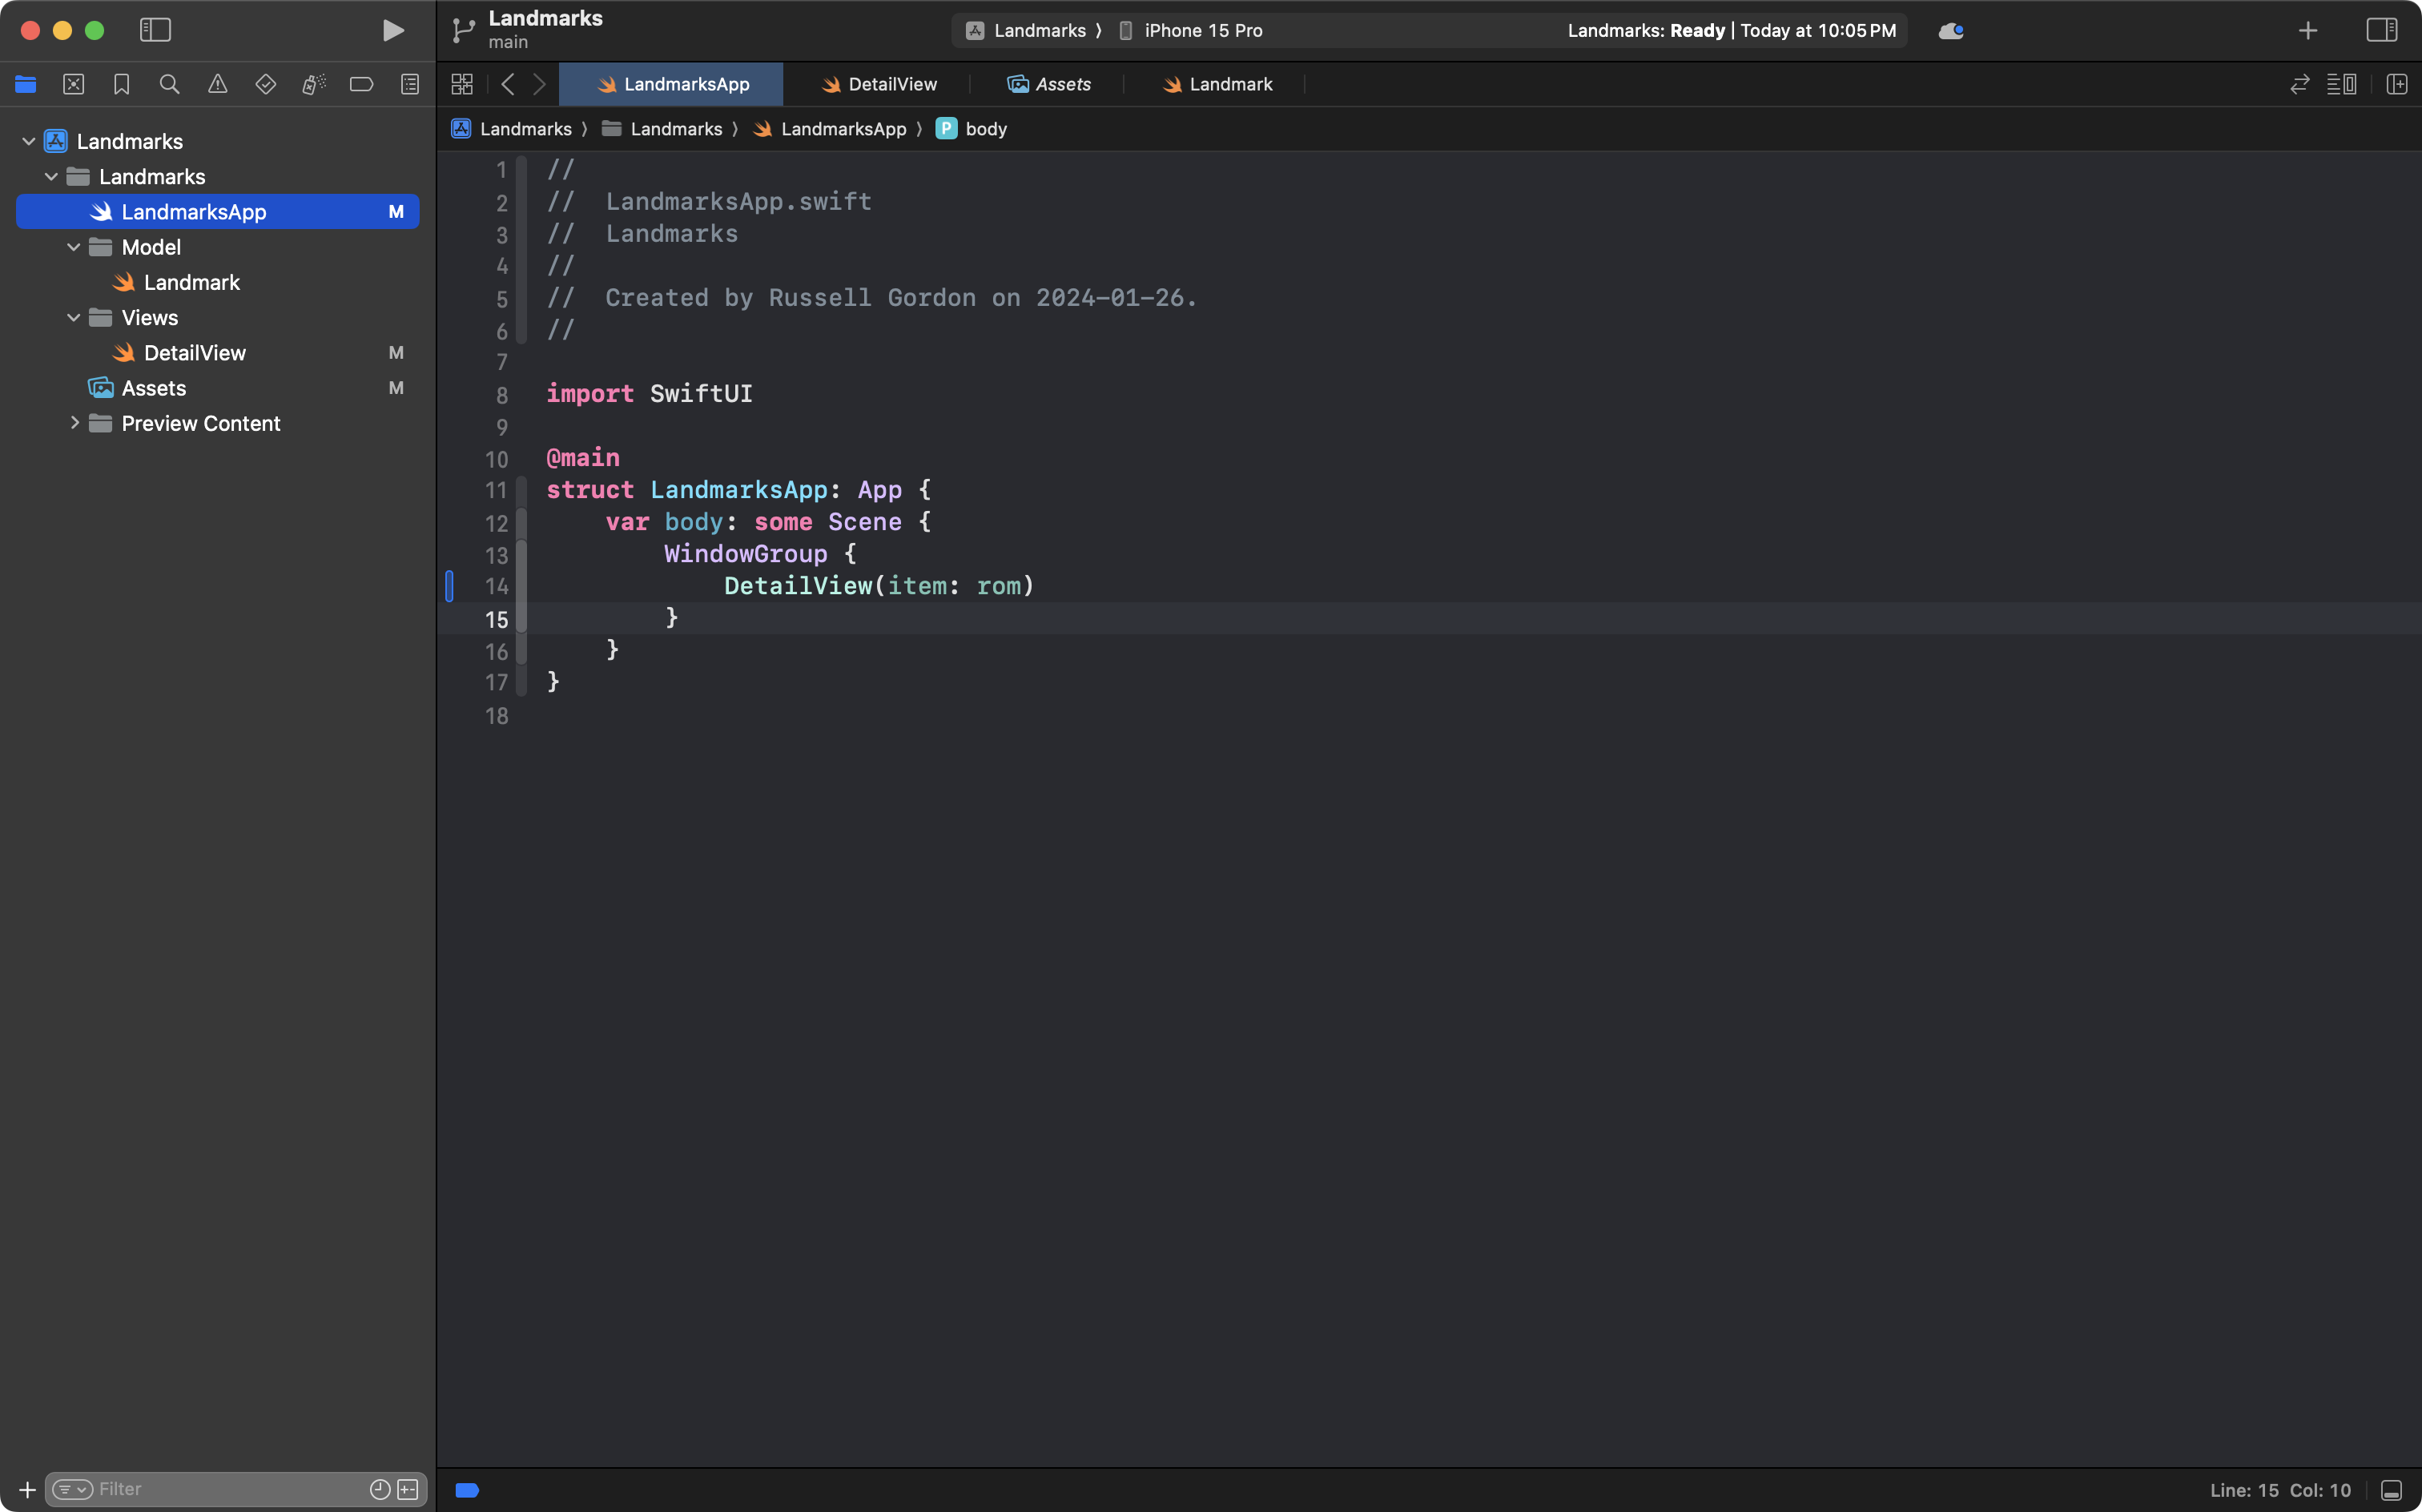
We will also need to update the app entry point file:
… by making this edit:
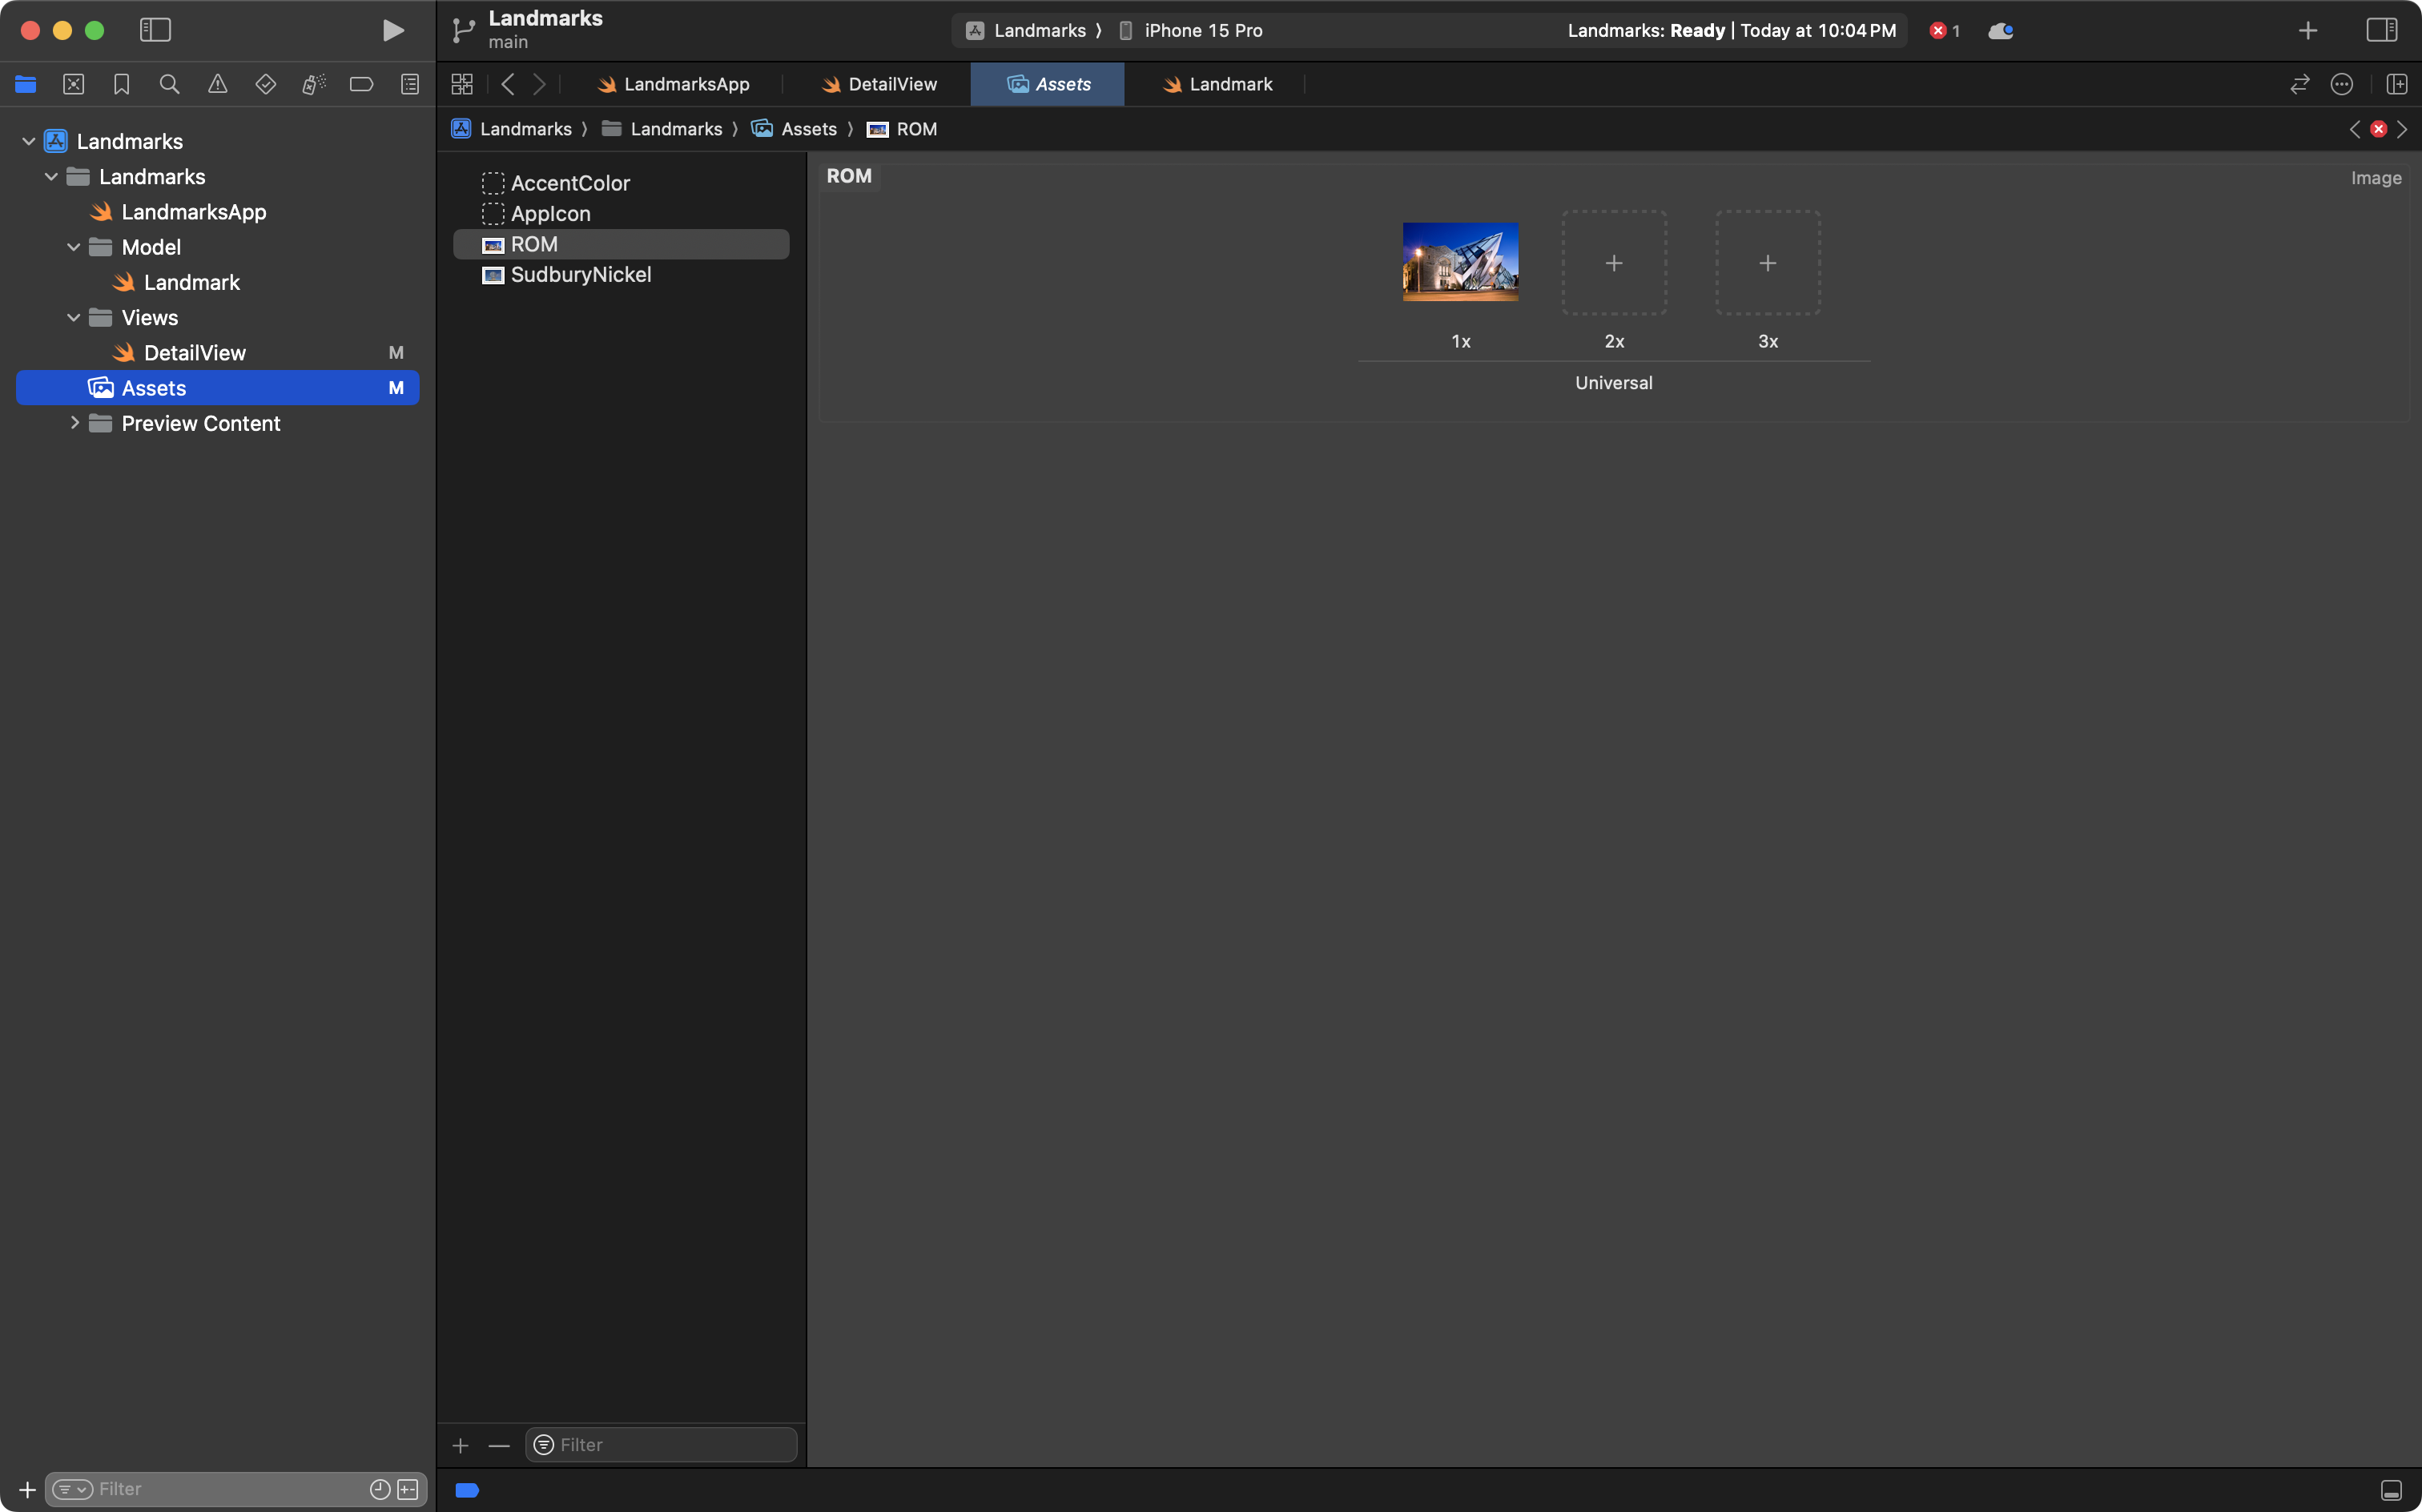
For the next part of this lesson to work for you, please download this image to your computer:

Then add it to the Assets catalog in Xcode:
Now return to DetailView:

At the moment, DetailView still uses hard-coded values in the form of string literals.
IMPORTANT
We literally apply abstraction at this point by replacing the hard-coded values with references to the stored properties of the instance of
Landmarkthat is being provided toDetailView.
Here is the first edit – note that old code is in dark grey and new code is in dark blue below:
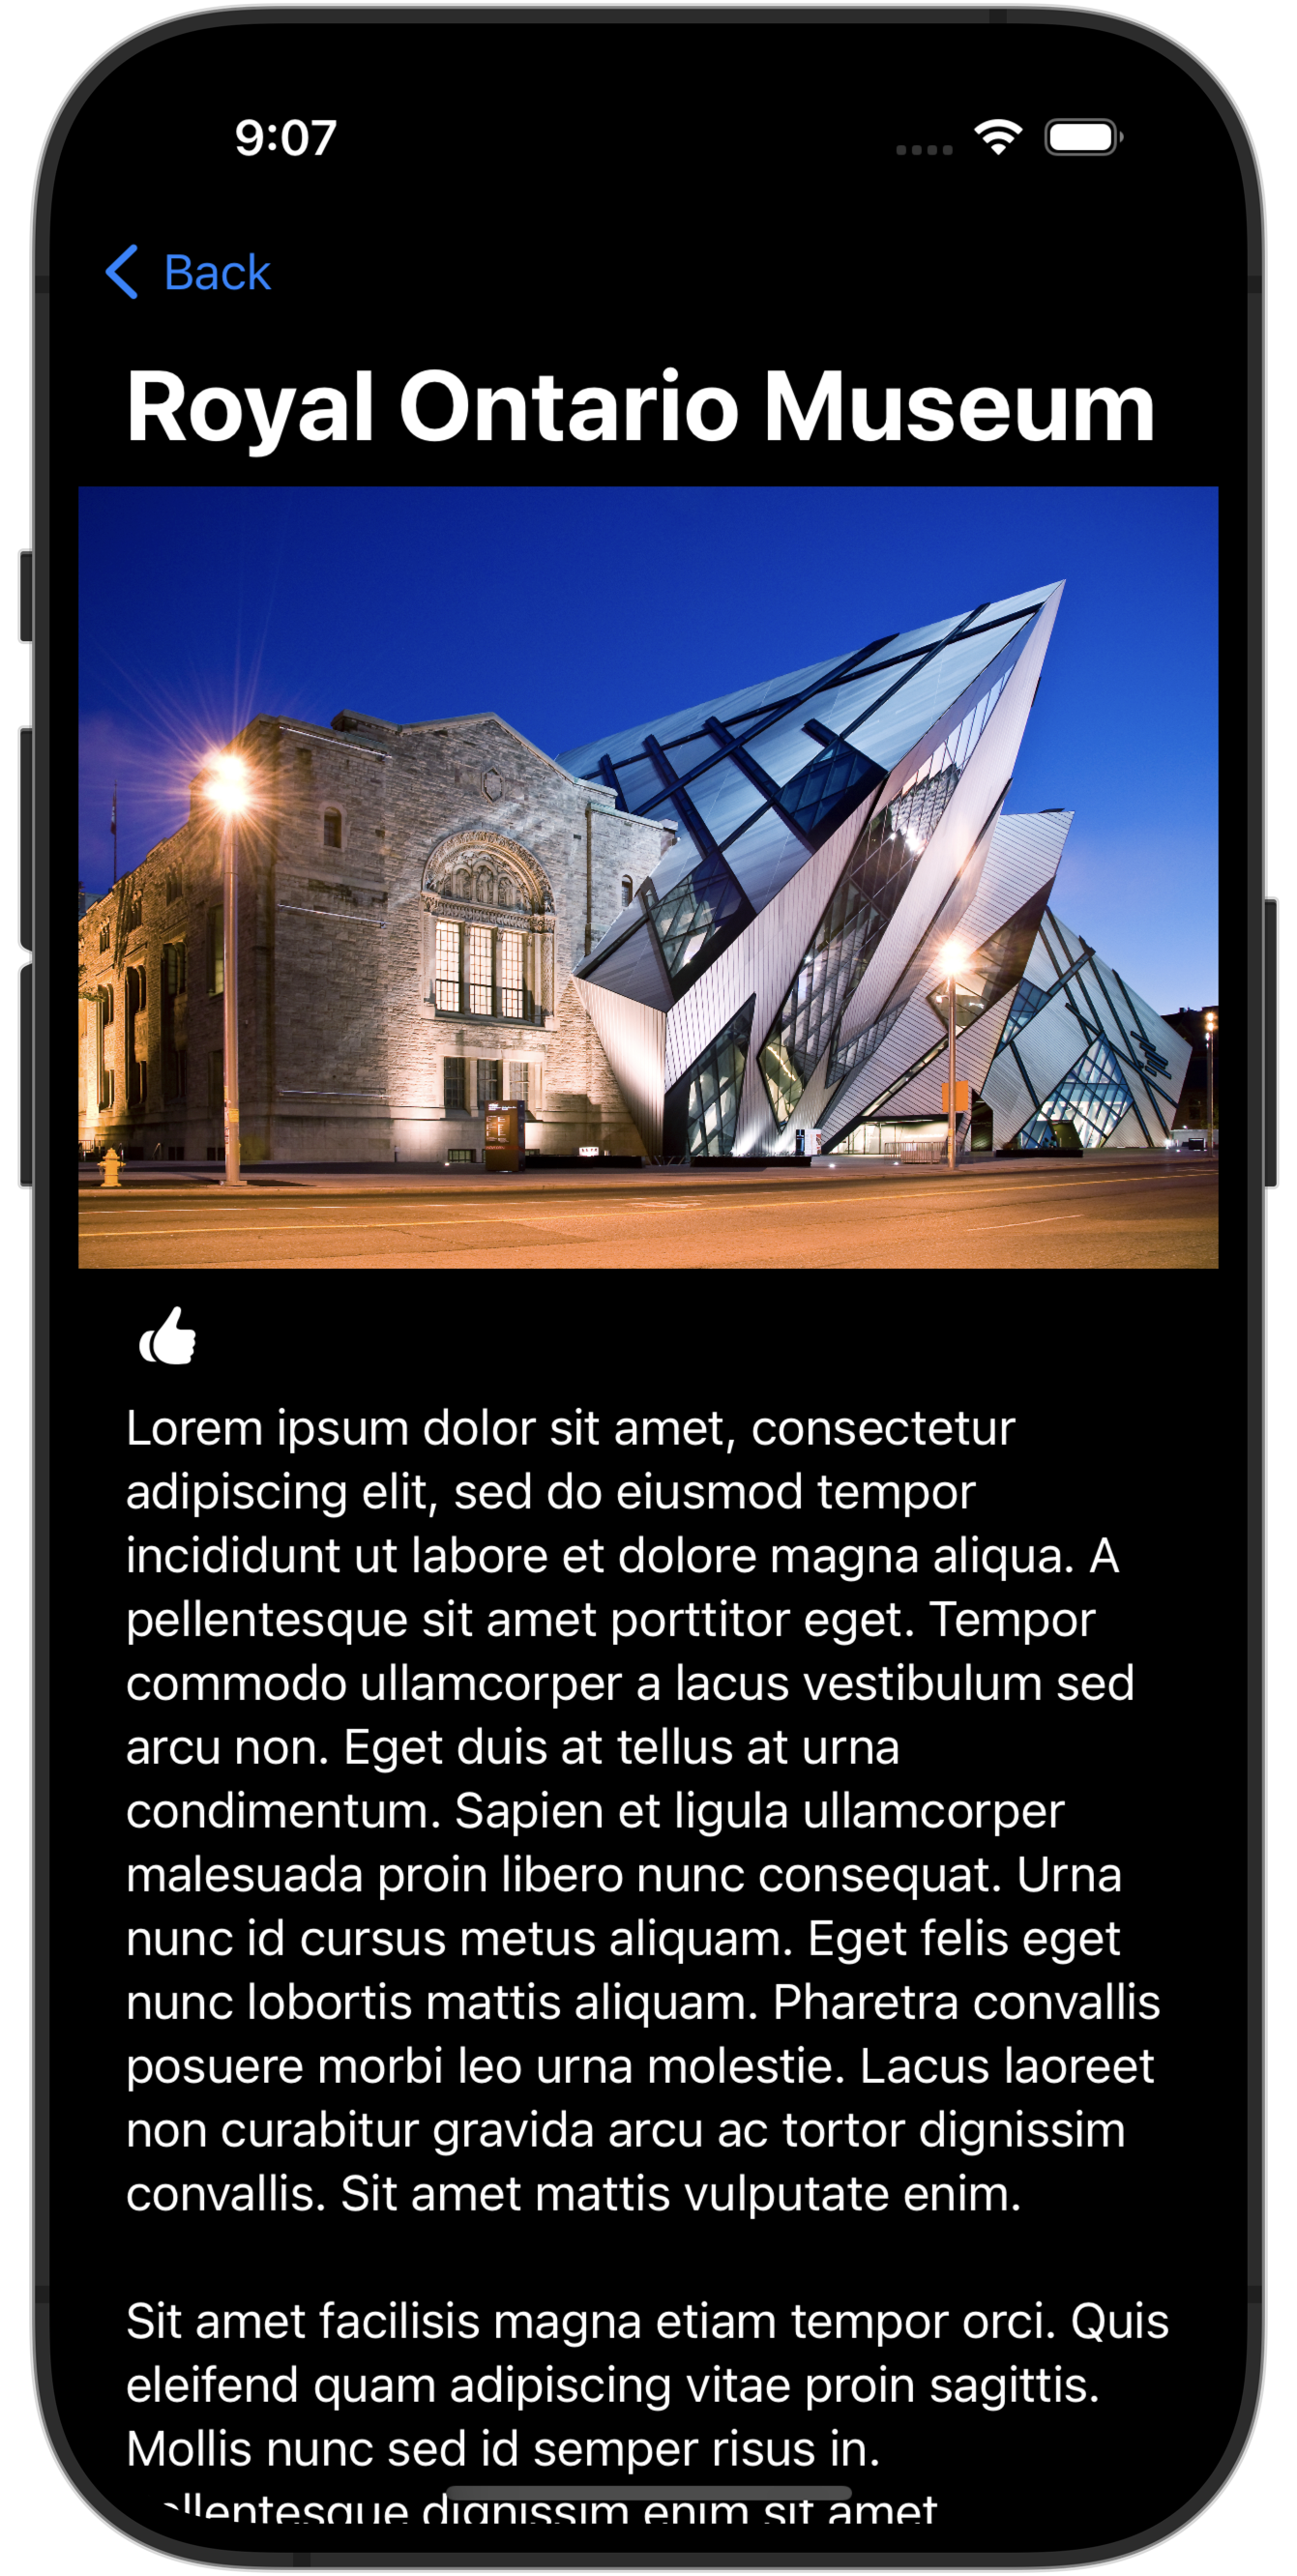
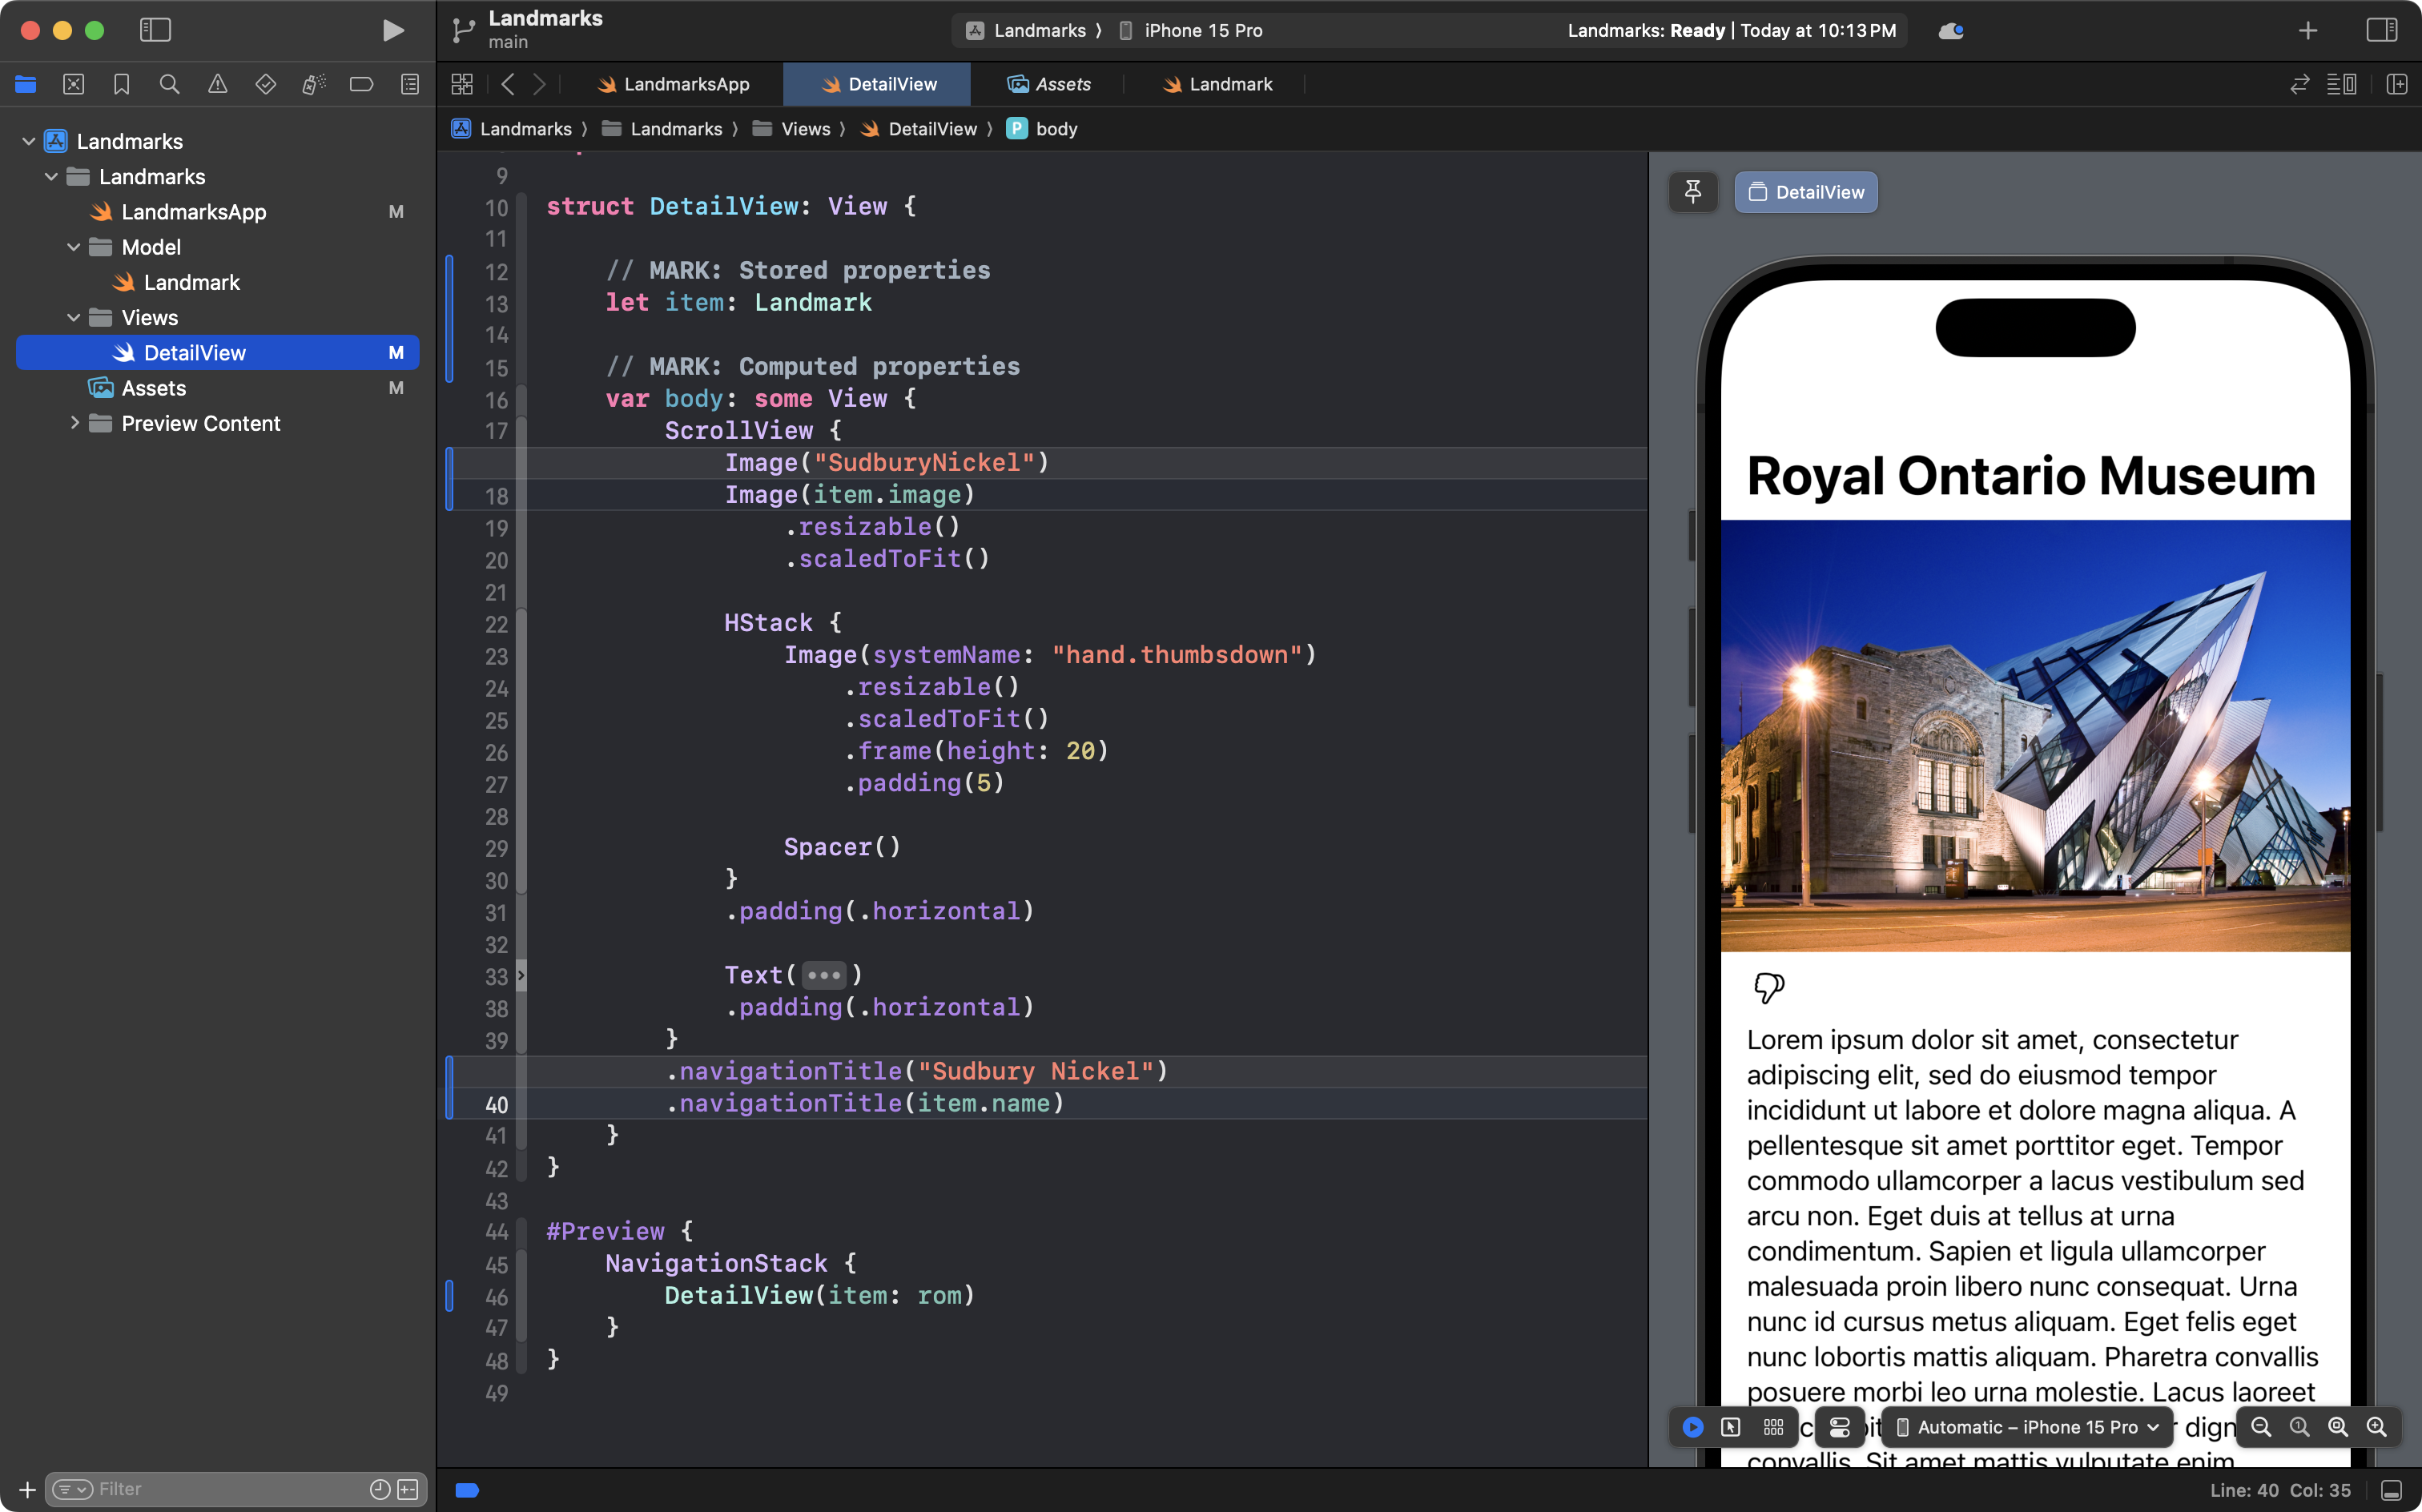
We have changed a hard-coded string literal reference:
Image("SudburyNickel")… to a reference that is dynamic, using whatever is in the image property of item instead:
Image(item.image)Note how the image in the preview has changed to show the Royal Ontario Museum:

Next make the edit to change the navigation title:
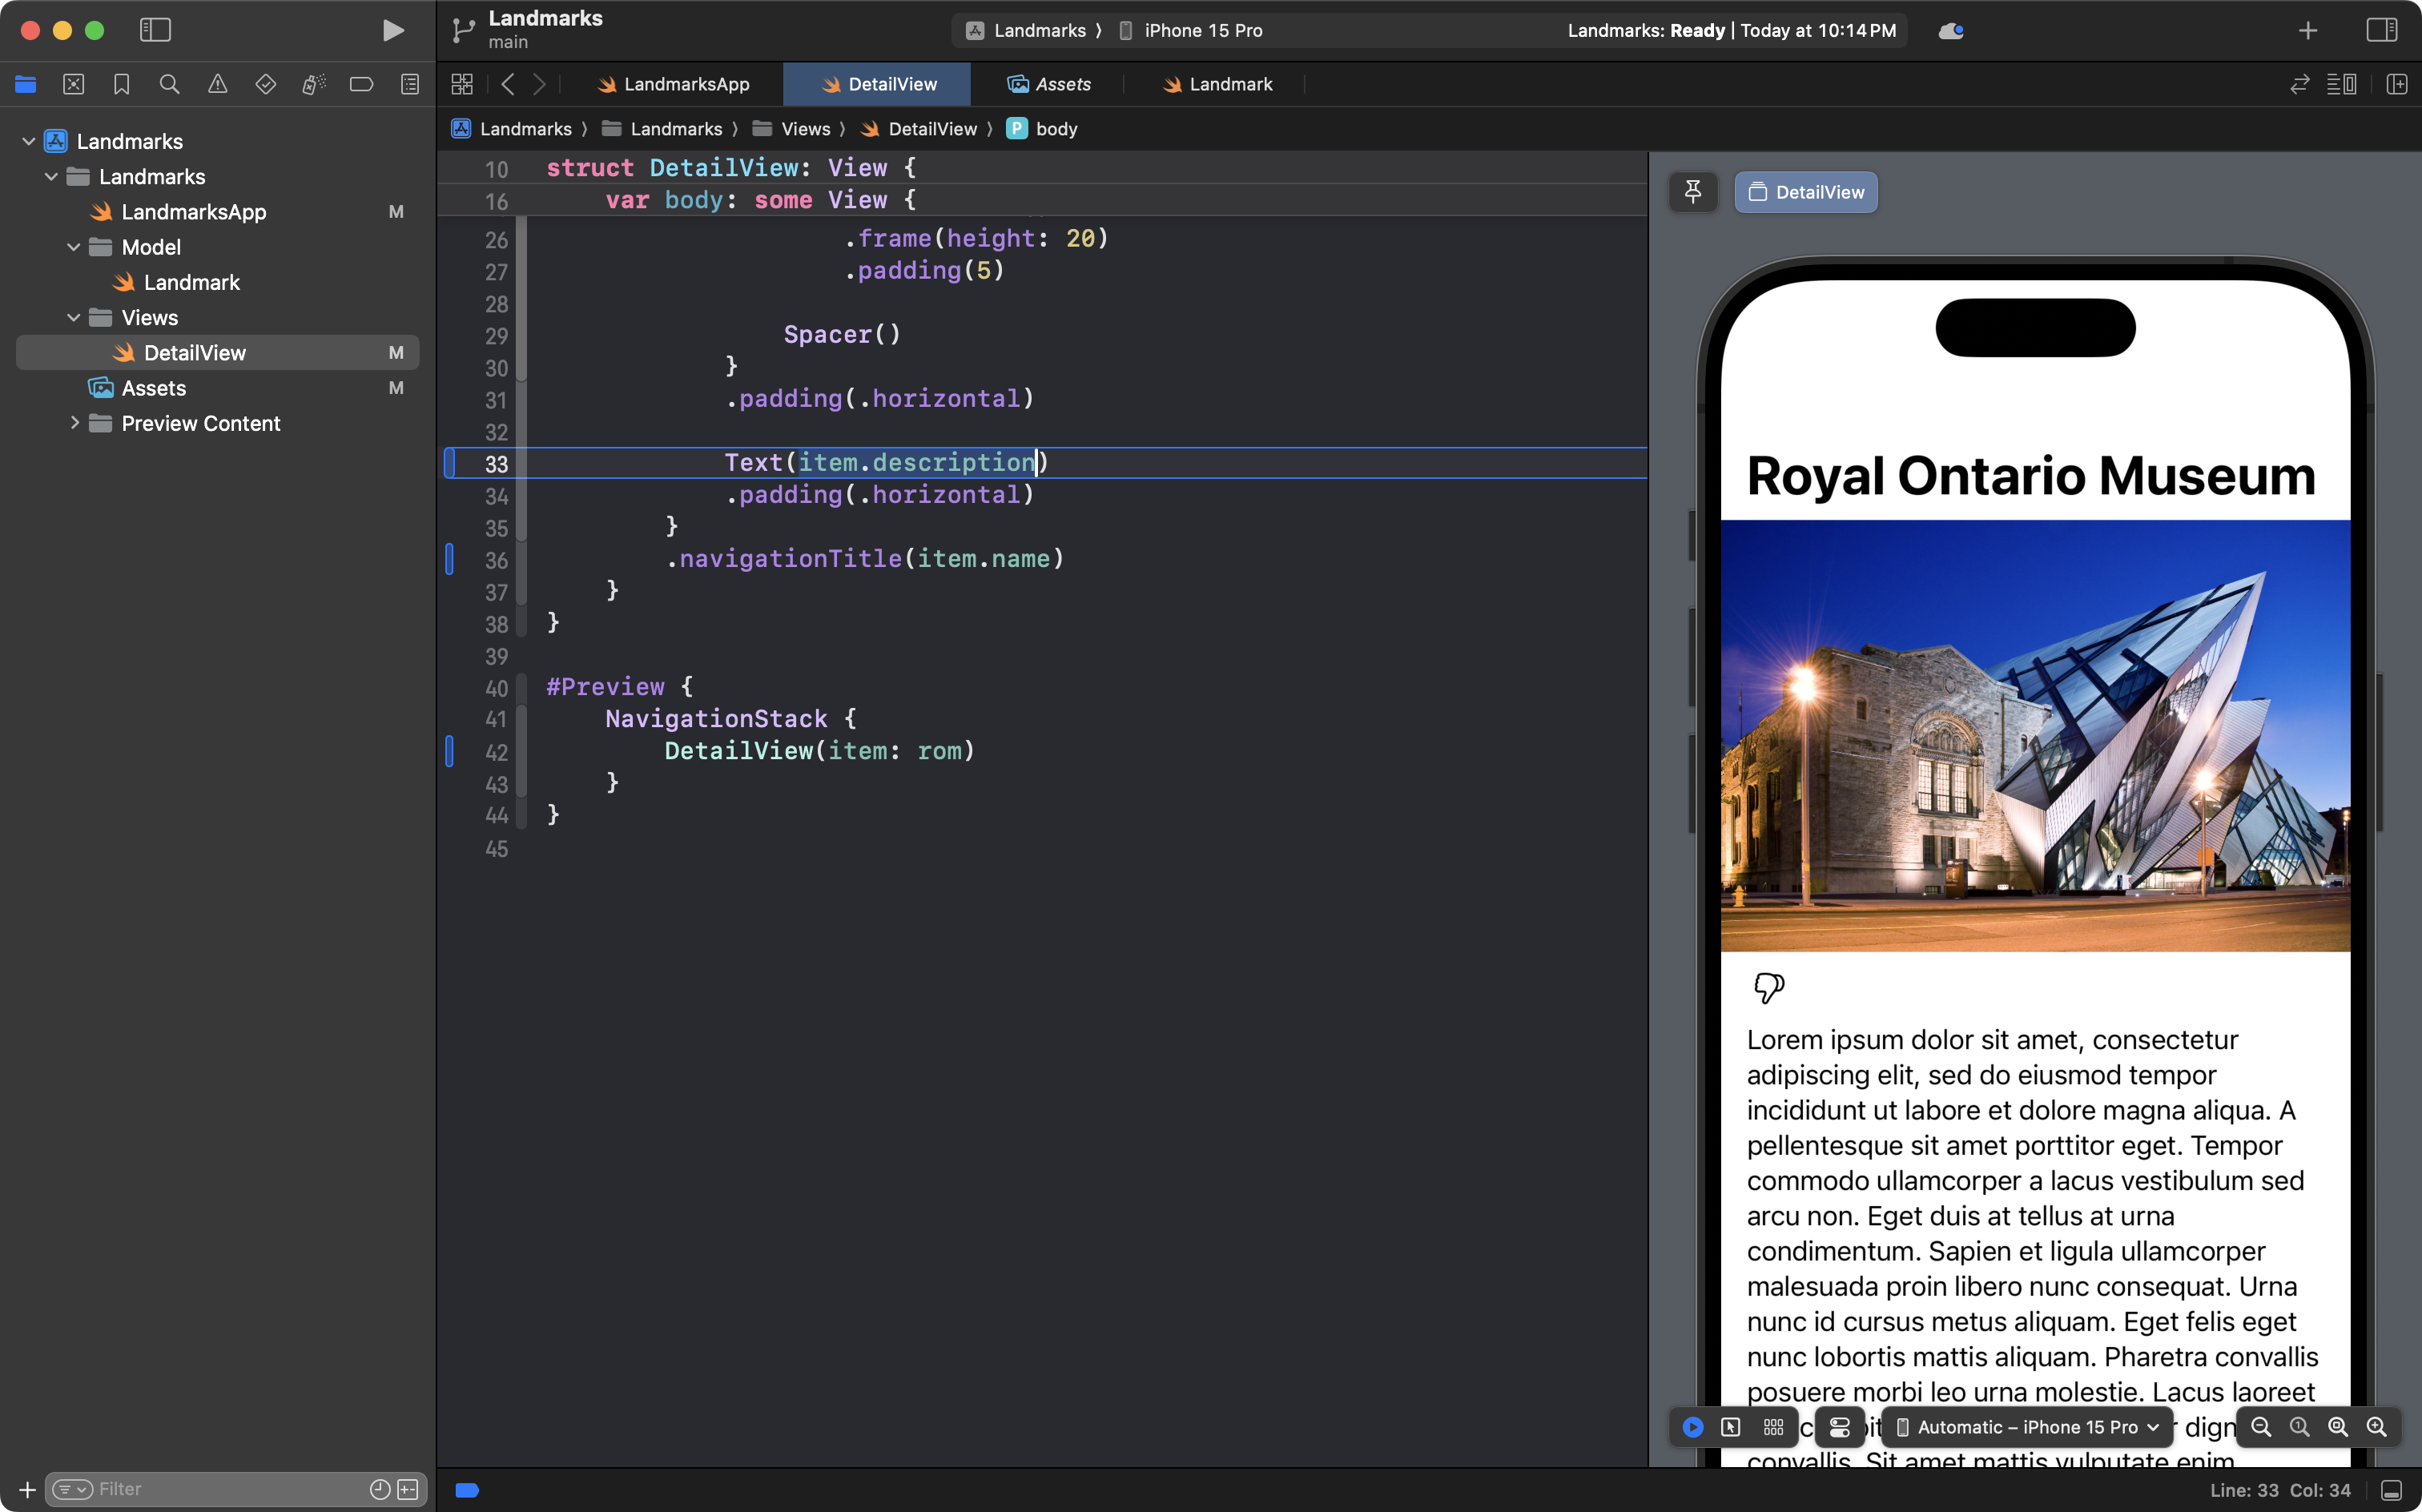
Then make the edit to change the landmark description from a string literal:
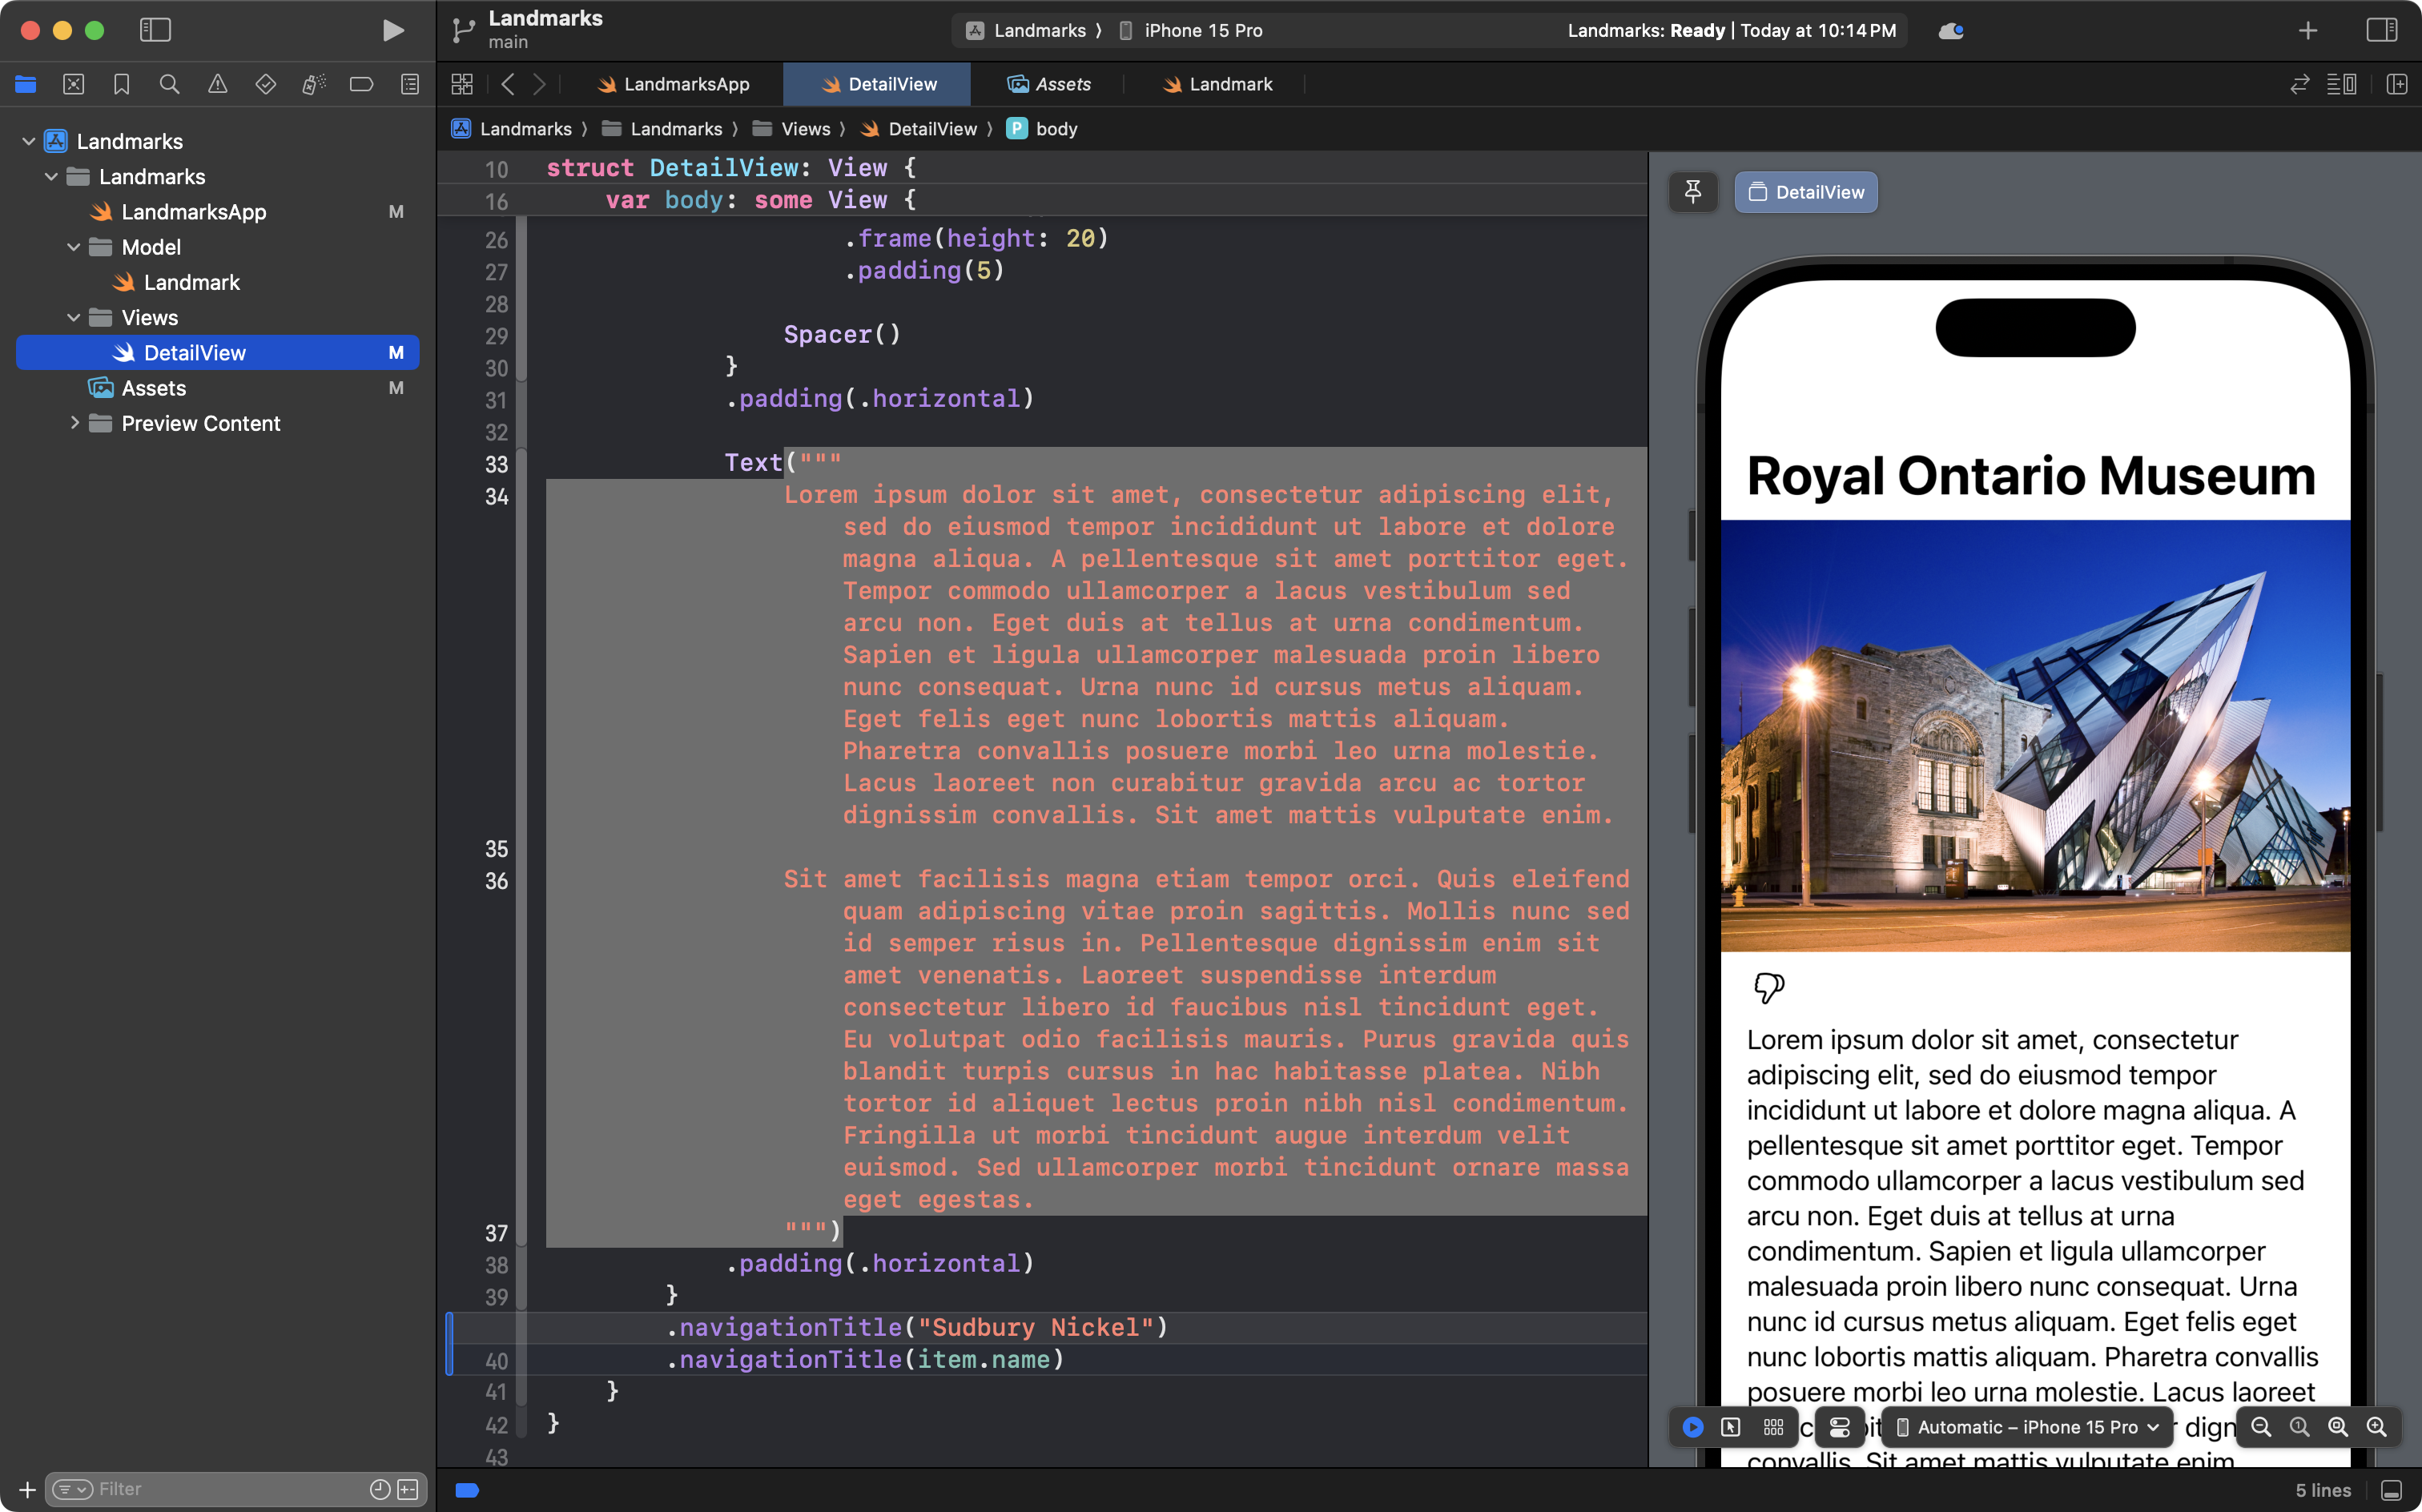
… to use the description property of item instead:
Finally, we need to make use of the isRecommended property.
Here is where we need to be a little fancy – and make a decision about what SF Symbol to show.
When the landmark is something we liked, we want to show a “thumbs up” image.
When the landmark is something we did not like, we want to show a “thumbs down” image.
We can do this here using something called a ternary conditional operator.
Quoting an explanation originally given in the Develop in Swift tutorials, a ternary conditional operator comes in three parts:
- First is a Boolean (true or false) expression, followed by a question mark.
- Next is a value to use when the expression is true, followed by a colon.
- Finally, there’s the value to use when the expression is false.
The ternary operator is a compact way to change what shows in a view based on an either/or condition.
So, please make this edit, changing:
Image(systemName: "hand.thumbsdown")To:
Image(systemName: item.isRecommended == true ? "hand.thumbsup.fill" : "hand.thumbsdown")… like this, shown on line 23:

We are evaluating the expression item.isRecommended == true .
When the item has been recommended, we show the hand.thumbsup.fill symbol.
Otherwise, we show the hand.thumbsdown symbol.
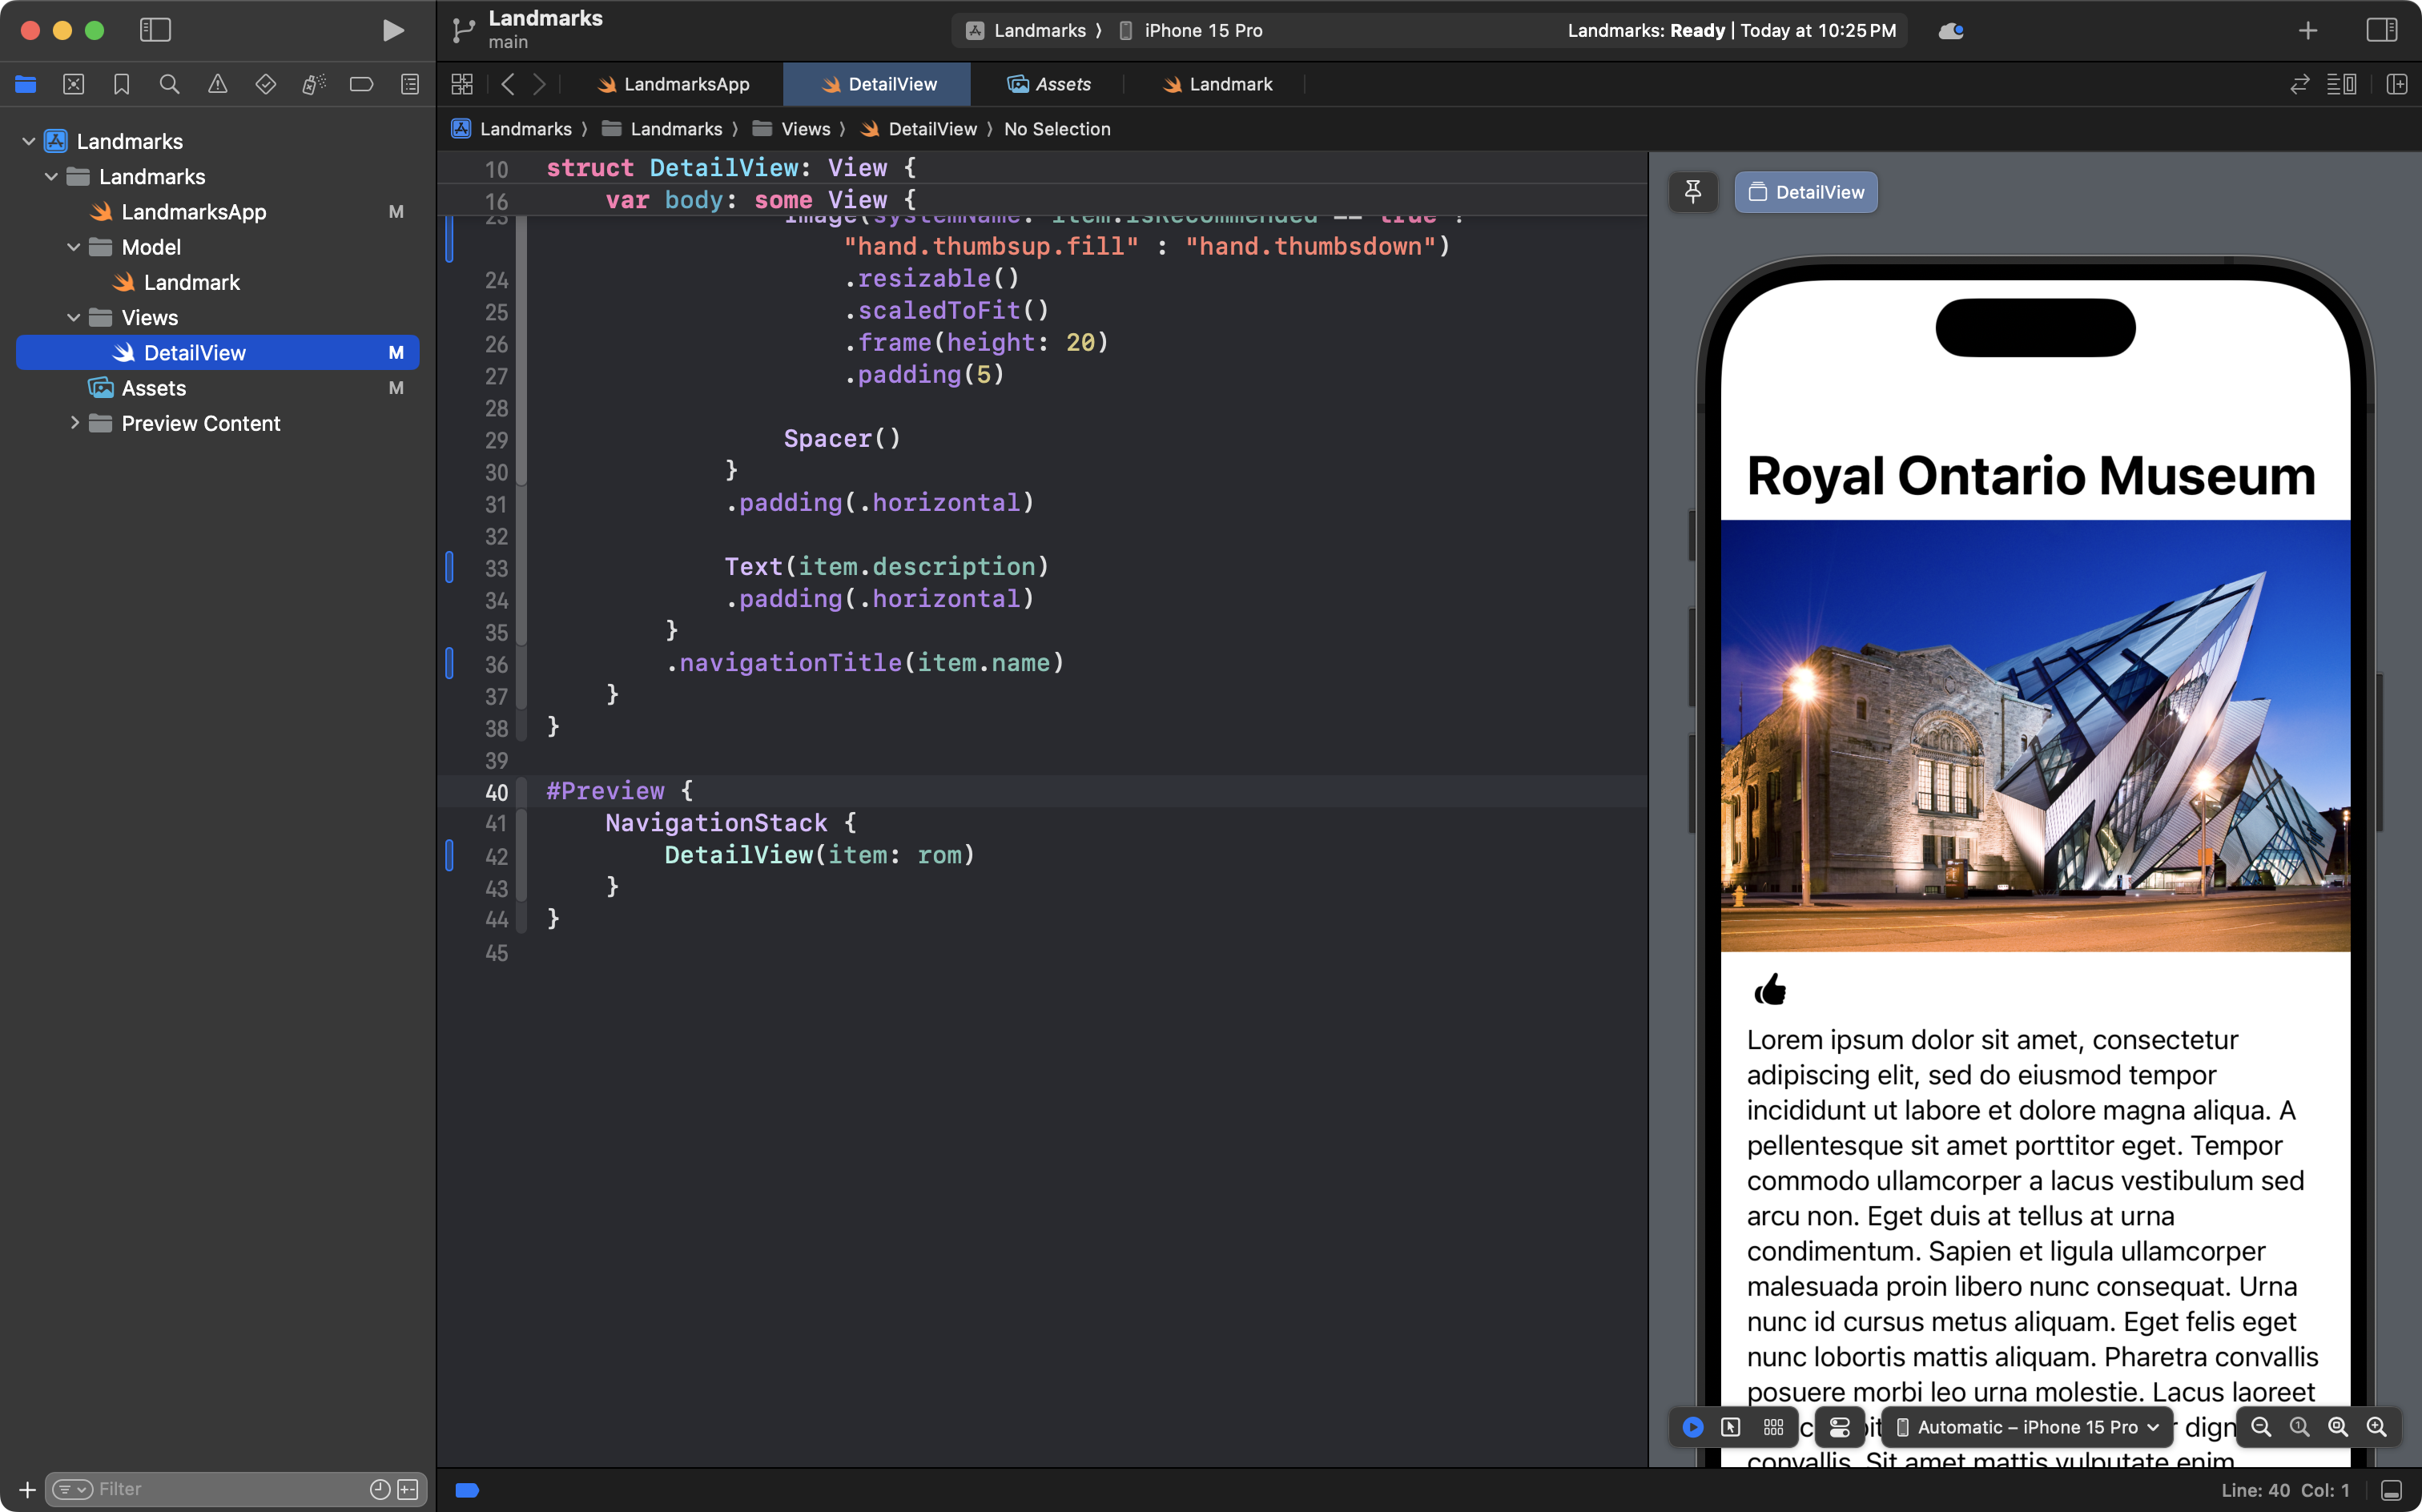
We can test this out by scrolling down to the previews section of this view:

Currently, we have just one preview showing, beginning on line 40:
However, there is no reason we cannot show a second preview, so add this code below the existing preview:
#Preview {
    NavigationStack {
        DetailView(item: sudburyNickel)
    }
}
… like this:
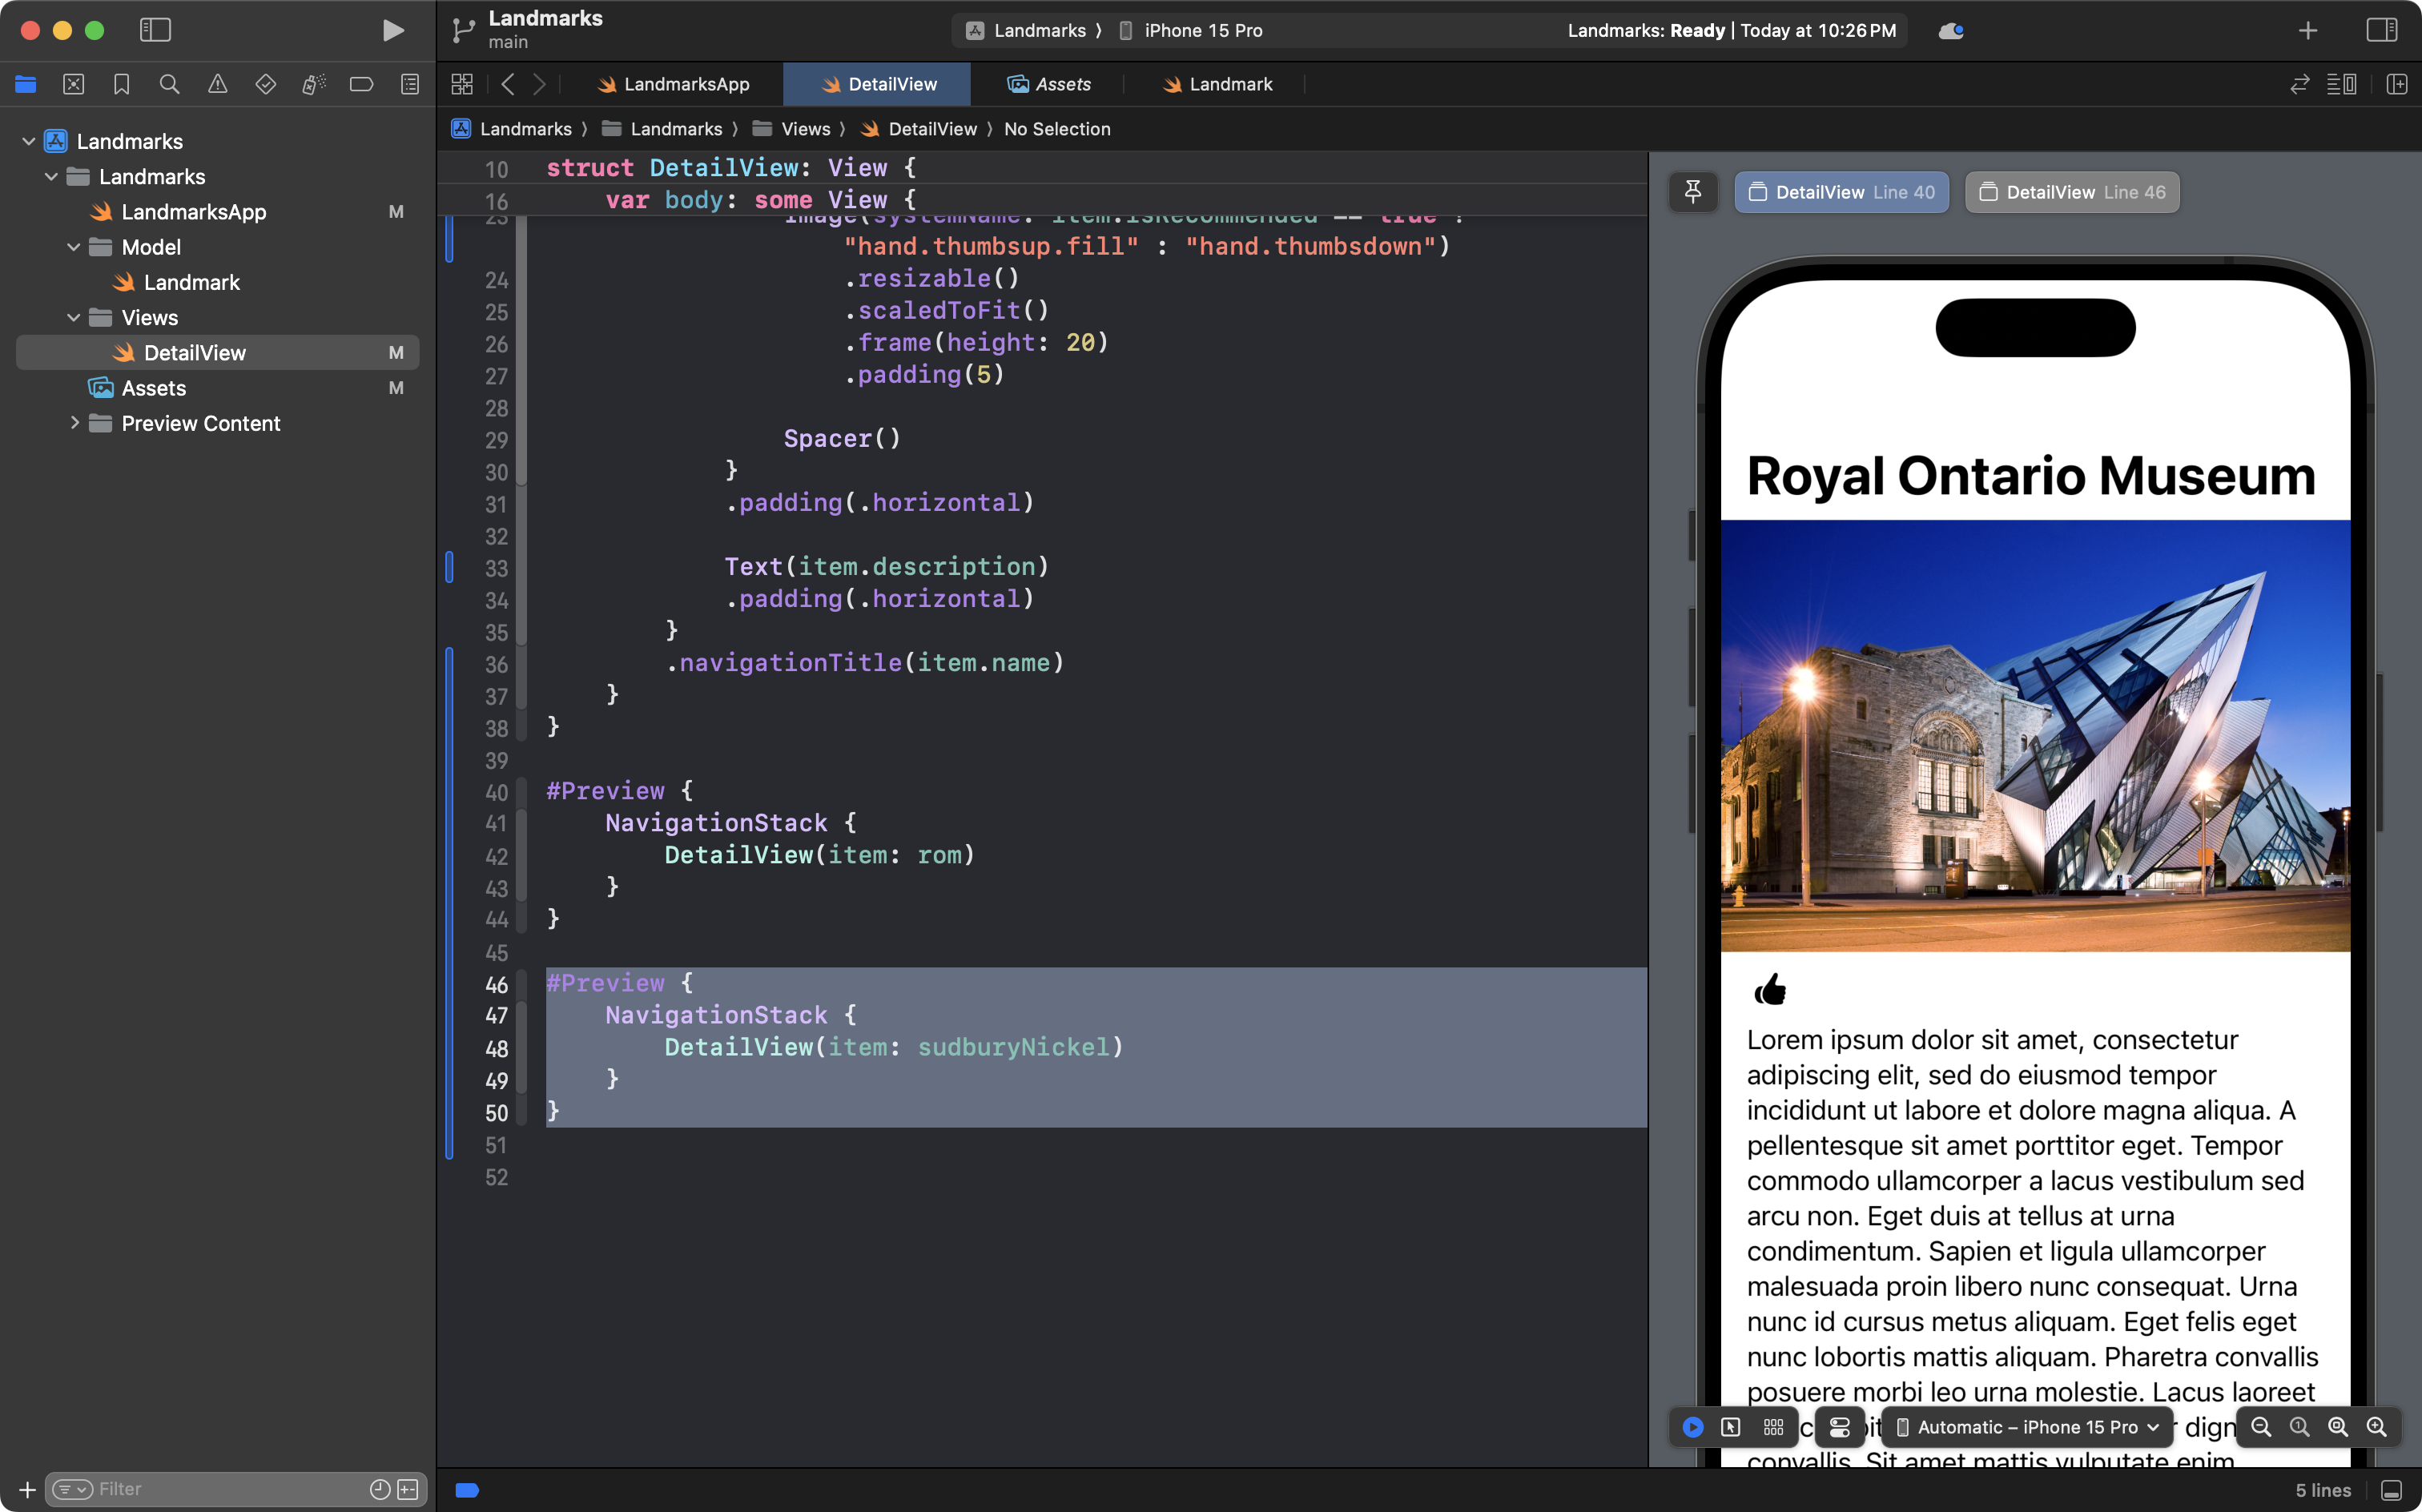
Notice how there are now two preview buttons:
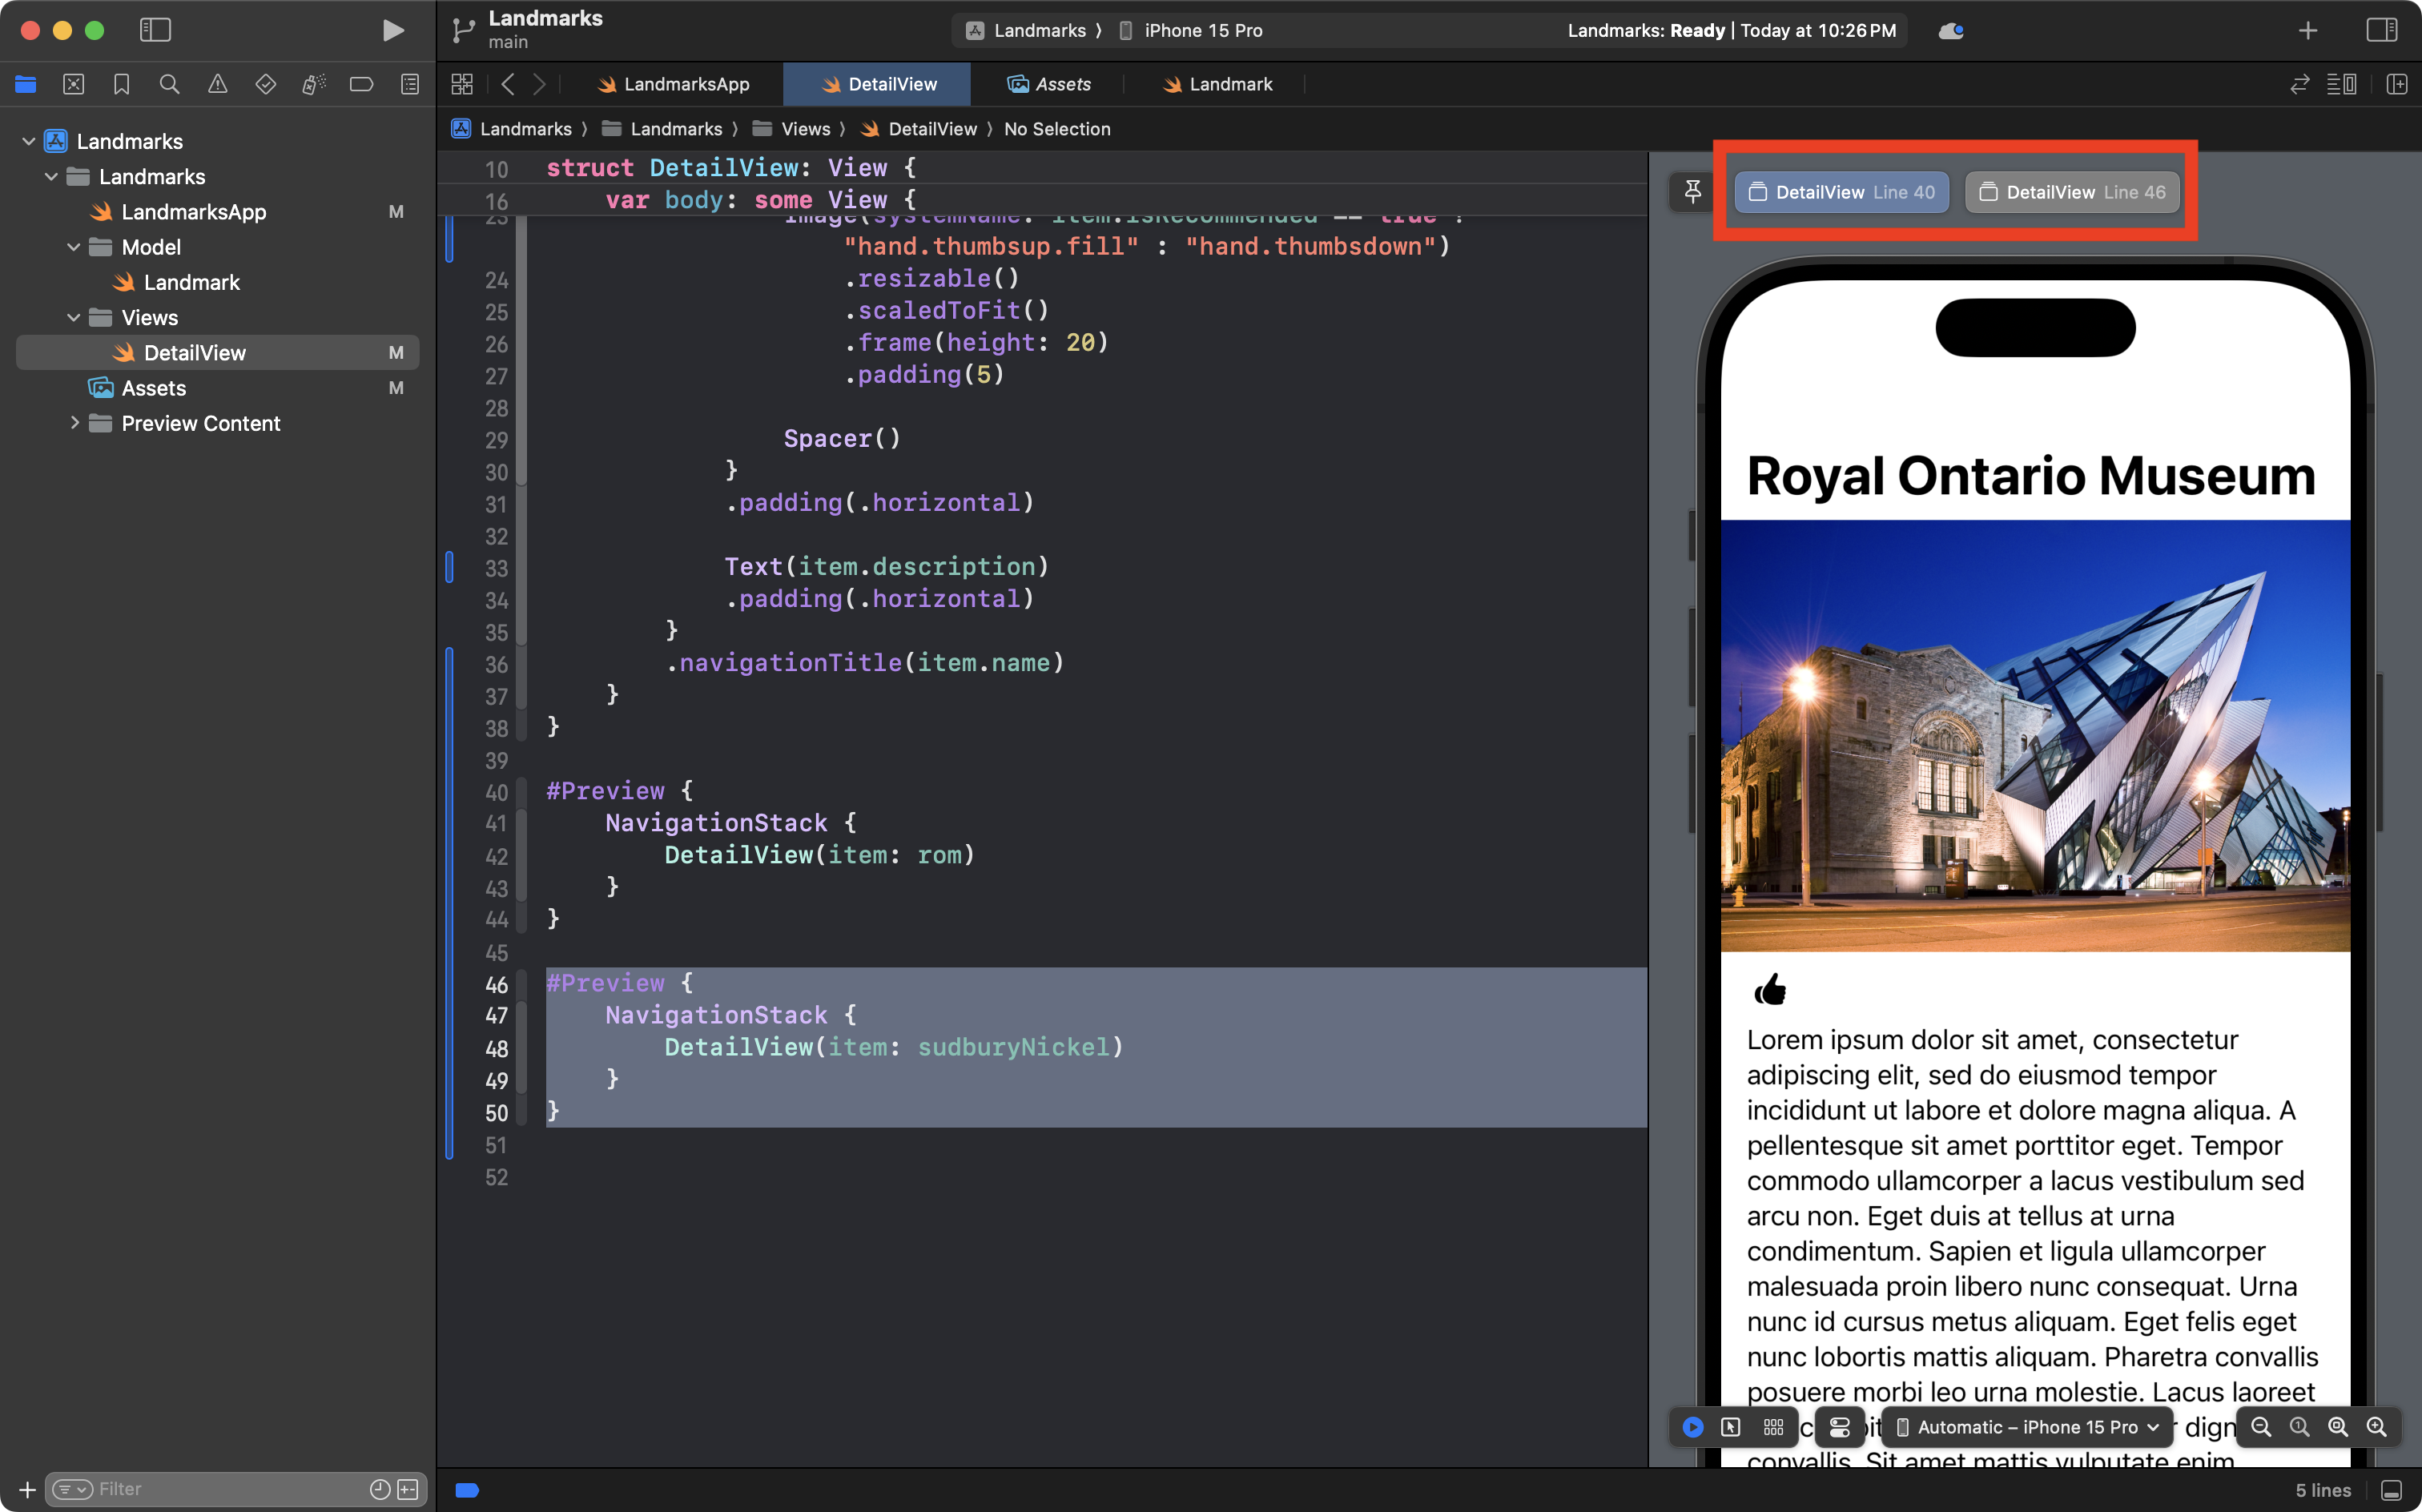
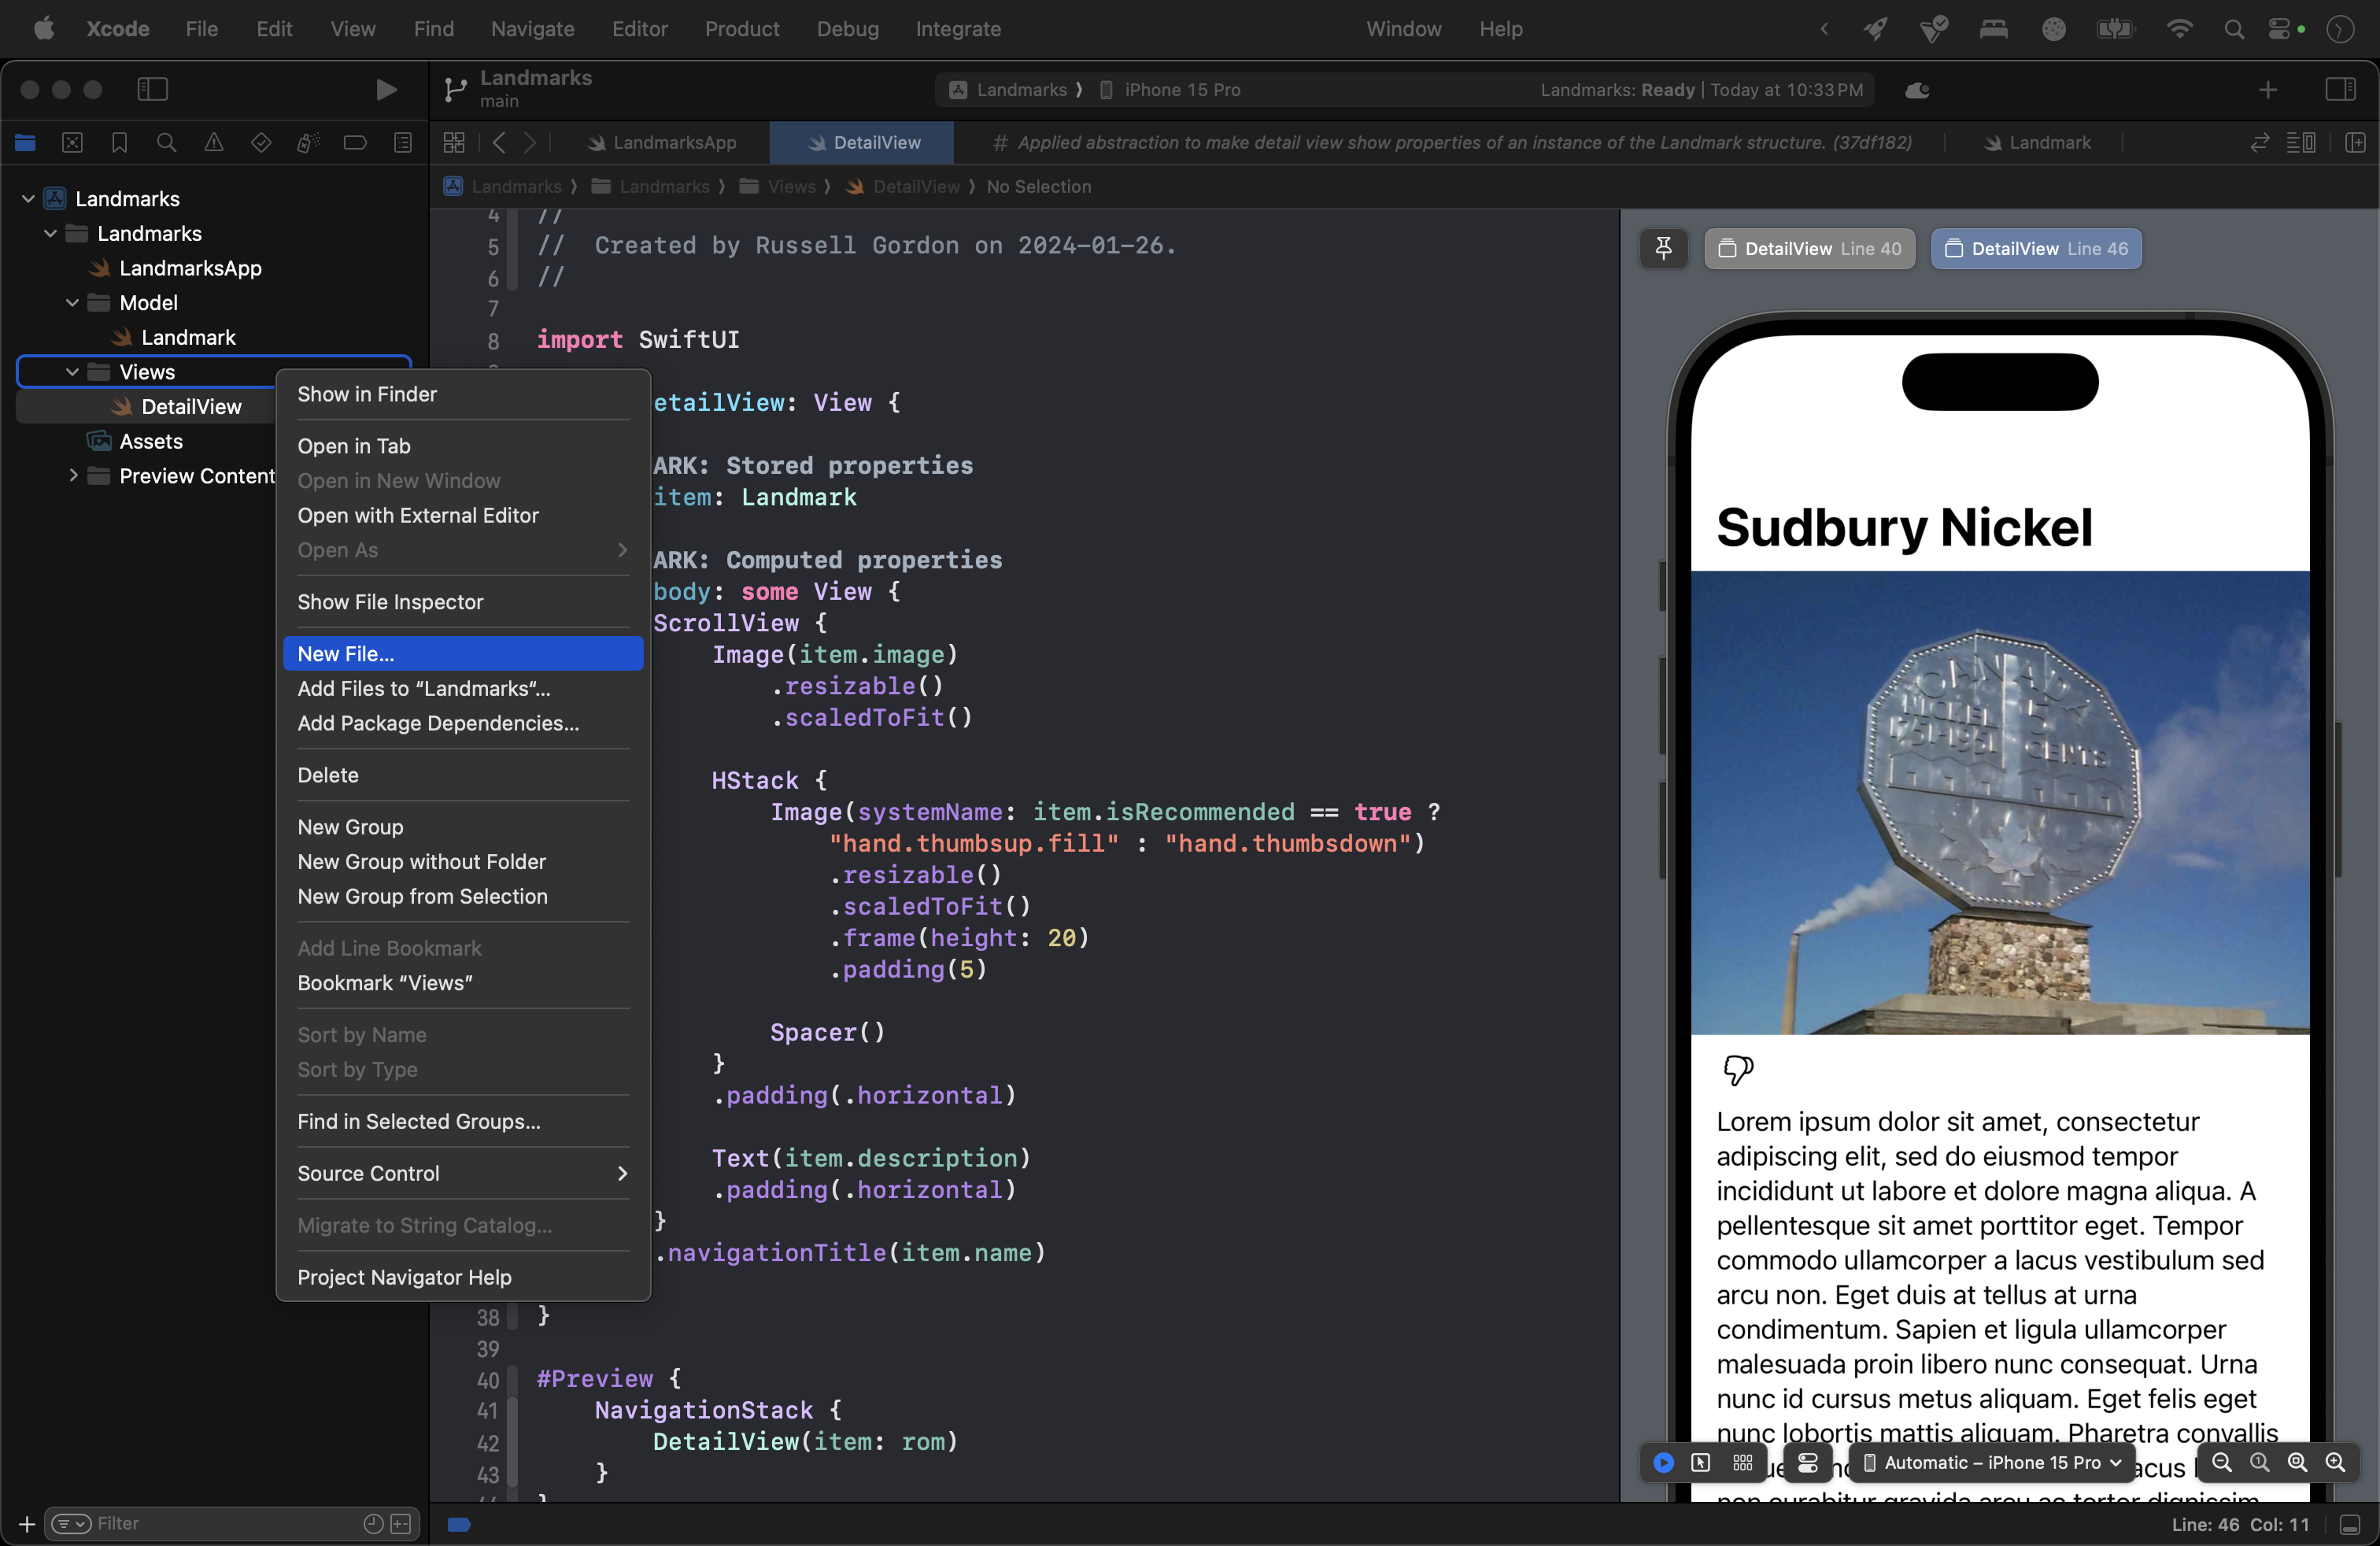
You can click between those two previews, and you will see abstraction in action – the contents of the detail view shown will differ – because in each case we are passing a different instance of the Landmark structure to be shown in DetailView.
This is big progress, so commit and push your work now with this message:
Applied abstraction to make detail view show properties of an instance of the Landmark structure.
Create the list view
Static list view
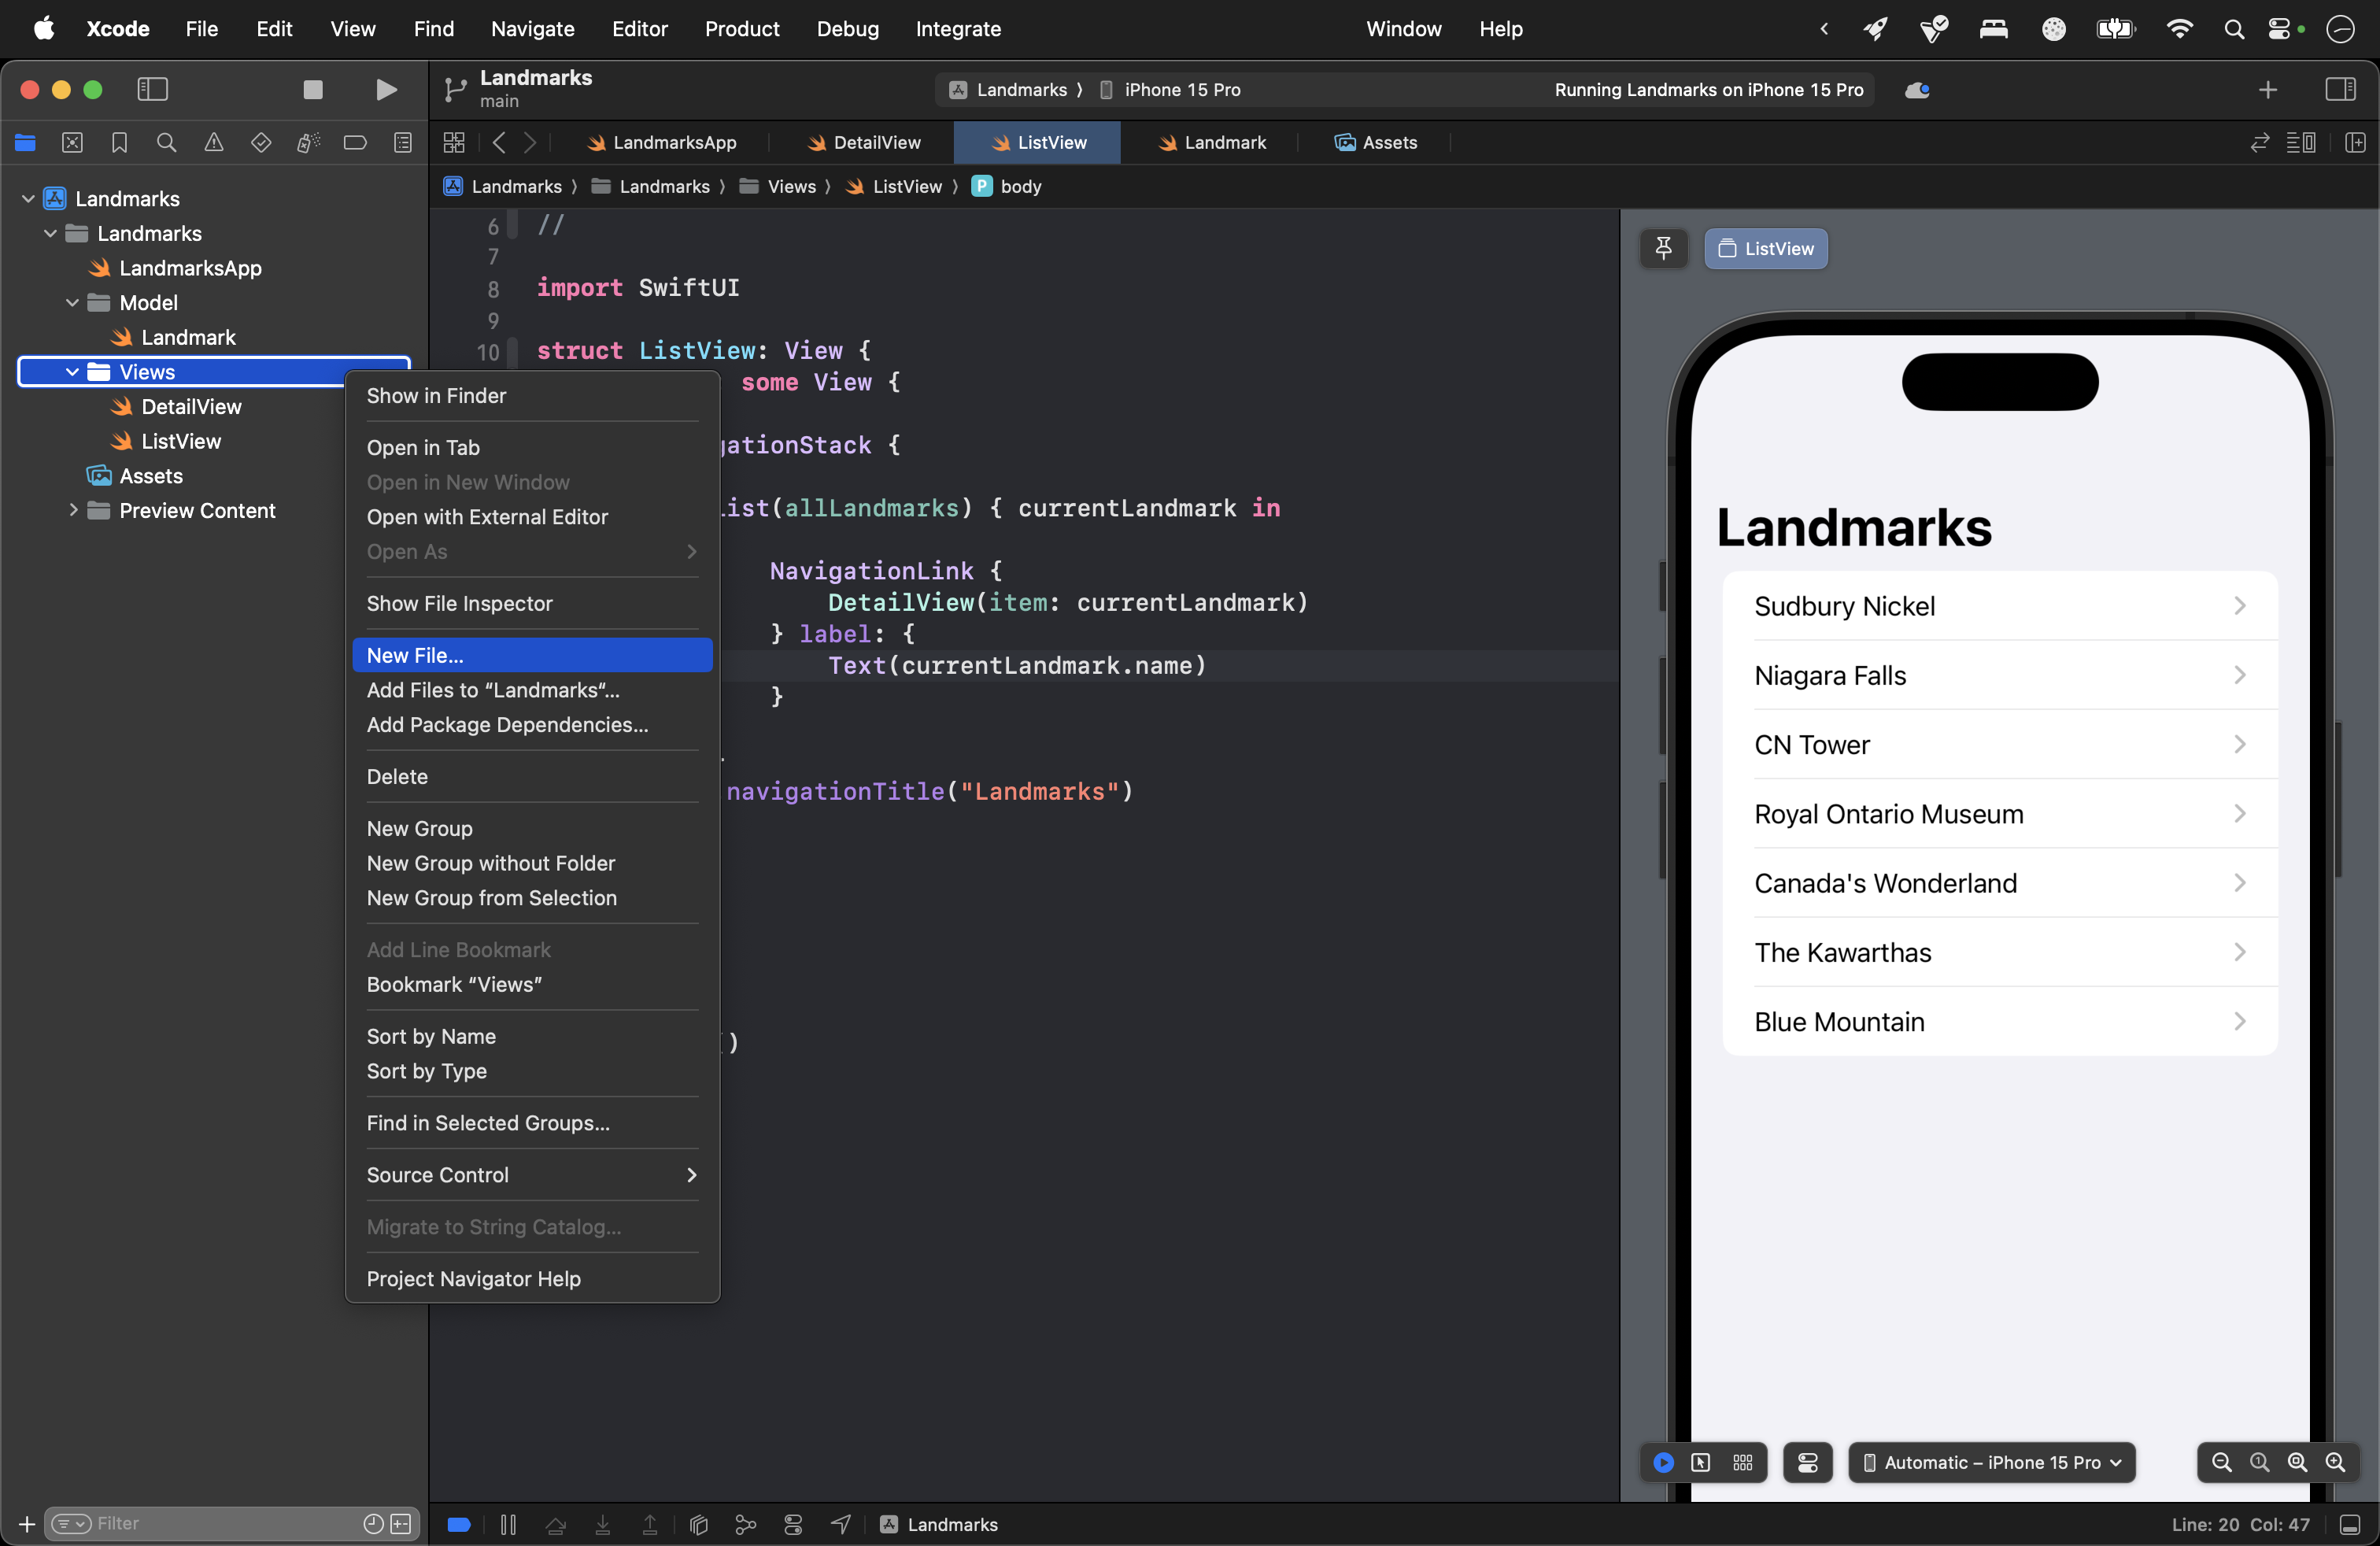
Now we need a list so that we can navigate down to each of the landmarks we want to see.
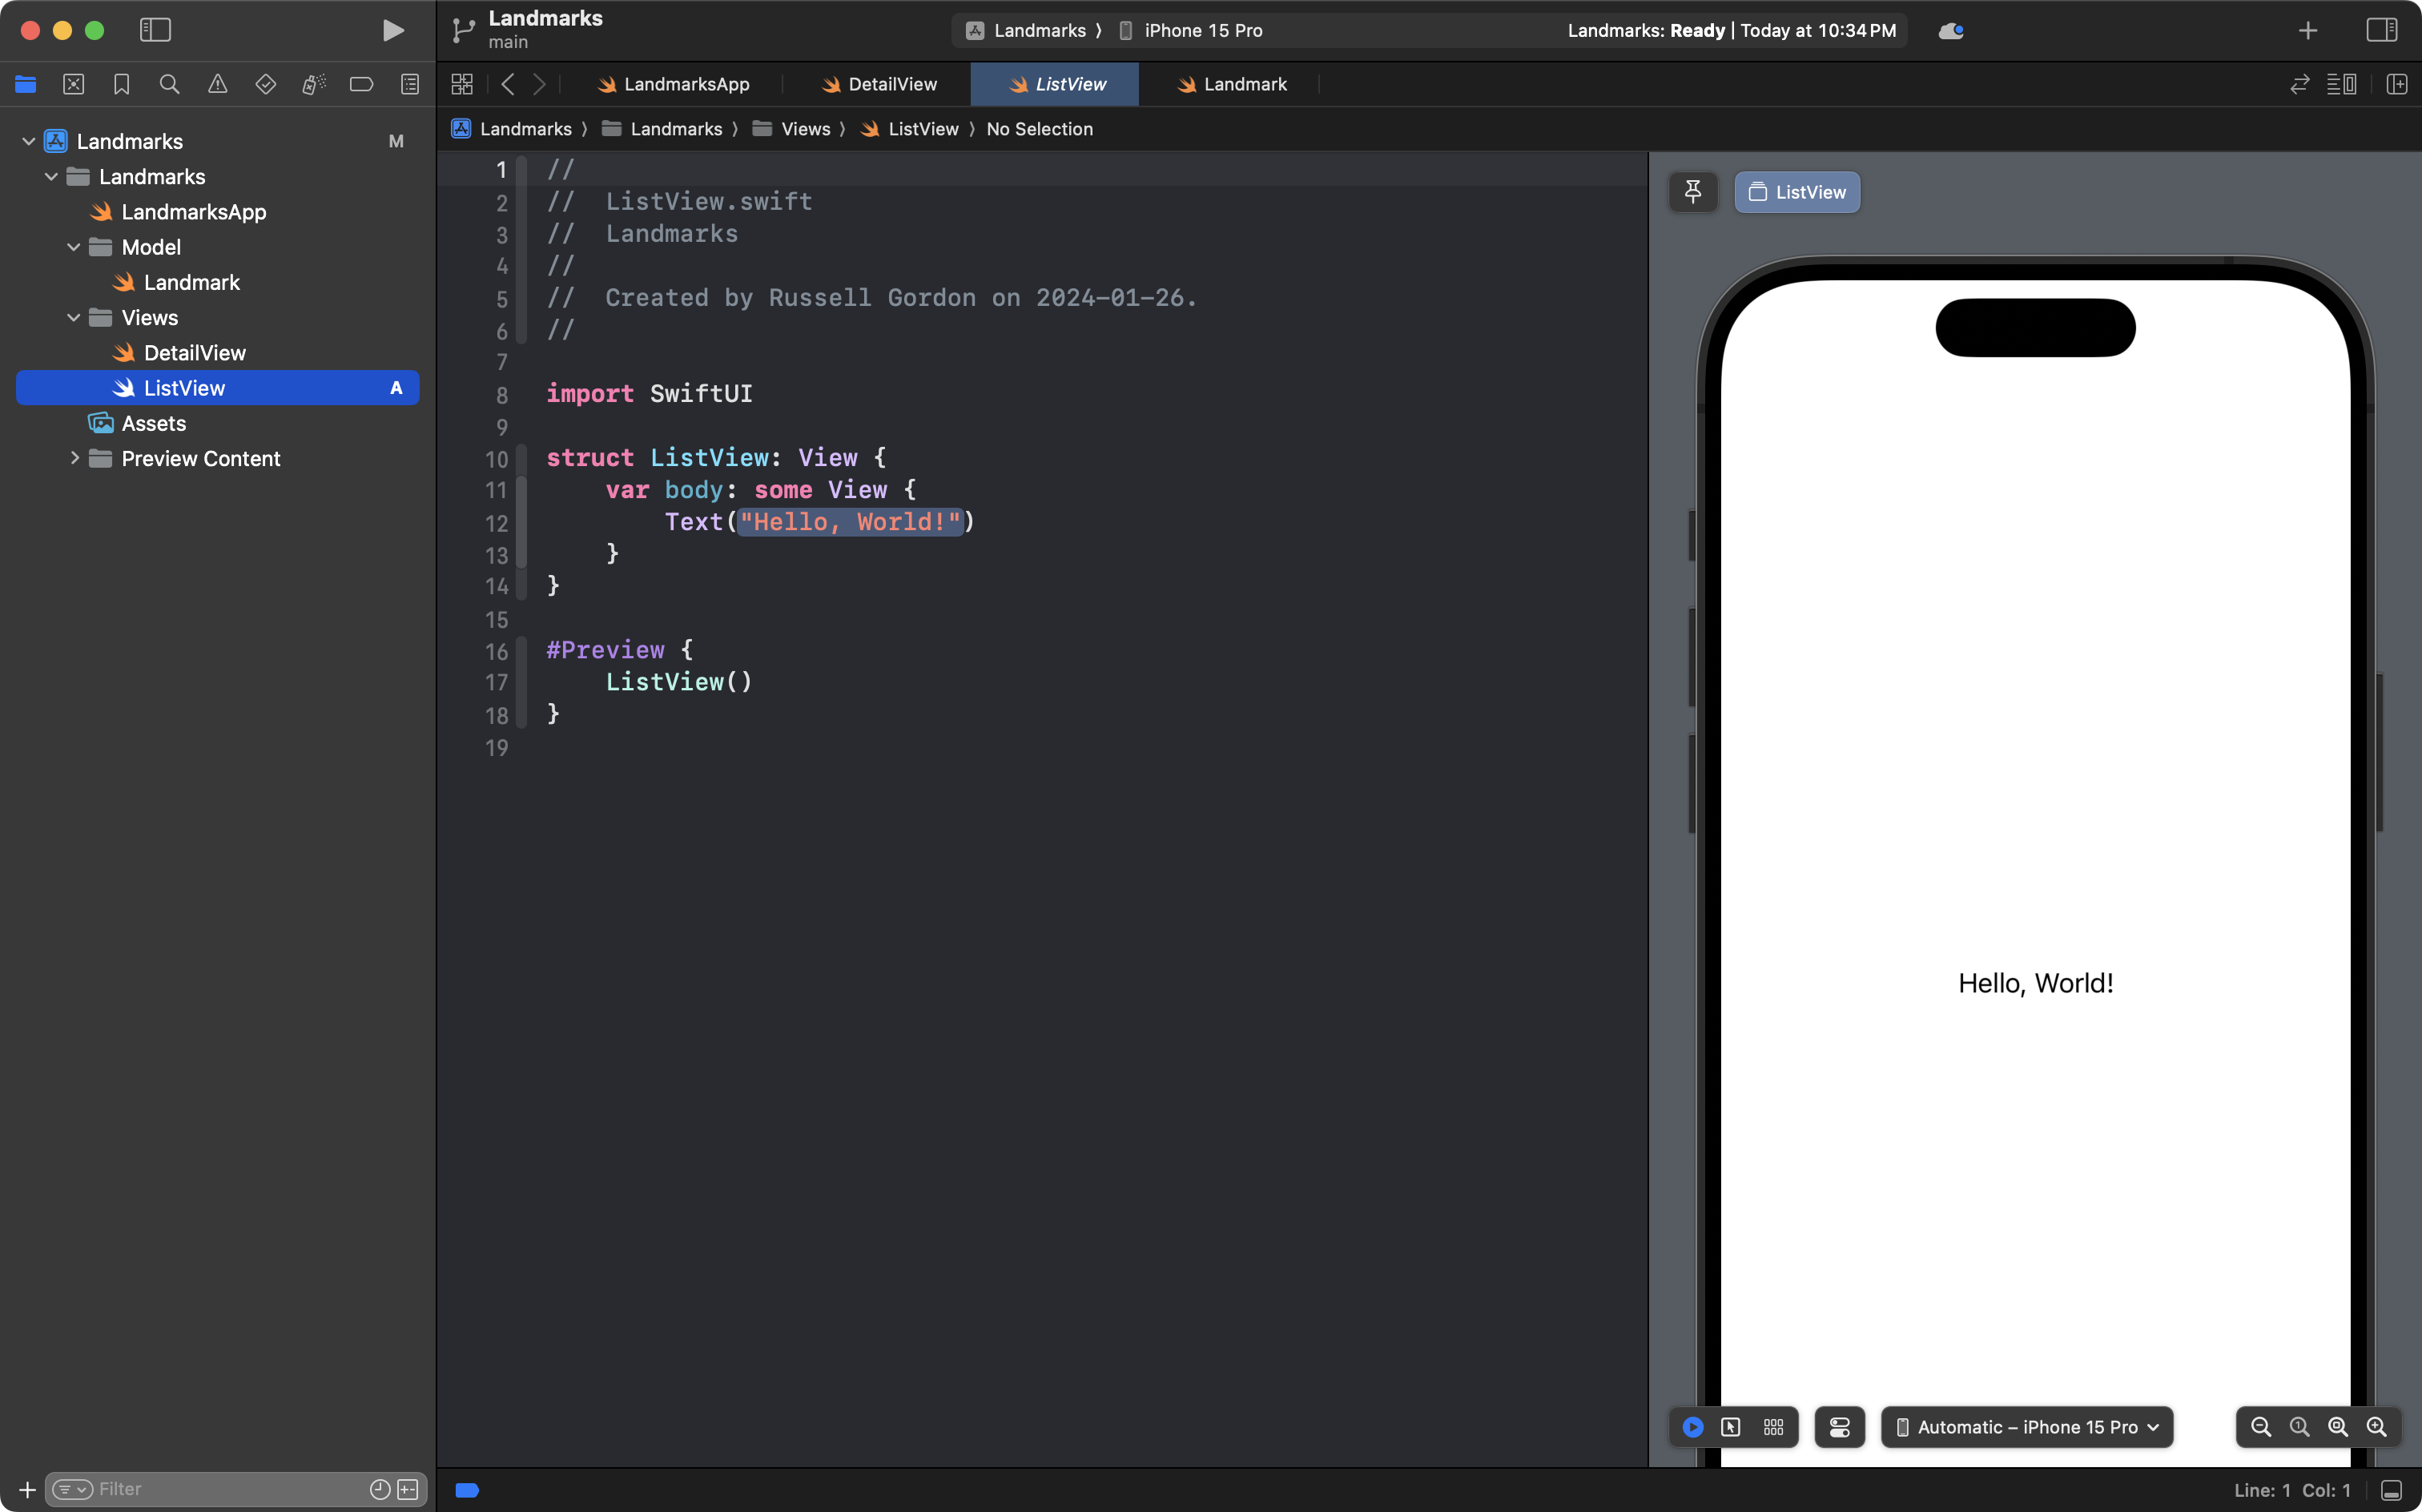
In the Views group create a new SwiftUI View named ListView:
… like this:
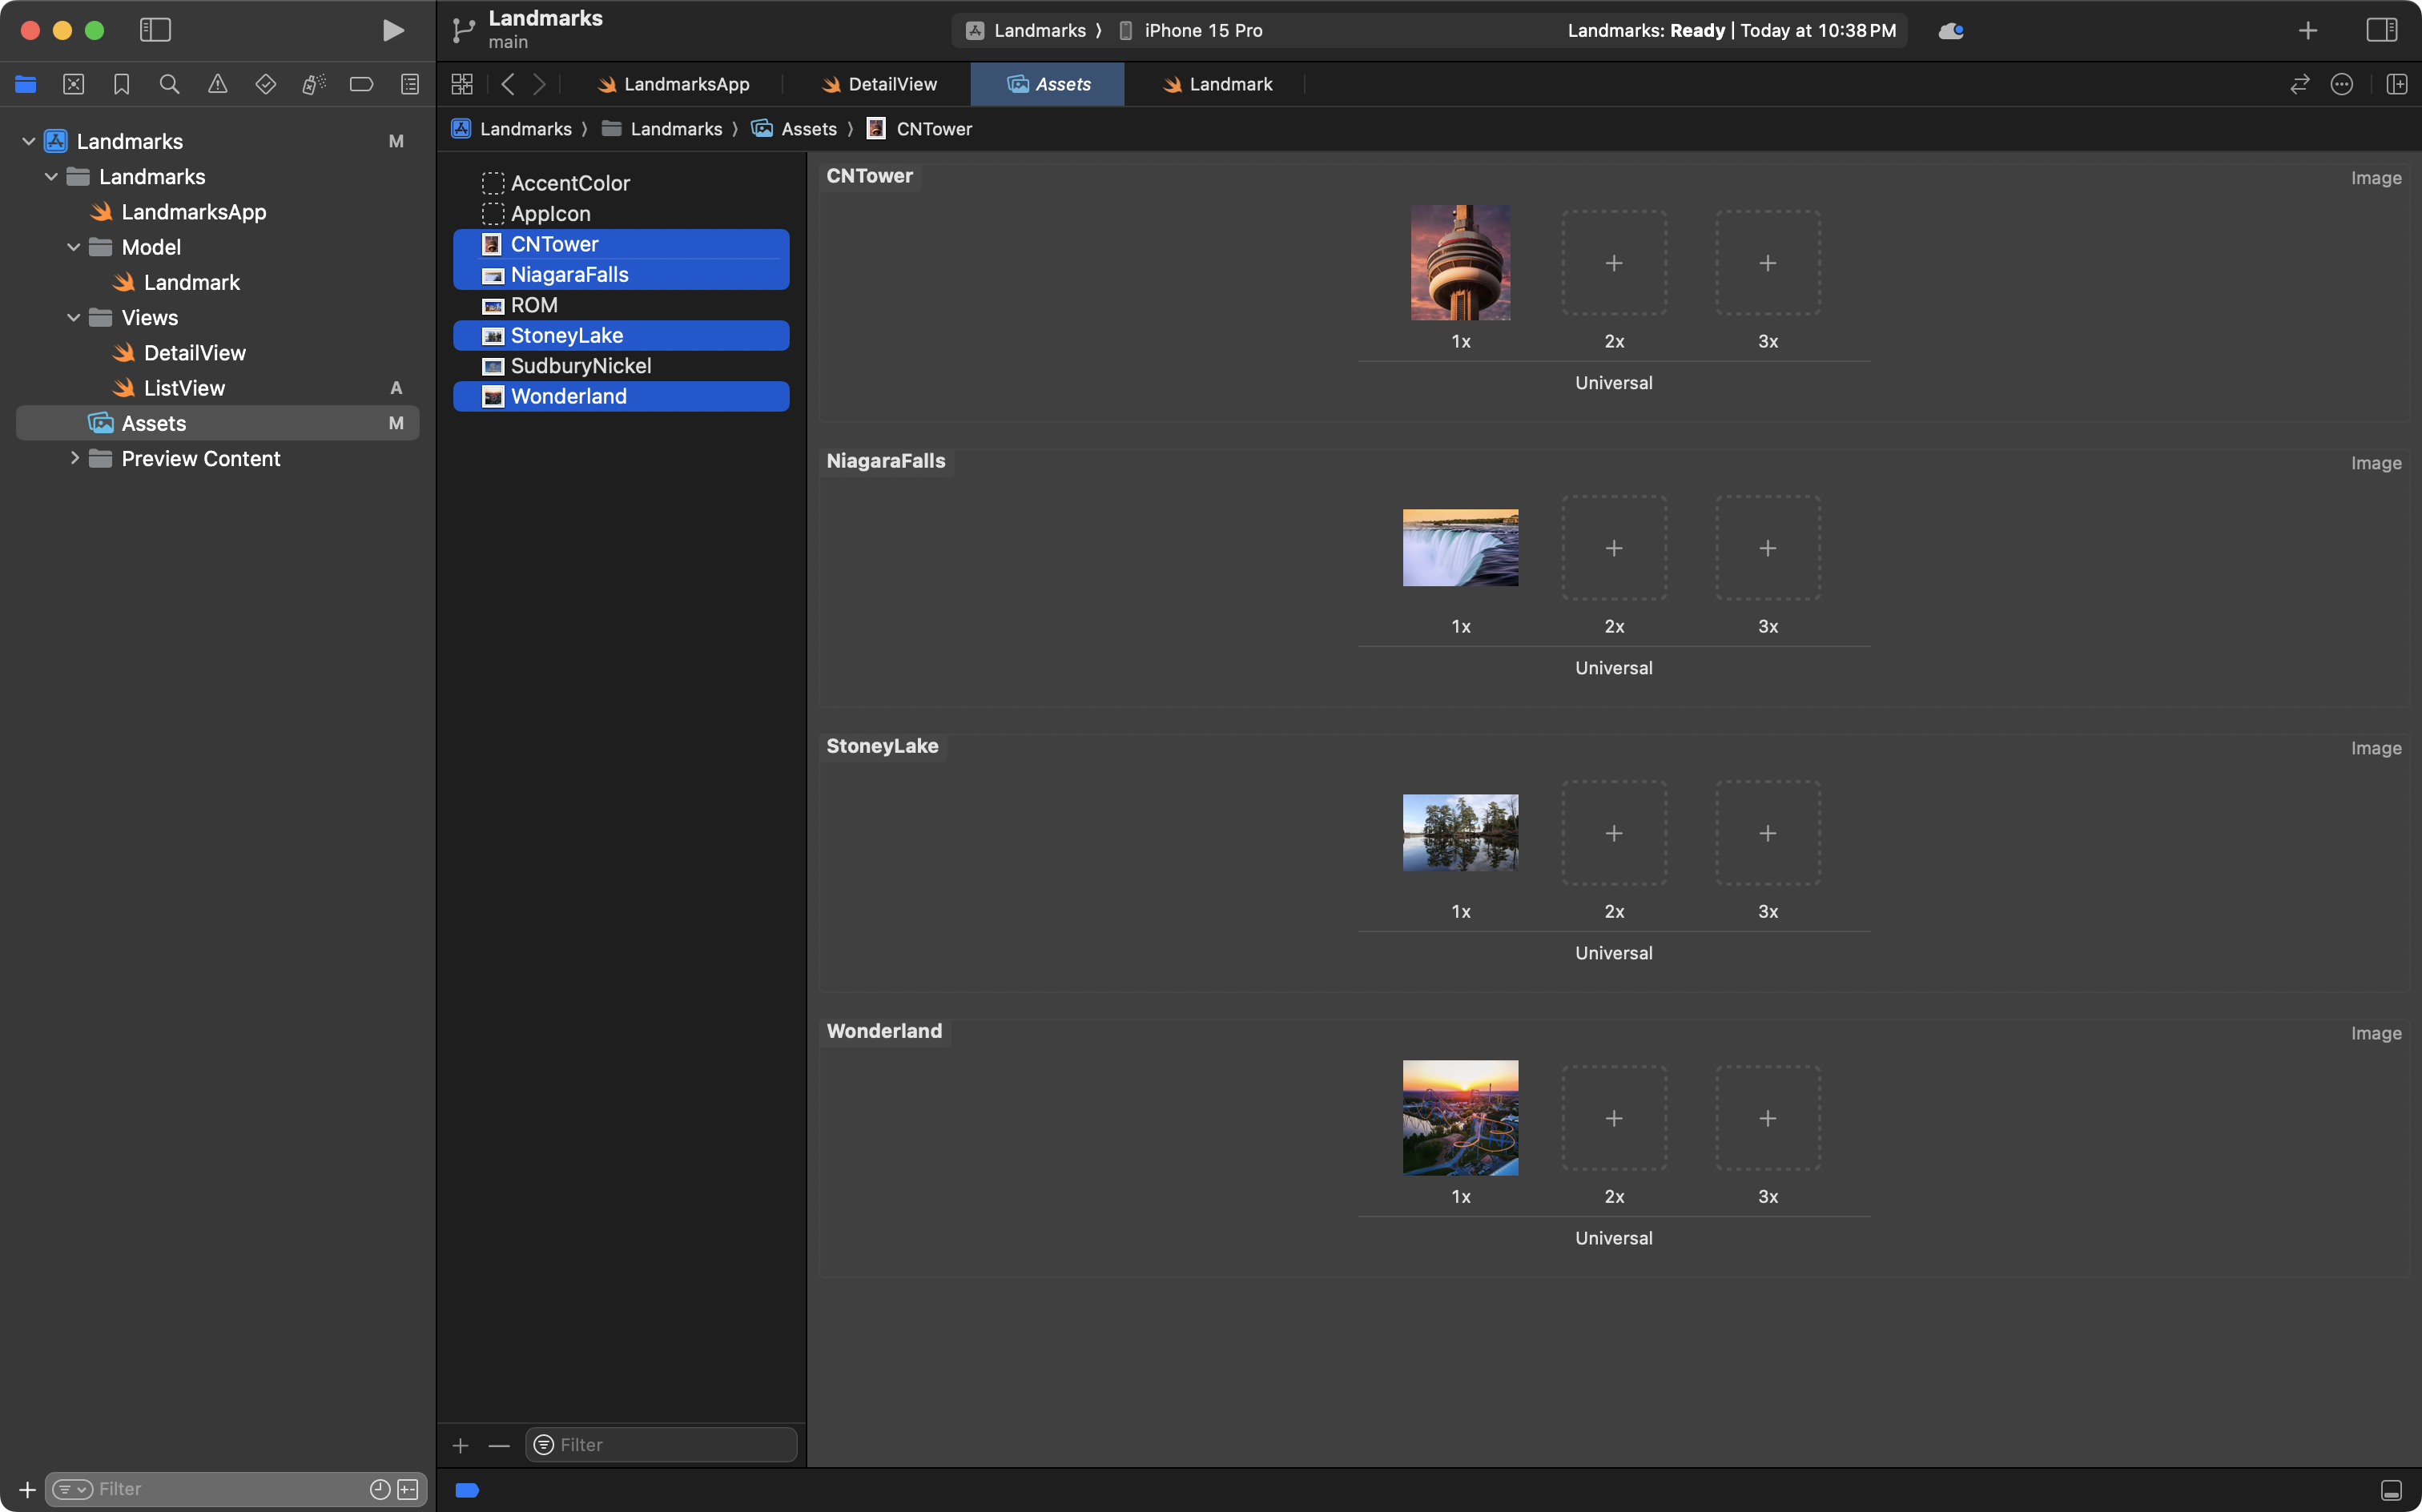
For this next part of the tutorial to work, you will need to download the following four images to your computer, and then add them all to your Assets catalog:


… like this:
Now again, the purpose of this lesson is not to practice typing.
So, feel free to copy this code into your ListView file, like this:
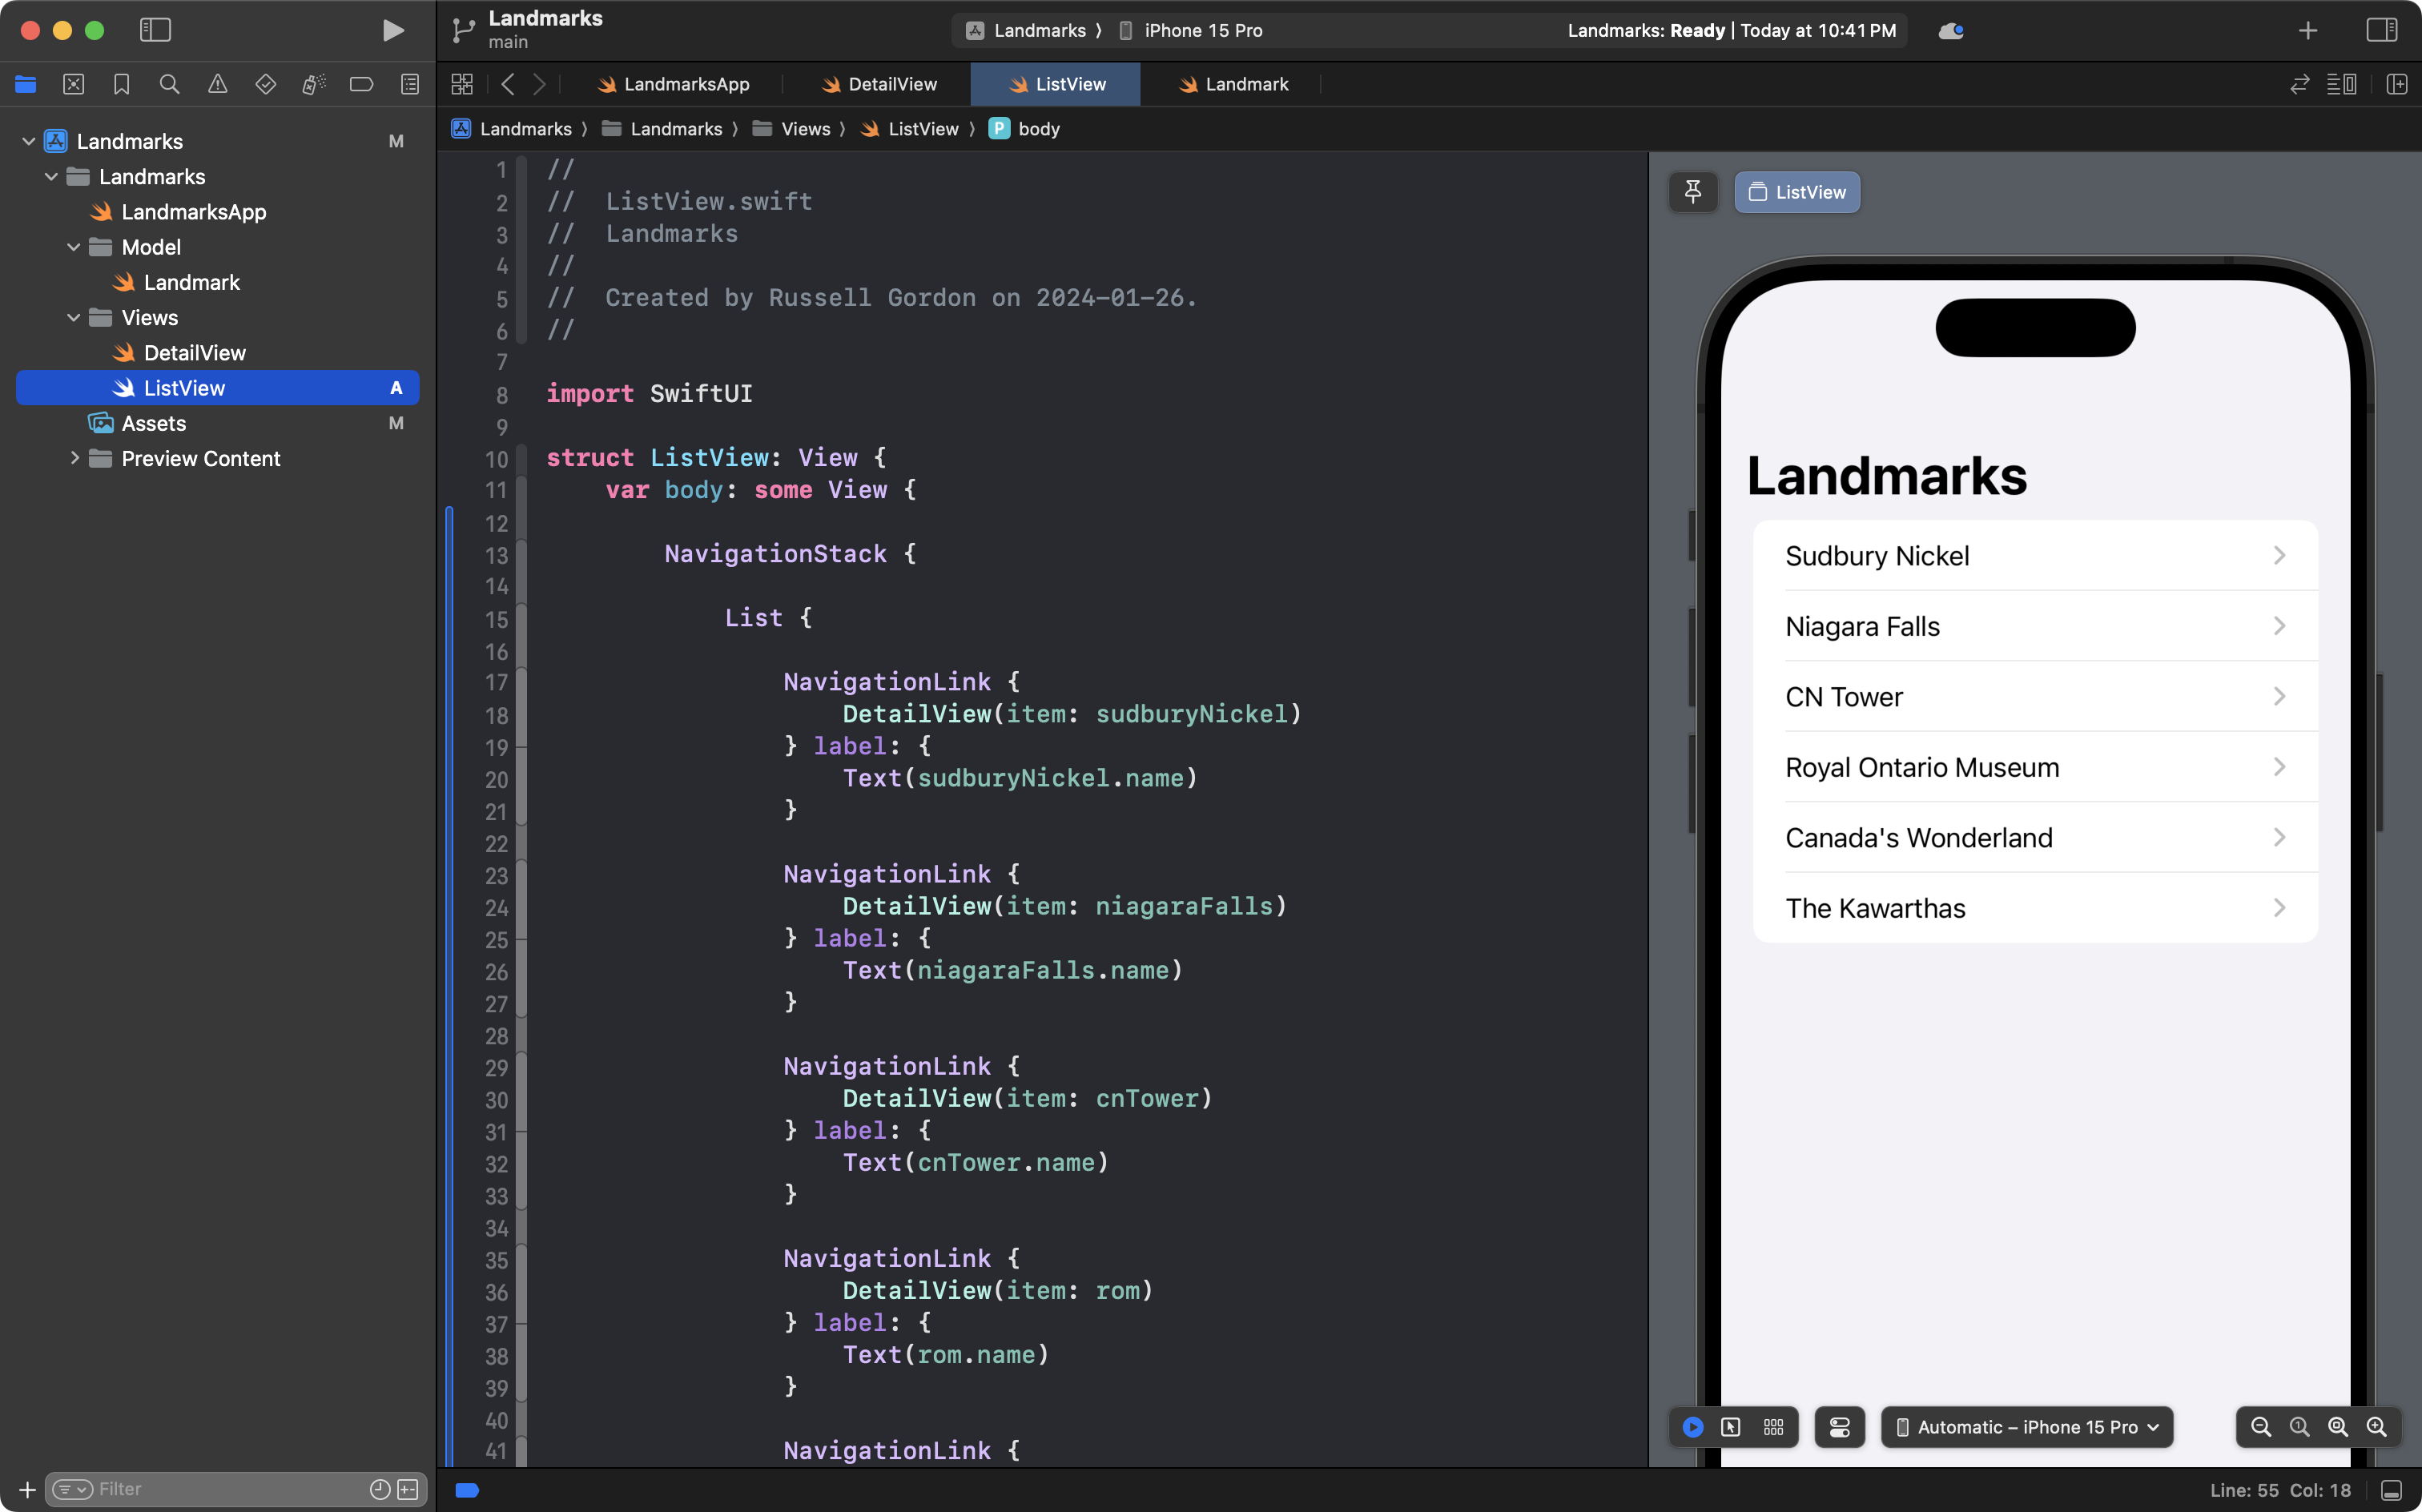
You can now navigate down to the detail view for each landmark. Try this out.
Commit and push with this message:
Created the list view, but our code is currently repetitive.
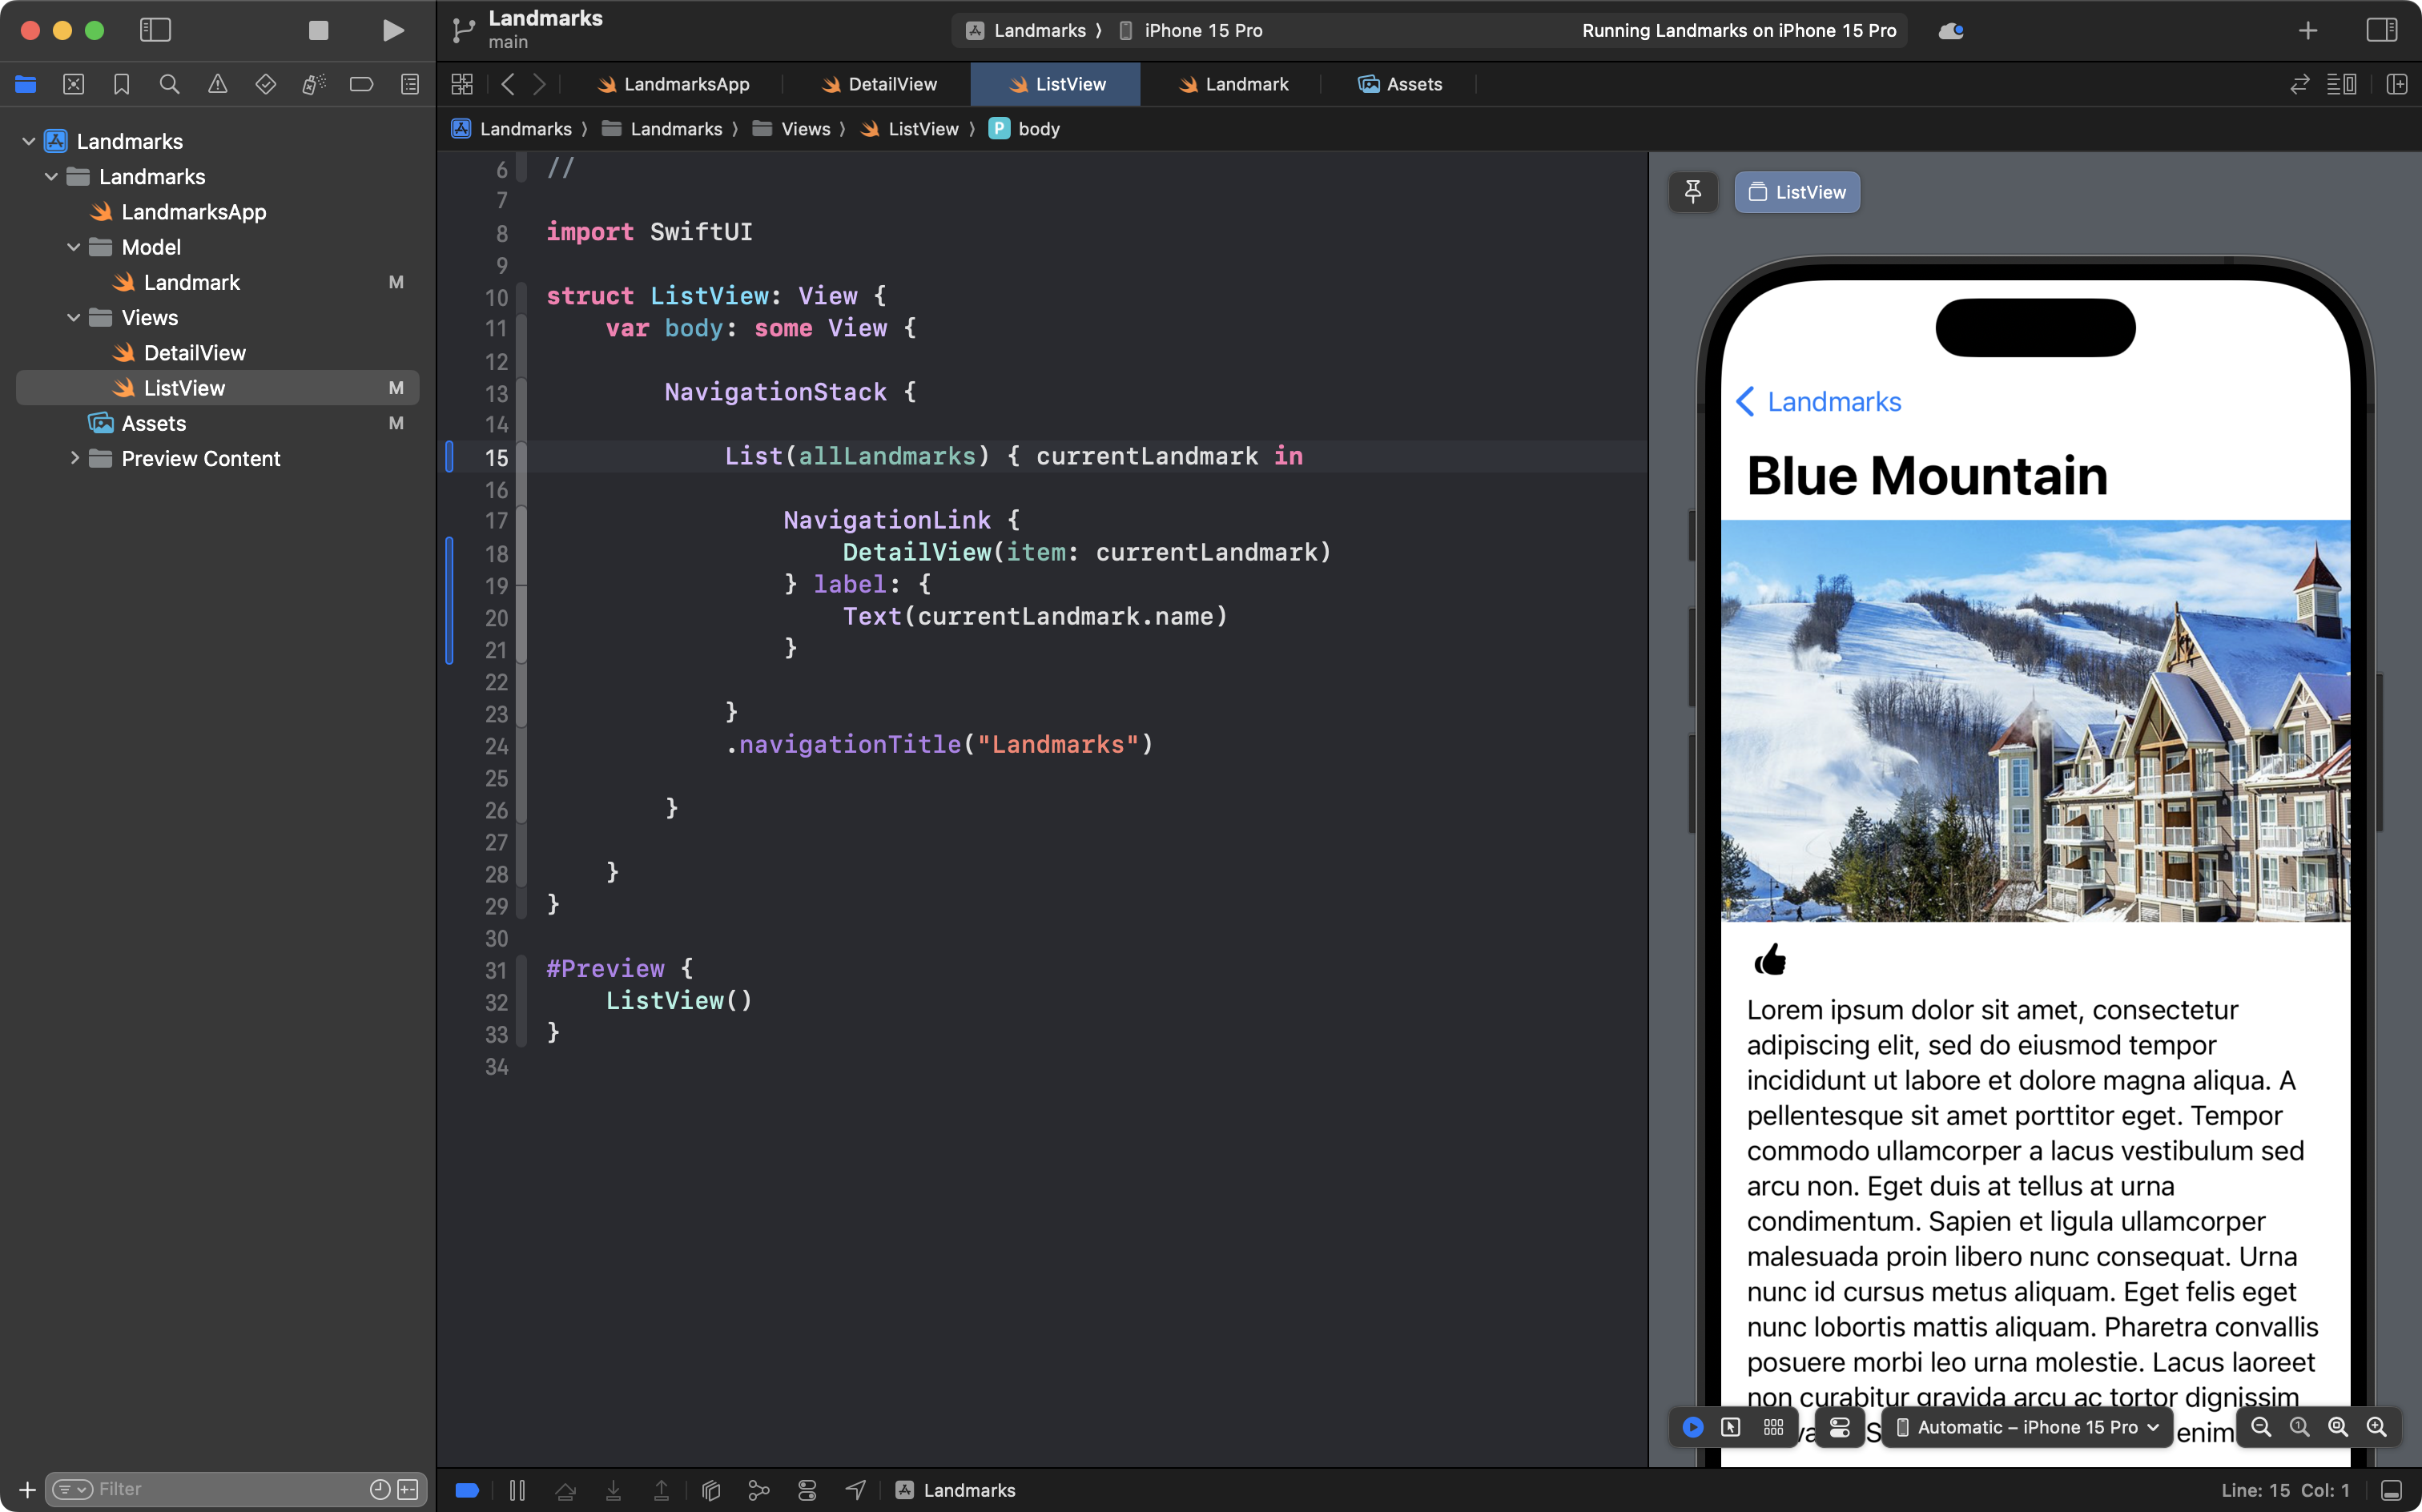
Apply abstraction
Of course, we know now that we can do better by applying abstraction to the list view.
Recall that we defined an array that contains all the landmarks we care about keeping track of:
Highlight the List structure and everything it contains, and replace it with this code:
List(allLandmarks) { currentLandmark in

	NavigationLink {
		DetailView(item: currentLandmark)
	} label: {
		Text(currentLandmark.name)
	}

}
.navigationTitle("Landmarks")
… like this:
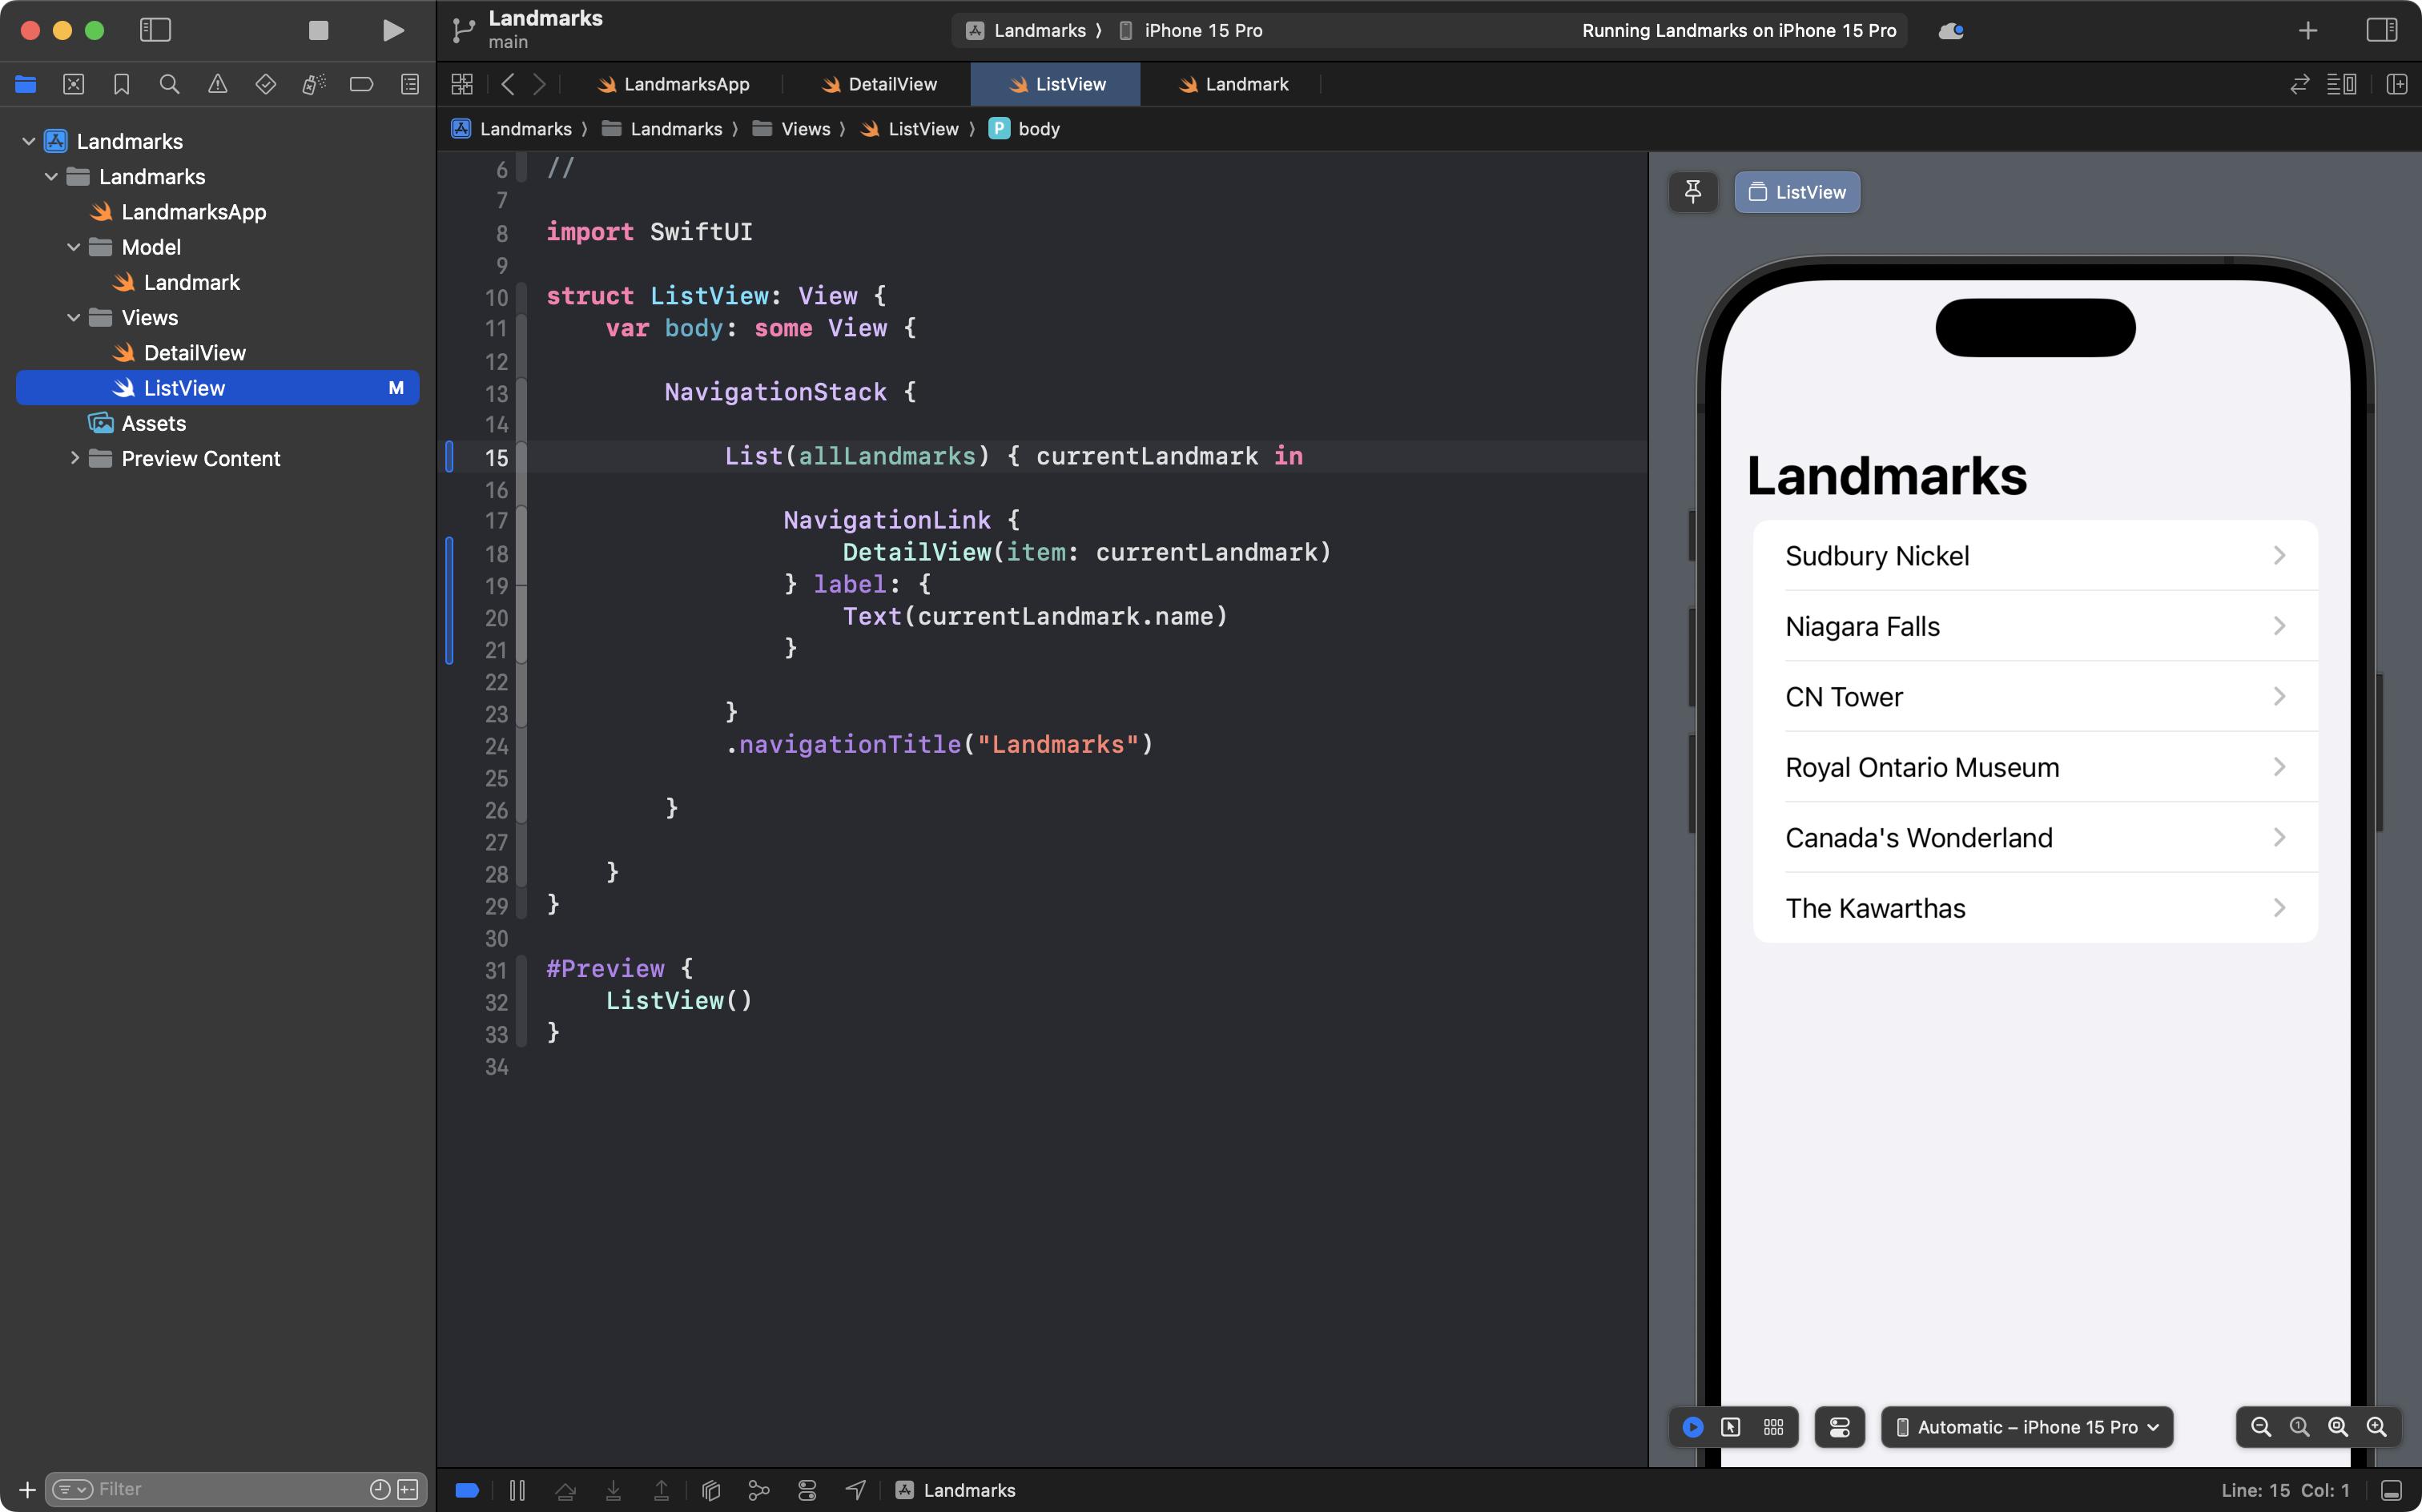
The visual result is identical.
However, the code is much shorter.
The contents of the allLandmarks array:
| Index | Element |
|---|---|
| 0 | Sudbury data |
| 1 | Niagara Falls data |
| 2 | CN Tower data |
| 3 | ROM data |
| 4 | Canada’s Wonderland data |
| 5 | Kawarthas data |
… is now iterated over by the List.
One by one, an instance of the Landmark model is placed in currentLandmark.
The List iterates six times because there are six elements in the allLandmarks array.
Importantly, if we now add more instances of Landmark to the allLandmarks array, we will automatically see more items in our scrollable list here.
Let’s do that now to illustrate the point.
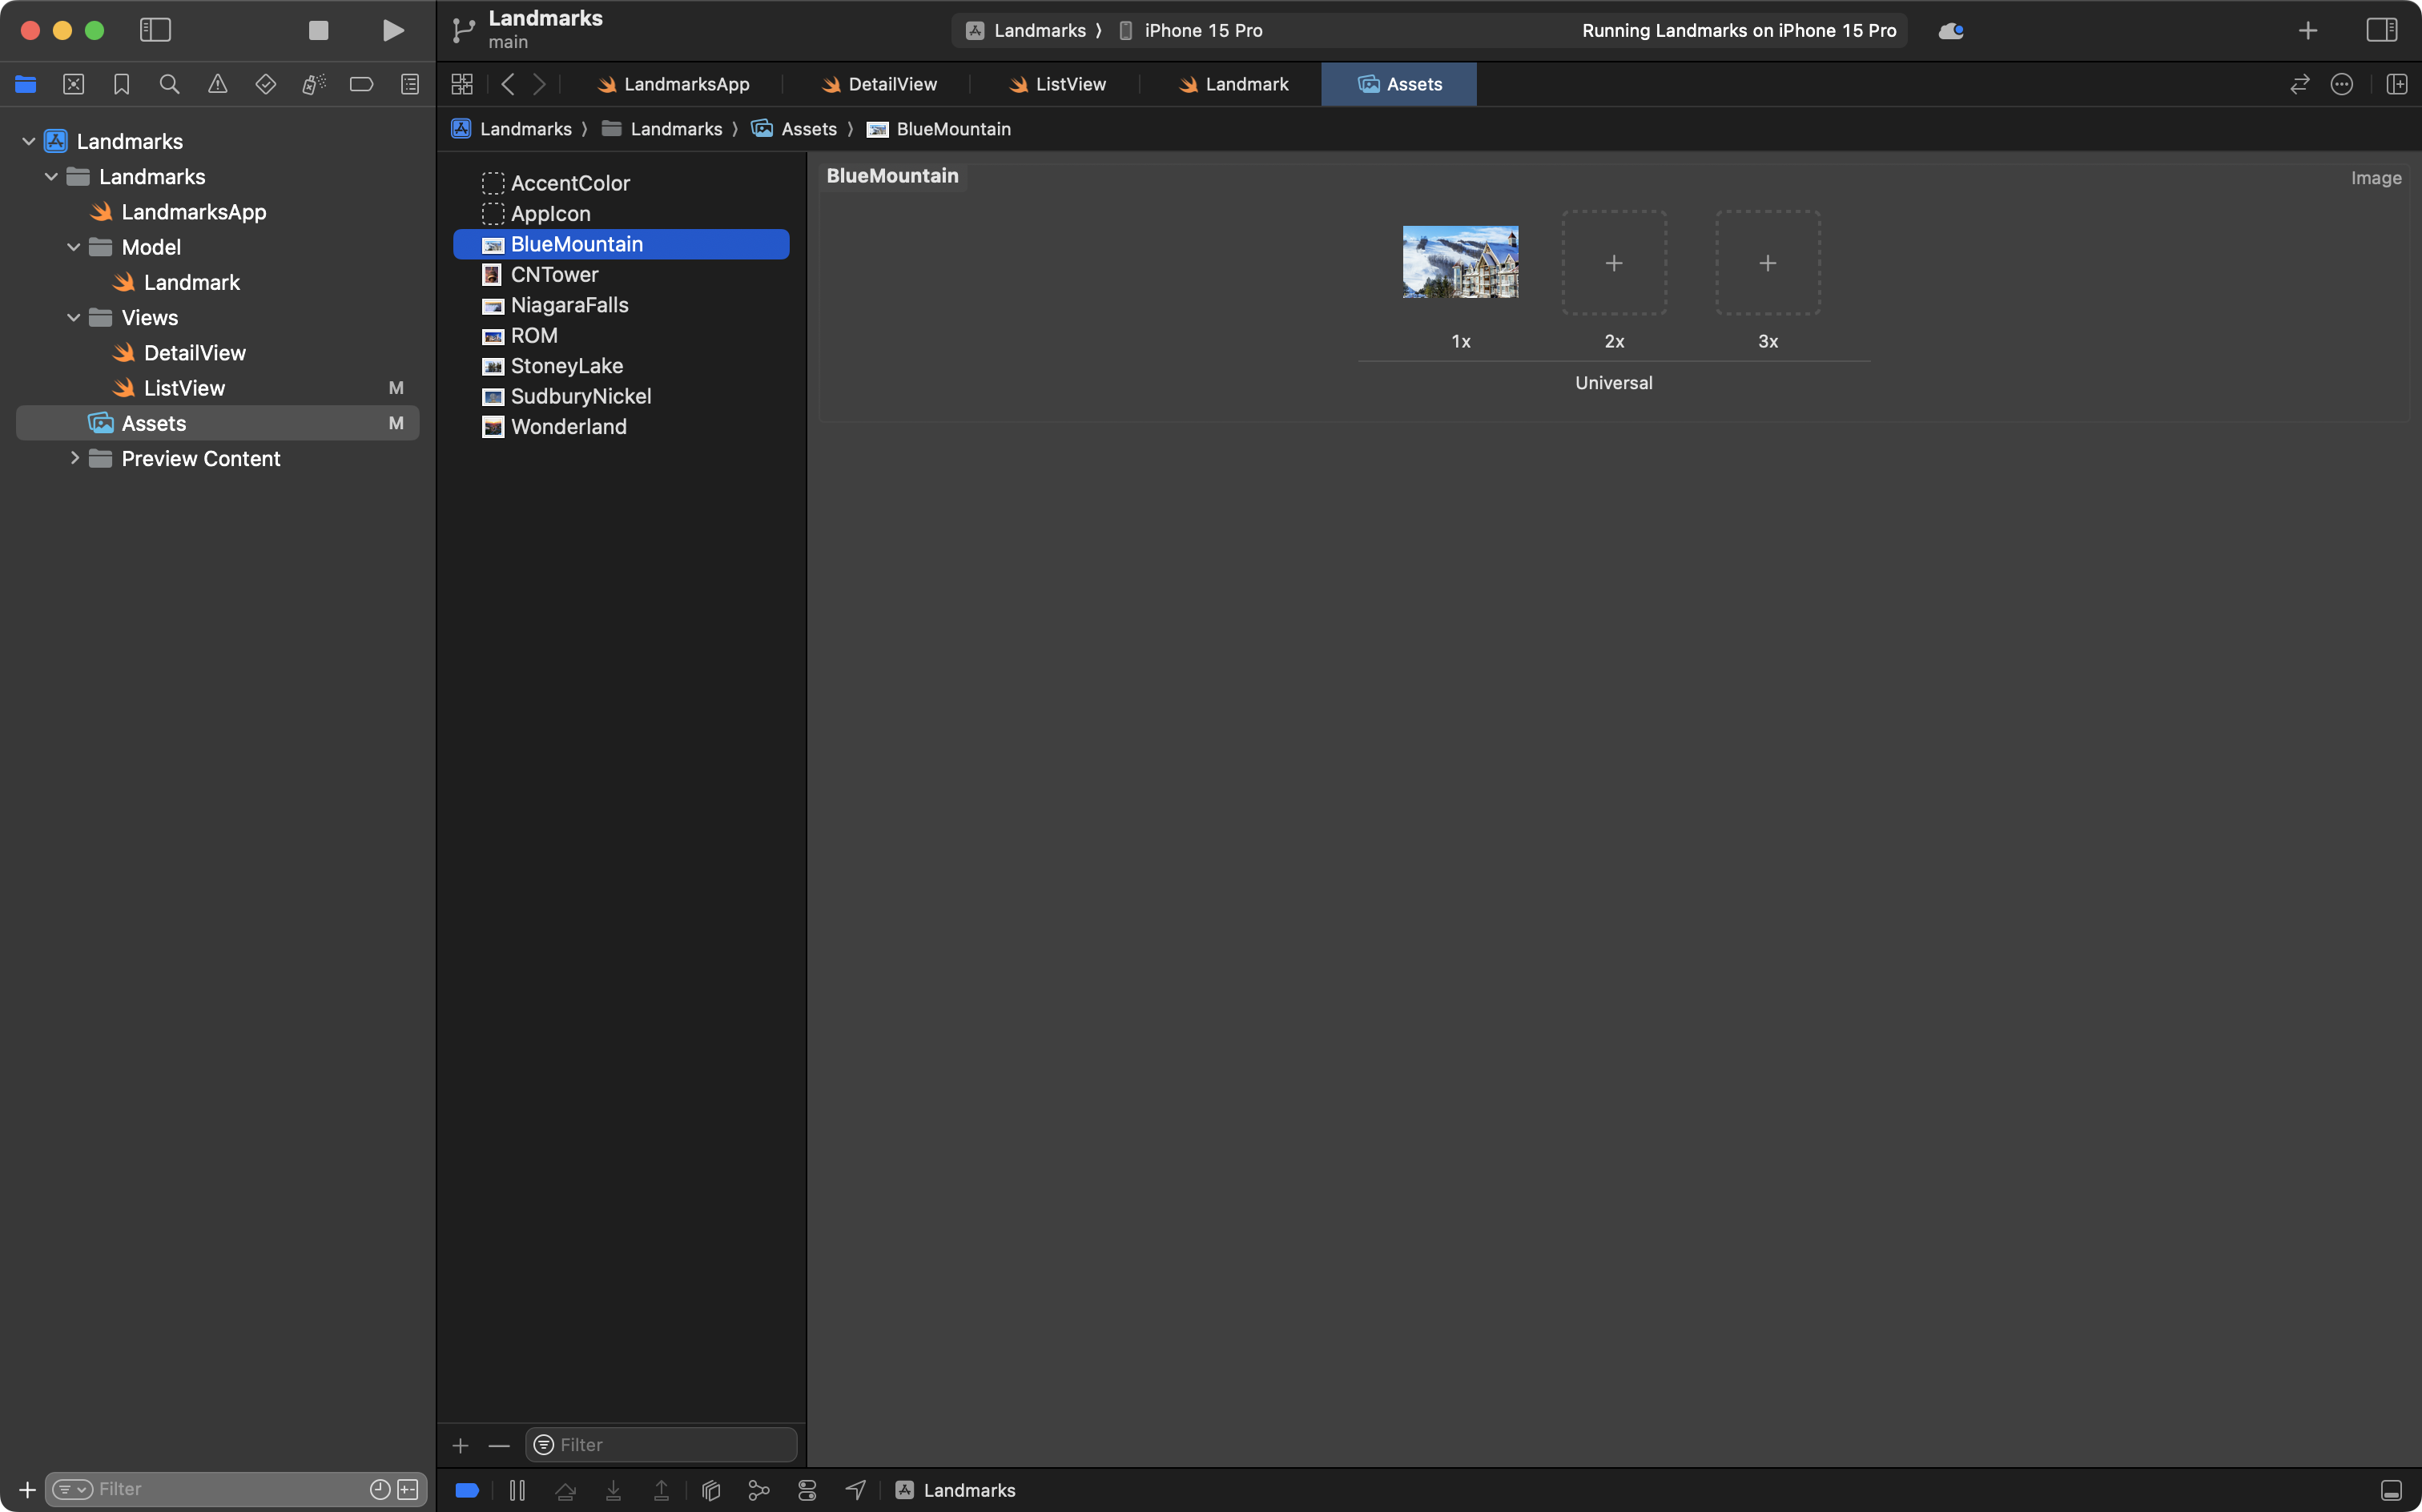
Download the following image to your computer and then add it to the Assets catalog in Xcode:

… like this:
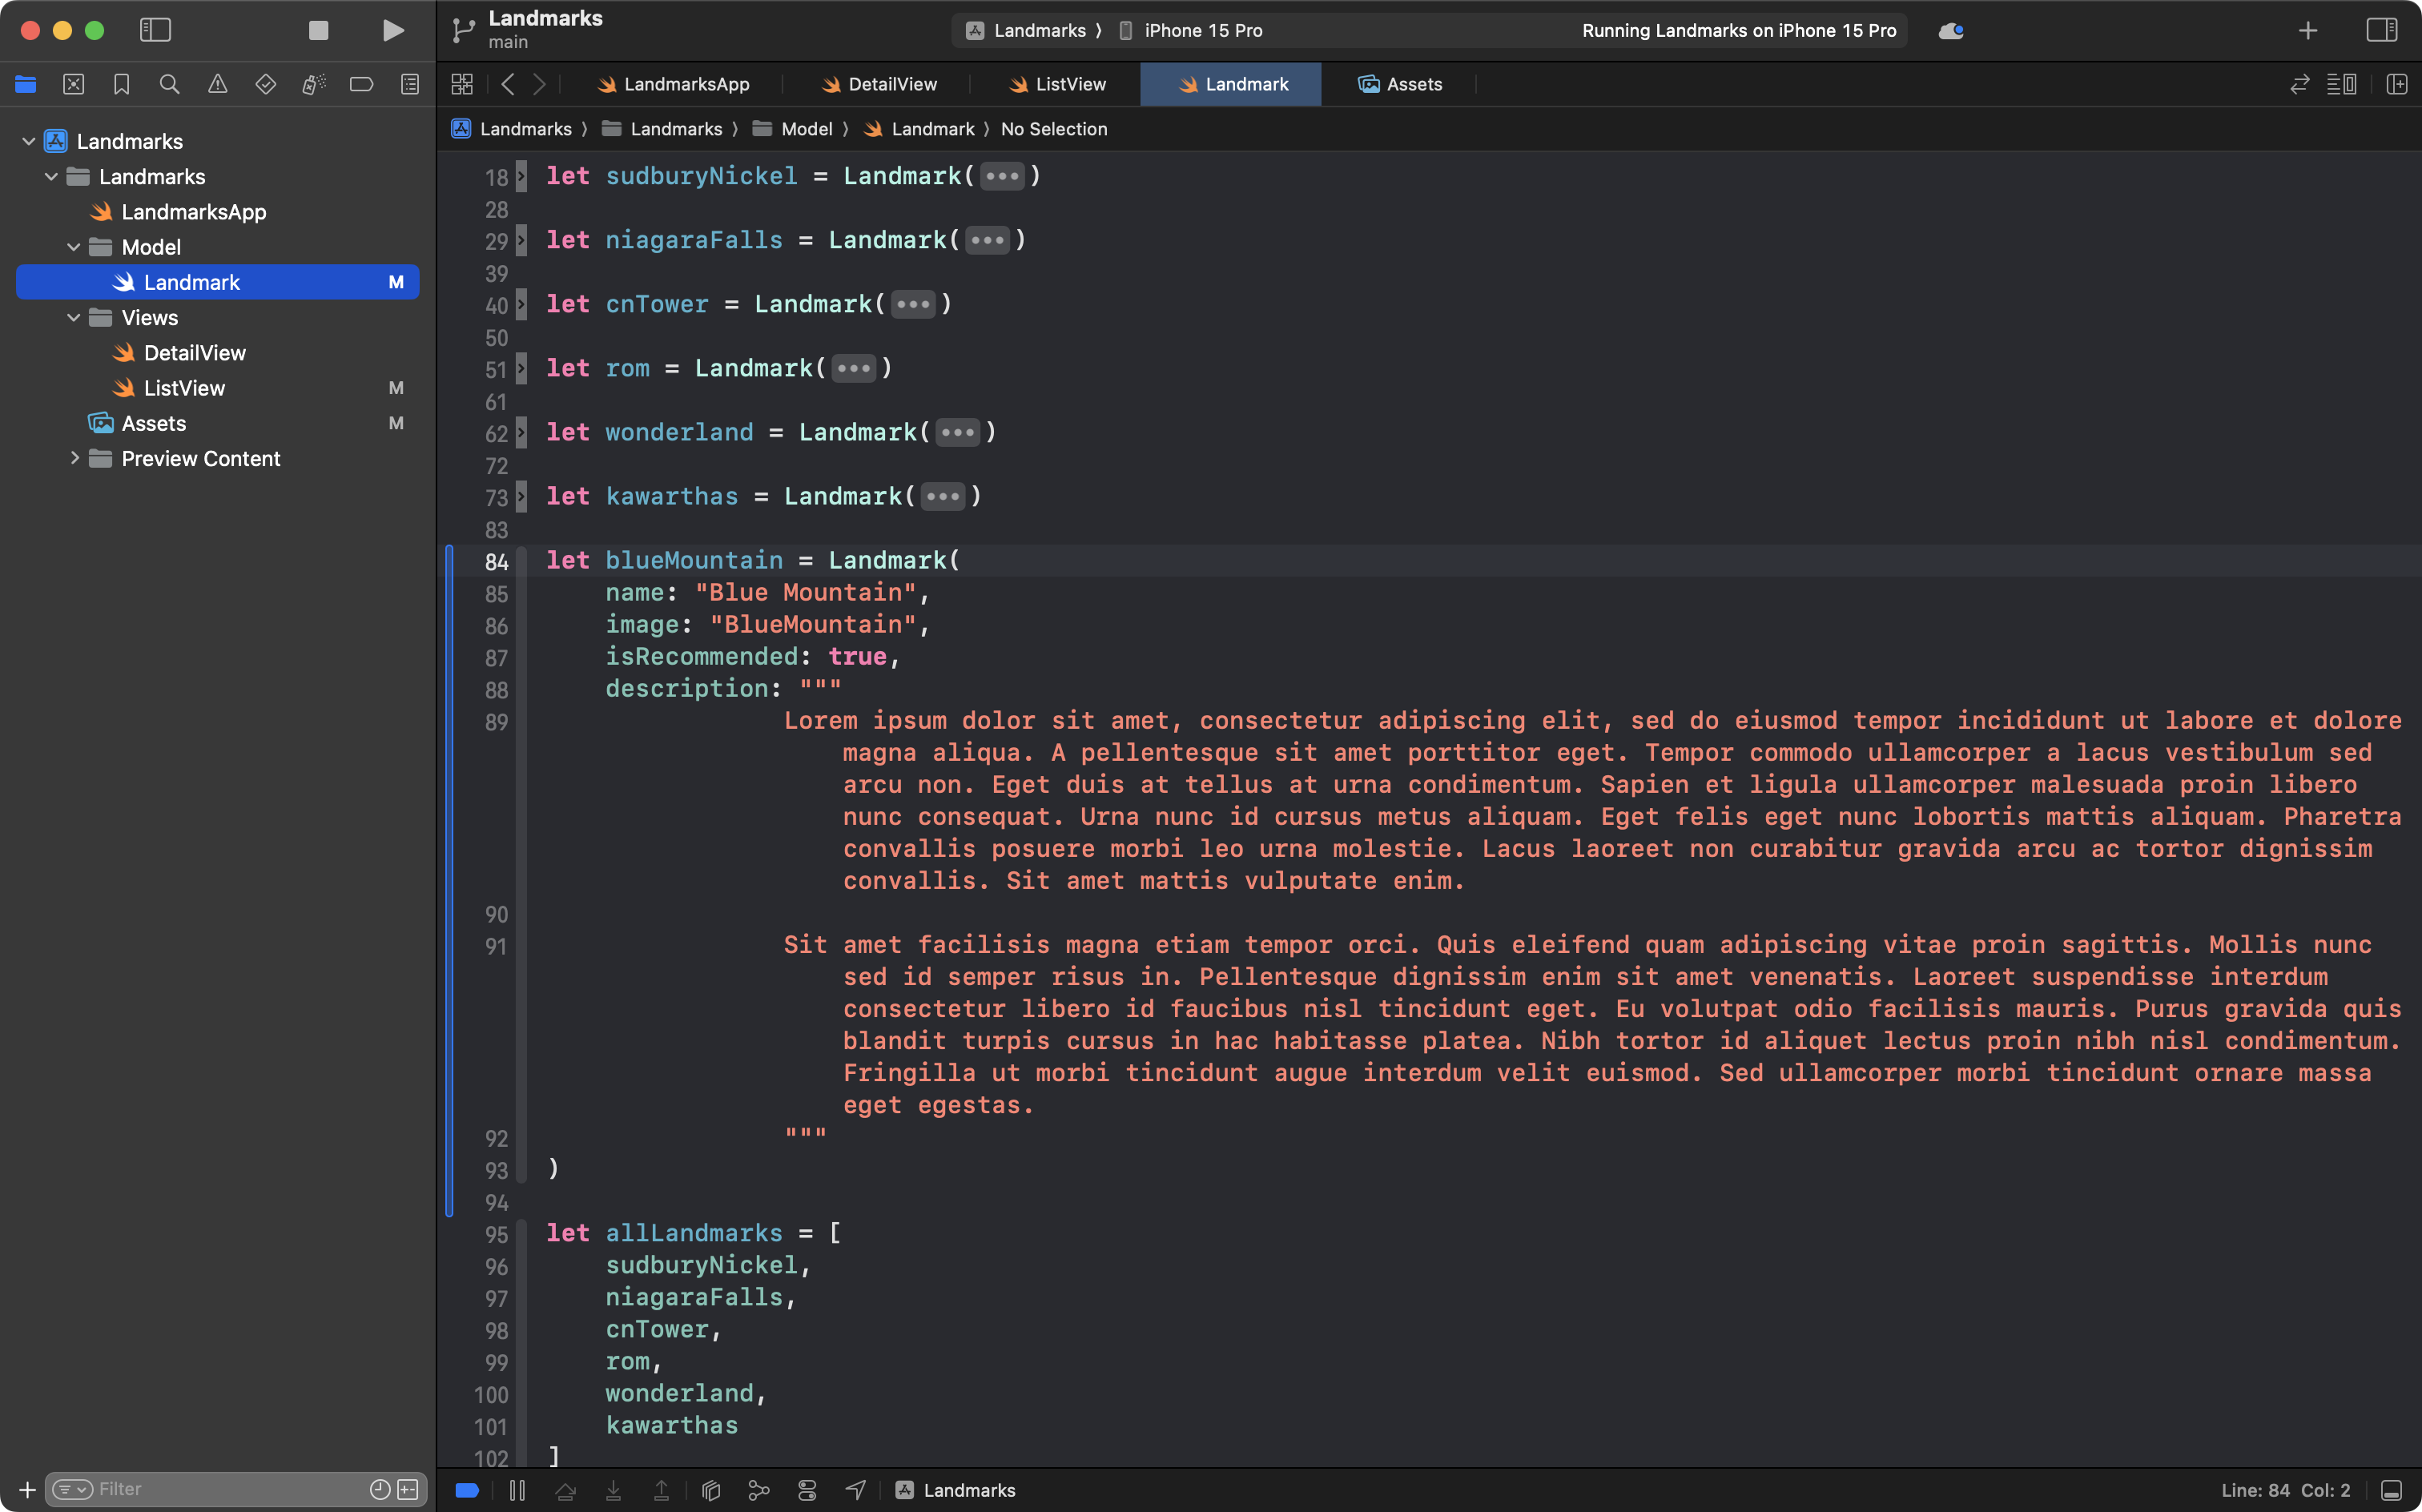
Then, open the Landmark file in the Model group add the following code to create a seventh instance of the Landmark structure:
let blueMountain = Landmark(
    name: "Blue Mountain",
    image: "BlueMountain",
    isRecommended: true,
    description: """
                Lorem ipsum dolor sit amet, consectetur adipiscing elit, sed do eiusmod tempor incididunt ut labore et dolore magna aliqua. A pellentesque sit amet porttitor eget. Tempor commodo ullamcorper a lacus vestibulum sed arcu non. Eget duis at tellus at urna condimentum. Sapien et ligula ullamcorper malesuada proin libero nunc consequat. Urna nunc id cursus metus aliquam. Eget felis eget nunc lobortis mattis aliquam. Pharetra convallis posuere morbi leo urna molestie. Lacus laoreet non curabitur gravida arcu ac tortor dignissim convallis. Sit amet mattis vulputate enim.

                Sit amet facilisis magna etiam tempor orci. Quis eleifend quam adipiscing vitae proin sagittis. Mollis nunc sed id semper risus in. Pellentesque dignissim enim sit amet venenatis. Laoreet suspendisse interdum consectetur libero id faucibus nisl tincidunt eget. Eu volutpat odio facilisis mauris. Purus gravida quis blandit turpis cursus in hac habitasse platea. Nibh tortor id aliquet lectus proin nibh nisl condimentum. Fringilla ut morbi tincidunt augue interdum velit euismod. Sed ullamcorper morbi tincidunt ornare massa eget egestas.
                """
)
… like this:
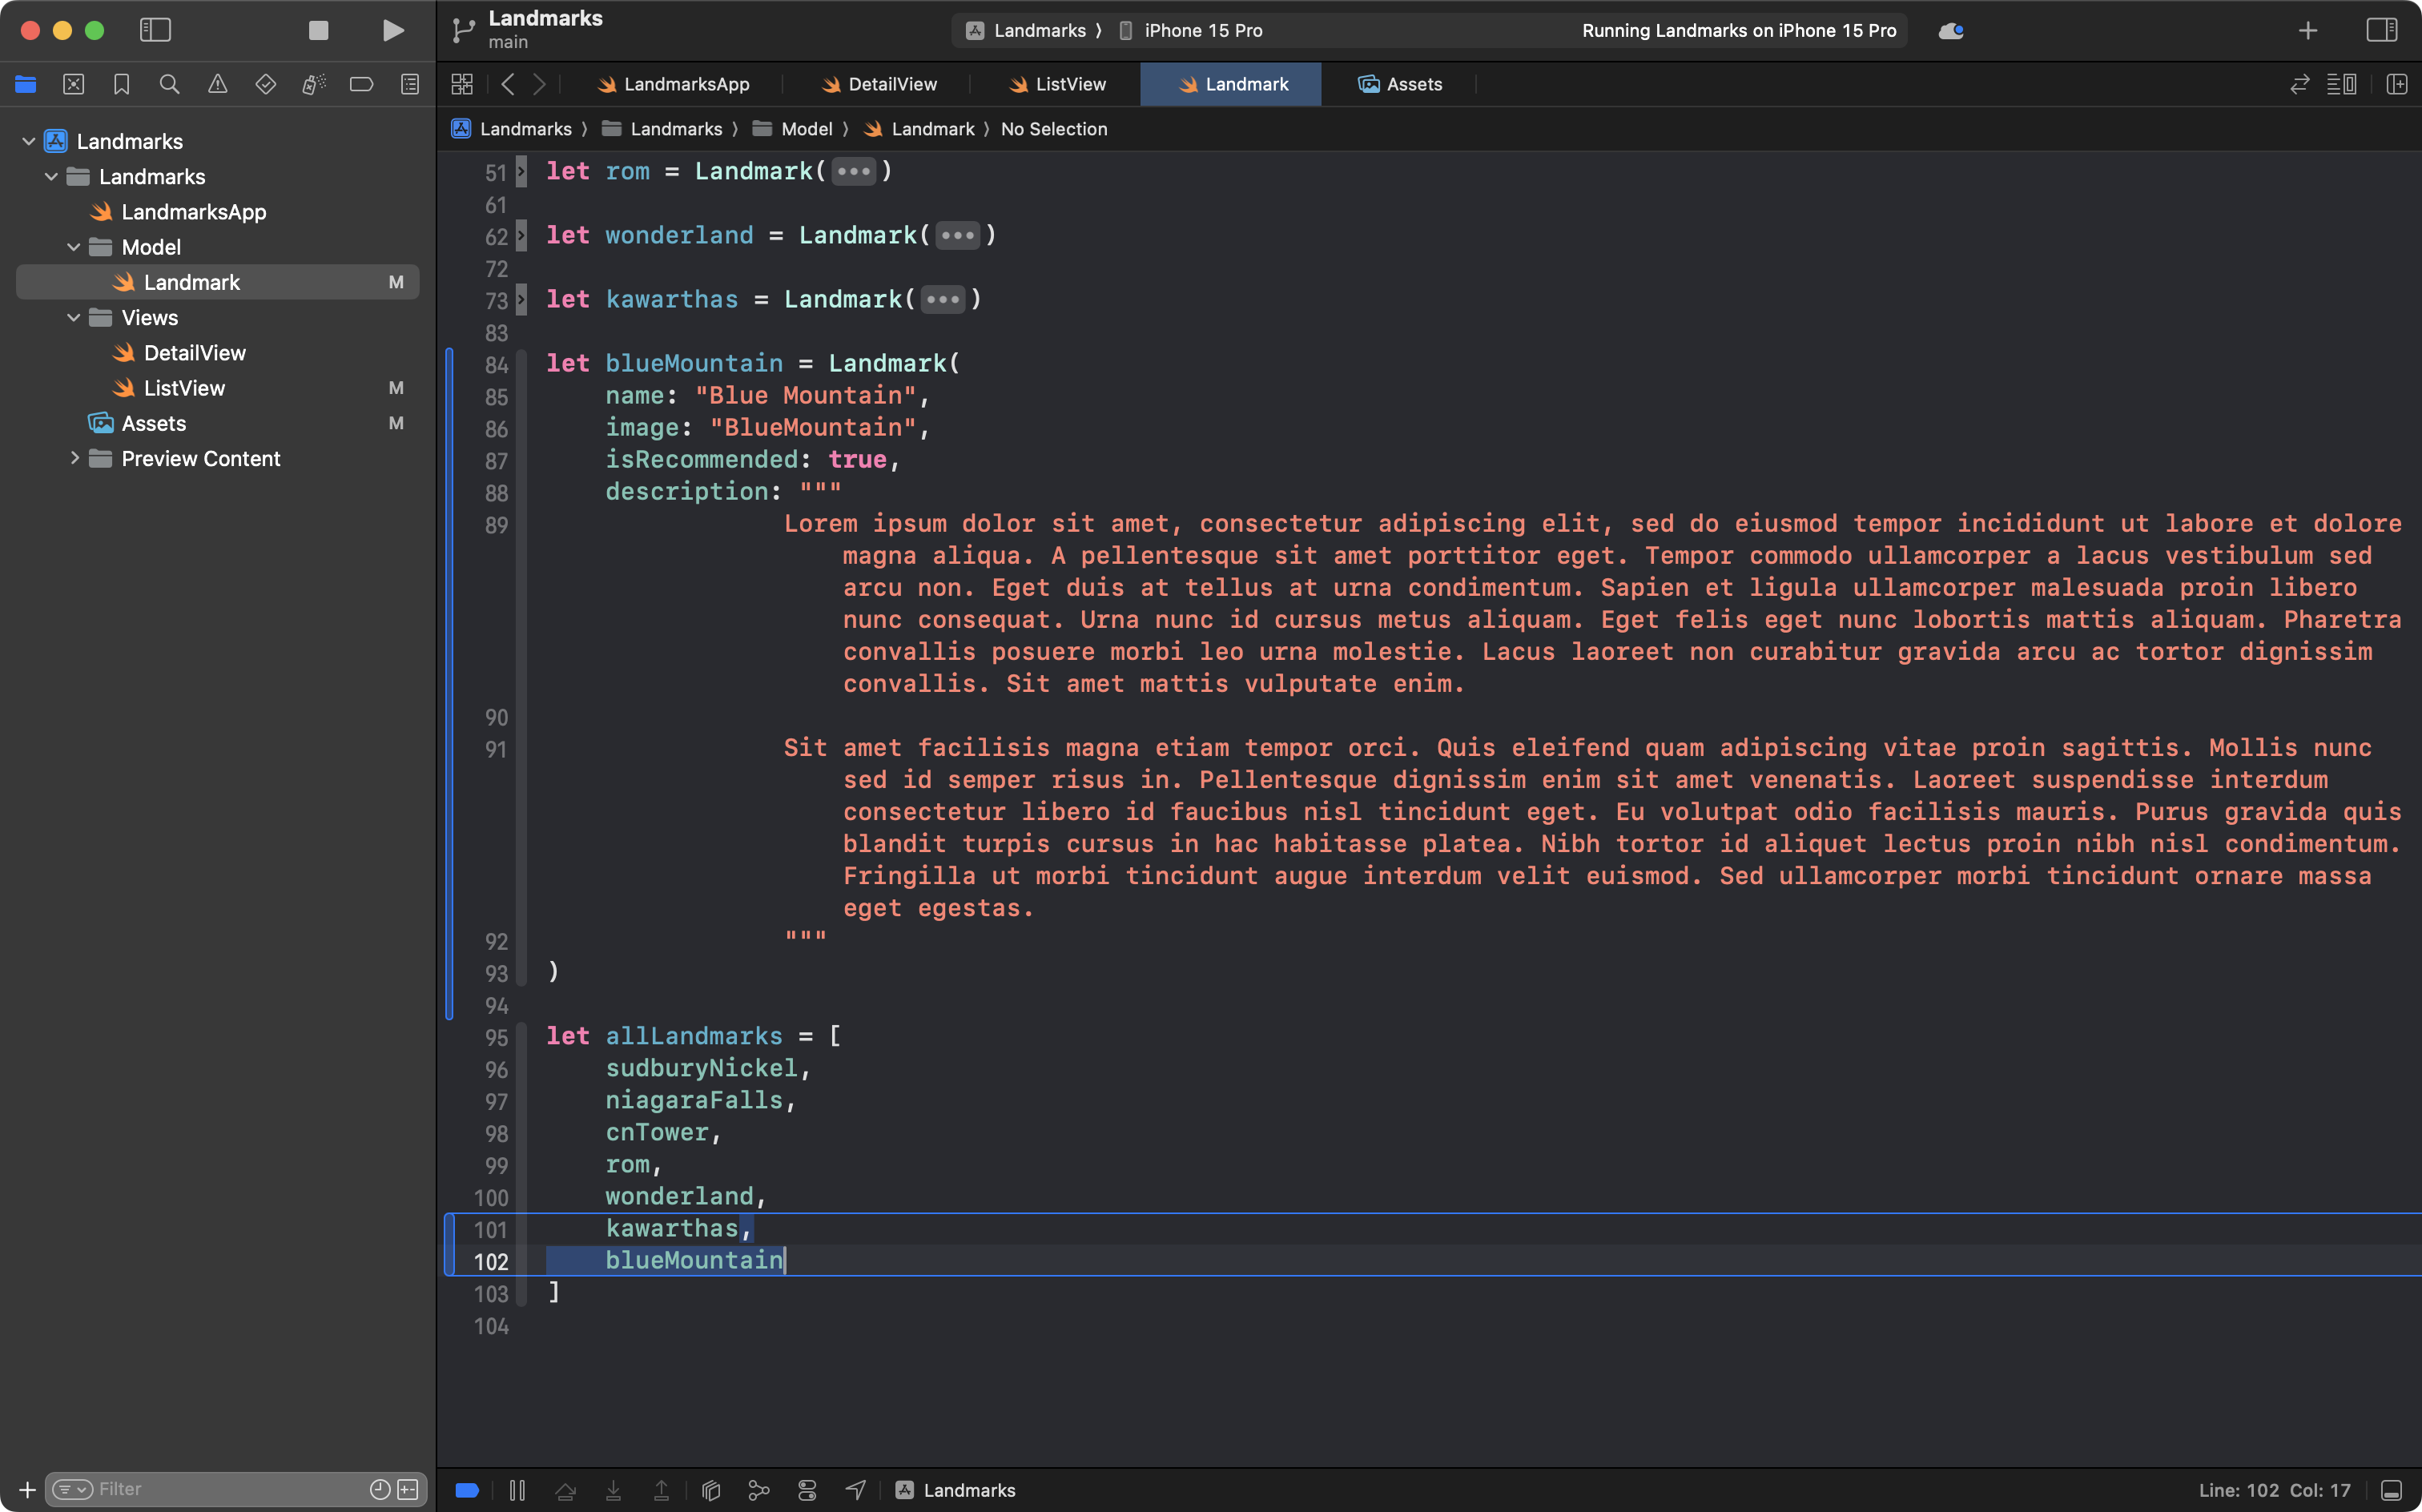
Finally, be sure to add the blueMountain instance to the allLandmarks array:
Now return to the preview of ListView, and you will see the new item in our scrollable list:

We can, of course, navigate down to the detail view for the new entry:
This is amazing progress, so please commit and push your work now with this message:
Applied abstraction to the scrollable List structure so it reads the array containing all the landmarks.
Improve the list item view
At this point in the lesson you have completed the primary objective – you have practiced applying abstraction twice.
You have transformed a static detail view that used string literals so that it accepts and uses an instance of the Landmark structure instead.
You have modified a scrollable List so that instead of using six copy-pasted NavigationLinks, the List reads an array containing landmarks.
Now, we can continue making use of abstraction to create a more attractive version of this app.
Update app entry point
Now that our list is working the way we want it to, we should probably update the app entry point so that it shows the list, rather than the detail view.
Make this edit to the LandmarksApp file – the old code is above, and the new code is below:
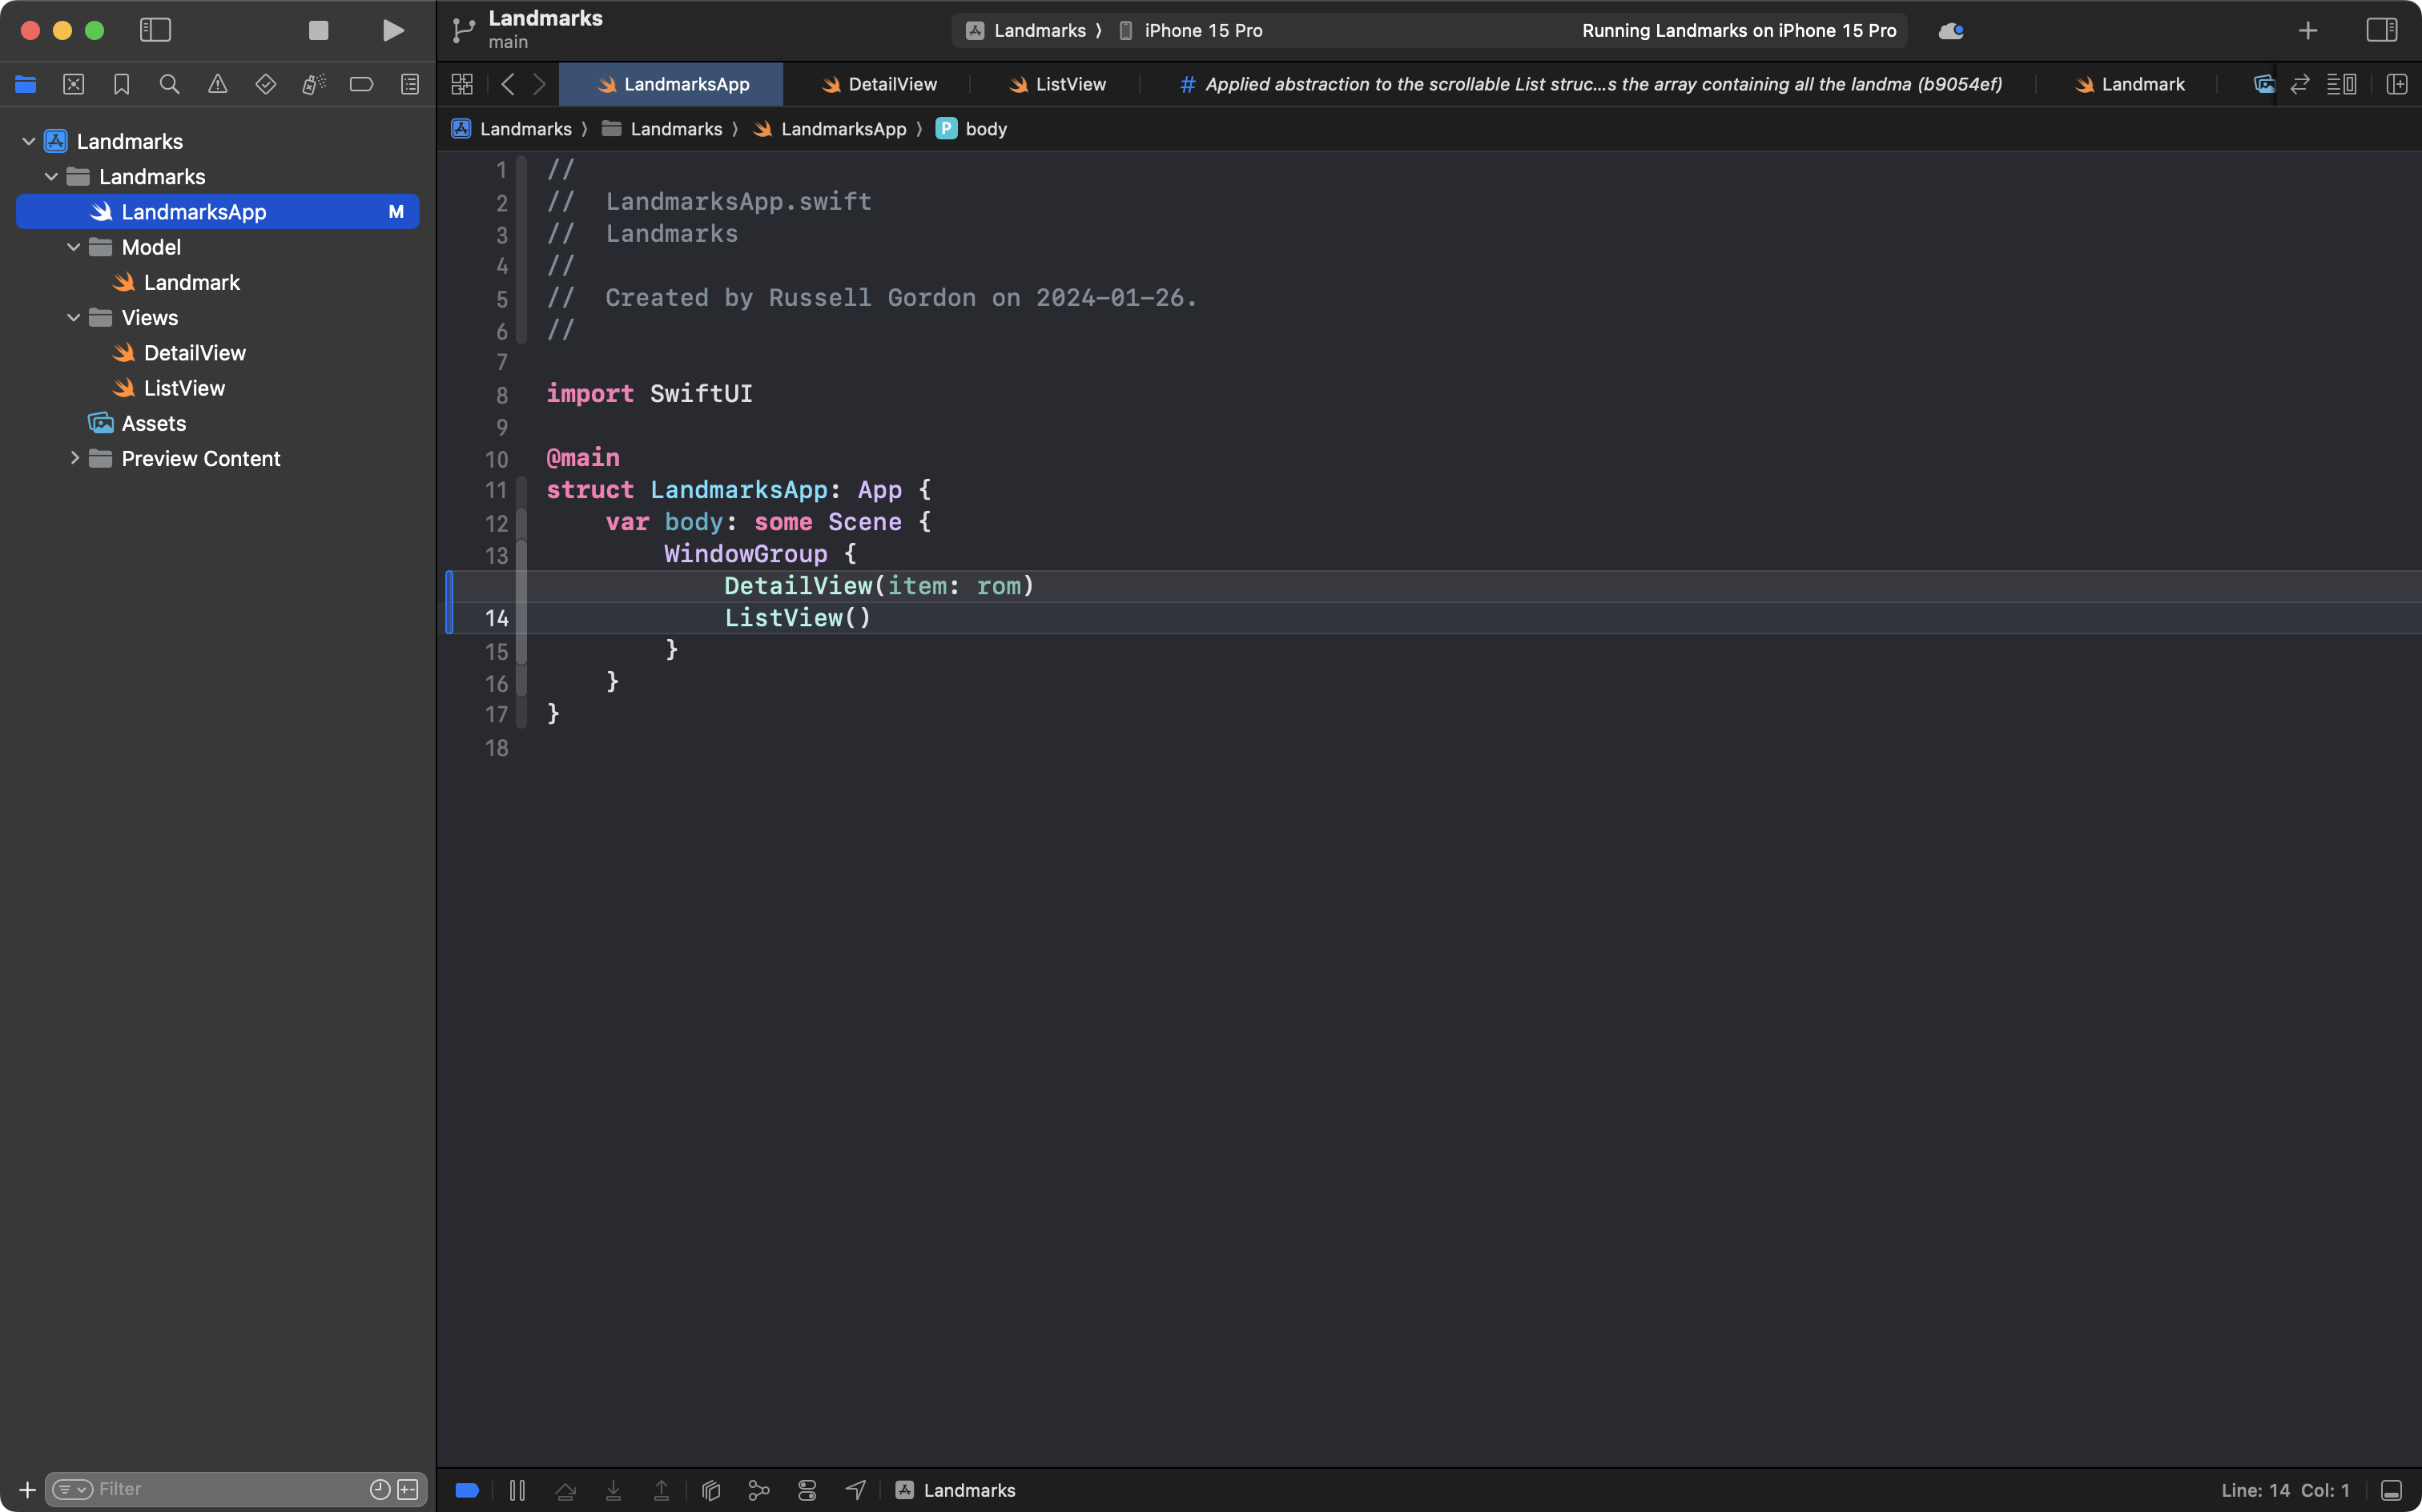
Now if we run the app in the Simulator, or on a real device, the list will be shown:
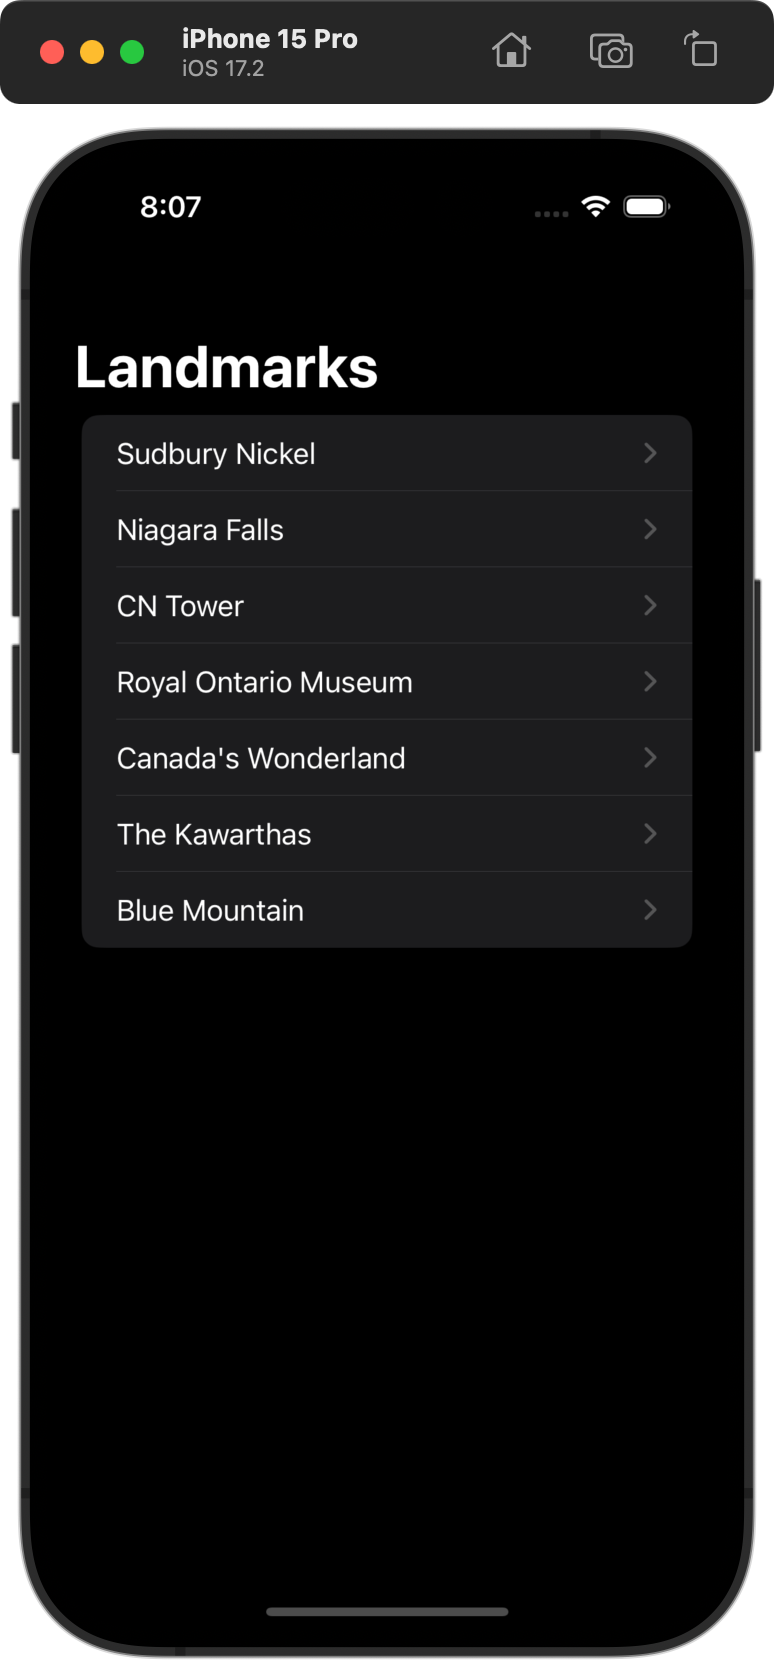
Commit and push your work with this message:
Made the app entry point open the list view.
Add the list item view
We can do better than the plain scrollable list that we have now.
Add a new SwiftUI View named ListItemView to the Views group:
… like this:
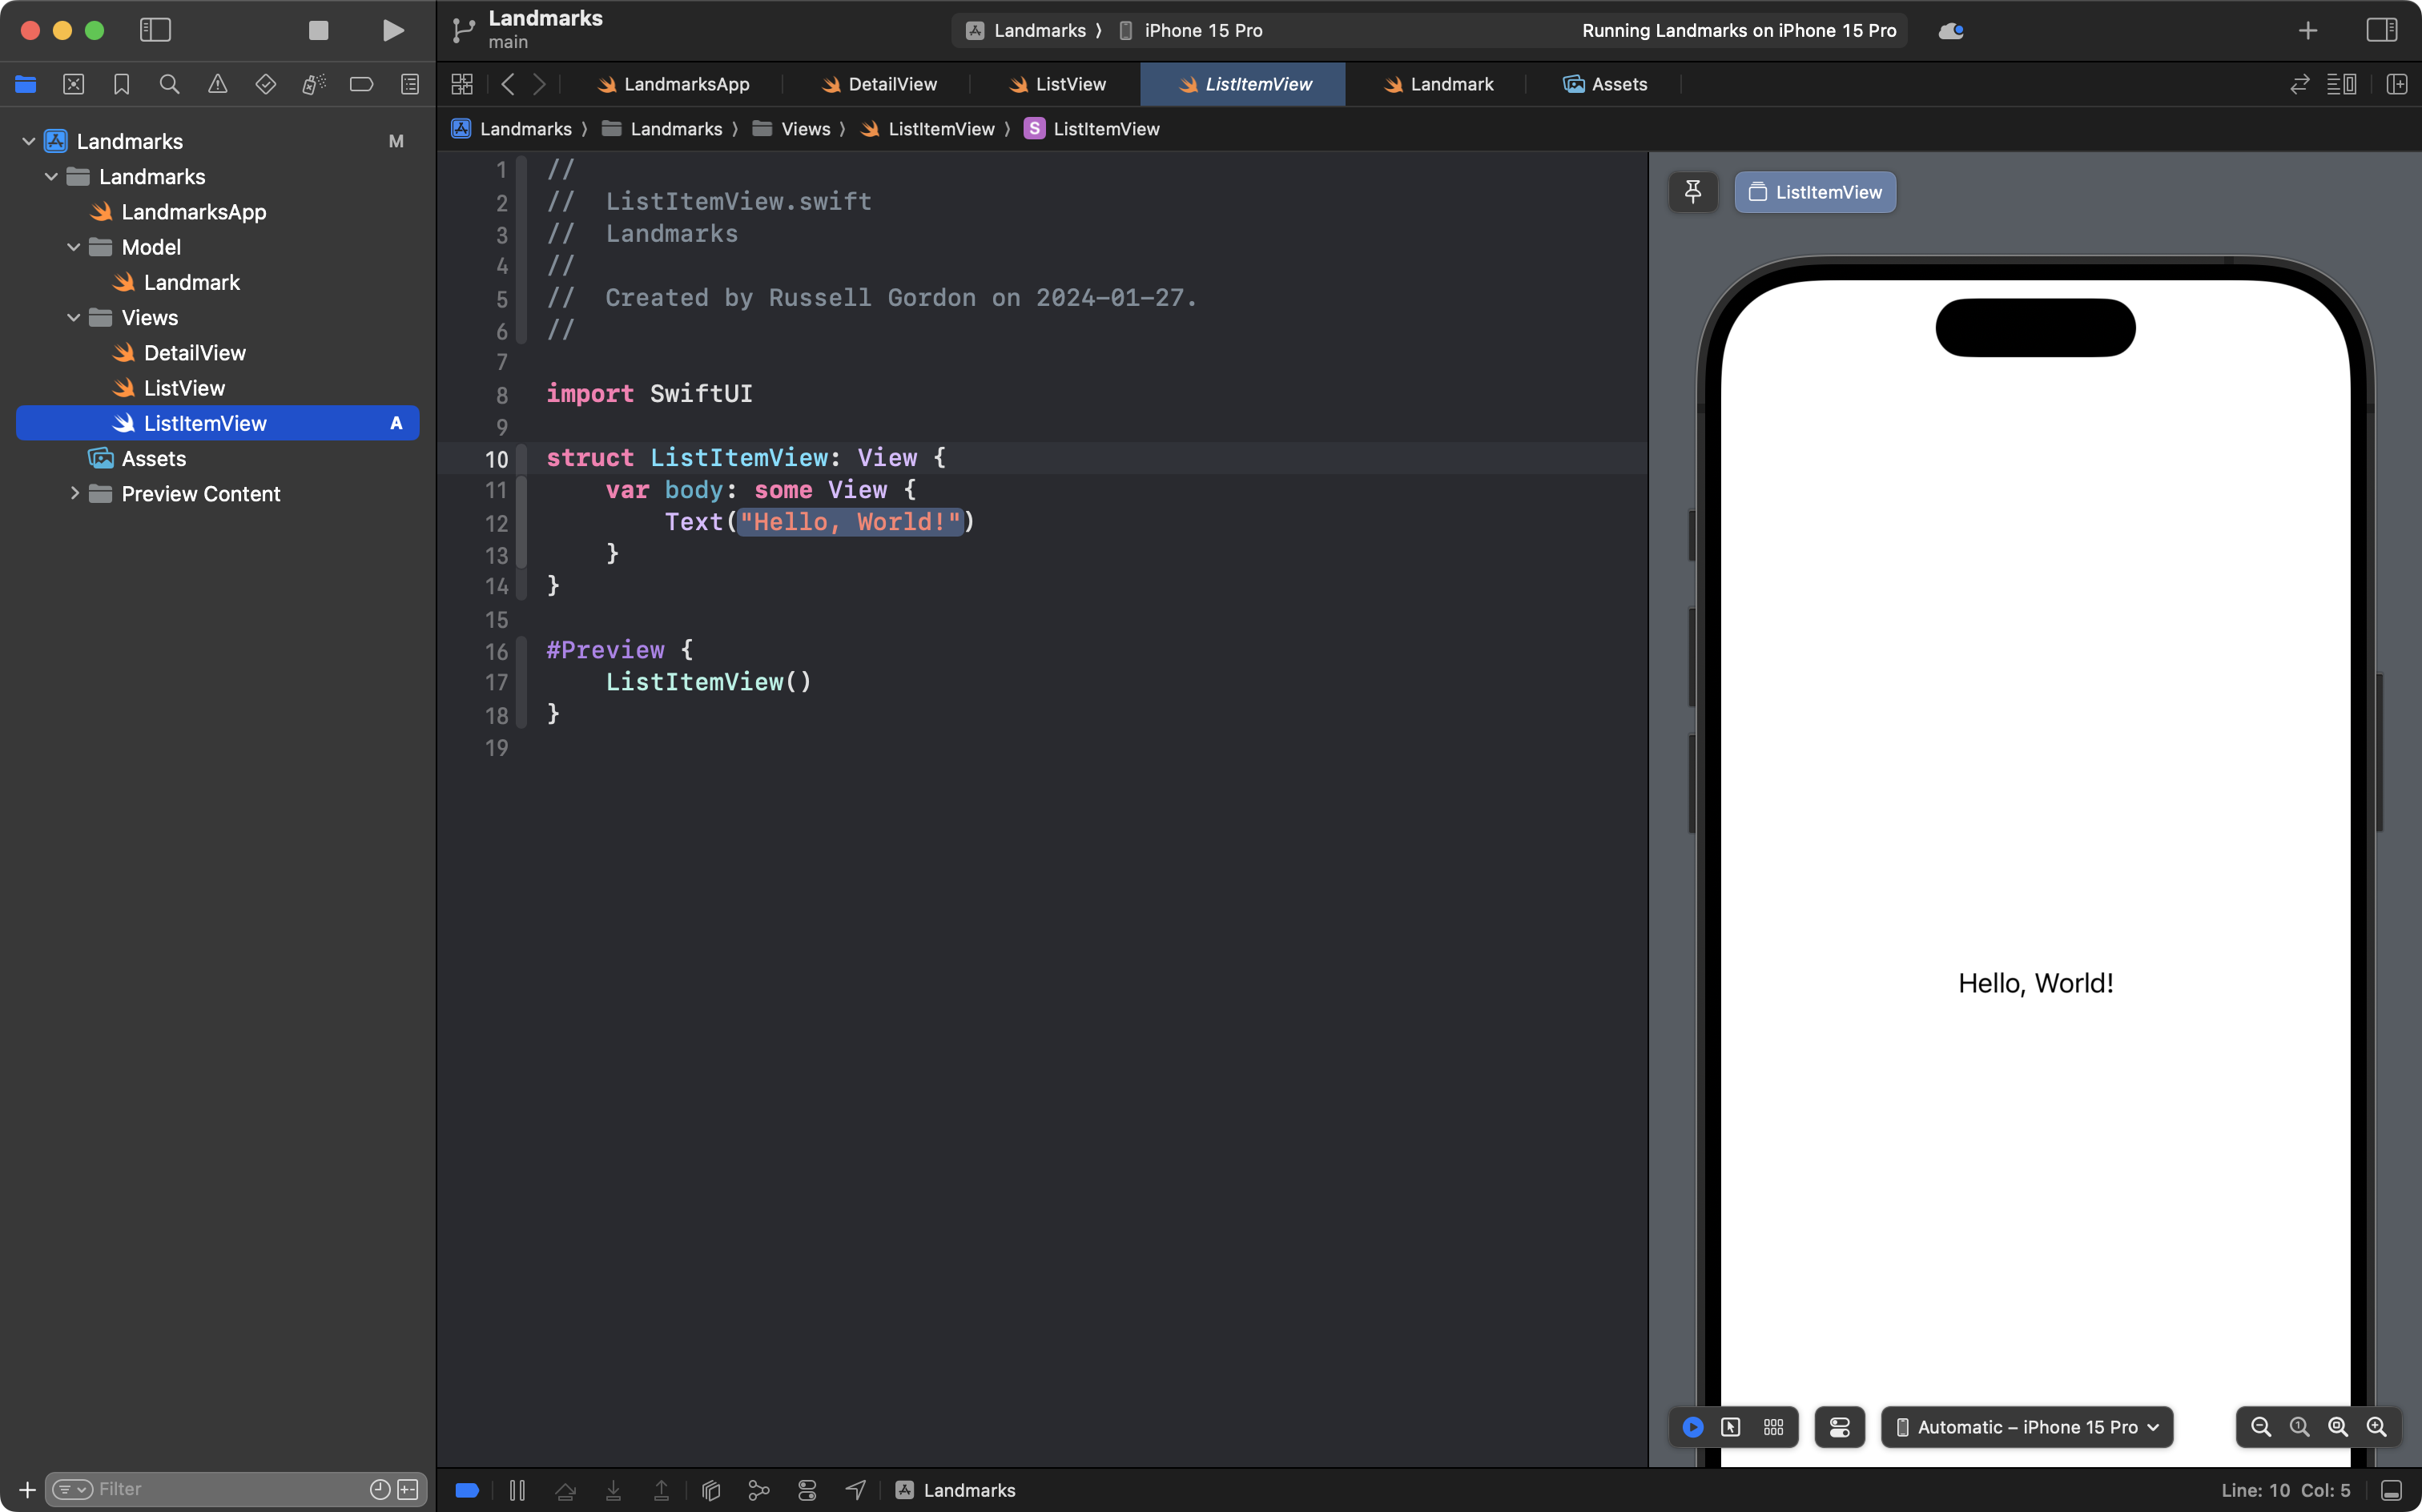
You can copy this code into ListItemView, so the file looks like this:
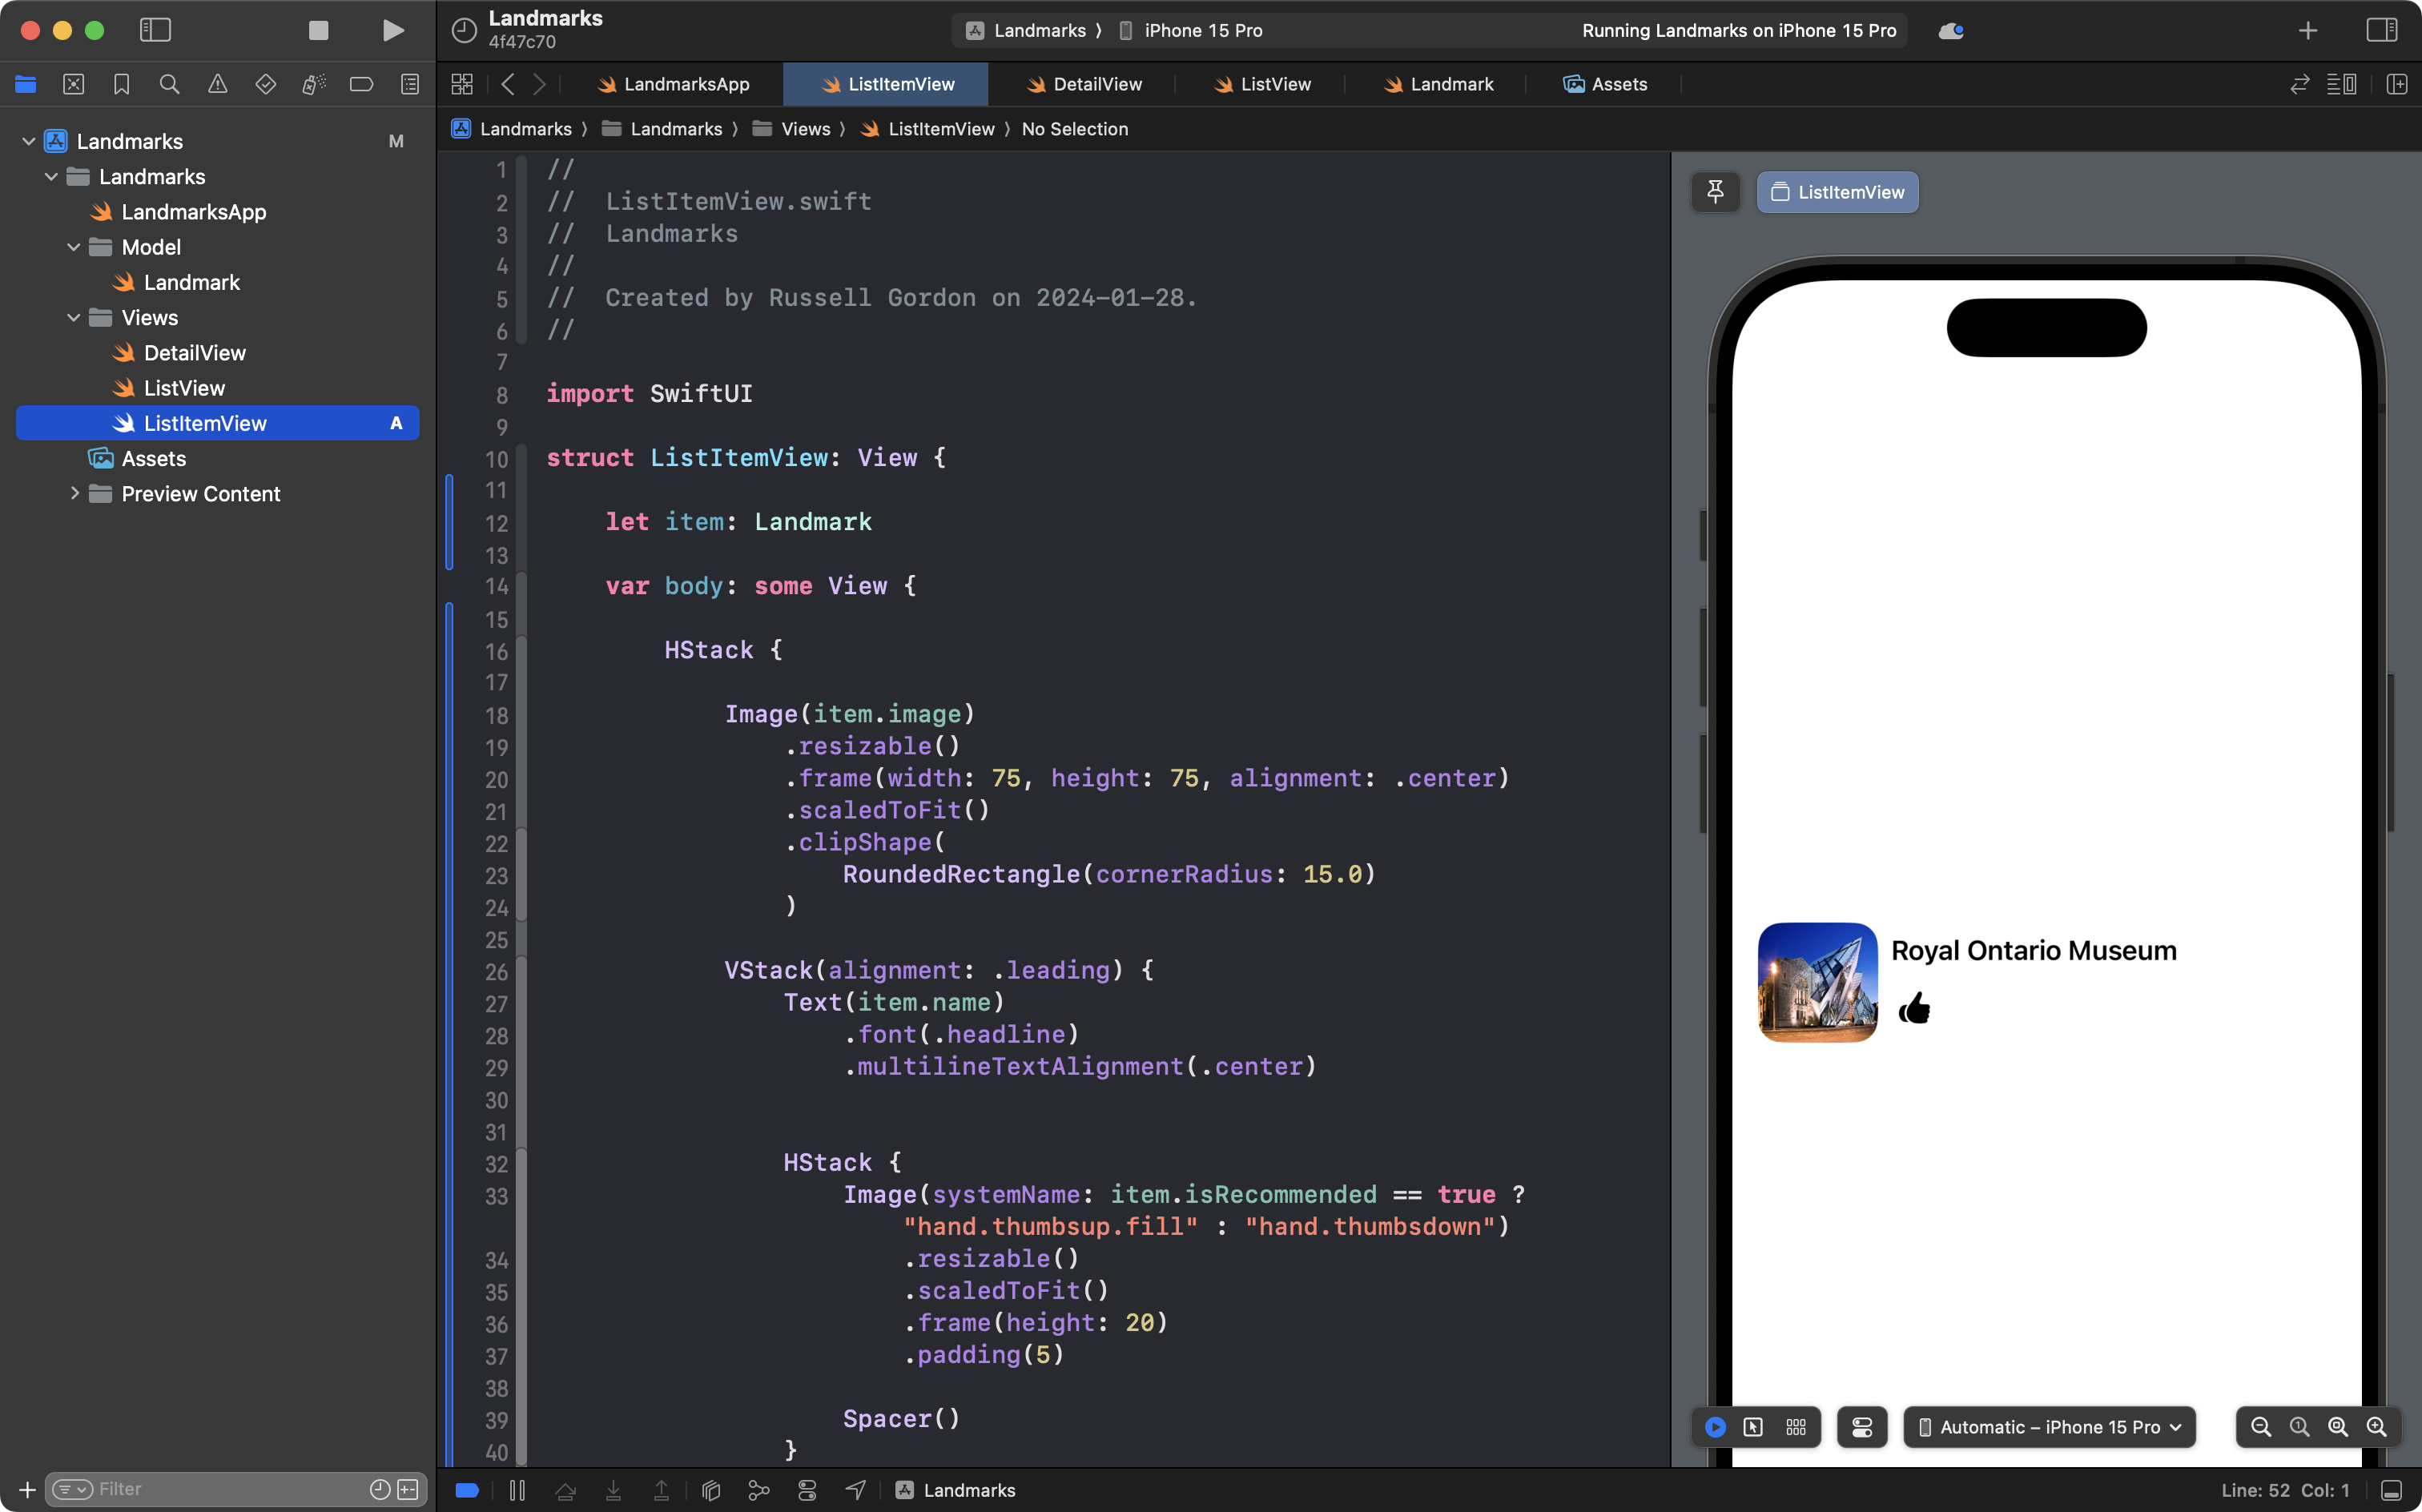
Now we have a nicer way to see the name, image, and recommendation status of a landmark.
IMPORTANT
Note how
ListItemViewaccepts an instance ofLandmarkon line 12.We then make use of that instance’s properties on lines 18, 27, and 33.
This is abstraction in action!
Use the list item view
Let’s make use of this new structure by making one edit to ListView.
Replace the code here:
Text(currentLandmark.name)… with this instead:
ListItemView(item: currentLandmark)… like this:
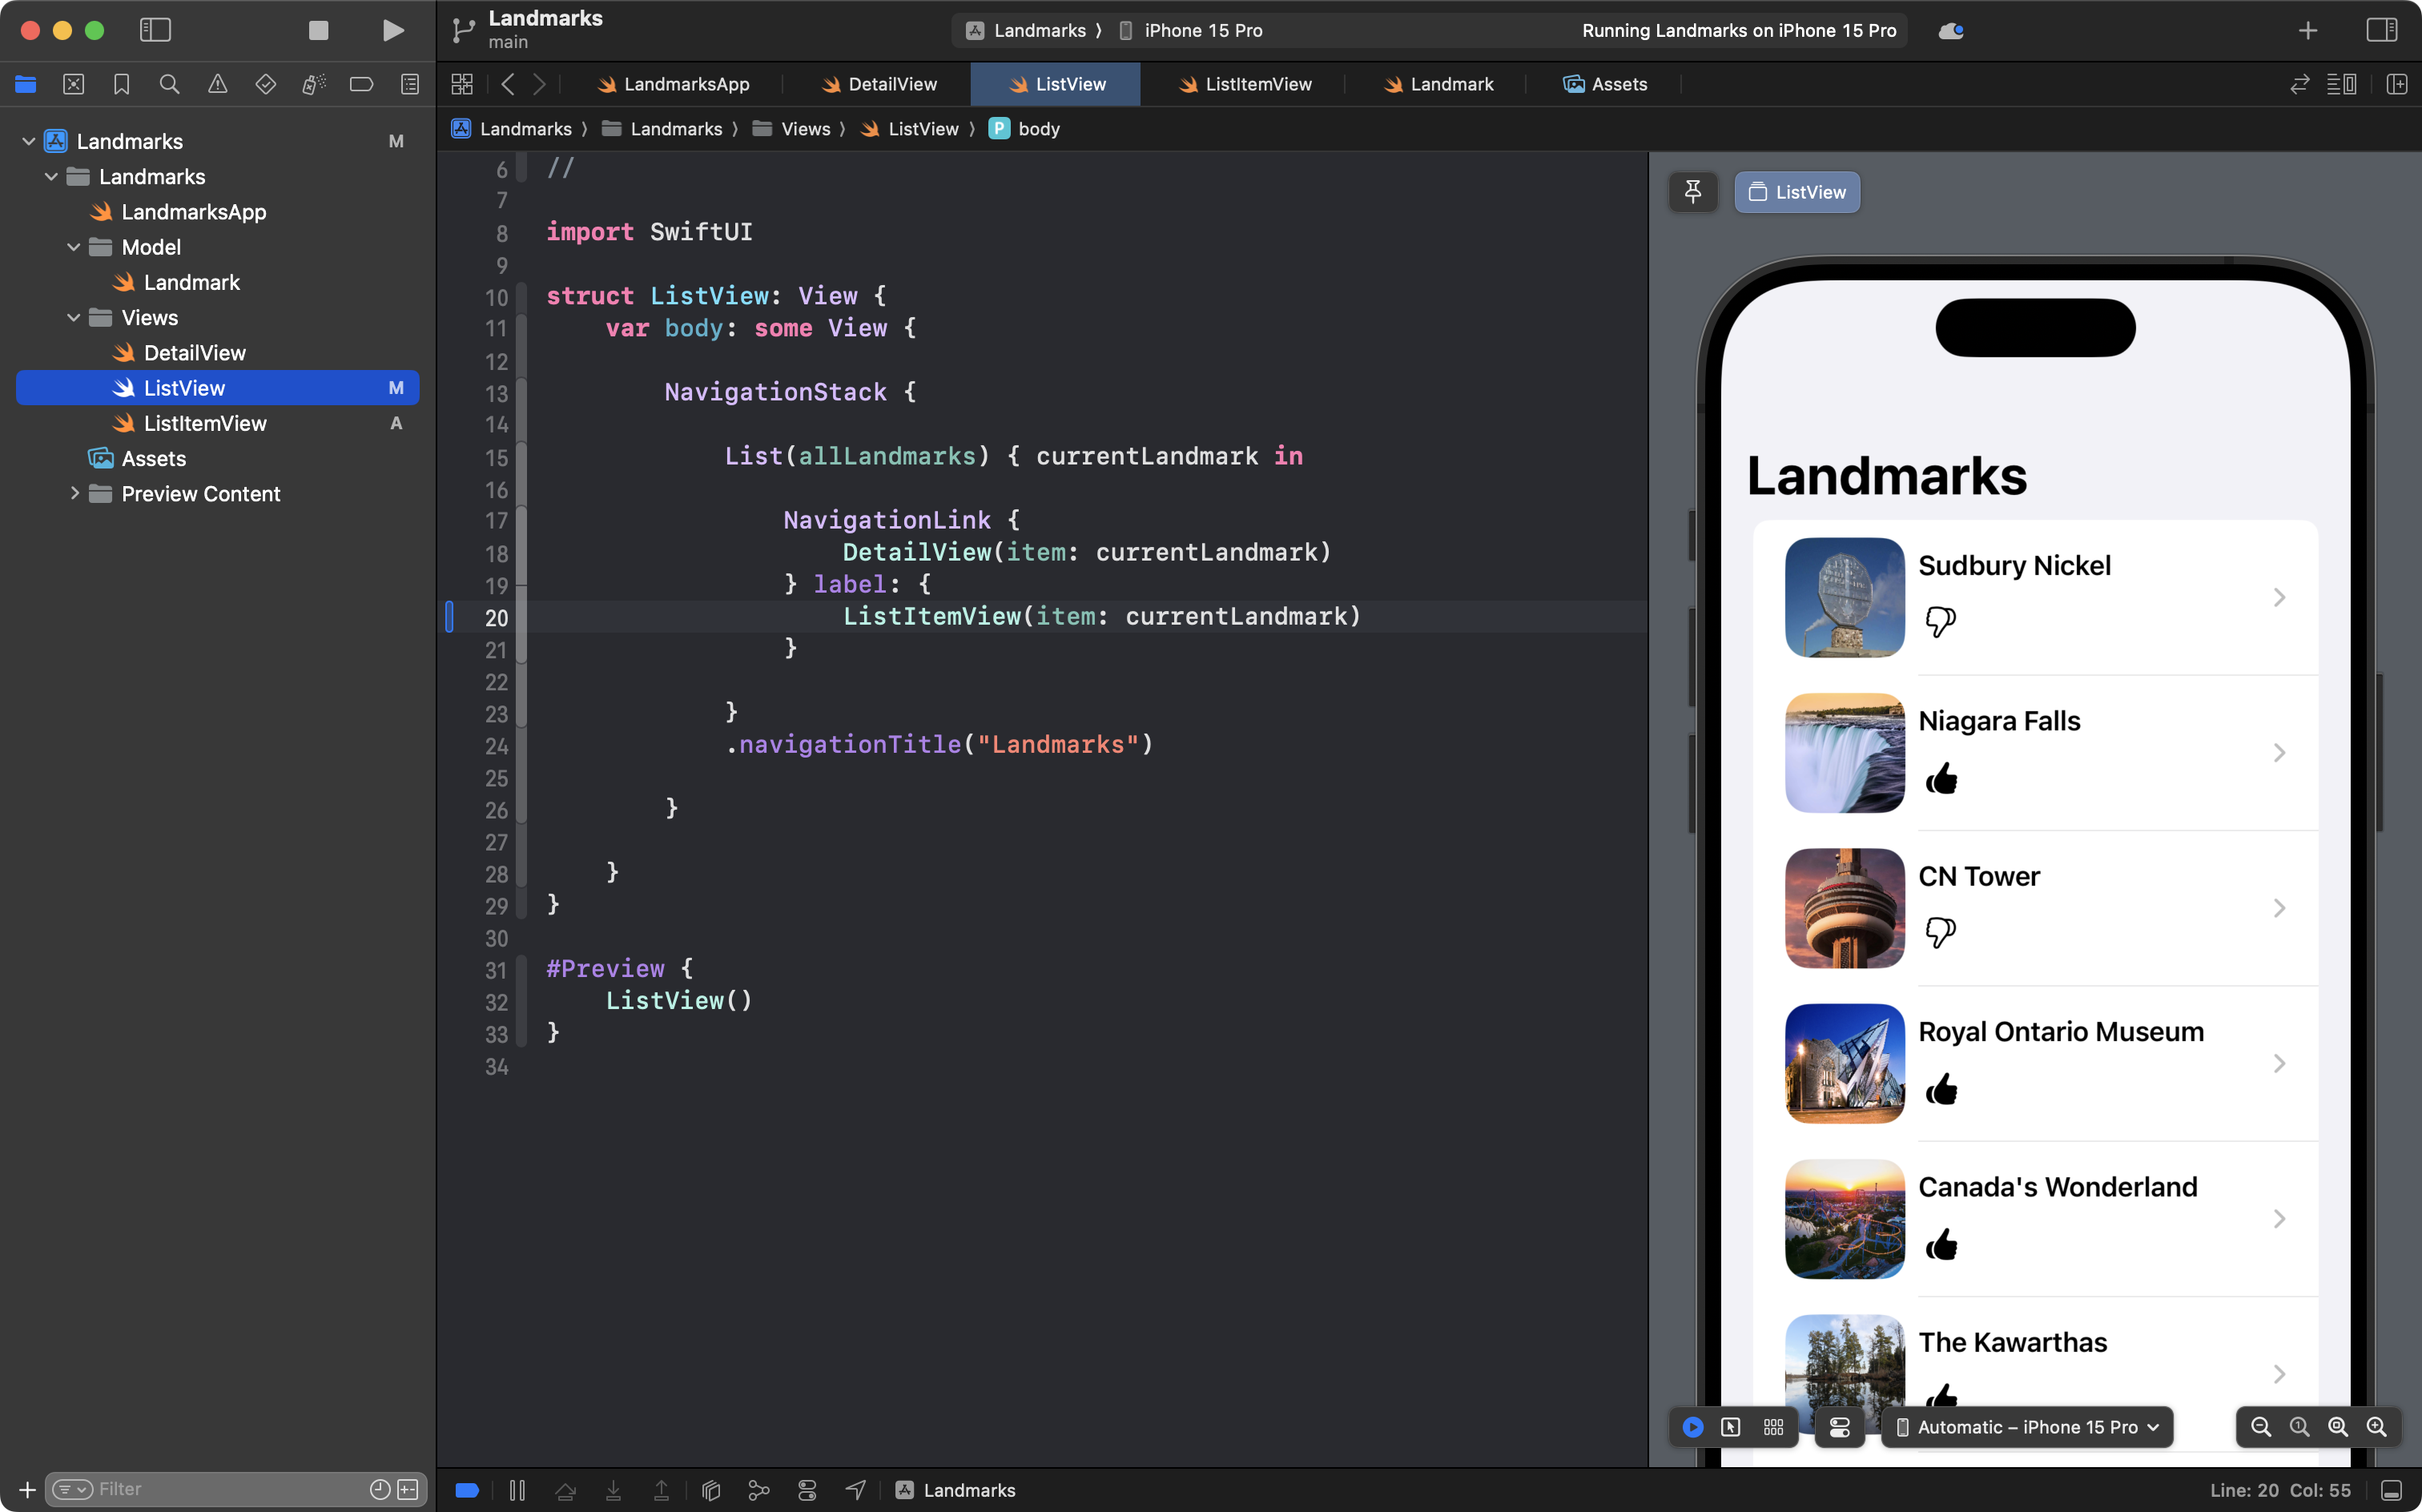
This is a big improvement, so please commit and push your work with this message:
Made the scrollable list look nicer and display more information by using a helper view.
Improving the landing view
Generally speaking, the view that is presented when an app first opens can be referred to as the landing view.
Our new scrollable list that serves as our landing view is nice, but it could be better.
If you cast a critical eye at the interface:

… notice how much empty space there is in each list item view.
On a device like a phone, with a small screen, this is a lost opportunity to display more information.
Let’s make a better landing view for our app now, in the form of a scrollable gallery.
This gallery will take the form of a grid that can be scrolled and navigated from.
Add another helper view
Add a new SwiftUI View file to the Views group named GalleryItemView:
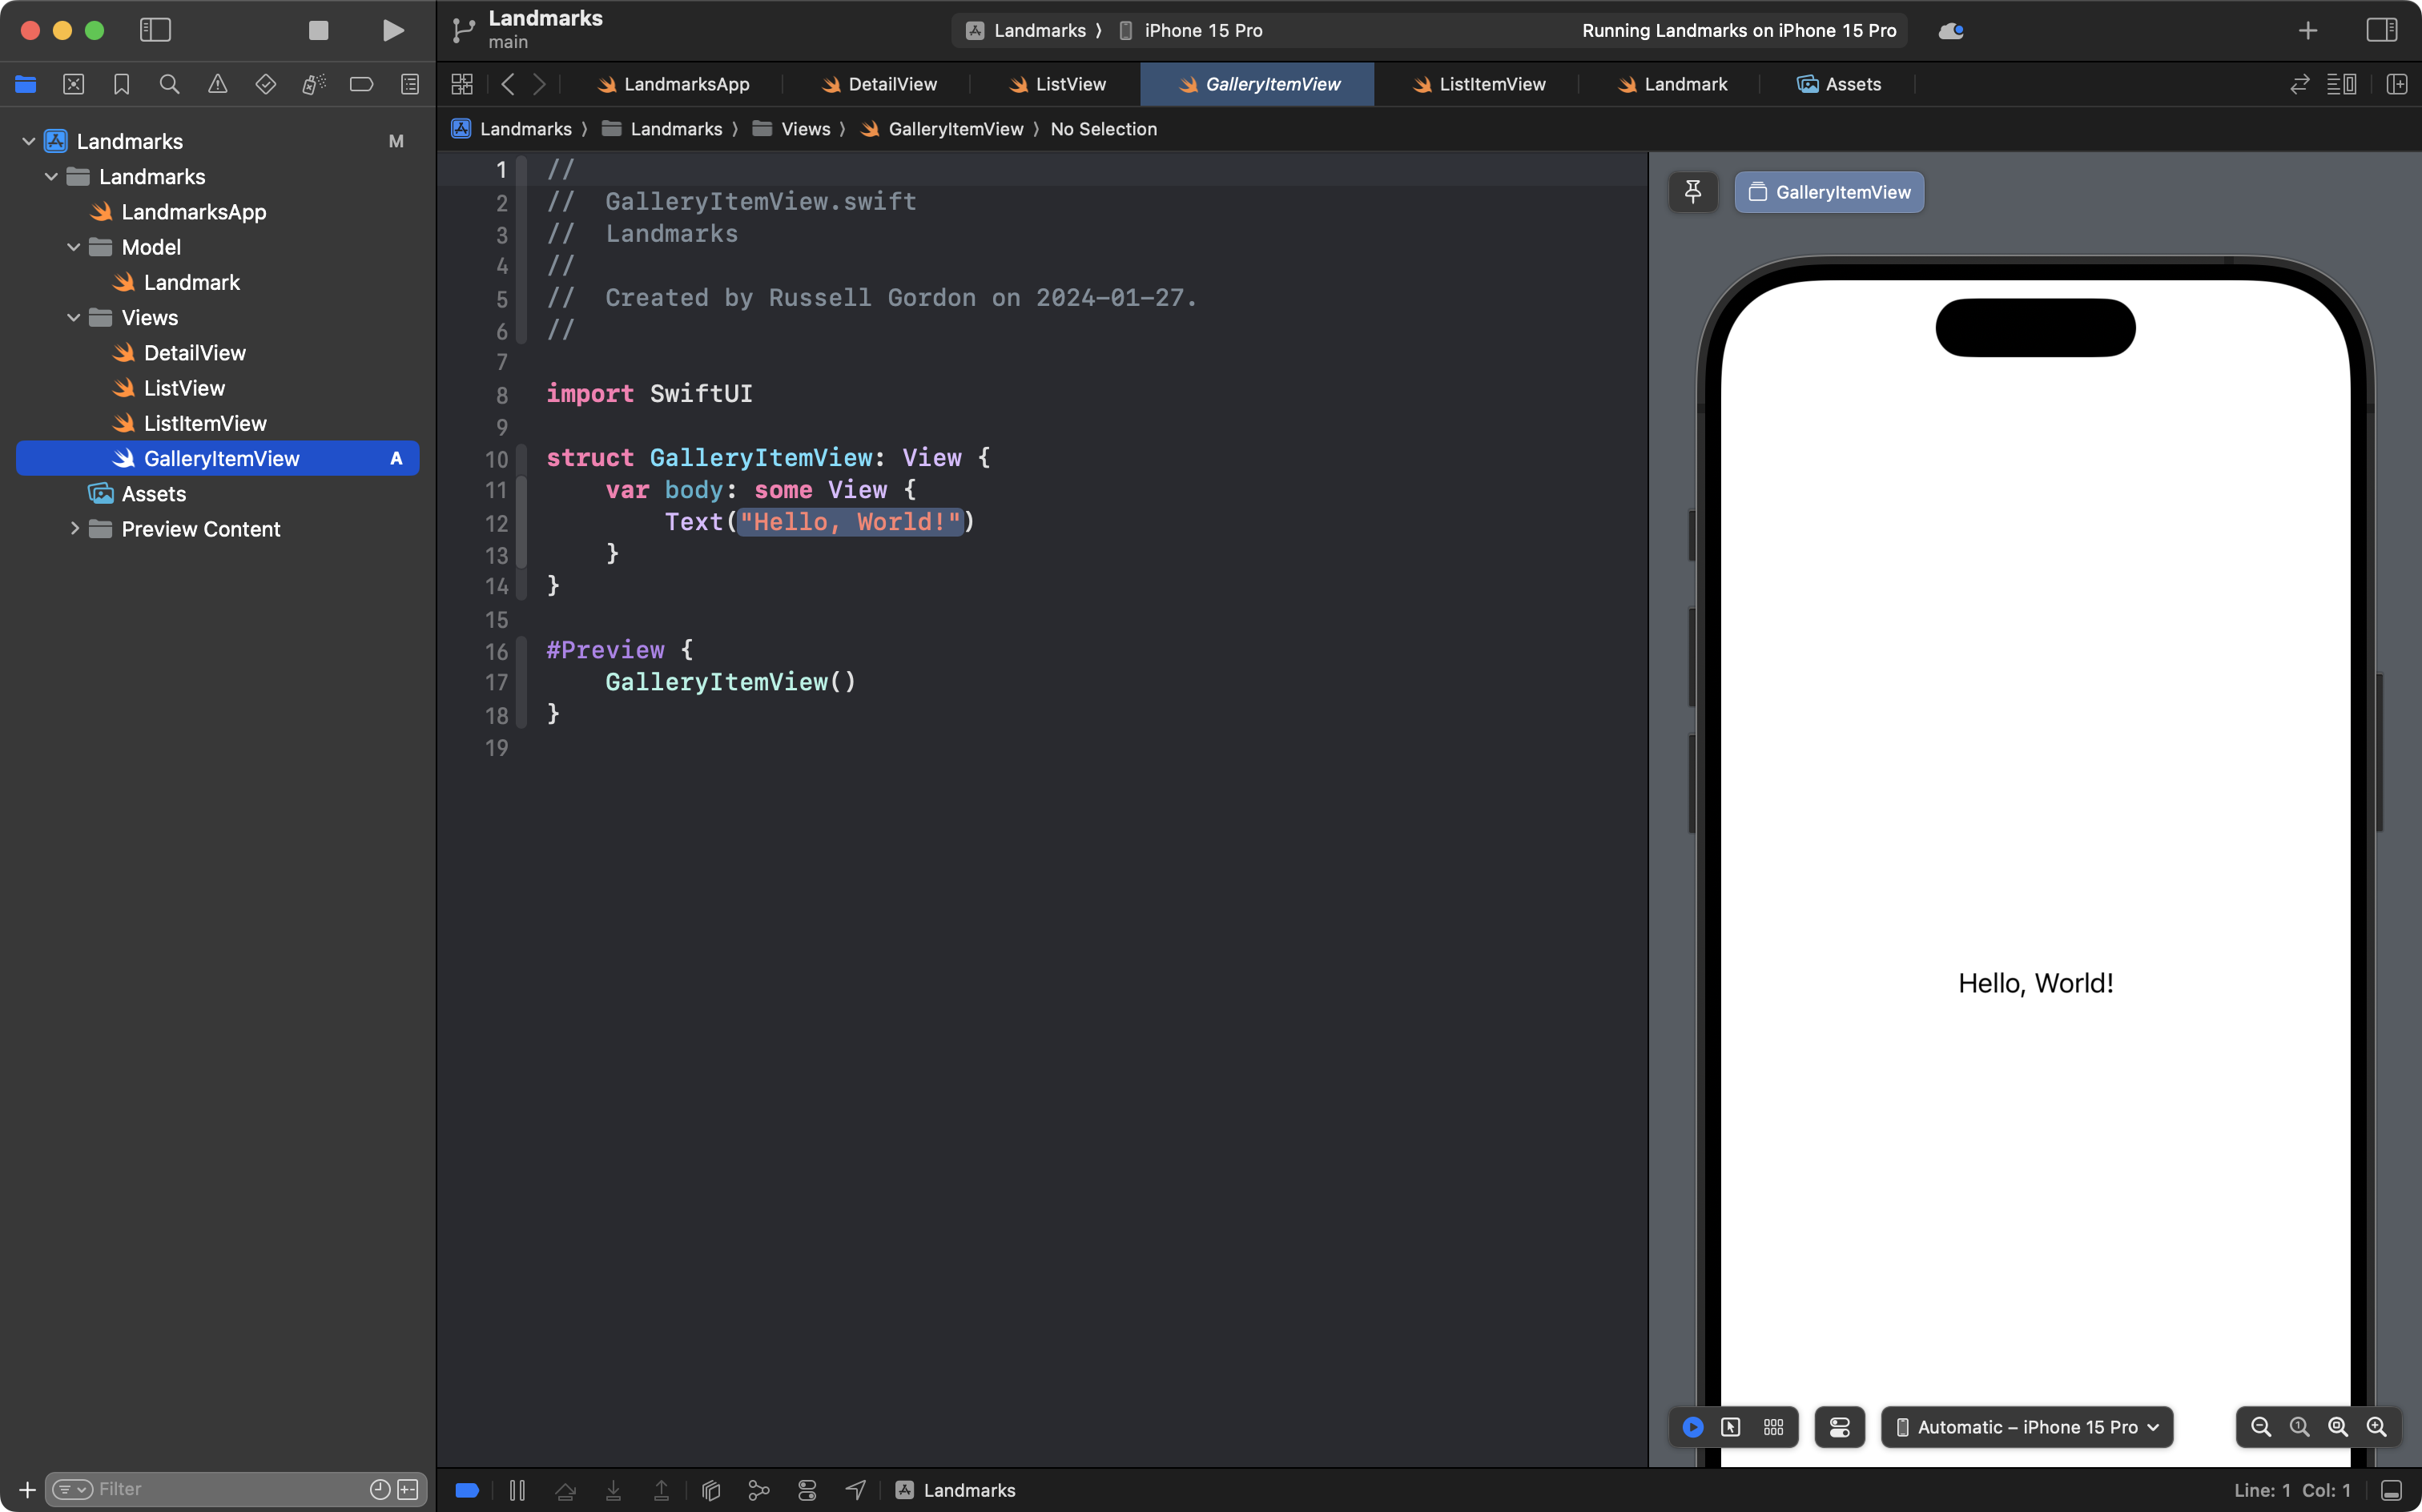
Then copy this code into the new file, so it looks like this:

The layout of this new helper view is not especially interesting – just several items arranged in VStack.
The code for the preview is worth a bit of discussion:
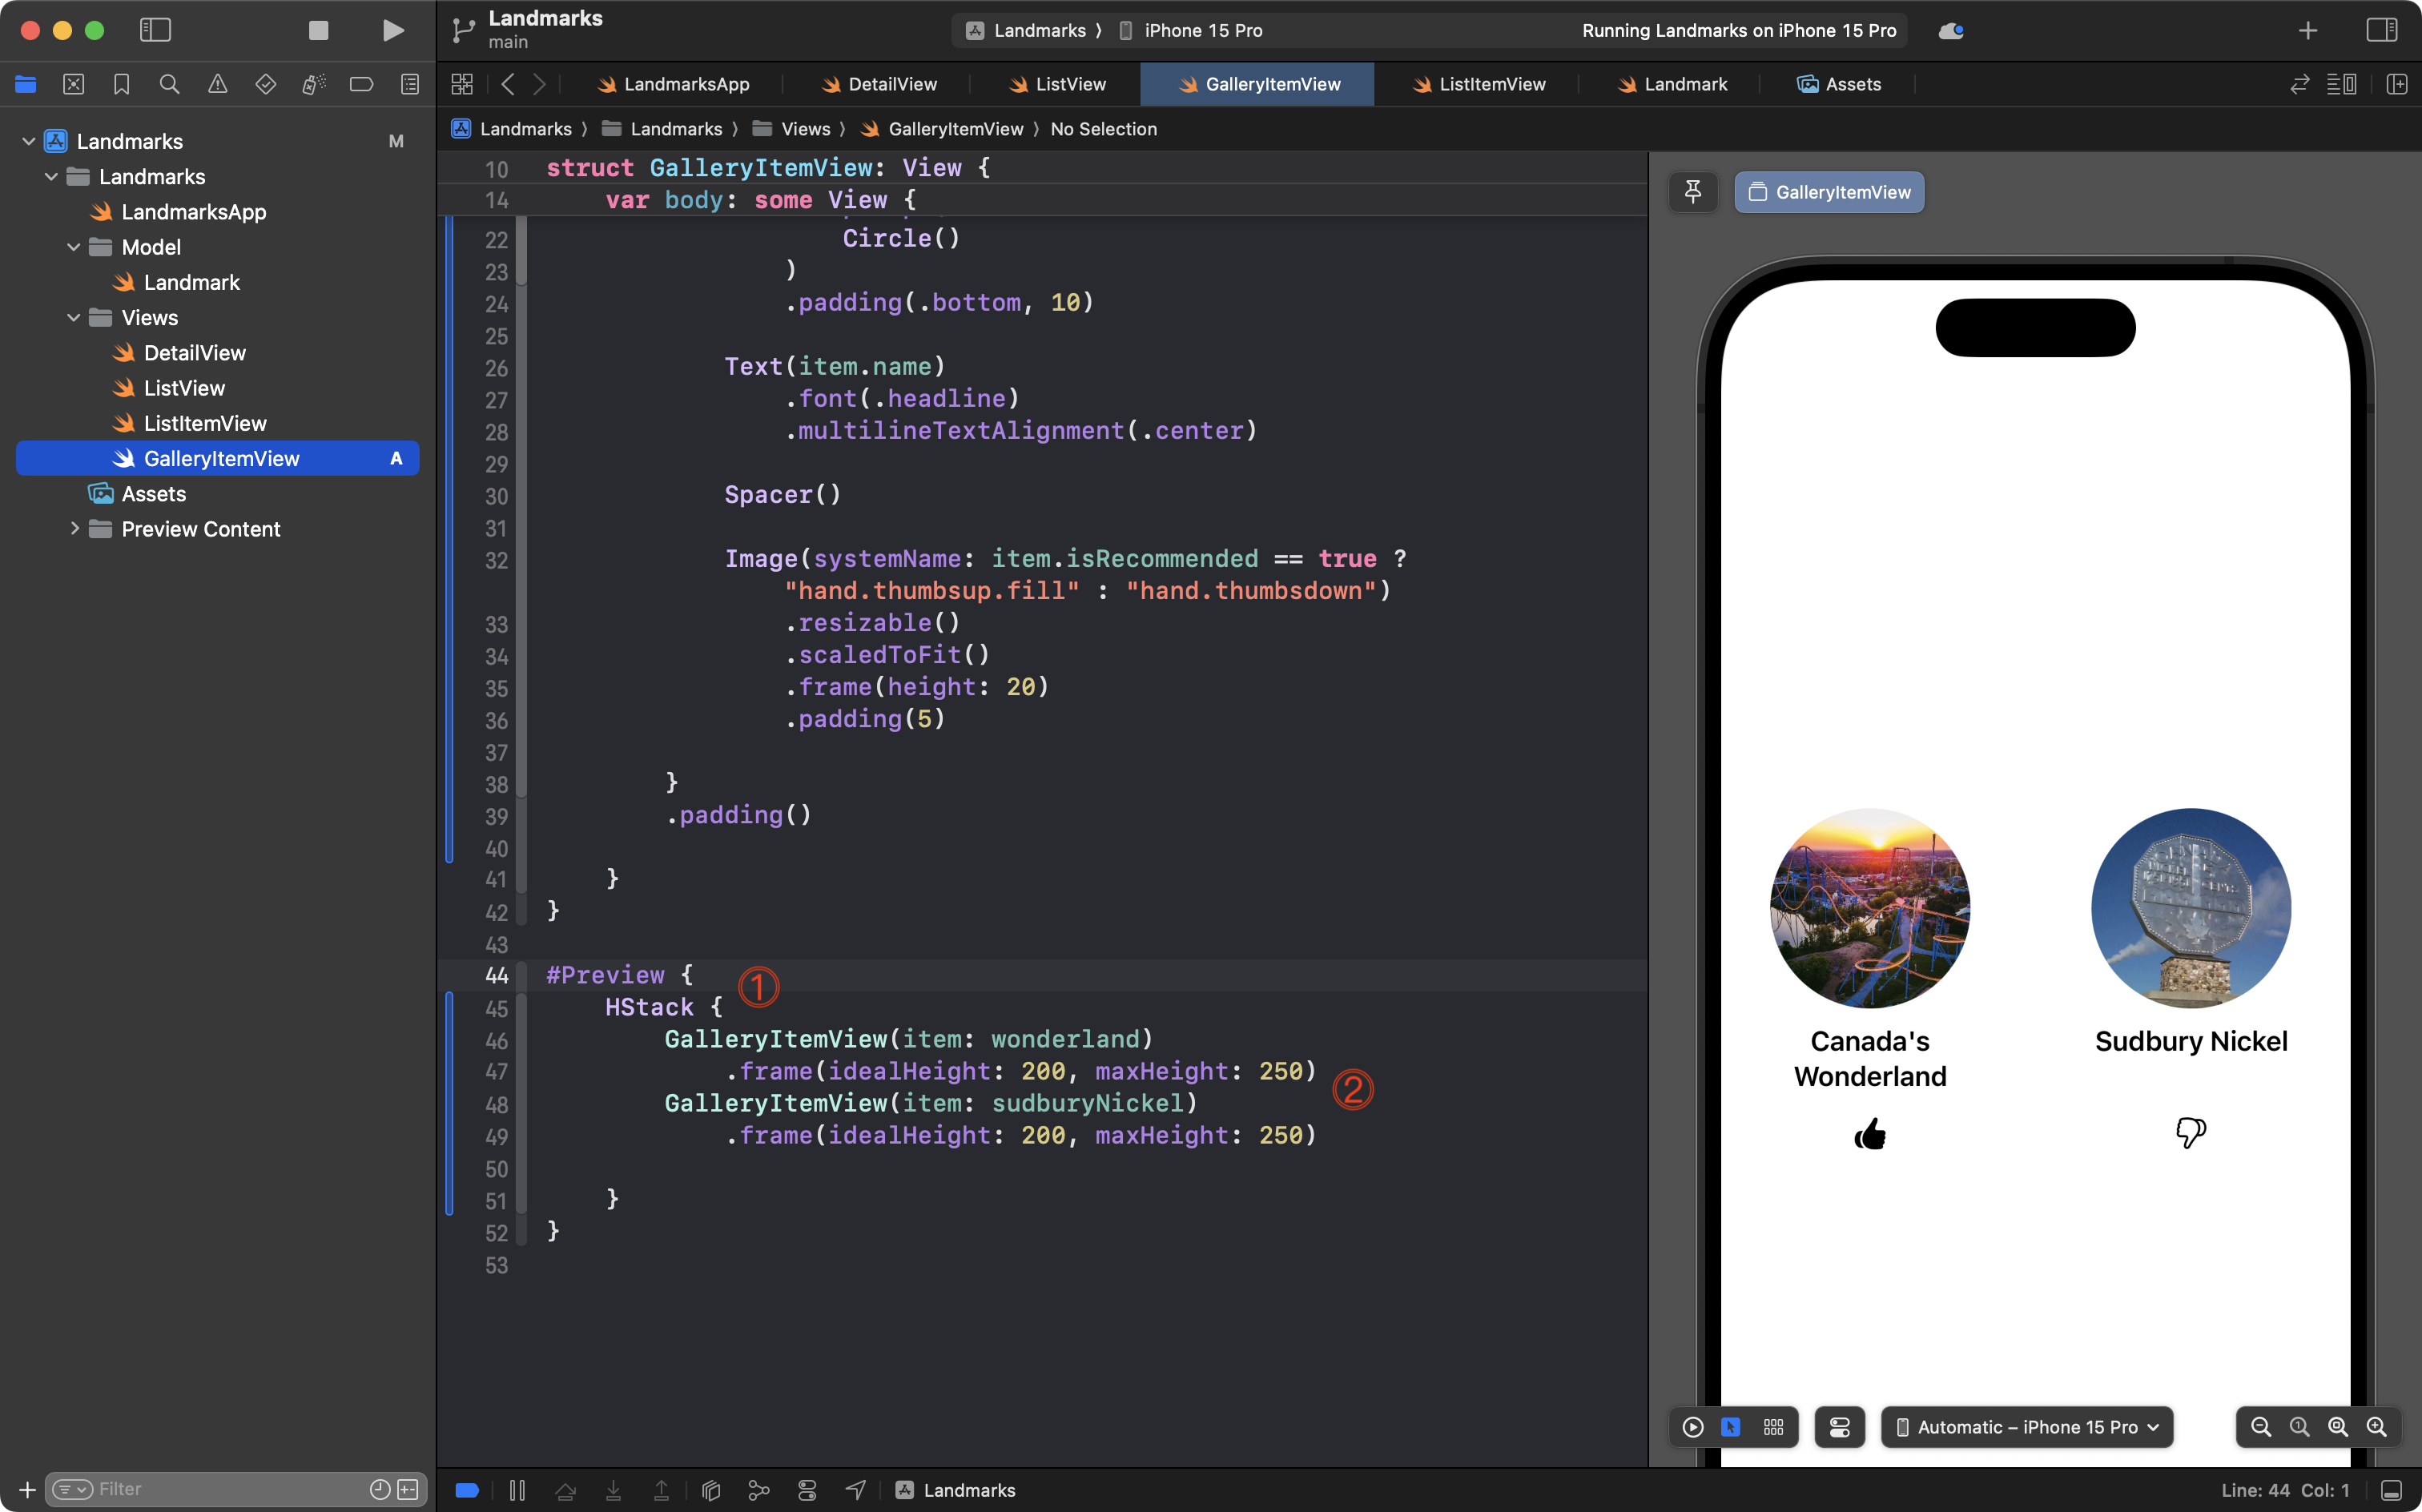
Examining that code:
- We create two instances of
GalleryItemViewinside anHStackso we can get a better sense of how this helper view will look inside of a grid (which is what we are going to create next). - We use a
.framemodifier to limit the vertical height of eachGalleryItemView, again, to better simulate the space they will have inside a grid.
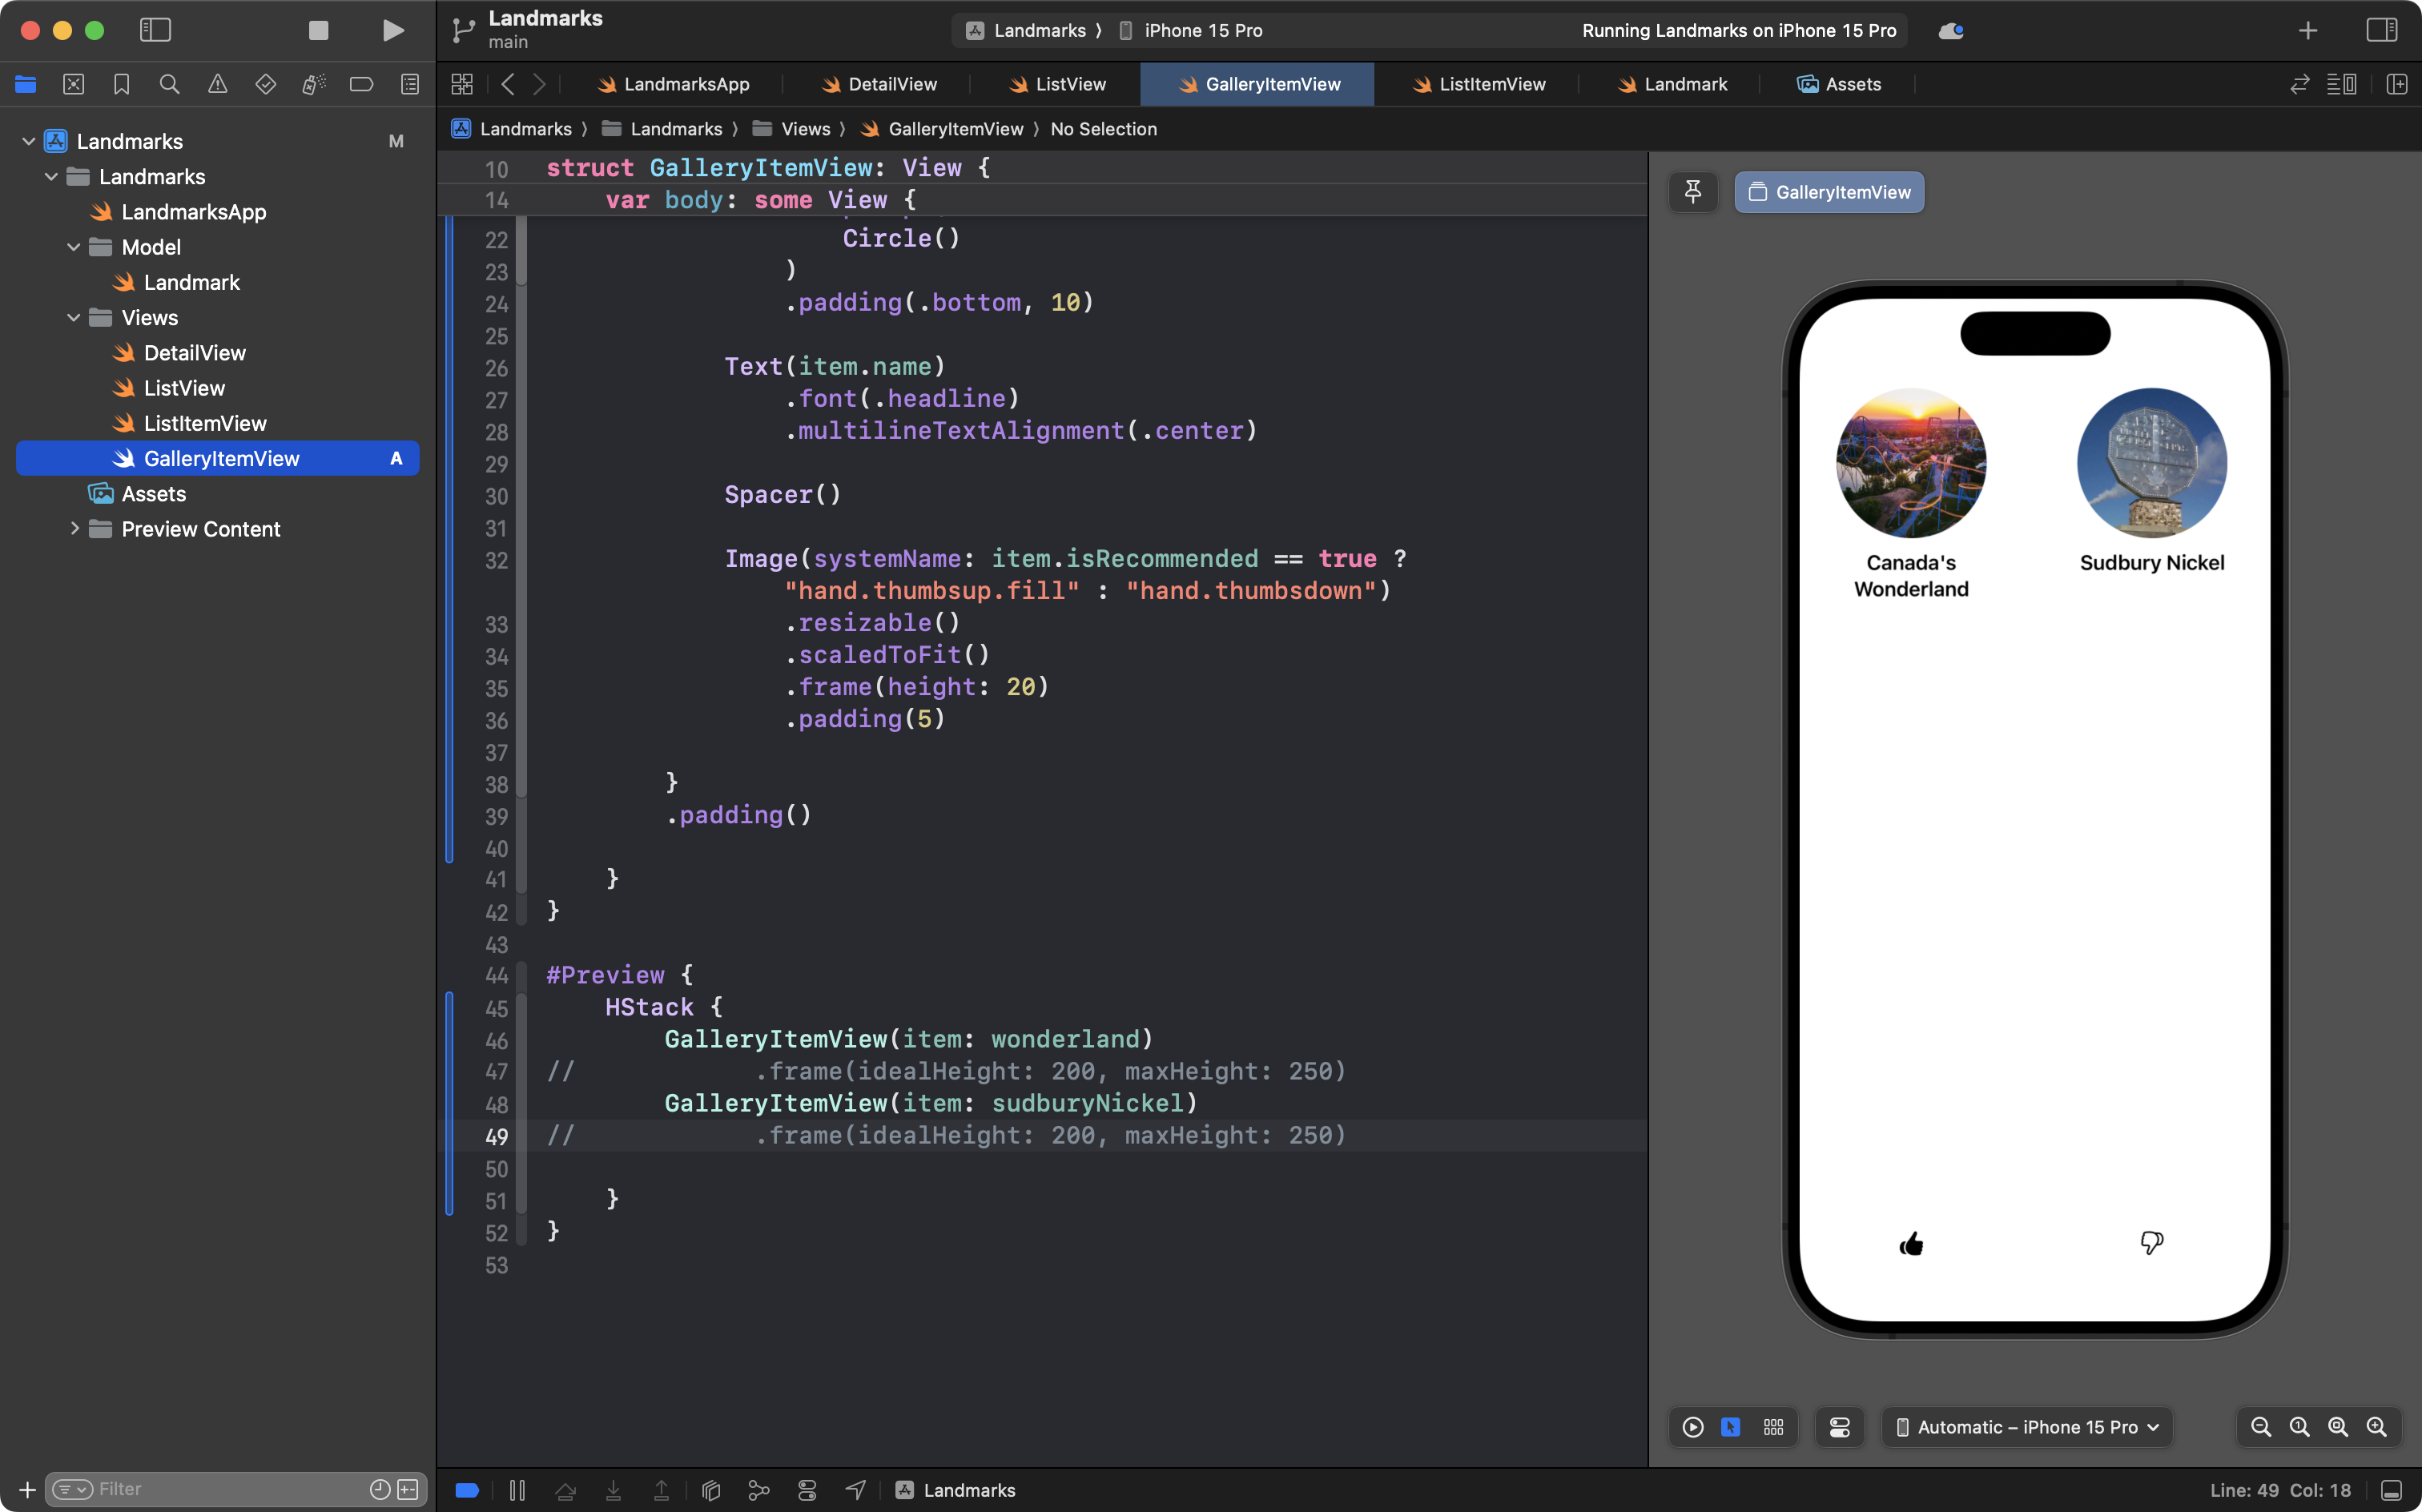
Try commenting out the .frame modifiers. You will see the preview then looks a bit strange, with a large gap:
That is because of the Spacer view on line 30. That Spacer exists to align the thumbs up/down images.
Try commenting out the Spacer as well:
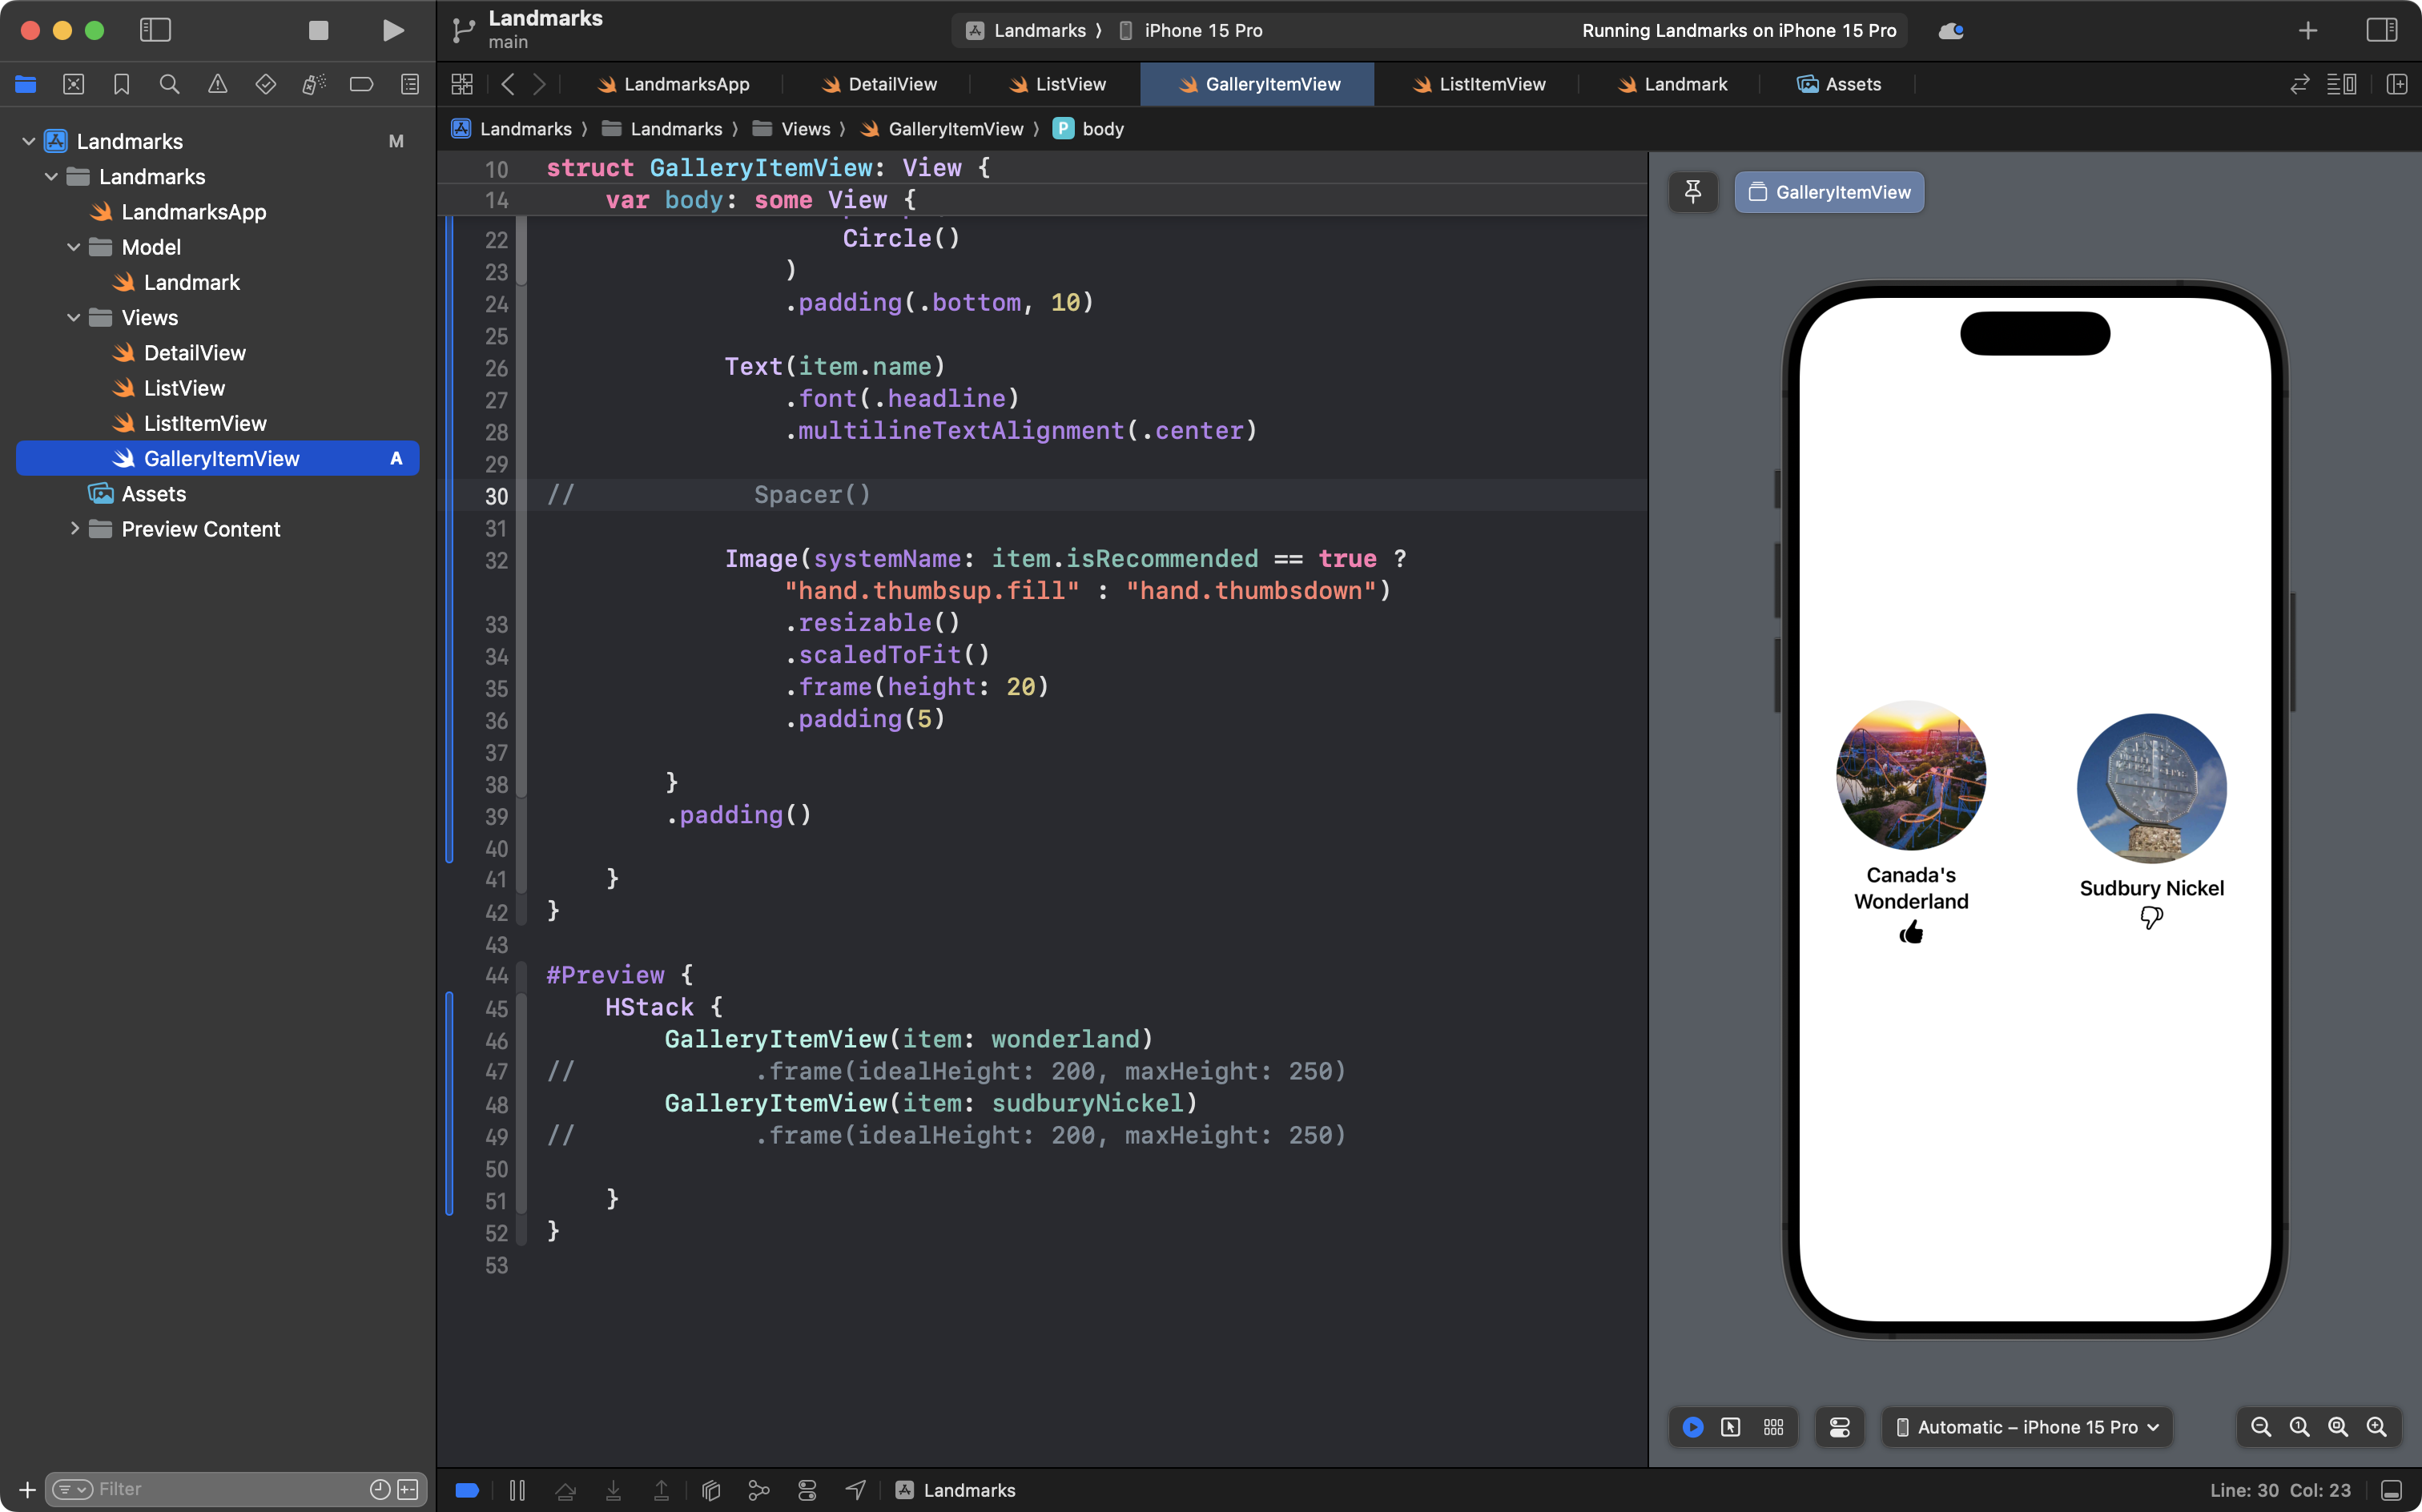
Notice how the items are misaligned.
Remove the comments from the .frame modifiers and the Spacer again:
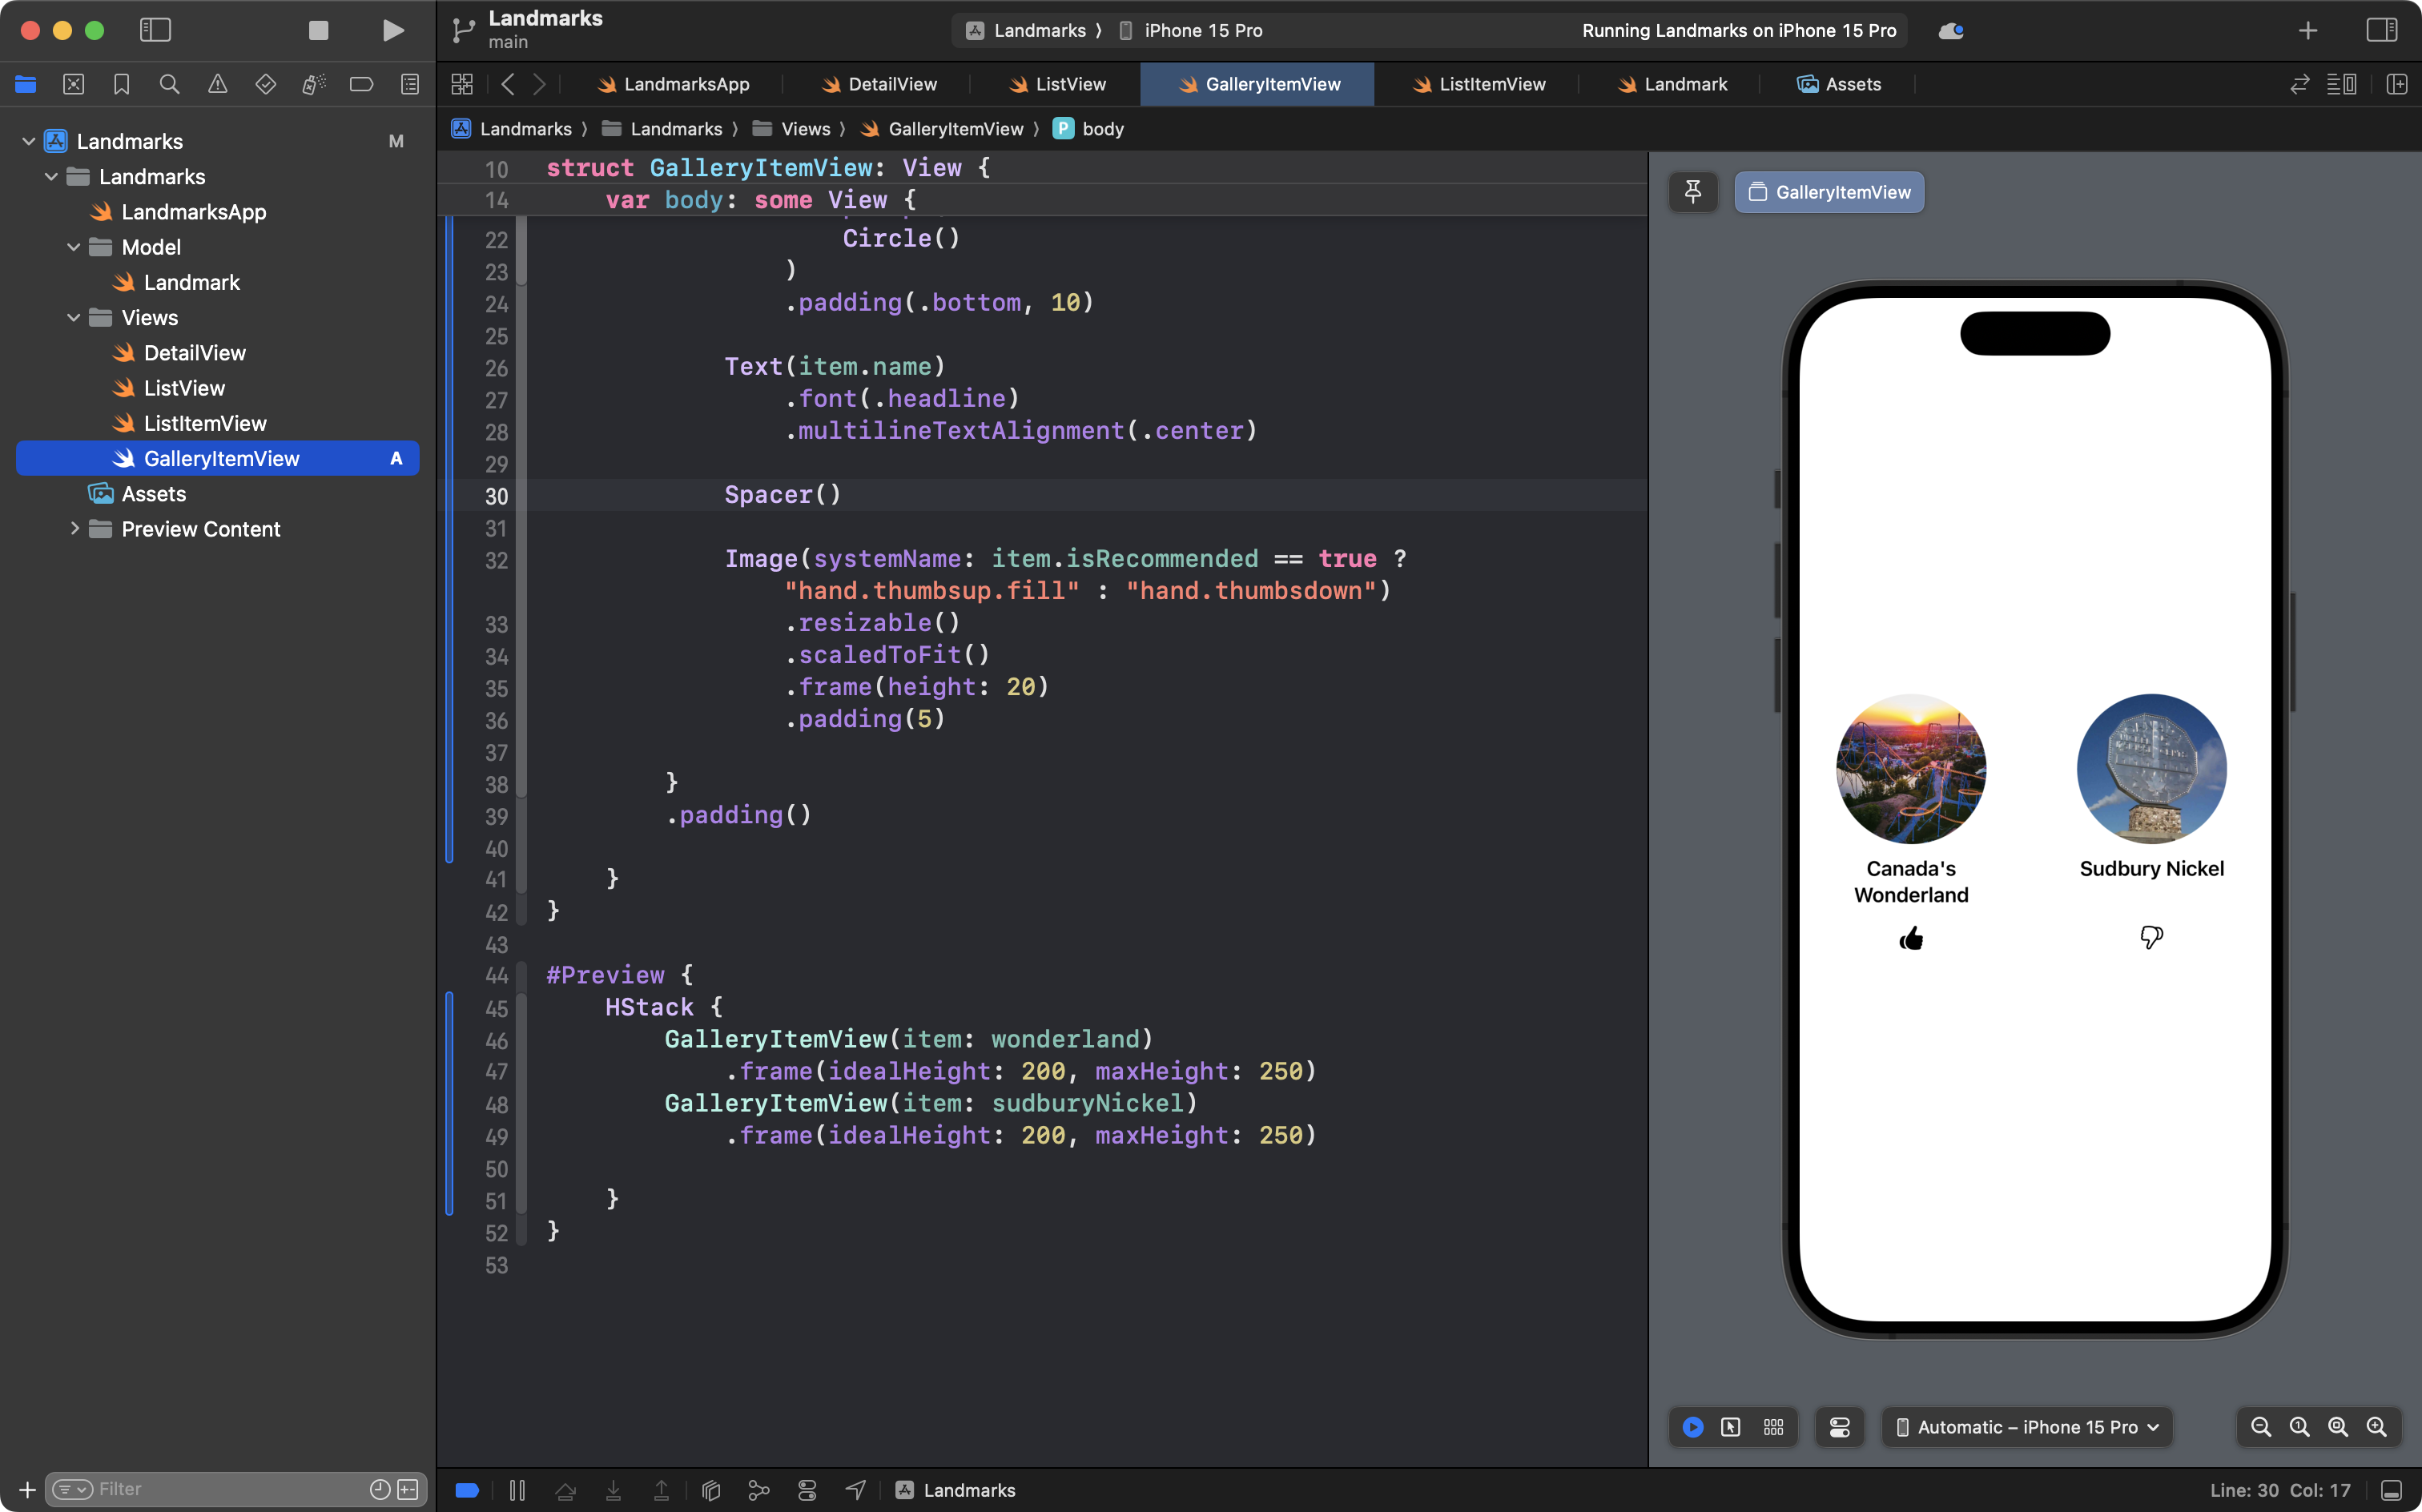
This is good progress, so please commit and push your work with this message:
Added a gallery item view to use later inside a scrolling grid.
Create a scrolling grid
Now, let’s create the scrolling grid, or gallery, of landmarks.
Please add a new SwiftUI View file named GalleryView to the Views group, like this:
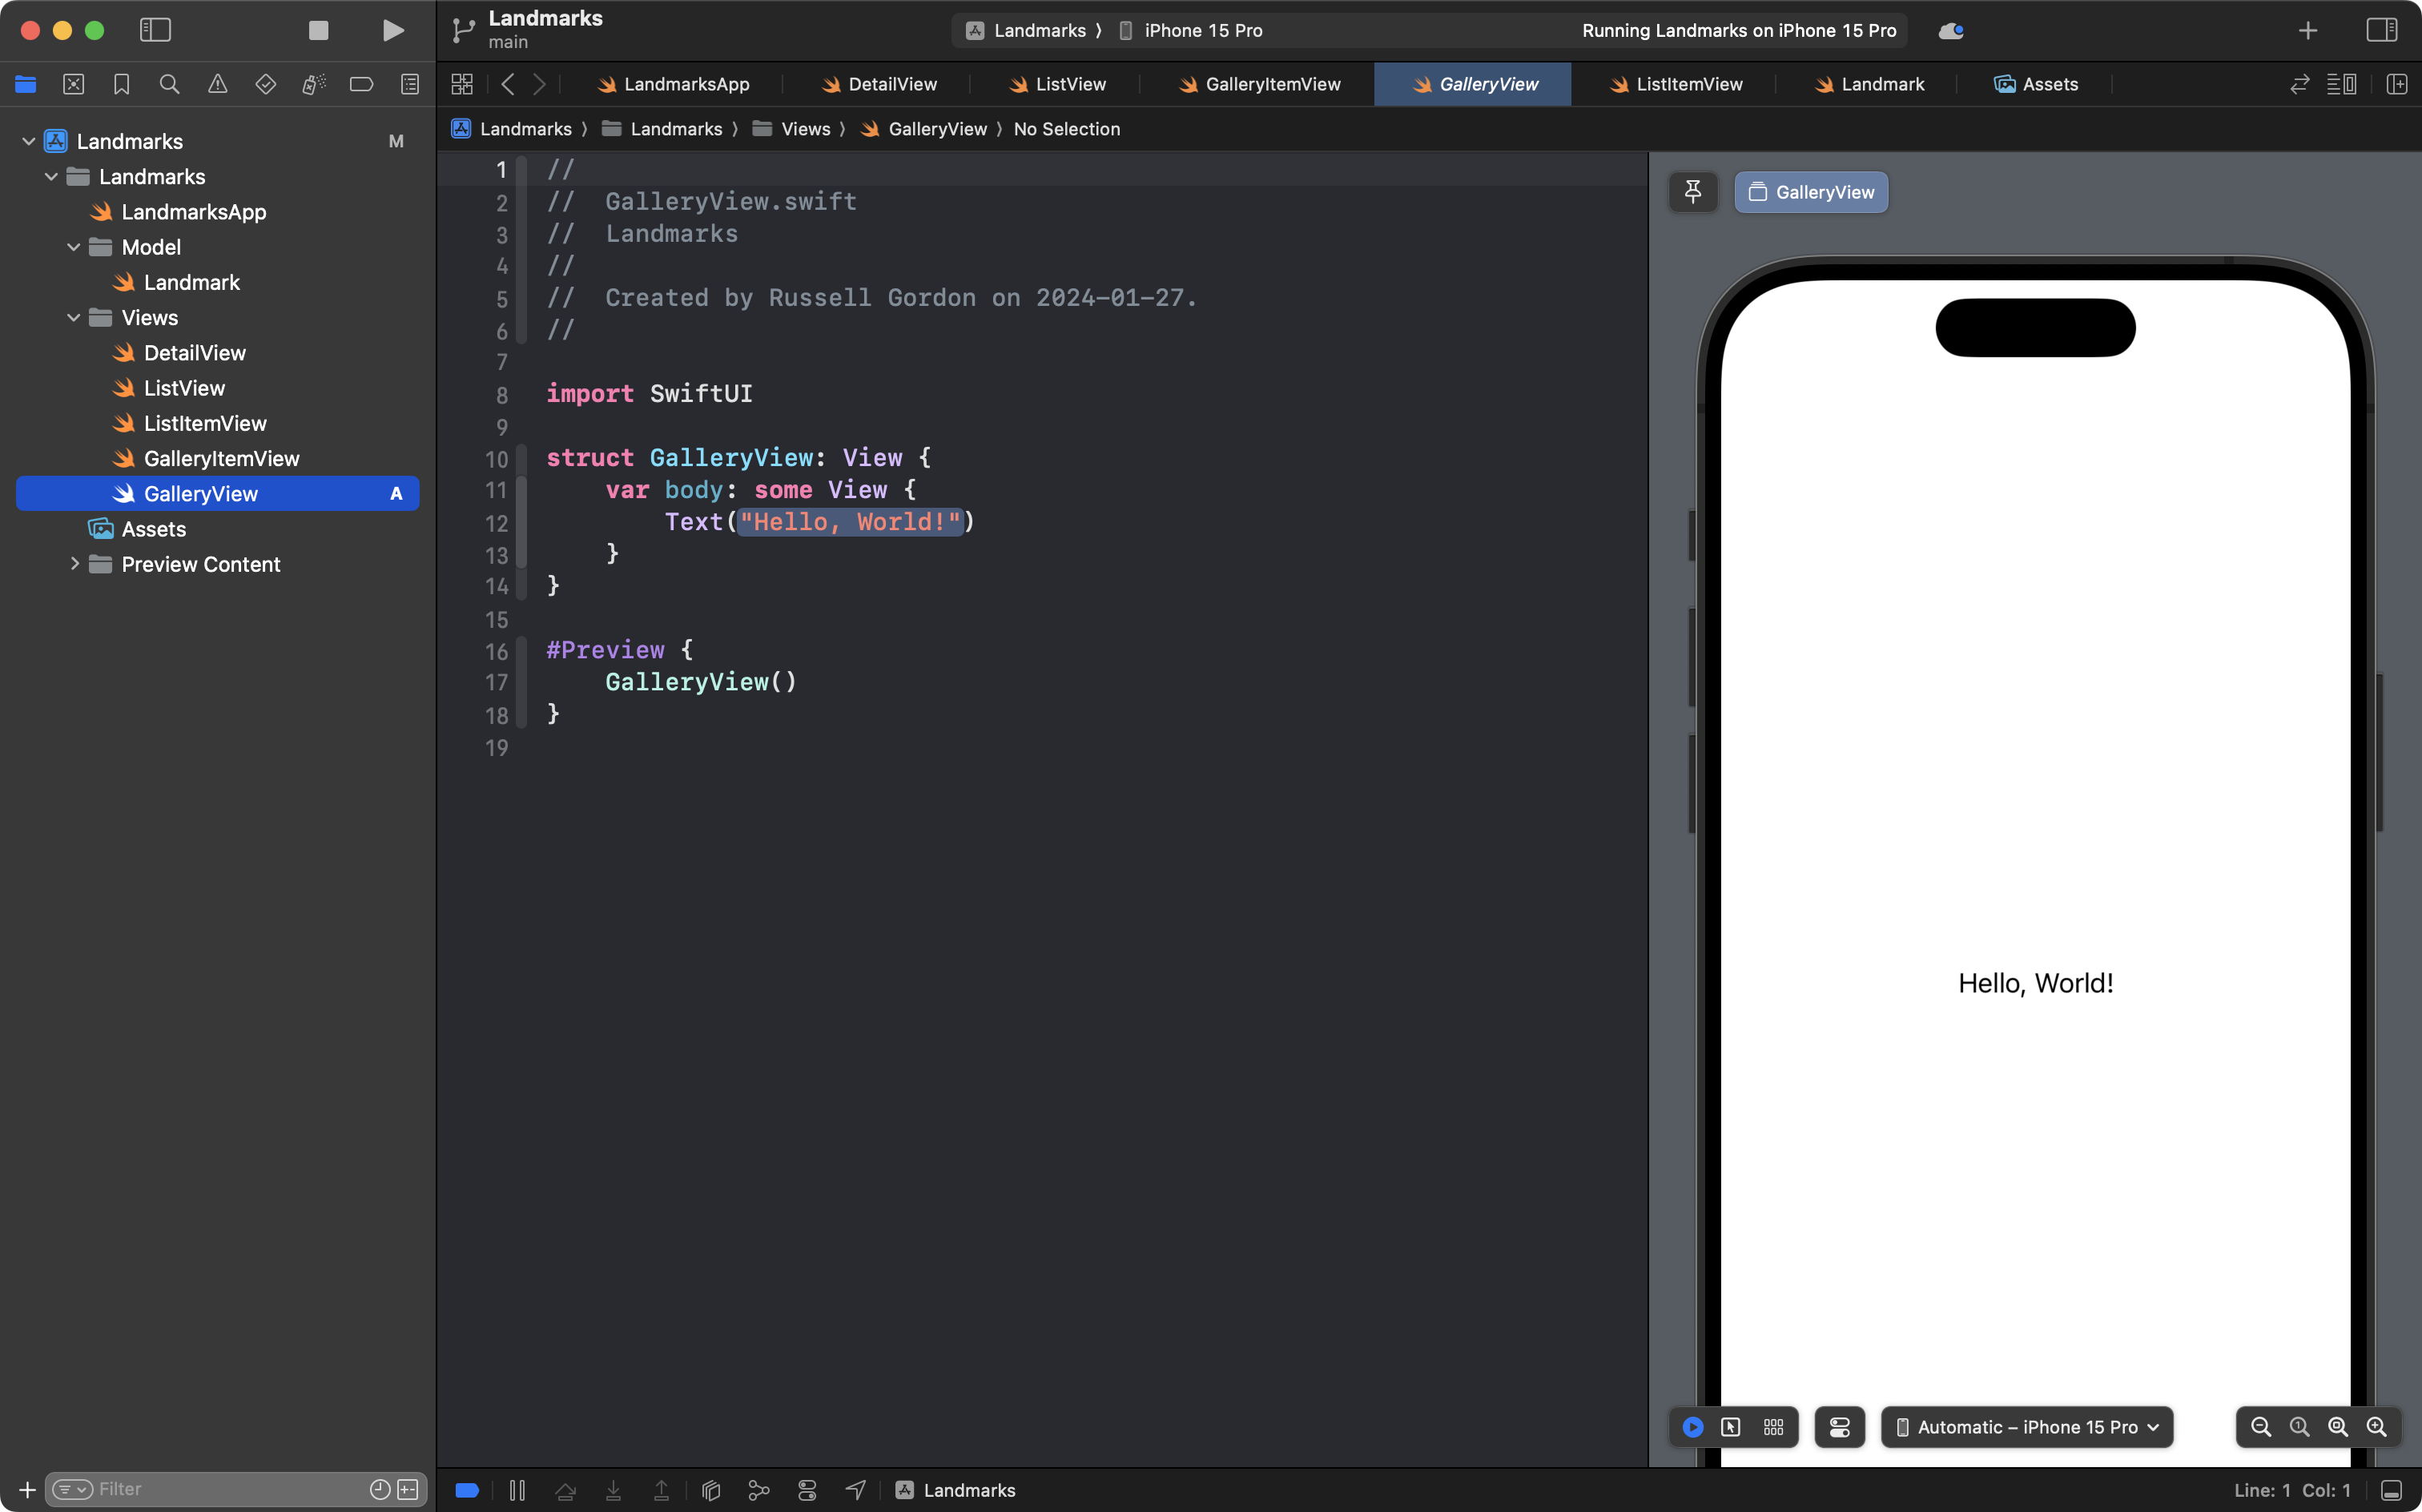
Now copy this code into the new file, like this:
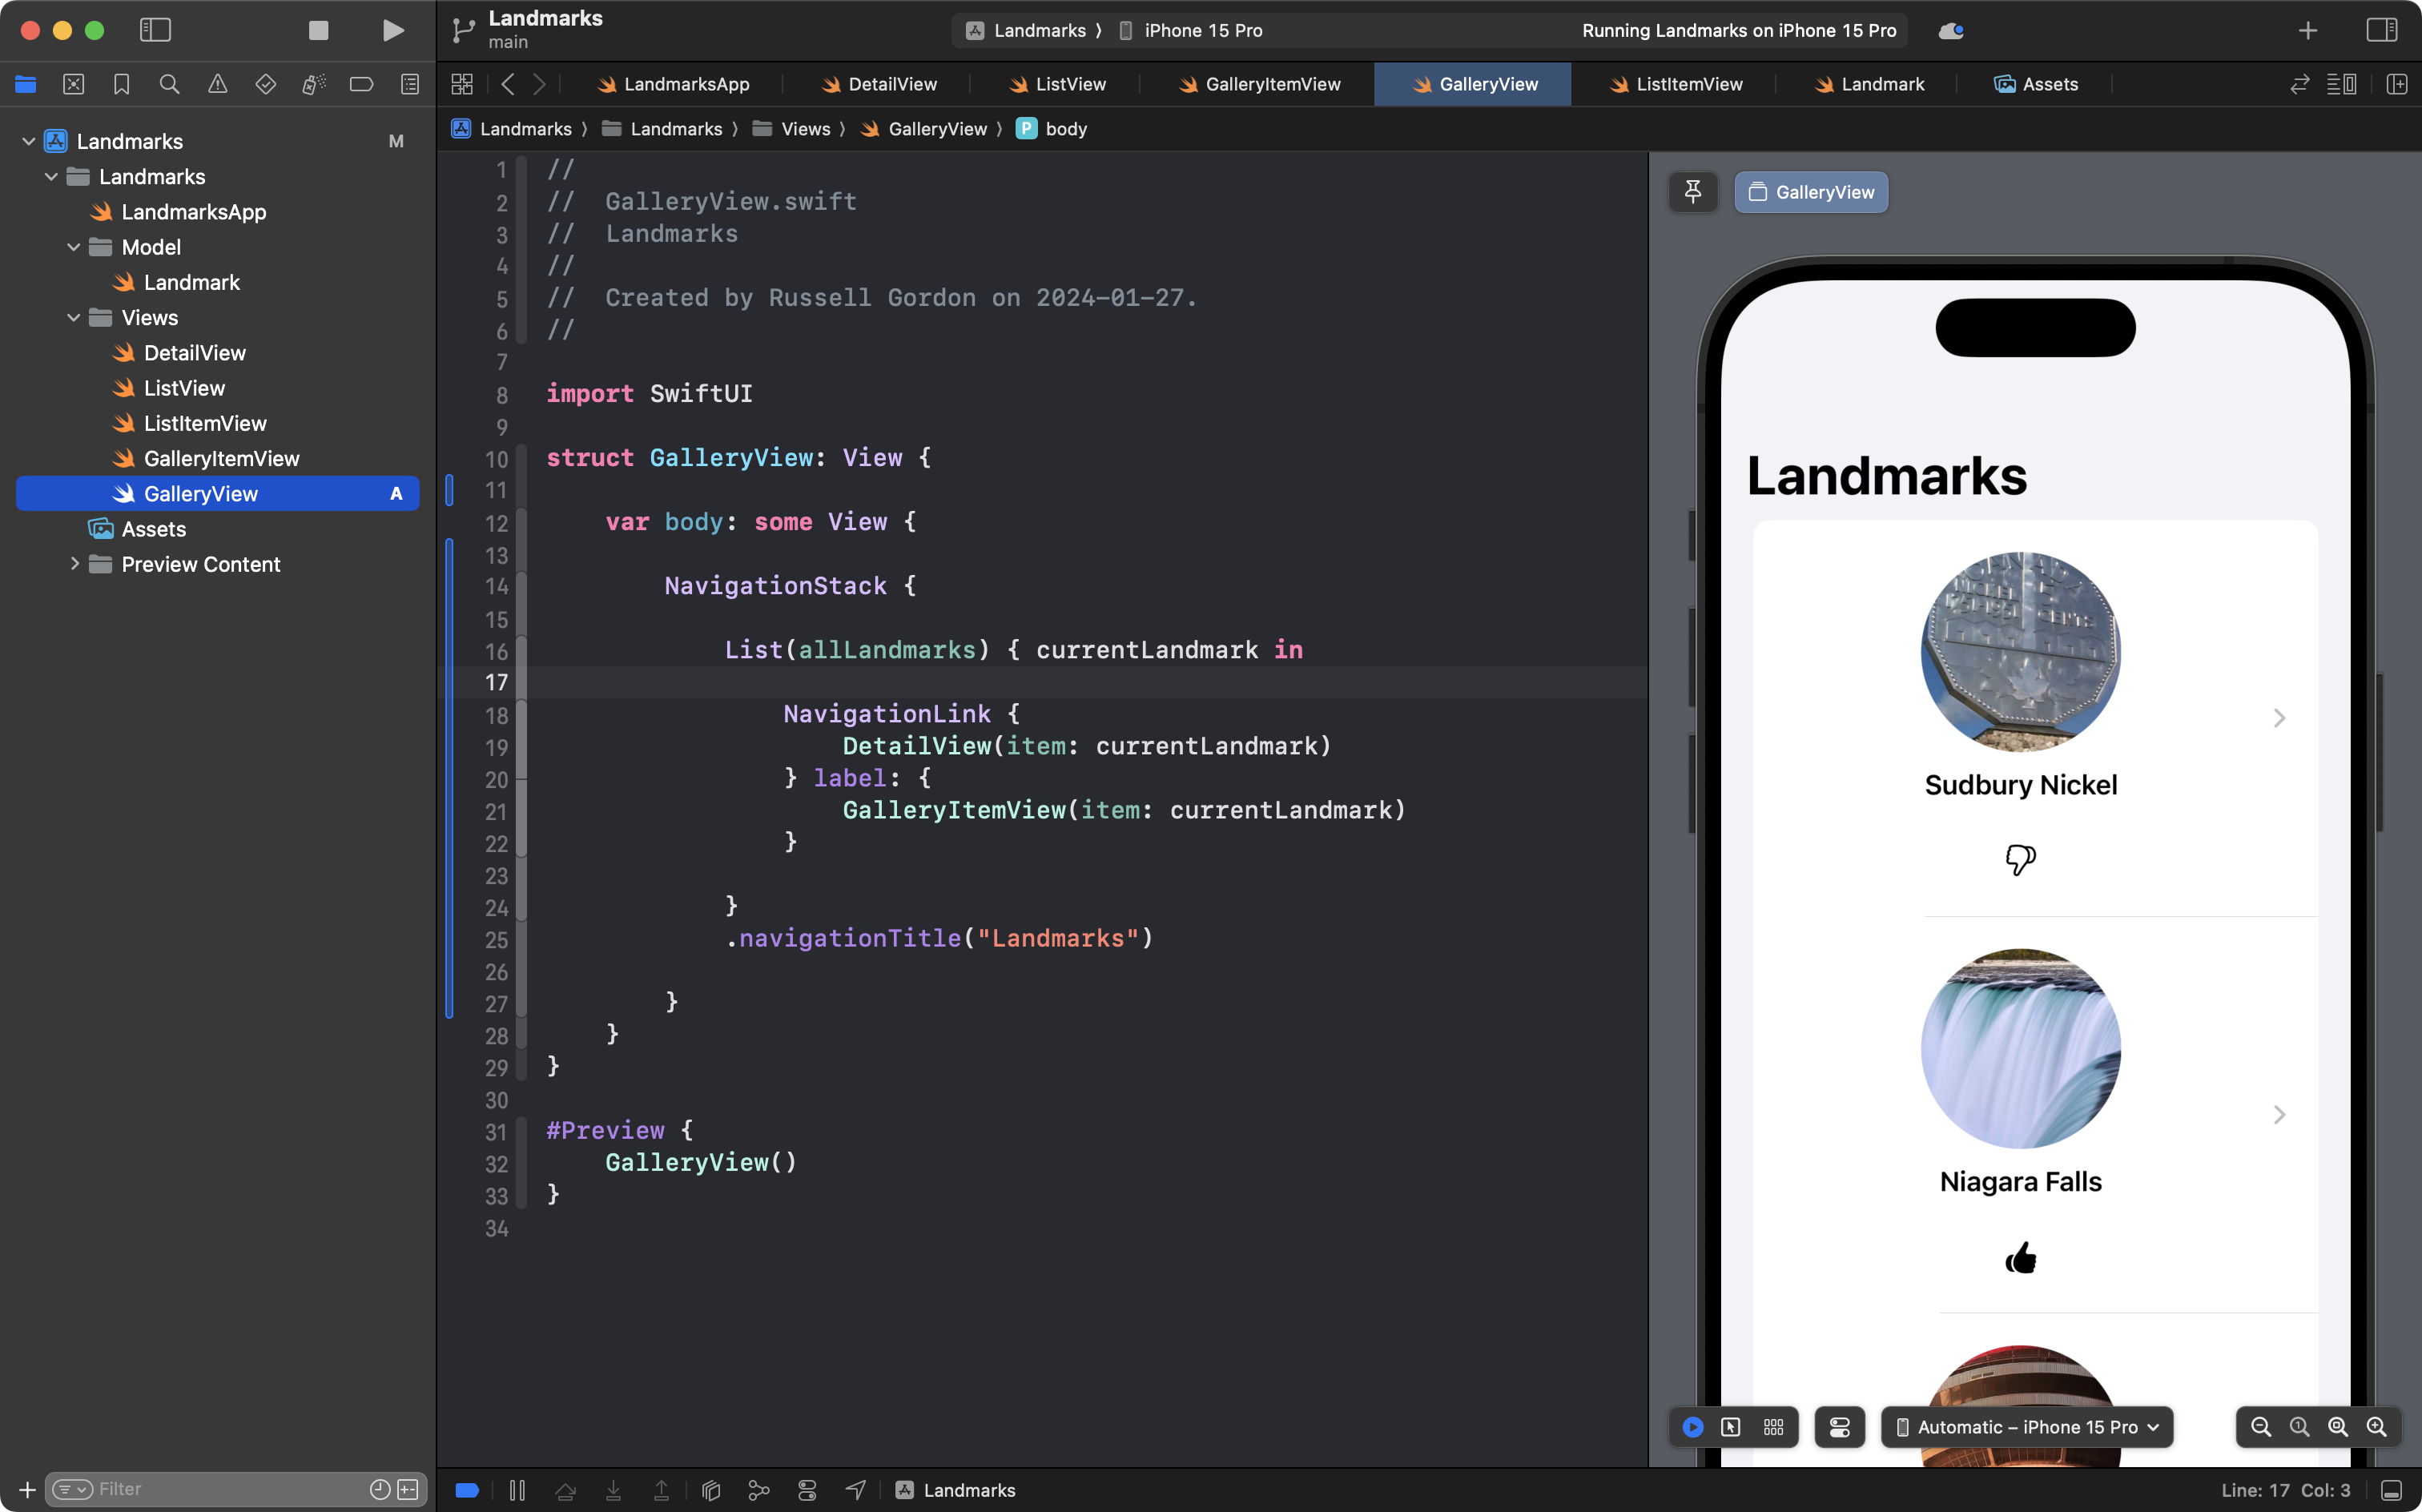
If you look closely at the code, you will notice it’s identical to the code in the ListView file, except instead of using ListItemView as the label for the NavigationLink, it is using our new GalleryItemView.
This does not look good, because GalleryItemView is not designed to be used in a List.
Although our work is not finished, it will be easier to see remaining edits if you commit your work now, with this message:
Using the new gallery item view inside a scrolling list, temporarily.
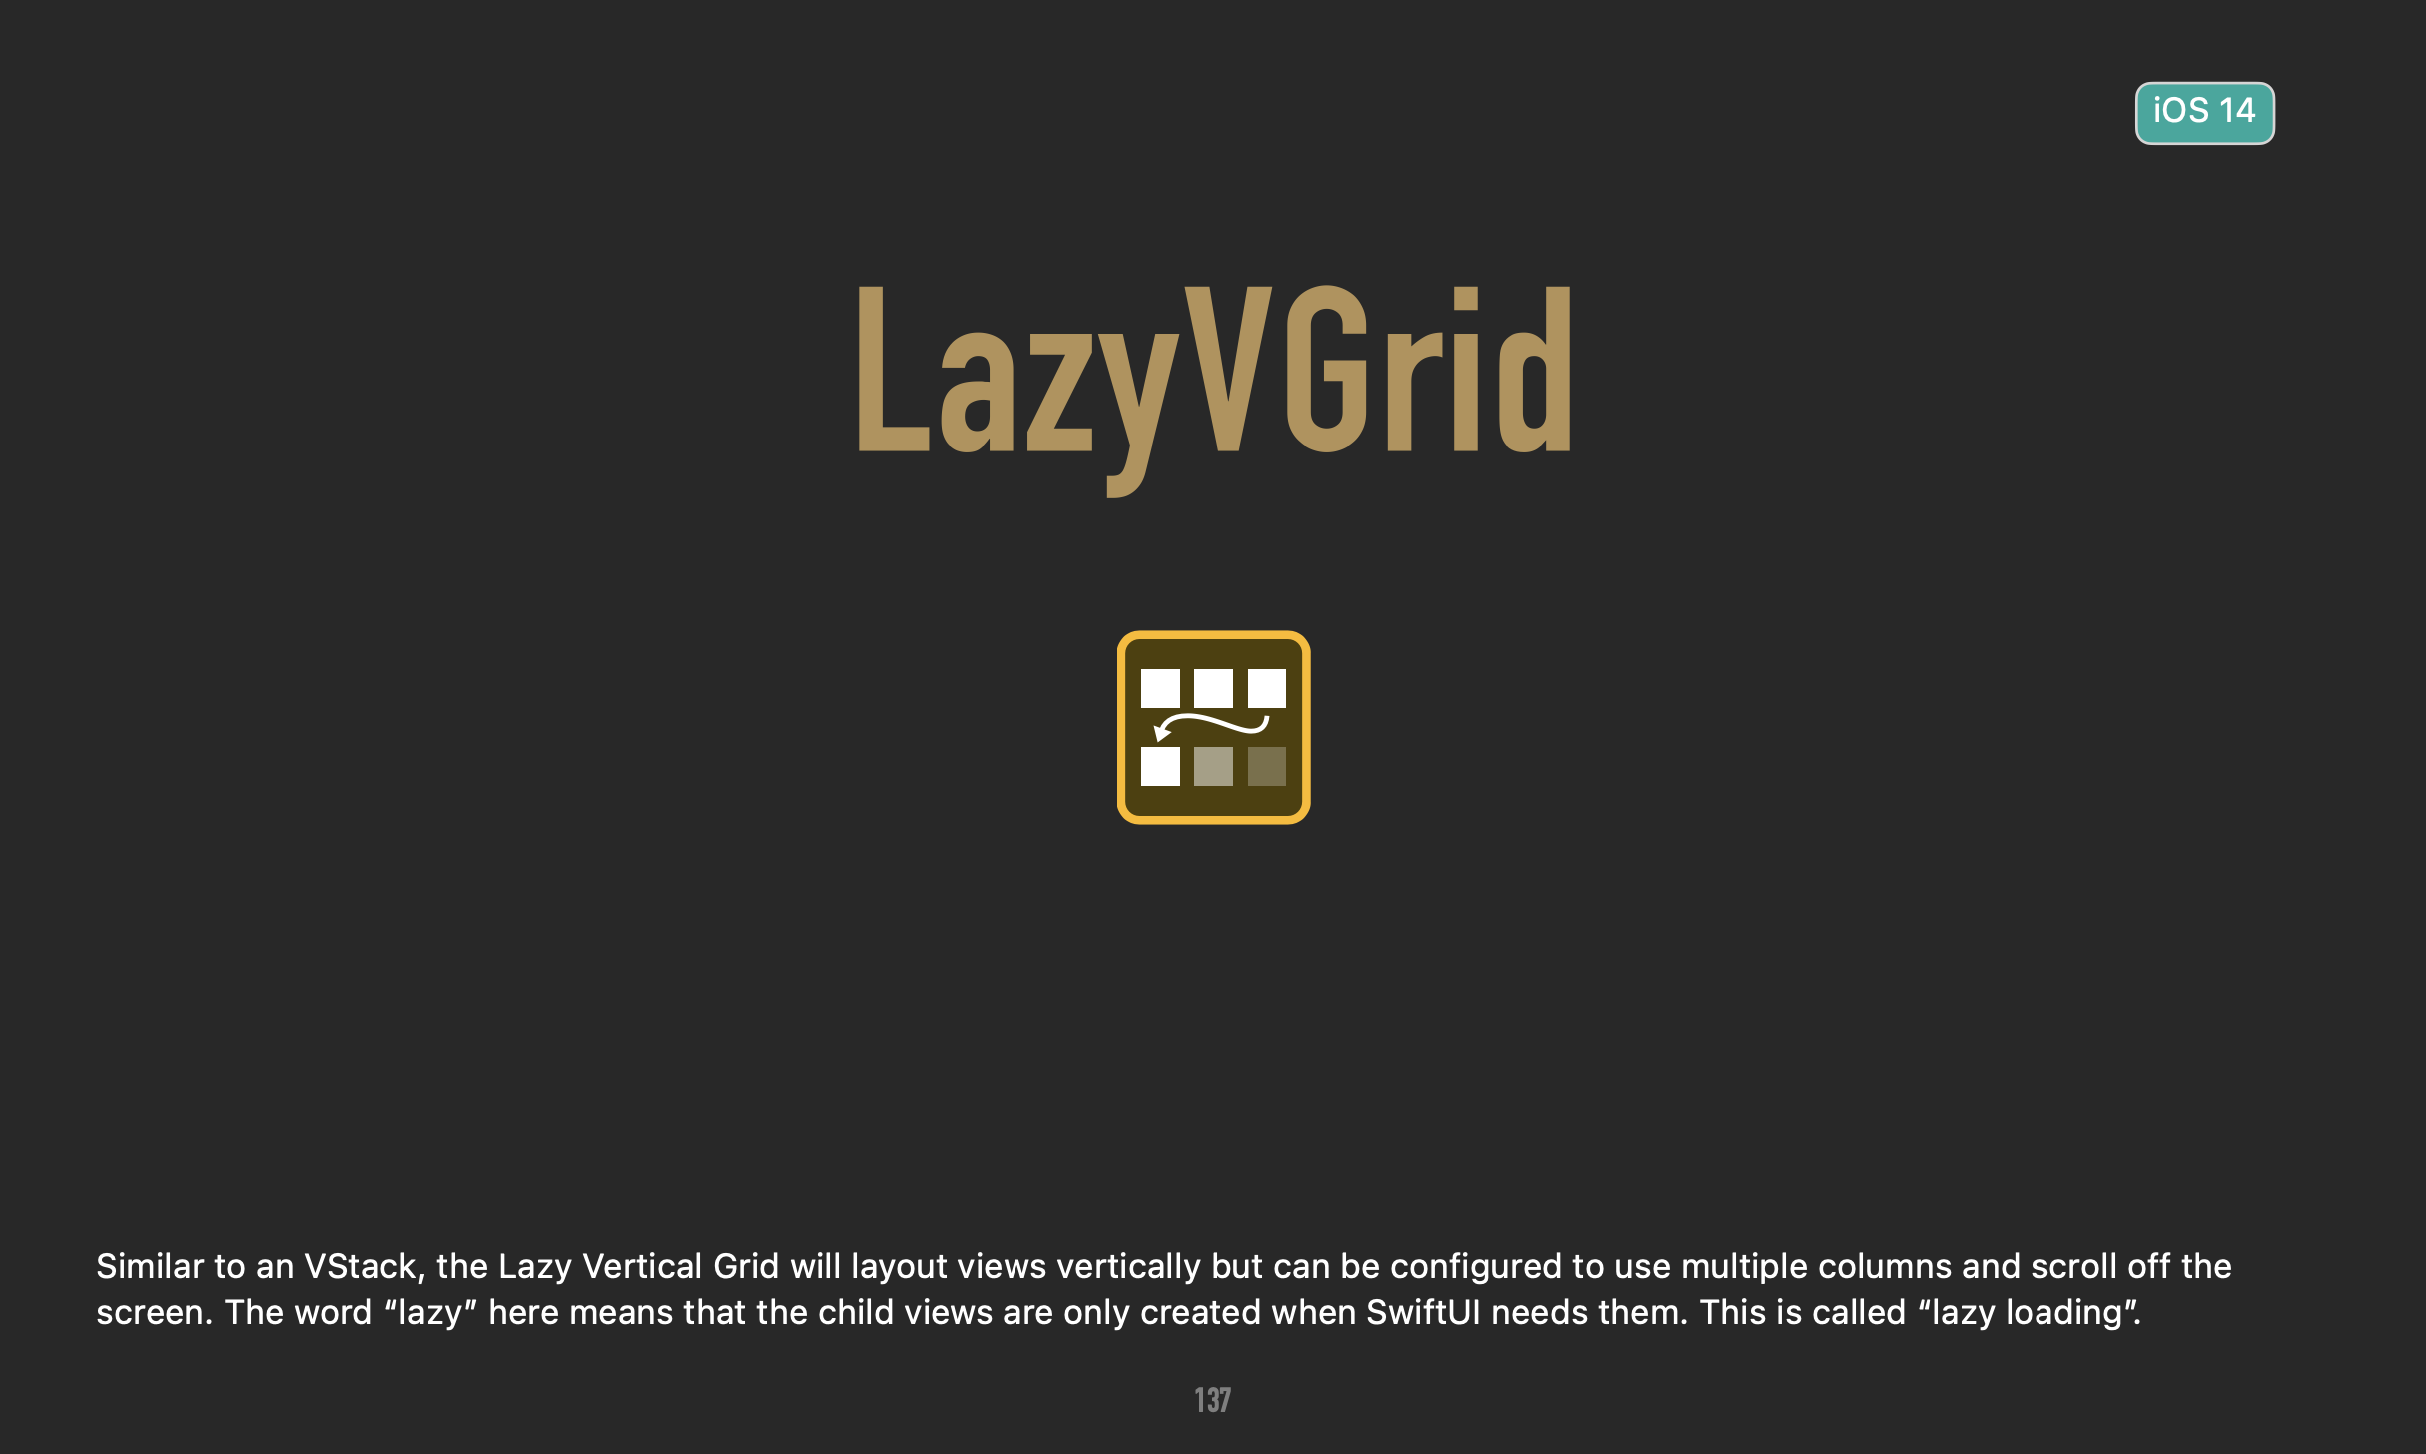
We are going to use the gallery item view inside of a layout structure that we have not formally examined before – the LazyVGrid.
Here is how Mark Moeykens describes this structure, which you can find on or near page 137 in SwiftUI Views Mastery:
Take some time to look through the examples in SwiftUI Views Mastery.
We are going to build out a grid together now. Note that there are many ways to use a LazyVGrid.
First, we cannot use a List any more.
Change this to a ForEach structure instead, like this – note that old code is on top, and new code is shown below:

The preview is going to look a little strange, but that is fine for now:
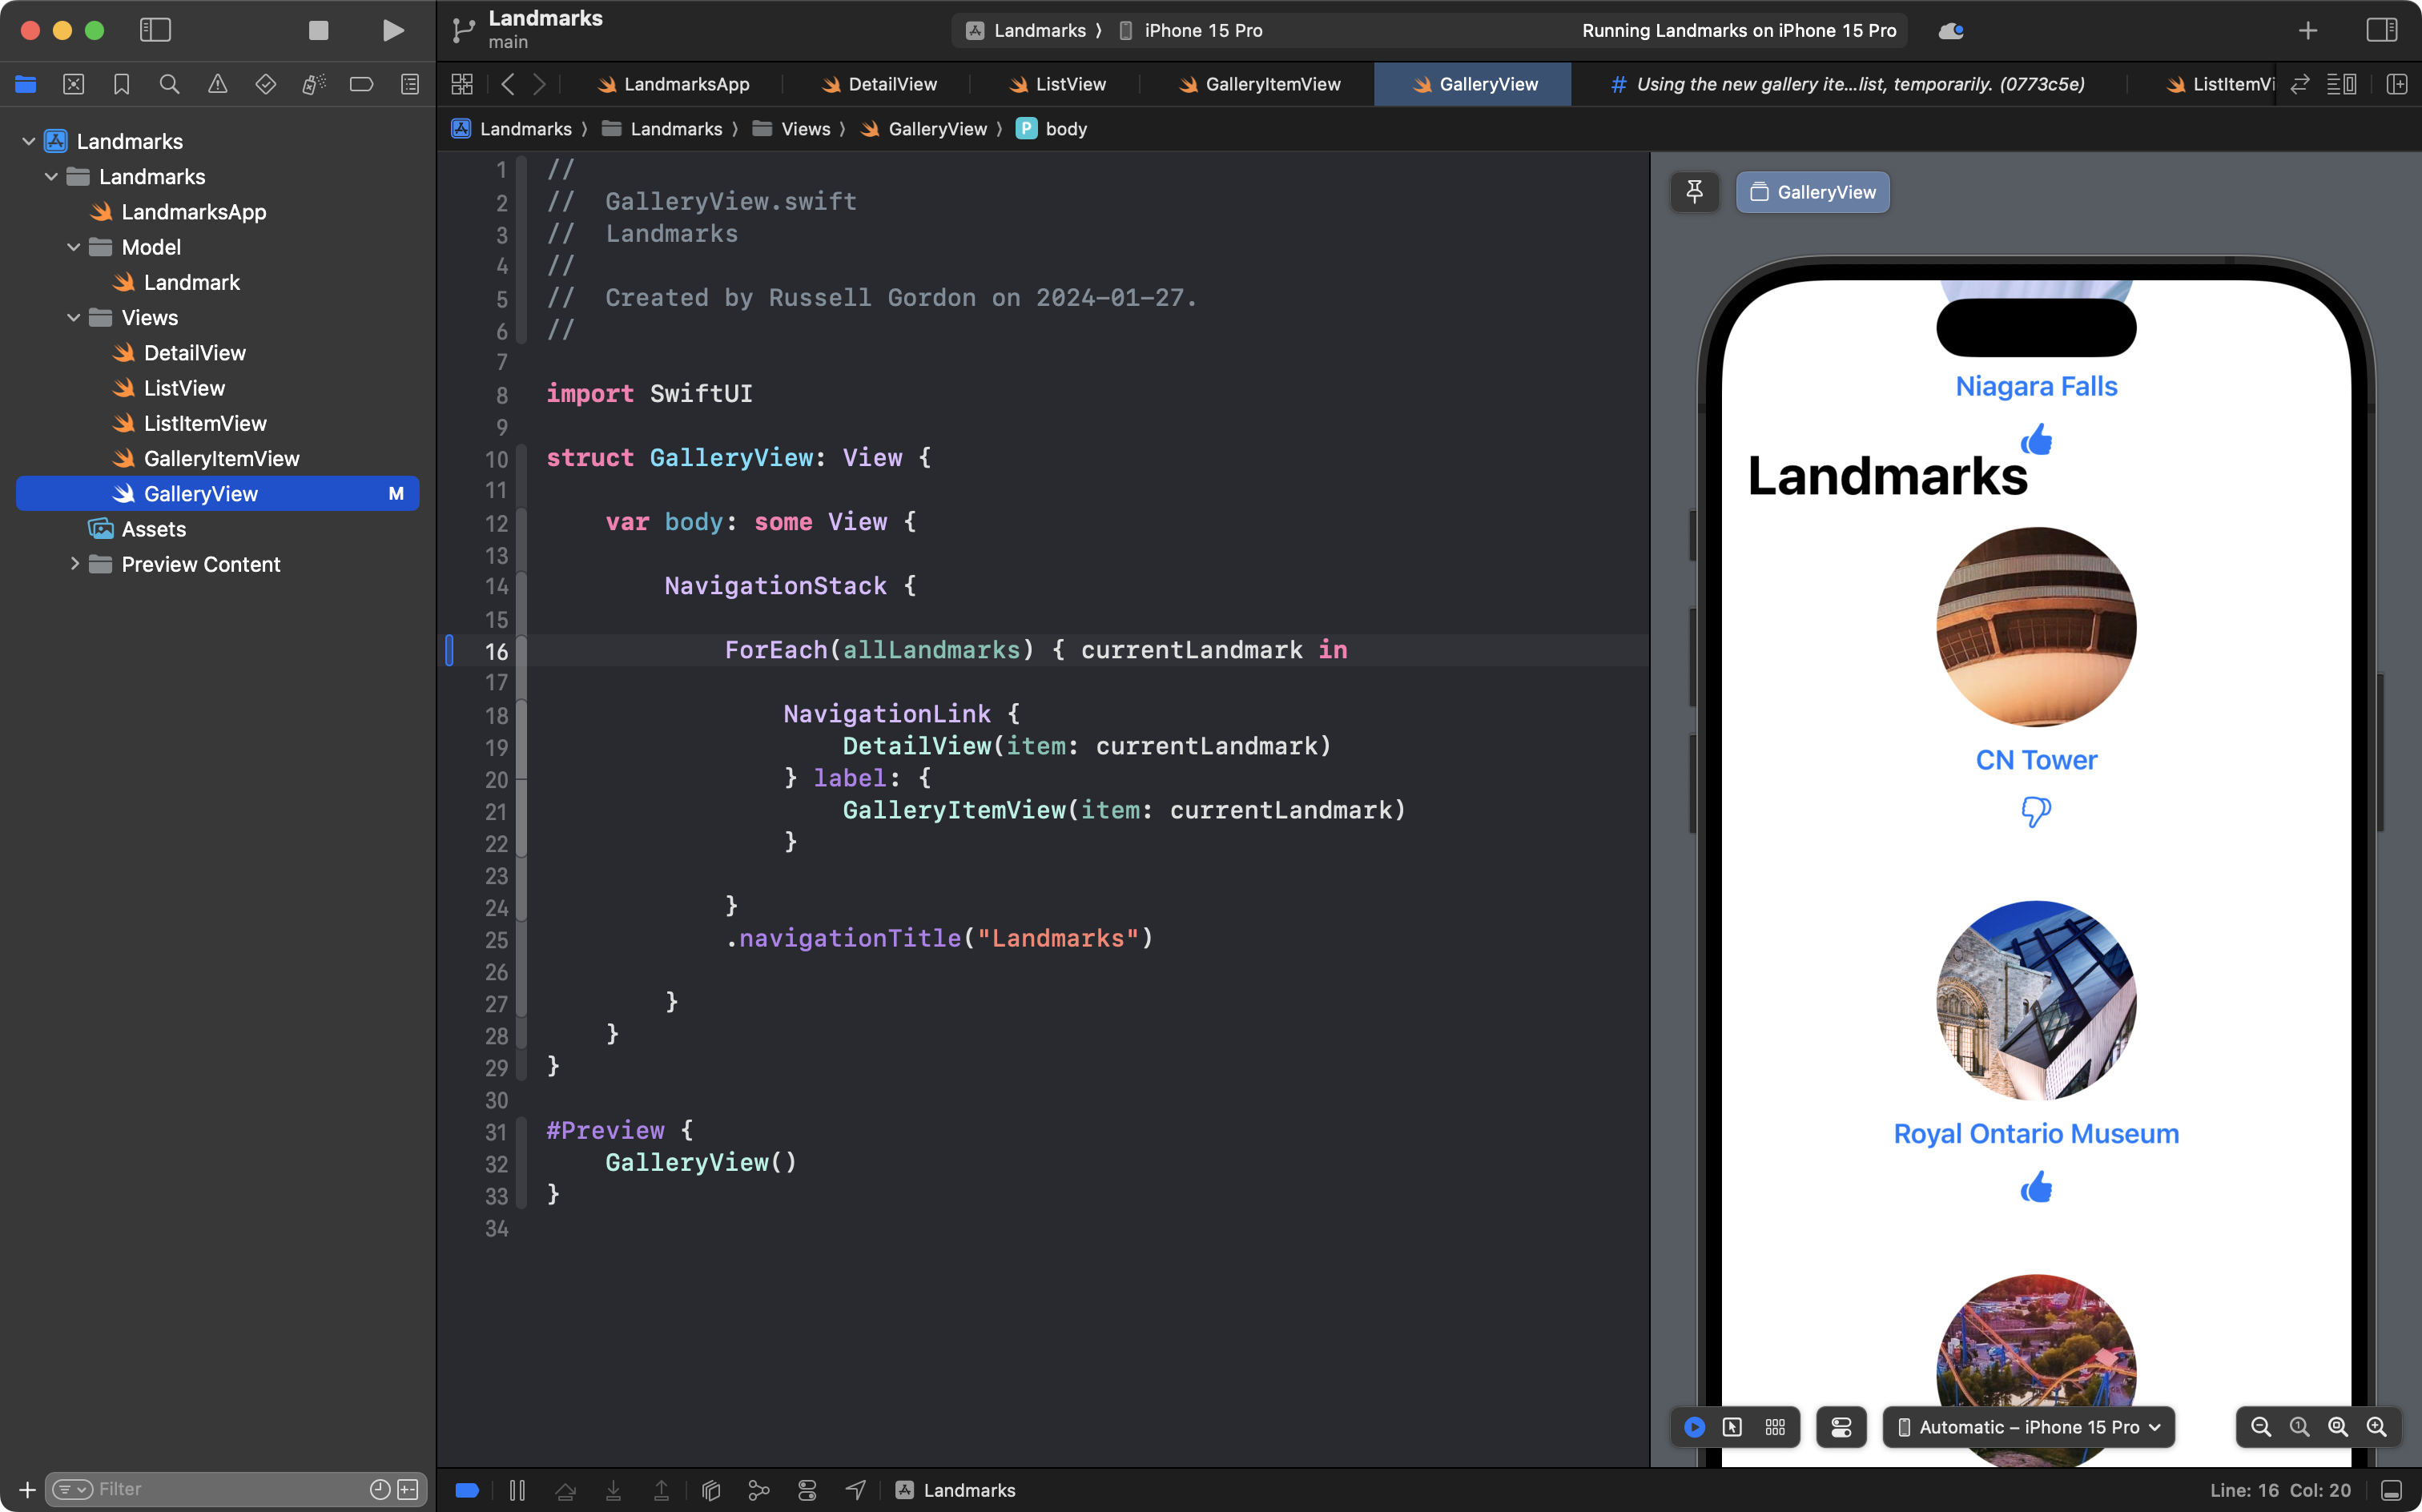
A ForEach structure is designed to iterate over an array. It iterates over an array the same way the List structure does, but it does not create a list with individual items. It just repeatedly builds the views it contains.
In our code currently, we use the ForEach to iterate over the allLandmarks array and create a new NavigationLink for each instance of the Landmark structure that we defined in our model.
Our next step is to wrap the ForEach structure in a LazyVGrid structure, like this:
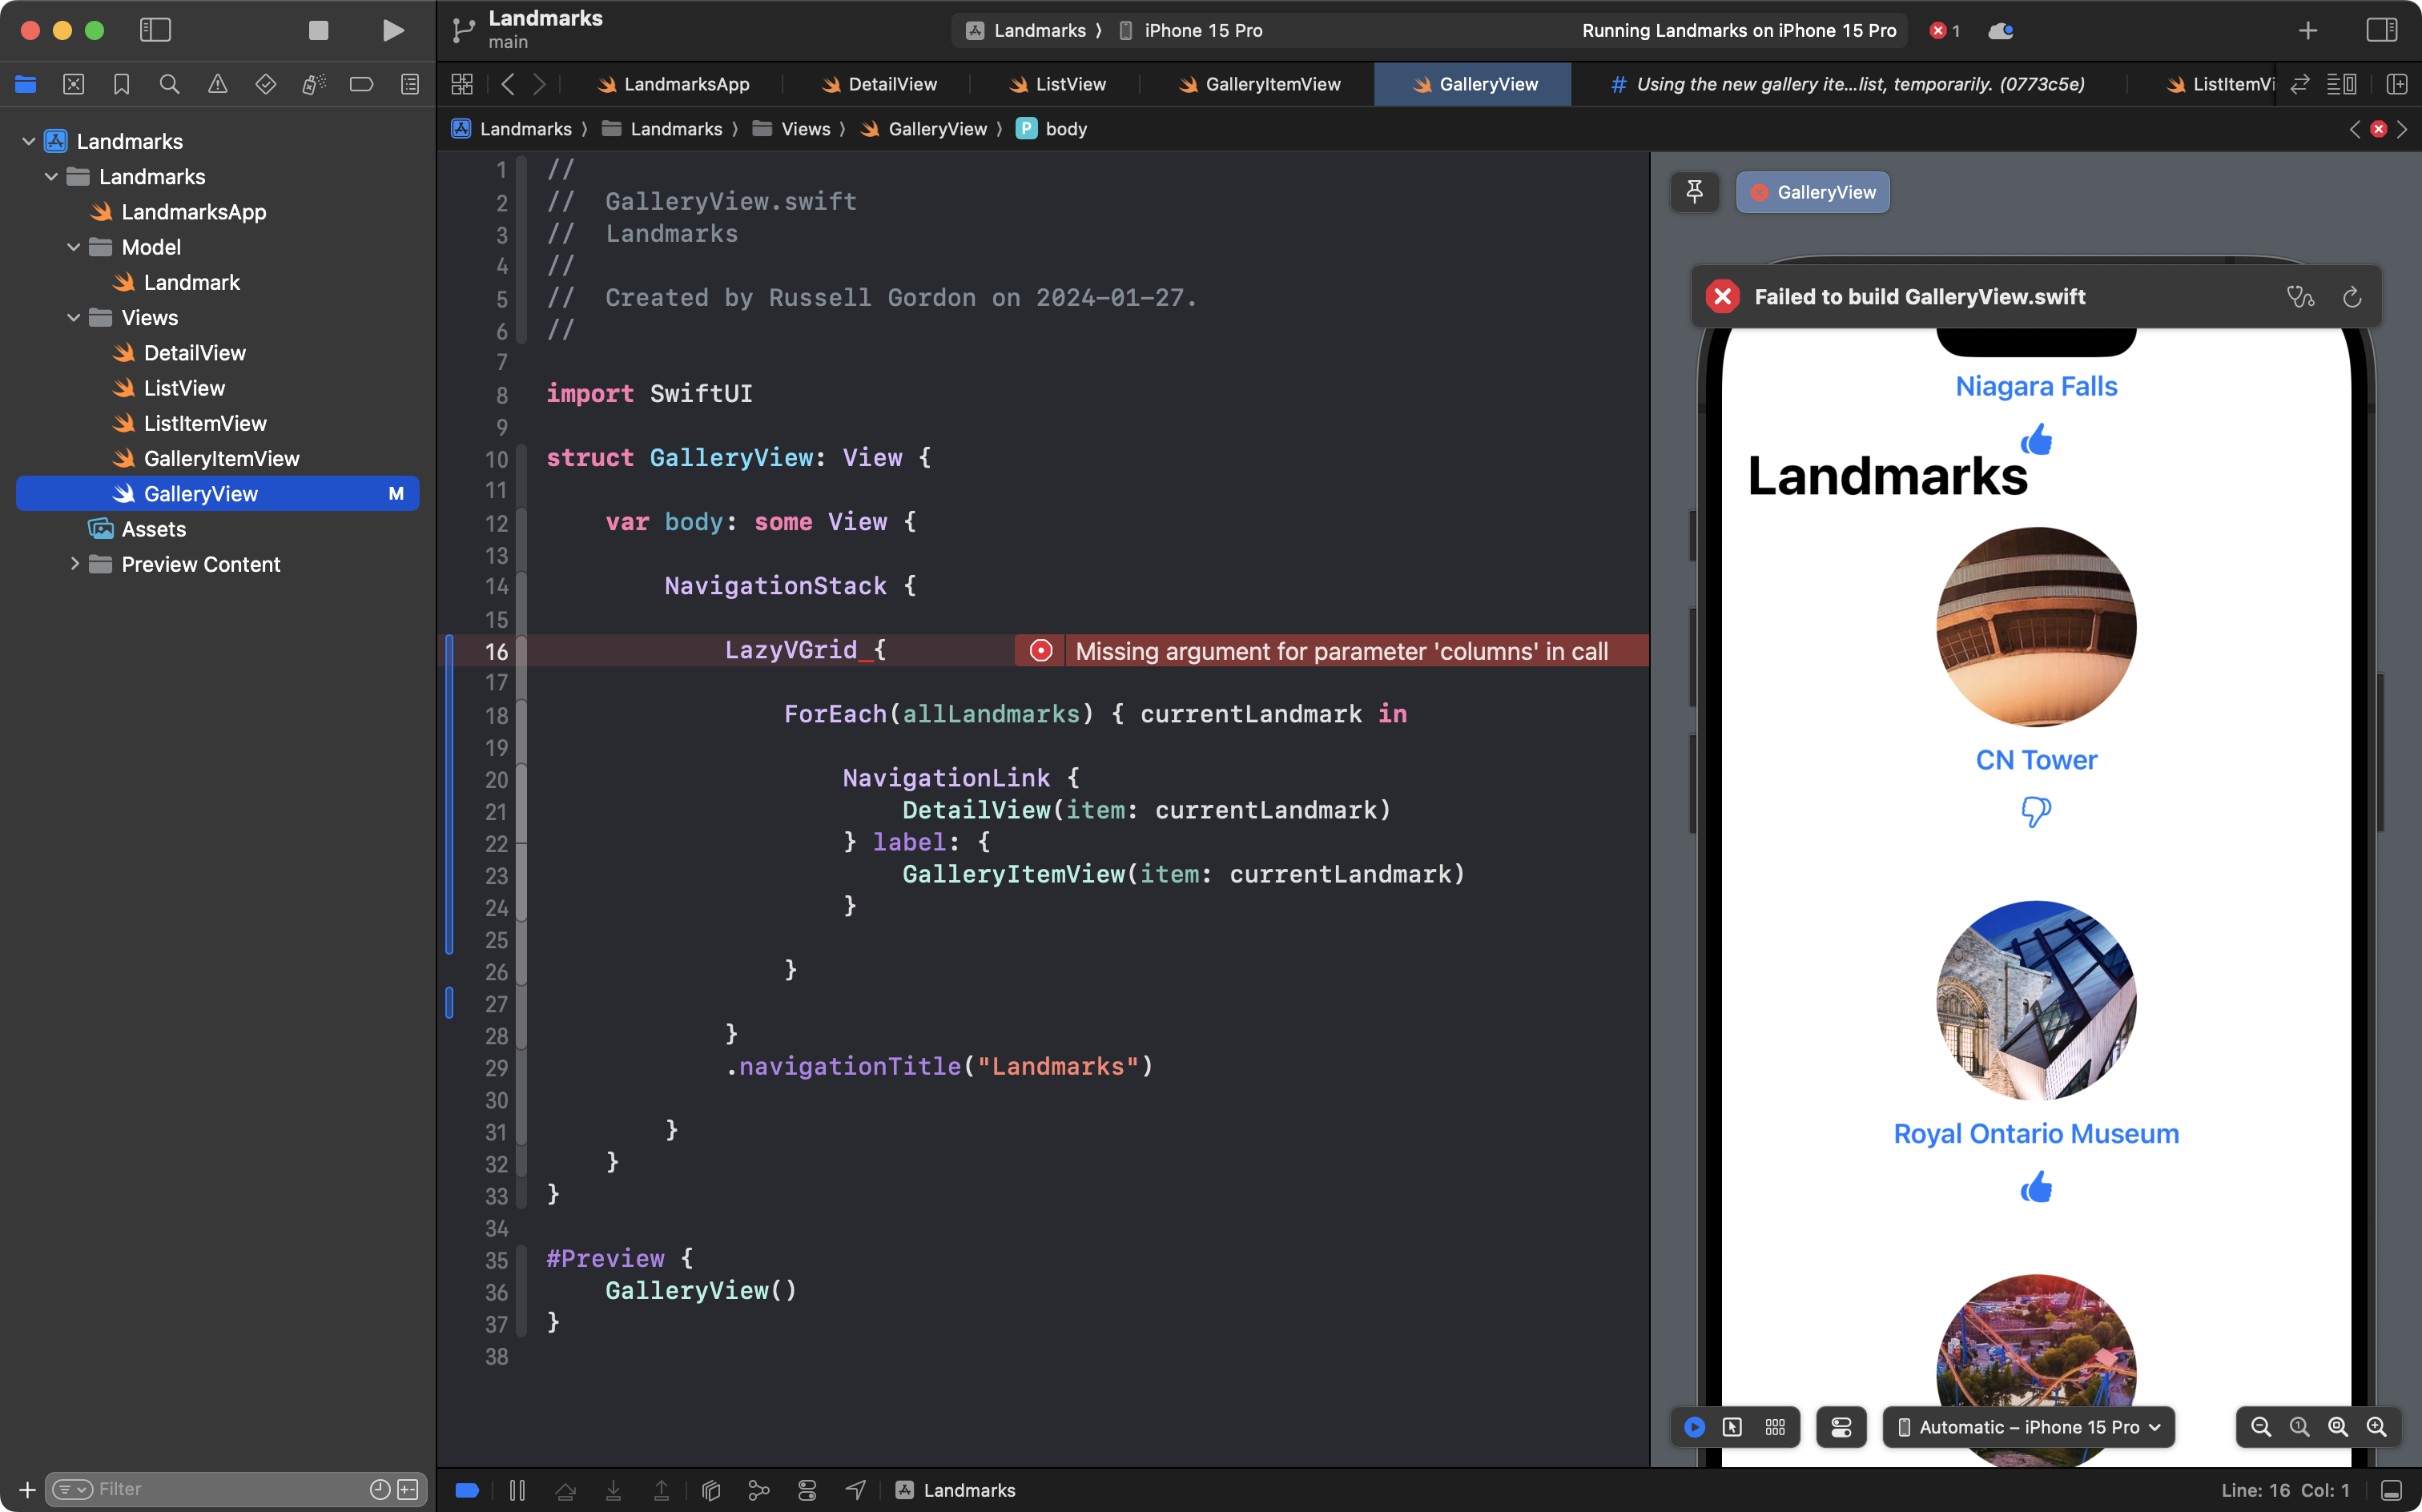
Notice that we immediately get an error.
This is because the LazyVGrid structure needs to know how many columns we want in our grid.
Although our code is not yet working, again it will be easier to see the remaining few edits if we commit and push now.
Please do so with this message:
Almost finished adding our LazyVGrid to GalleryView.
We will specify how many columns we want by adding a stored property named twoColumns to the GalleryView structure:
// MARK: Stored properties
let twoColumns = [
	GridItem(.adaptive(minimum: 100, maximum: 200), alignment: .top),
	GridItem(.adaptive(minimum: 100, maximum: 200), alignment: .top),
]

// MARK: Computed properties
… like this:

Now we need to use the new stored property with our LazyVGrid.
Add the parameter named columns to the LazyVGrid and provide the argument twoColumns, using the stored property we just created, as shown on line 23:
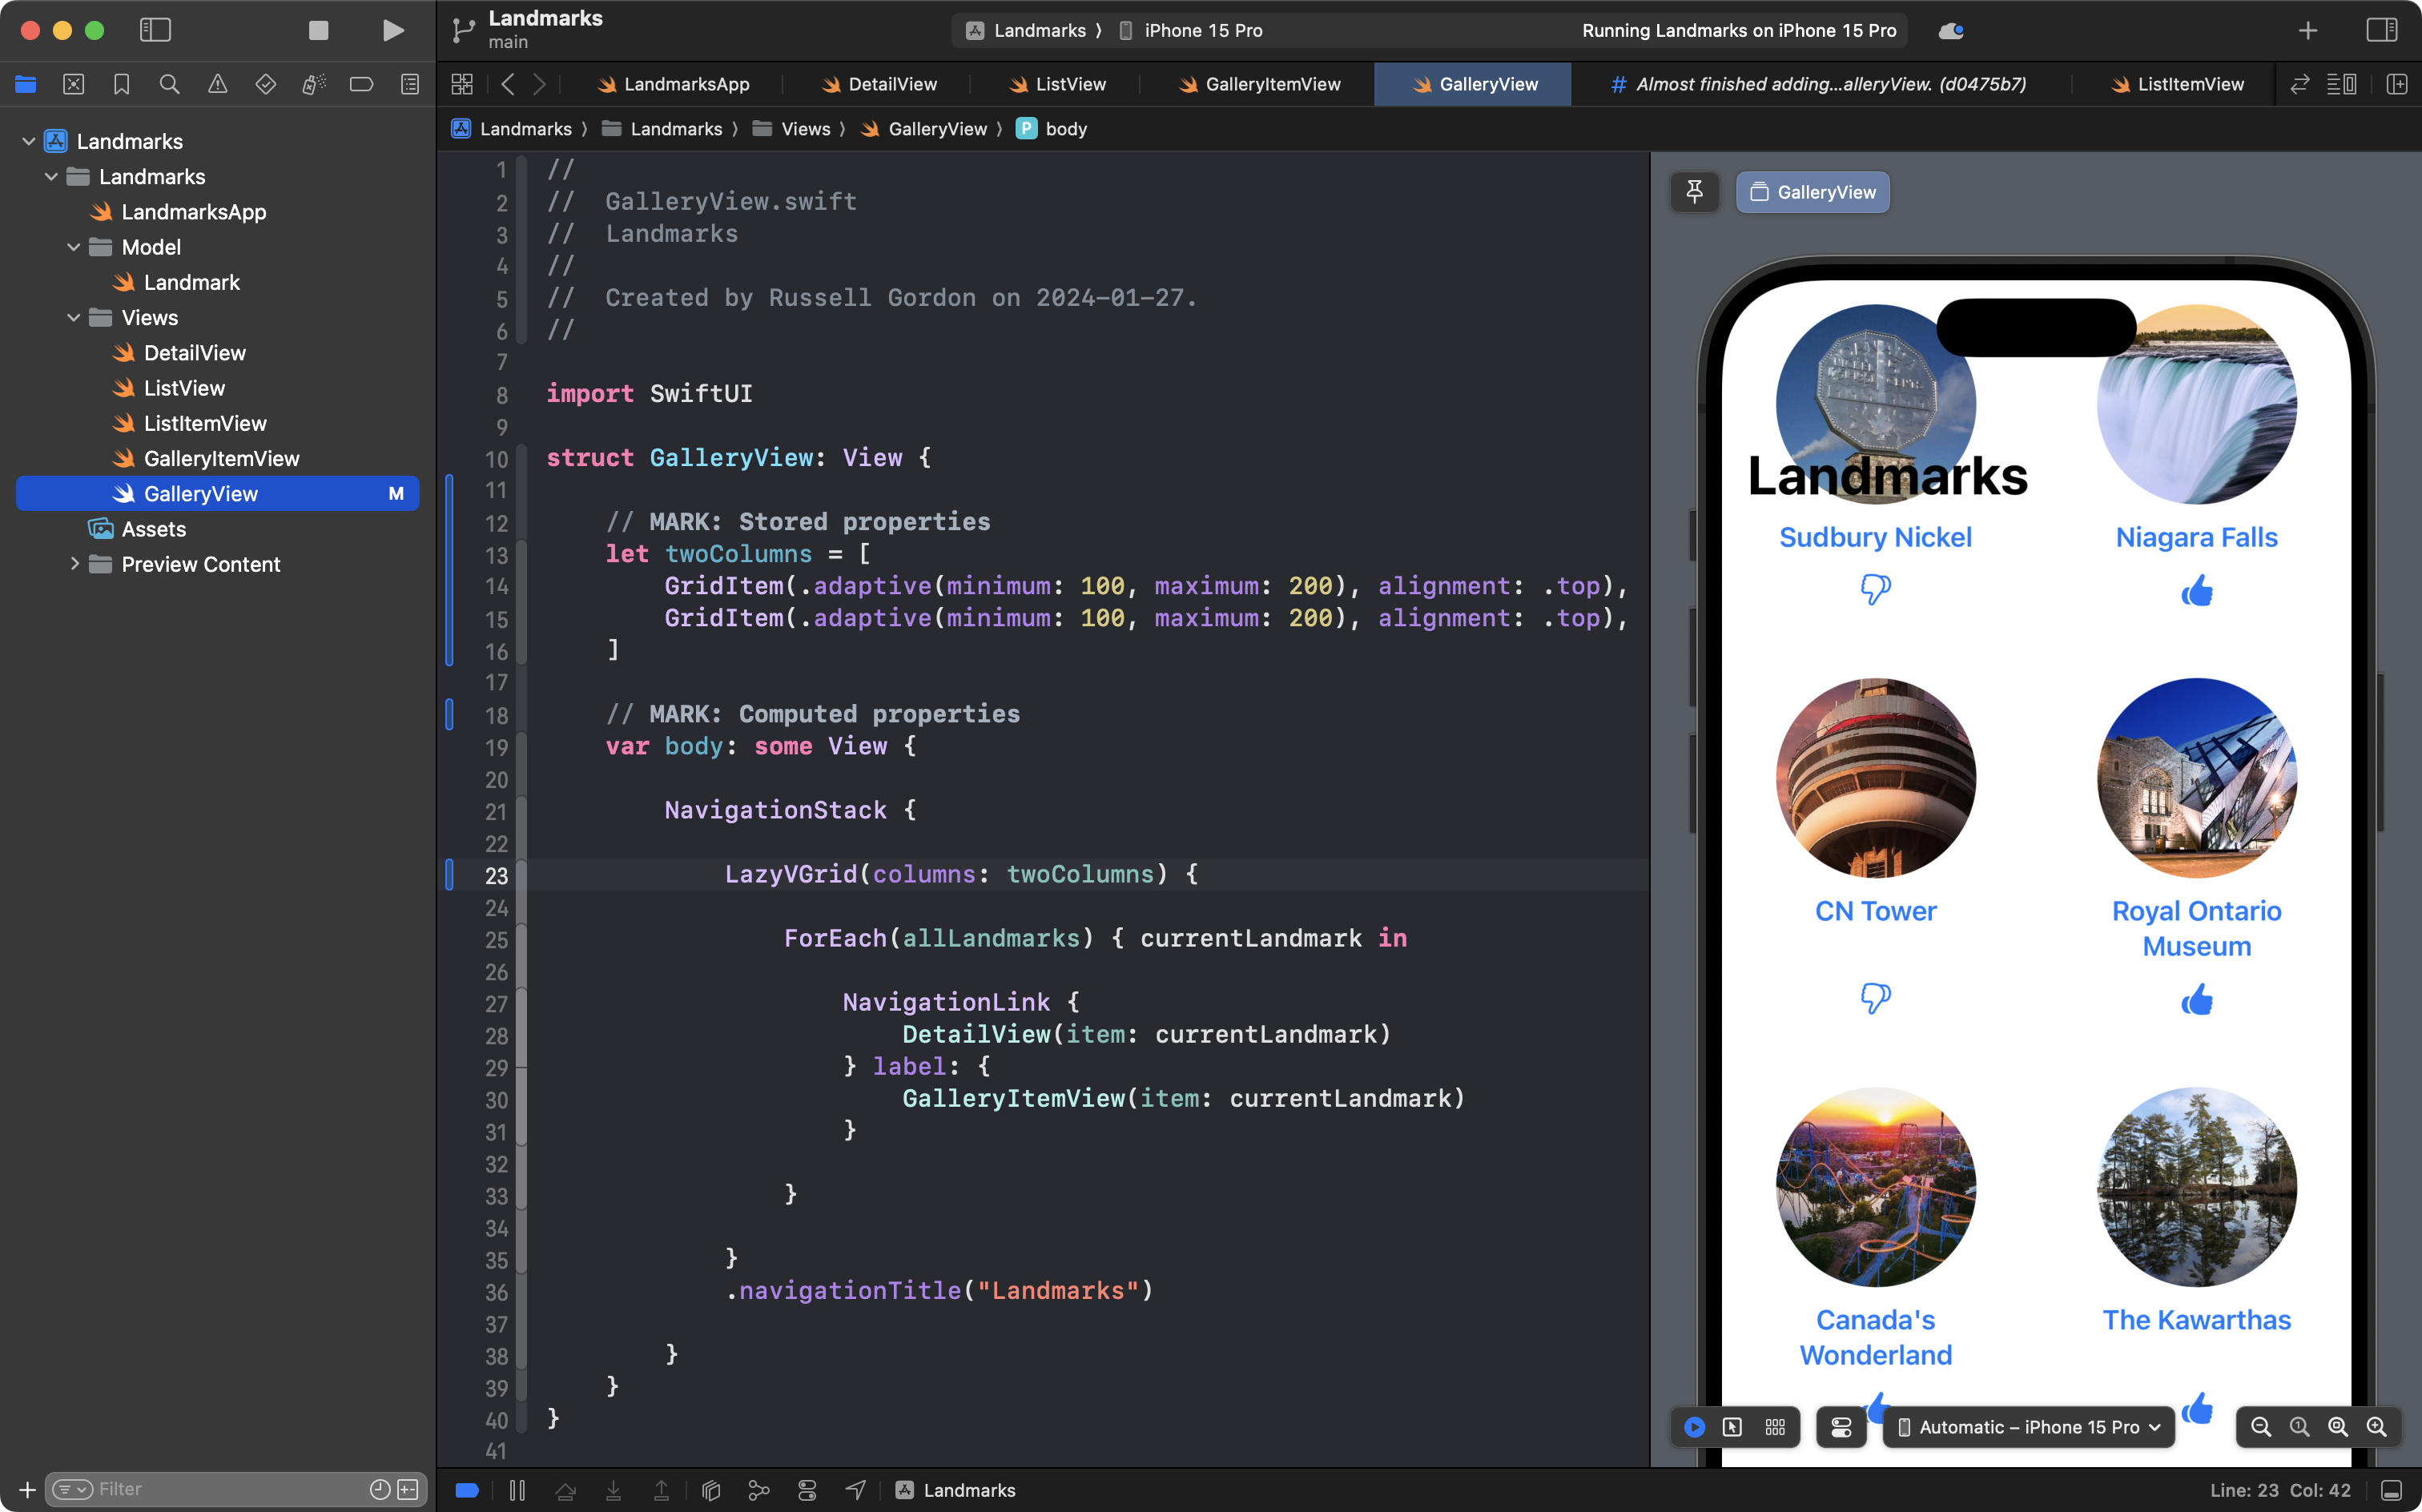
In short, we have told the LazyVGrid that we want two columns, and that it can automatically adjust the size of the columns, between a minimum width of 100 points and a maximum width of 200 points.
You could try adding a third column by adjusting the stored property:

… but this looks a bit crowded. So, leave it as just two columns:

We have two more small edits to make.
First, we need to be able to scroll the LazyVGrid.
Wrap the LazyVGrid in a ScrollView structure, like this:

Now the layout looks the way we intend.
A final touch – items in a grid automatically inherit the default accent color for an iOS app, which is a bright blue.
This doesn’t look great, so, let’s override that accent colour.
Attach the following view modifier to the NavigationLink:
.tint(.primary)And you will see the following:

At this point, you can scroll the grid, and select items to navigate to the detail view.
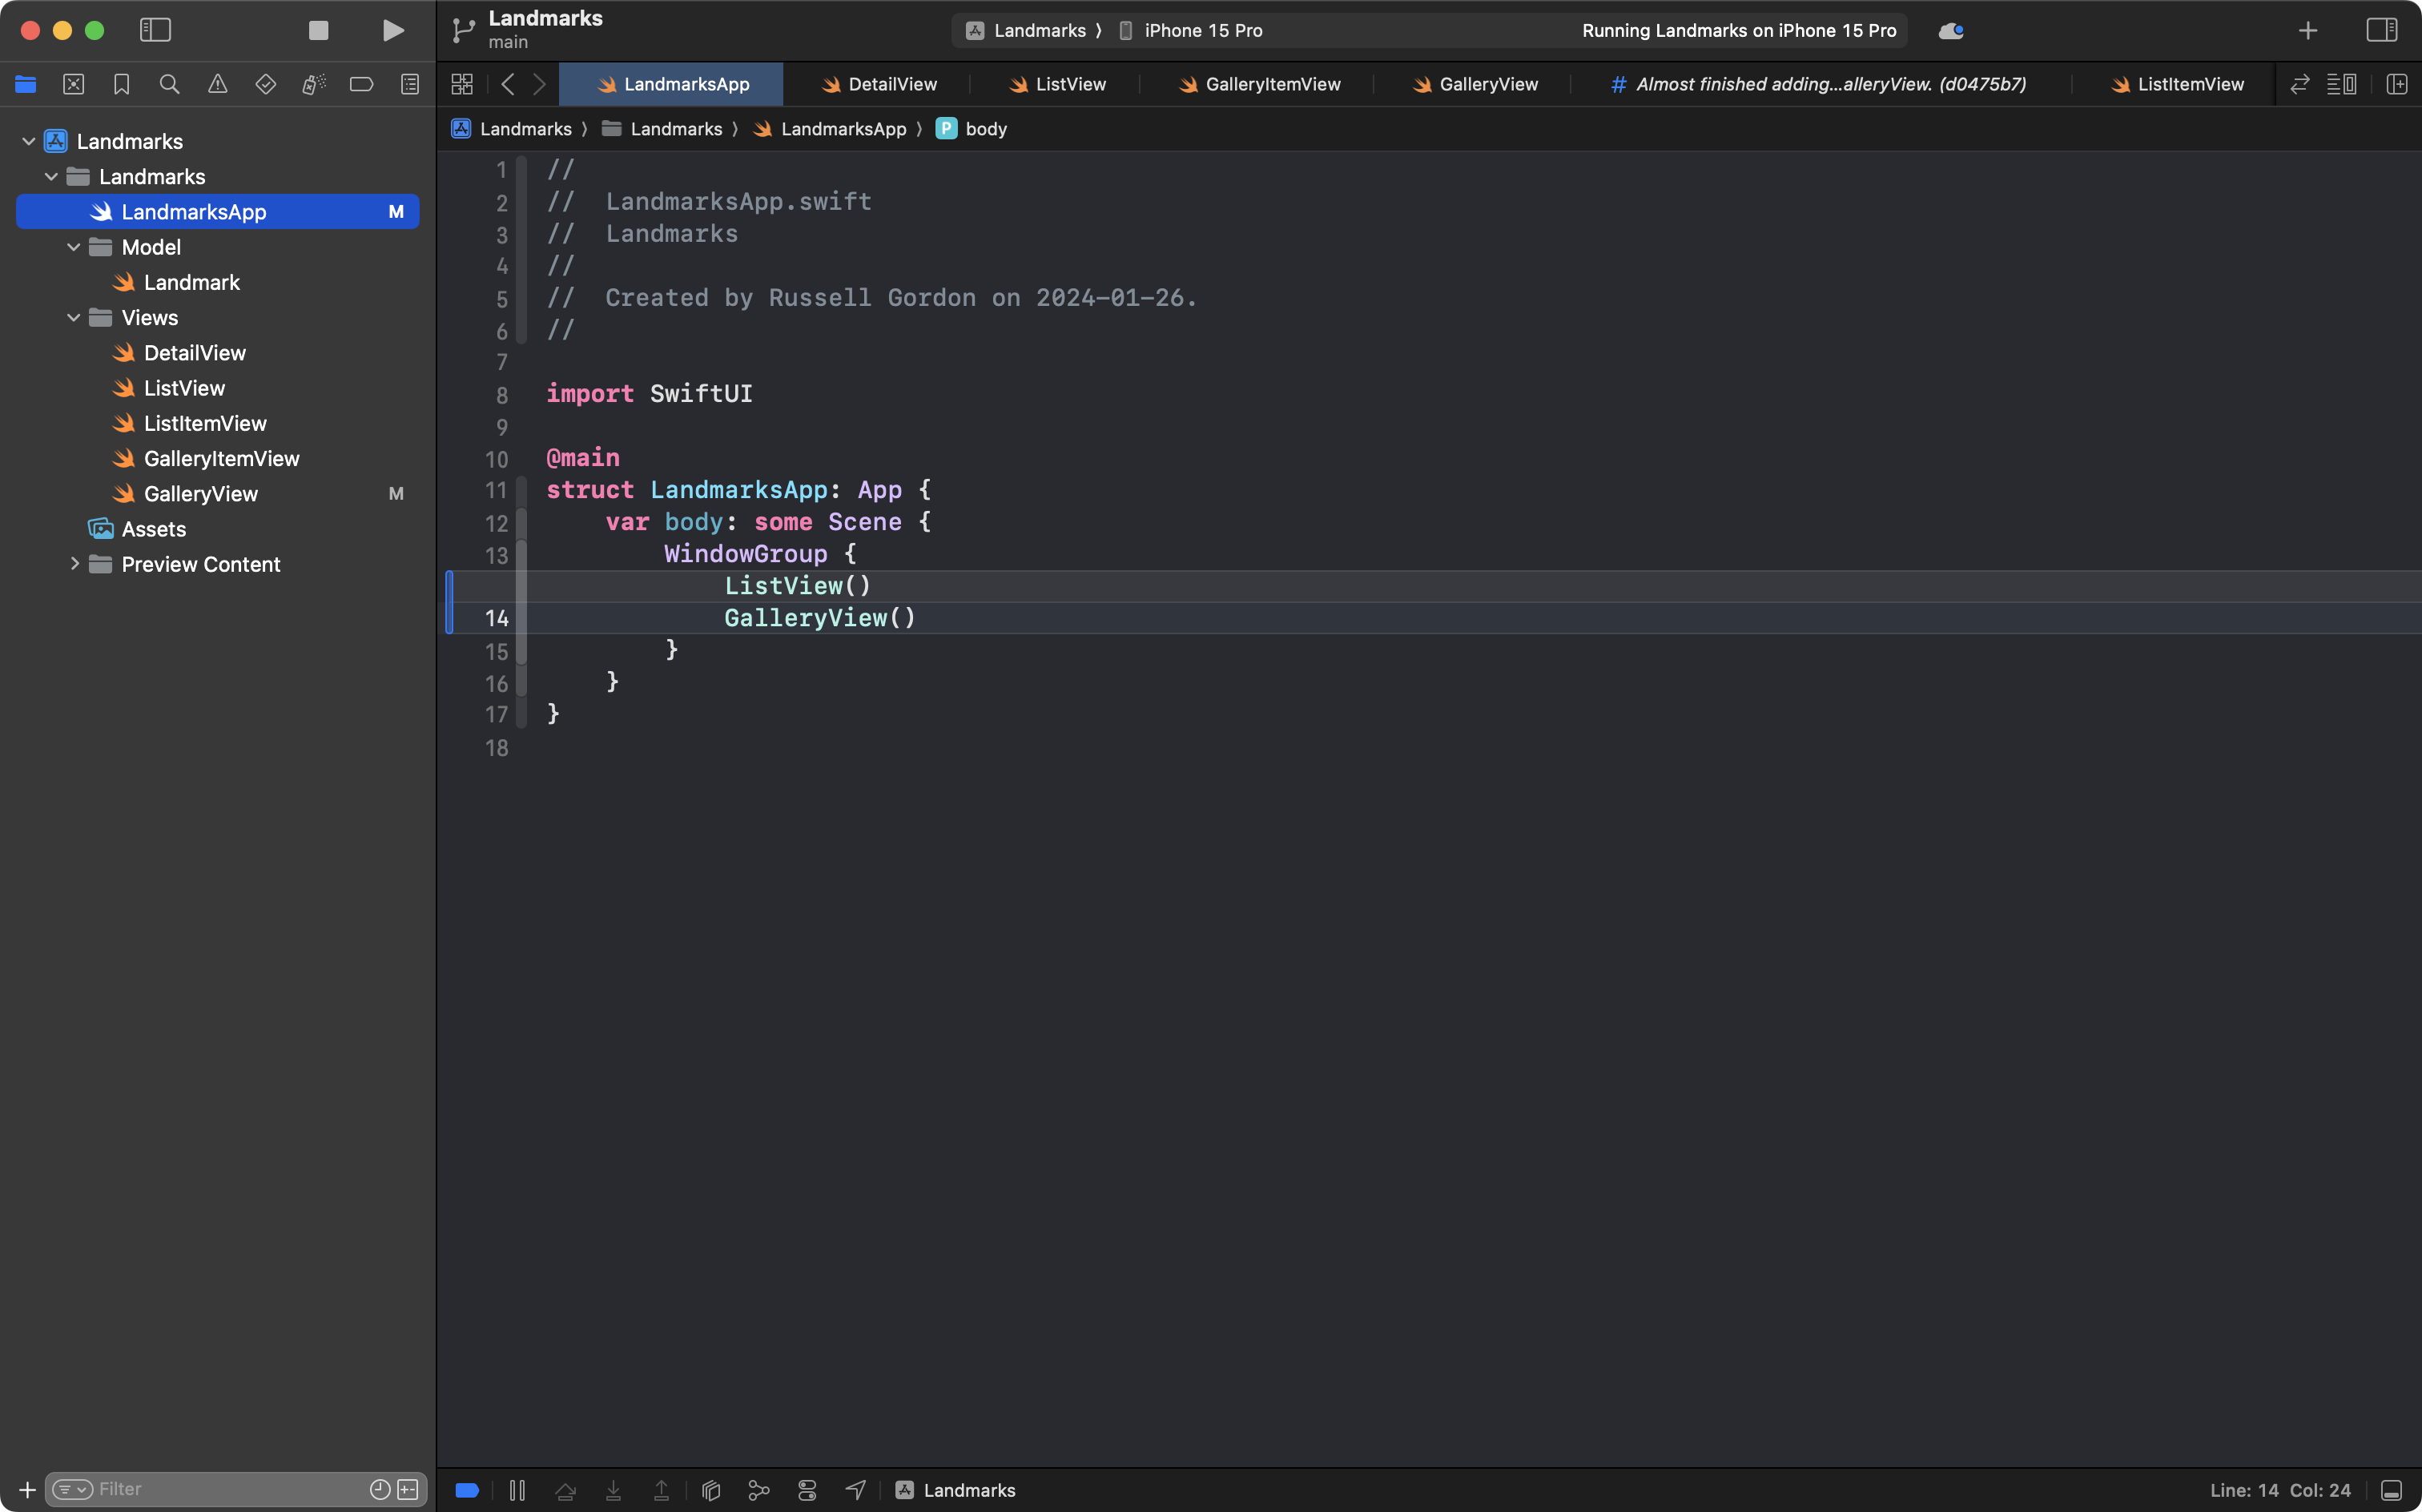
This is nicer than the scrolling list, so please adjust the app entry point file to use this new view instead – old code is on top, new code is below:
We are done! Please commit and push your work with this message:
Finished adding a gallery in the form of a scrollable grid to our new landing view.
Exercises
-
If you look closely at the following three files:
-
DetailView -
ListItemView -
GalleryItemView… you will see some repetitive code.
Add a helper view named
RecommendationViewthat will replace this repeated code. It will need a stored property nameditemof typeLandmark.
-
-
Replace the landmarks listed with several landmarks of your own, from your own experience in life. Instead of placeholder text, write a couple of paragraphs of actual text, explaining why you enjoyed or did not enjoy visiting a particular landmark.