So far we have made lists that hold a set number of values, like in the Trading Cards app:

In the screenshot above, on line 67, a list (also called an array) named allPlayers was created and holds five elements, with indices from 0 to 4:
| Index | Element |
|---|---|
| 0 | kellyGruber |
| 1 | joeCarter |
| 2 | patBorders |
| 3 | tonyFernandez |
| 4 | georgeBell |
However, a great deal of the utility of using a list comes from its flexibility: the number of elements can be increased (or decreased) while our program runs.
Understanding the data structure
Before building an app with a proper user interface, let’s take just a bit of time to explore the structure of an array (also known as a list) again.
Initializing an array
Create a new command-line macOS app named DynamicListExamples, and then copy this code into the main file:
// Create an array of integers that
// holds three random numbers to start
var numbers: [Int] = [

    Int.random(in: 1...100),
    Int.random(in: 1...100),
    Int.random(in: 1...100),

]

// Print the values in the array
for number in numbers {
    print(number)
}
… like this:
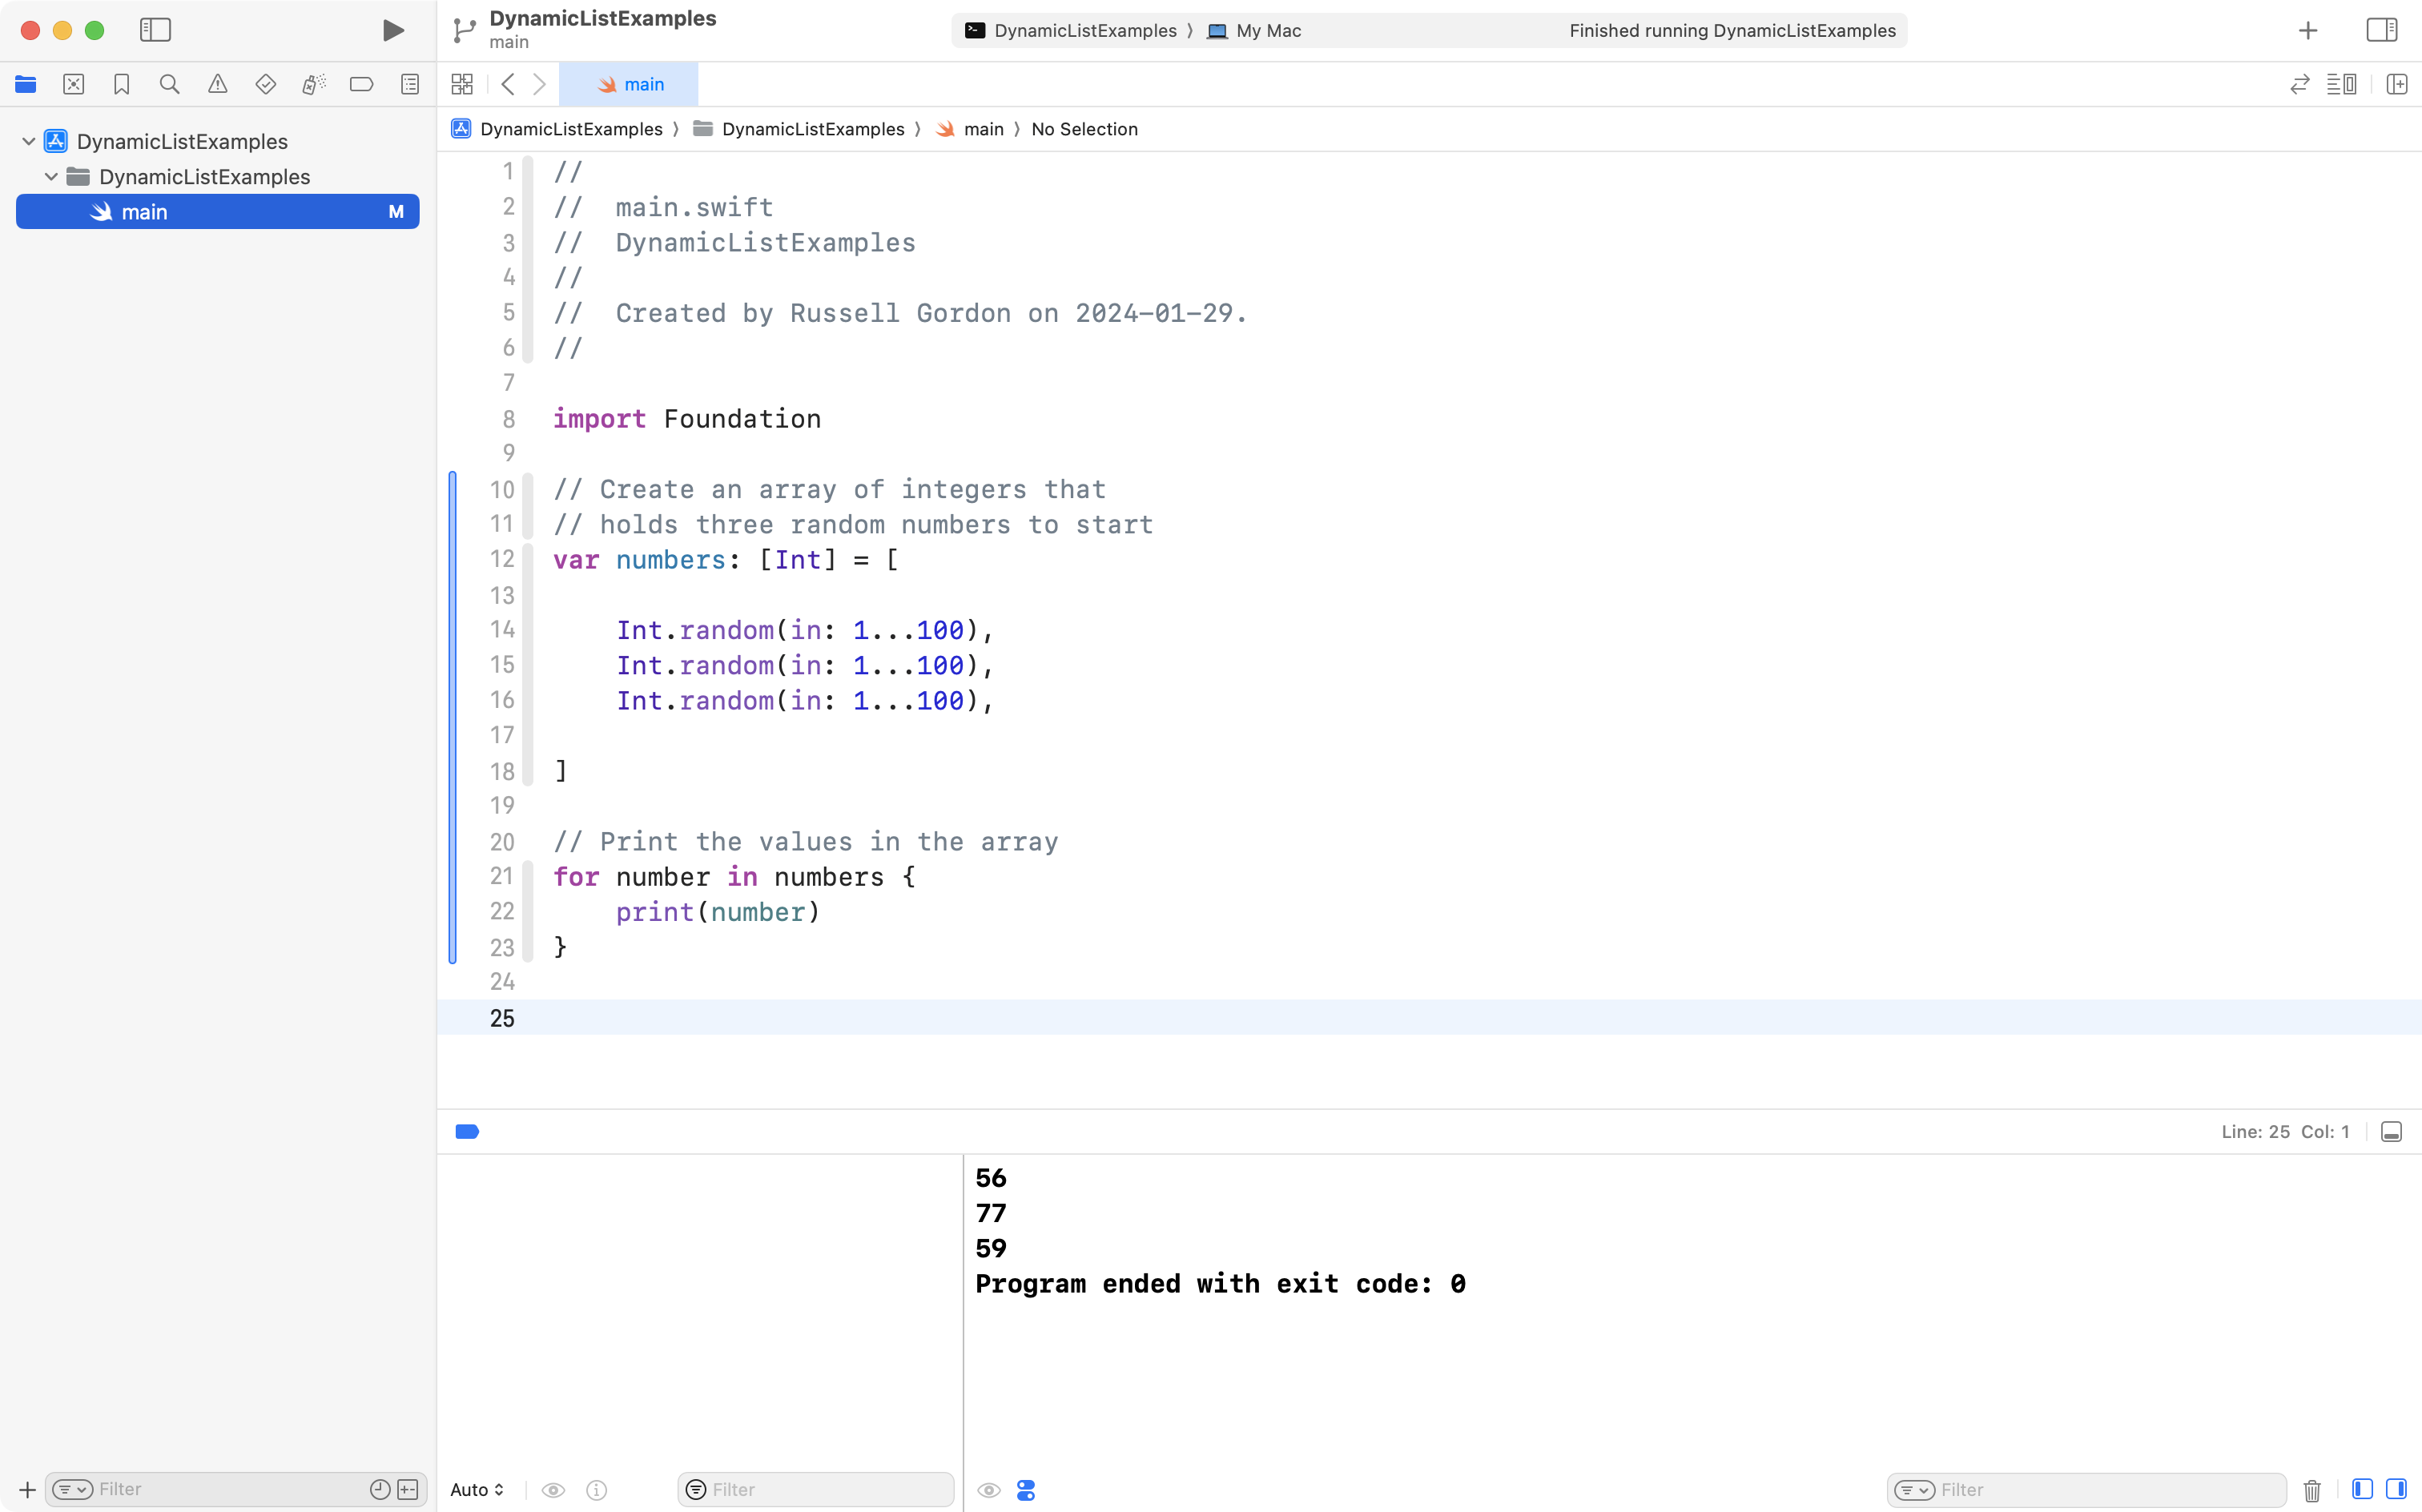
Run the app a few times by using the Command-R keyboard shortcut.
Notice how the numbers in the array change each time. That is because they are randomly generated.
However, there are always three elements in the array.
Three elements will exist at indices 0 through 2, inclusive, like this (using values from the screenshot above):
| Index | Element |
|---|---|
| 0 | 56 |
| 1 | 77 |
| 2 | 59 |
You can check for yourself that this is in fact how the array is organized.
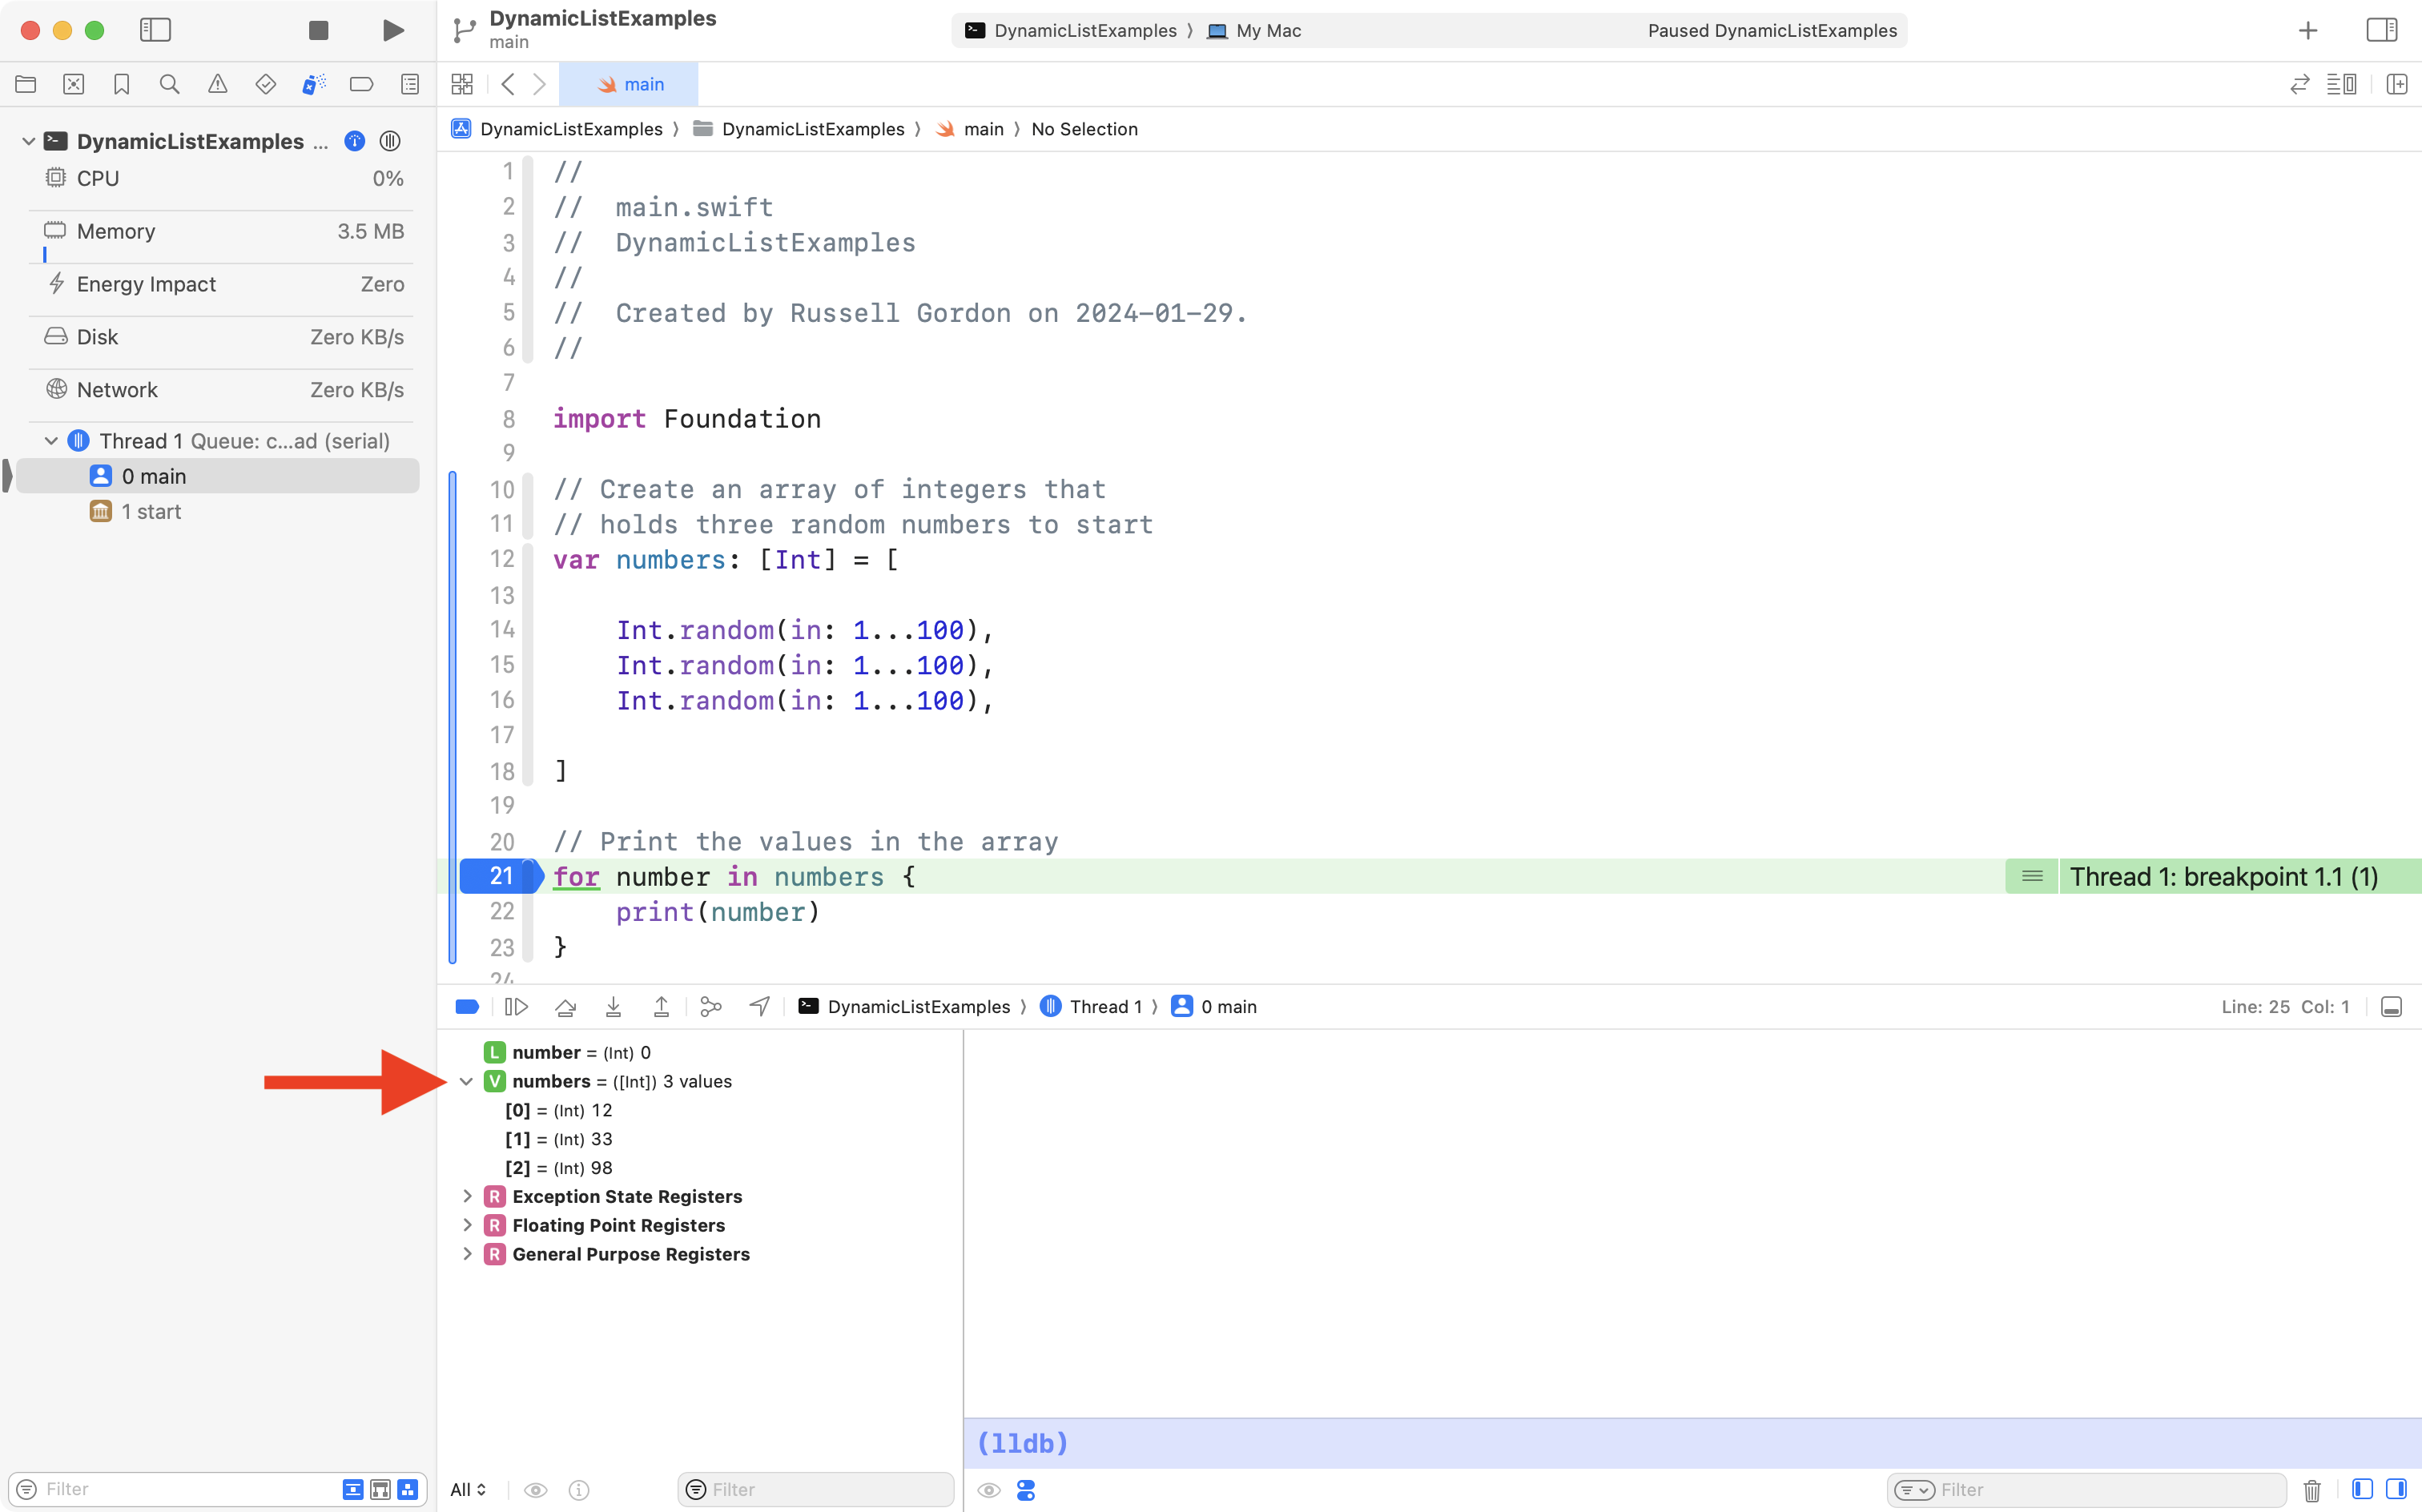
Click the left margin of the Xcode interface, where it says line 21, then run your app:
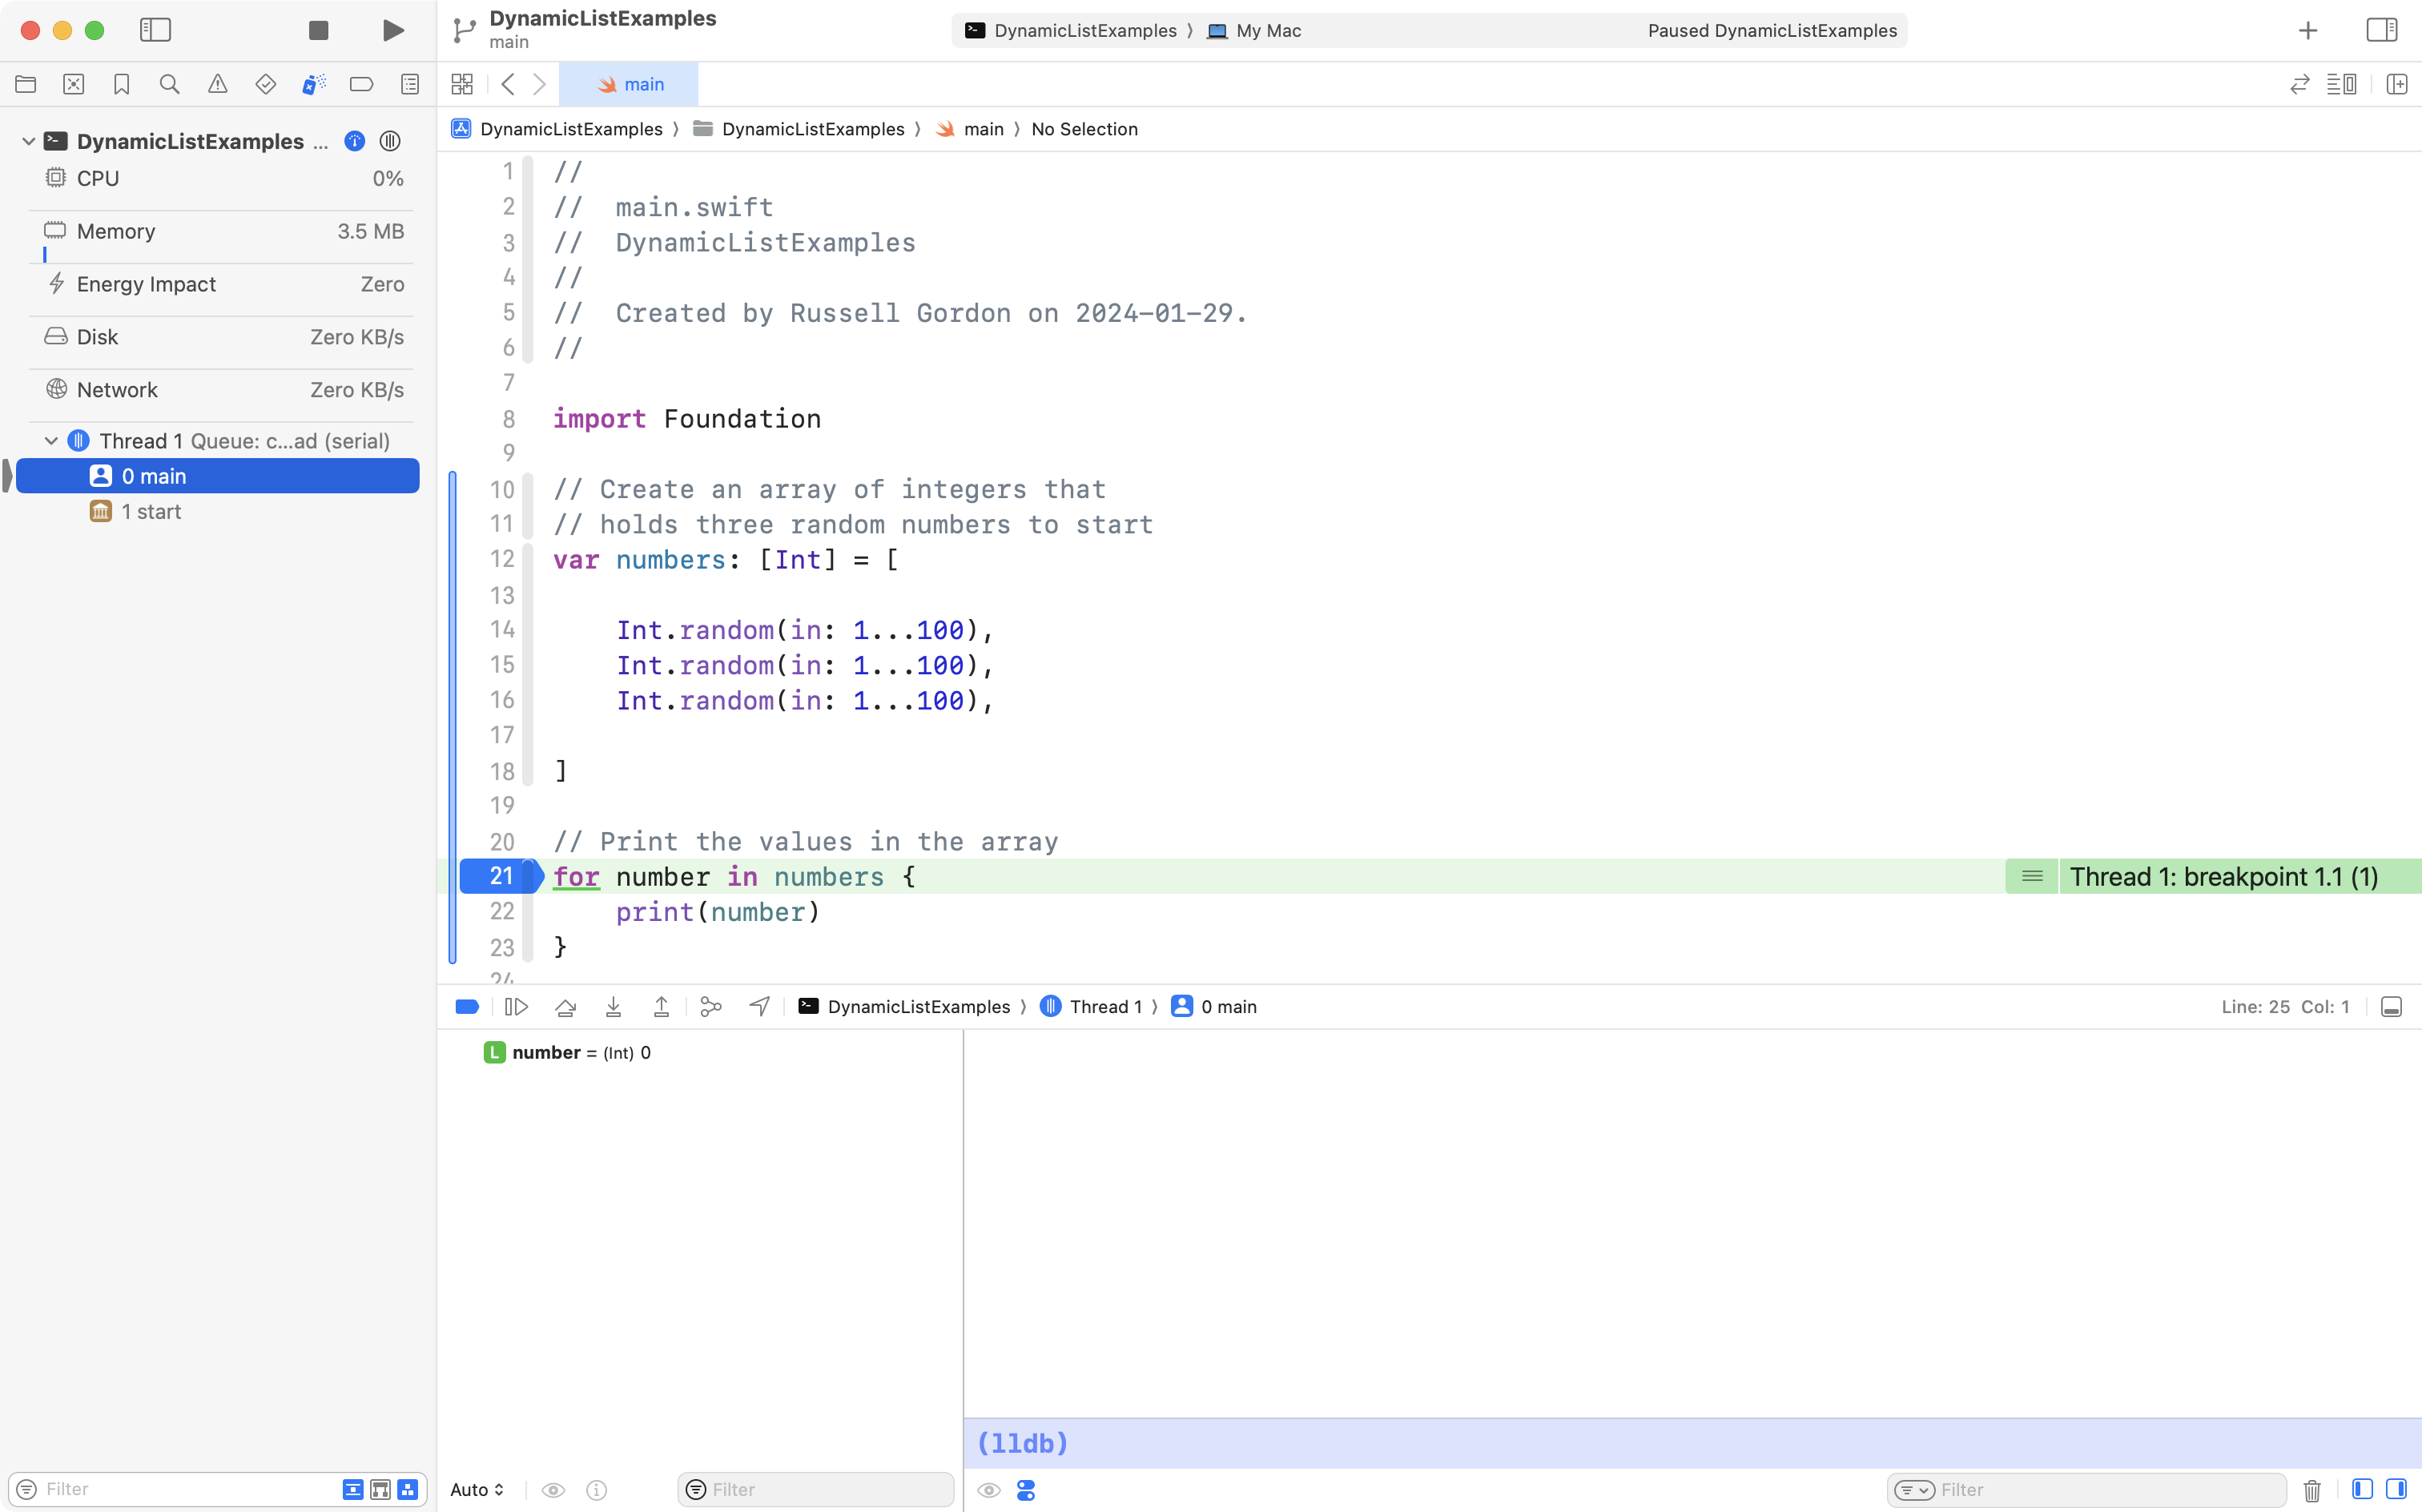
The blue mark in the margin is a breakpoint, and you are now debugging your app in real-time.
The green line indicates the line of code that is about to be run. We will use this in a moment.
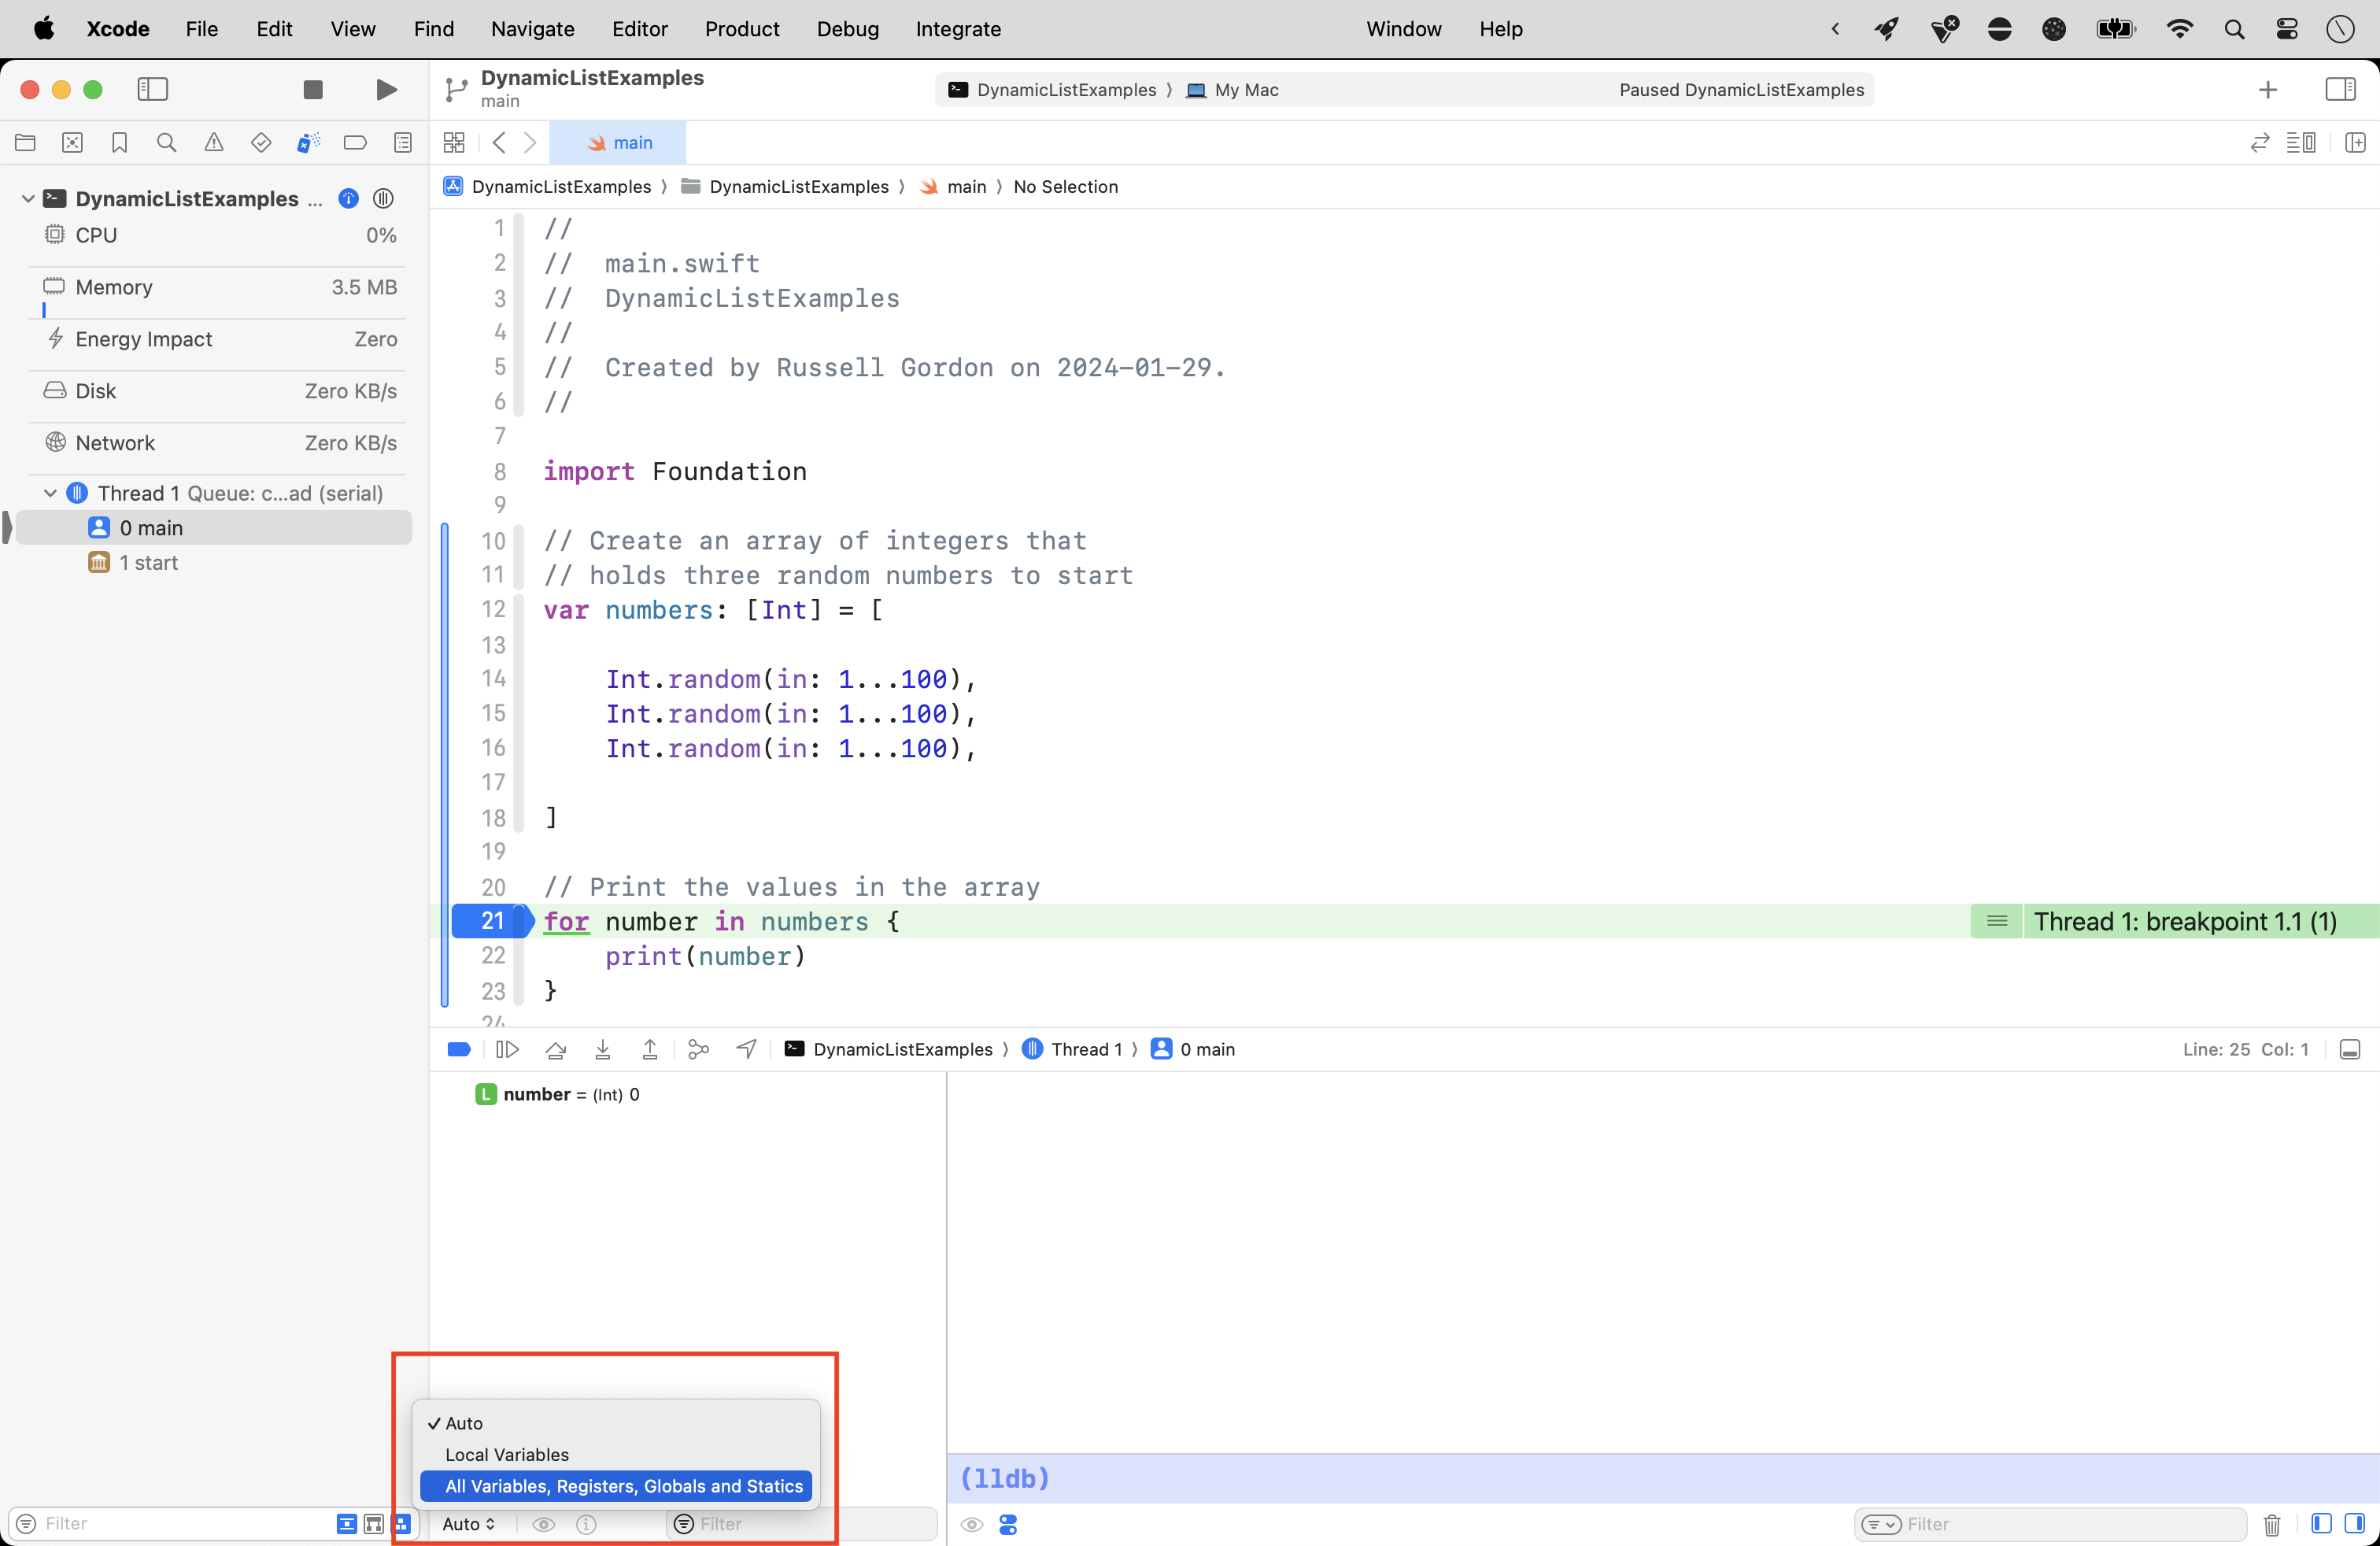
For now, click near the bottom of the Xcode interface, where it says Auto↕, and then select All Variables, Registers, Globals and Statics, like this:
You should then see the following:
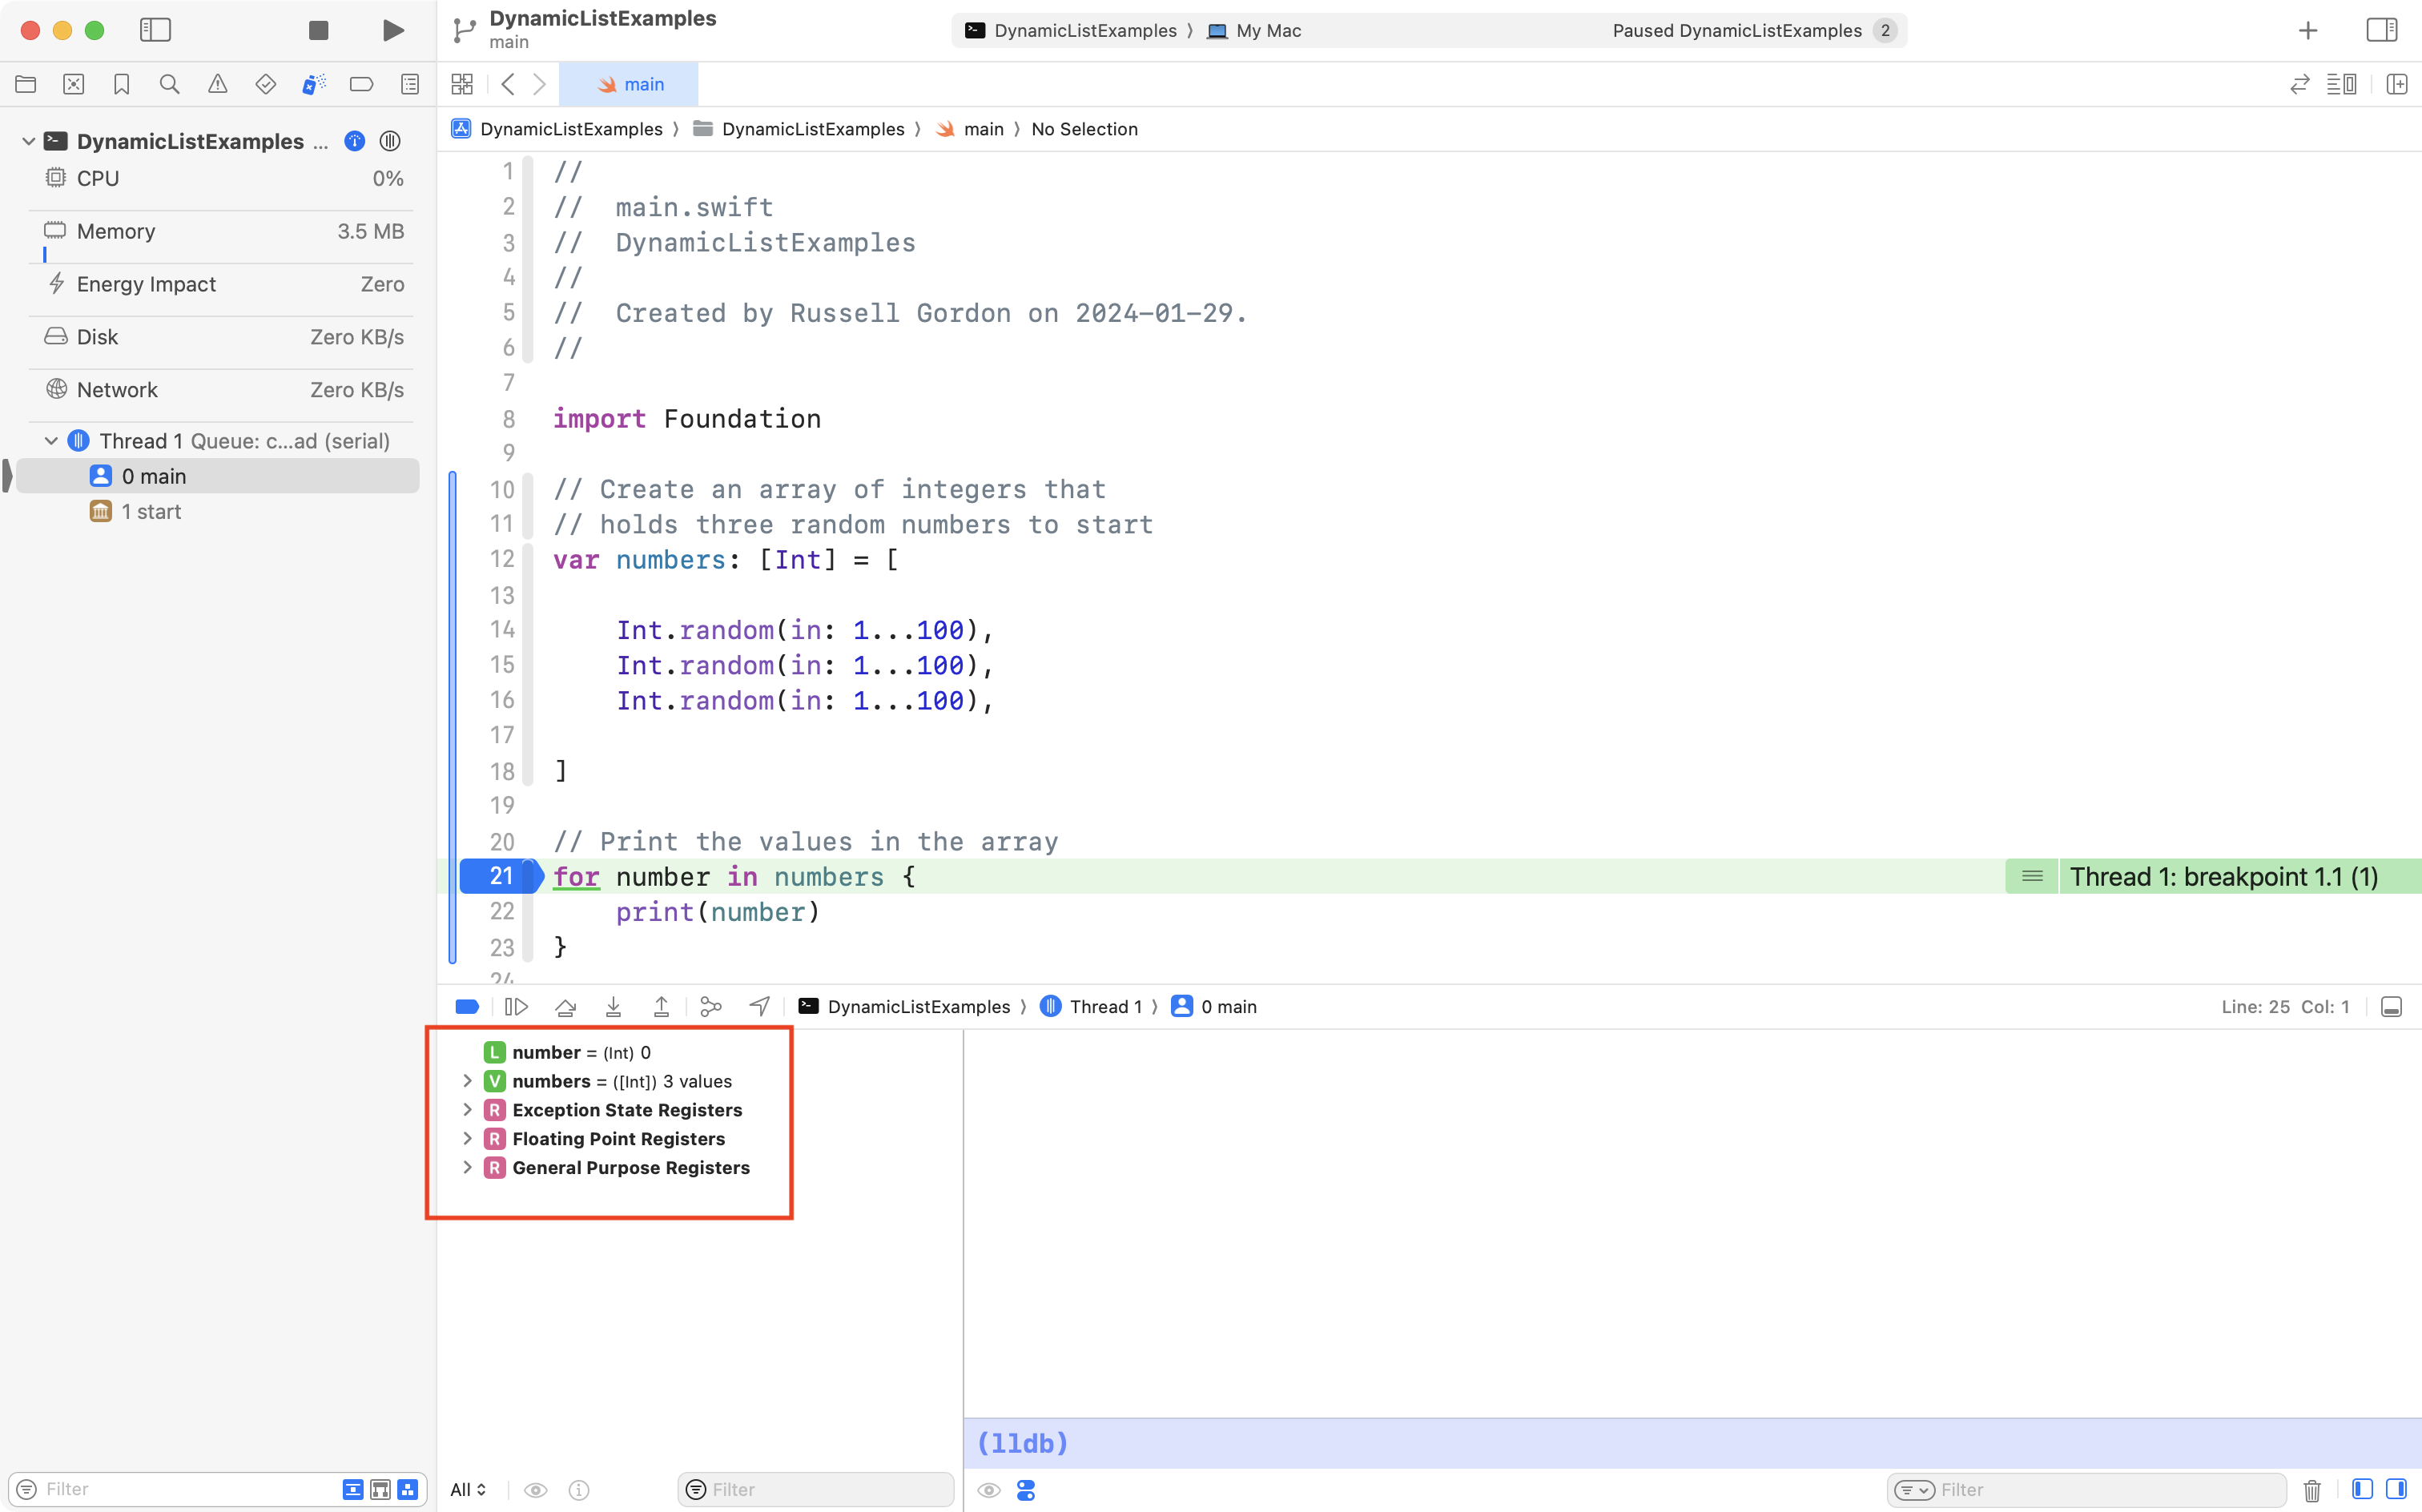
Finally, click the disclosure triangle beside numbers and you will see the three existing values in the array, and index positions 0, 1, and 2:
If you wish, you can step through the code. Press the Step Over button a few times, and you will see the loop print the numbers in the array to the console:

Mutating the array
However, what if we want to add more values to the array?
When a data structure is changed, we say it is mutated.
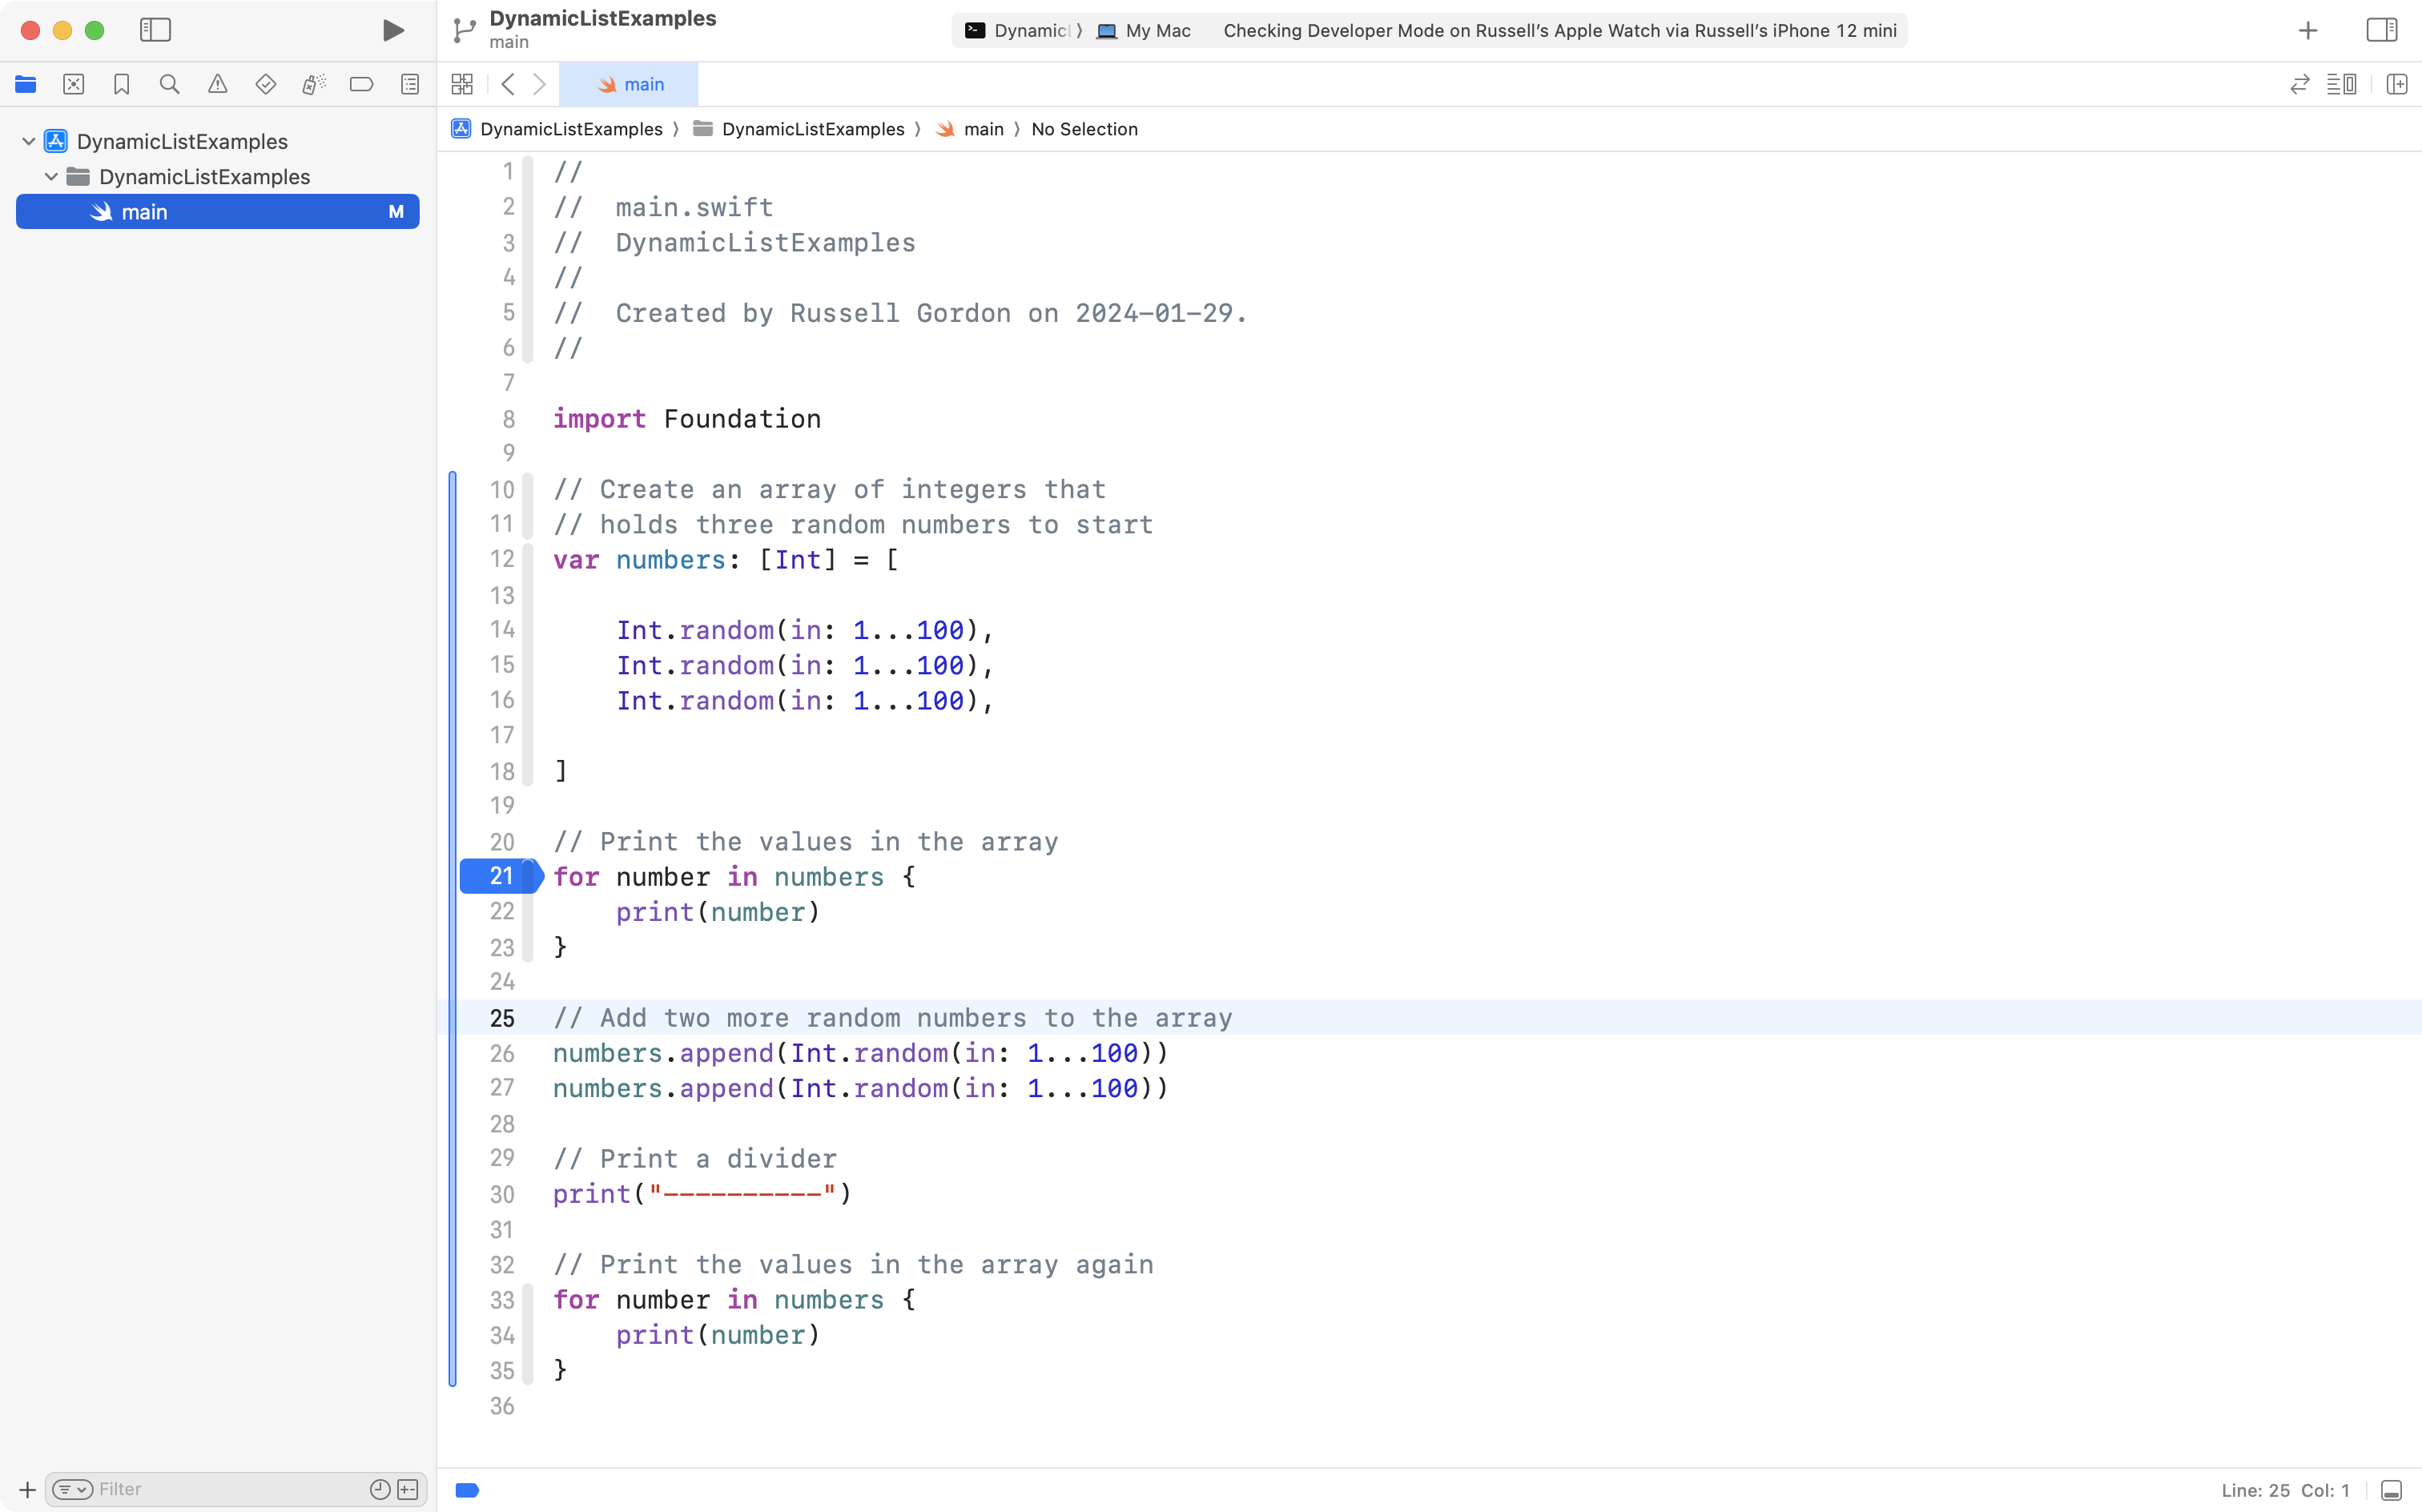
We could do this by adding more lines of code after the existing code:
// Add two more random numbers to the array
numbers.append(Int.random(in: 1...100))
numbers.append(Int.random(in: 1...100))

// Print a divider
print("----------")

// Print the values in the array again
for number in numbers {
    print(number)
}
… like this – all the code on lines 25 and below is new:
With the new code, from the screenshot above, at first the array contains just three values:
| Index | Element |
|---|---|
| 0 | 21 |
| 1 | 35 |
| 2 | 55 |
However, after the additional elements are appended (added to the end) of the array, it contains:
| Index | Element |
|---|---|
| 0 | 21 |
| 1 | 35 |
| 2 | 55 |
| 3 | 82 |
| 4 | 51 |
This demonstrates that you can mutate, or change, the number of elements in an array after the array is first initialized.
Try this out by running the code and stepping through it – notice how the size of the array changes as the additional lines of code are run:

However, we, as the programmer, are still deciding to add two more elements, and we are writing the code to make that happen.
What if we want to change the elements in the array at run time?
That is… while the program is running?
By letting the user decide?
We can do that.
Mutating at run time
First, let’s clear the breakpoint on line 21, like this:
![]()
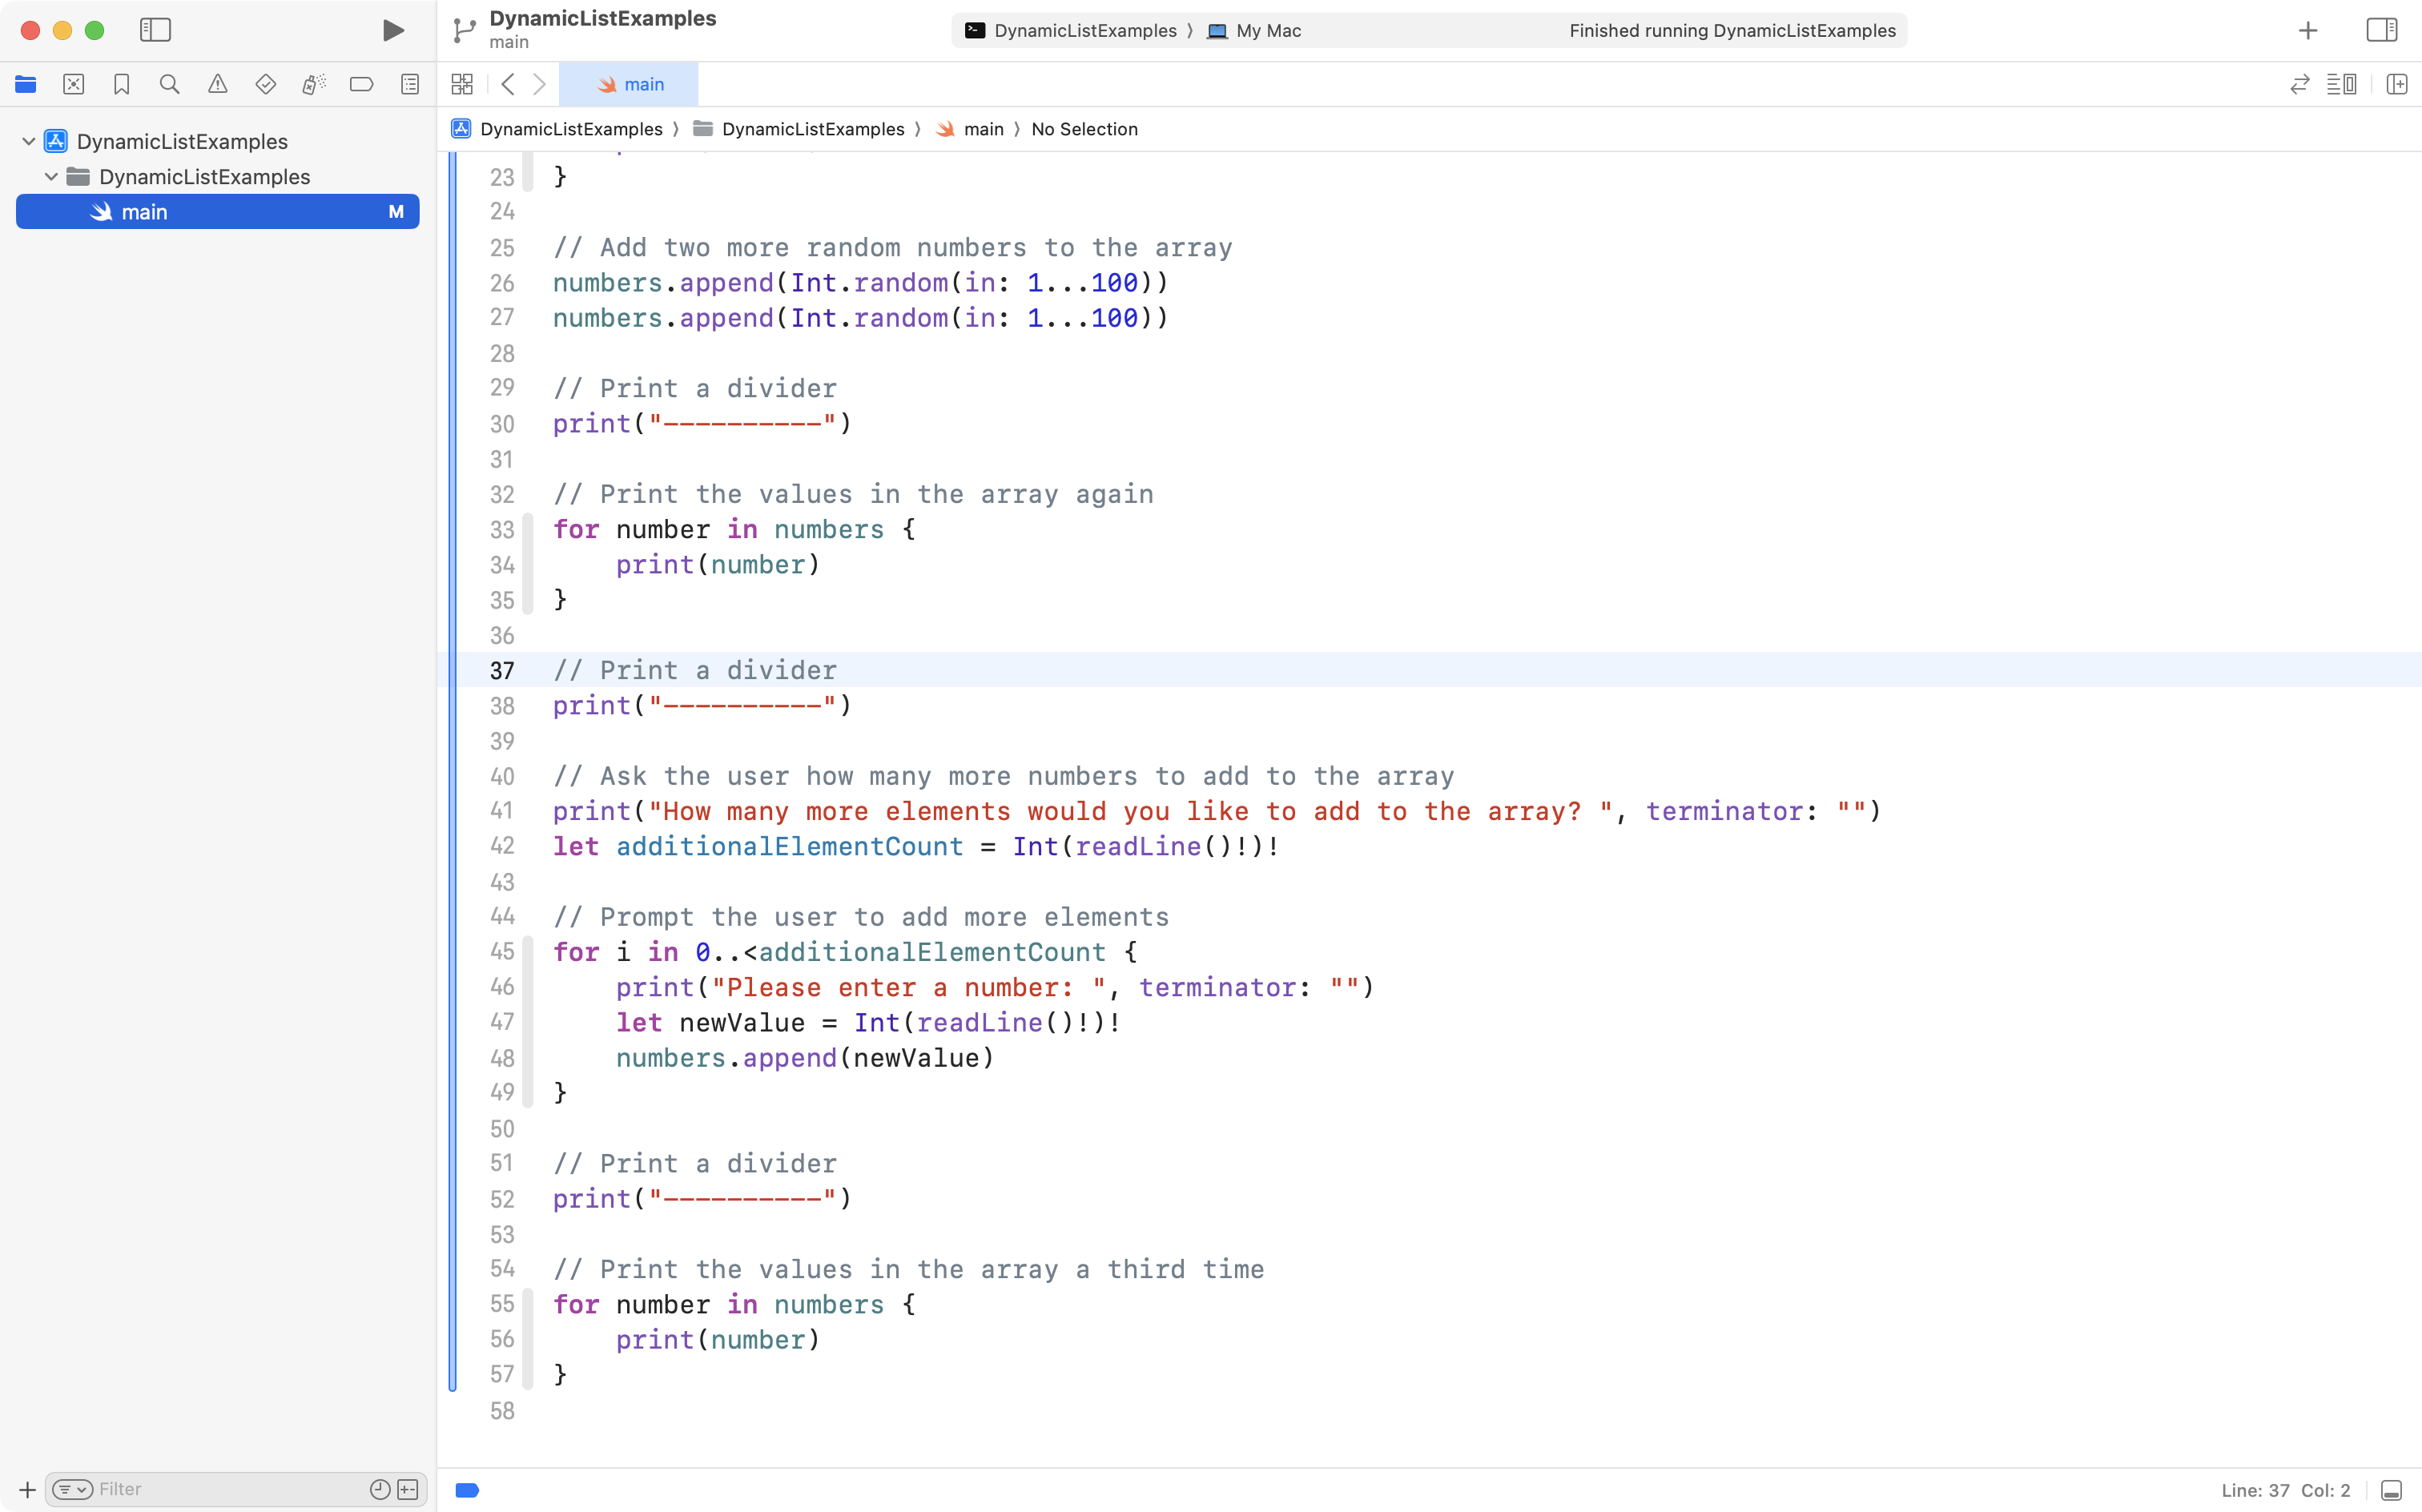
Then add the code below to the bottom of the existing code in your app:
// Print a divider
print("----------")

// Ask the user how many more numbers to add to the array
print("How many more elements would you like to add to the array? ", terminator: "")
let additionalElementCount = Int(readLine()!)!

// Prompt the user to add more elements
for _ in 0..<additionalElementCount {
    print("Please enter a number: ", terminator: "")
    let newValue = Int(readLine()!)!
    numbers.append(newValue)
}

// Print a divider
print("----------")

// Print the values in the array a third time
for number in numbers {
    print(number)
}
… like this – everything on line 37 and after is new:
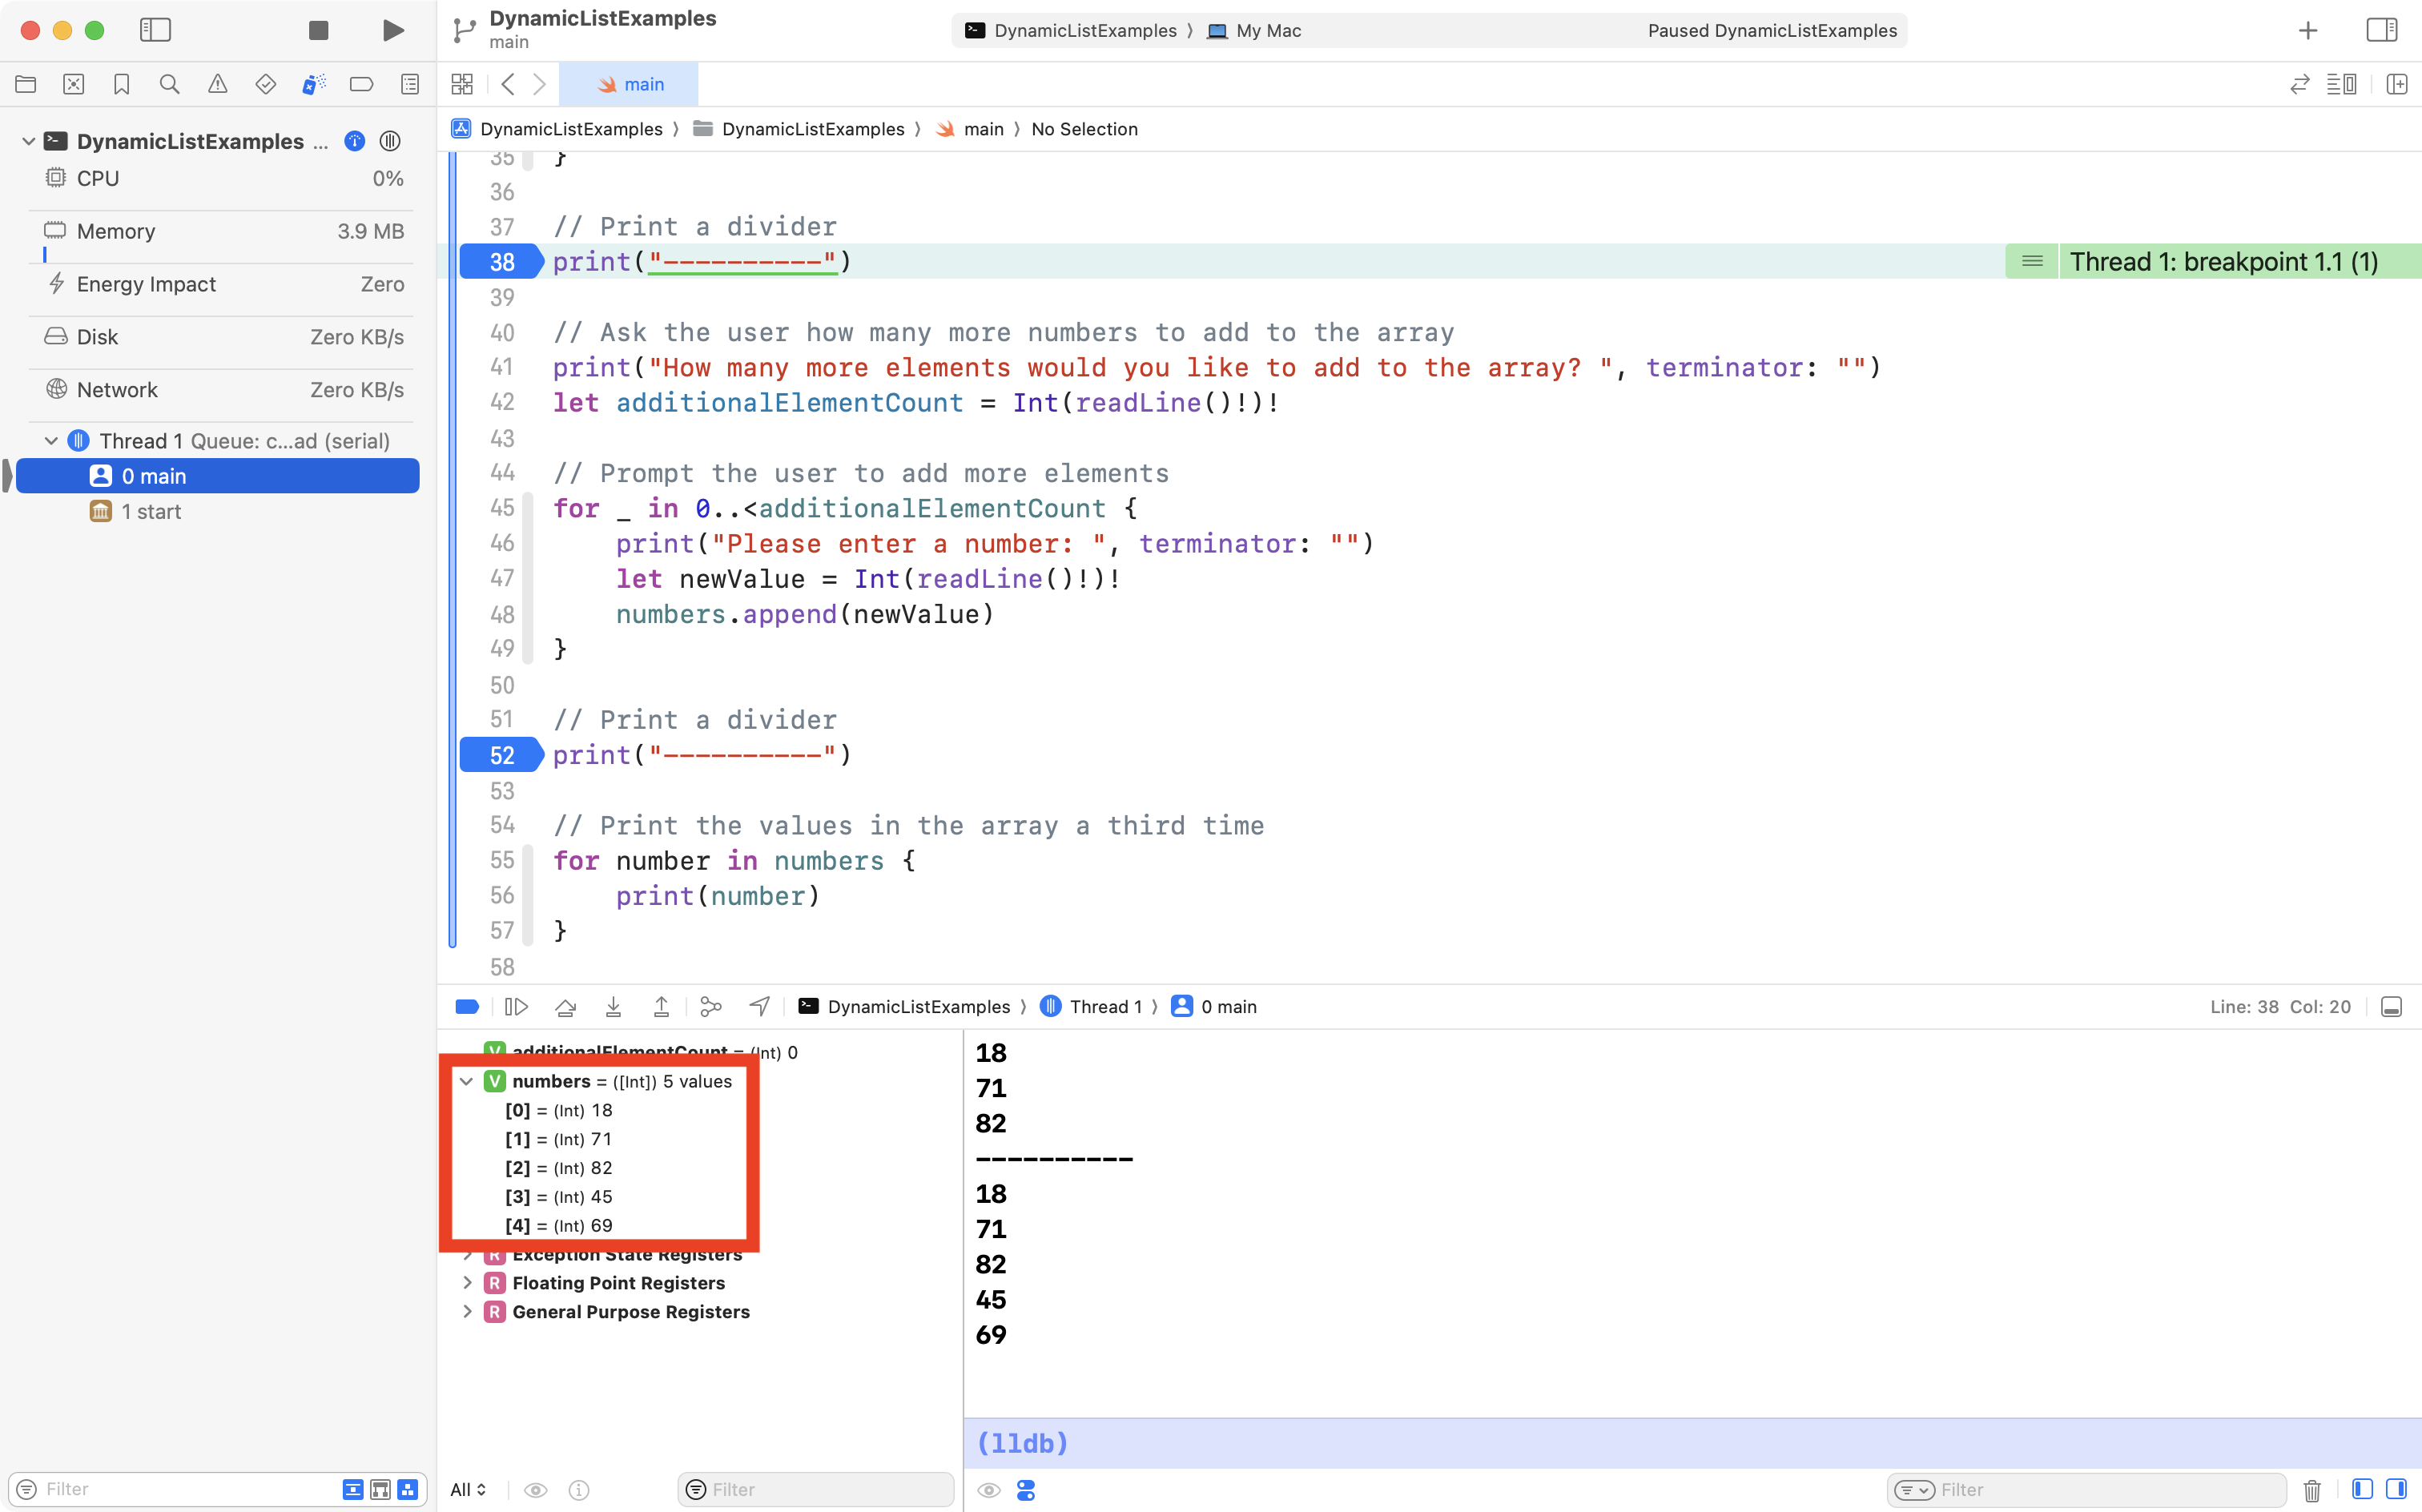
Now set a breakpoint on line 38, and another breakpoint on line 52, like this:
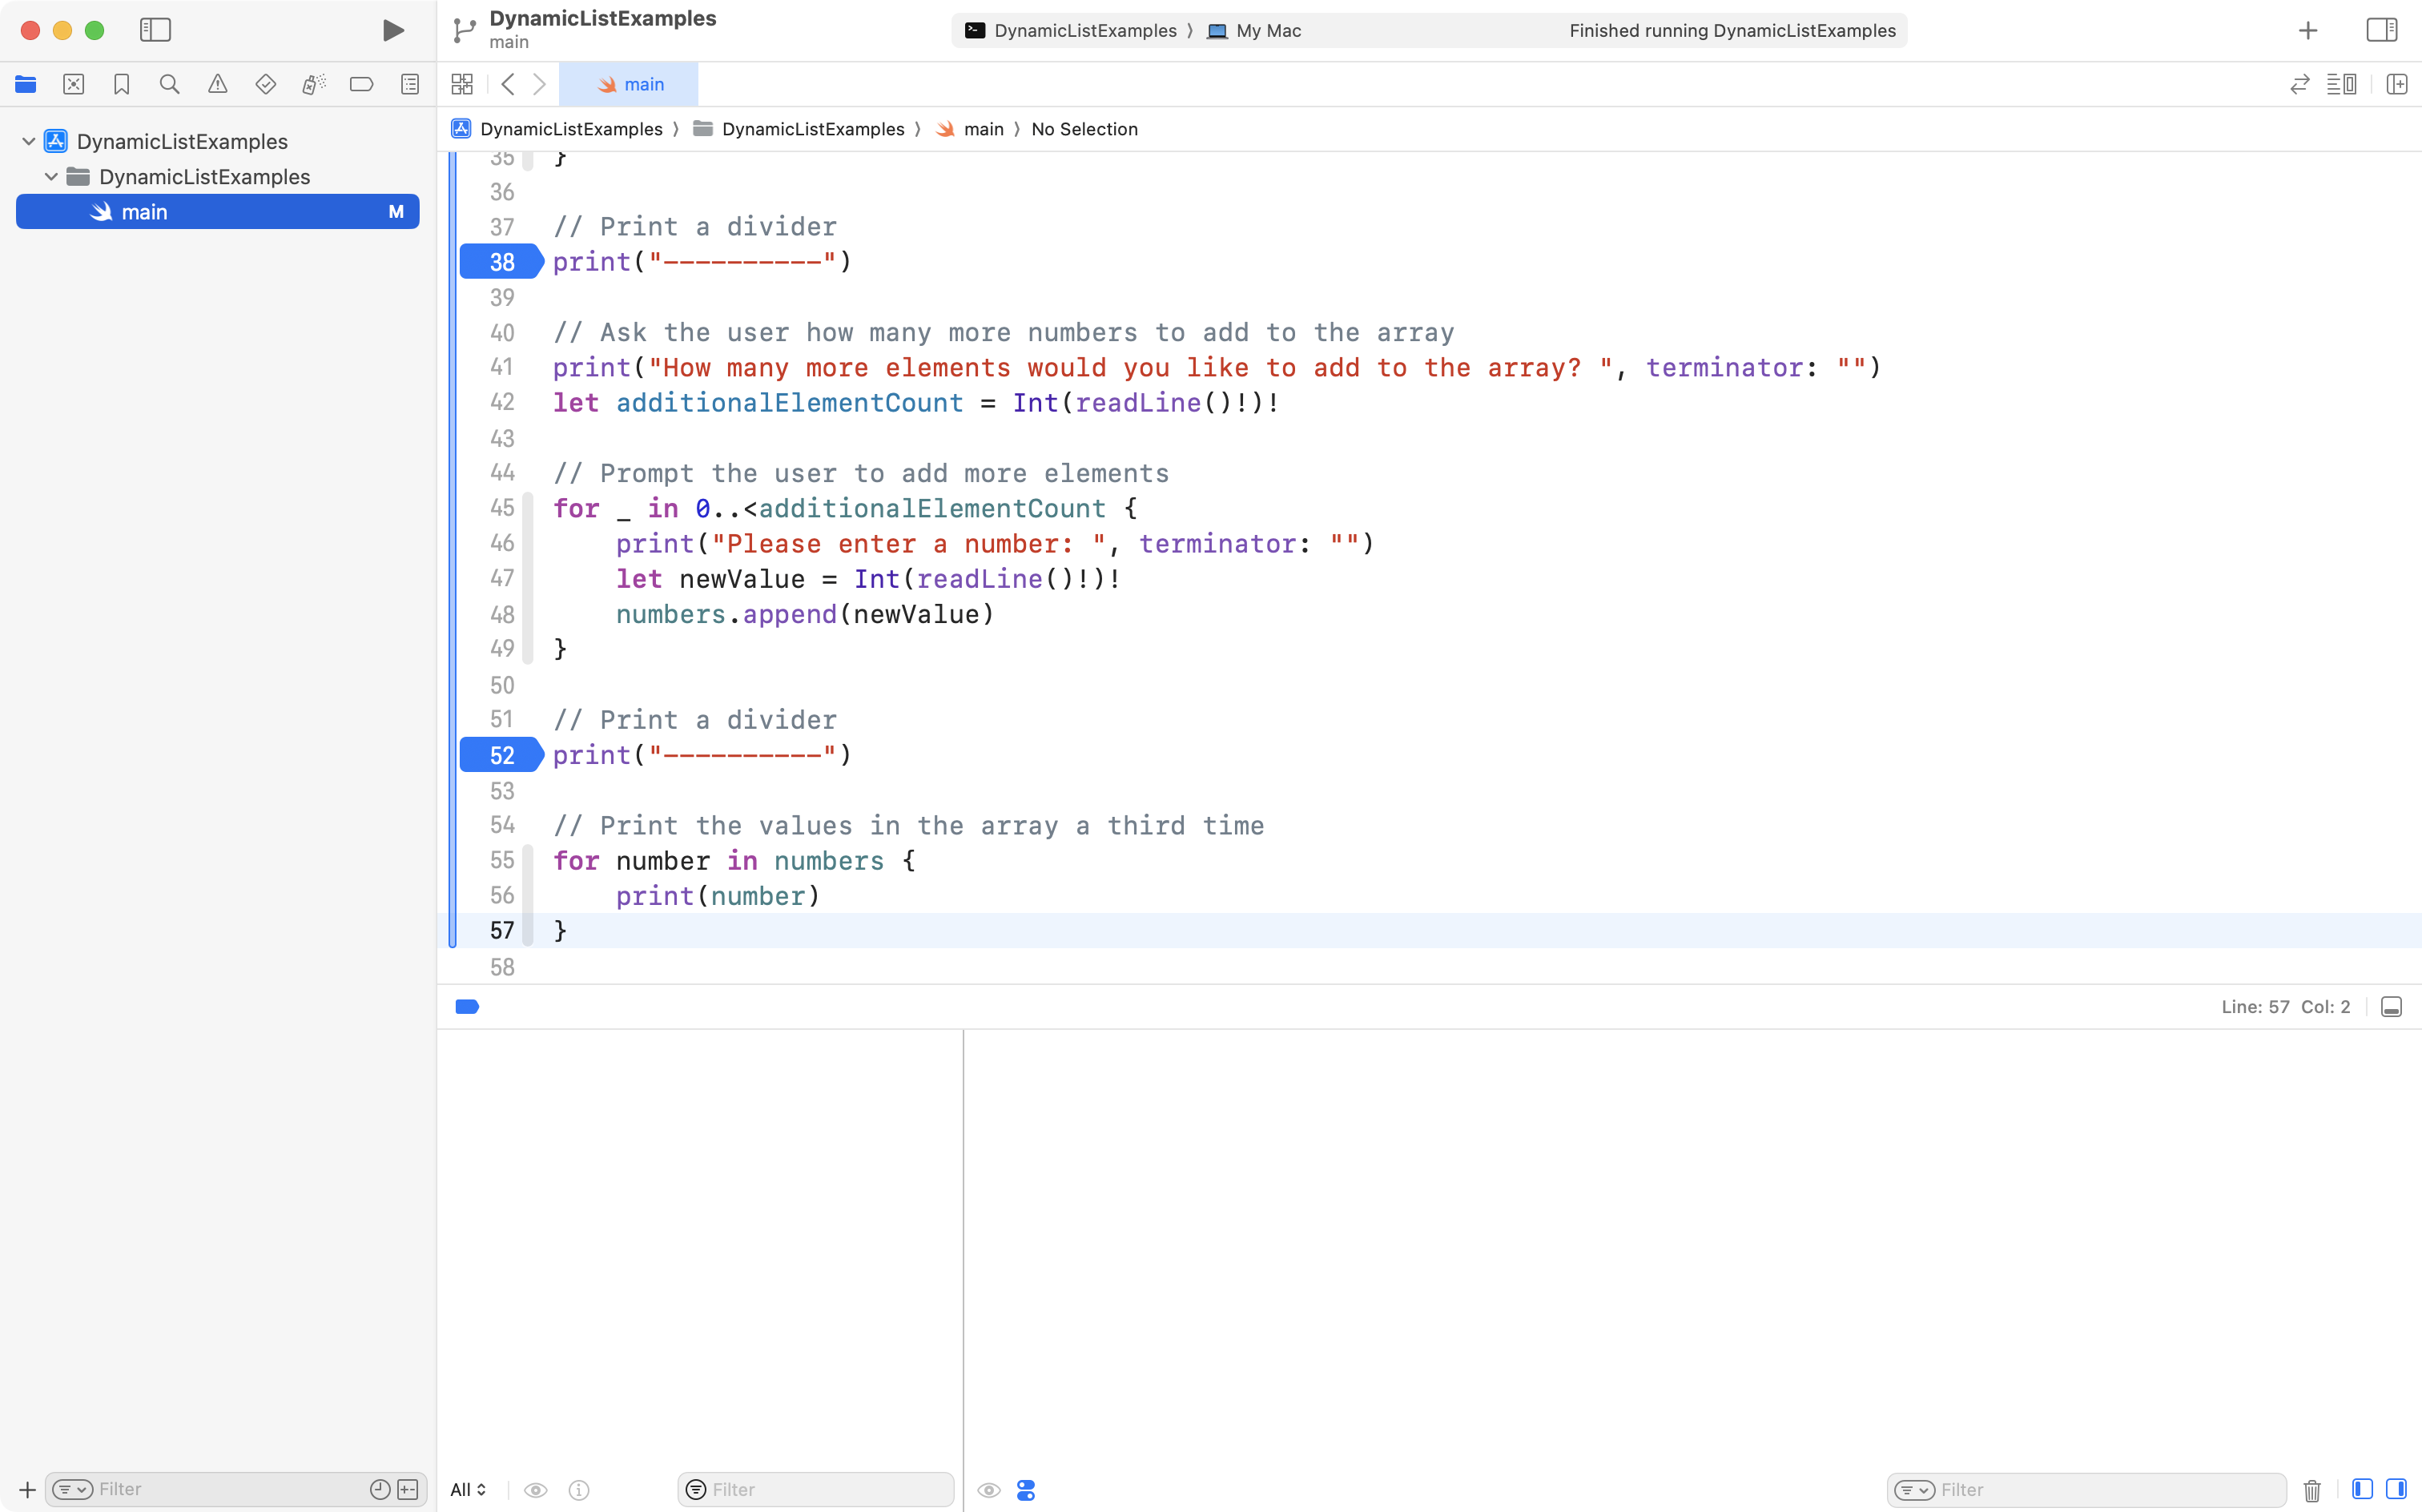
Try running the program.
It will stop just before the user – you – will be prompted to add more elements to the array.
Notice how there are currently five elements in the array:
If you press the Continue program execution button:
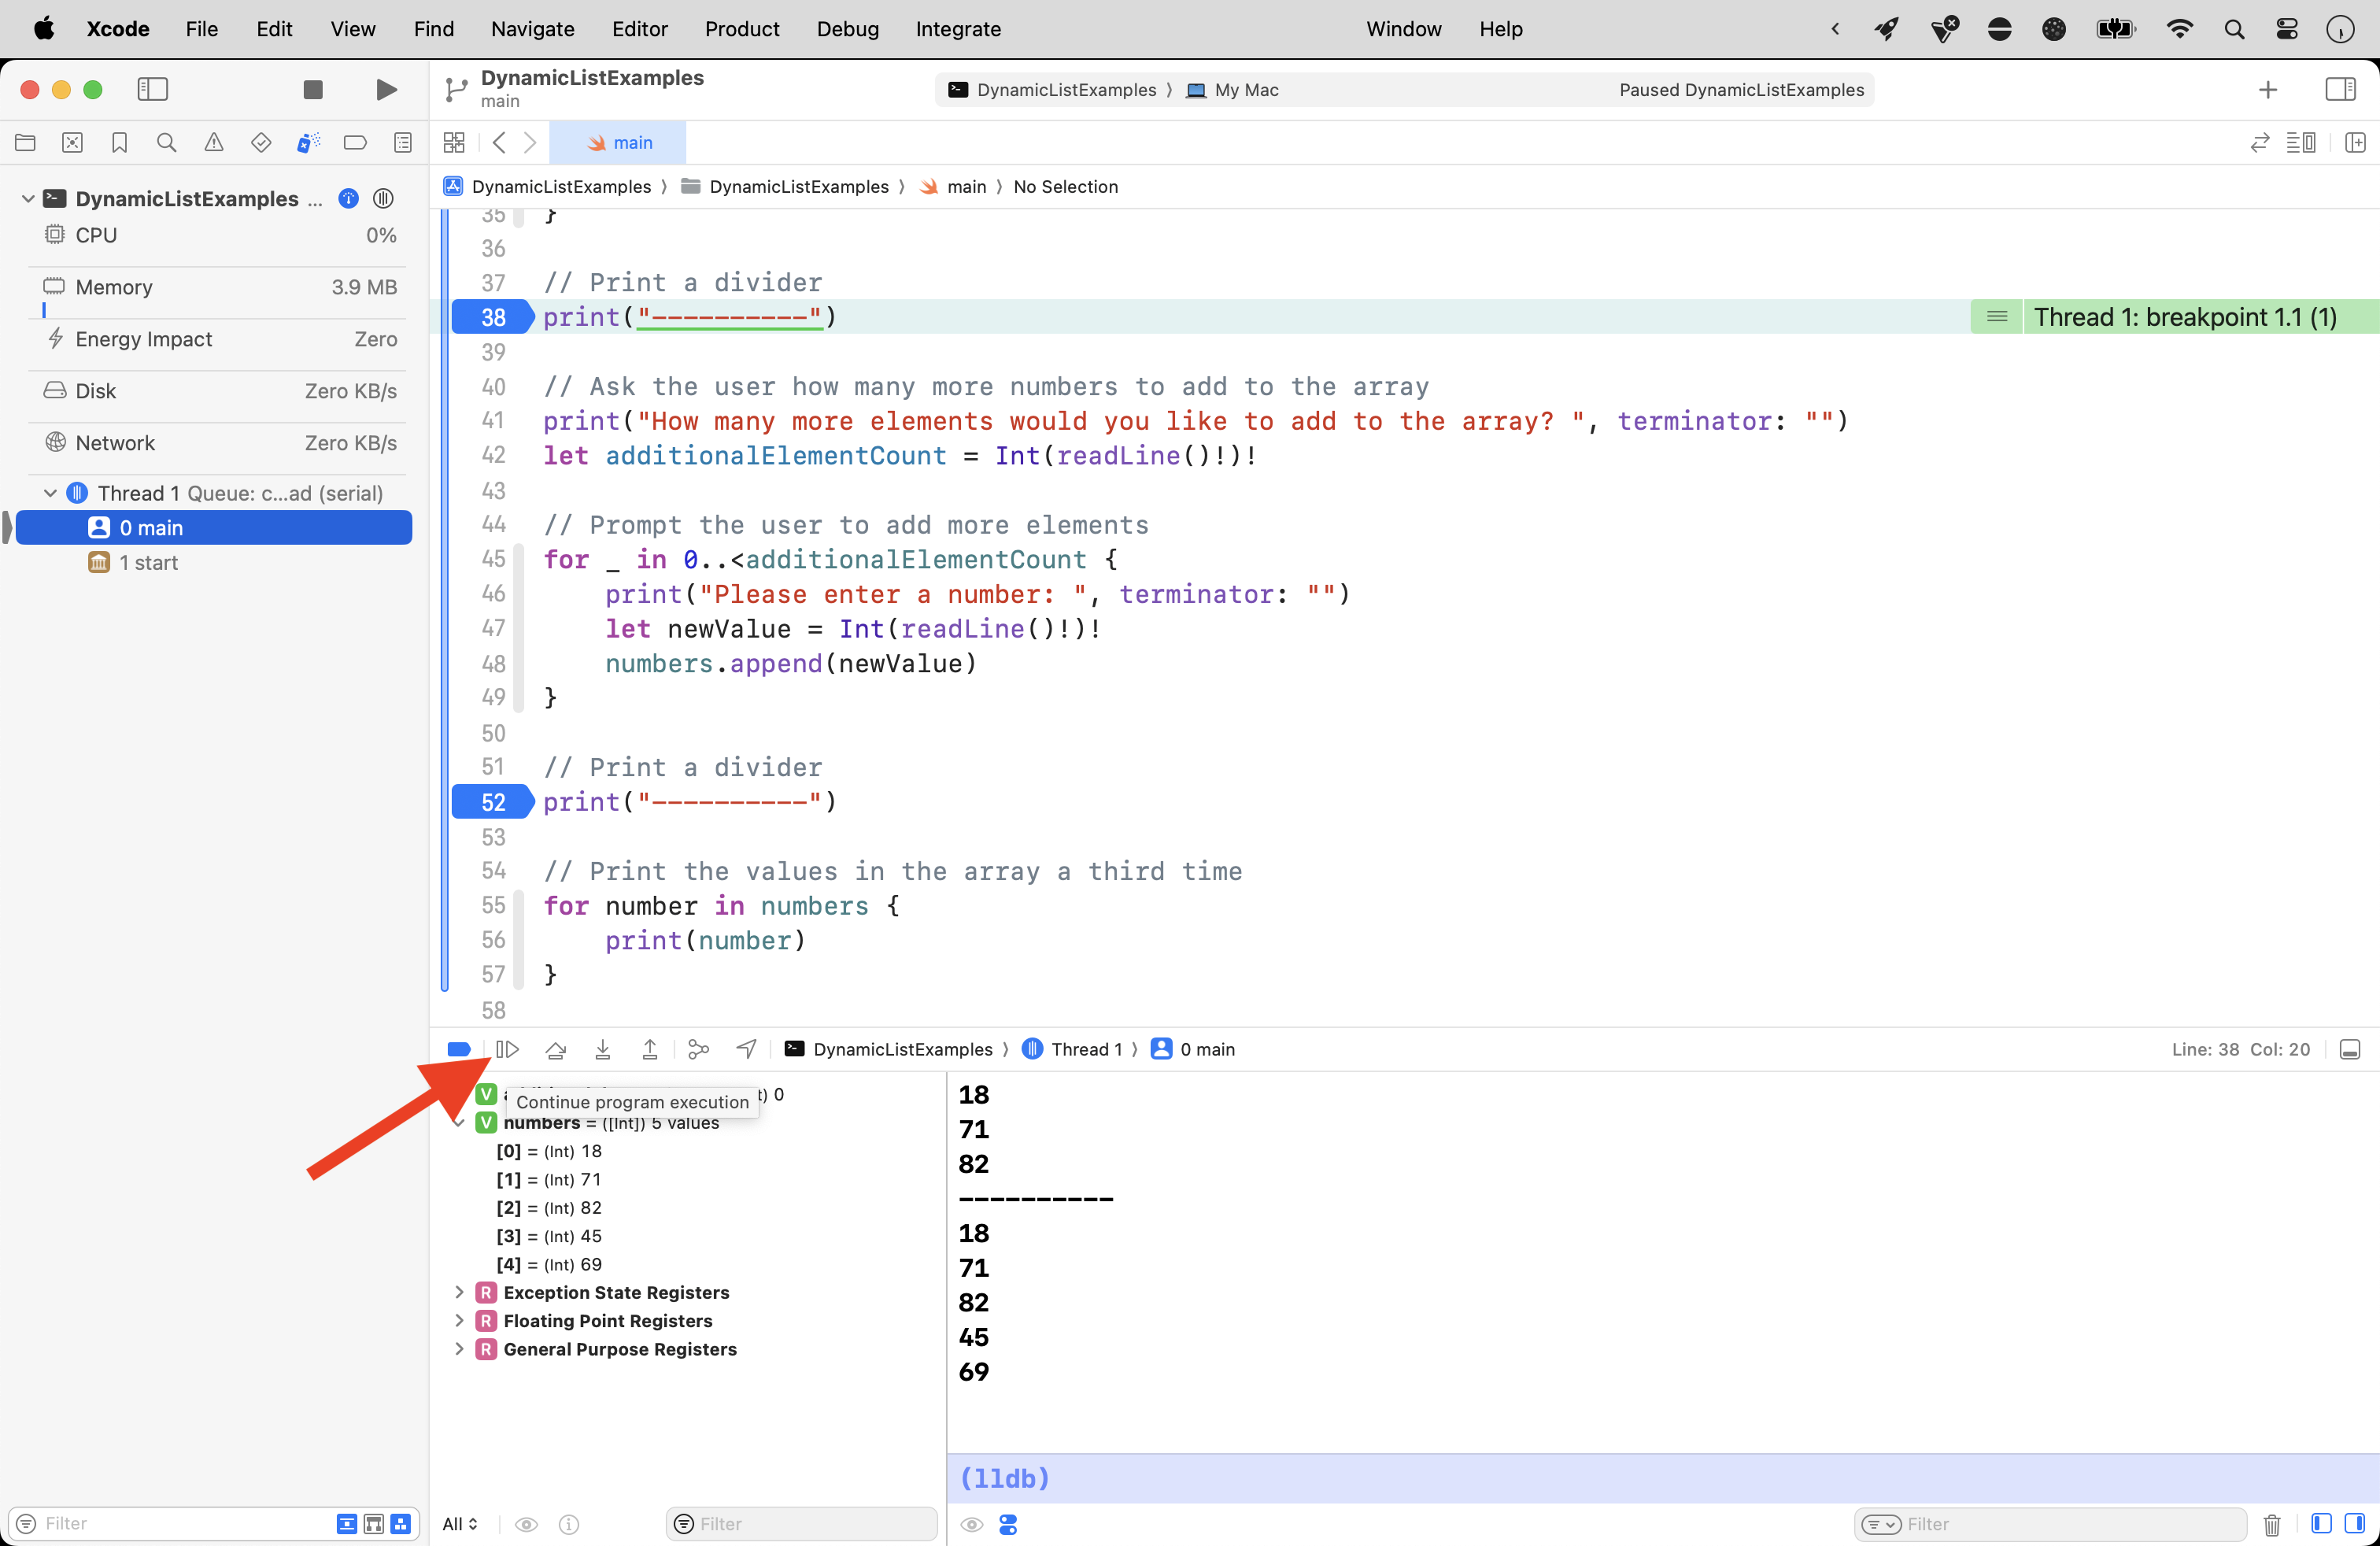
… you will be prompted to add as many new elements to the array as you want.
Choosing a value less than 10 is recommended unless you really enjoy typing numbers into a computer!
Notice that when the program stops at the second breakpoint, the size of the array has grown by however many elements you chose to add:

So, that is a recap of how arrays are structured.
We have shown that we can place elements in an array:
- when it is first initialized
- this is what we did in Trading Cards, Landmarks, and similar apps
- after it is initialized
- we can change an array’s contents after it is first created
- at run time
- the user can control how many new elements are added to an array
TIP
Run the command line program we just wrote again.
Try typing something other than a number in when prompted.
For example, type
fiverather than5.What happens? Why do you think that happened? Write your response in your Notion post for today before continuing.
More on how to handle this later…
Exercise
Let’s apply the idea of dynamically changing the contents of an array in a real app.
Create the project
Create a new iOS project or a new macOS project with a graphical user interface.
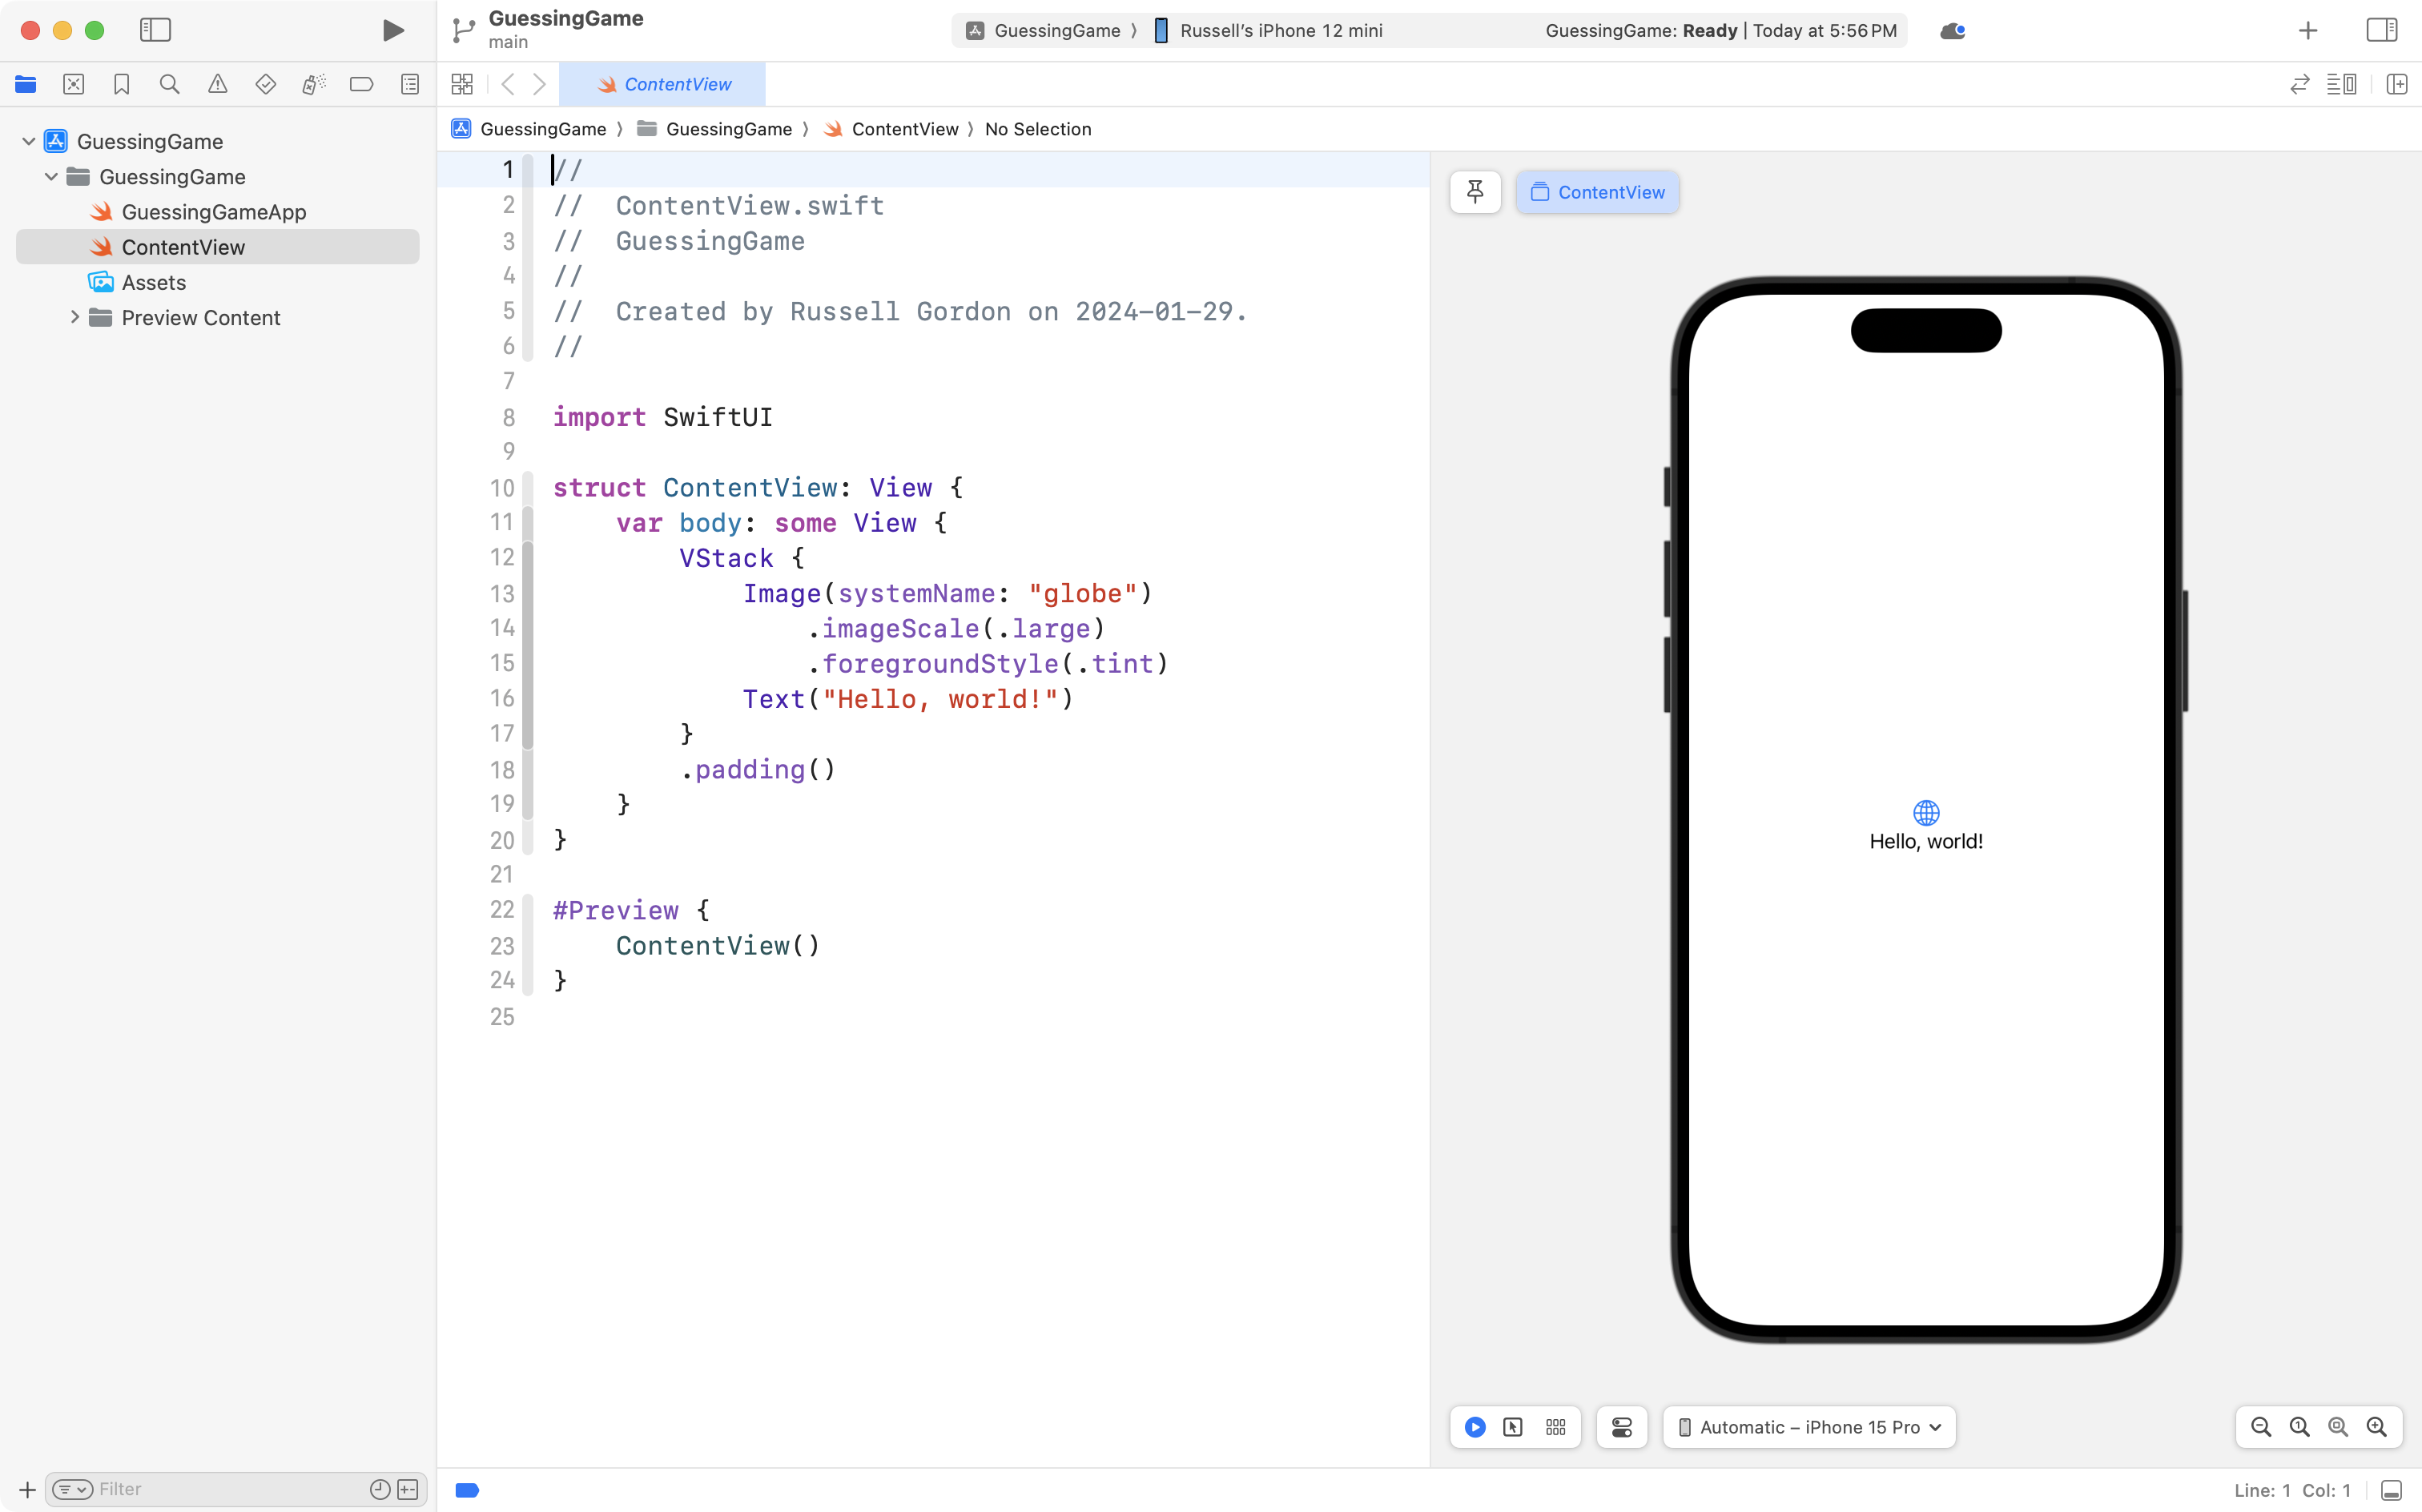
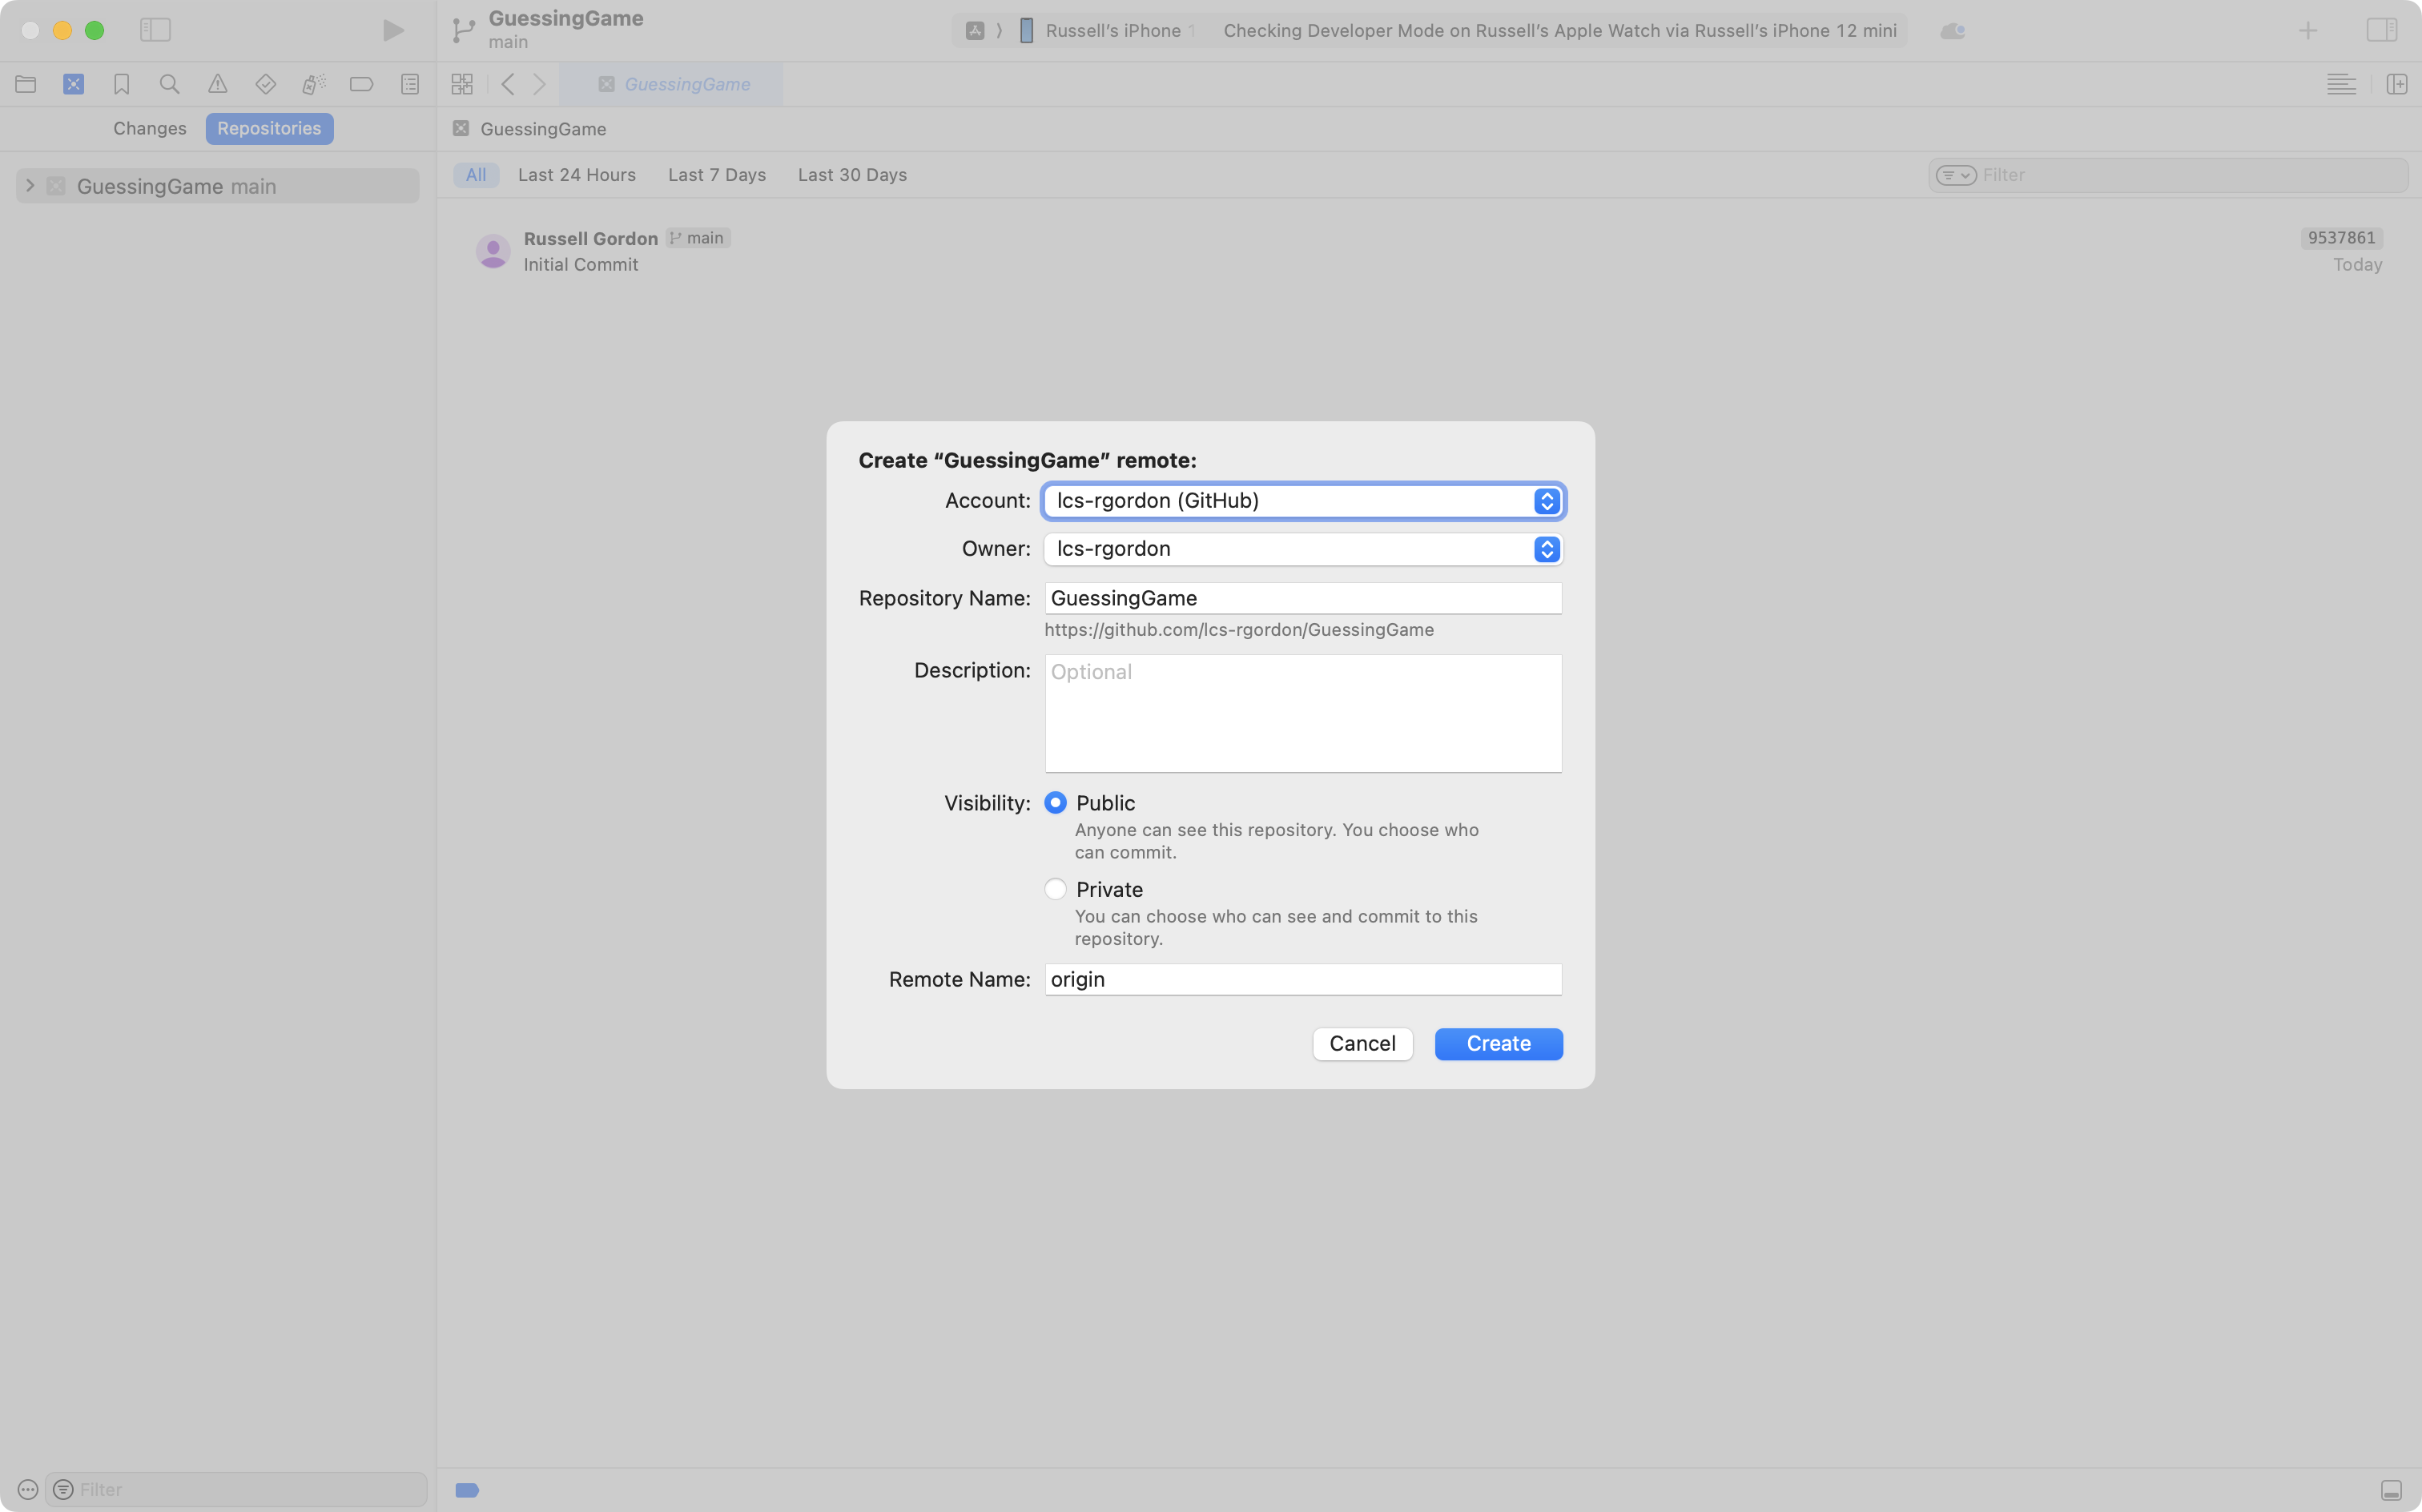
Name the project GuessingGame, like this:
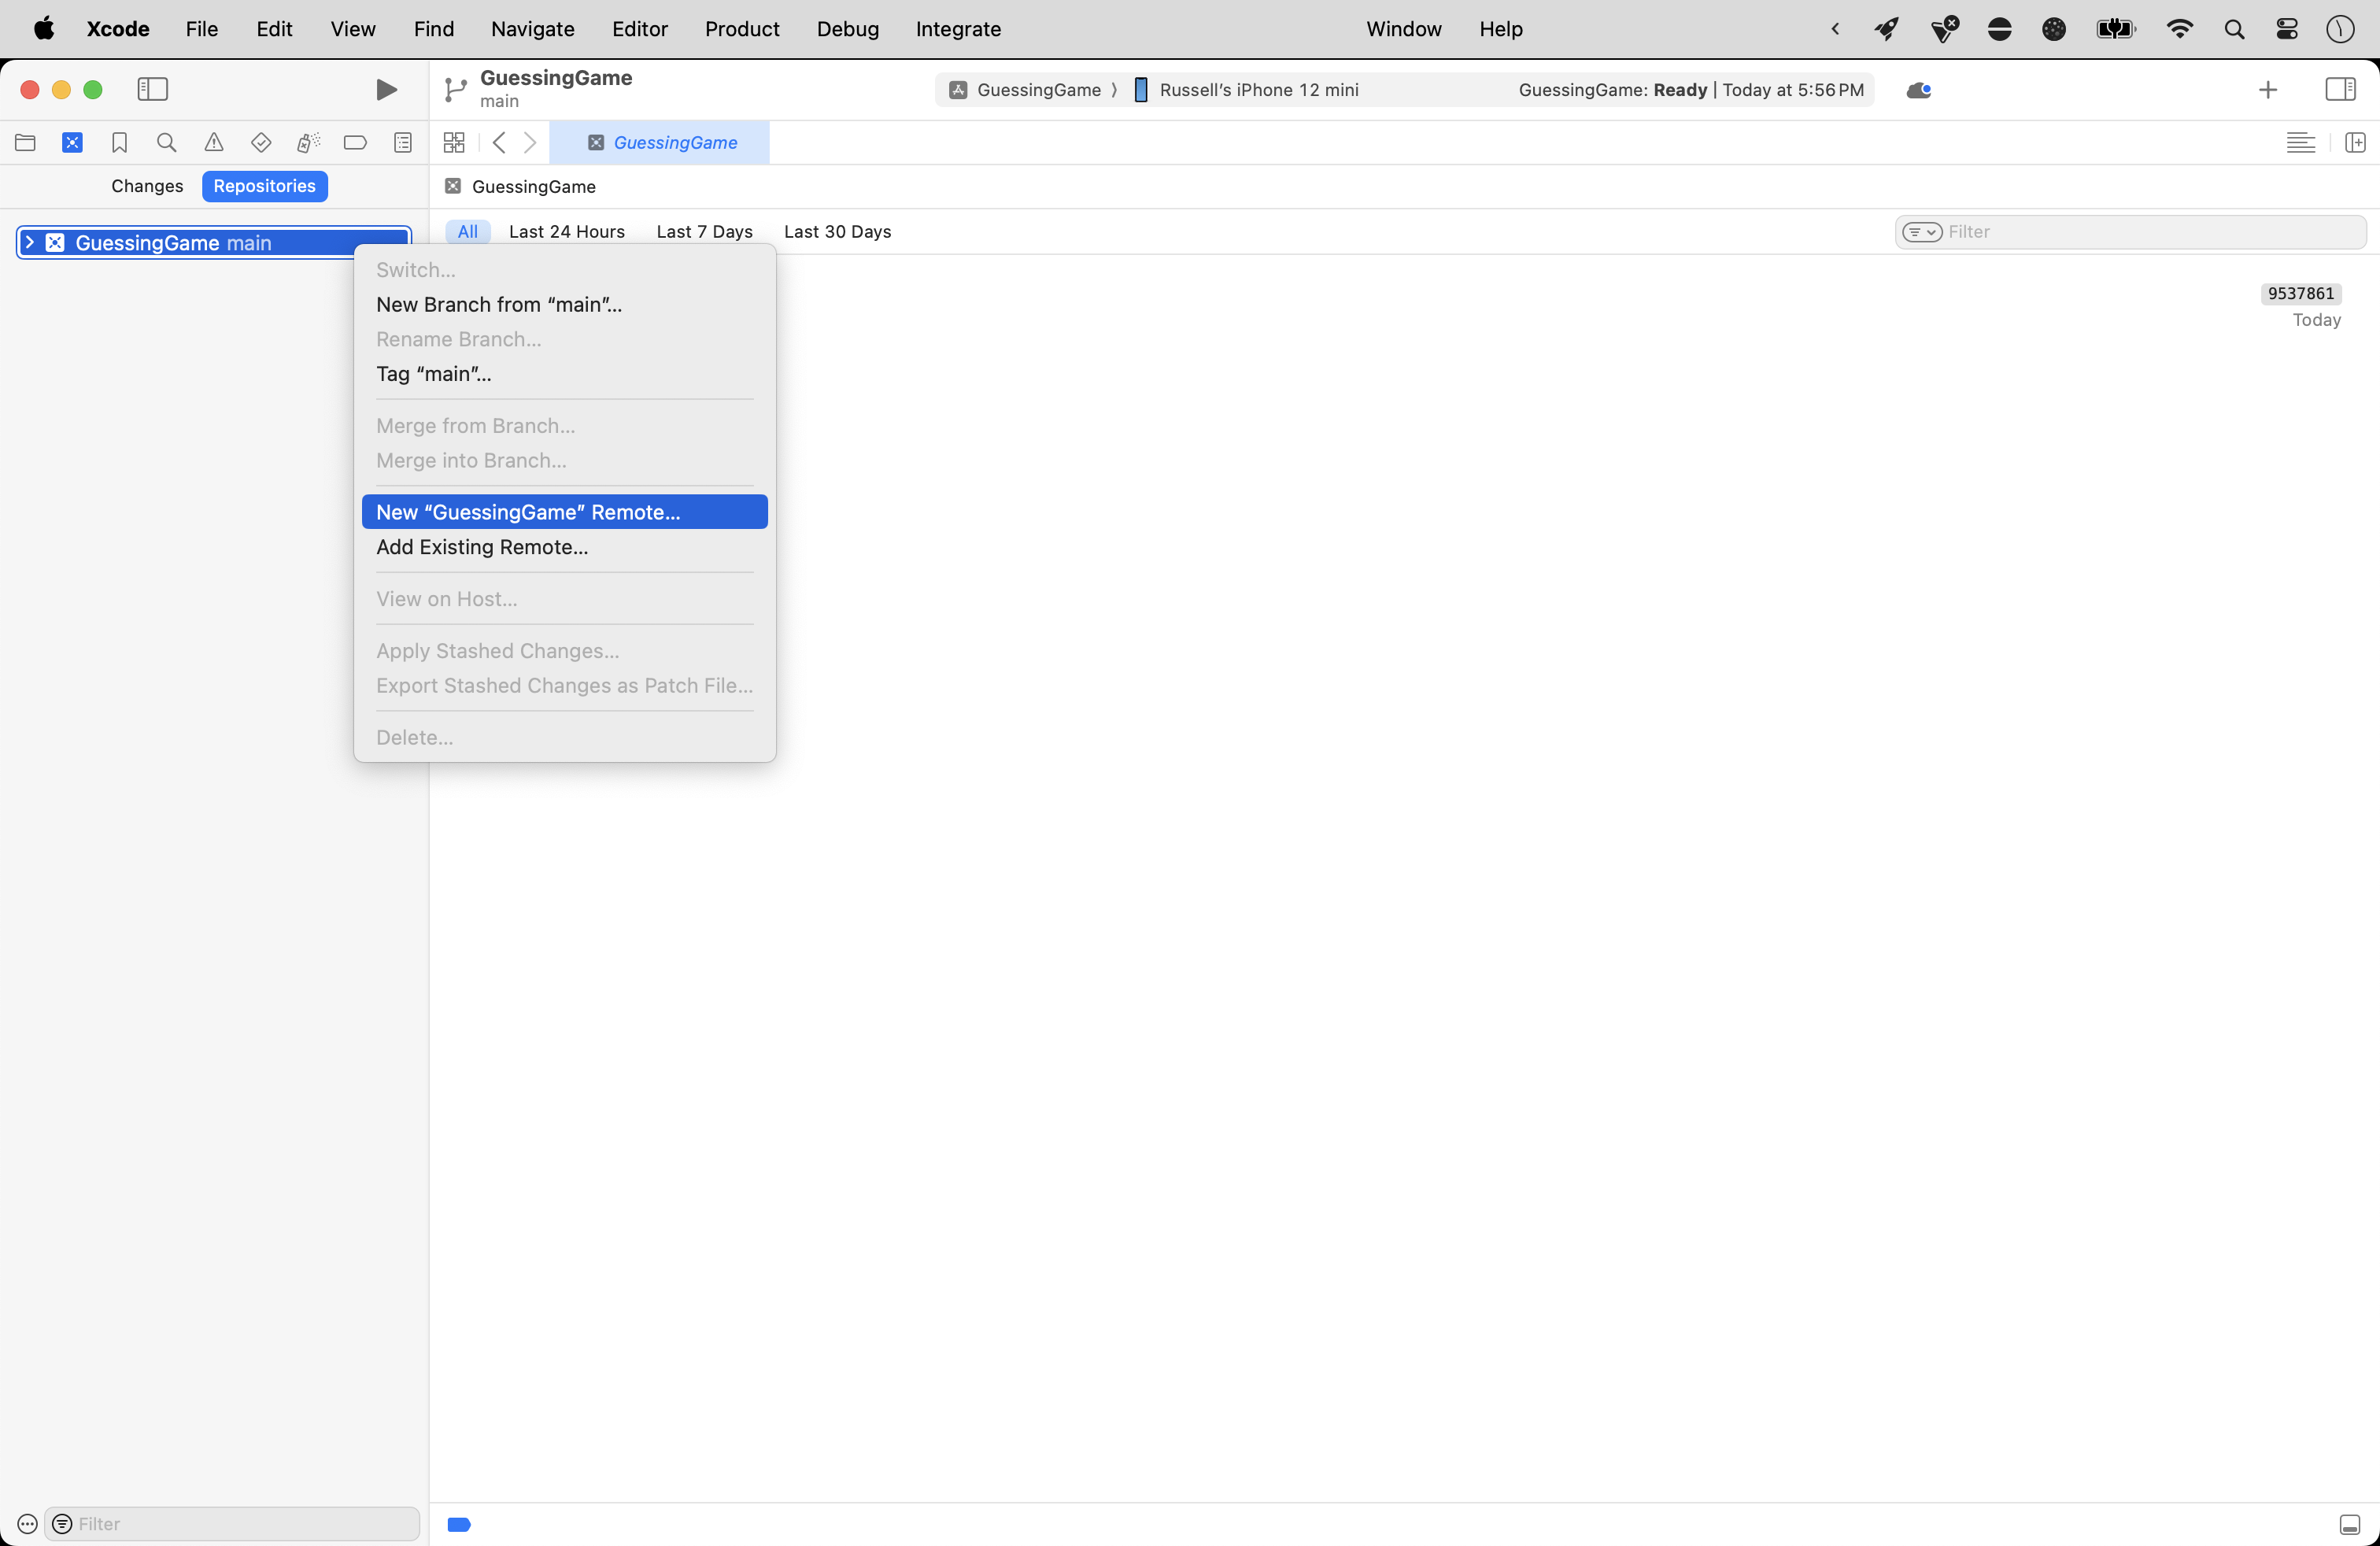
… and be sure to create a remote after you have made the project, like this:
Now, delete ContentView, and then add a new SwiftUI File named GameView:
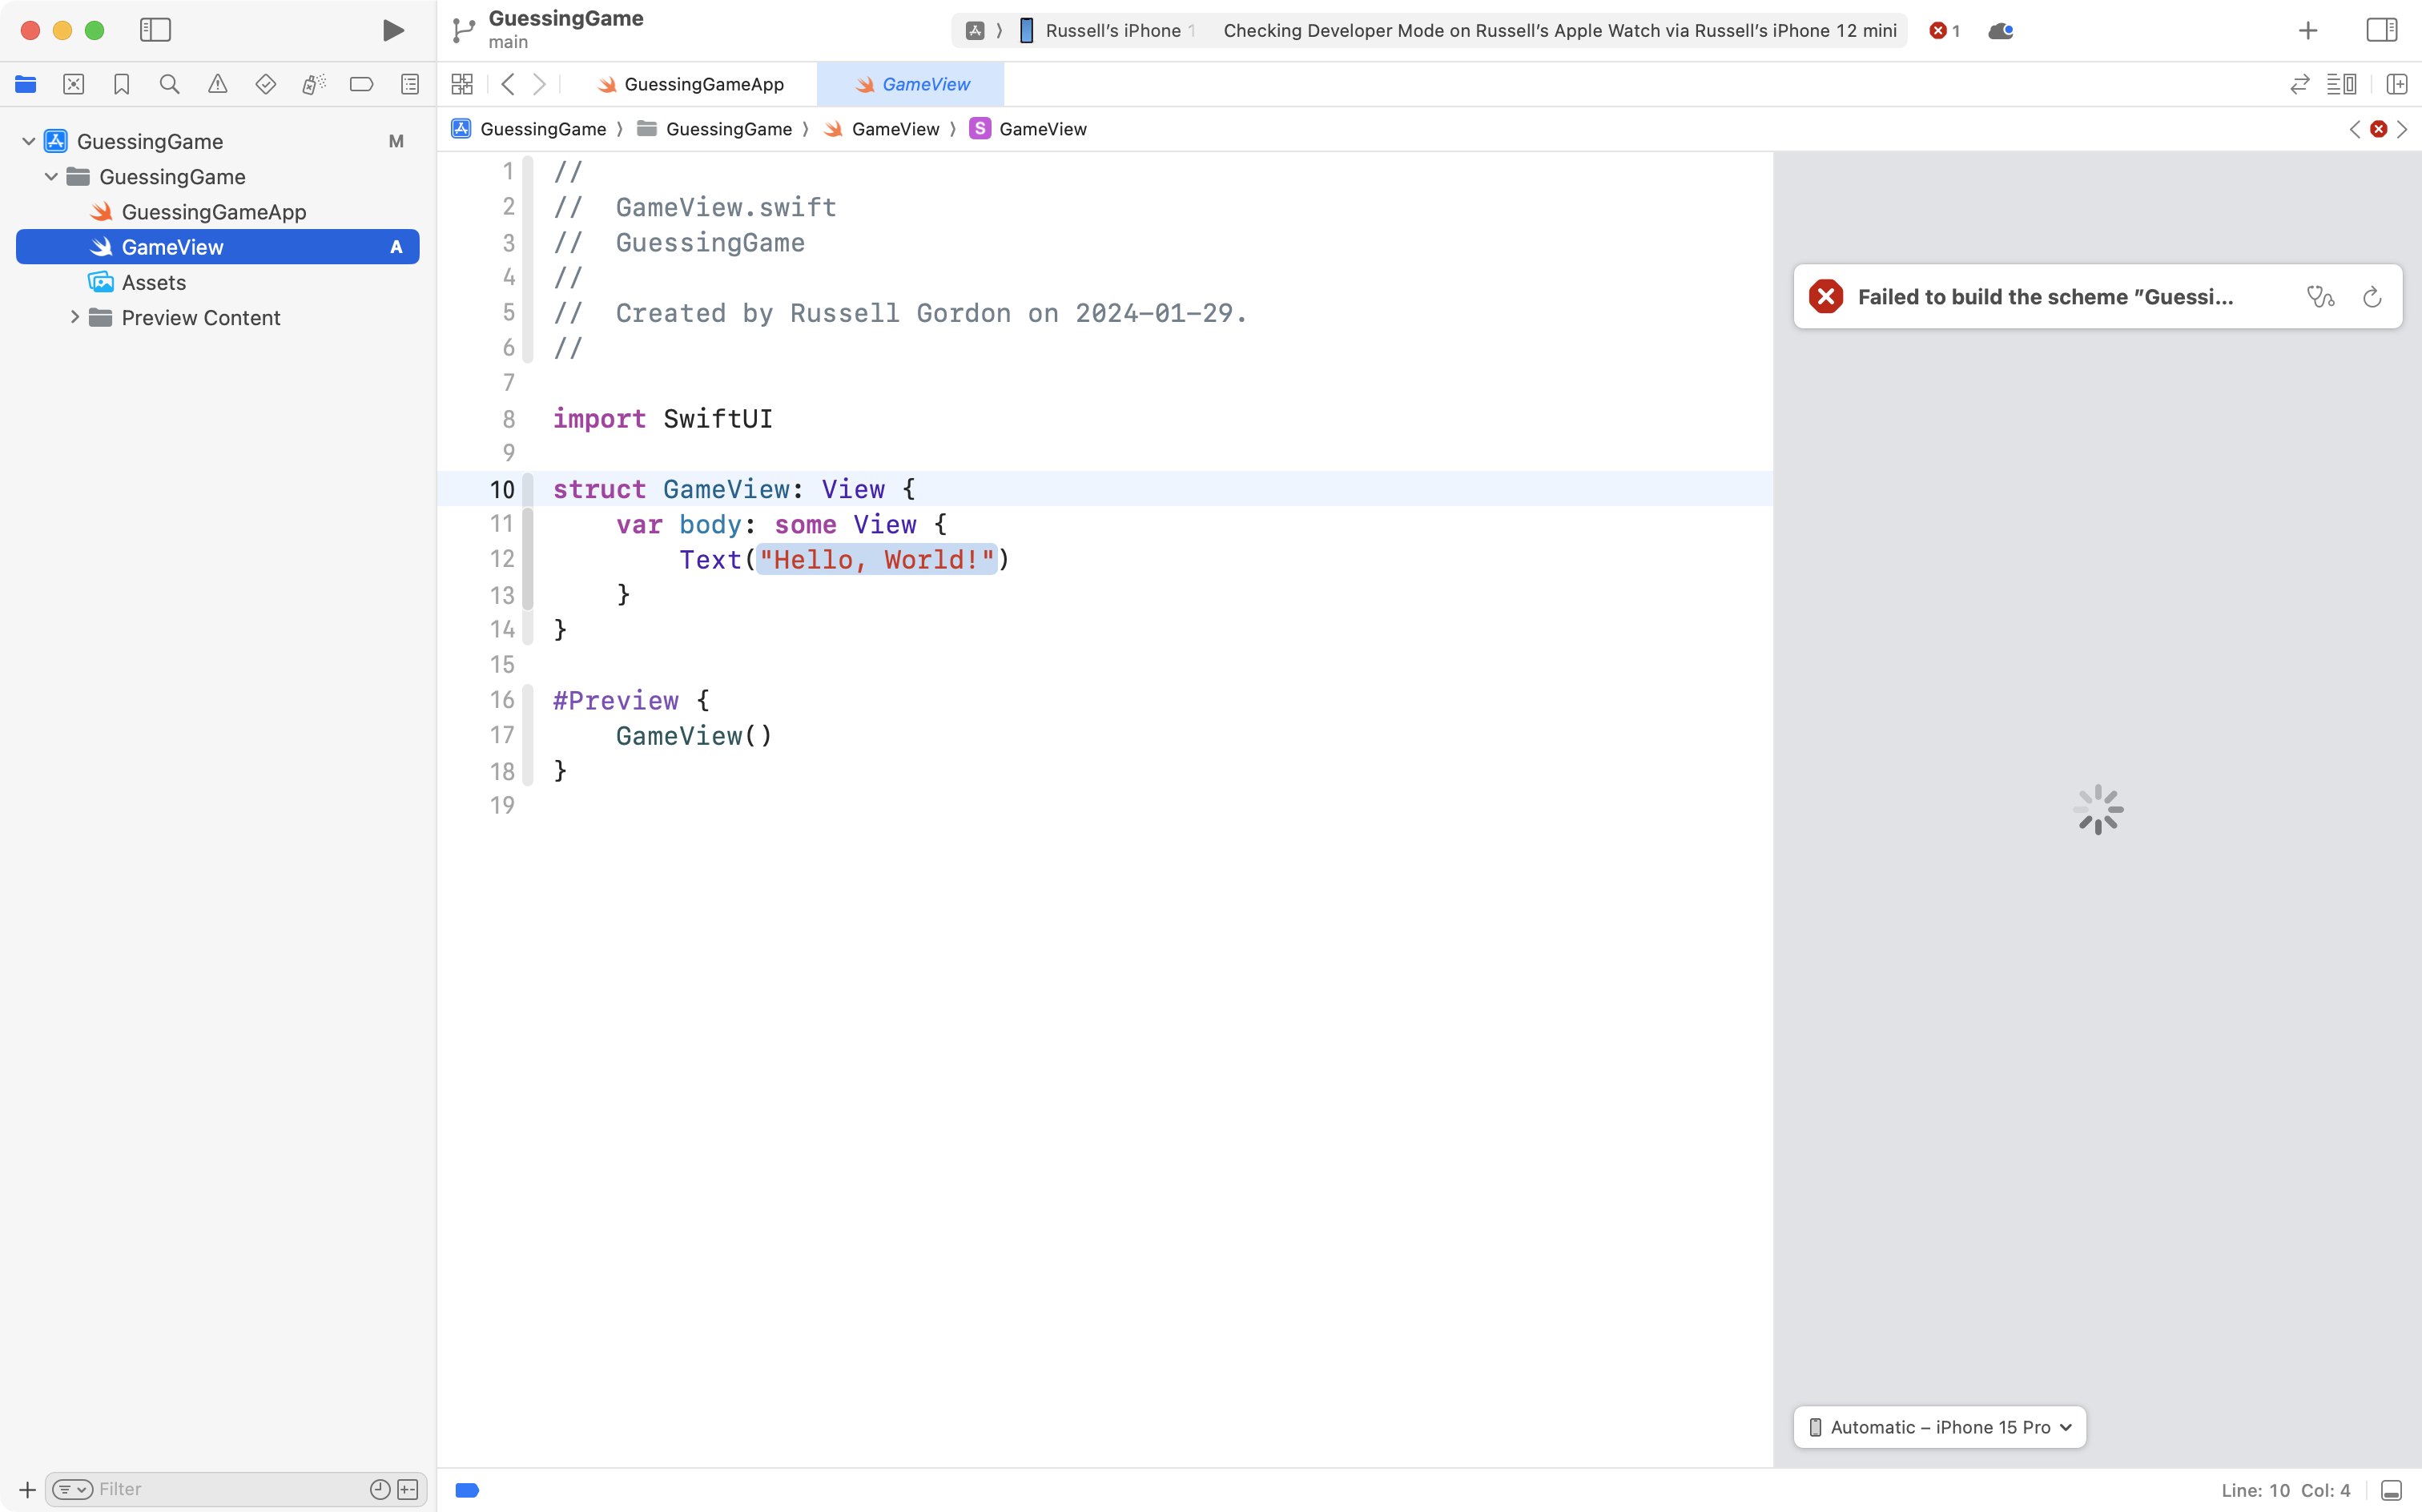
… and finally, and make the app entry point open GameView instead:
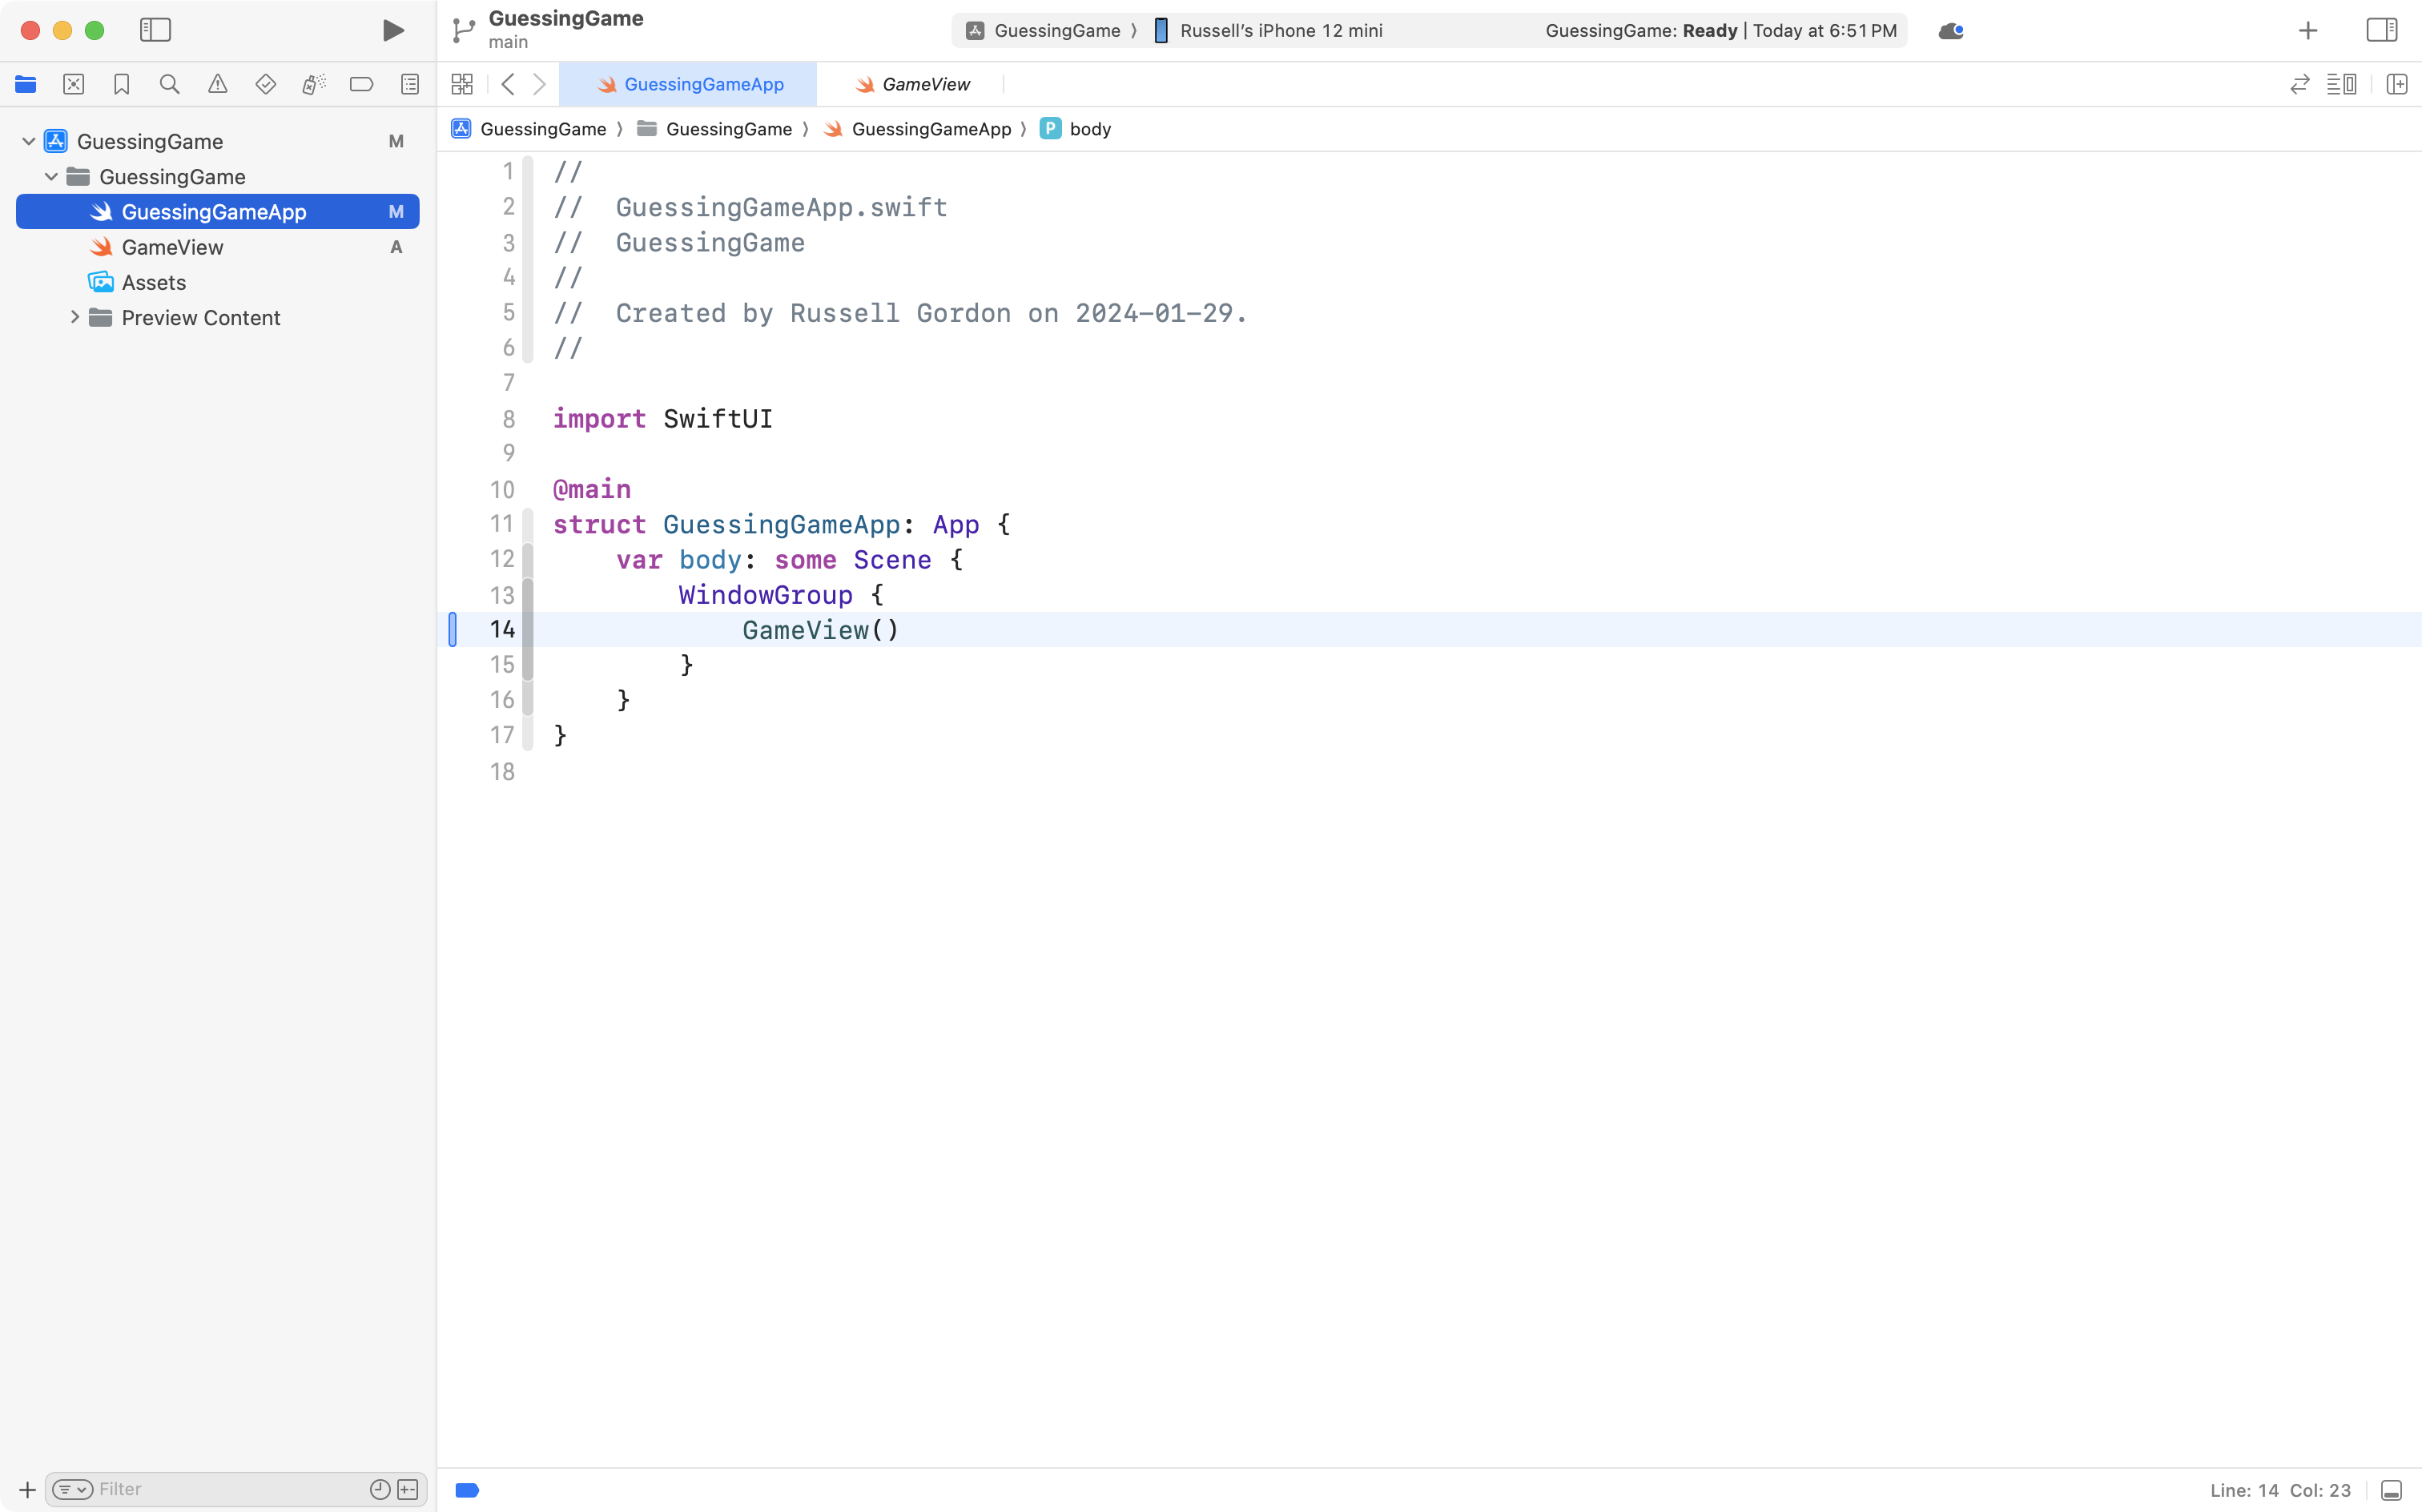
Before continuing, please commit and push your work with this message:
Re-organized project and created a GameView file.
Add starter code
Now, switch back to GameView, and copy-paste this code into the file, so it looks like this:
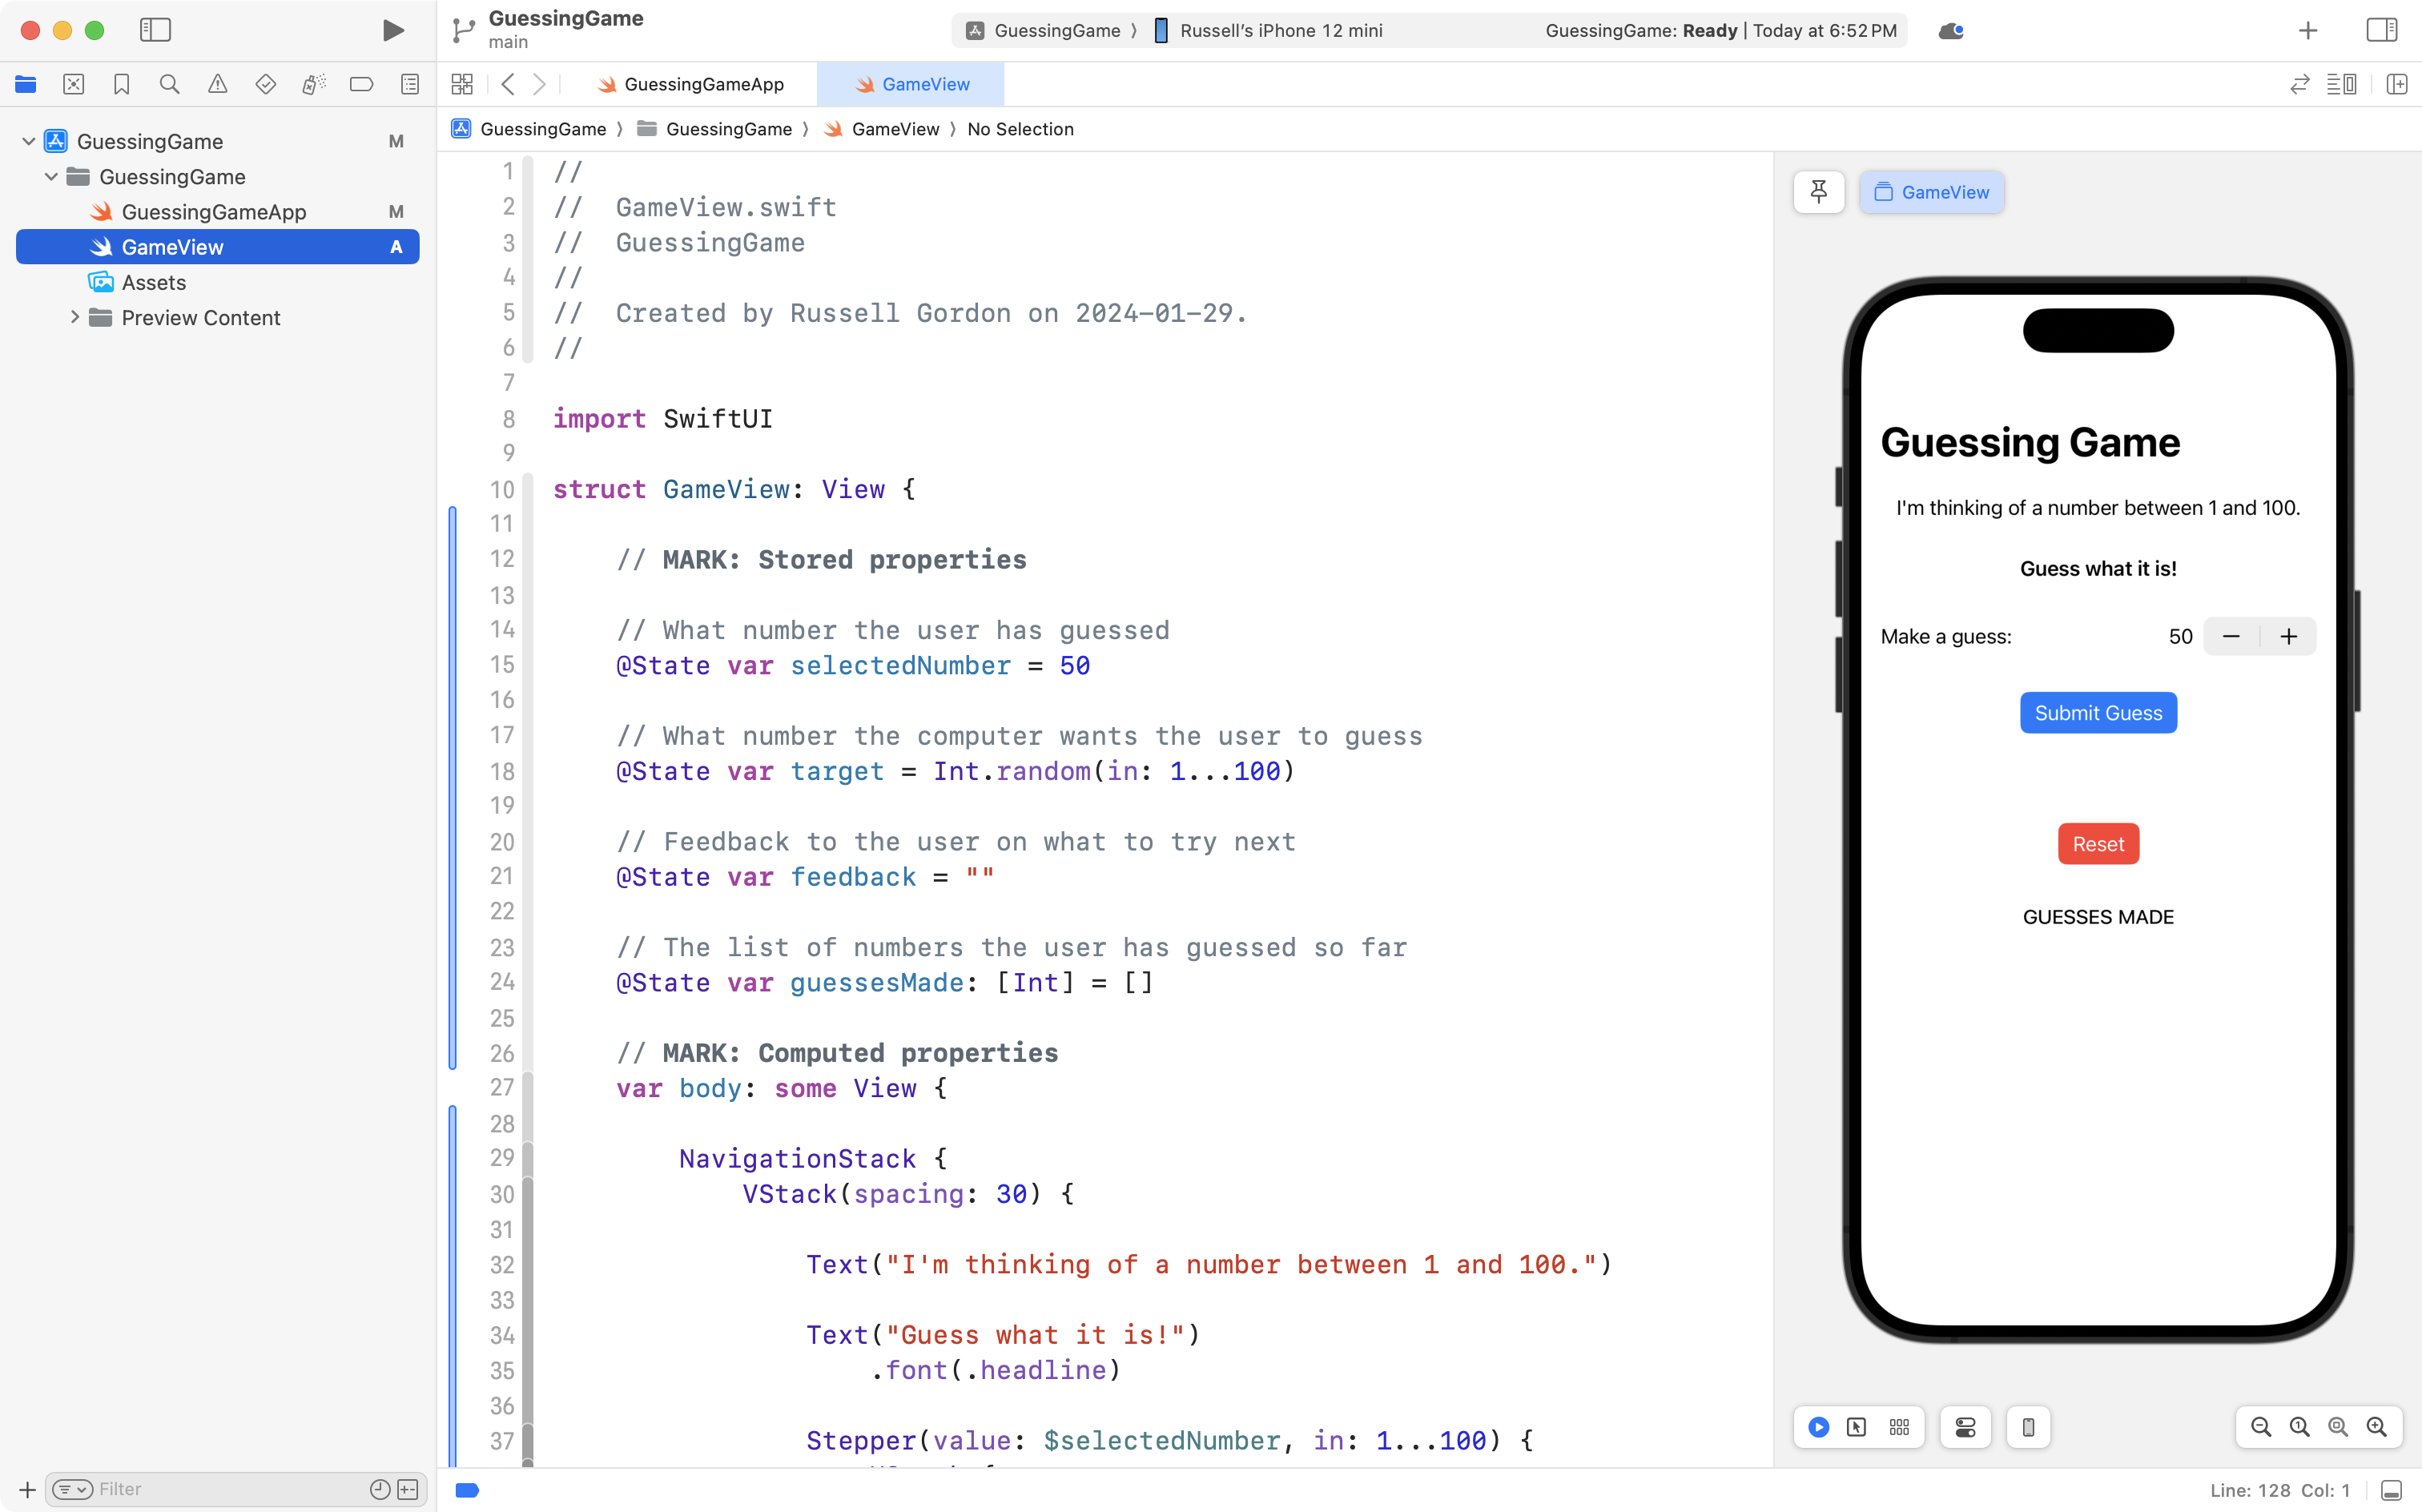
Try out the interface.
This is a template within which you can complete the logic for a guessing game.
Before continuing, commit and push your work with this message:
Added starter code for Guessing Game interface.
Array is mutated at run time
Note how as you submit guesses, they are shown in a scrolling interface on screen.
As you can see, the guessesMade array begins completely empty:
// The list of numbers the user has guessed so far
@State var guessesMade: [Int] = []
… but it grows as the user makes guesses, since this code exists in the checkGuesses function:
// Save the user's guesses
guessesMade.append(selectedNumber)
For example, in this screenshot, I have made three guesses:
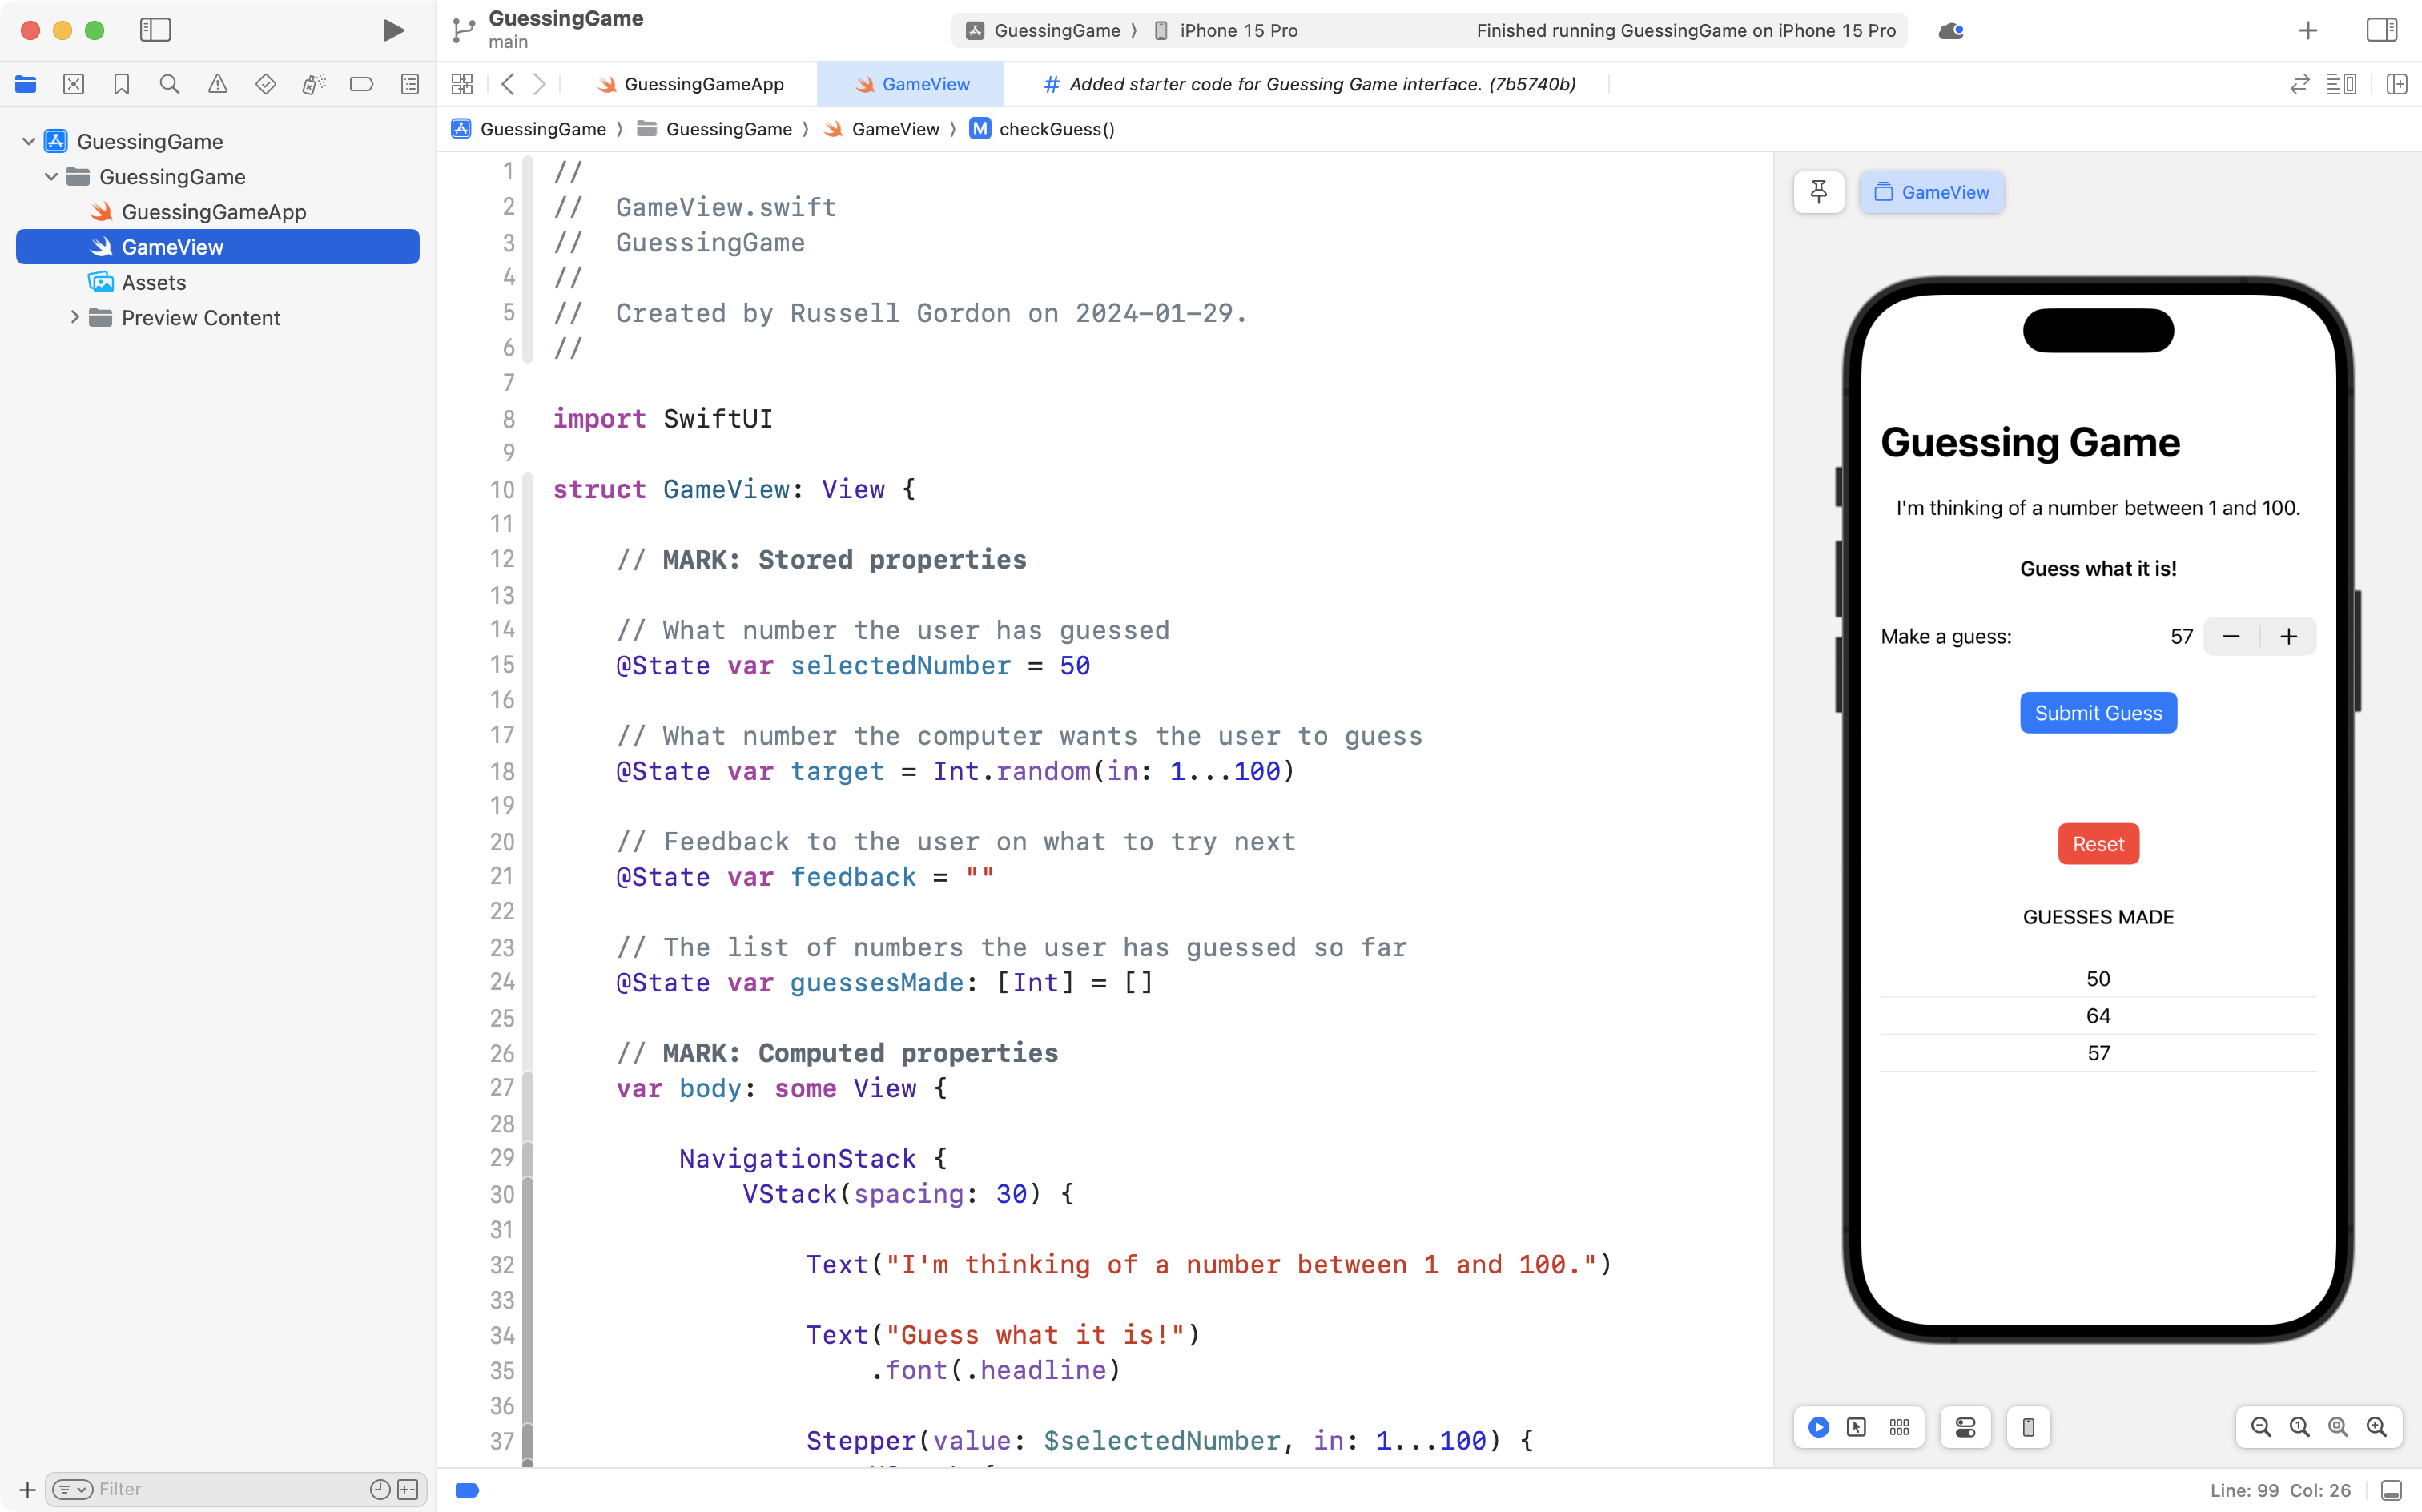
… so the guessesMade array contains:
| Index | Element |
|---|---|
| 0 | 50 |
| 1 | 64 |
| 2 | 57 |
Selection statements
To finish the guessing game, you need to add logic here, beginning on line 100:
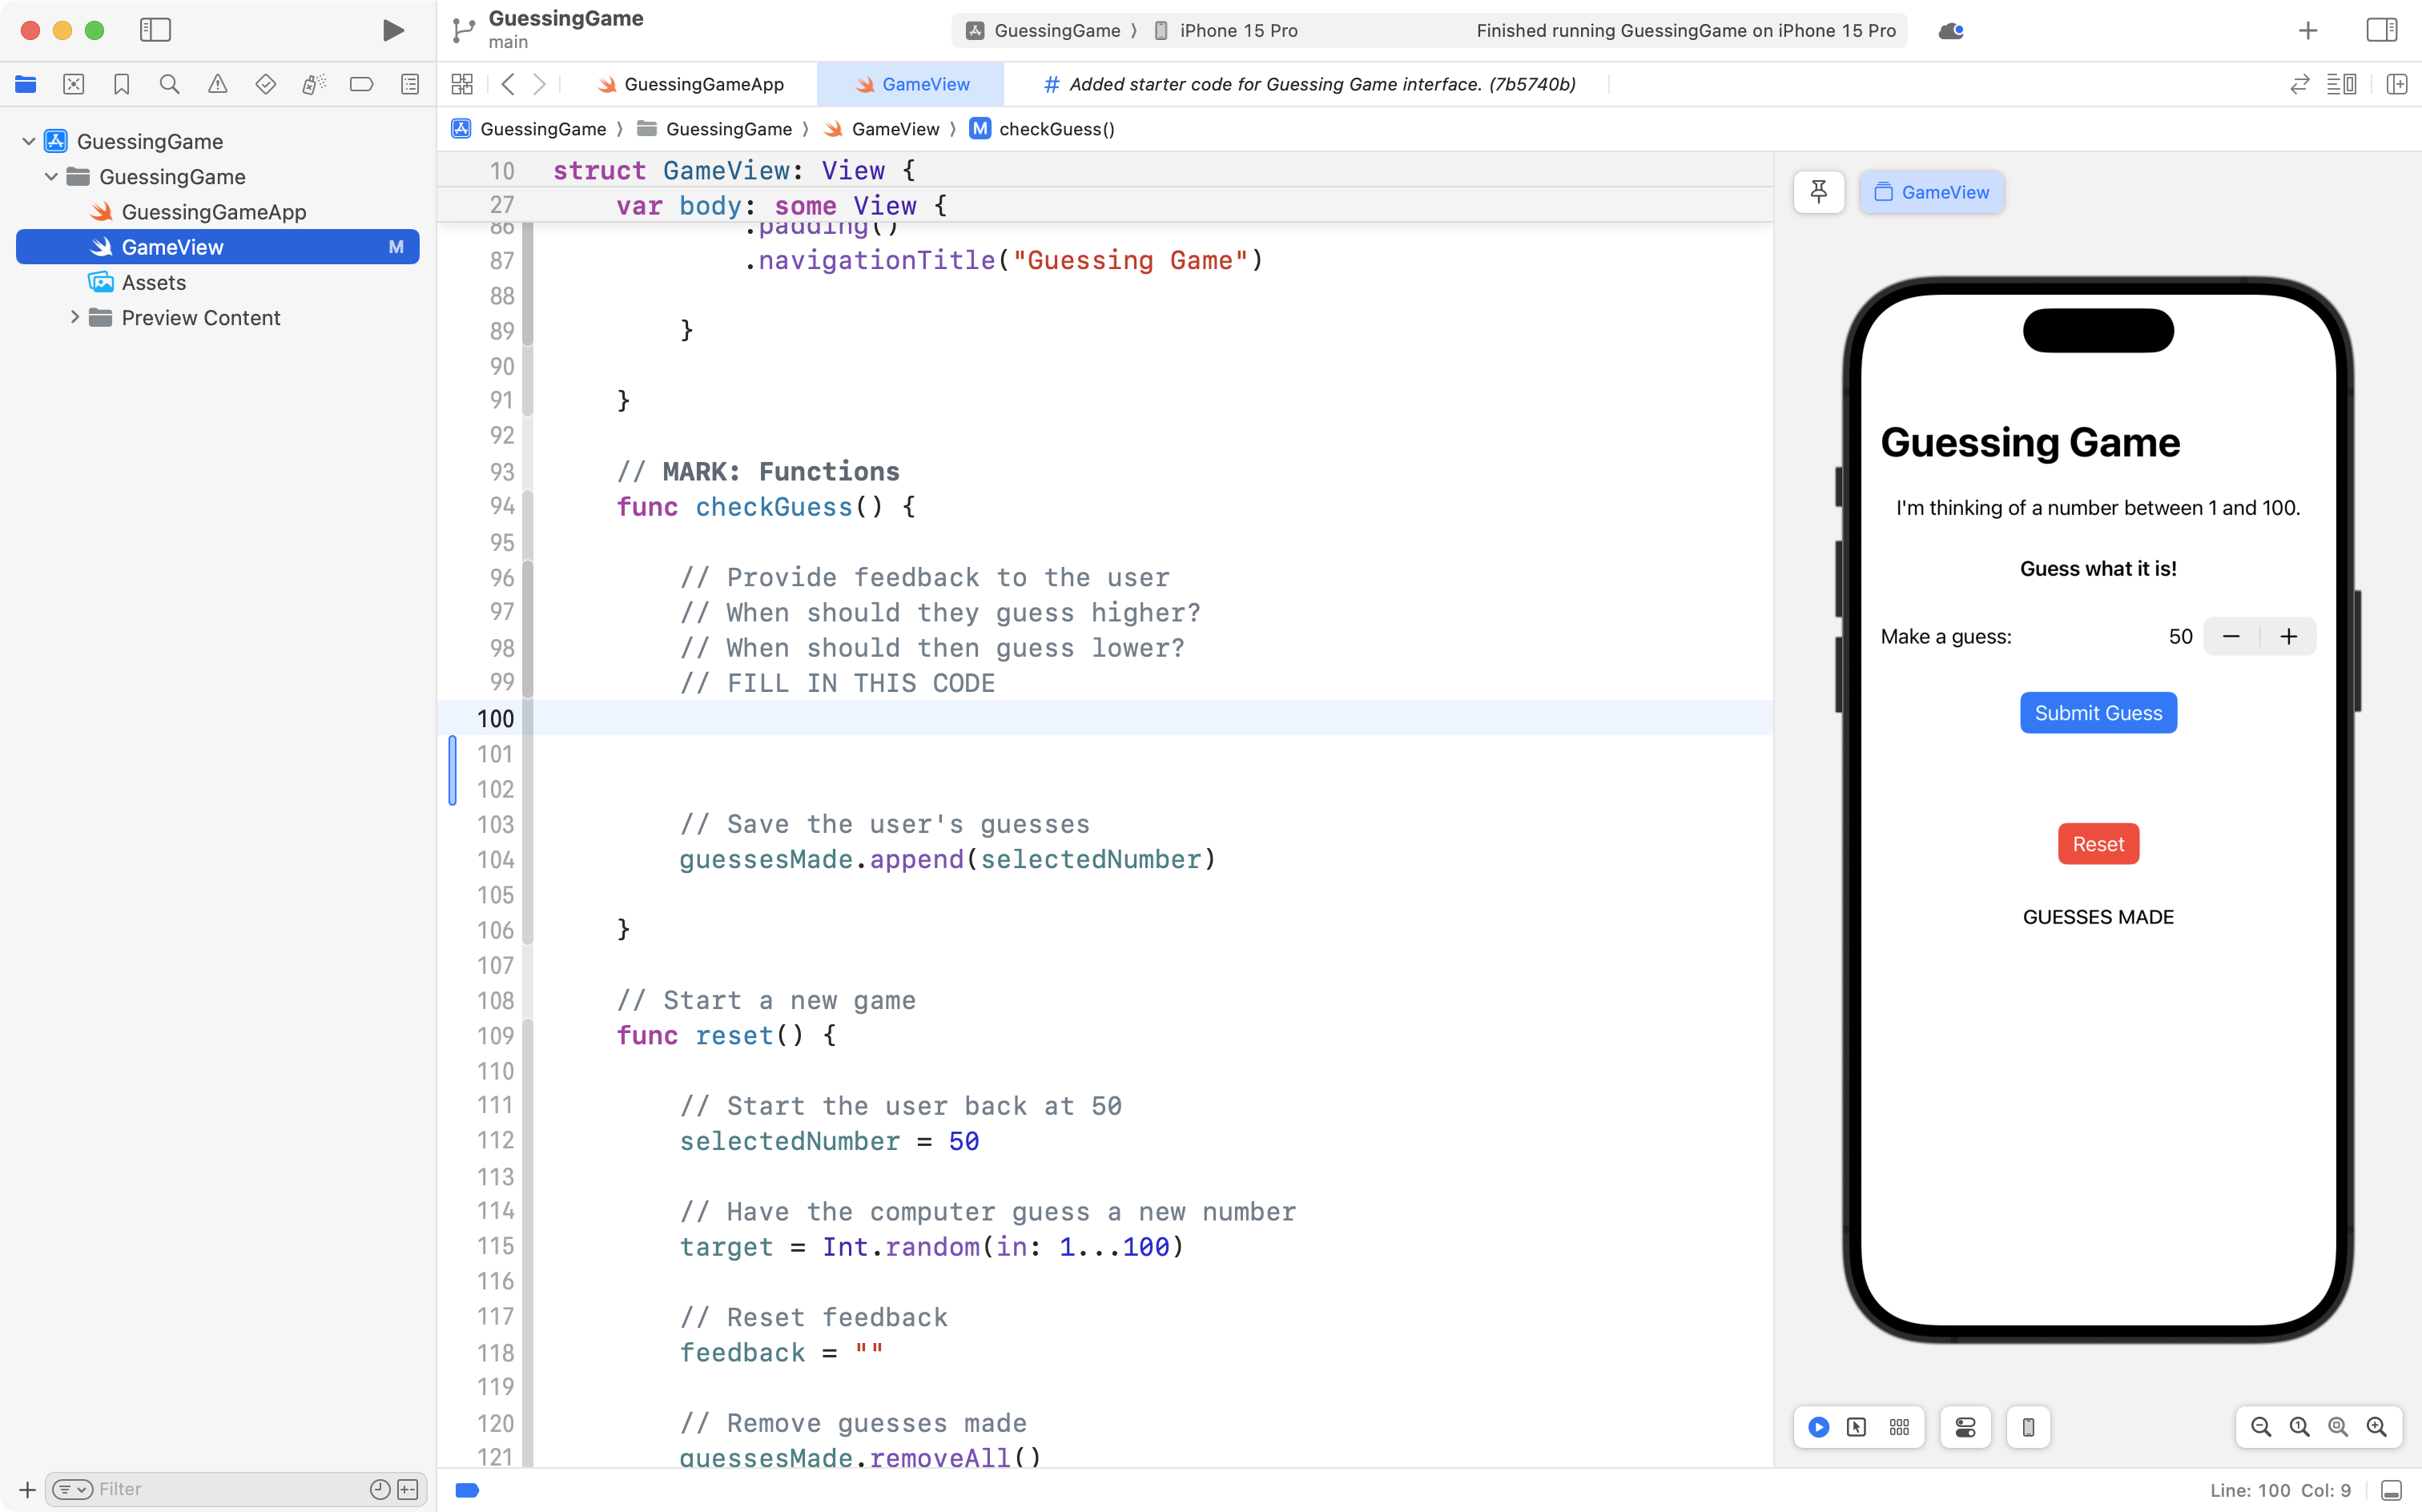
That will require you to compare values to one another, and selectively – based on certain conditions – set the contents of the feedback variable as needed so the user can make a better guess next time.
There are multiple types of programming language structures that allow for selection to occur.
In this discussion, we will look at if statements.
The general syntax is:
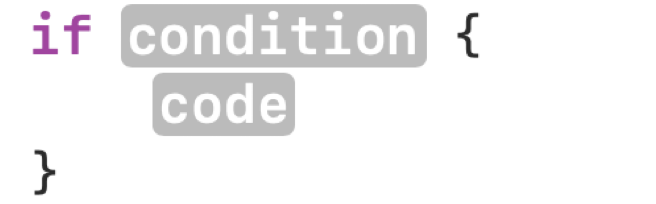
In that example, only when the condition evaluates to true does the block of code inside the { } brackets get selected to be run. Otherwise, the block of code is skipped.
Here is another example:
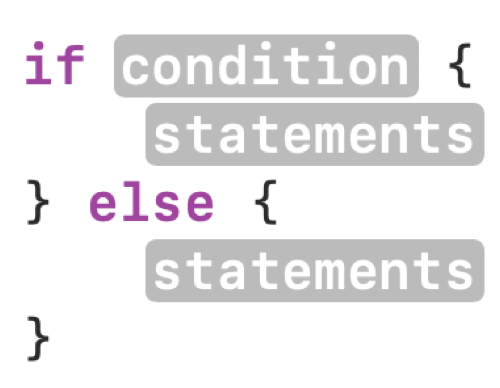
In that example, when the condition is true the first block of code runs. Otherwise, else, the second block of code runs.
And finally, here is a third example – note that as necessary, you can add additional else if branches:
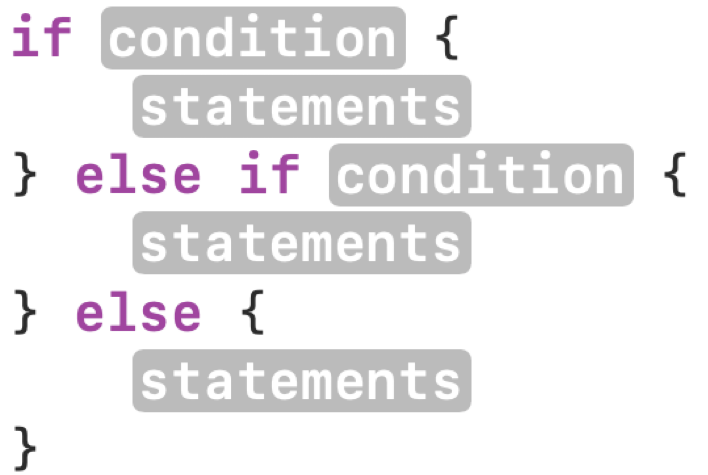
In this example, there would be different conditions in the first and second branches.
So… what is a condition?
A condition is often a comparison of two values. Here are all the ways two numeric values can be compared:
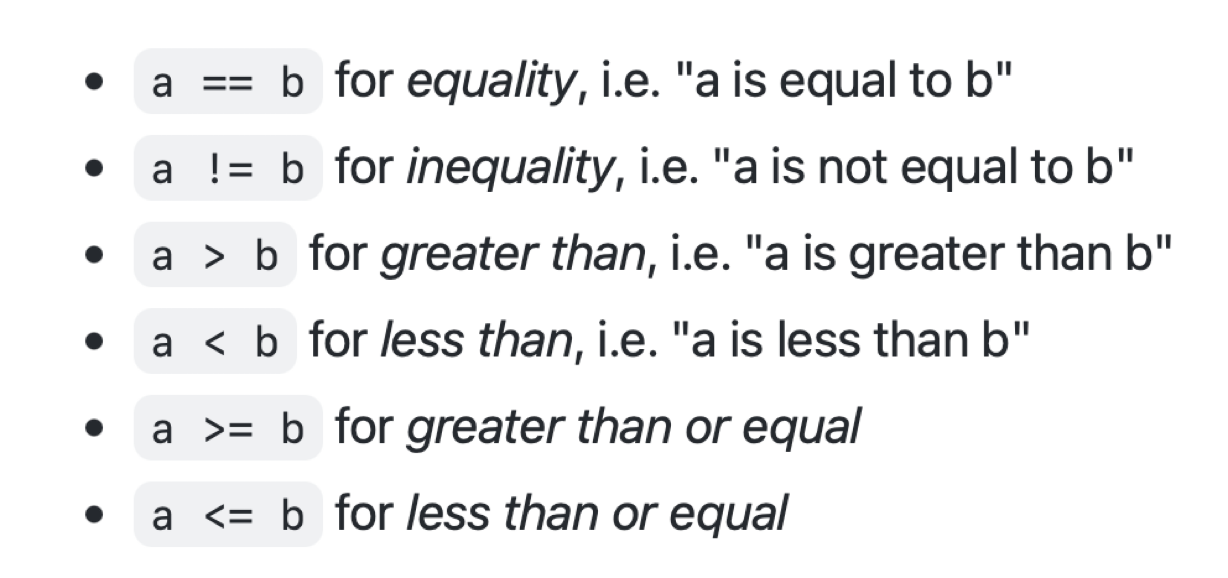
For example, the following code has a condition, a > b:
let a = 20
let b = 10
if a > b {
	print("a is greater")
} else {
	print("b is greater")
}
Since a has a value of 20 in that example, the first branch of the if statement is run, and second branch is ignored. a is greater will be printed on the screen.
Complete the game
Add logic to the Guessing Game app, beginning on line 100, to guide the player toward making a correct guess:
You can do that by selectively changing the value of the feedback property.
When the user does make a correct guess, be sure to let them know they have won the game.
When you have finished this exercise, commit and push your work using this message:
Finished Guessing Game logic by guiding the user toward a correct answer.
Identify an efficient algorithm
How can you win the Guessing Game in the fewest number of guesses?
Describe your strategy for doing so in your portfolio post for today in Notion.