In part one of this task, you worked to activate prior knowledge by building a static interface for the To-do List app.
Creating the static interface
There was a lot to remember for creating a static interface, and a long March Break probably did not help!
If there was any part of creating the static interface that you could not remember how to do, use the following video to get ready for part 2 of this tutorial.
If you watch the video directly on YouTube, and click the more link, you can access the chapter markers for this video.
You should see the following:
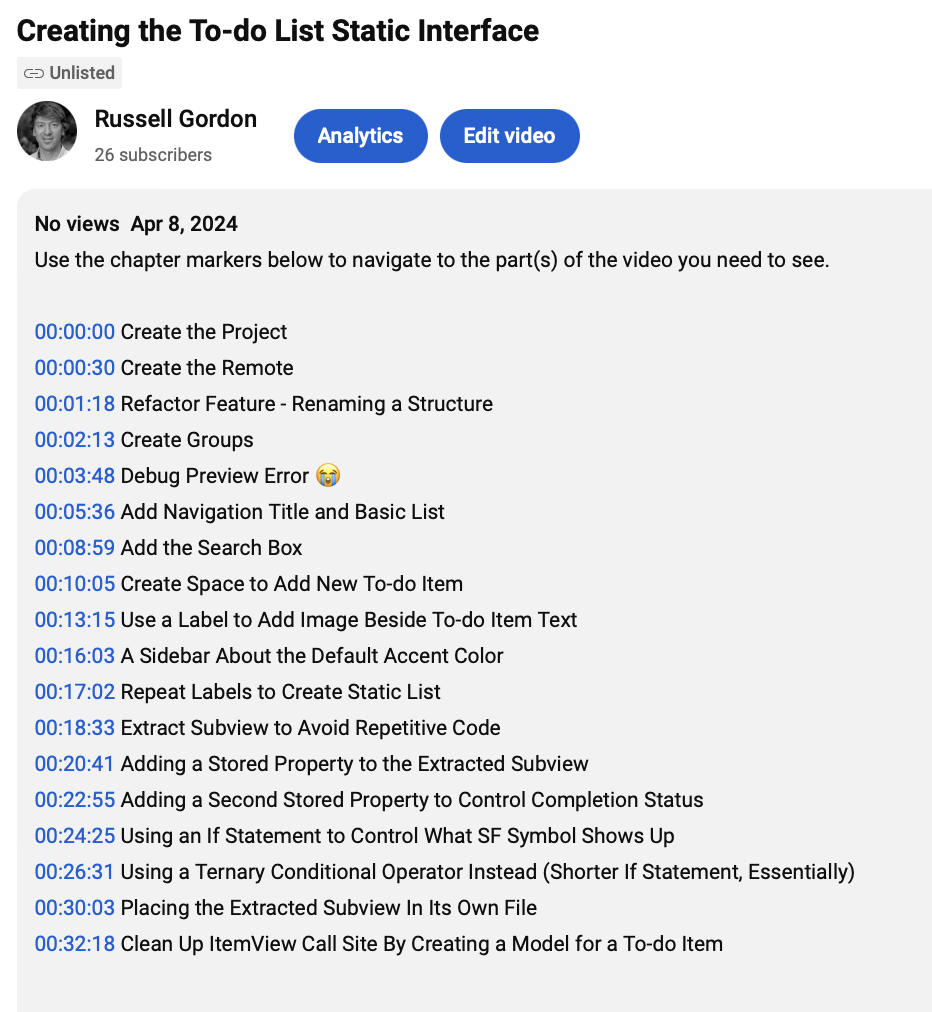
Using chapter markers is recommended if you only need to review part of the process of creating a static interface.
Review the project
At present (after using the video above, or making adjustments to your prior work to match) you should have a project with three groups:
HelpersModelViews
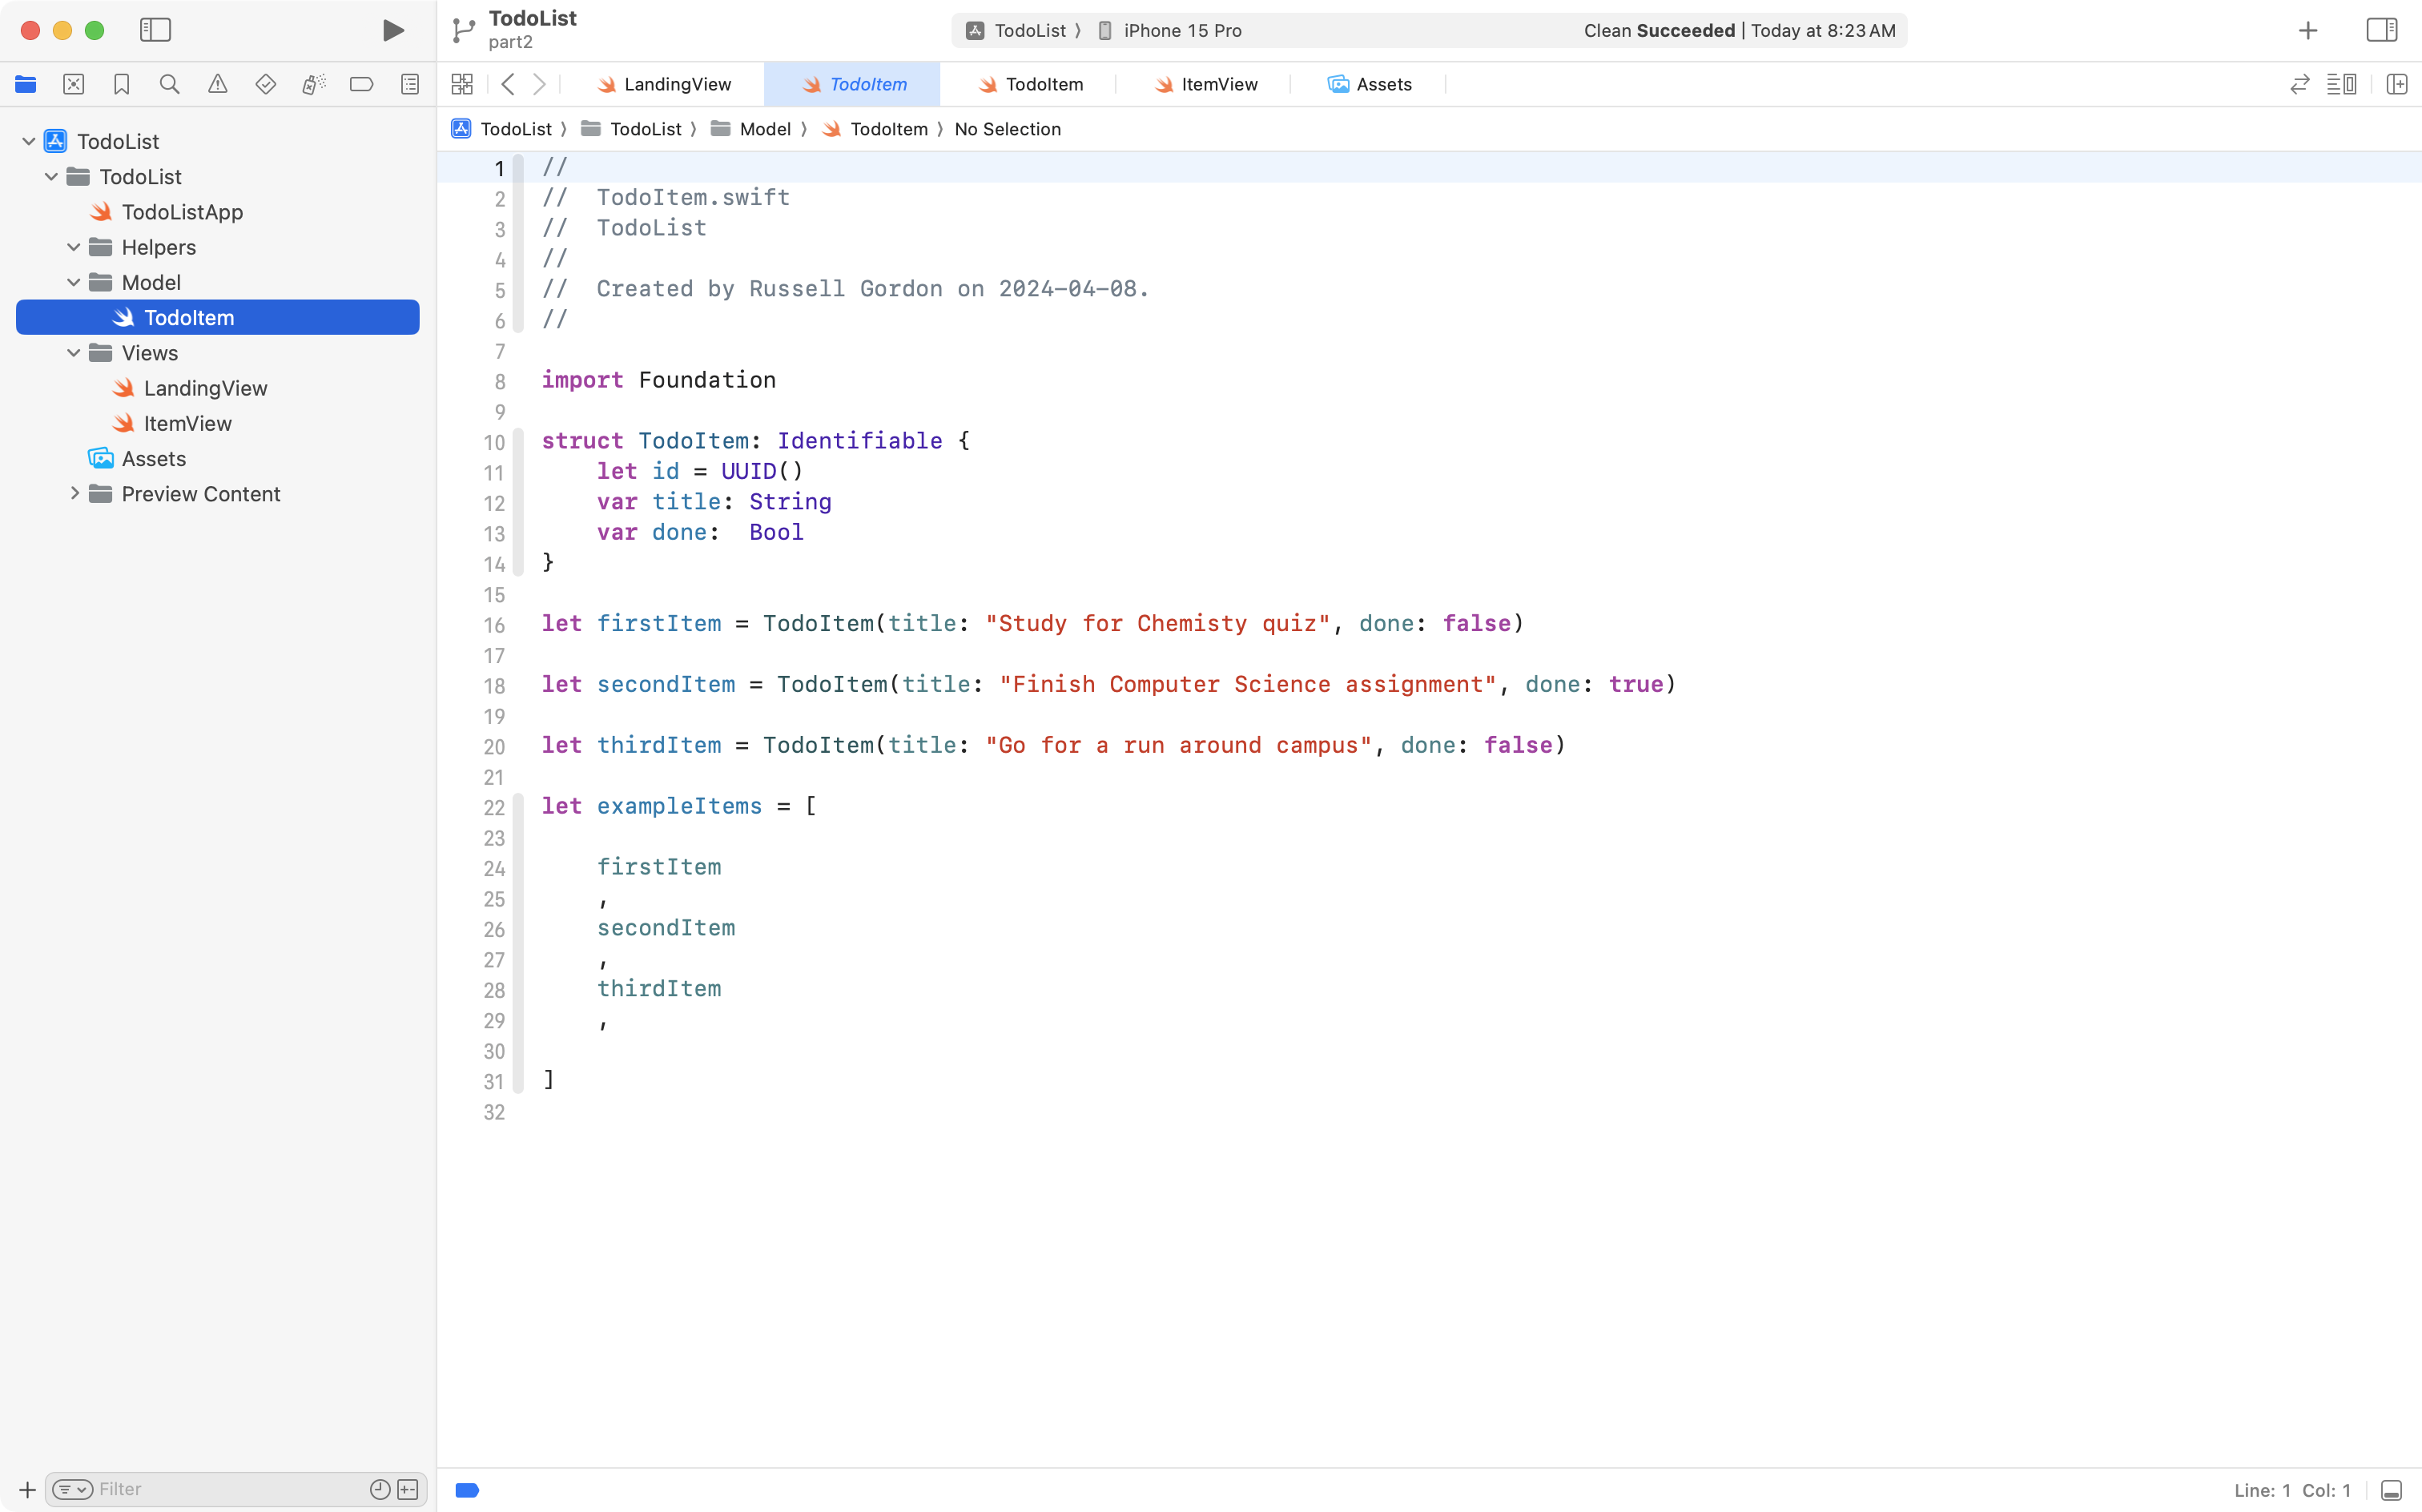
There should be a model to represent a single to-do item, or reminder.
Here, that has been named TodoItem:
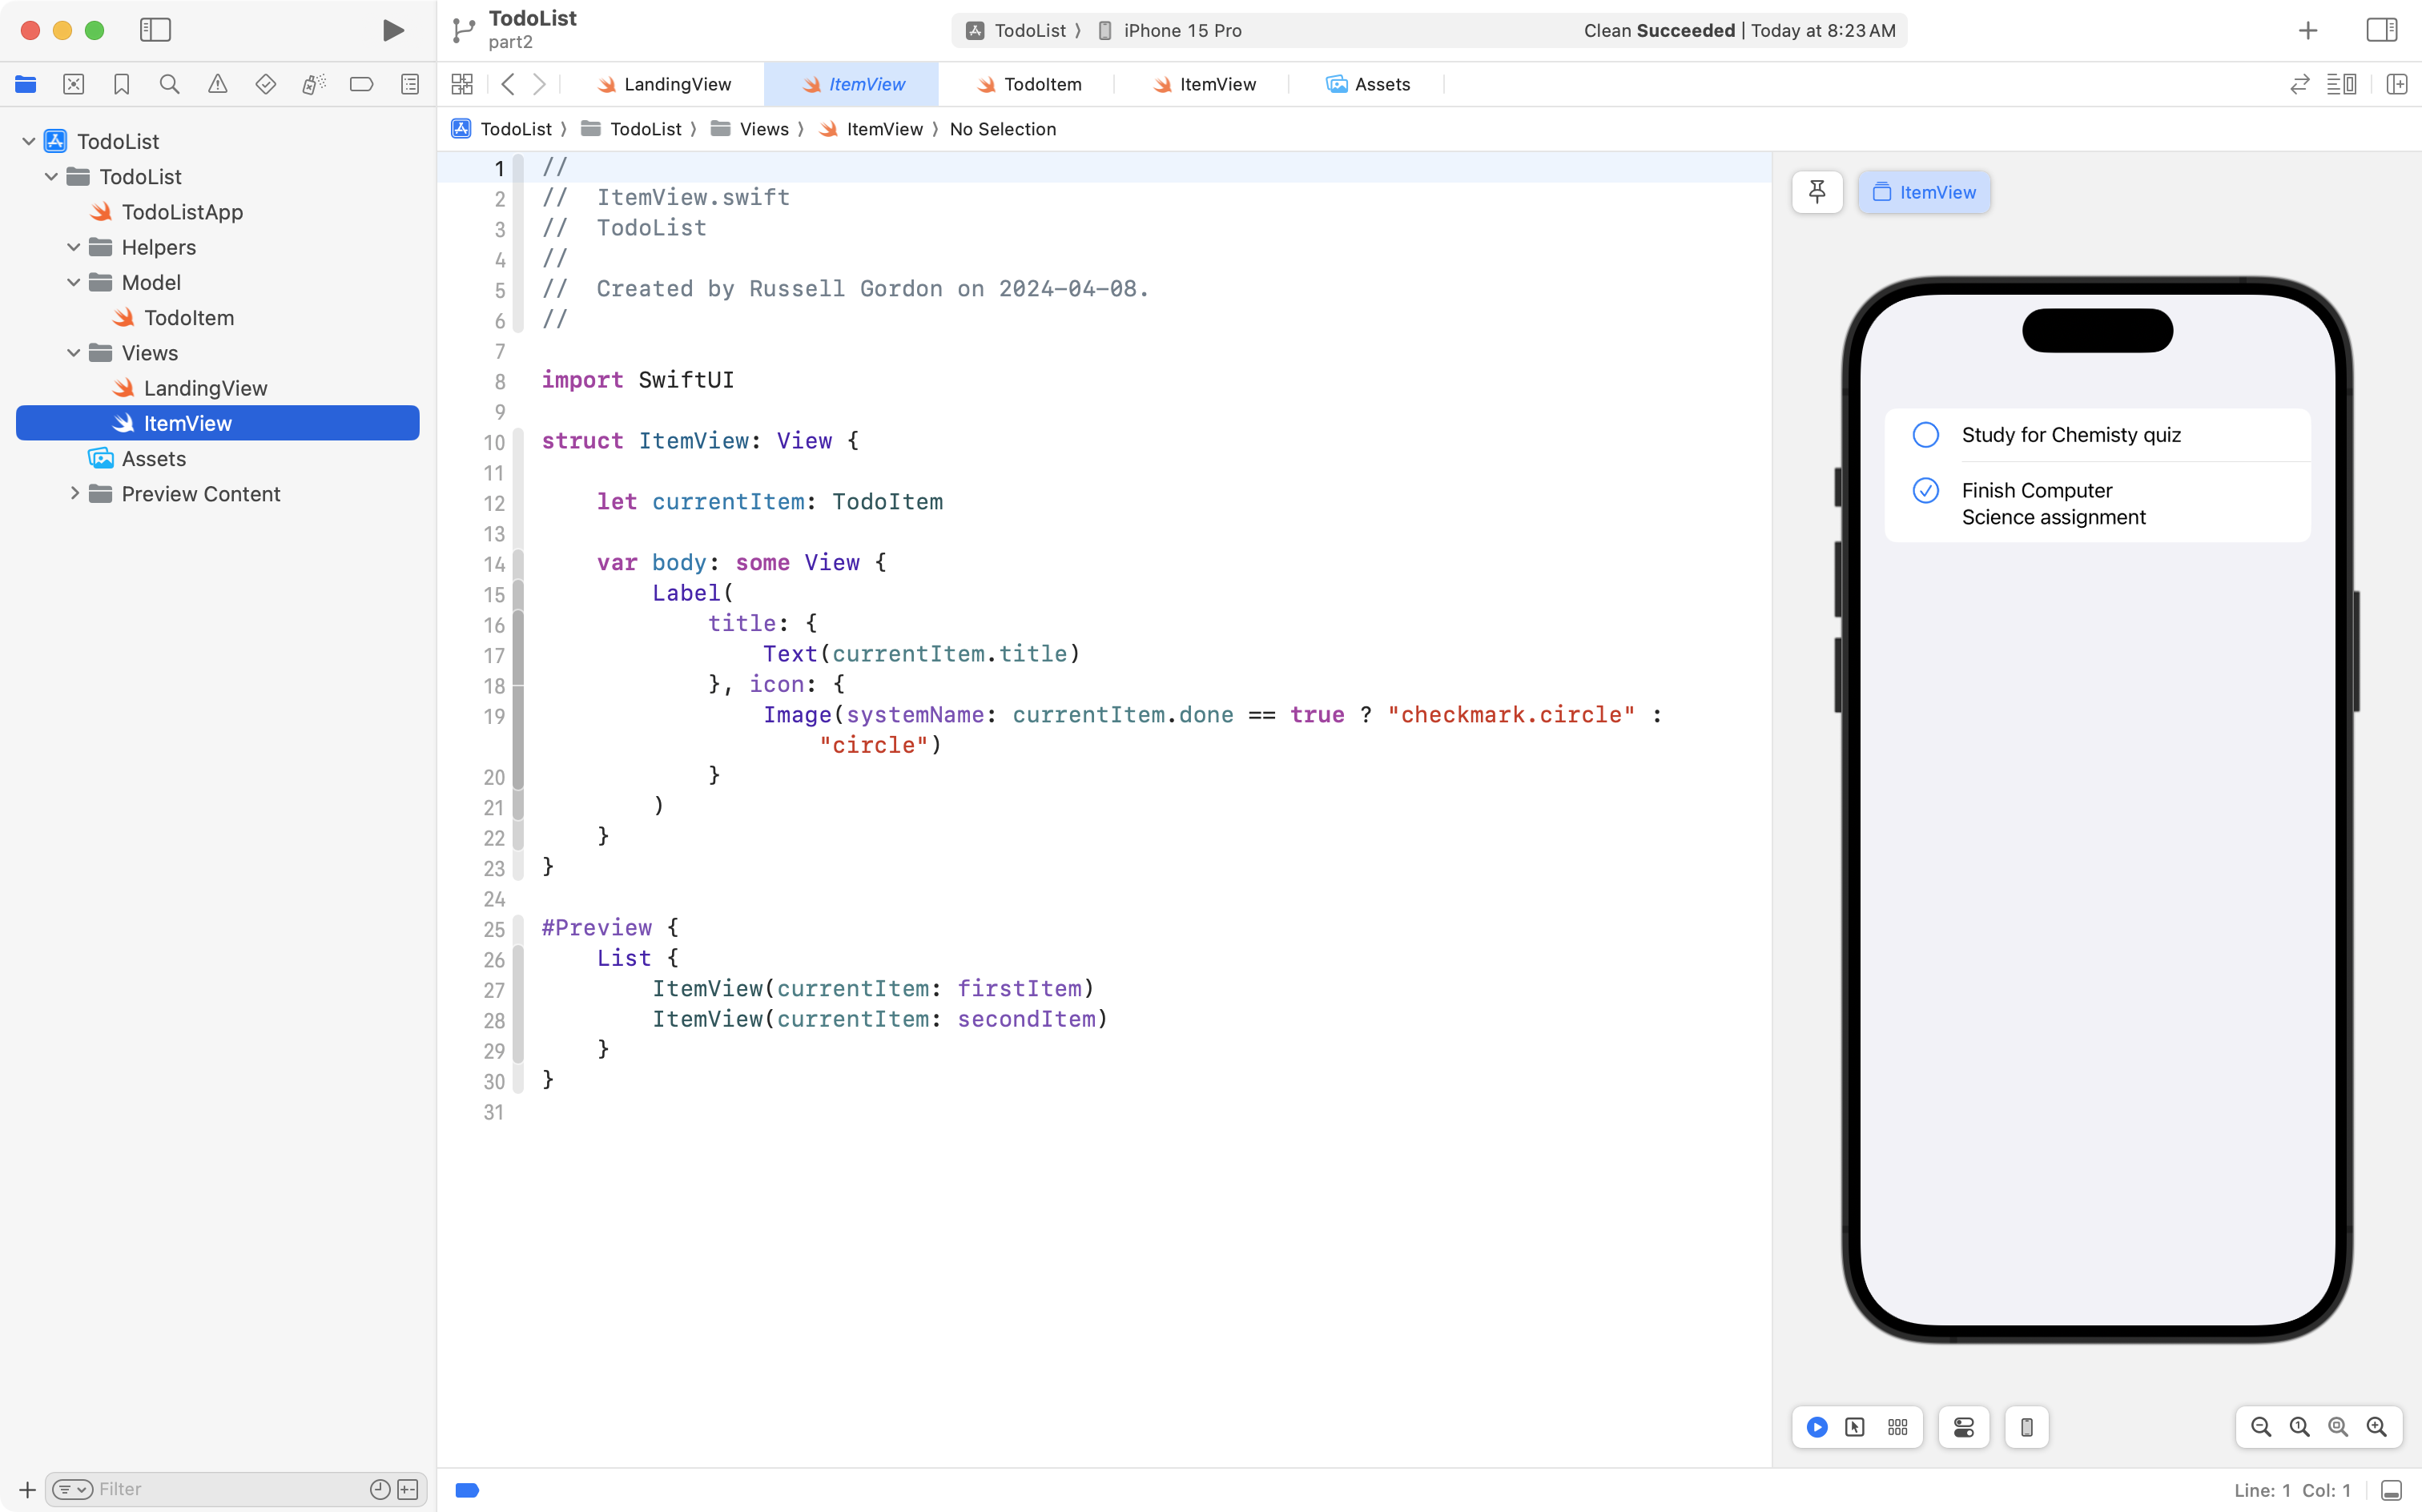
A helper view named ItemView should exist. It’s job is to show the user interface for a single to-do item:
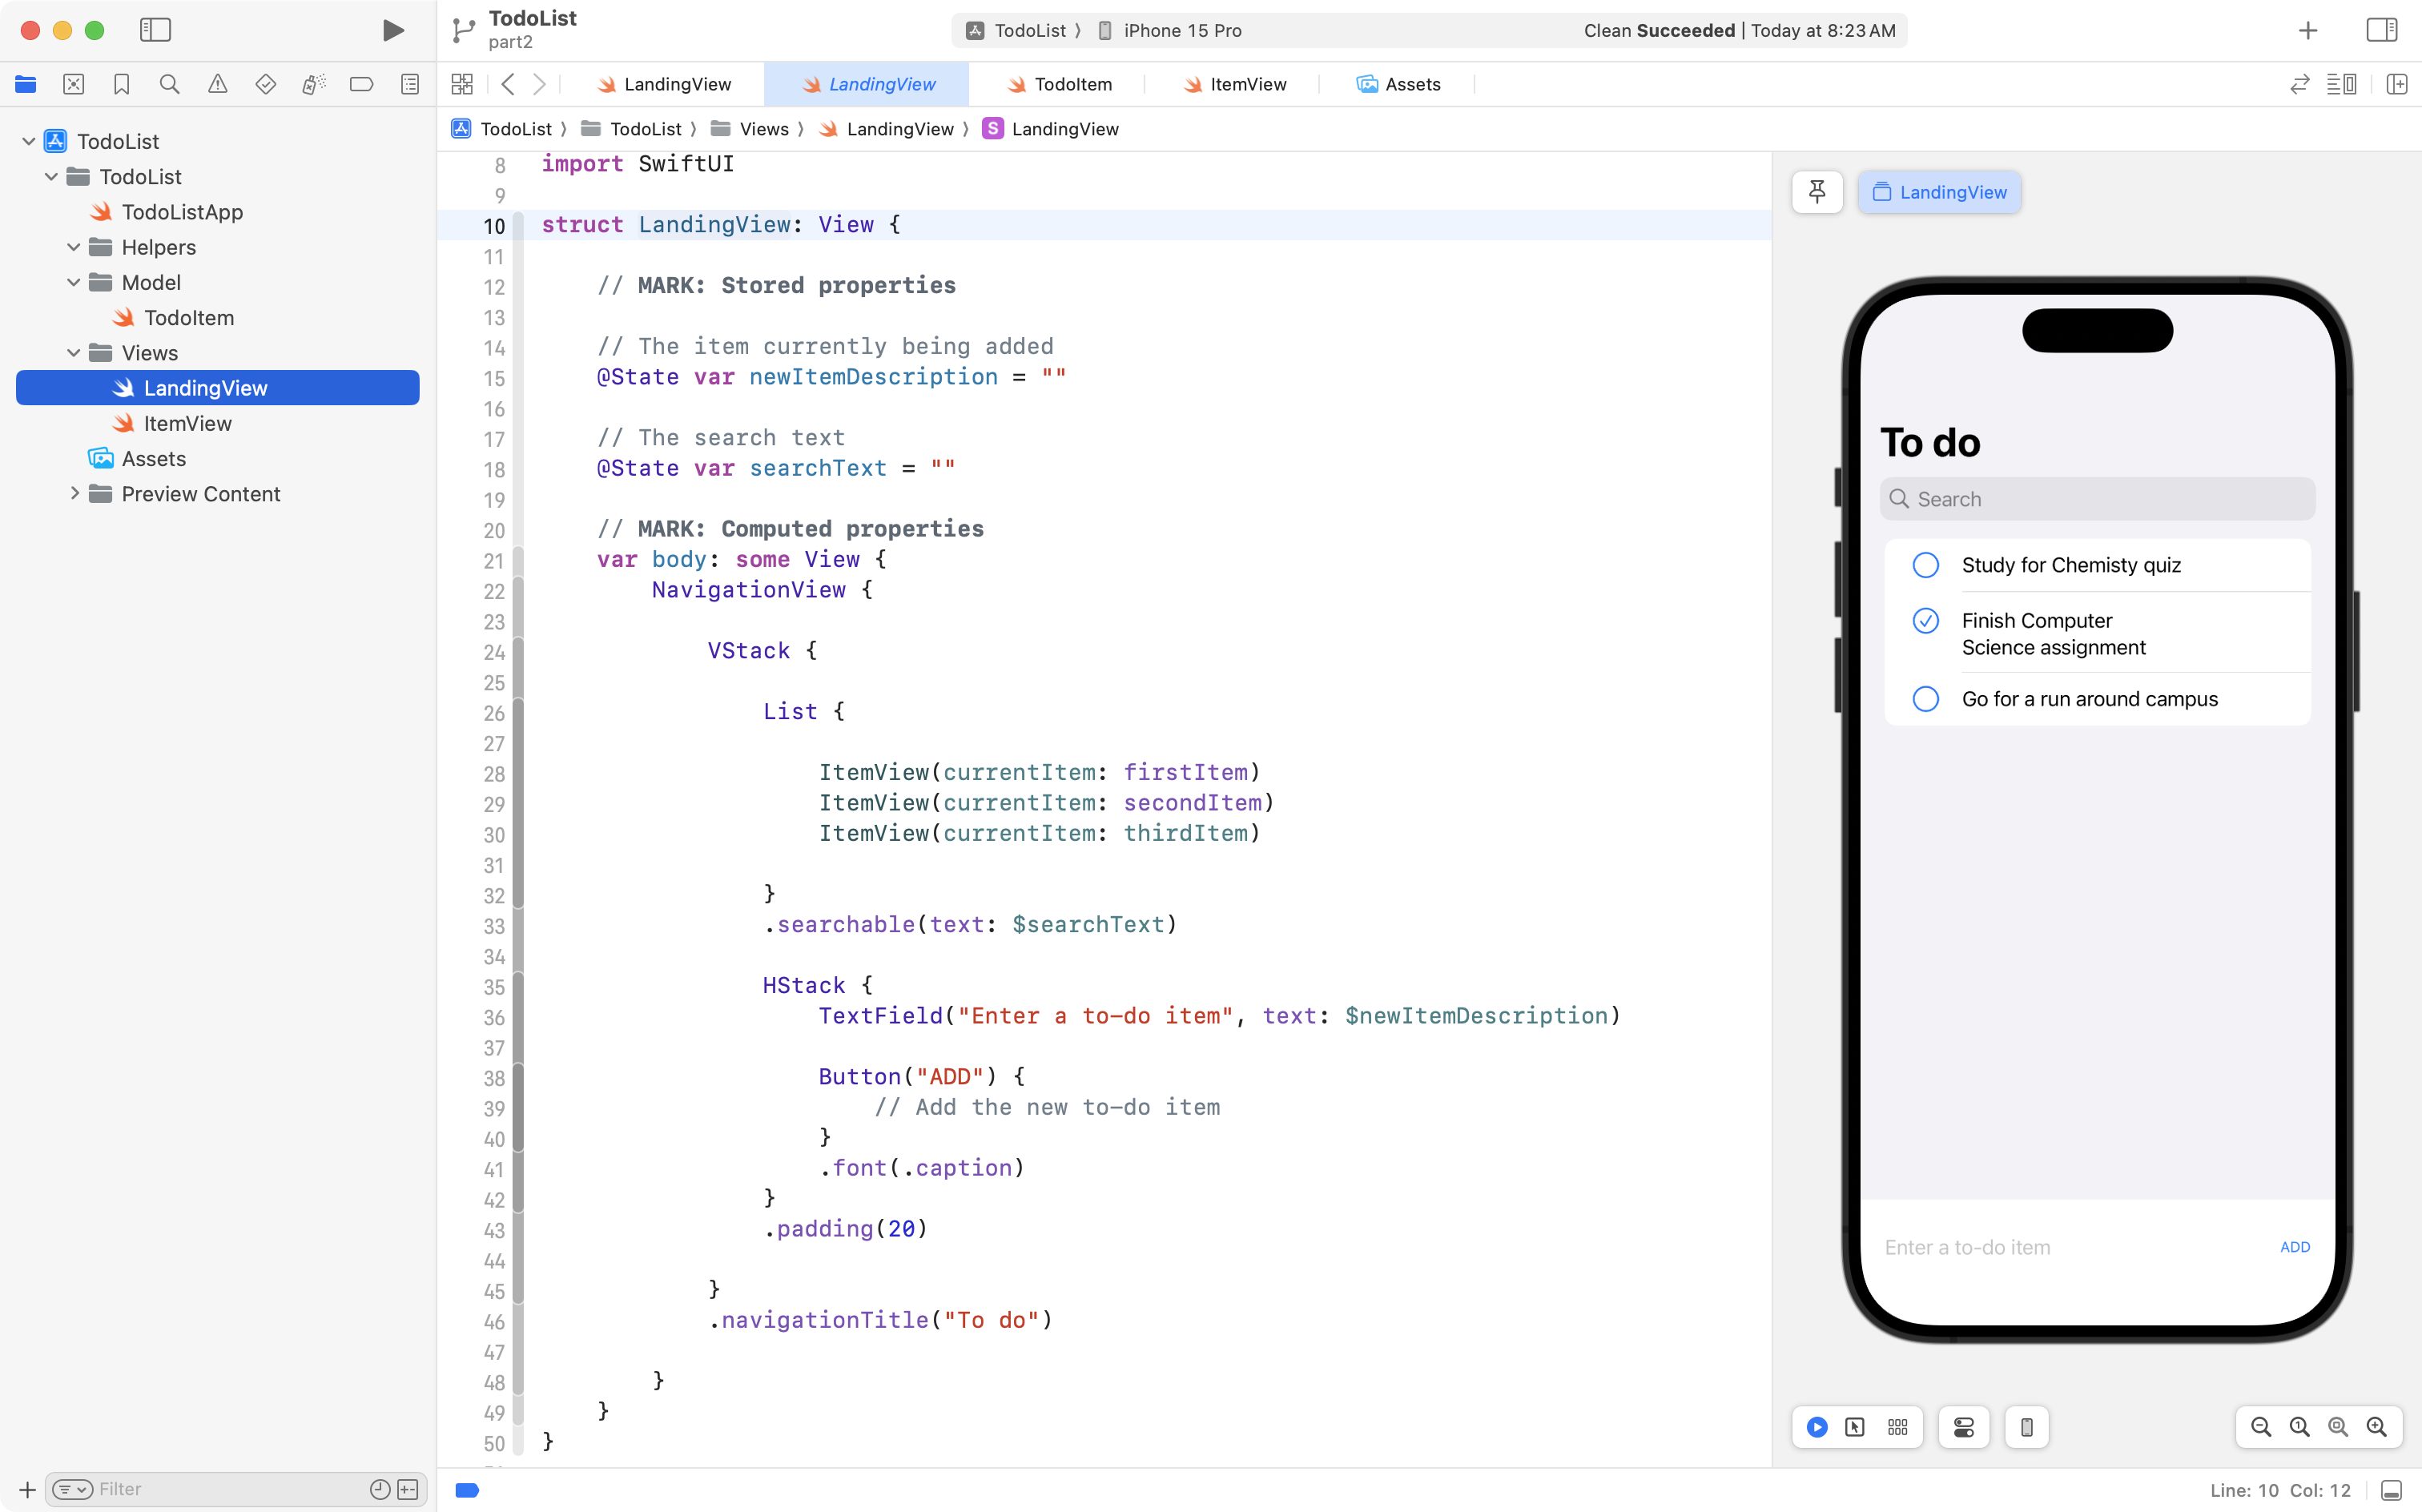
Finally, a view named LandingView exists – it is the view that the app entry point “lands on”, hence, it’s name.
This view presents the main user interface of the to-do list app:
NOTE
If there are any parts of the code above that you do not understand – please – before proceeding – review the relevant parts of the video provided above.
Creating a dynamic scrollable list
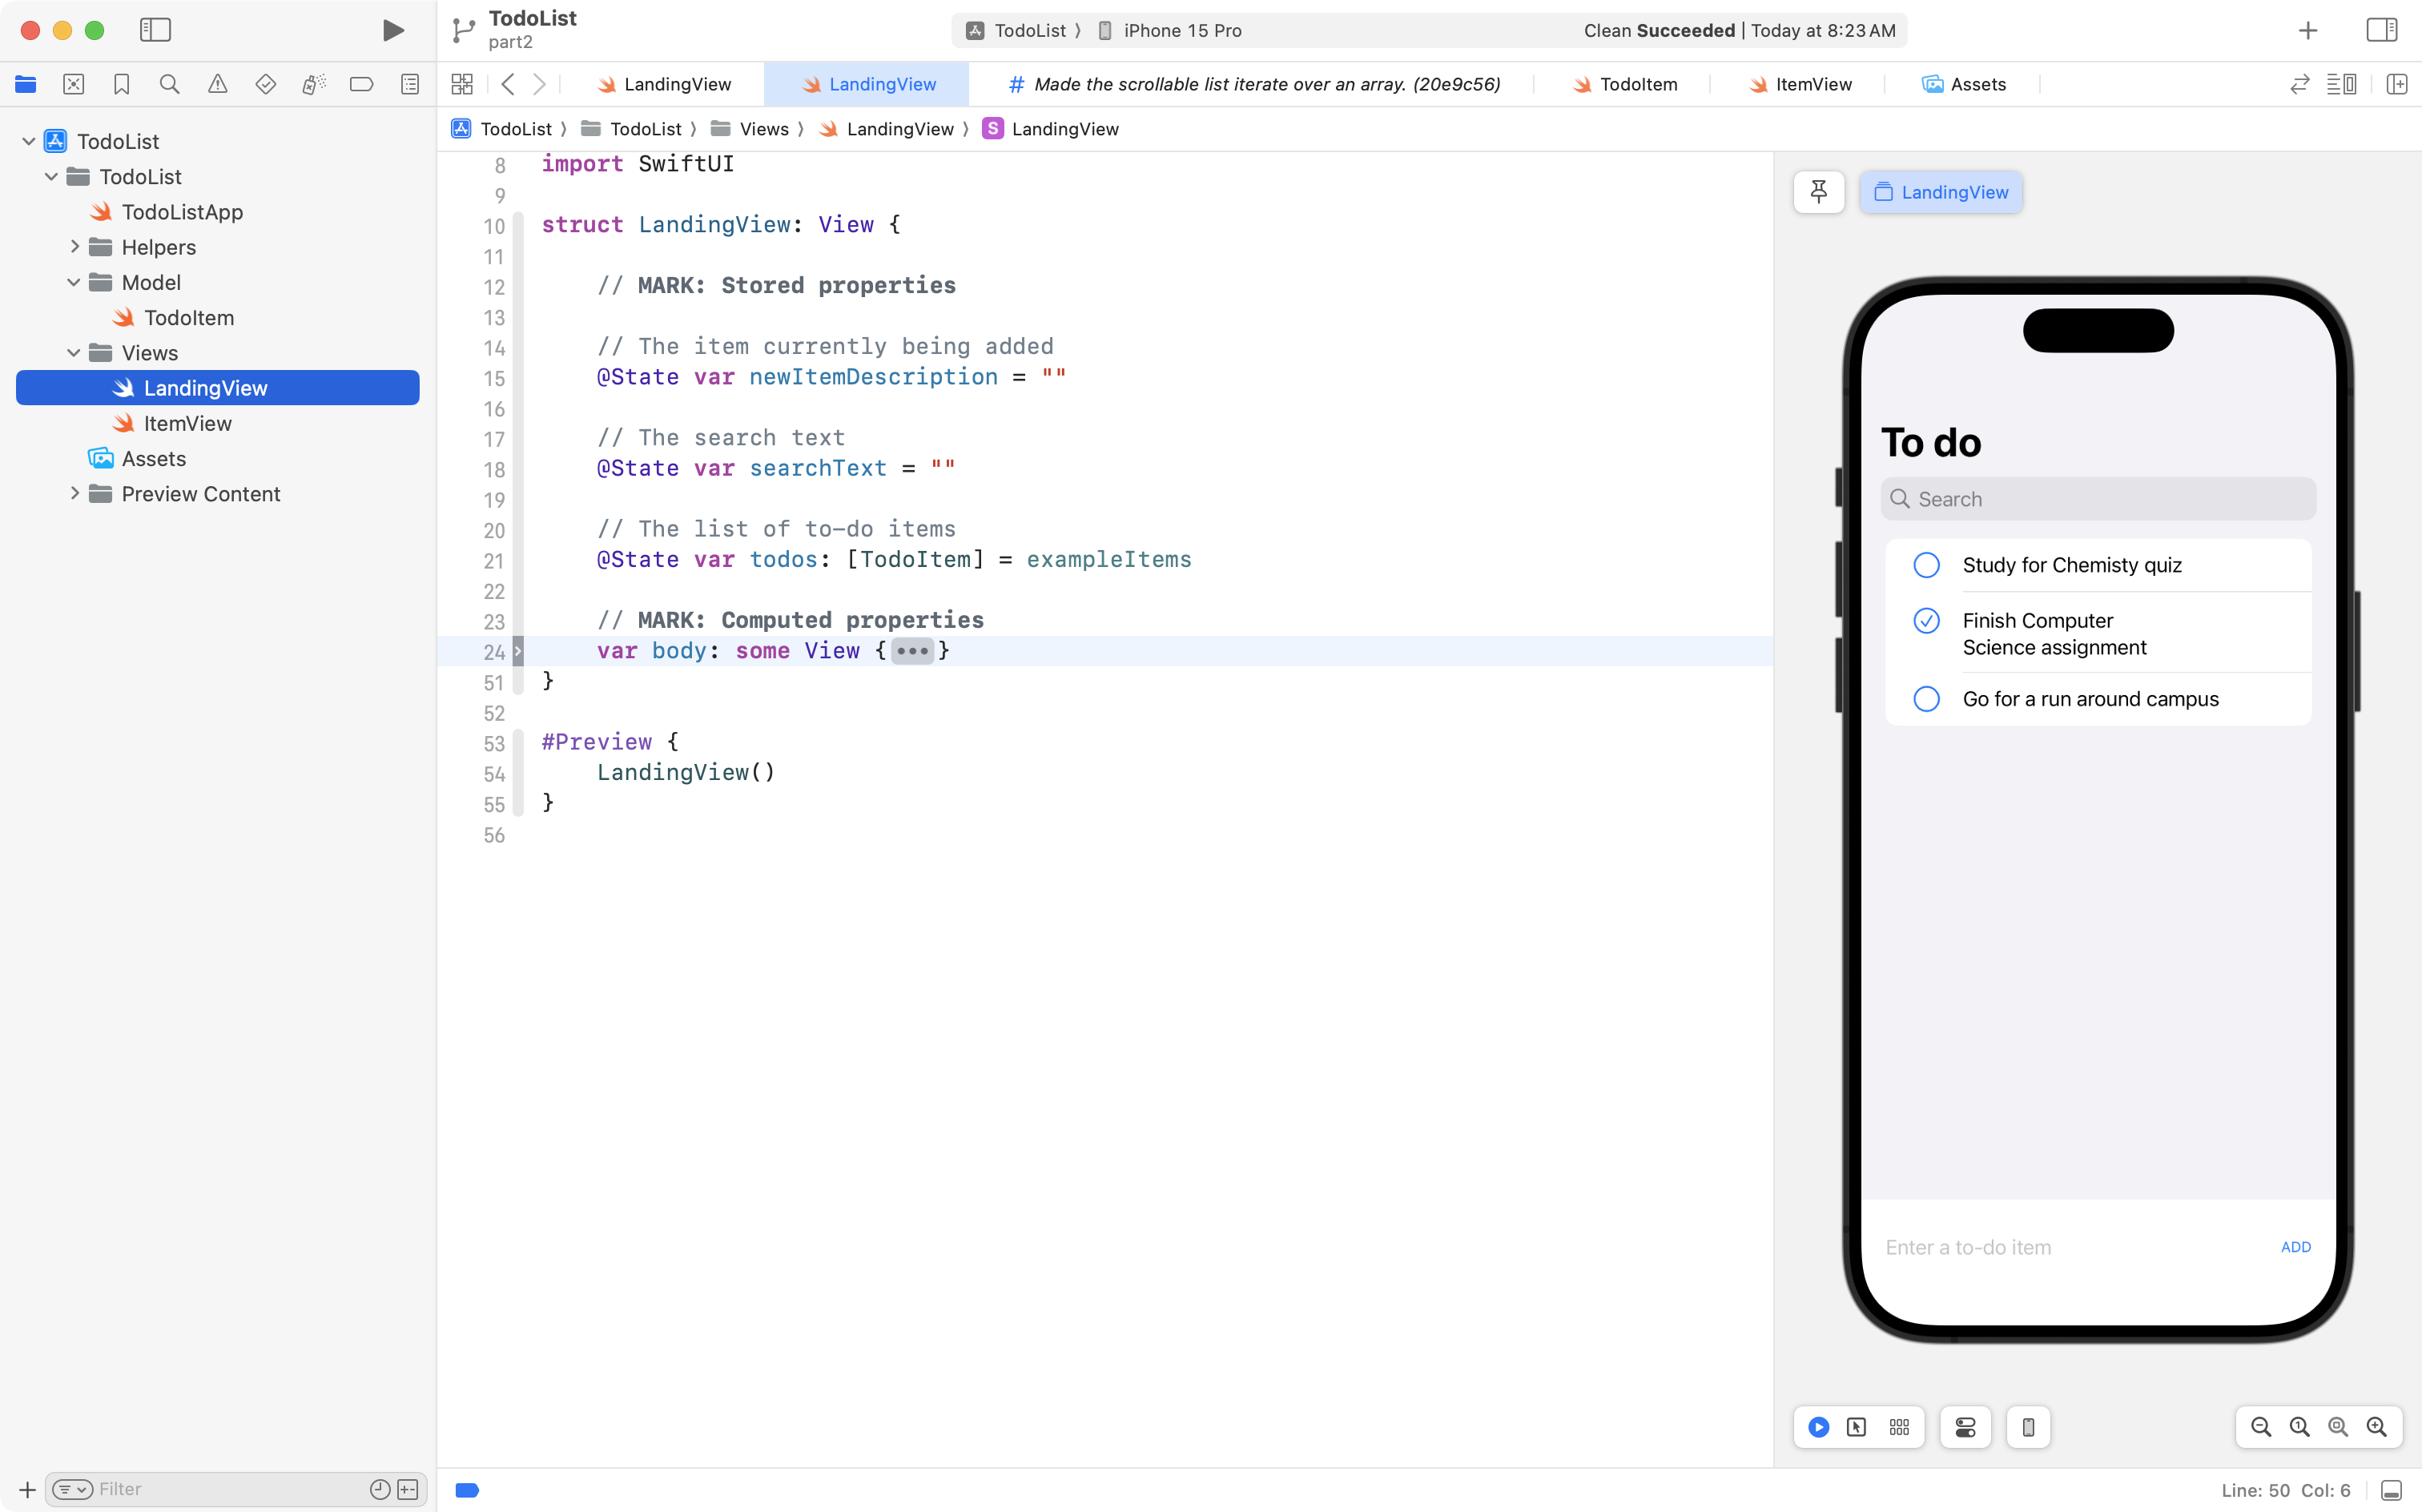
The scrollable list in the app is currently composed of three to-do items that never change:
The first thing we need to do is add an array (also called a list) to hold each to-do item.
Make the following edit to add that stored property:
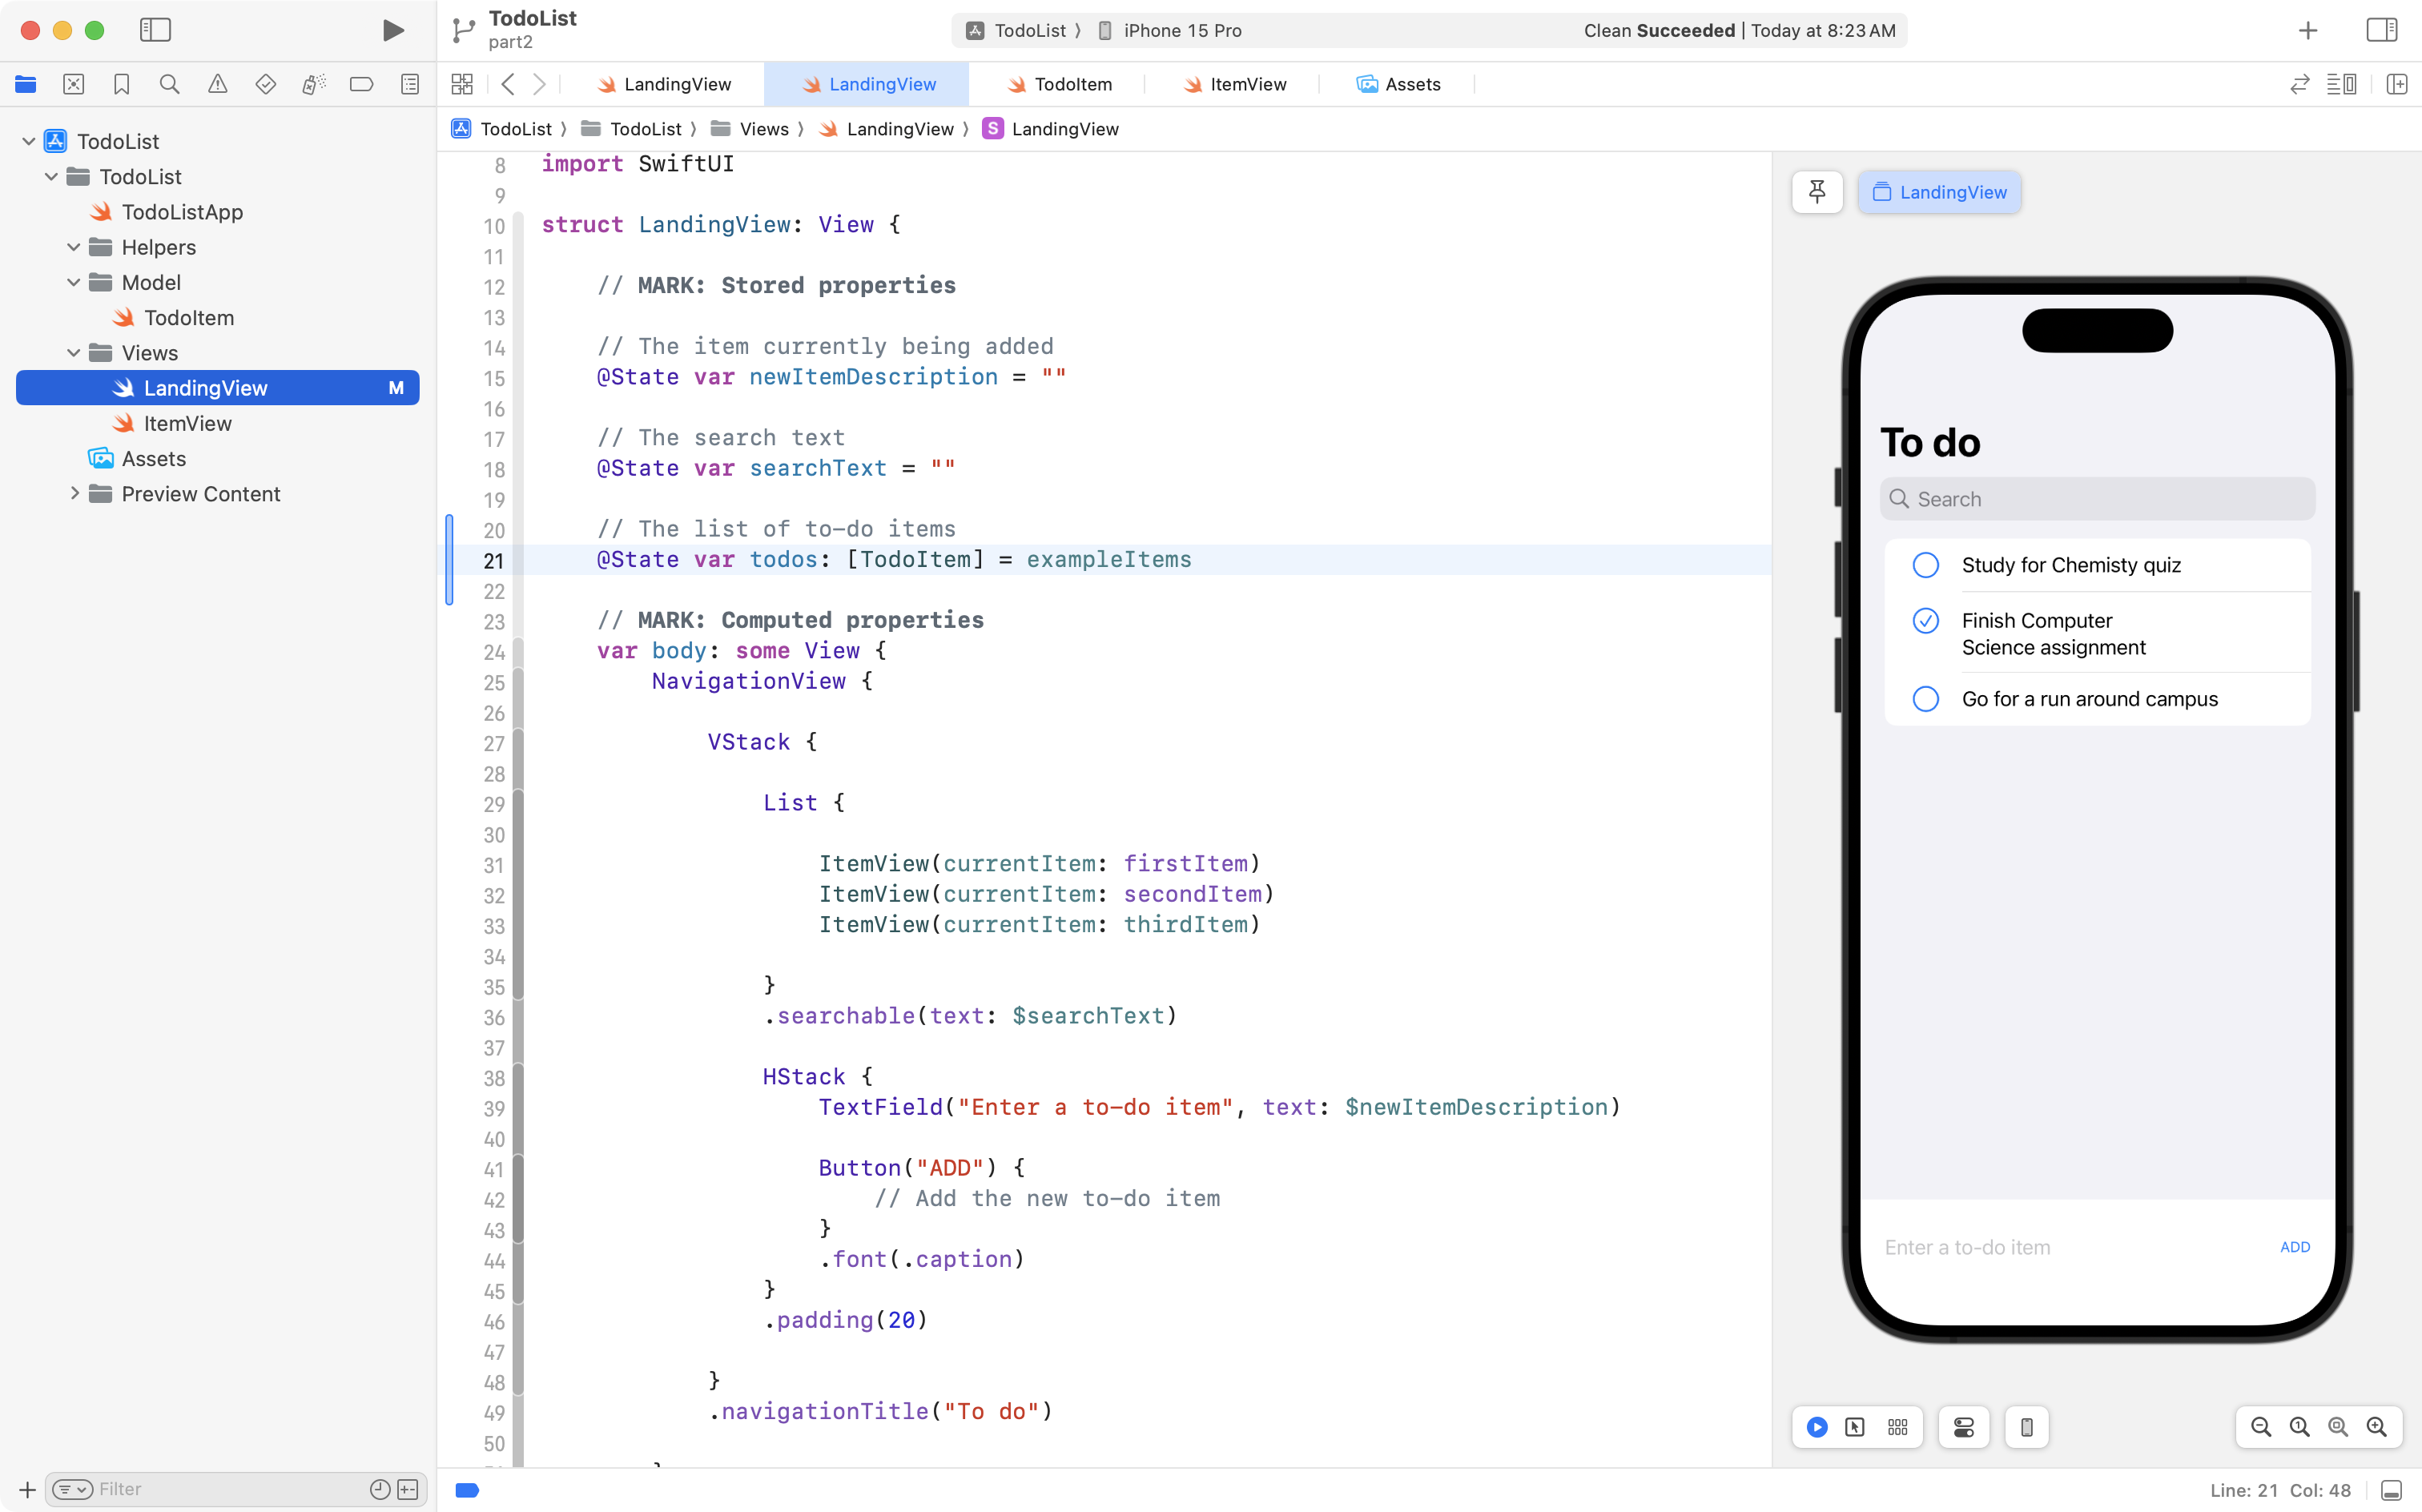
The name of the array that will holds our list of to-do items is todos. The array holds instances of the data type TodoItem. We initially populate the list with the exampleItems array found in the TodoItem.swift file.
Next, we need to make the List structure iterate over this new array, to show it’s contents.
Make the following changes:
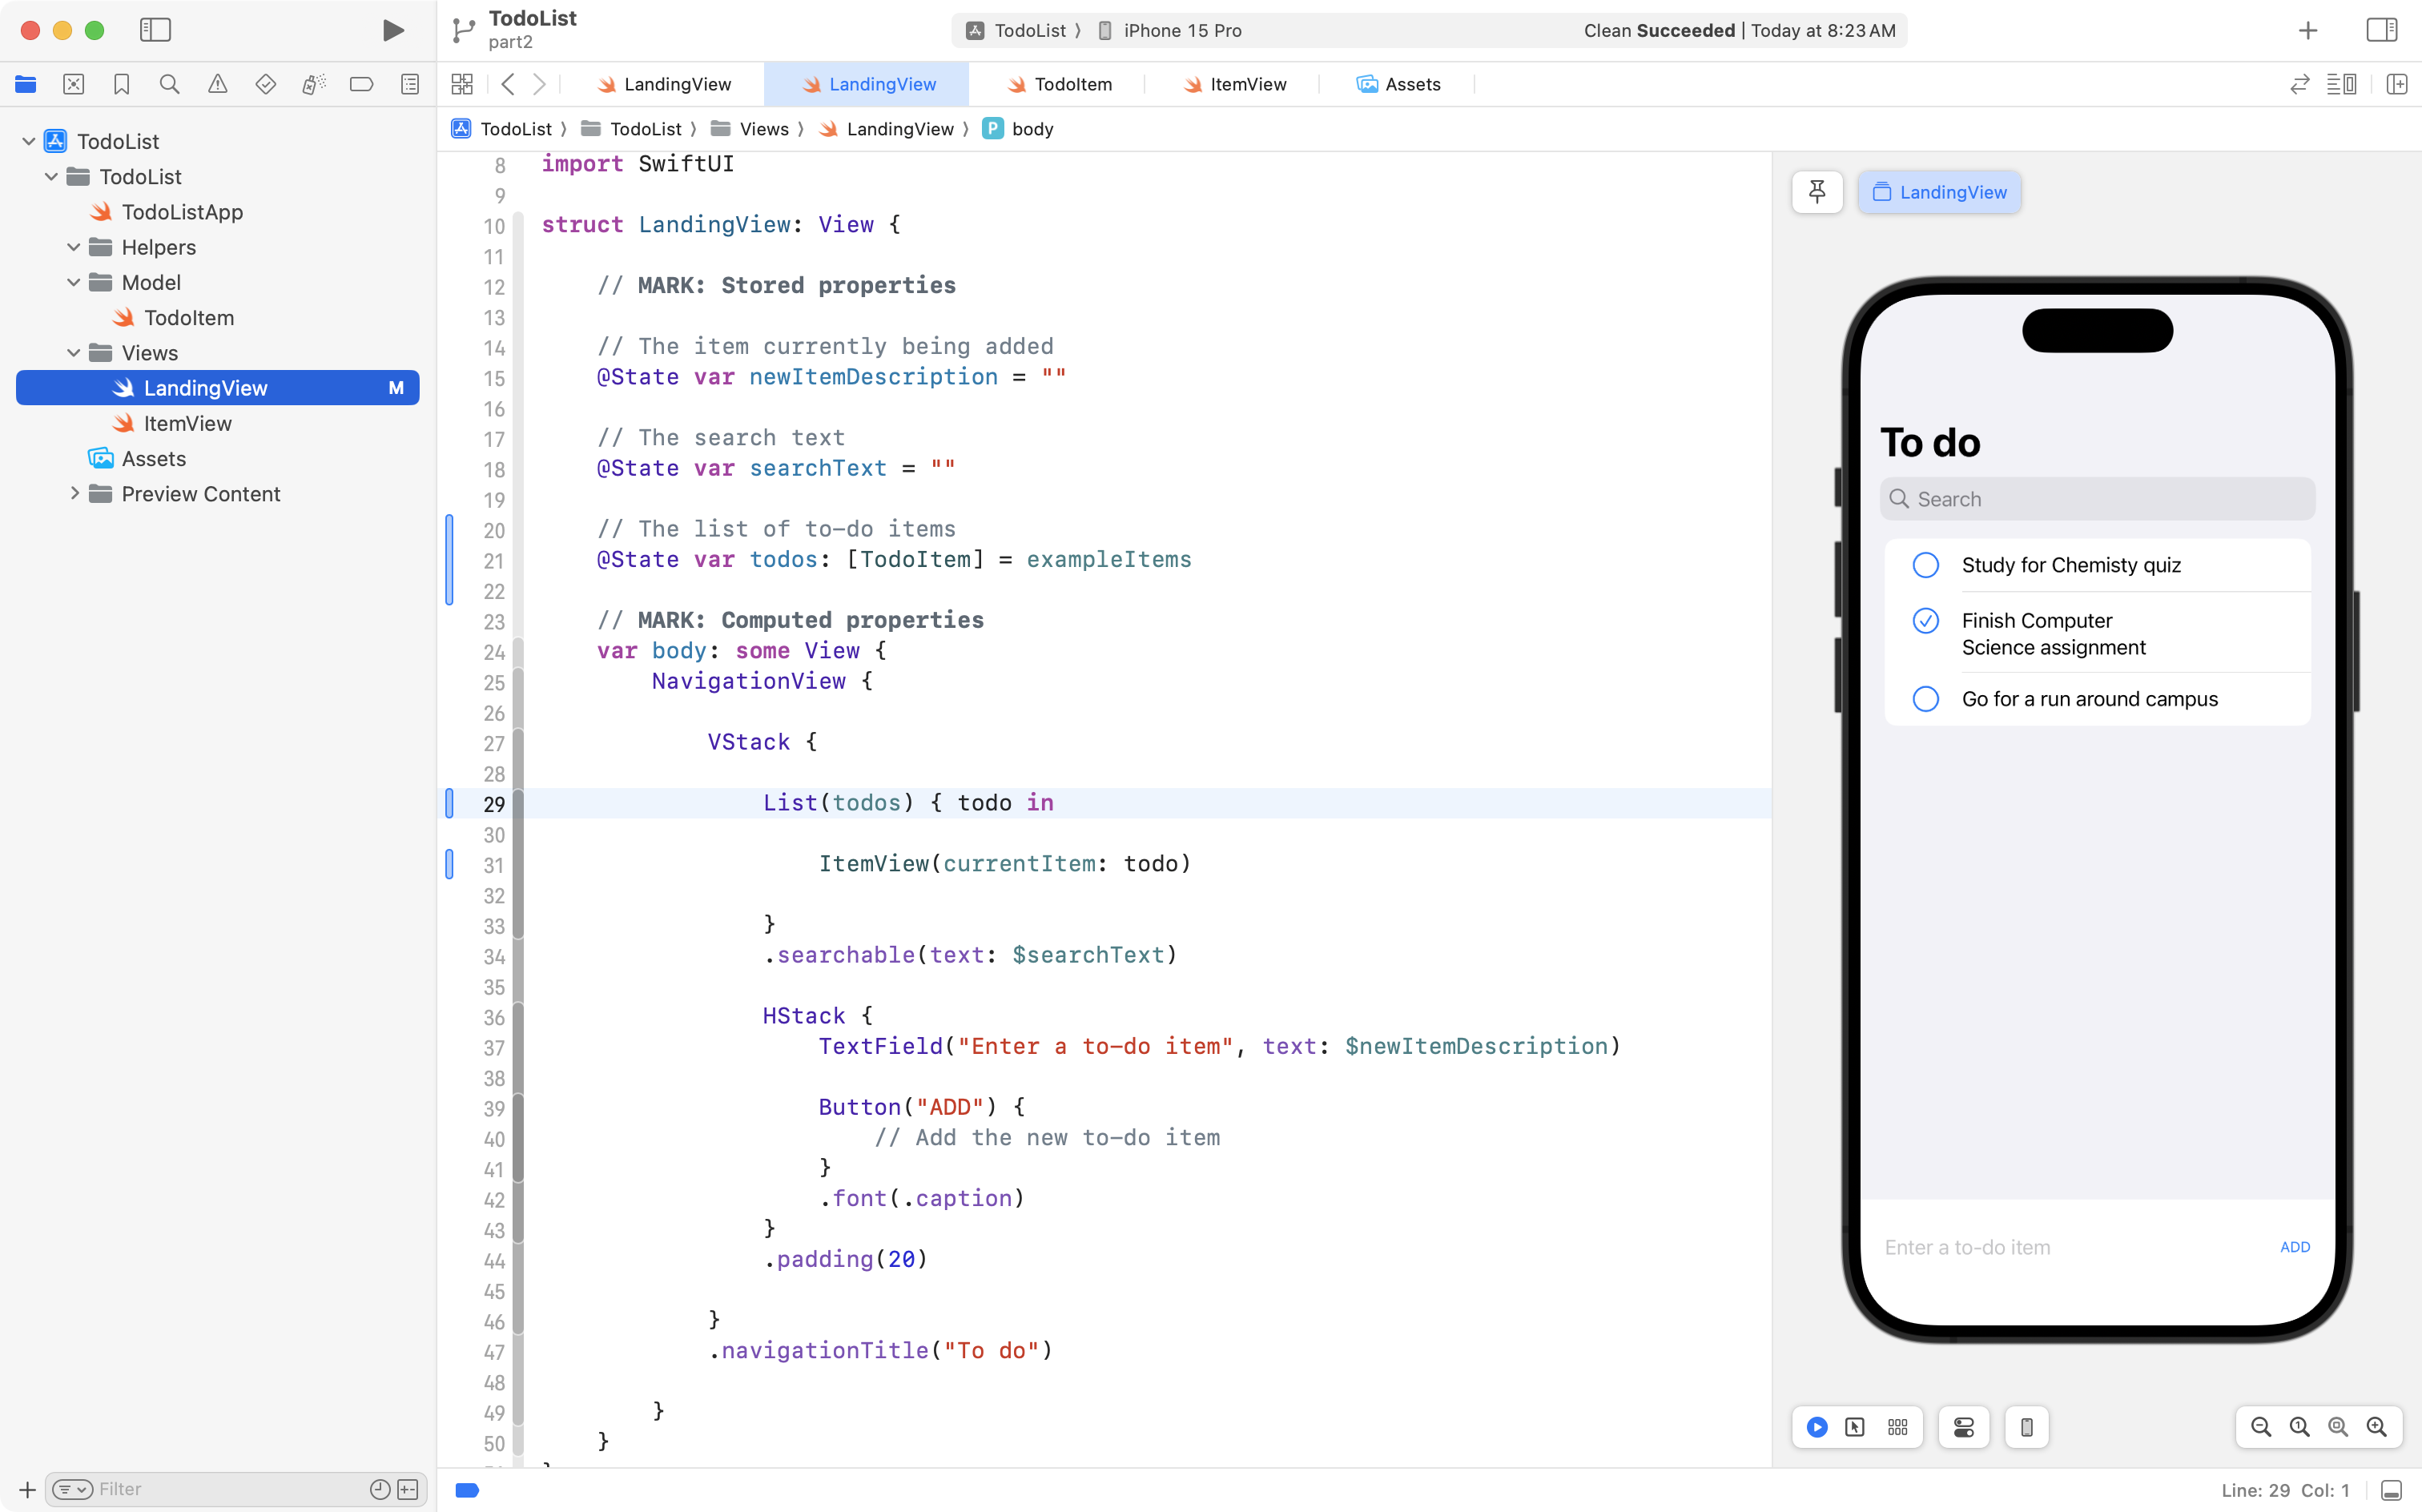
Now, on line 29, the List iterates over the array named todos. As that happens, each individual to-do item is placed in a temporary constant named todo.
On line 31, instead of showing specific pre-written to-do items, instances of ItemView are created to show whatever values exist in the todos array.
Here are the same changes again, showing old code above in grey, with new code below in blue:
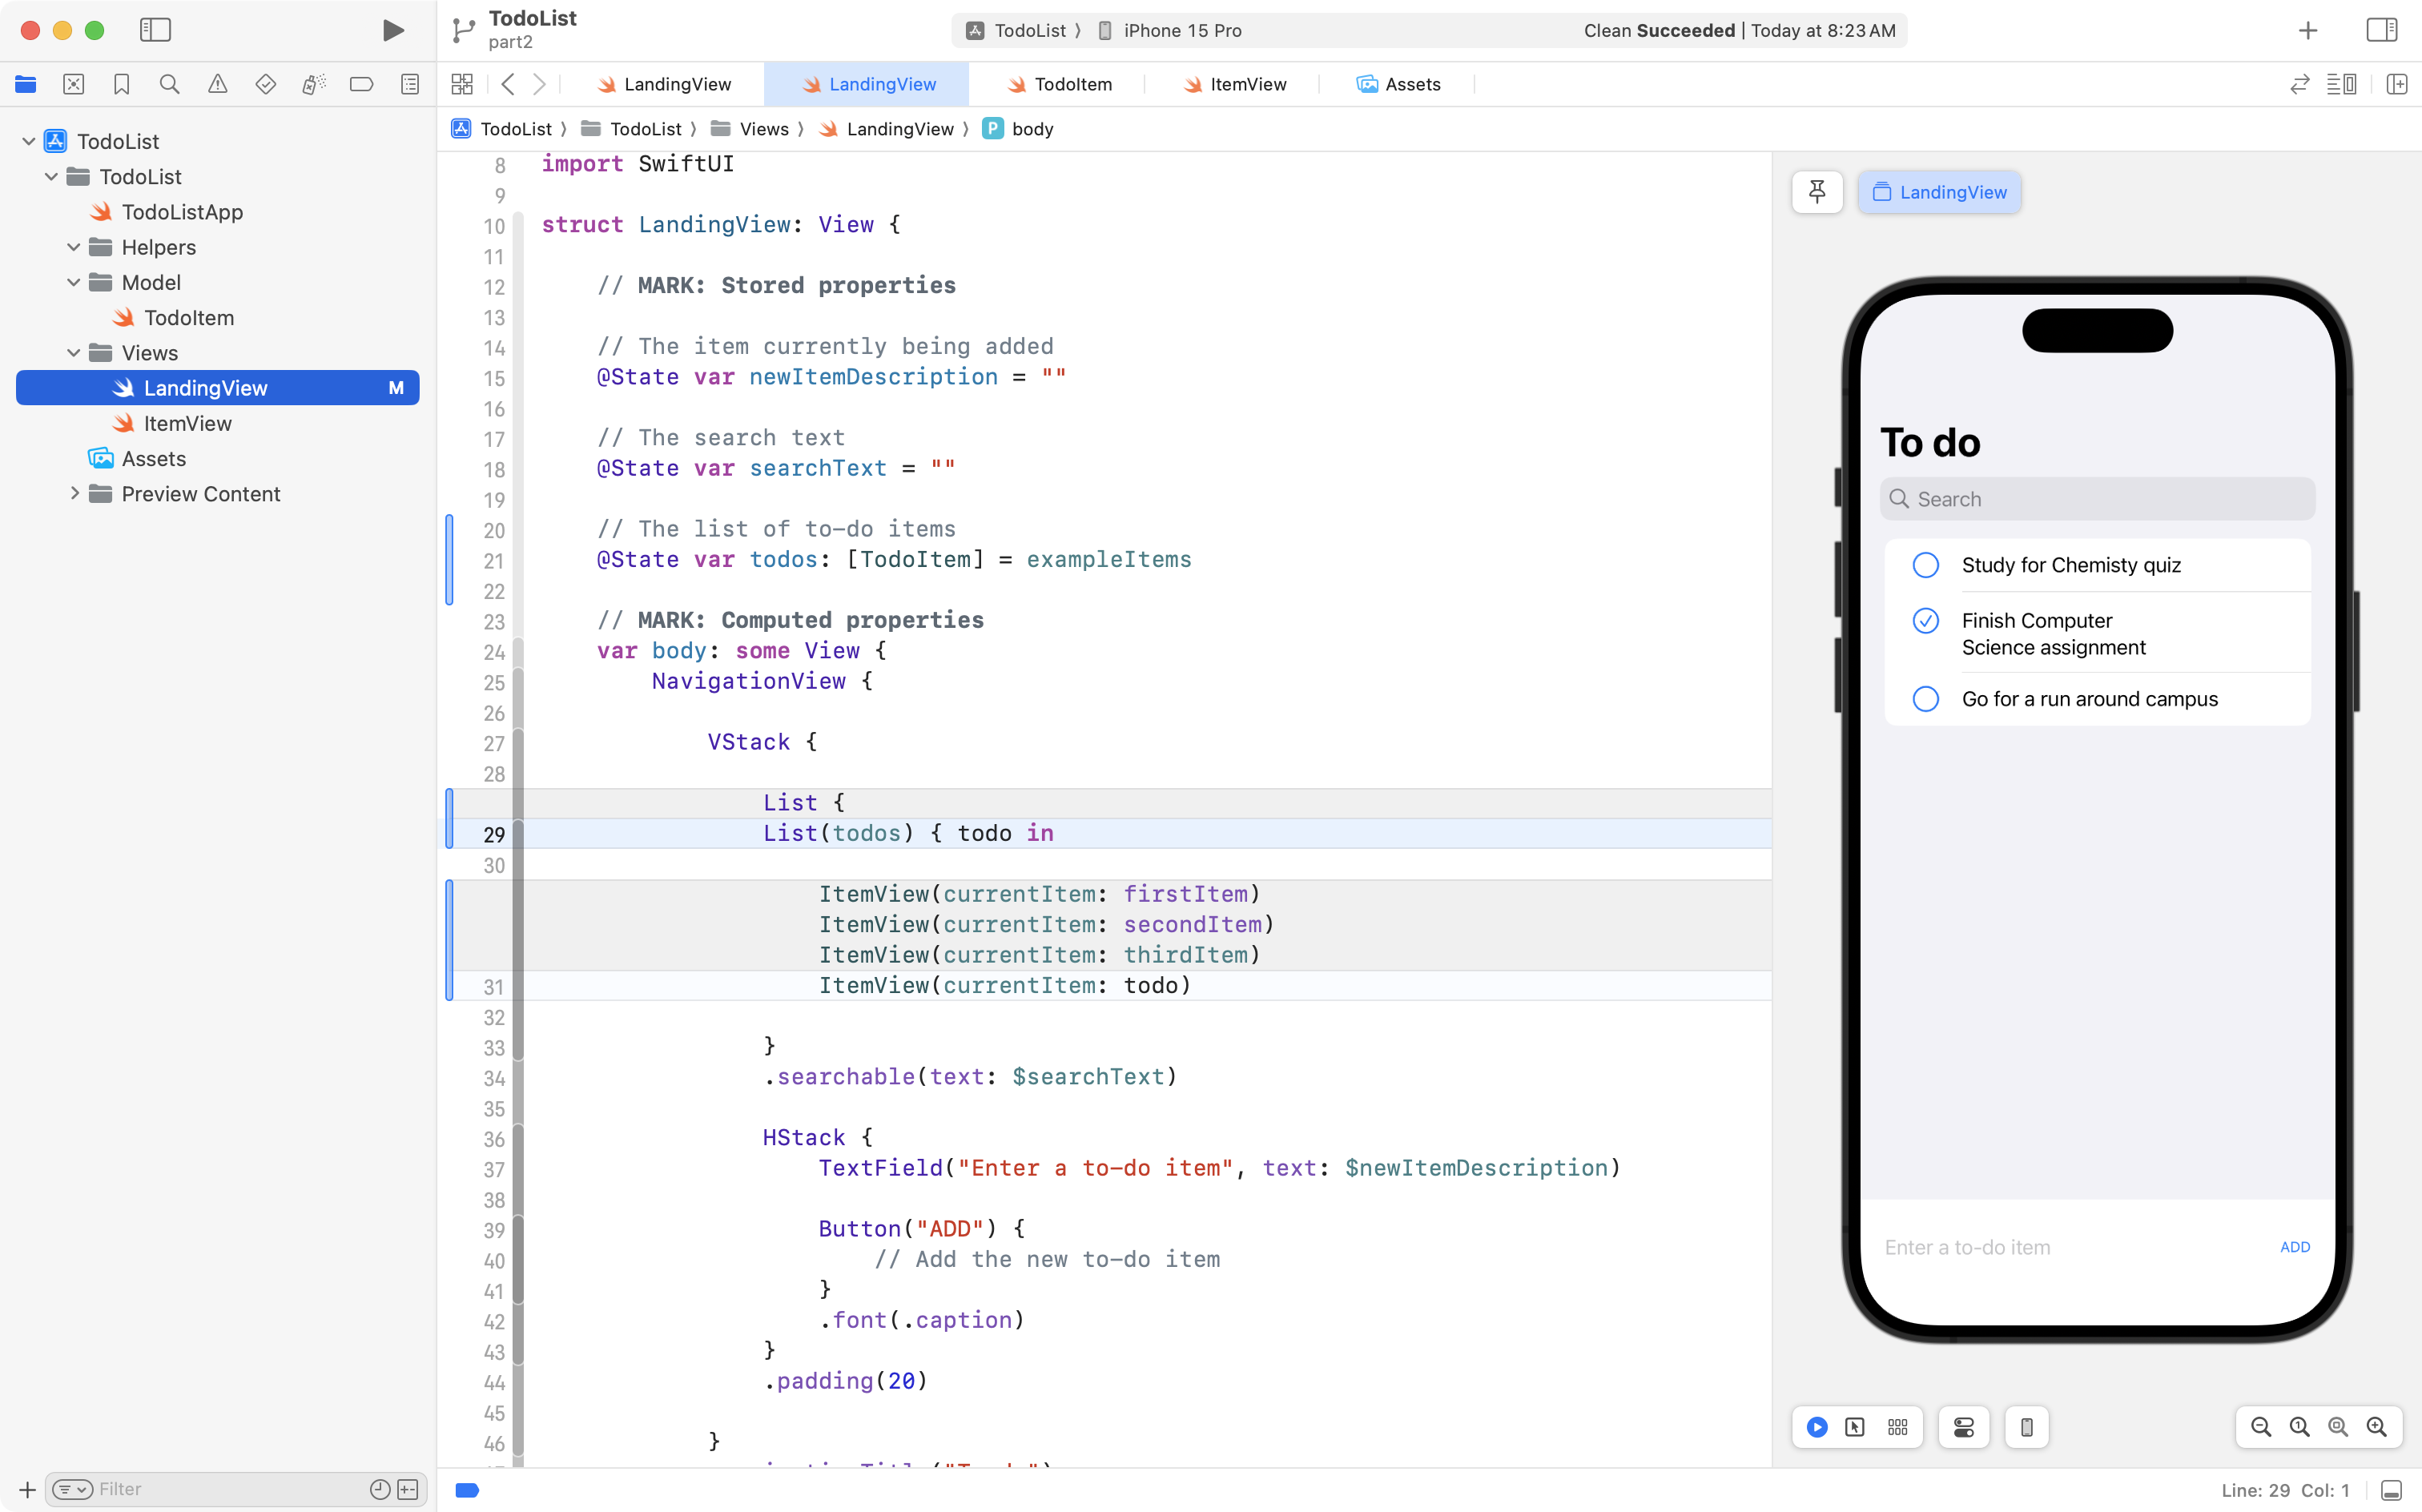
There are no visible changes to the user interface, but we have made the list dynamic.
This sets us up to be able to add new to-do items to the array – but first – please commit and push your work with this message:
Made the scrollable list iterate over an array.
Adding new to-do items
Next we will make it possible to add to-do items.
Define the function
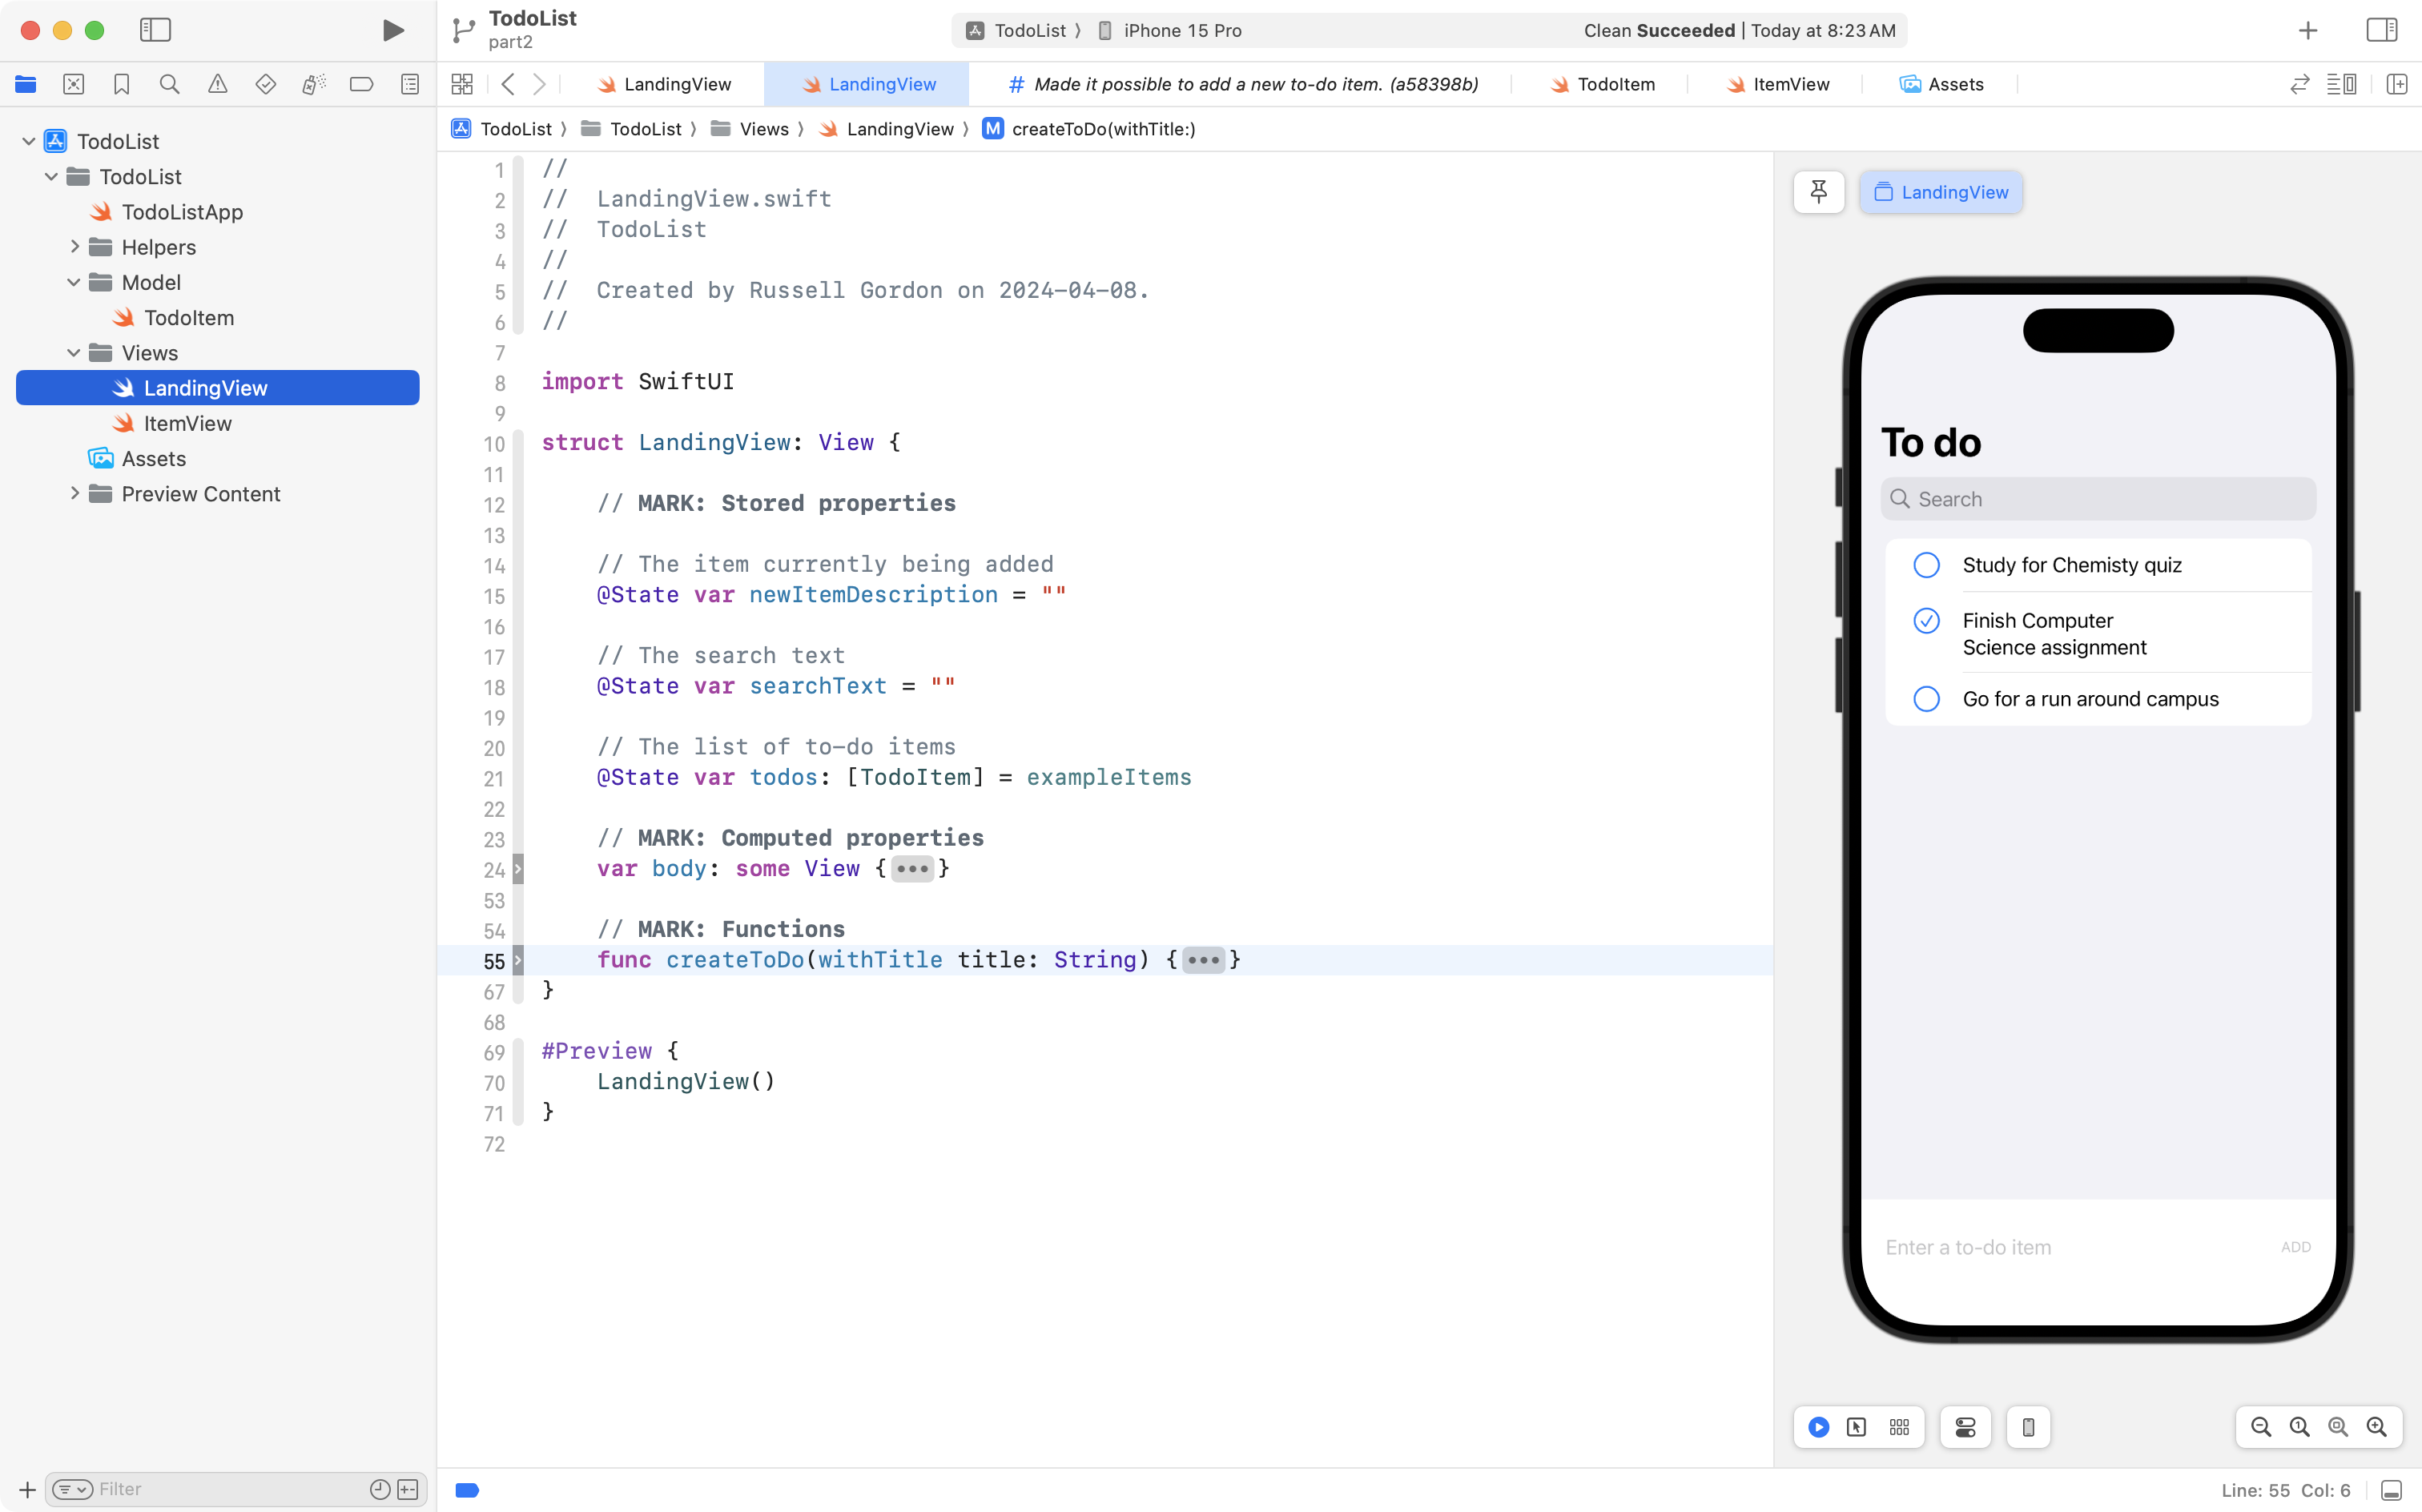
First, use code-folding to fold up the body property:
Now add the following code below the body property but before the closing } of the LandingView structure:

We have created a function named createToDo. It has one parameter, whose external name is withTitle. The argument passed in to that parameter can be accessed inside the function by the internal name of title. The datatype of the parameter is String.
Inside the function, we create a new instance of the TodoItem data type (lines 56 to 59).
Finally, we add the new to-do item to the end of the array (line 62).
Invoke the function
We have defined the function above, but not invoked it.
To invoke, or use the function, expand the body property and add this code to the Button structure:
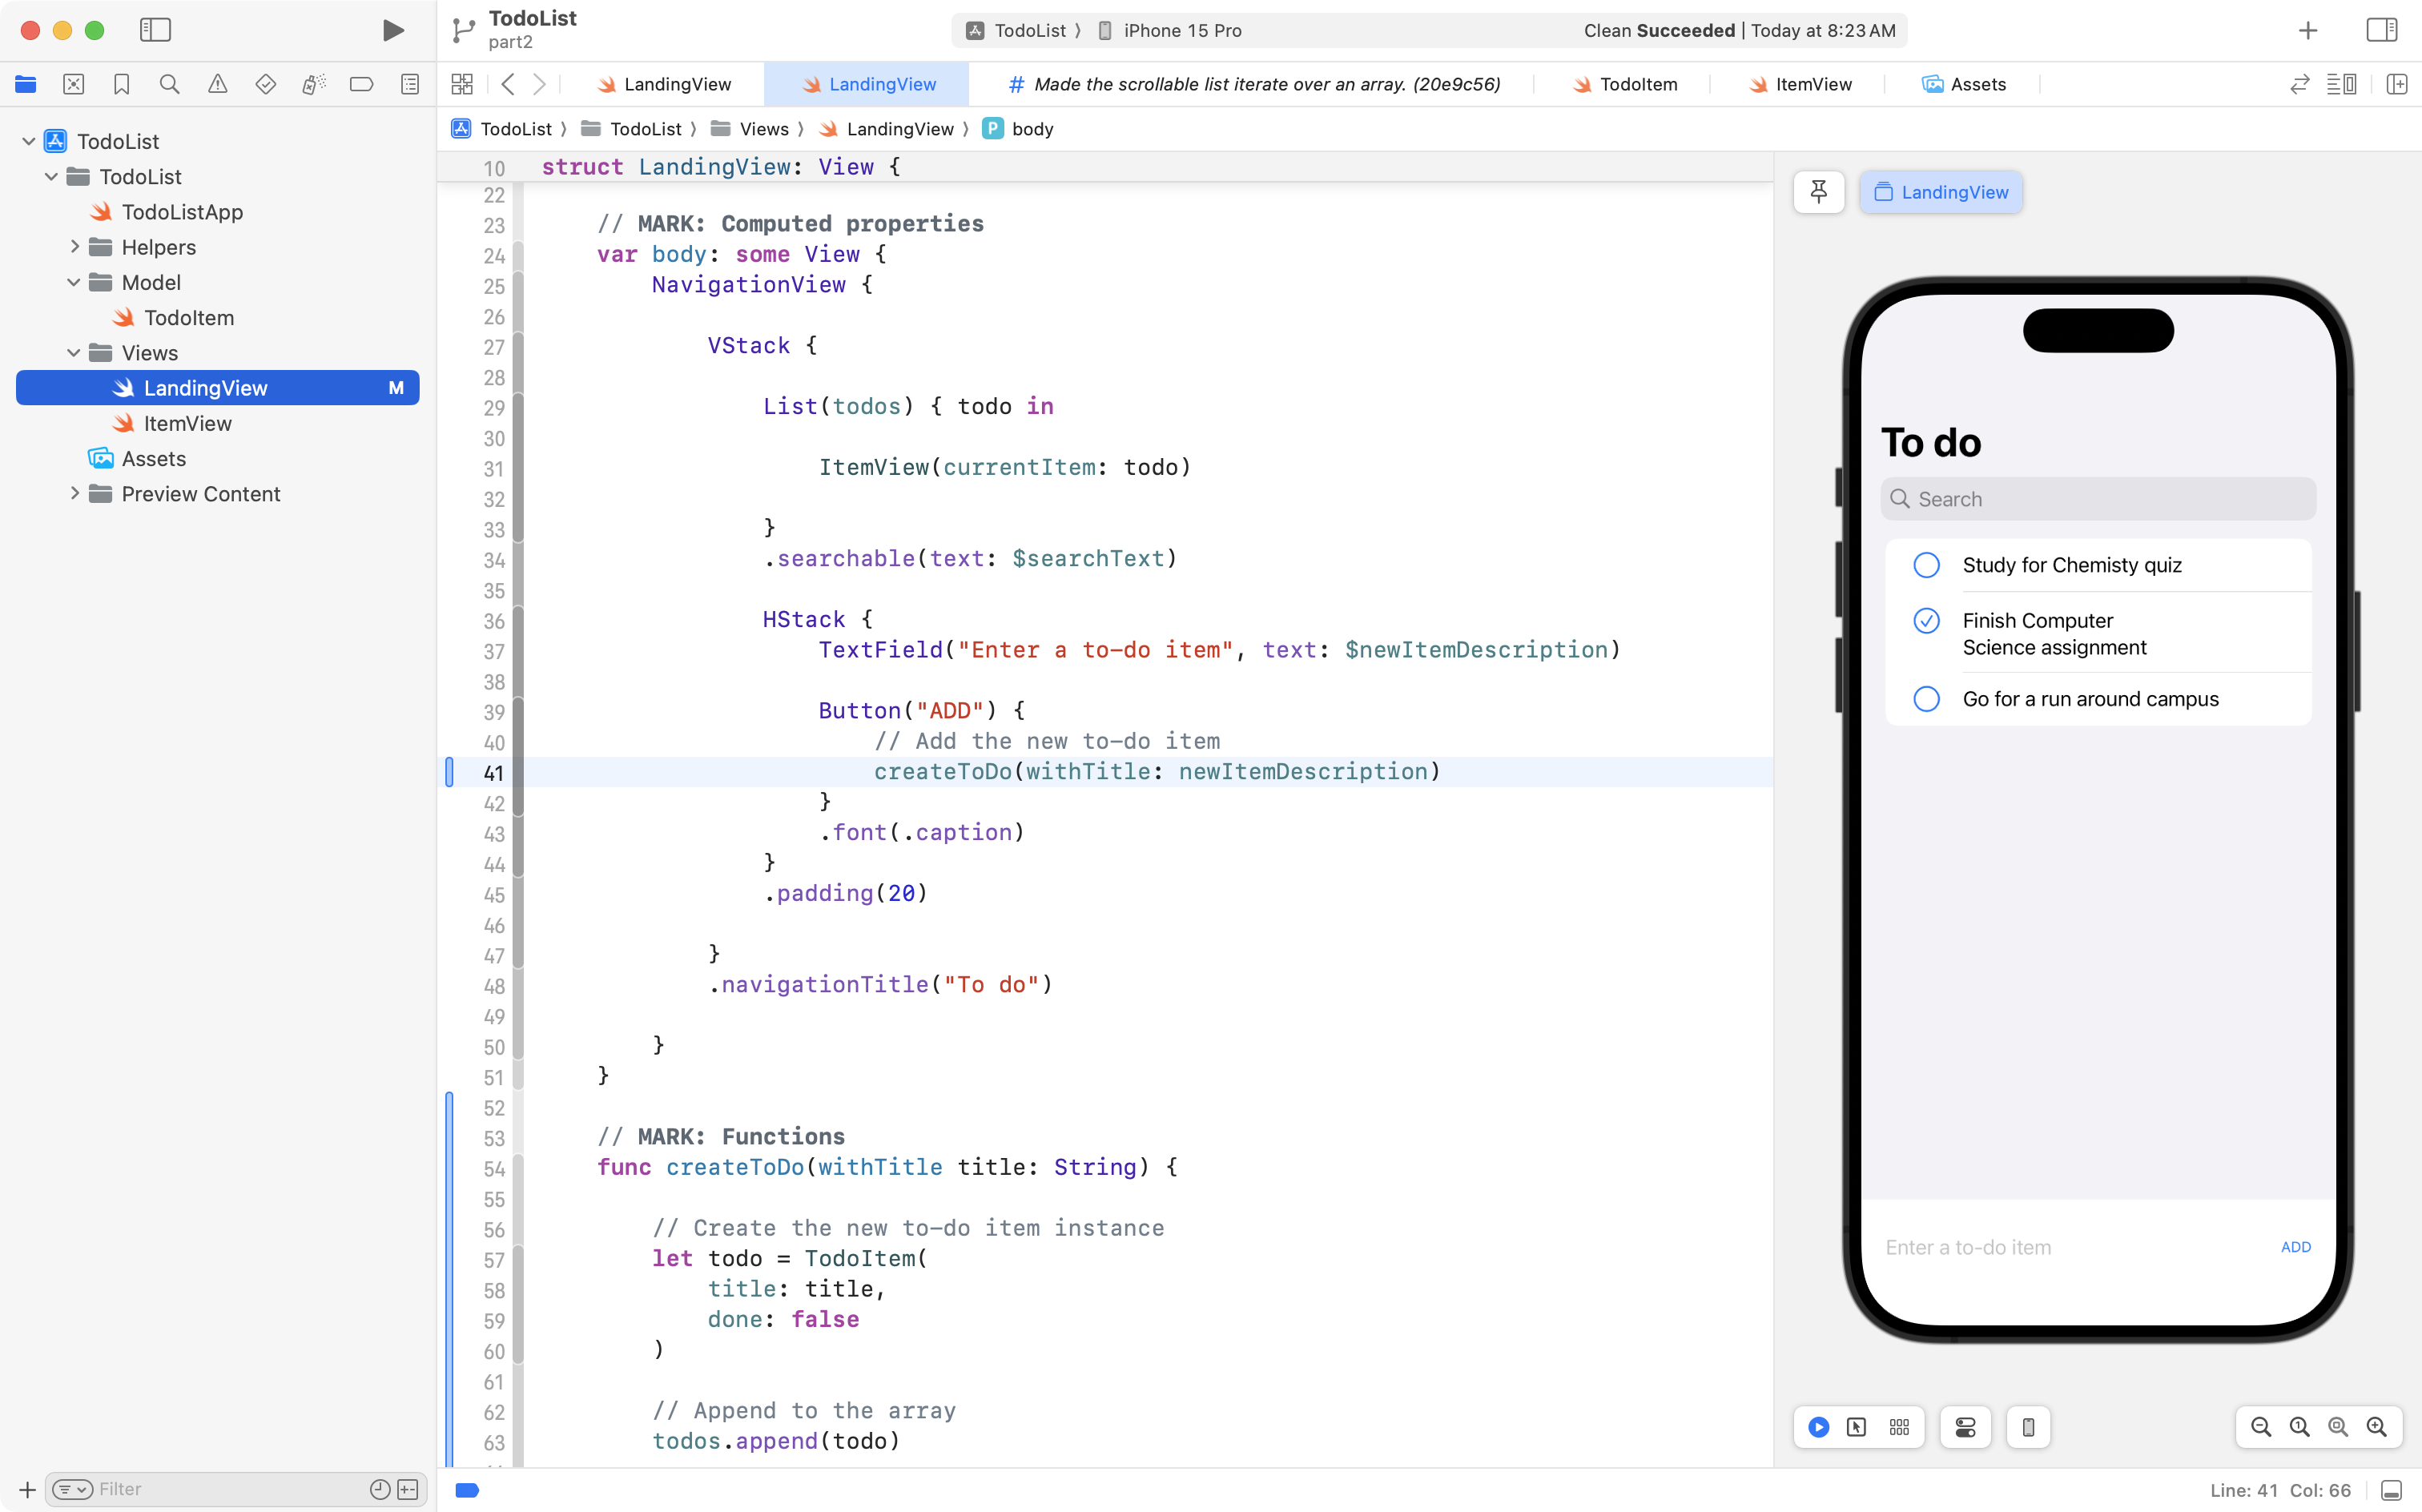
On line 41, we invoke the function, creating a to-do item using whatever was typed into the text field.
Try this out.
Avoid blank to-do items
You may notice it is possible to add a to-do item that has no text.
We can disable the ADD button when no text has been entered.
Add the following code:

On line 44, the disabled view modifier greys out – disables – itself until the newItemDescription stored property (which the text field on line 37 is bound to) is no longer empty.
Once something is typed in the text field, the button is enabled. This ensures that blank items are not added to the list.
Commit and push your work with this message:
Made it possible to add a new to-do item.
Deleting to-do items
Sometimes we might create to-do items by mistake. The user should be able to delete items in this situation.
Define the function
Use code-folding to fold up the body property and the createToDo function:
After the createToDo function, but before the closing } of the LandingView structure, add the following function:
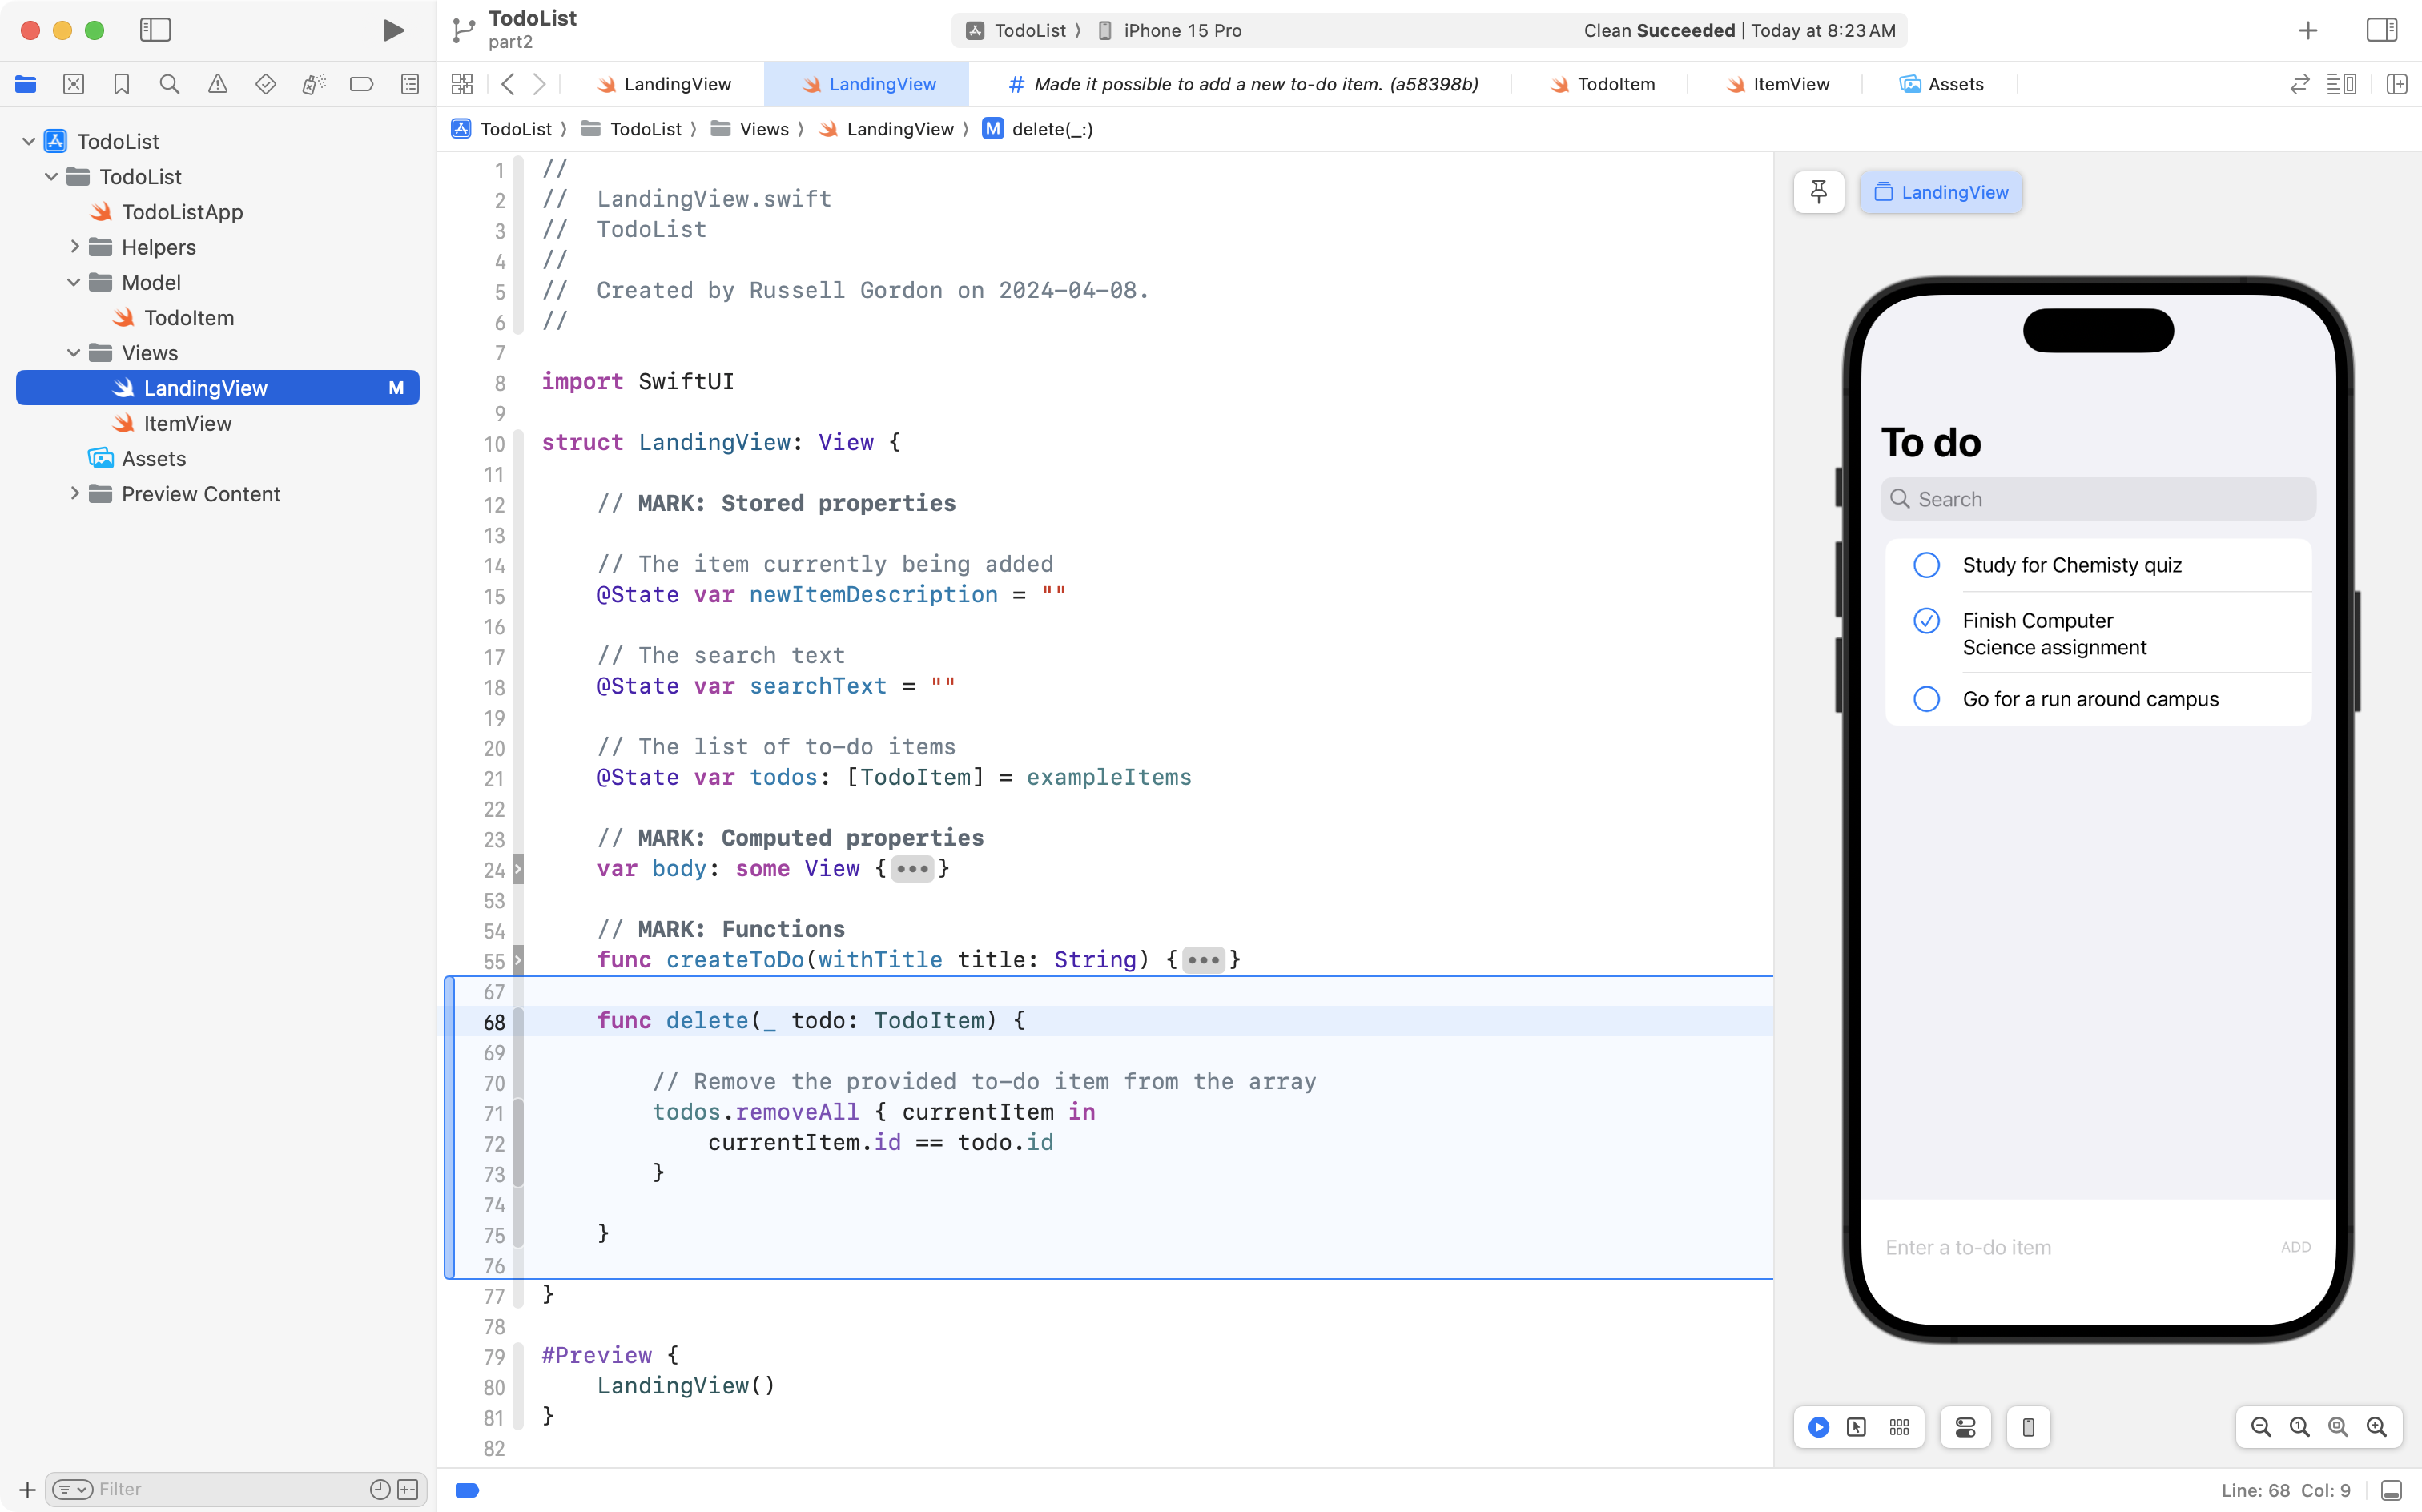
We have created a function named delete. It has one parameter that has no external name – this is indicated with an _ (underscore) character. The argument passed in to that parameter can be accessed inside the function by the internal name of todo. The datatype of the parameter is TodoItem.
Inside the function, we remove all to-do items from the todos array that have an id matching the id of the to-do item that was passed to the function.
We have defined the function, but we are not using it yet.
Invoke the function
Expand the body property and add the code shown immediately below the ItemView structure:
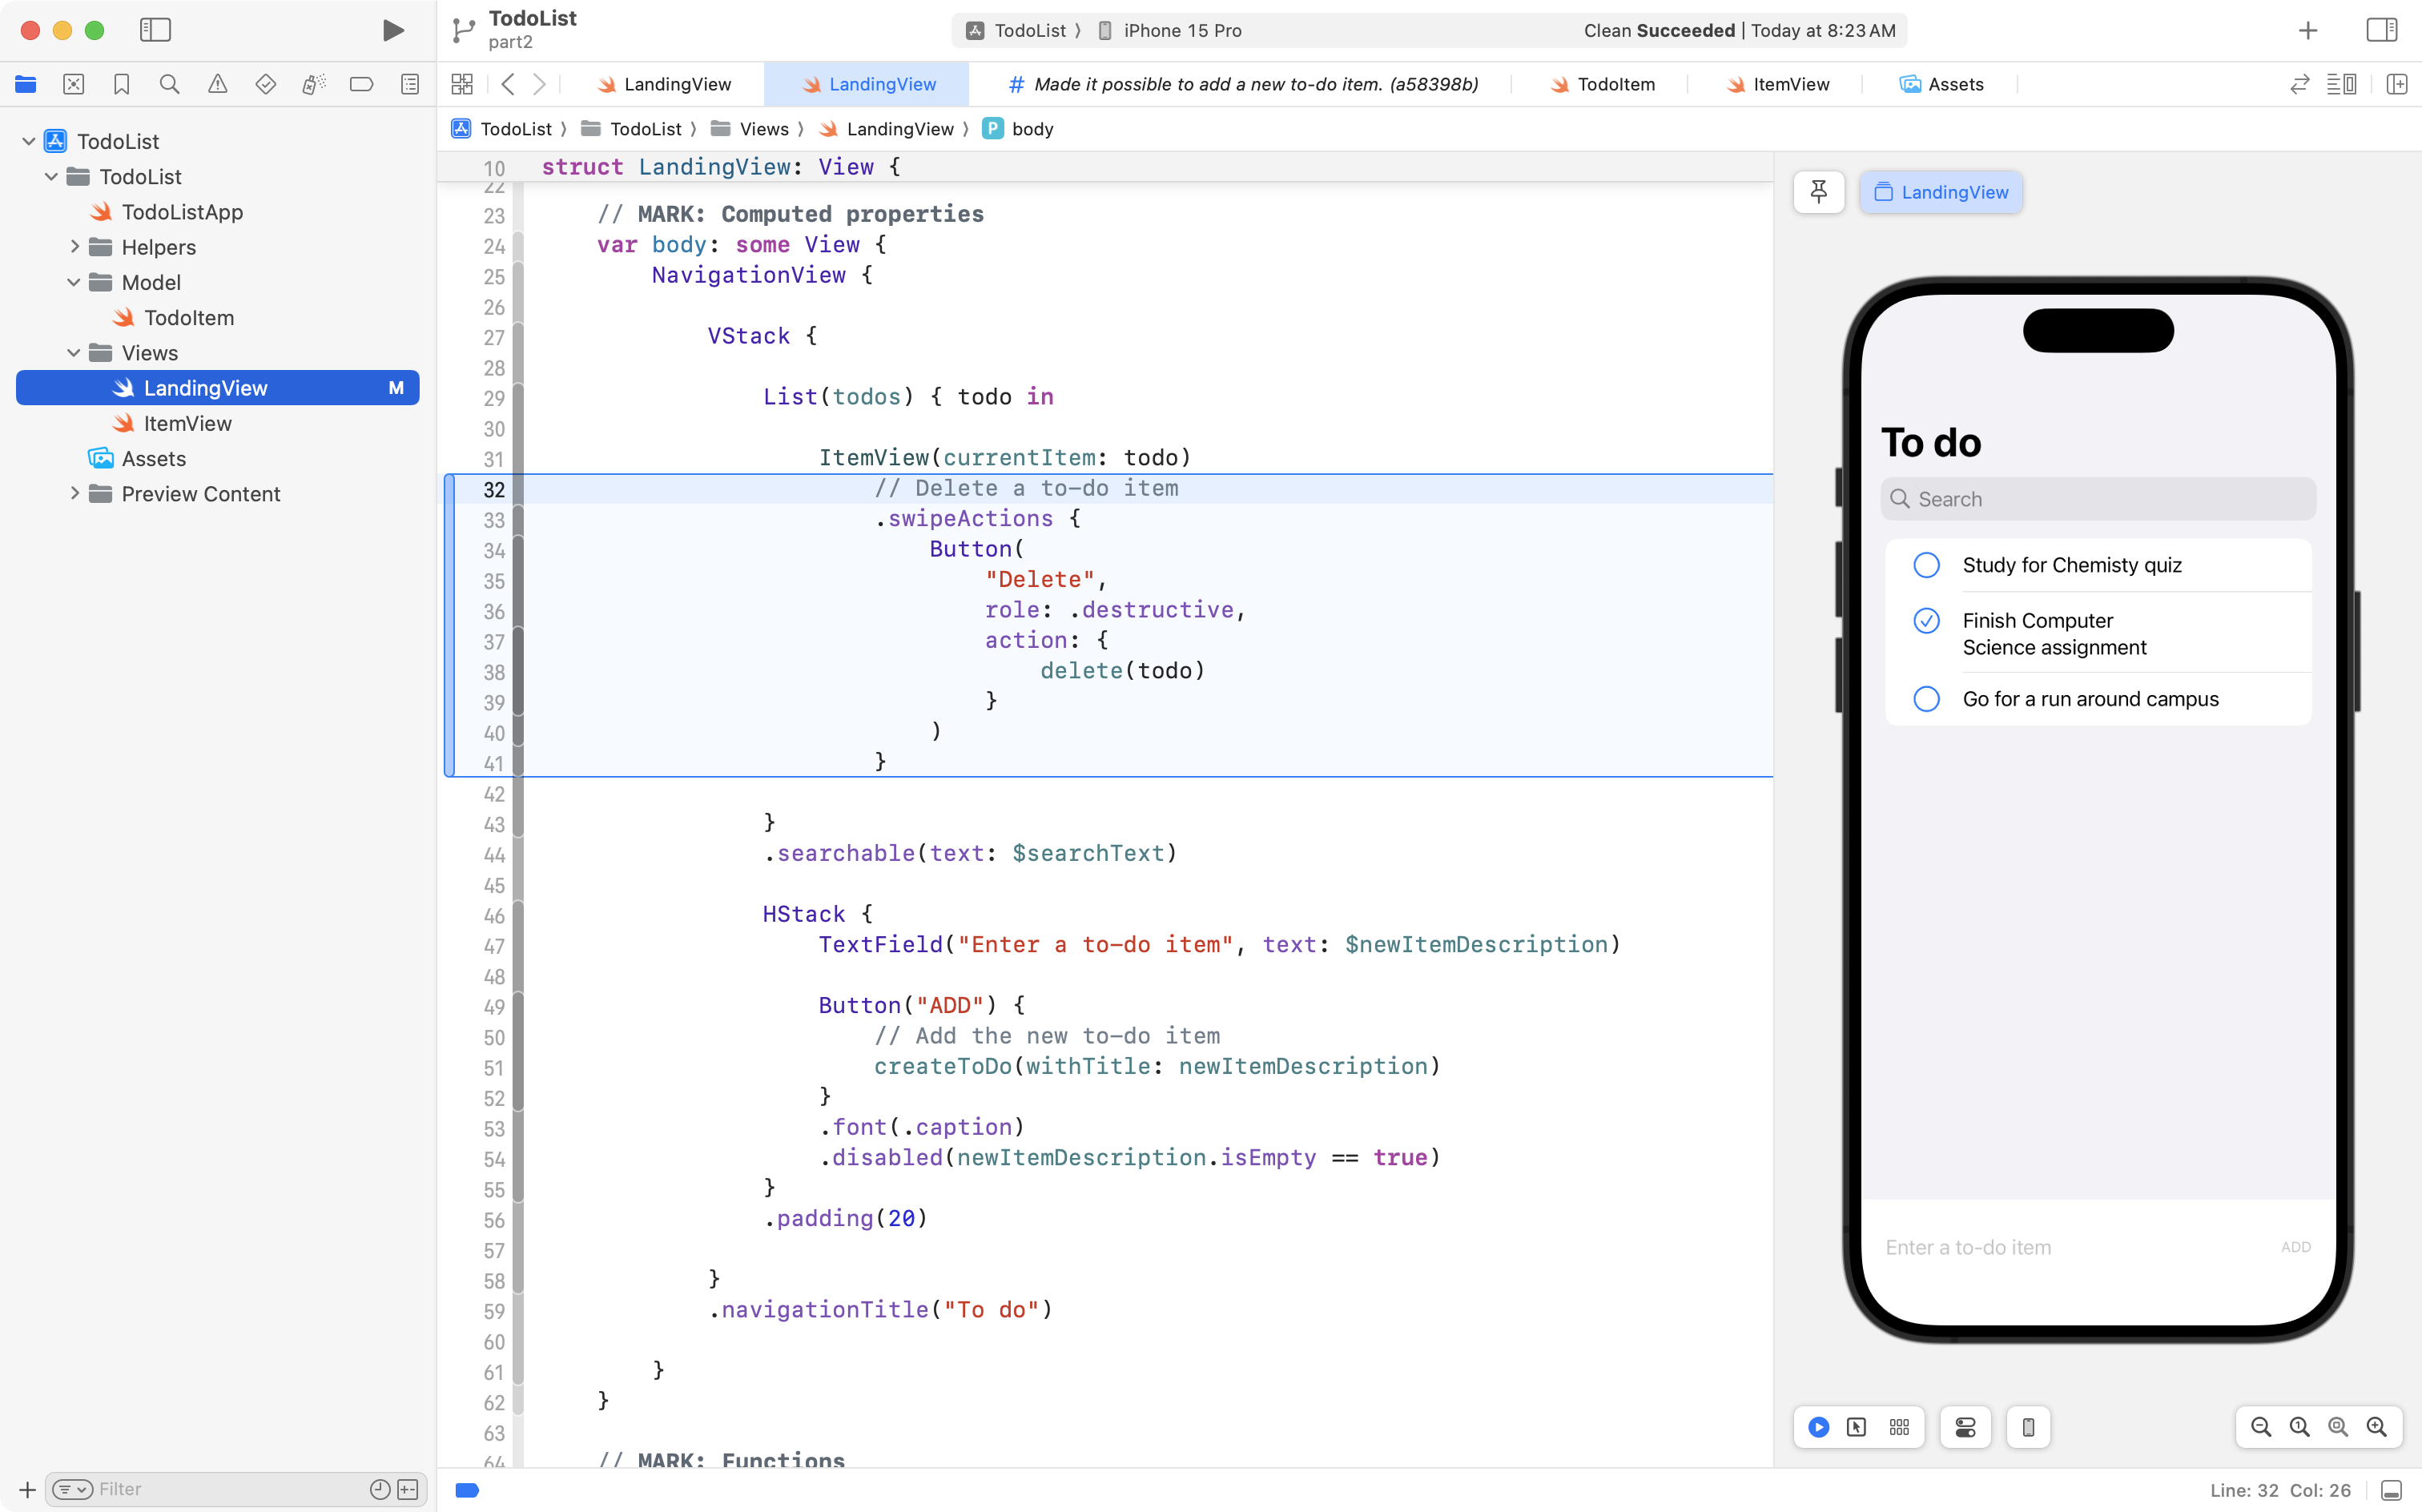
When the user swipes from right-to-left on a to-do item, a red Delete button will now appear.
If the user taps that button, the delete function is invoked. We pass the function an argument of todo, which represents the current to-do item in the list.
Recall that in this line of code:
List(todos) { todo in… we told the scrollable list to iterate over the array named todos and place each to-do item in turn in the temporary constant named todo. It is that constant that is passed to the delete function. When the button is pressed, the delete function is invoked.
Commit and push your work with this message:
Made it possible to delete a to-do item.
Mark an item as complete (or not)
The to-do list app is not very useful if we cannot change the status of a to-do item.
Add the code shown below on lines 42 to 45 to your project:
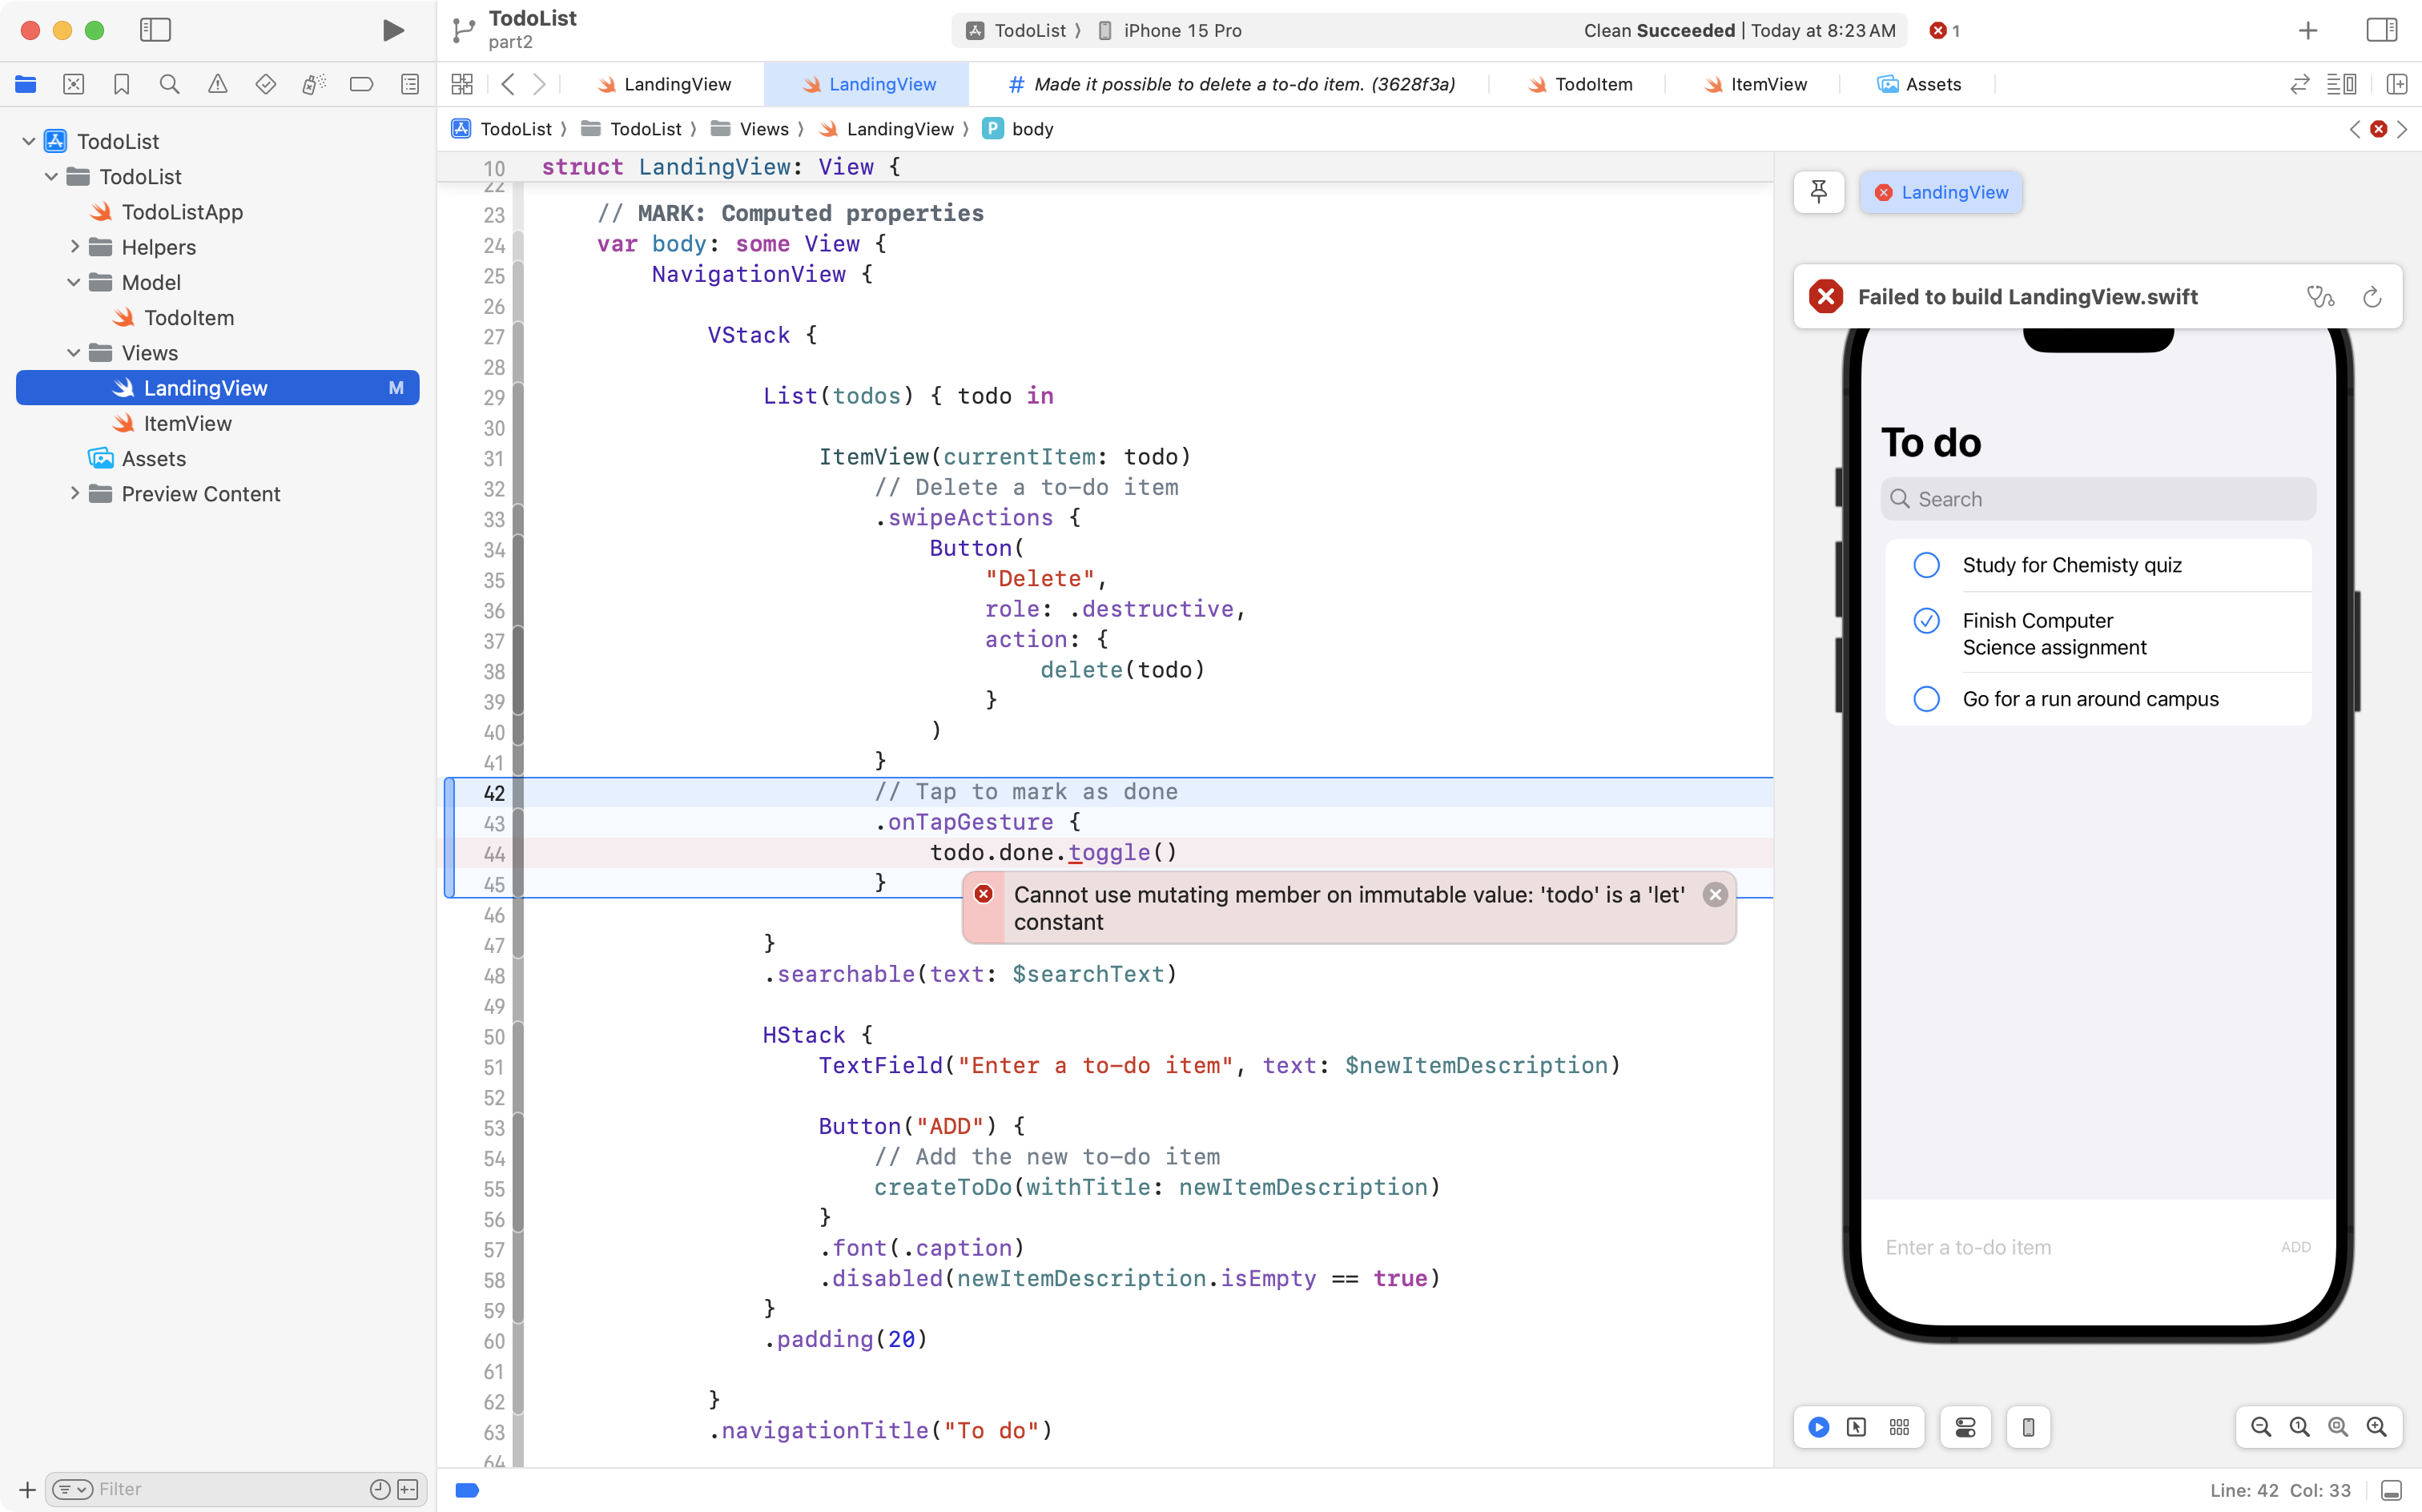
You will immediately see this error message:
“Cannot use mutating member on immutable value: ‘todo’ is a ‘let’ constant”
This is because of the code we have on line 29 in our app, shown here again for reference:
List(todos) { todo inWe have told the scrollable List structure to iterate over the todos array, but with the current syntax, todo is created as a constant. We can display the data it contains, but we cannot change it.
To fix this, change the code to the following:
List($todos) { $todo inLike this:

What happens now is that the List structure iterates over the todos array just like it did before. However, instead of creating constants, it creates bindings to each individual to-do item. That means we can change the data stored in each instance of TodoItem!
Try tapping on a few to-do items. You will see that the code on line 44 toggles the value of the Bool, or boolean, done property.
When done is true, it becomes false.
When done is false, it becomes true.
This what is means to “toggle” a boolean value.
The ItemView structure takes care of displaying the appropriate SF Symbol for us.
Commit and push your work with this message:
Can now mark item as being done or not by tapping.
Discussion
Right now, two immediate issues exist:
- We cannot modify the text of a to-do item.
- If we quit the app, the to-do items we created are lost.
In the next part of this tutorial, you will learn how fix these issues, making more use of bindings, and the SwiftData framework to persist the to-do items within a database.
TIP
When you have finished this part of the tutorial, in your next class, you can continue on to part 3.