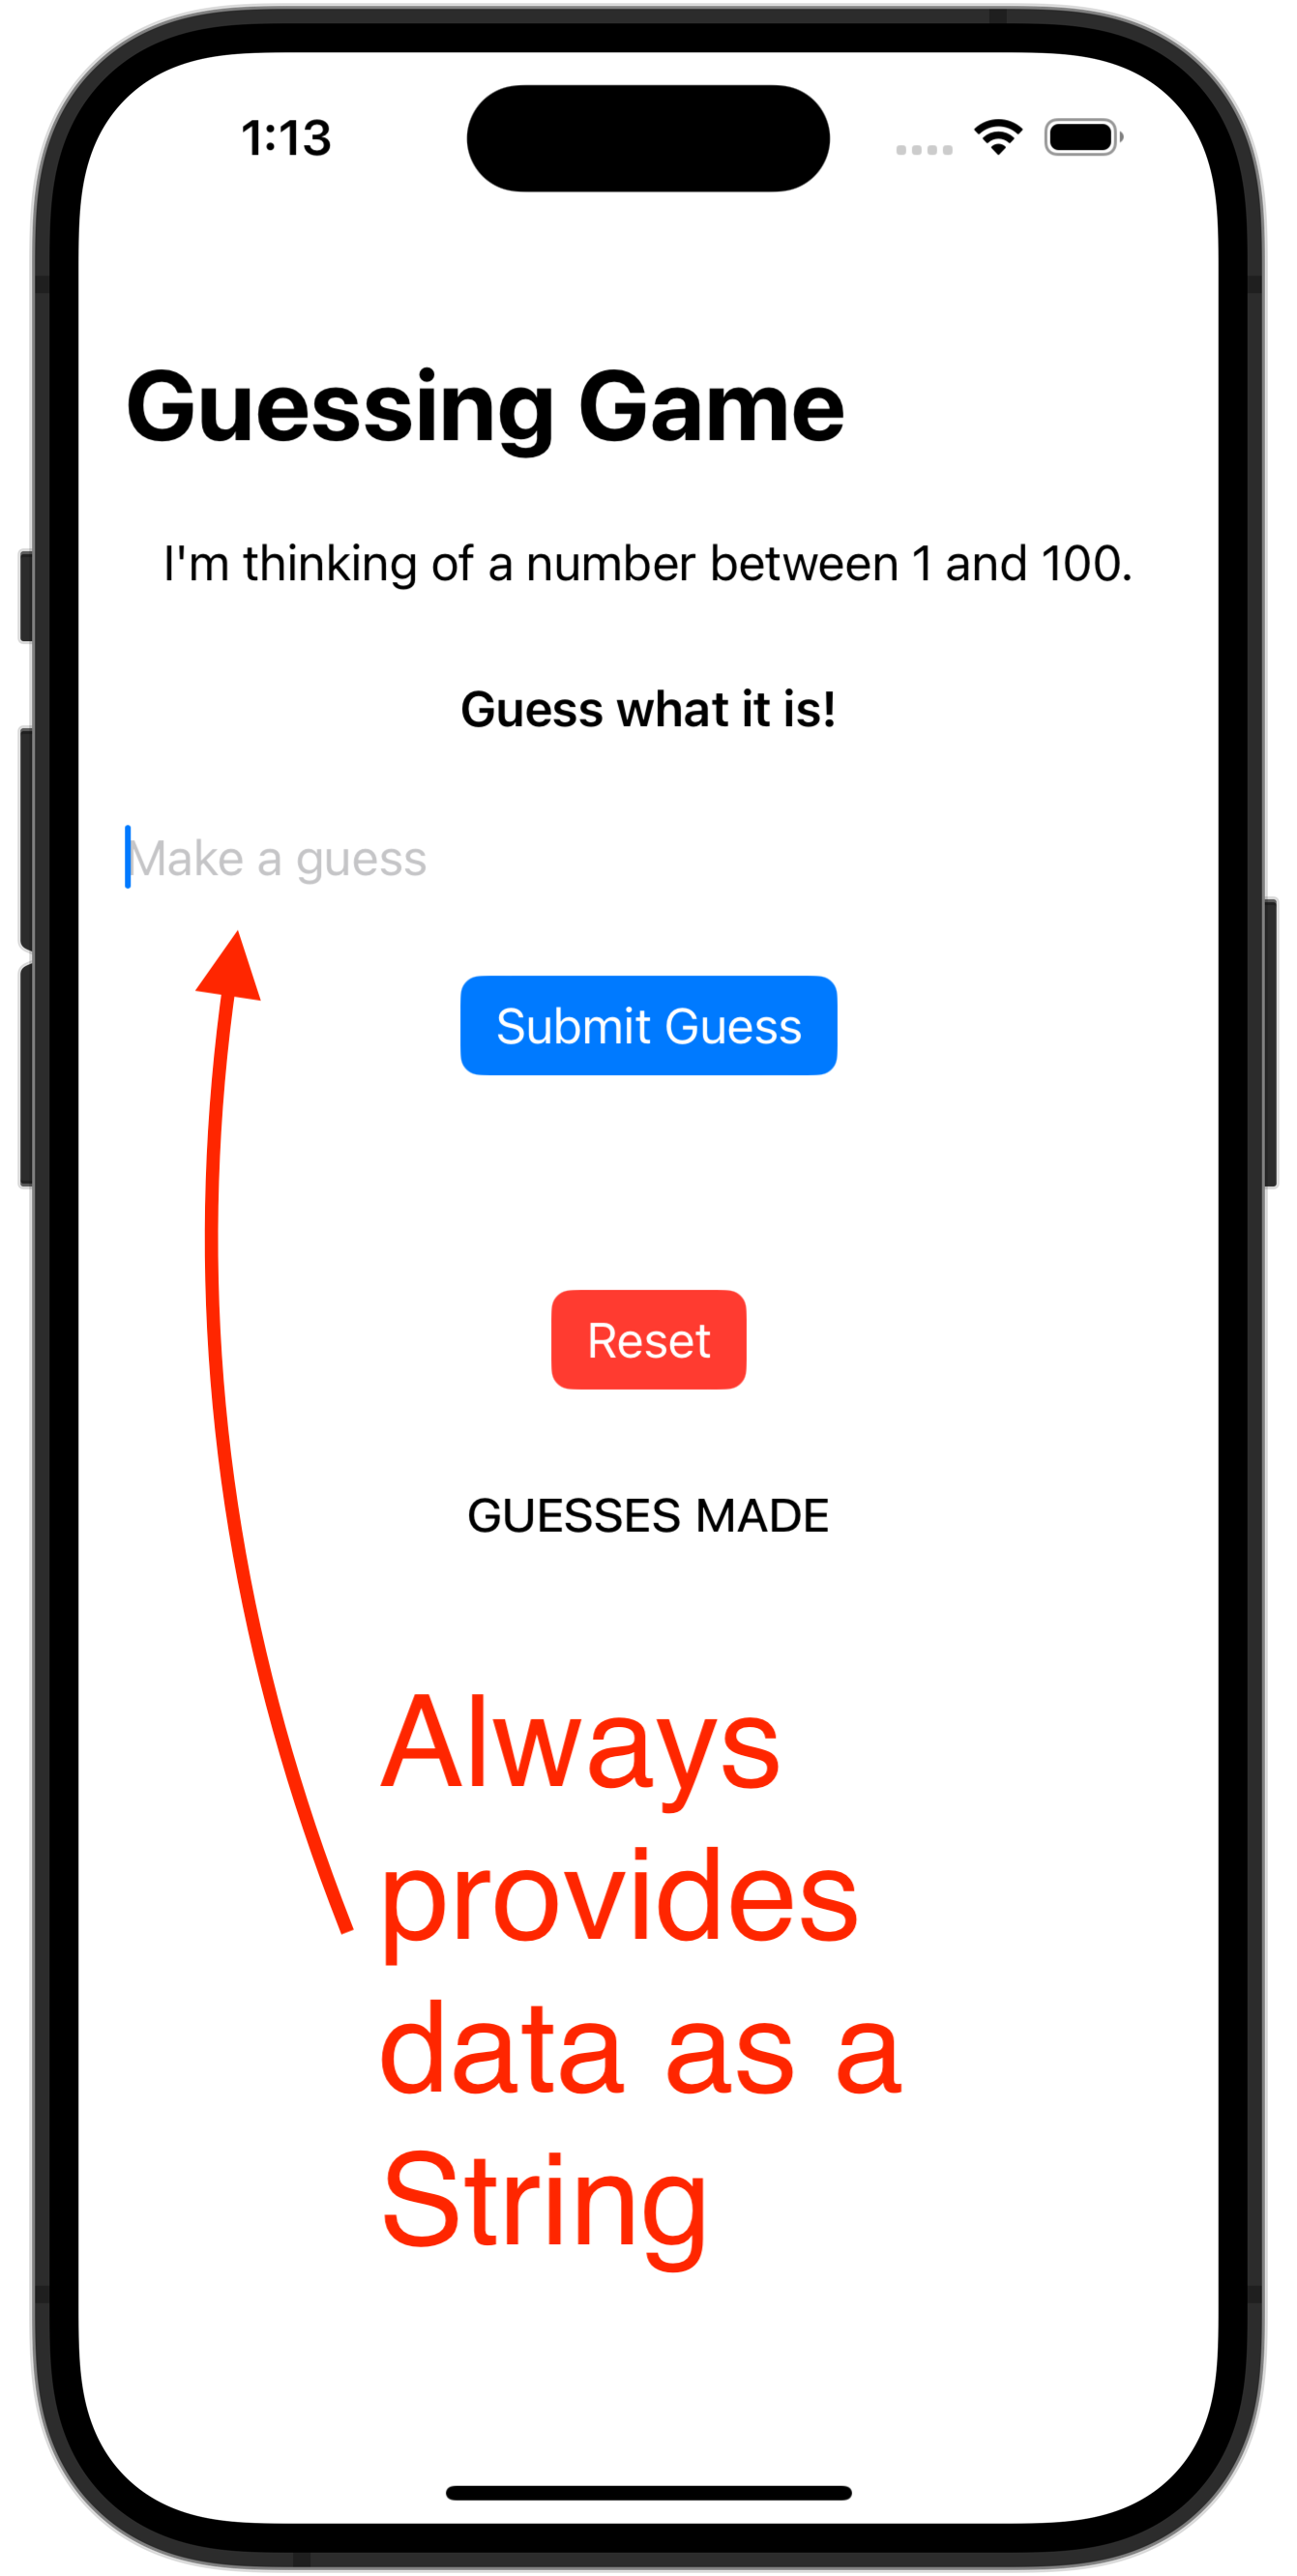
There is an obvious downside to the current interface of the Guessing Game app created in our most recent class:
It is inconvenient to have to repeatedly press the + or - signs.
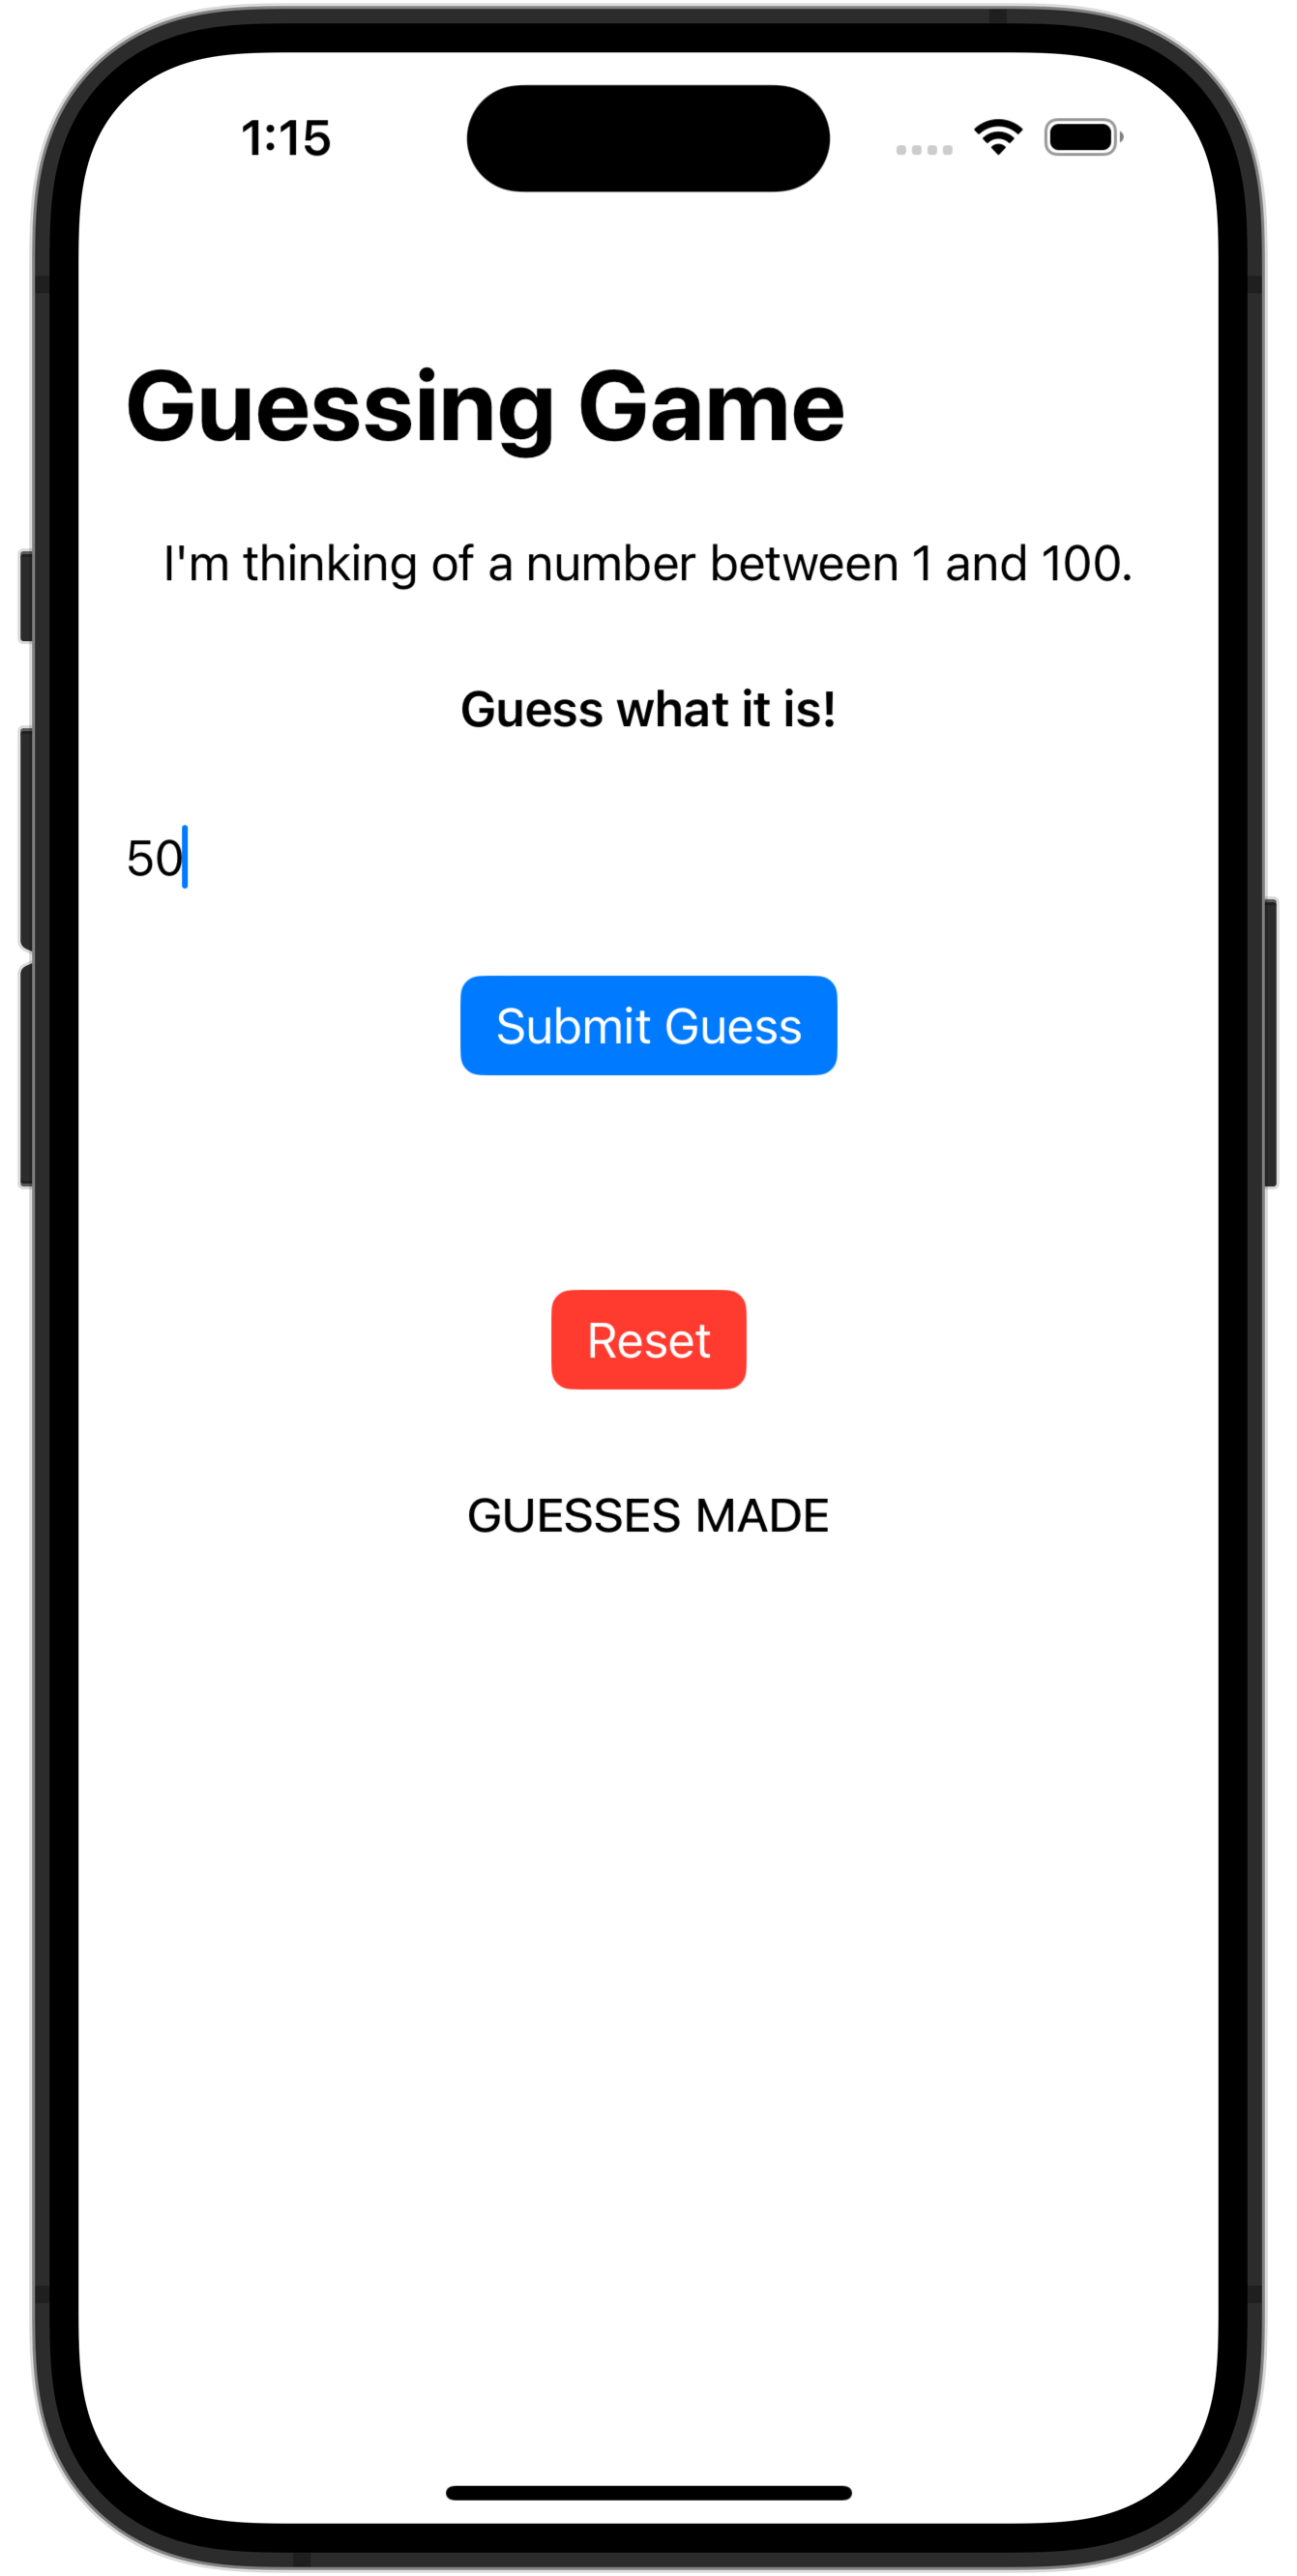
It would be easier for the user to be able to type in values using the keyboard, like this:
How can we accept user input in this way?
Read on to find out.
Understanding optional data types
You have already explored the theoretical concept of optional data types.
Let’s see, now, how to apply optional data types to safely handle the potential for bad user input within an app.
First, to better understand everything involved, we will simulate receiving user input in a command-line environment.
Later in this lesson, we will add text-based input to the Guessing Game app.
Then, you will try applying the same ideas in an exercise.
Right now, please create a new command-line macOS app named UserInputExamples, like this:
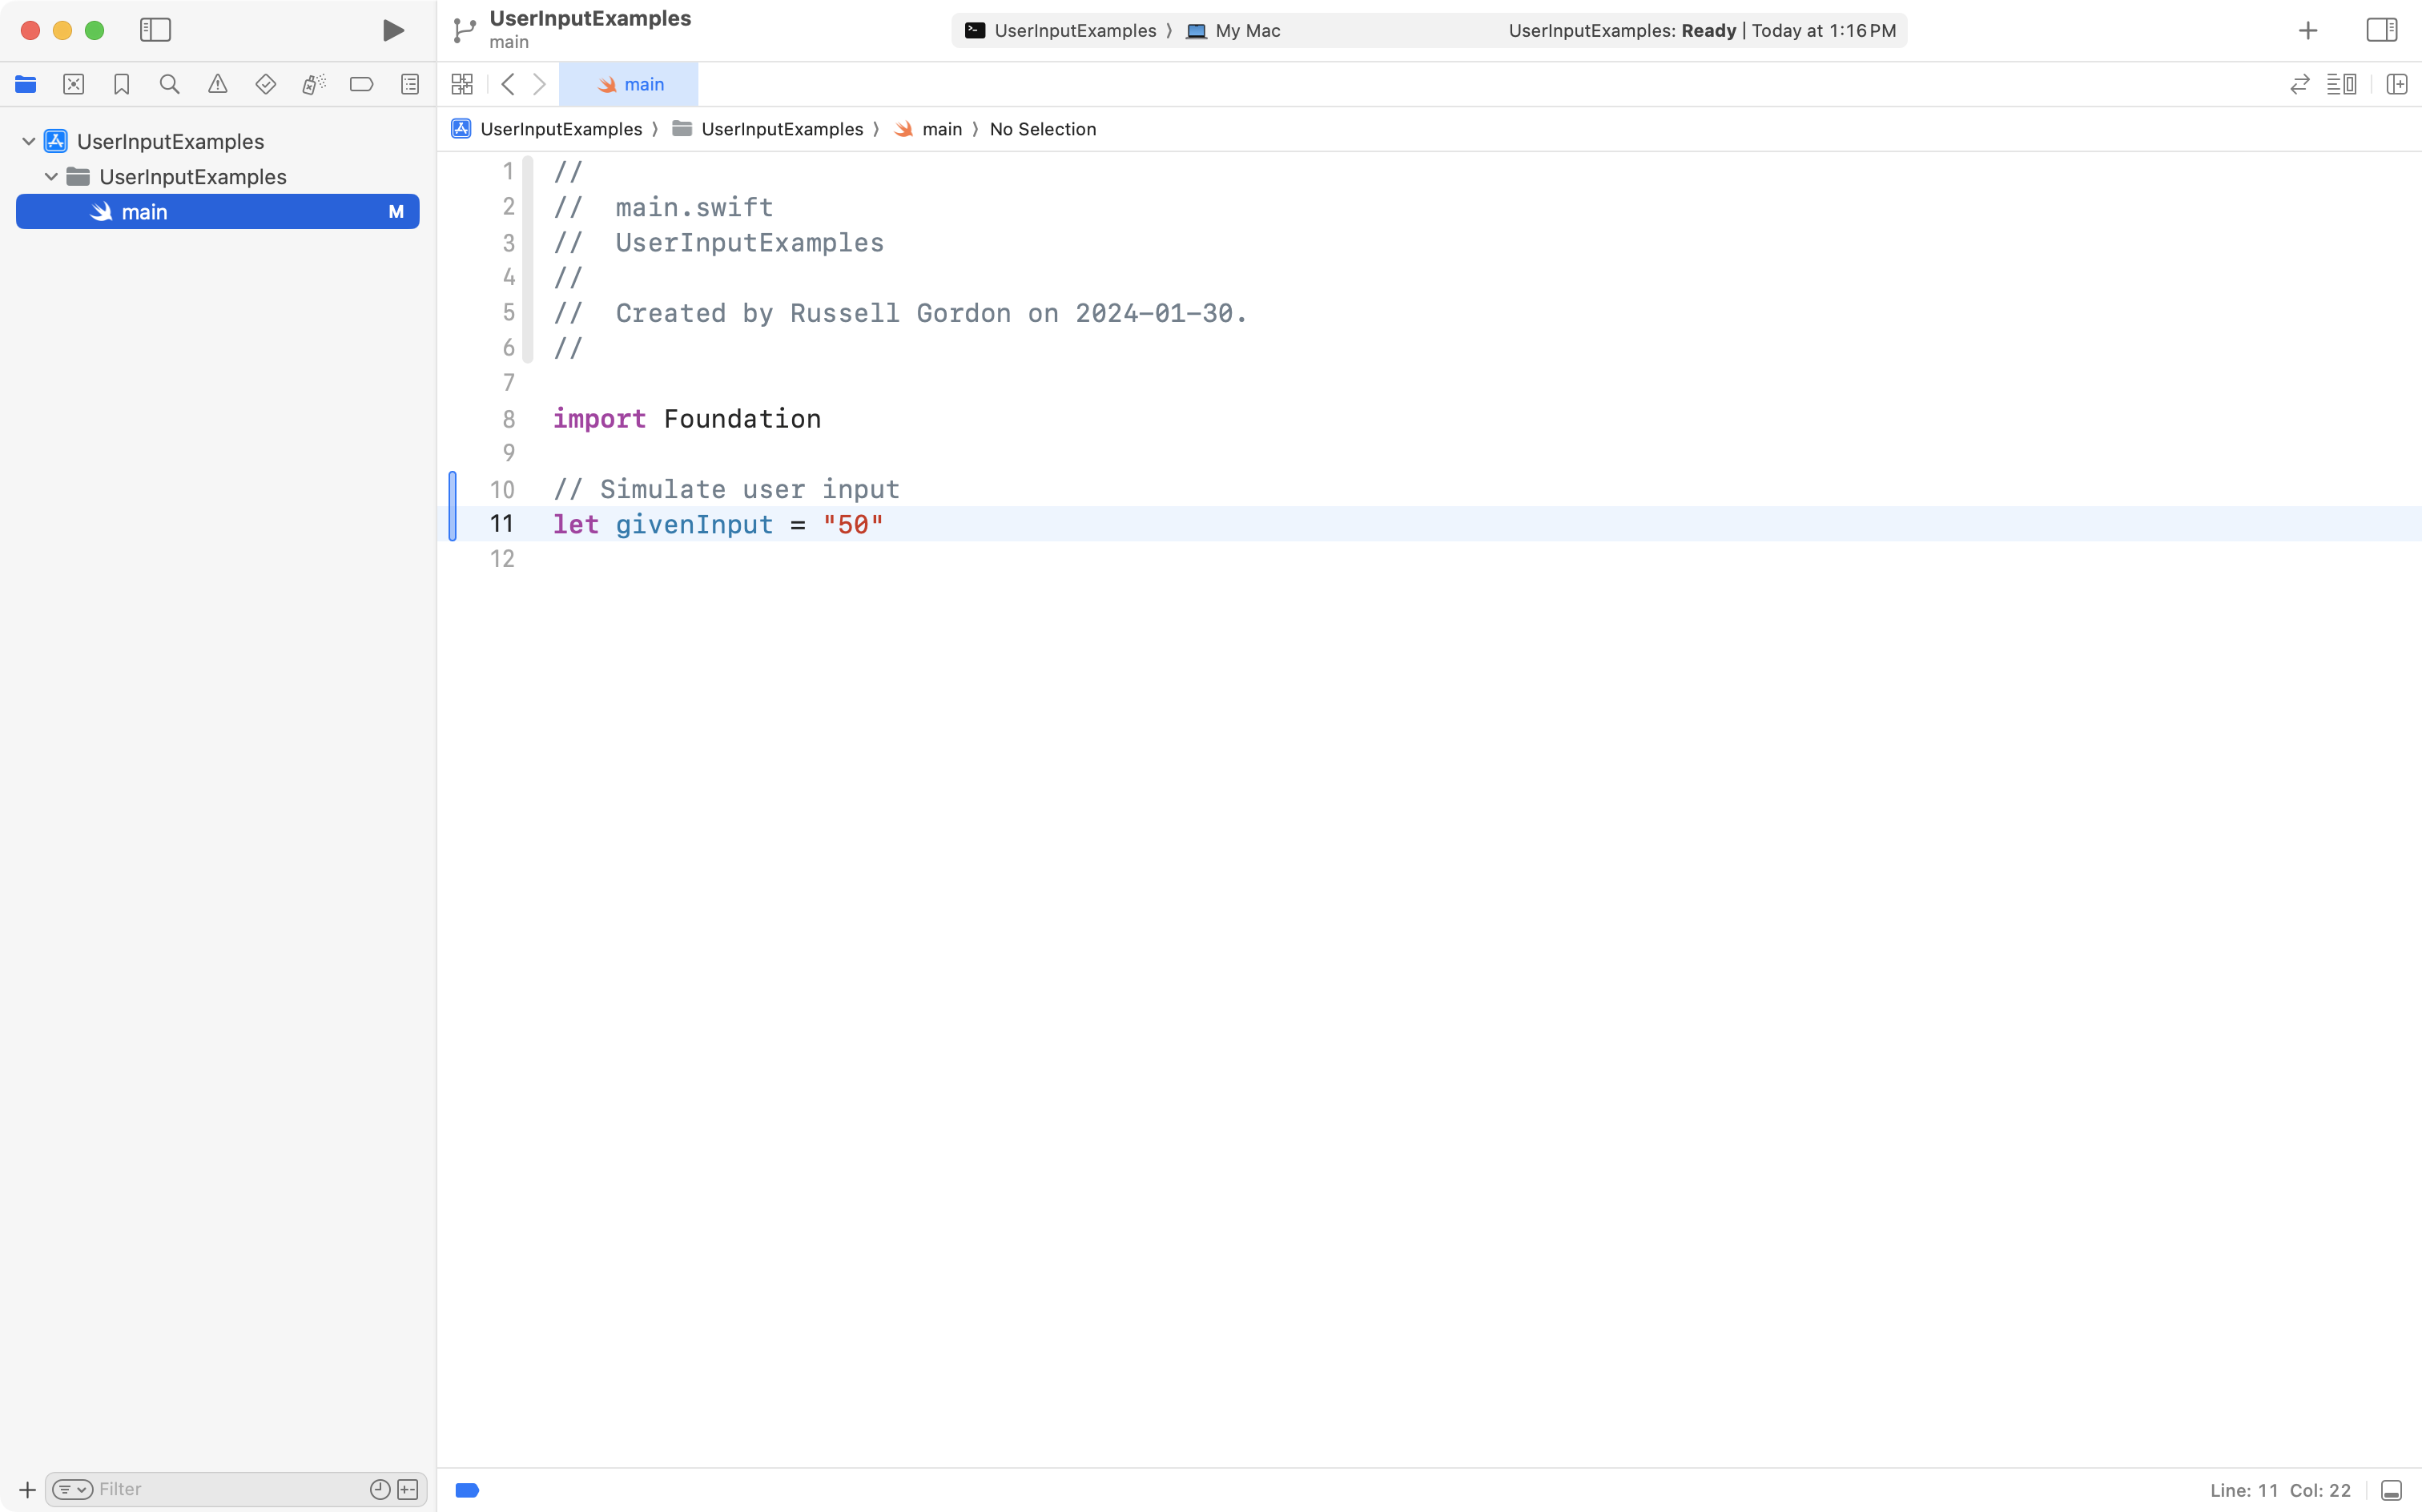
When input is received in a text field in an app, the data type is always String:
Let’s simulate the following user input:
In the command-line app you have just created, copy paste this code in:
// Simulate user input
let givenInput = "50"
… like this:
Press the Option key on your keyboard, then click the givenInput constant to confirm for yourself that its data type is String:

The Swift programming language is type strict.
This means that we cannot directly compare a String to an Int, for example. We can only compare a String to a String, or an Int to an Int, and so on.
IMPORTANT
Data types must match to perform a comparison.
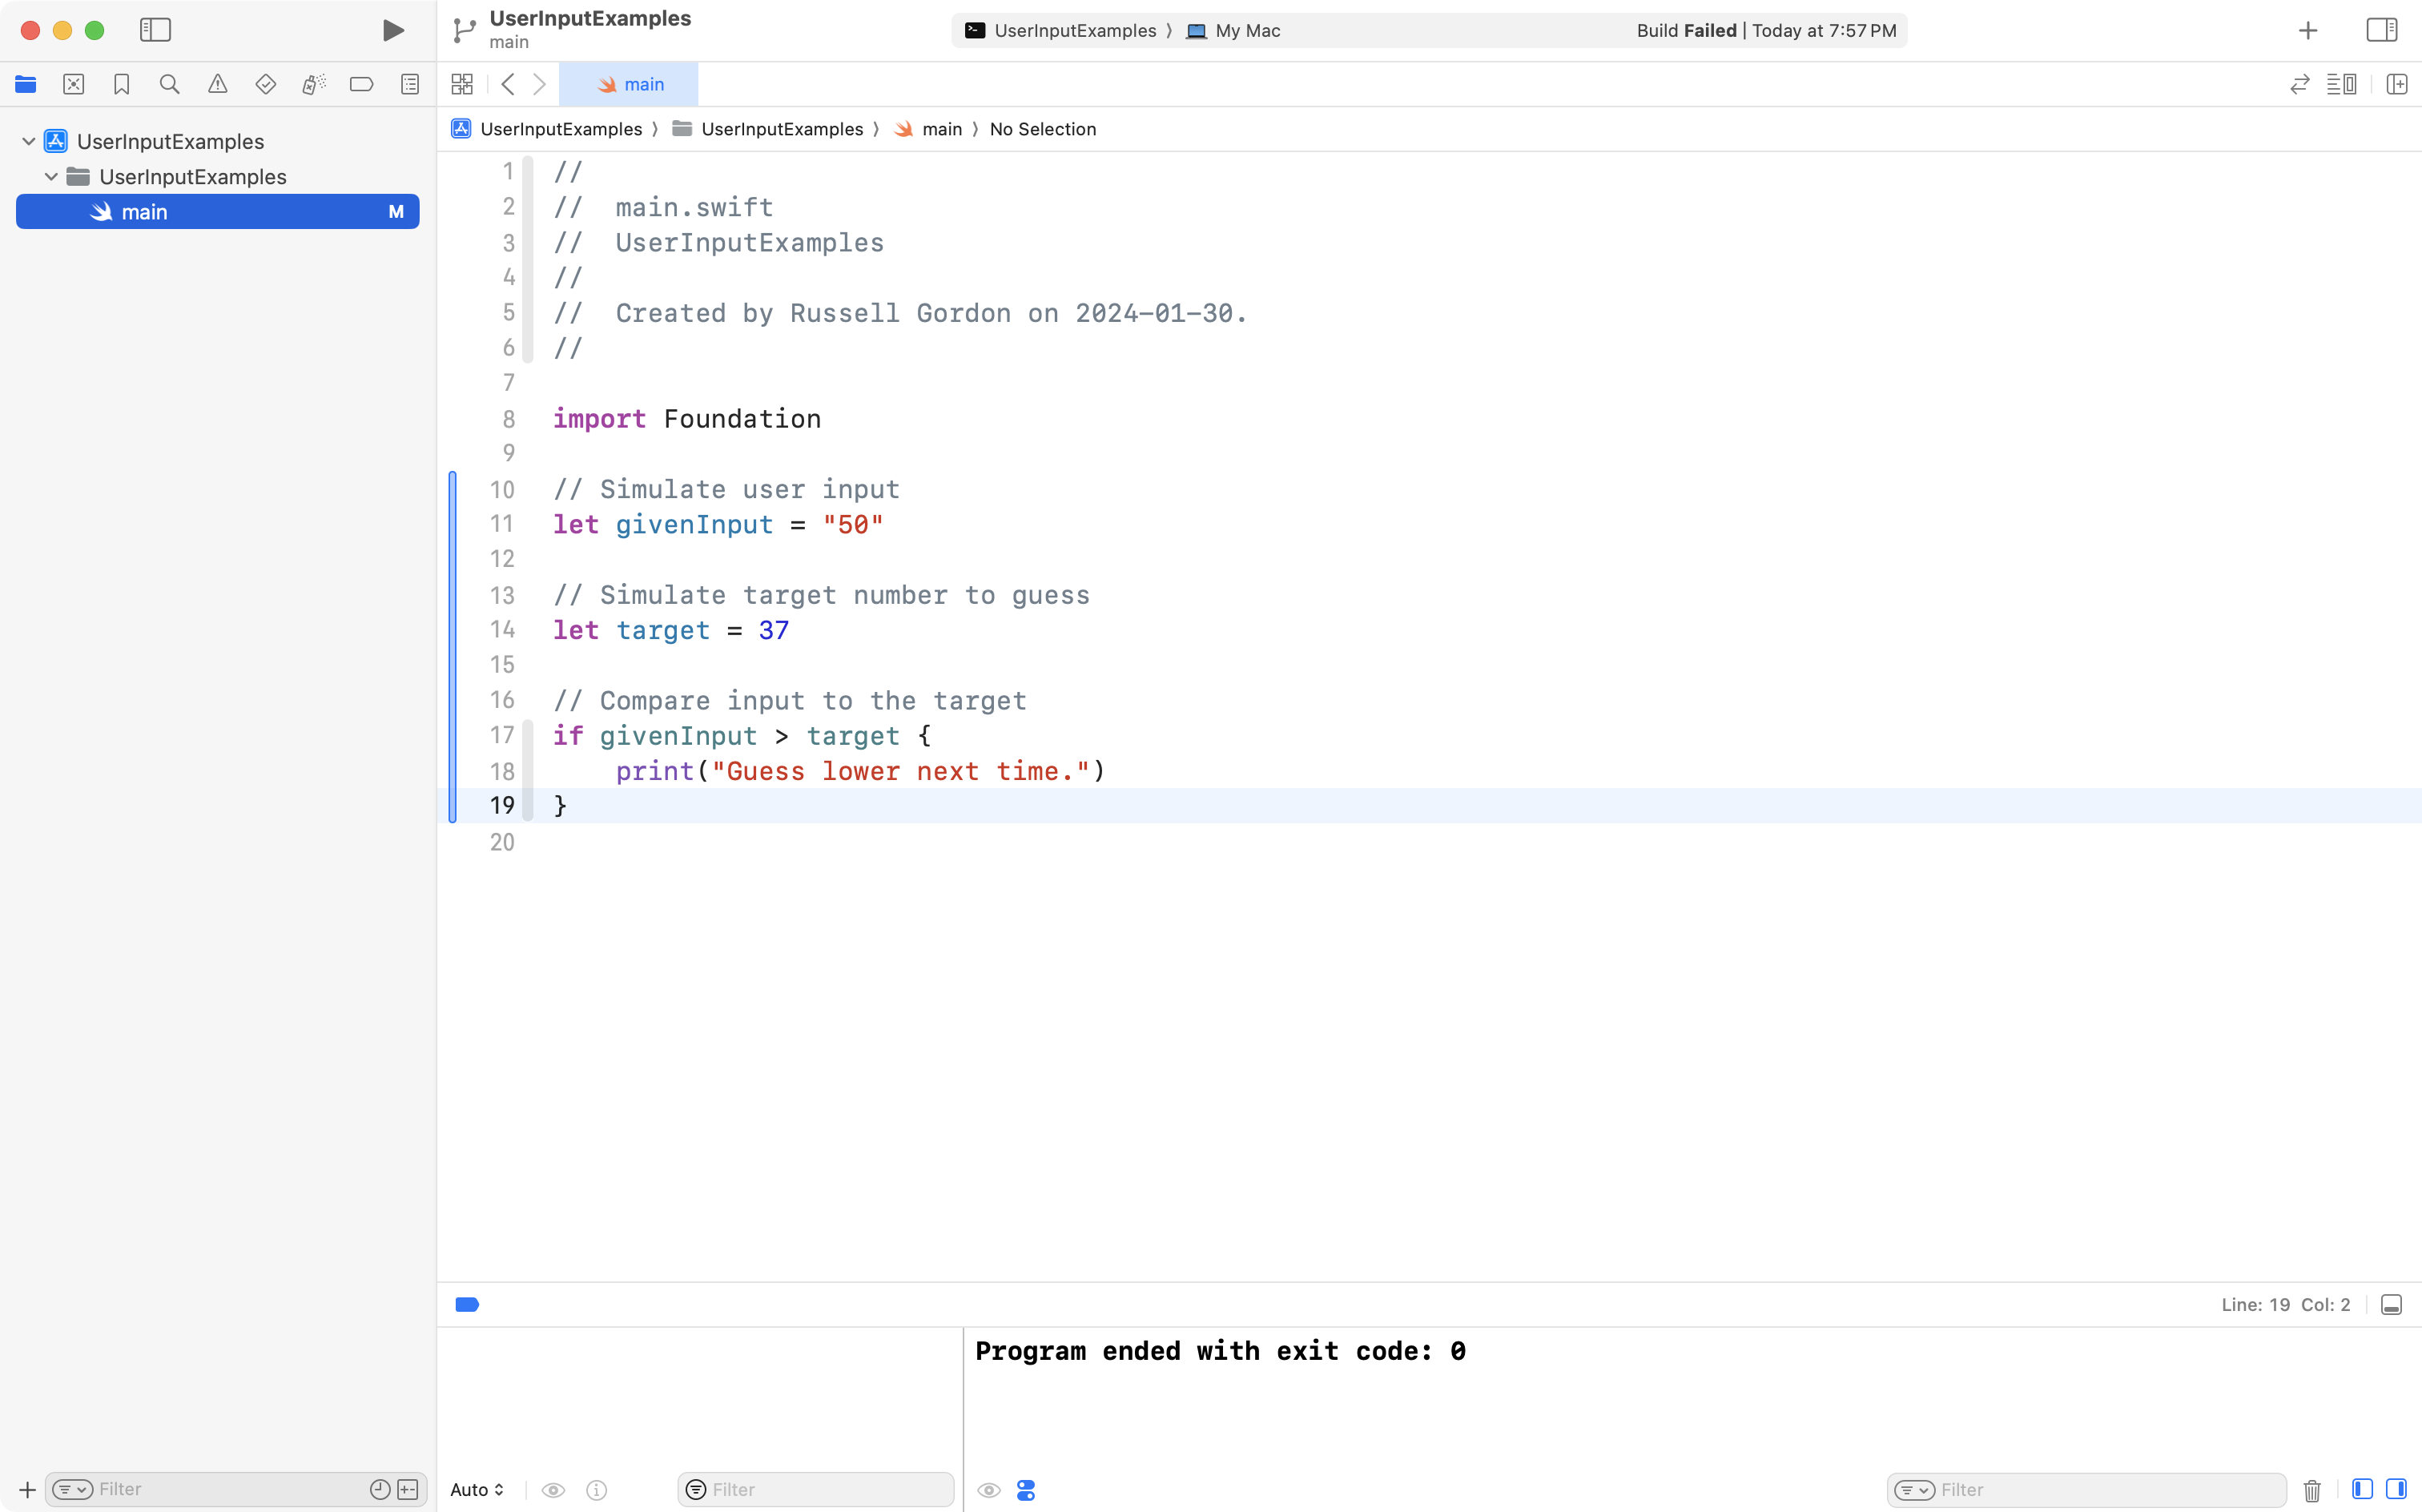
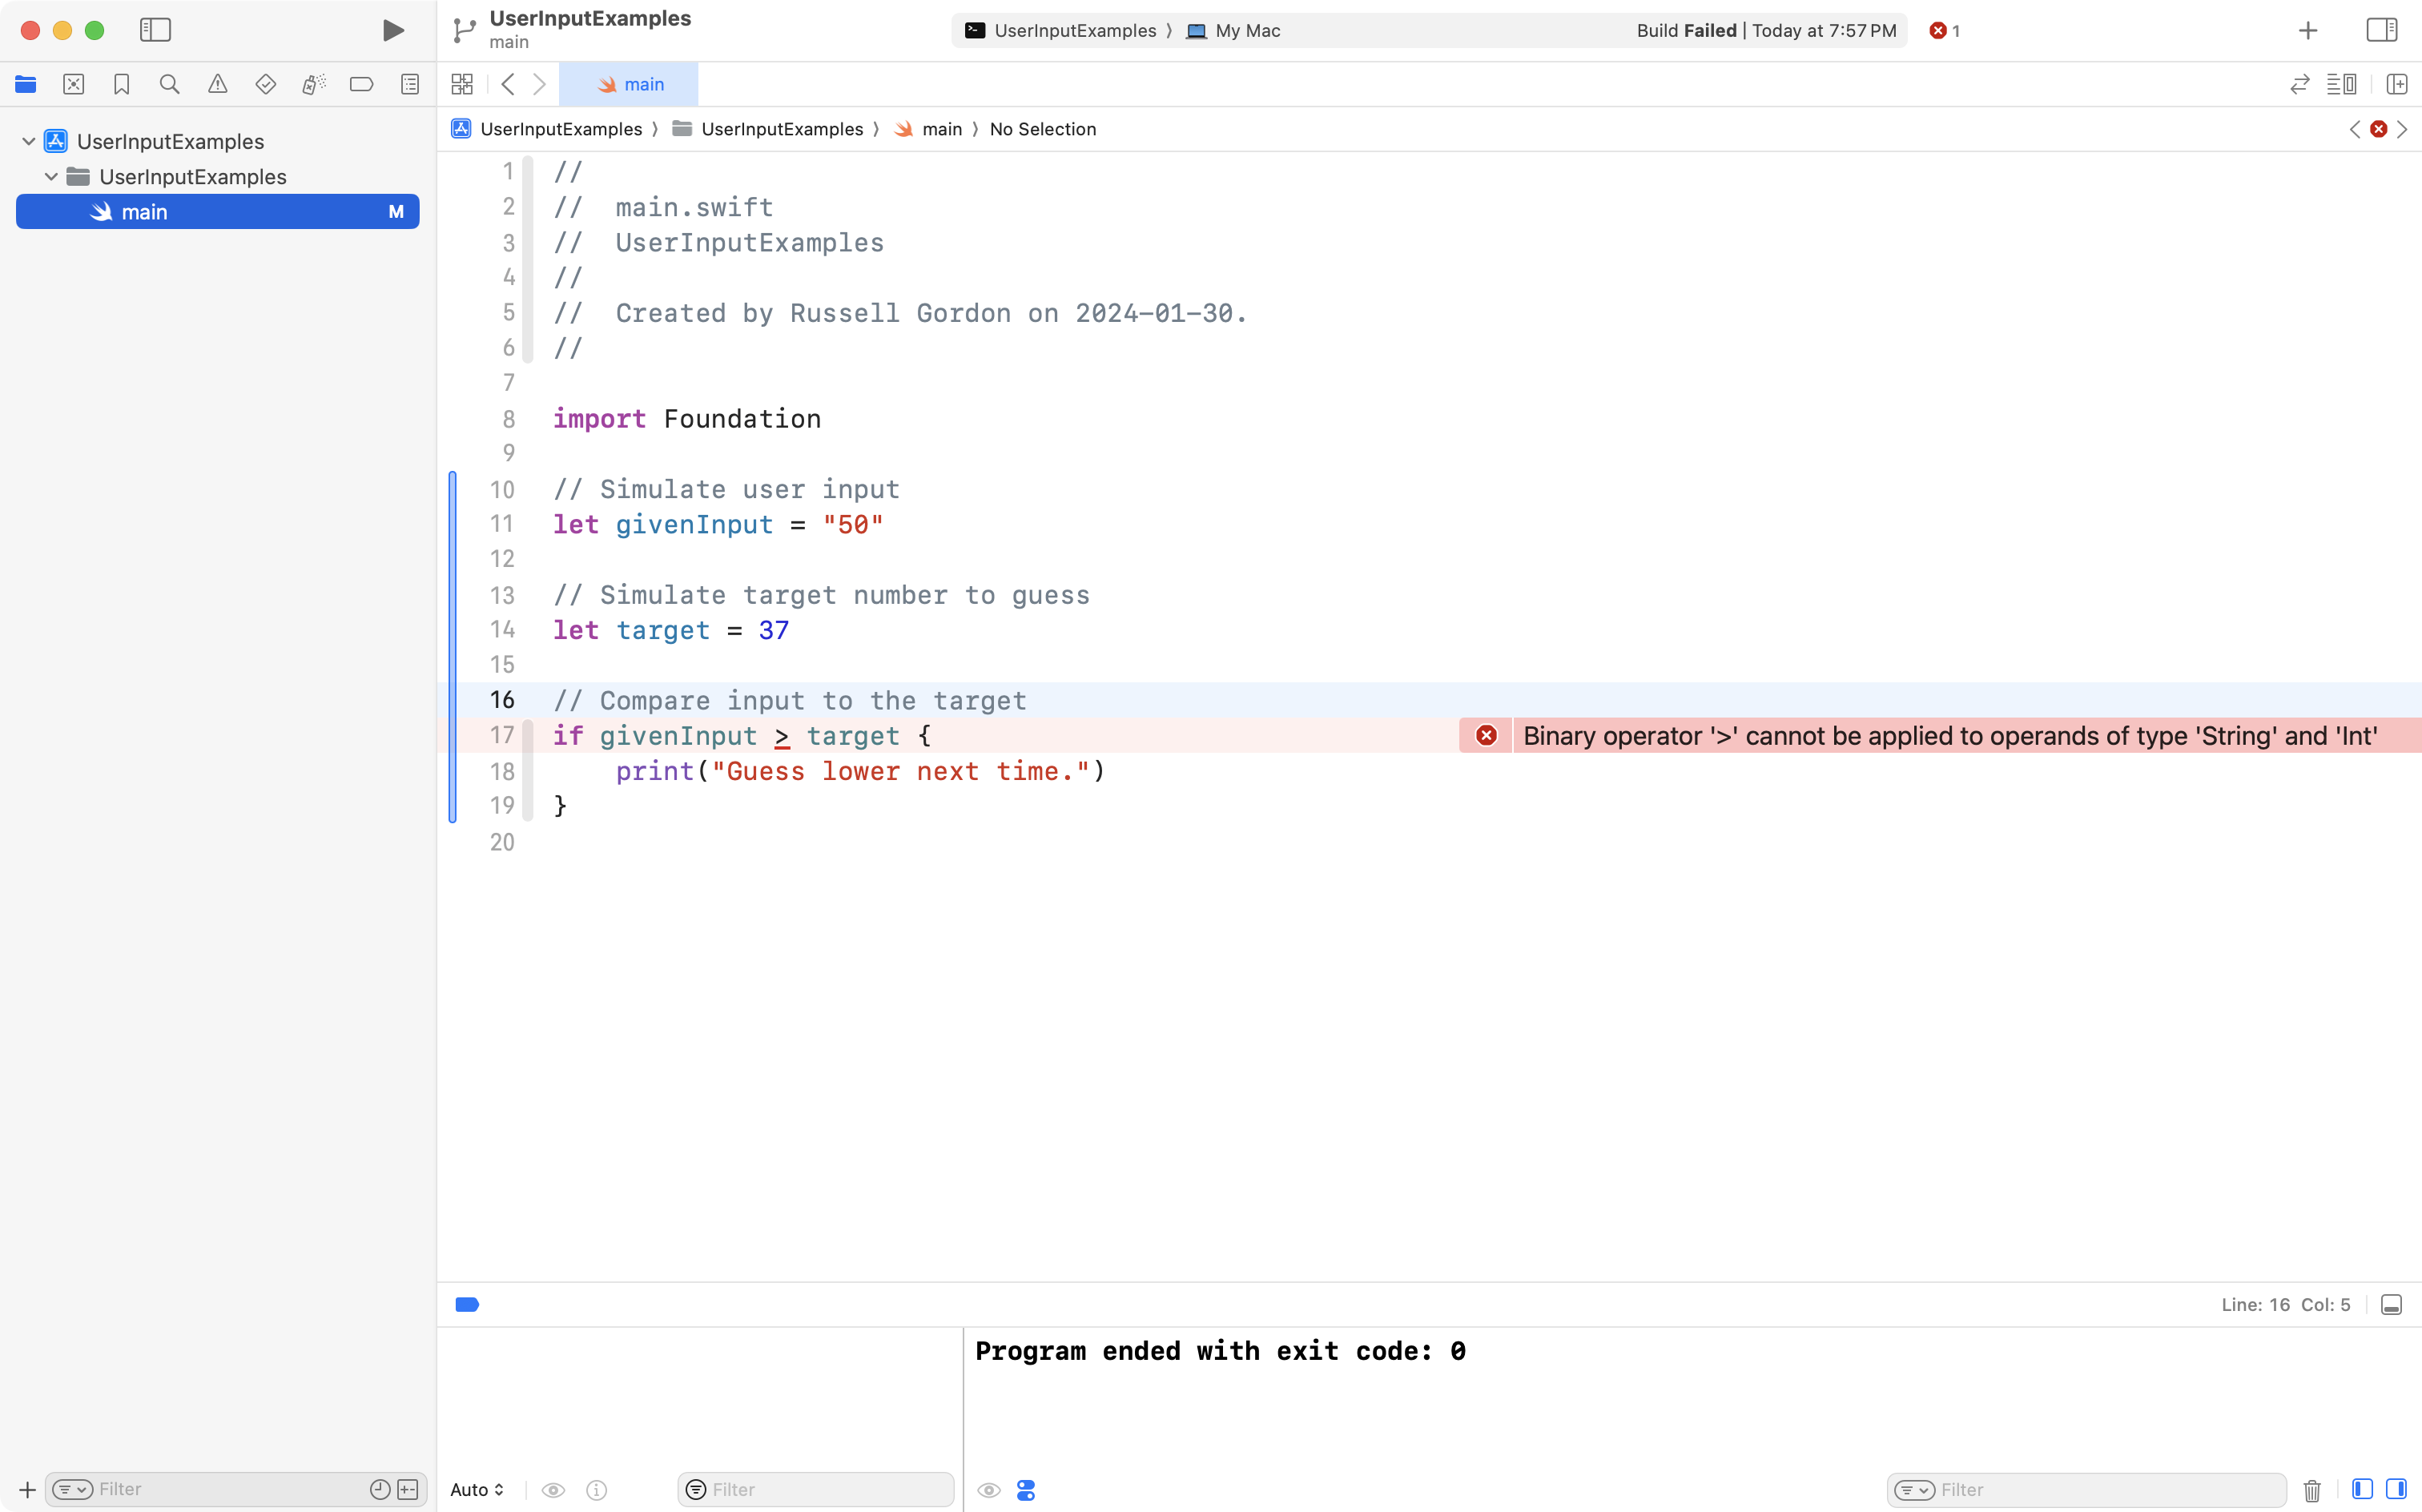
Check this for yourself by adding the following code below the code you added earlier:
// Simulate target number to guess
let target = 37

// Compare input to the target
if givenInput > target {
    print("Guess lower next time.")
}
So it looks like this:
Shortly after adding the code, you will see this error message:

The message:
Binary operator '>' cannot be applied to operands of type 'String' and 'Int'
… is the Swift compiler saying “I can’t compare these values.”
It’s like the old expression:
“You can’t compare apples to oranges”.
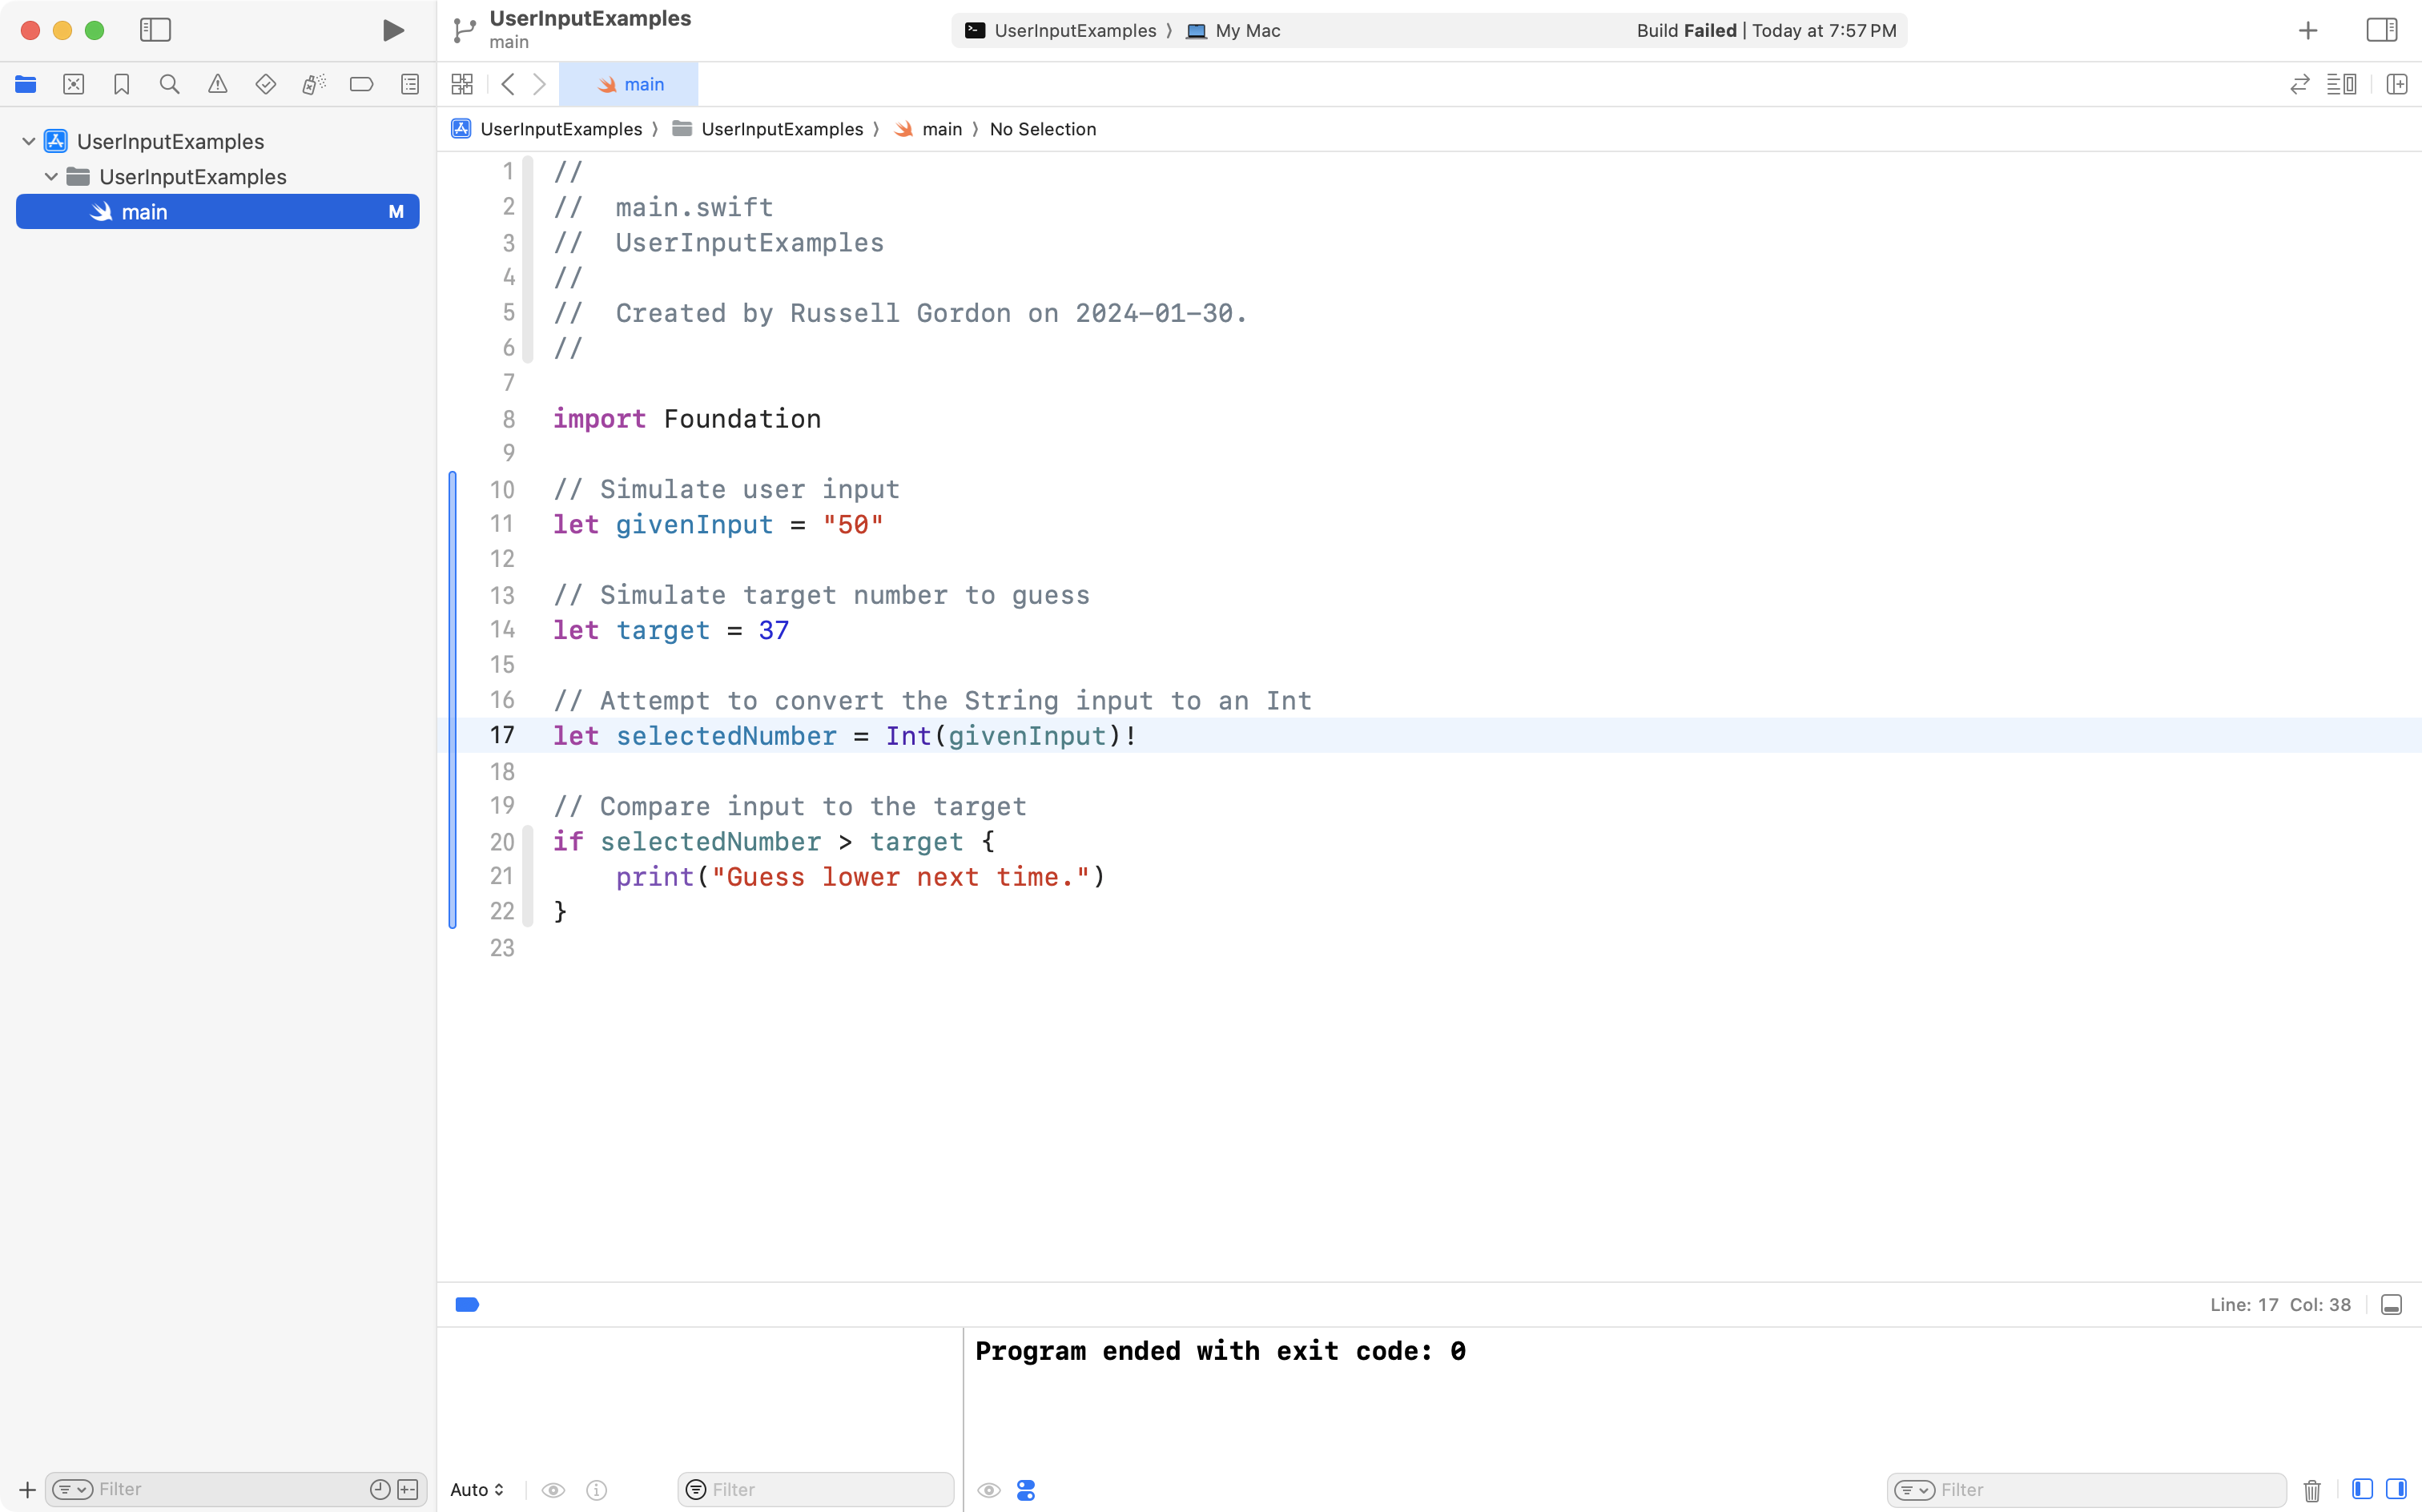
To perform the comparison, we have to convert the input into an integer first.
Replace all the code on line 16 and after:
… with this code instead:
// Attempt to convert the String input to an Int
let selectedNumber = Int(givenInput)

// Compare input to the target
if selectedNumber > target {
    print("Guess lower next time.")
}
… so that overall, the code looks like this:
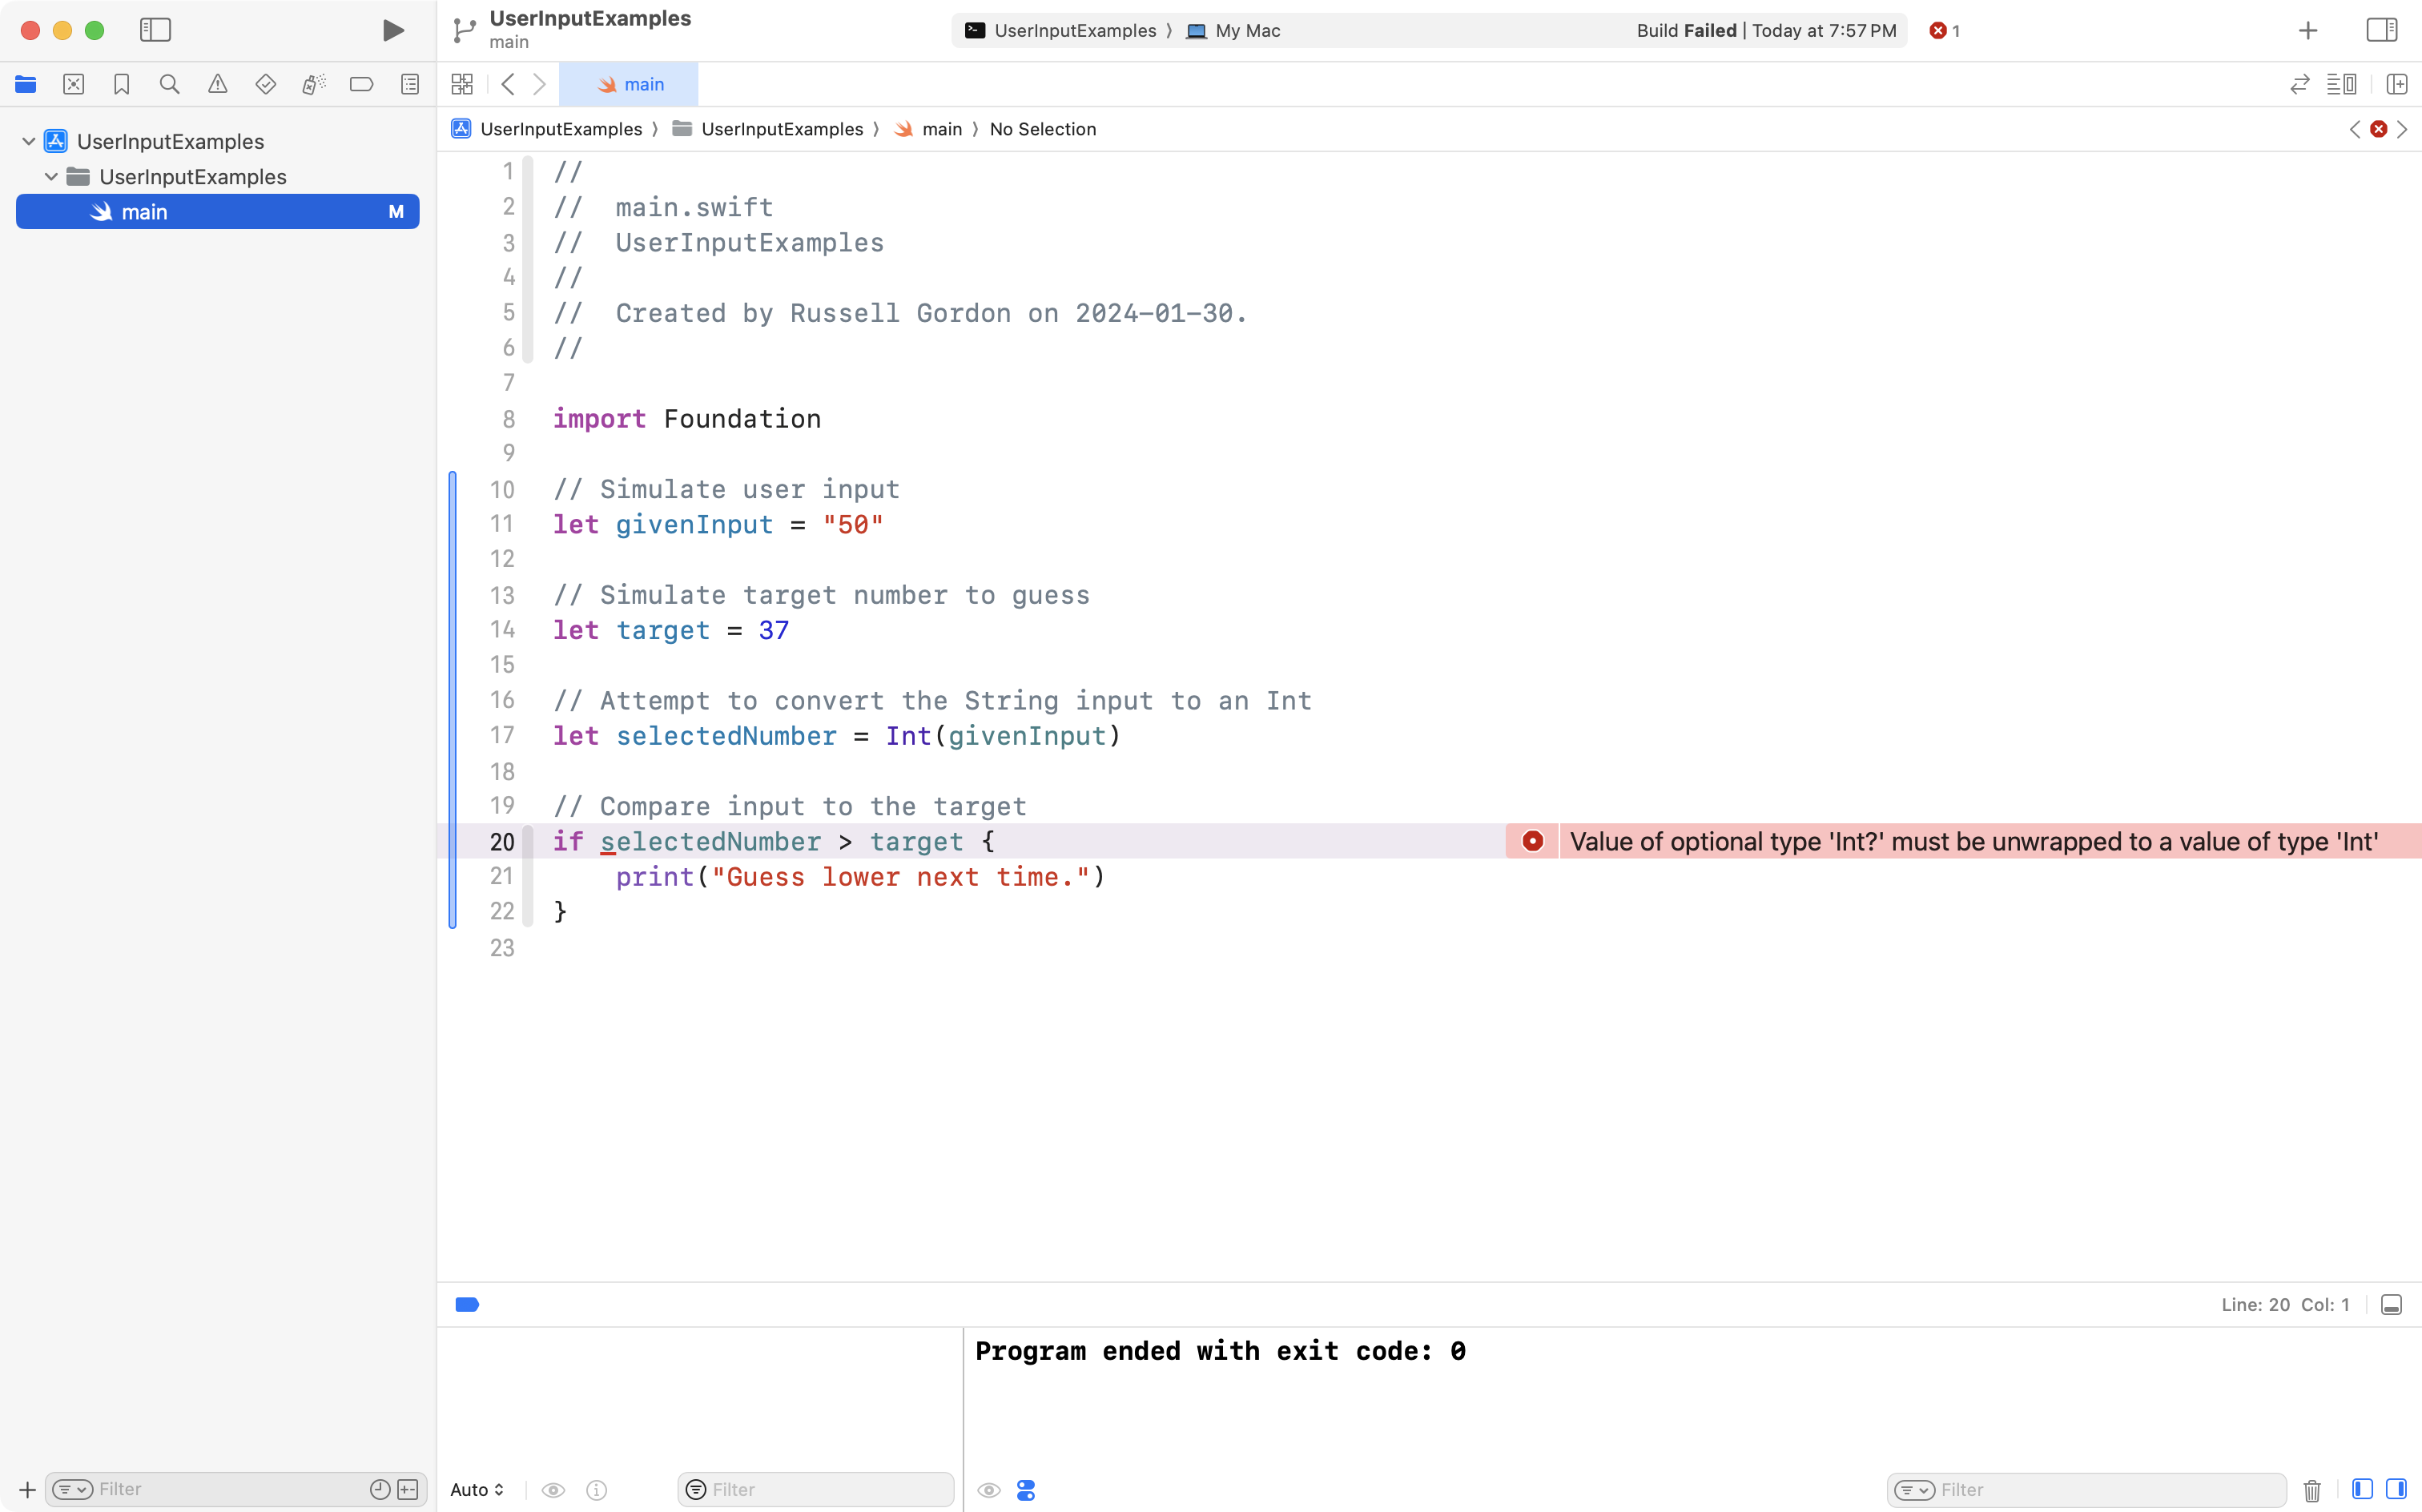
Now, on line 17, we take the input provided – givenInput – which has a data type of String – and attempt to make it into an Int.
However, we still cannot make the comparison on line 20. An error message is shown:
Value of optional type 'Int?' must be unwrapped to a value of type 'Int'
What does that mean?
Although the newly-created constant, selectedNumber, was made by attempting to convert givenInput into an Int, we cannot compare selectedNumber to target.
Again, why?
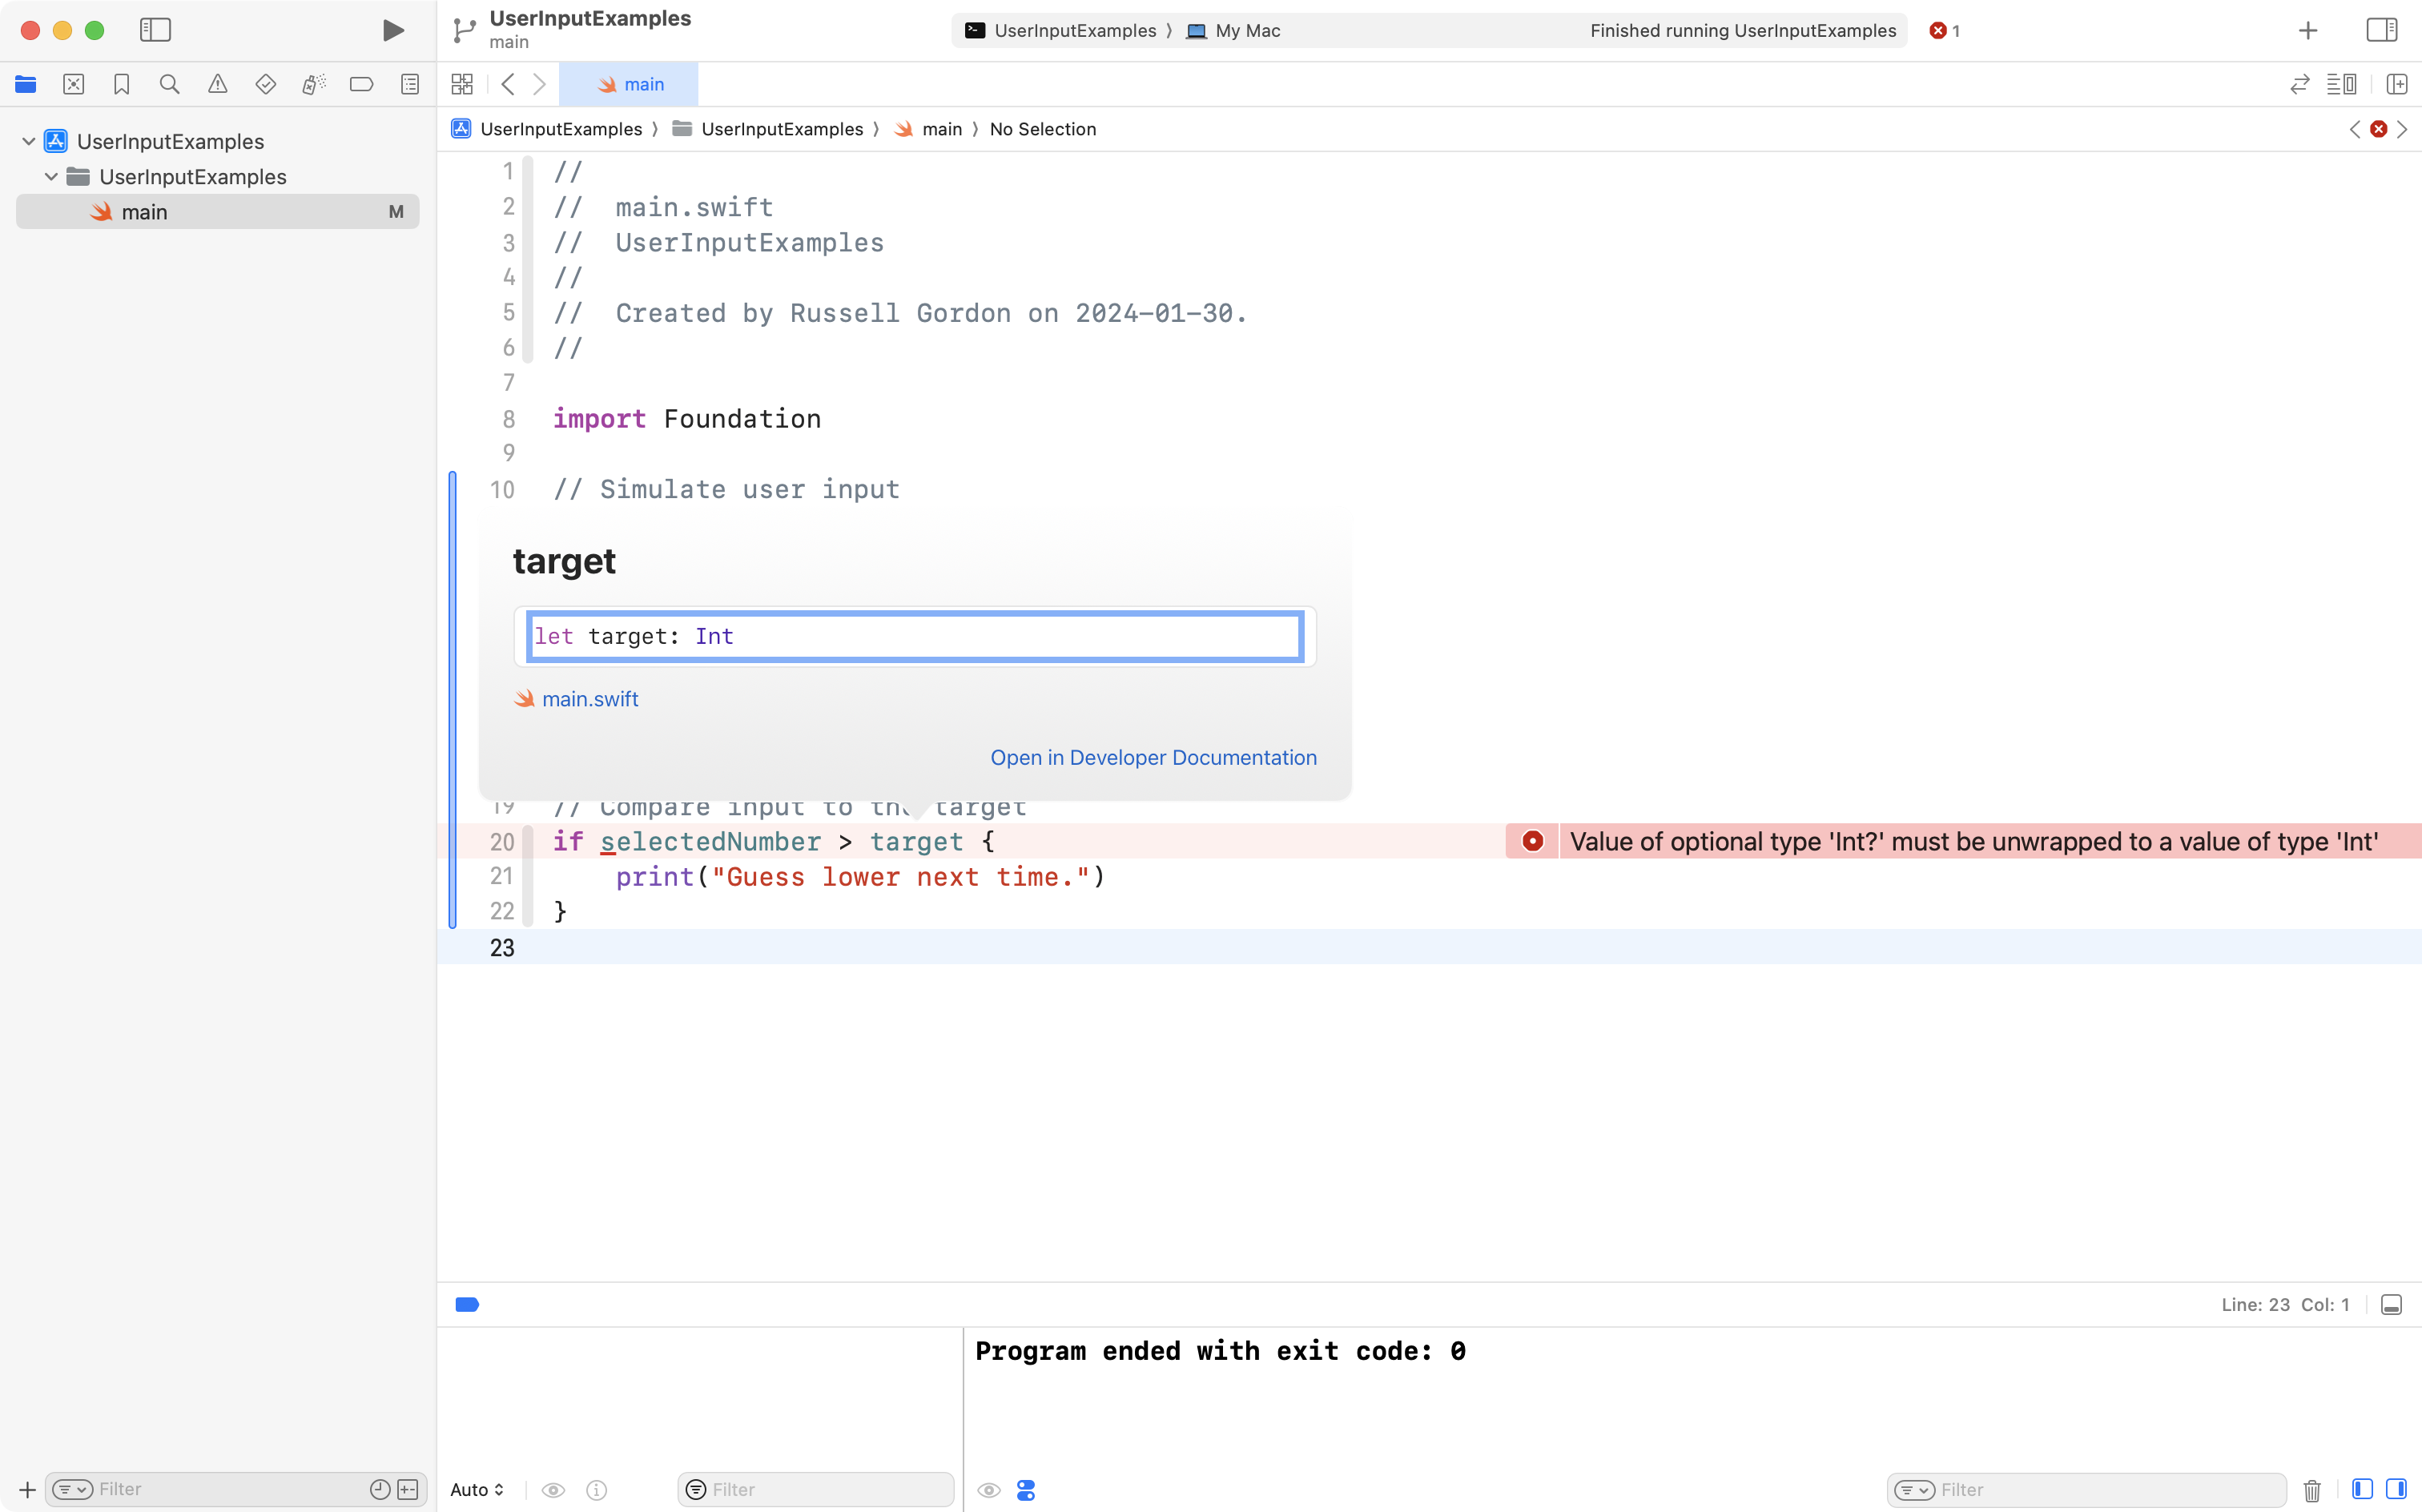
Press the Option key on your keyboard, then click the target constant to confirm that it is an Int:
Now press the Option key on your keyboard, and click the selectedNumber to check it’s data type:
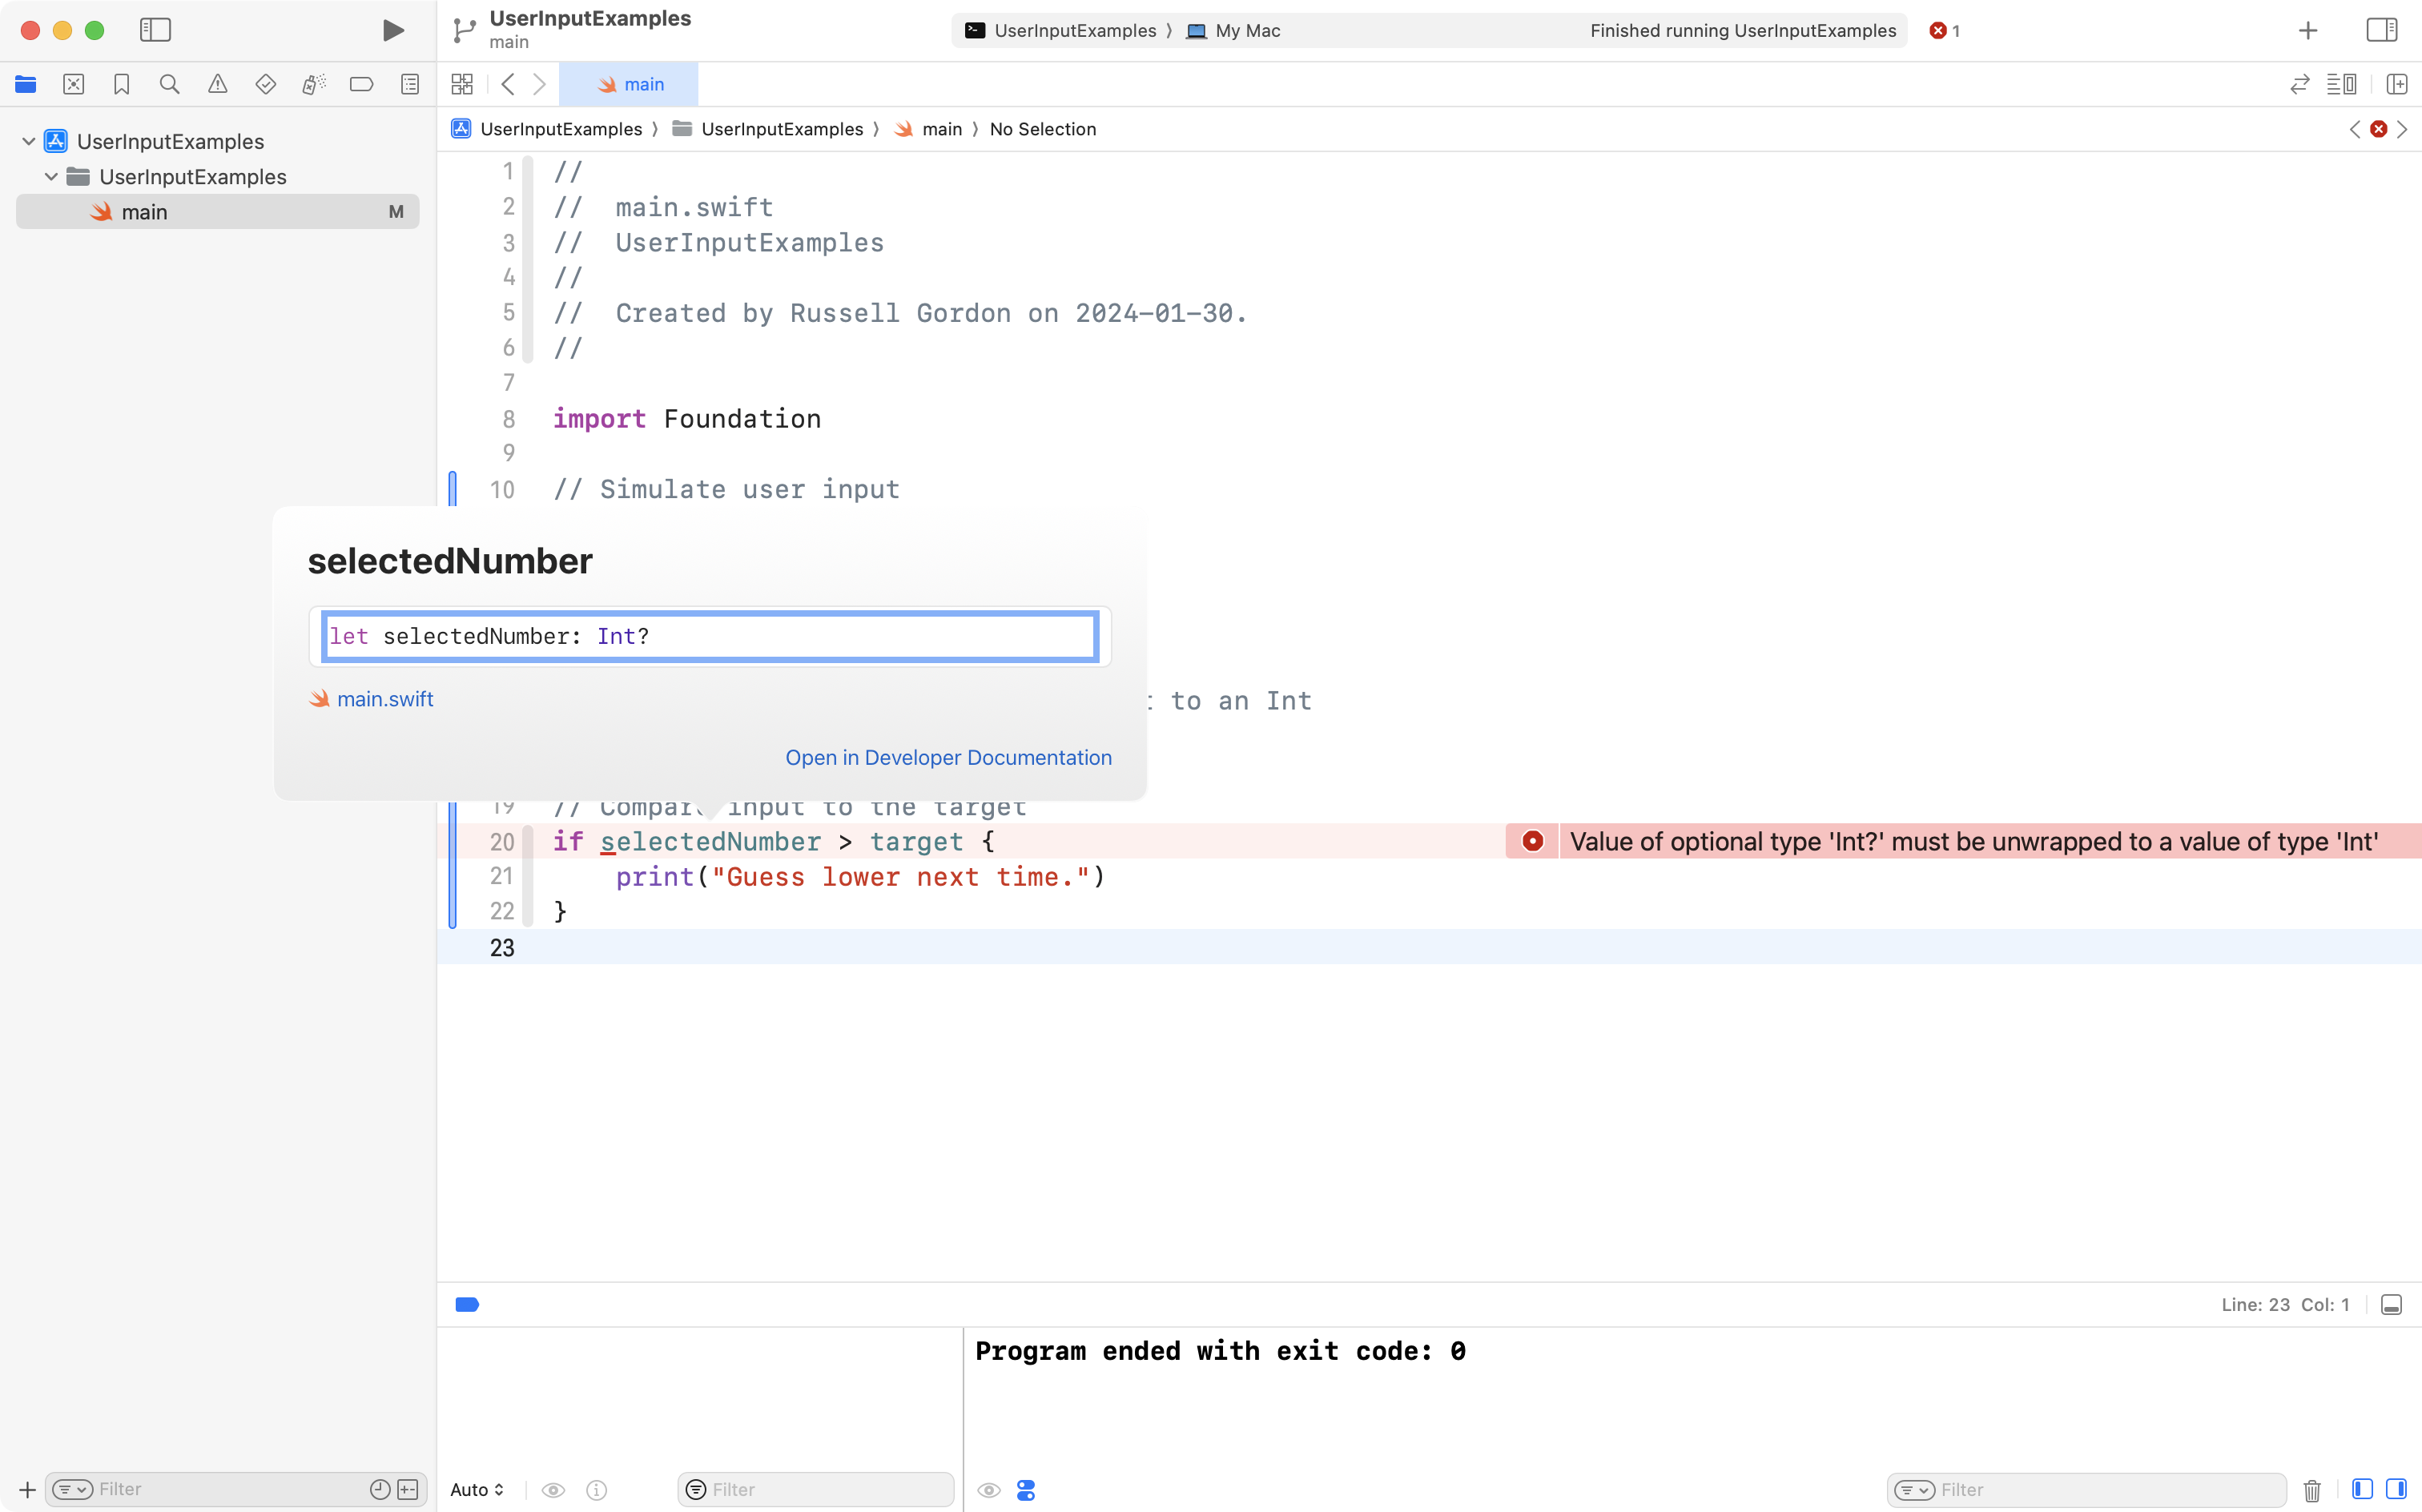
Ah-hah – notice how the left side of the comparison – selectedNumber – is an optional integer – that is, it might contain nil.
The right side of the comparison – target – is a regular integer that is guaranteed to never contain nil.
Swift, by design, forces us as the programmer to plan for the fact that the conversion of givenInput to an Int may not succeed:
// Attempt to convert the String input to an Int
let selectedNumber = Int(givenInput)
When the conversion fails – selectedNumber will be nil.
We need to unwrap the result of converting givenInput into an integer, so that the resulting constant, selectedNumber, is not optional.
One way to do this is to force-unwrap the conversion.
Change the code on line 17 from this:
let selectedNumber = Int(givenInput)… to this instead:
let selectedNumber = Int(givenInput)!Now, the compiler no longer throws an error:
Try running the program by pressing the Command-R keyboard shortcut:
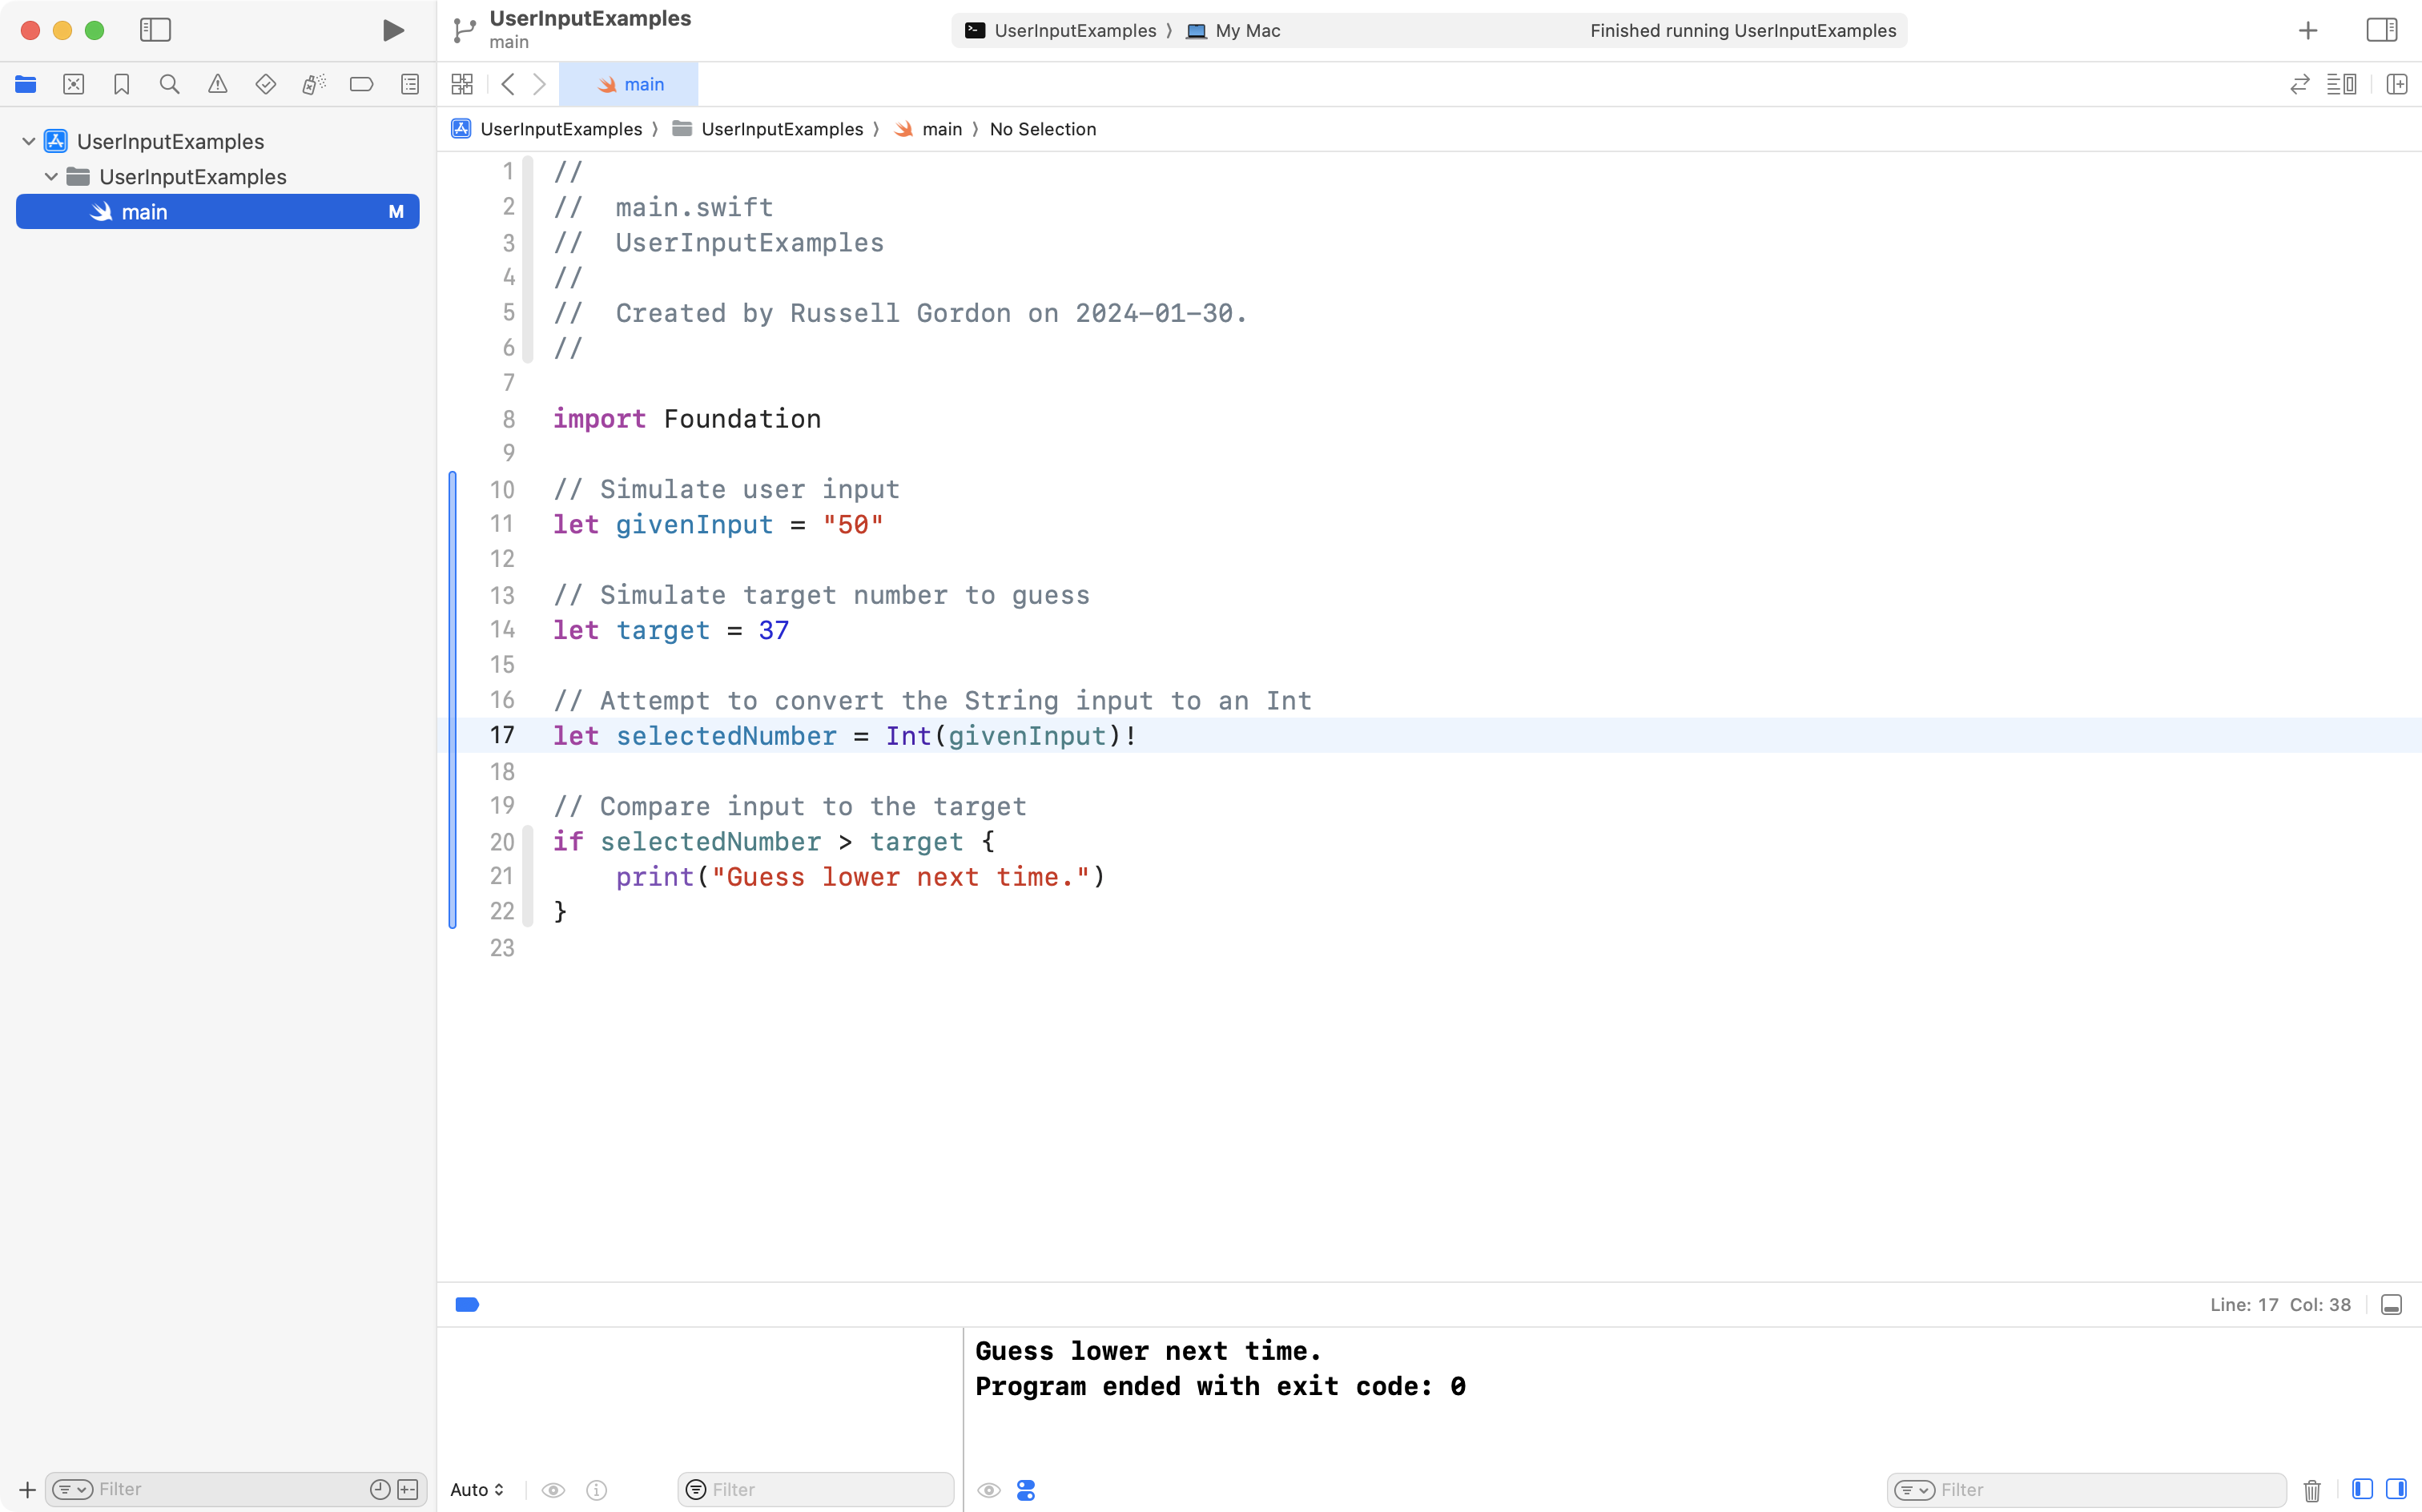
We see that the program ran successfully.
OK, so we’re good?
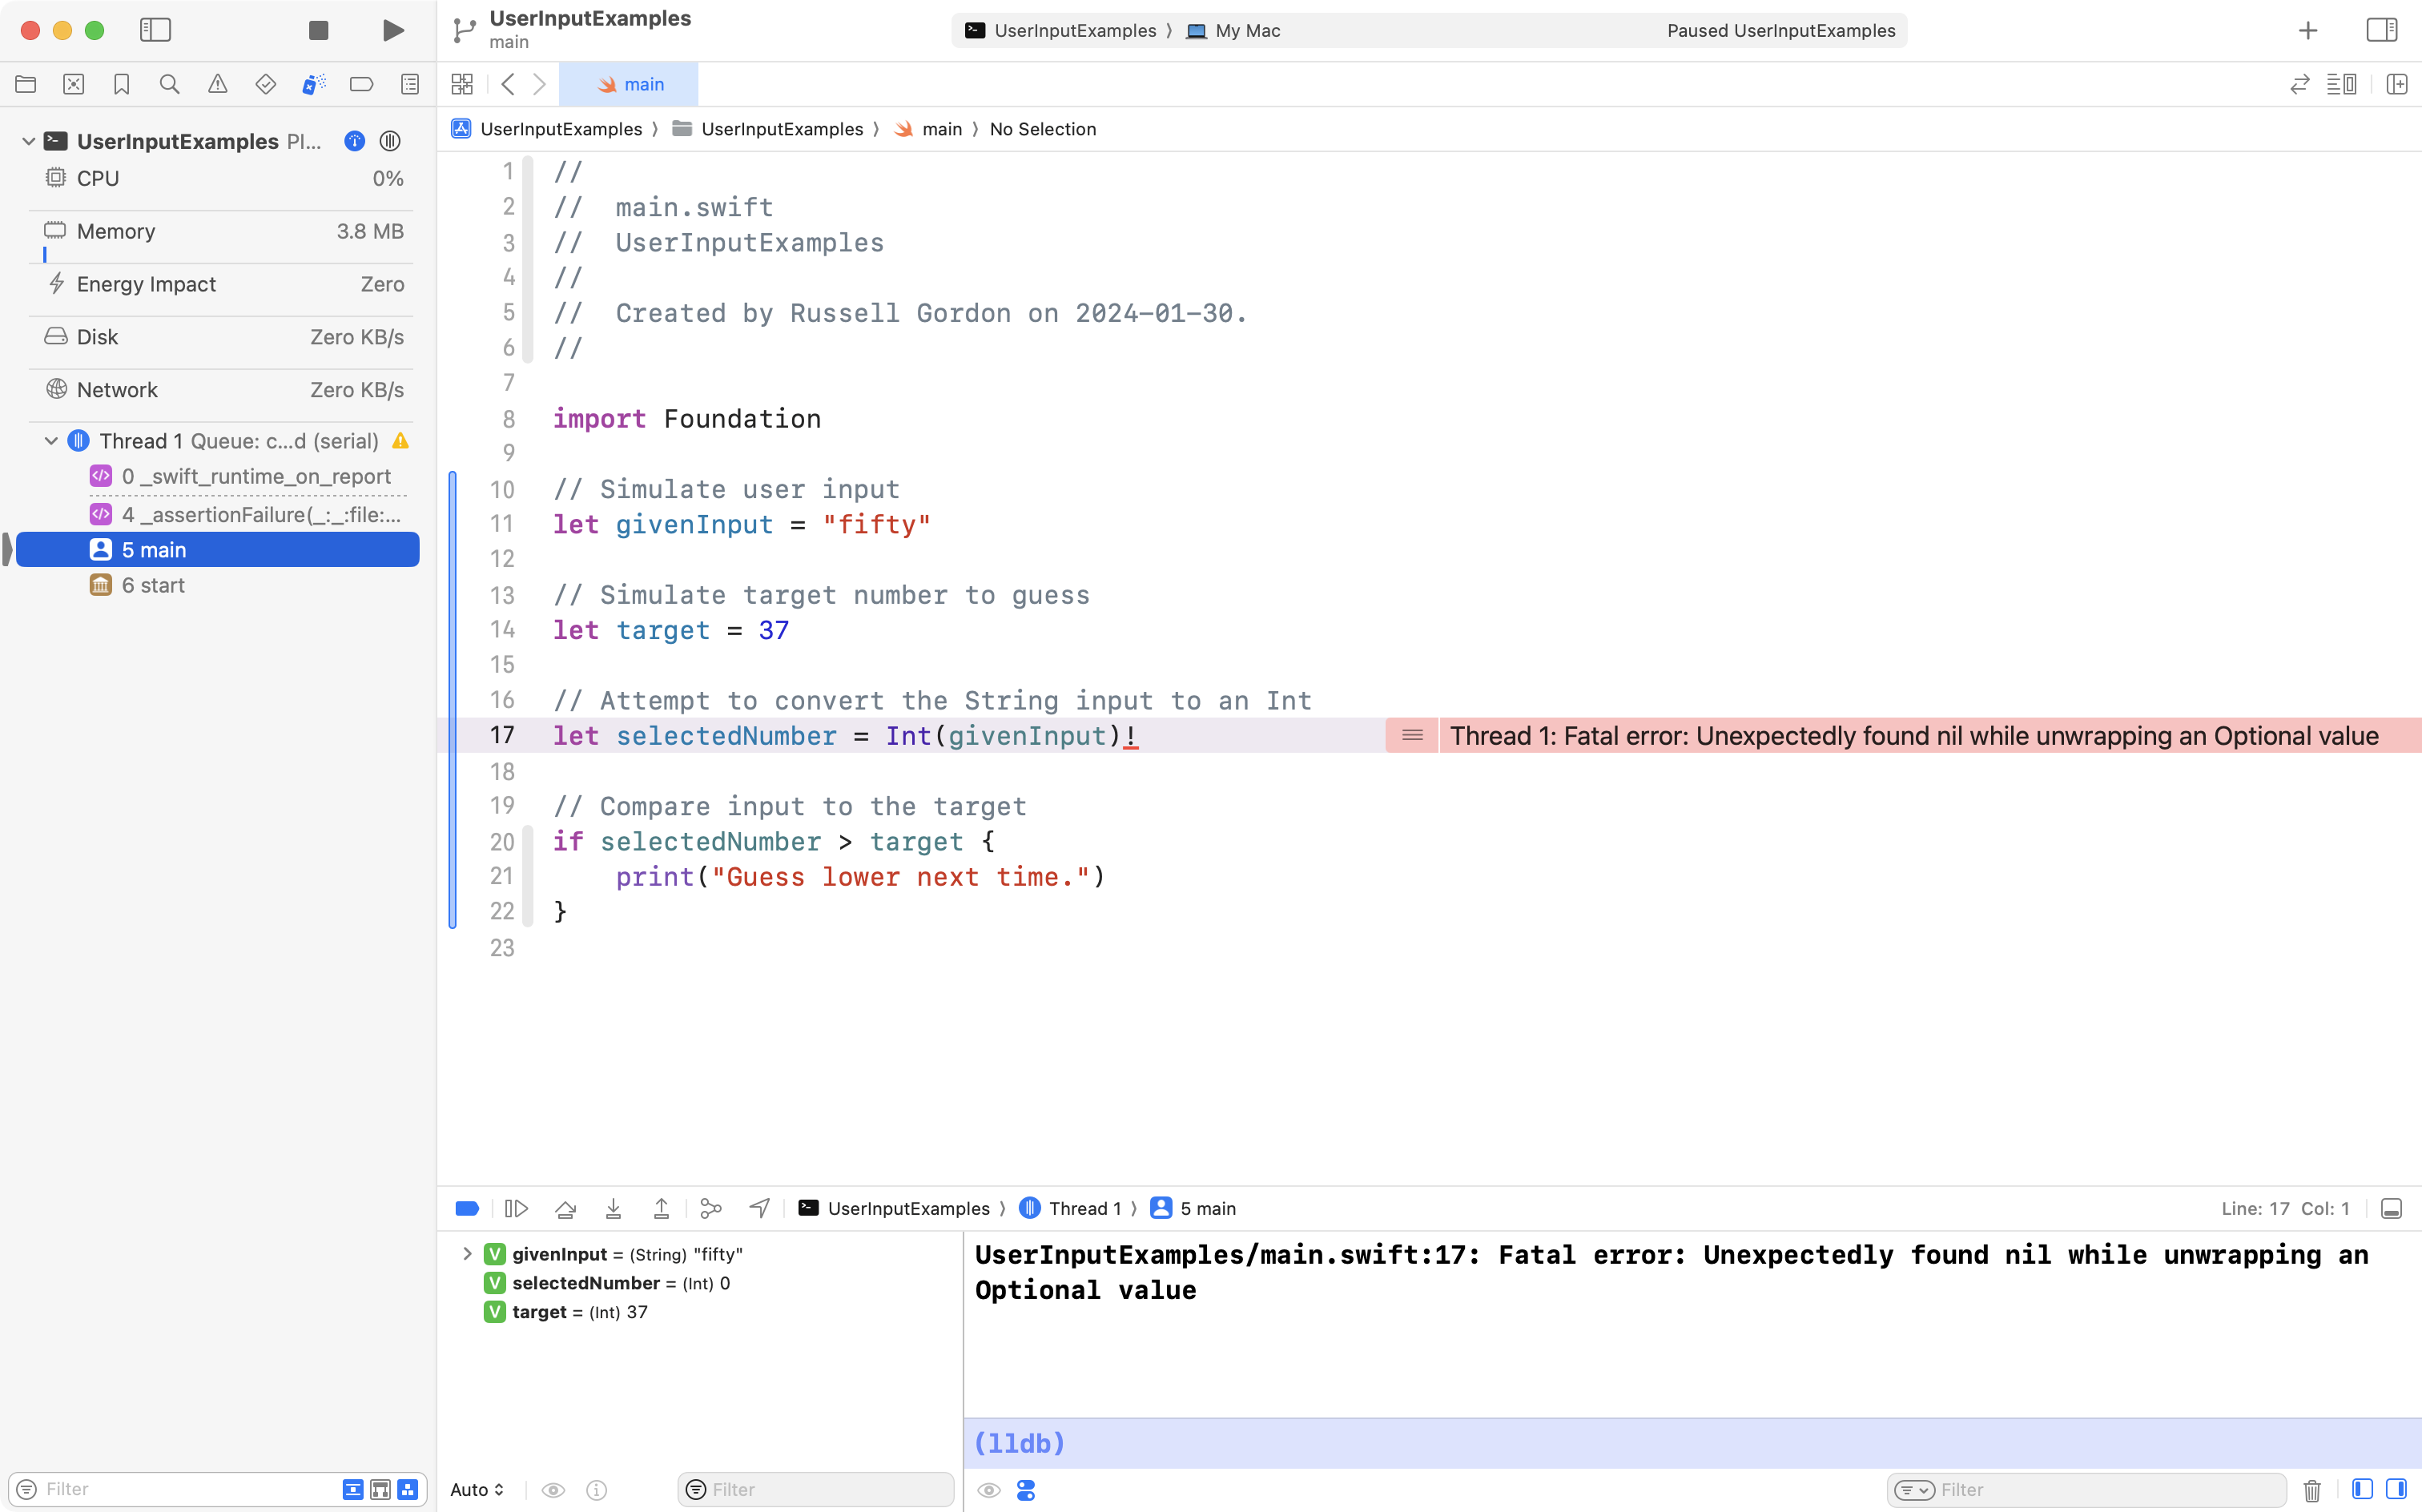
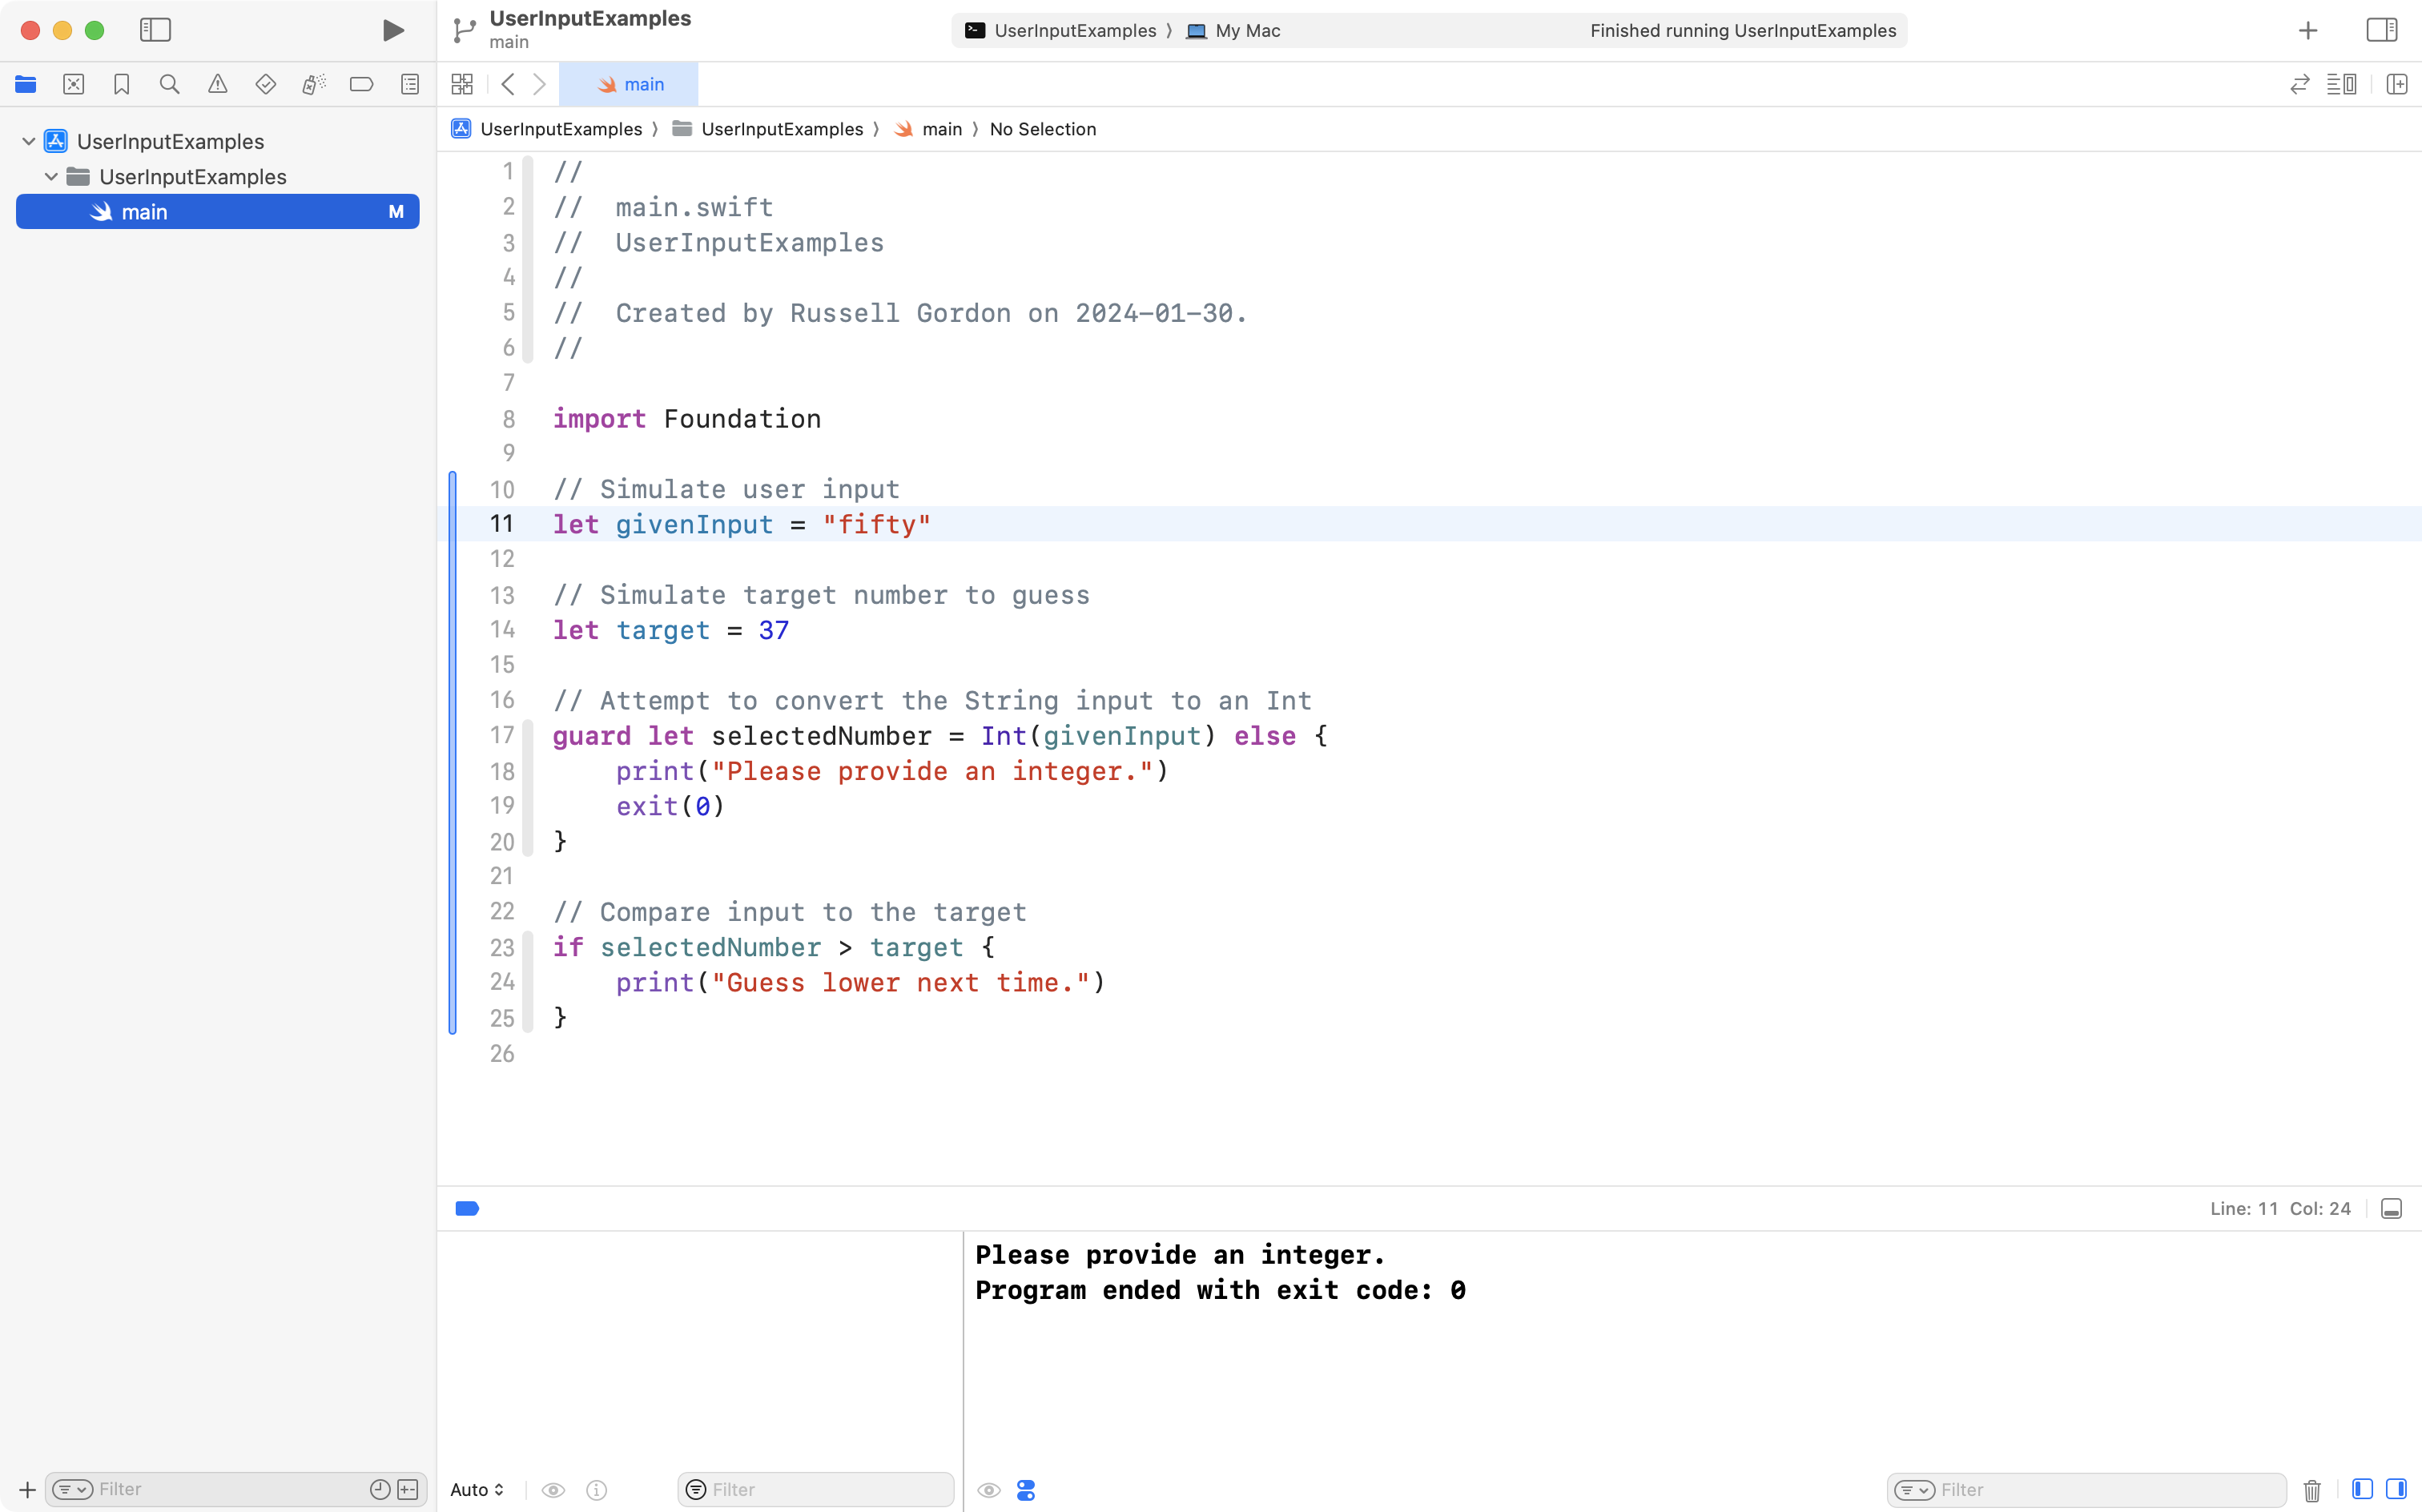
Not so fast… try changing the simulated input on line 11 to fifty instead, like this:
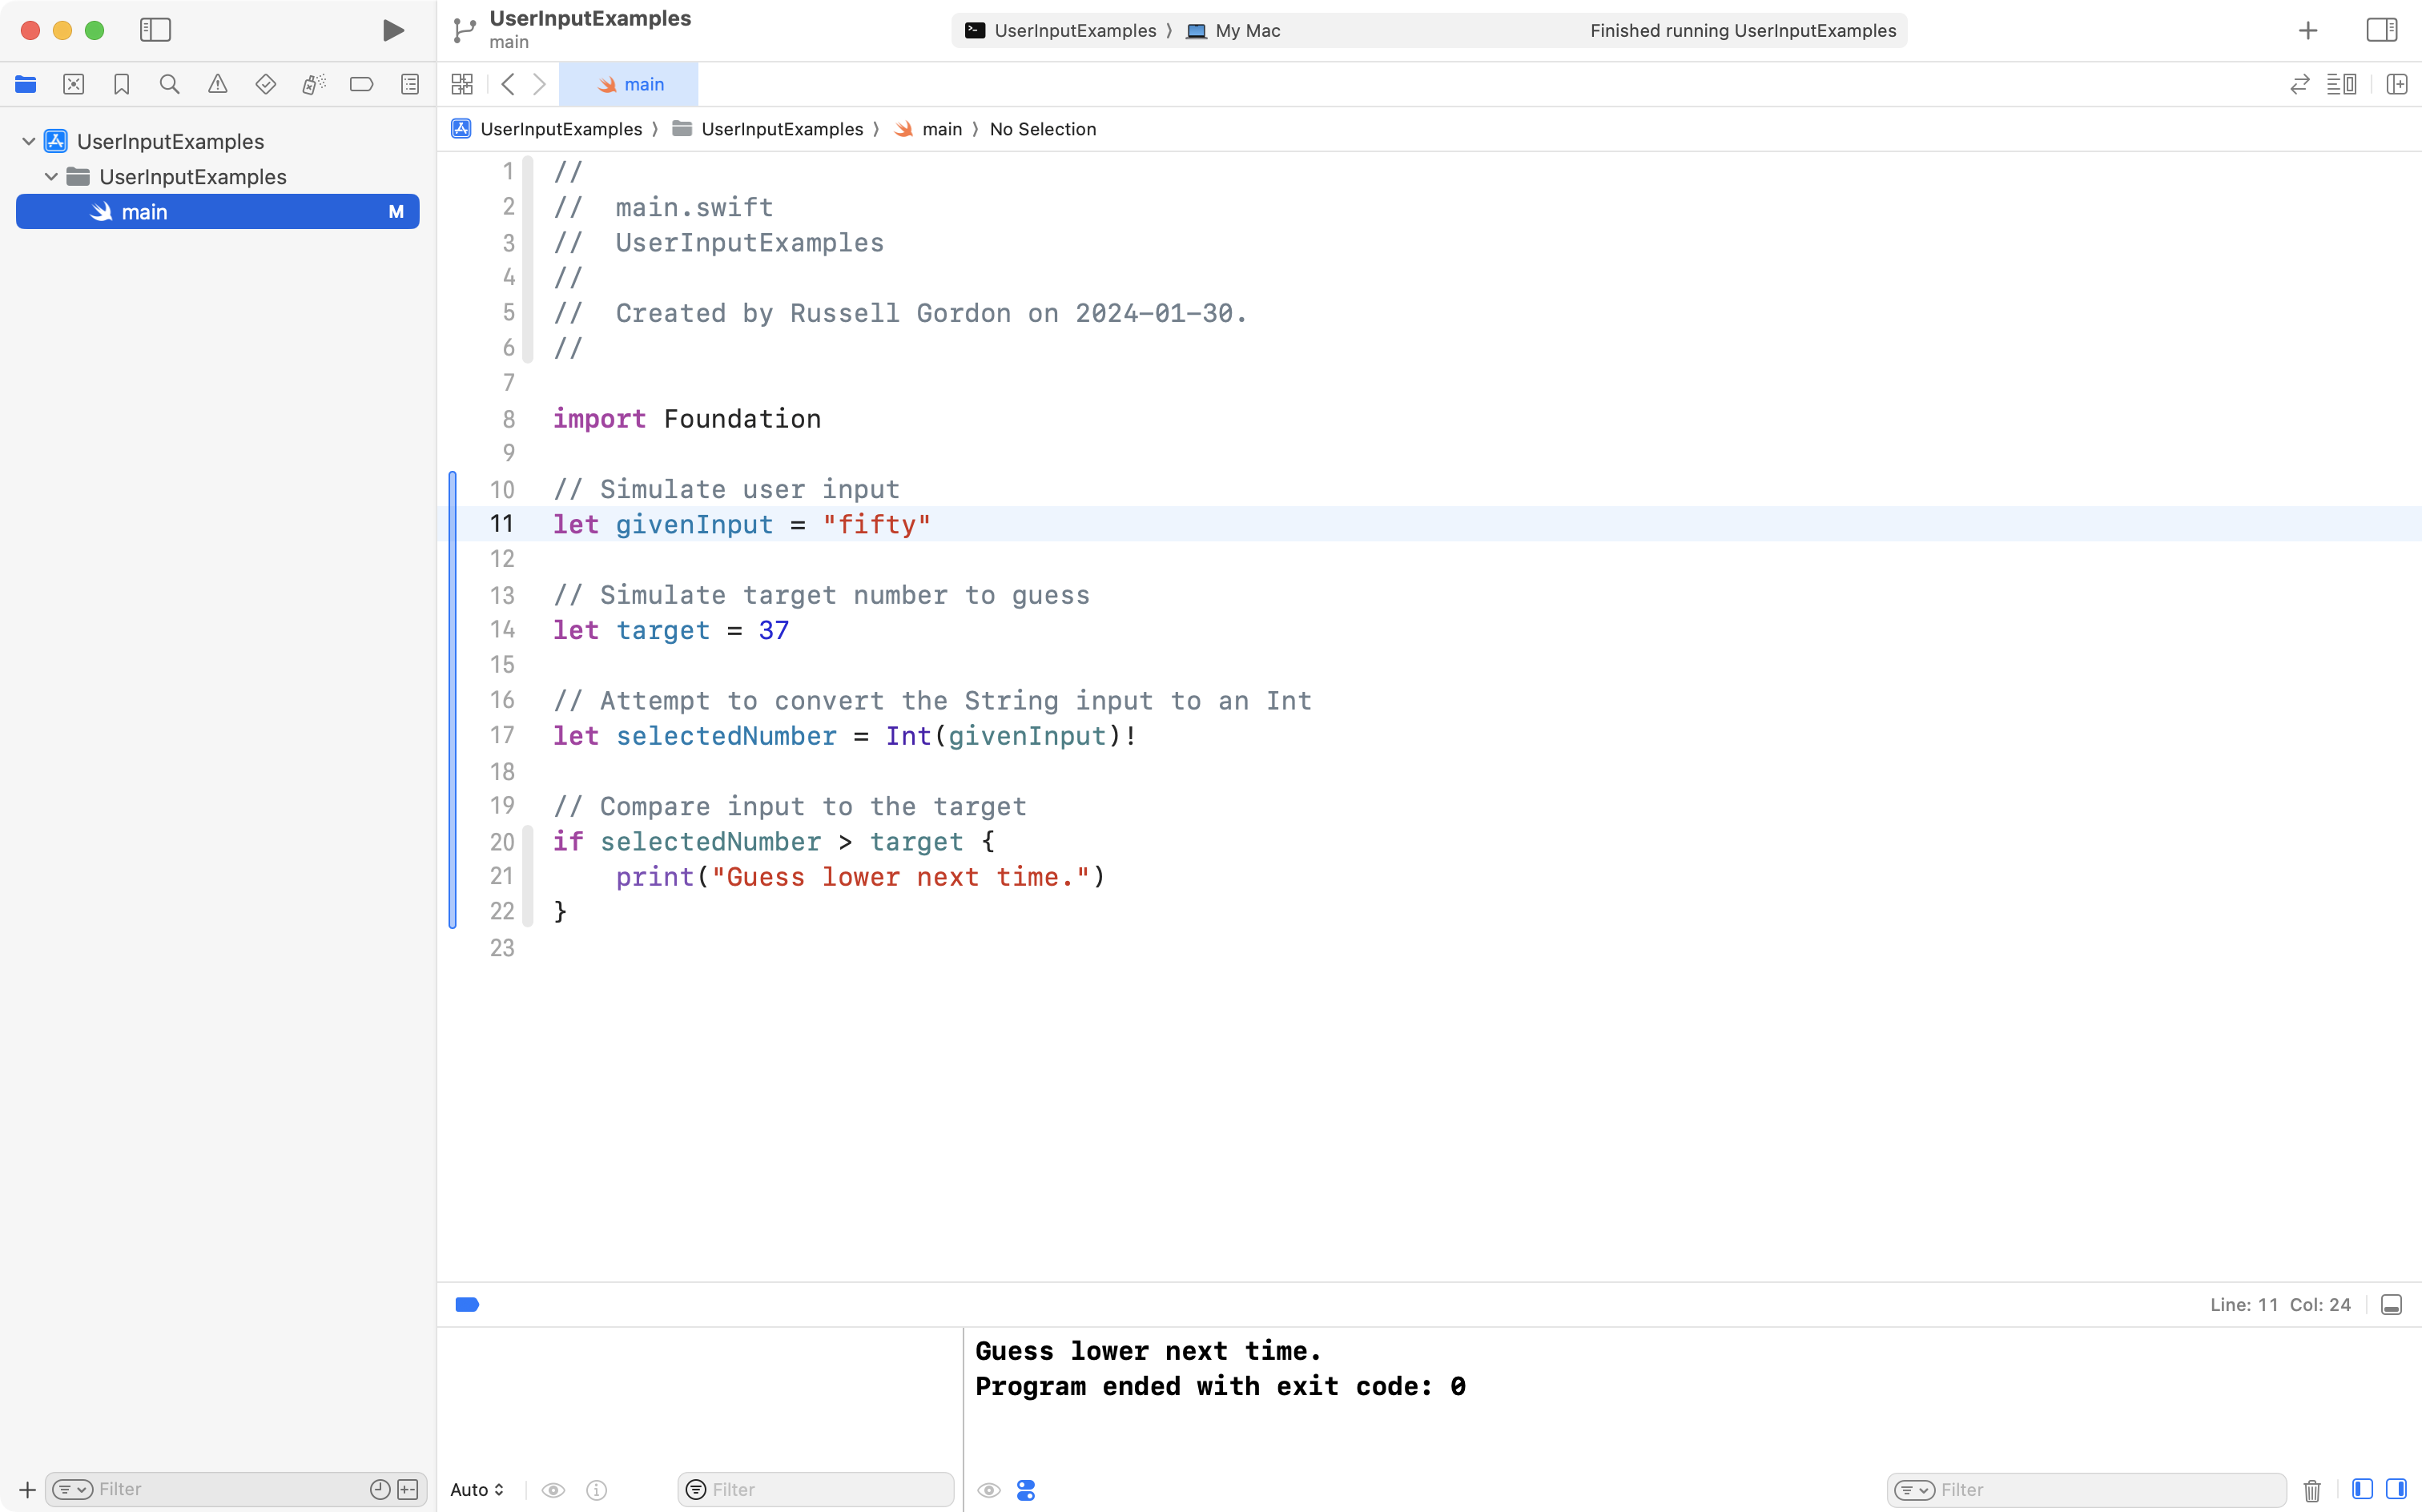
Now run the program again by using the Command-R shortcut.
What happens?
💥
Our program crashes:
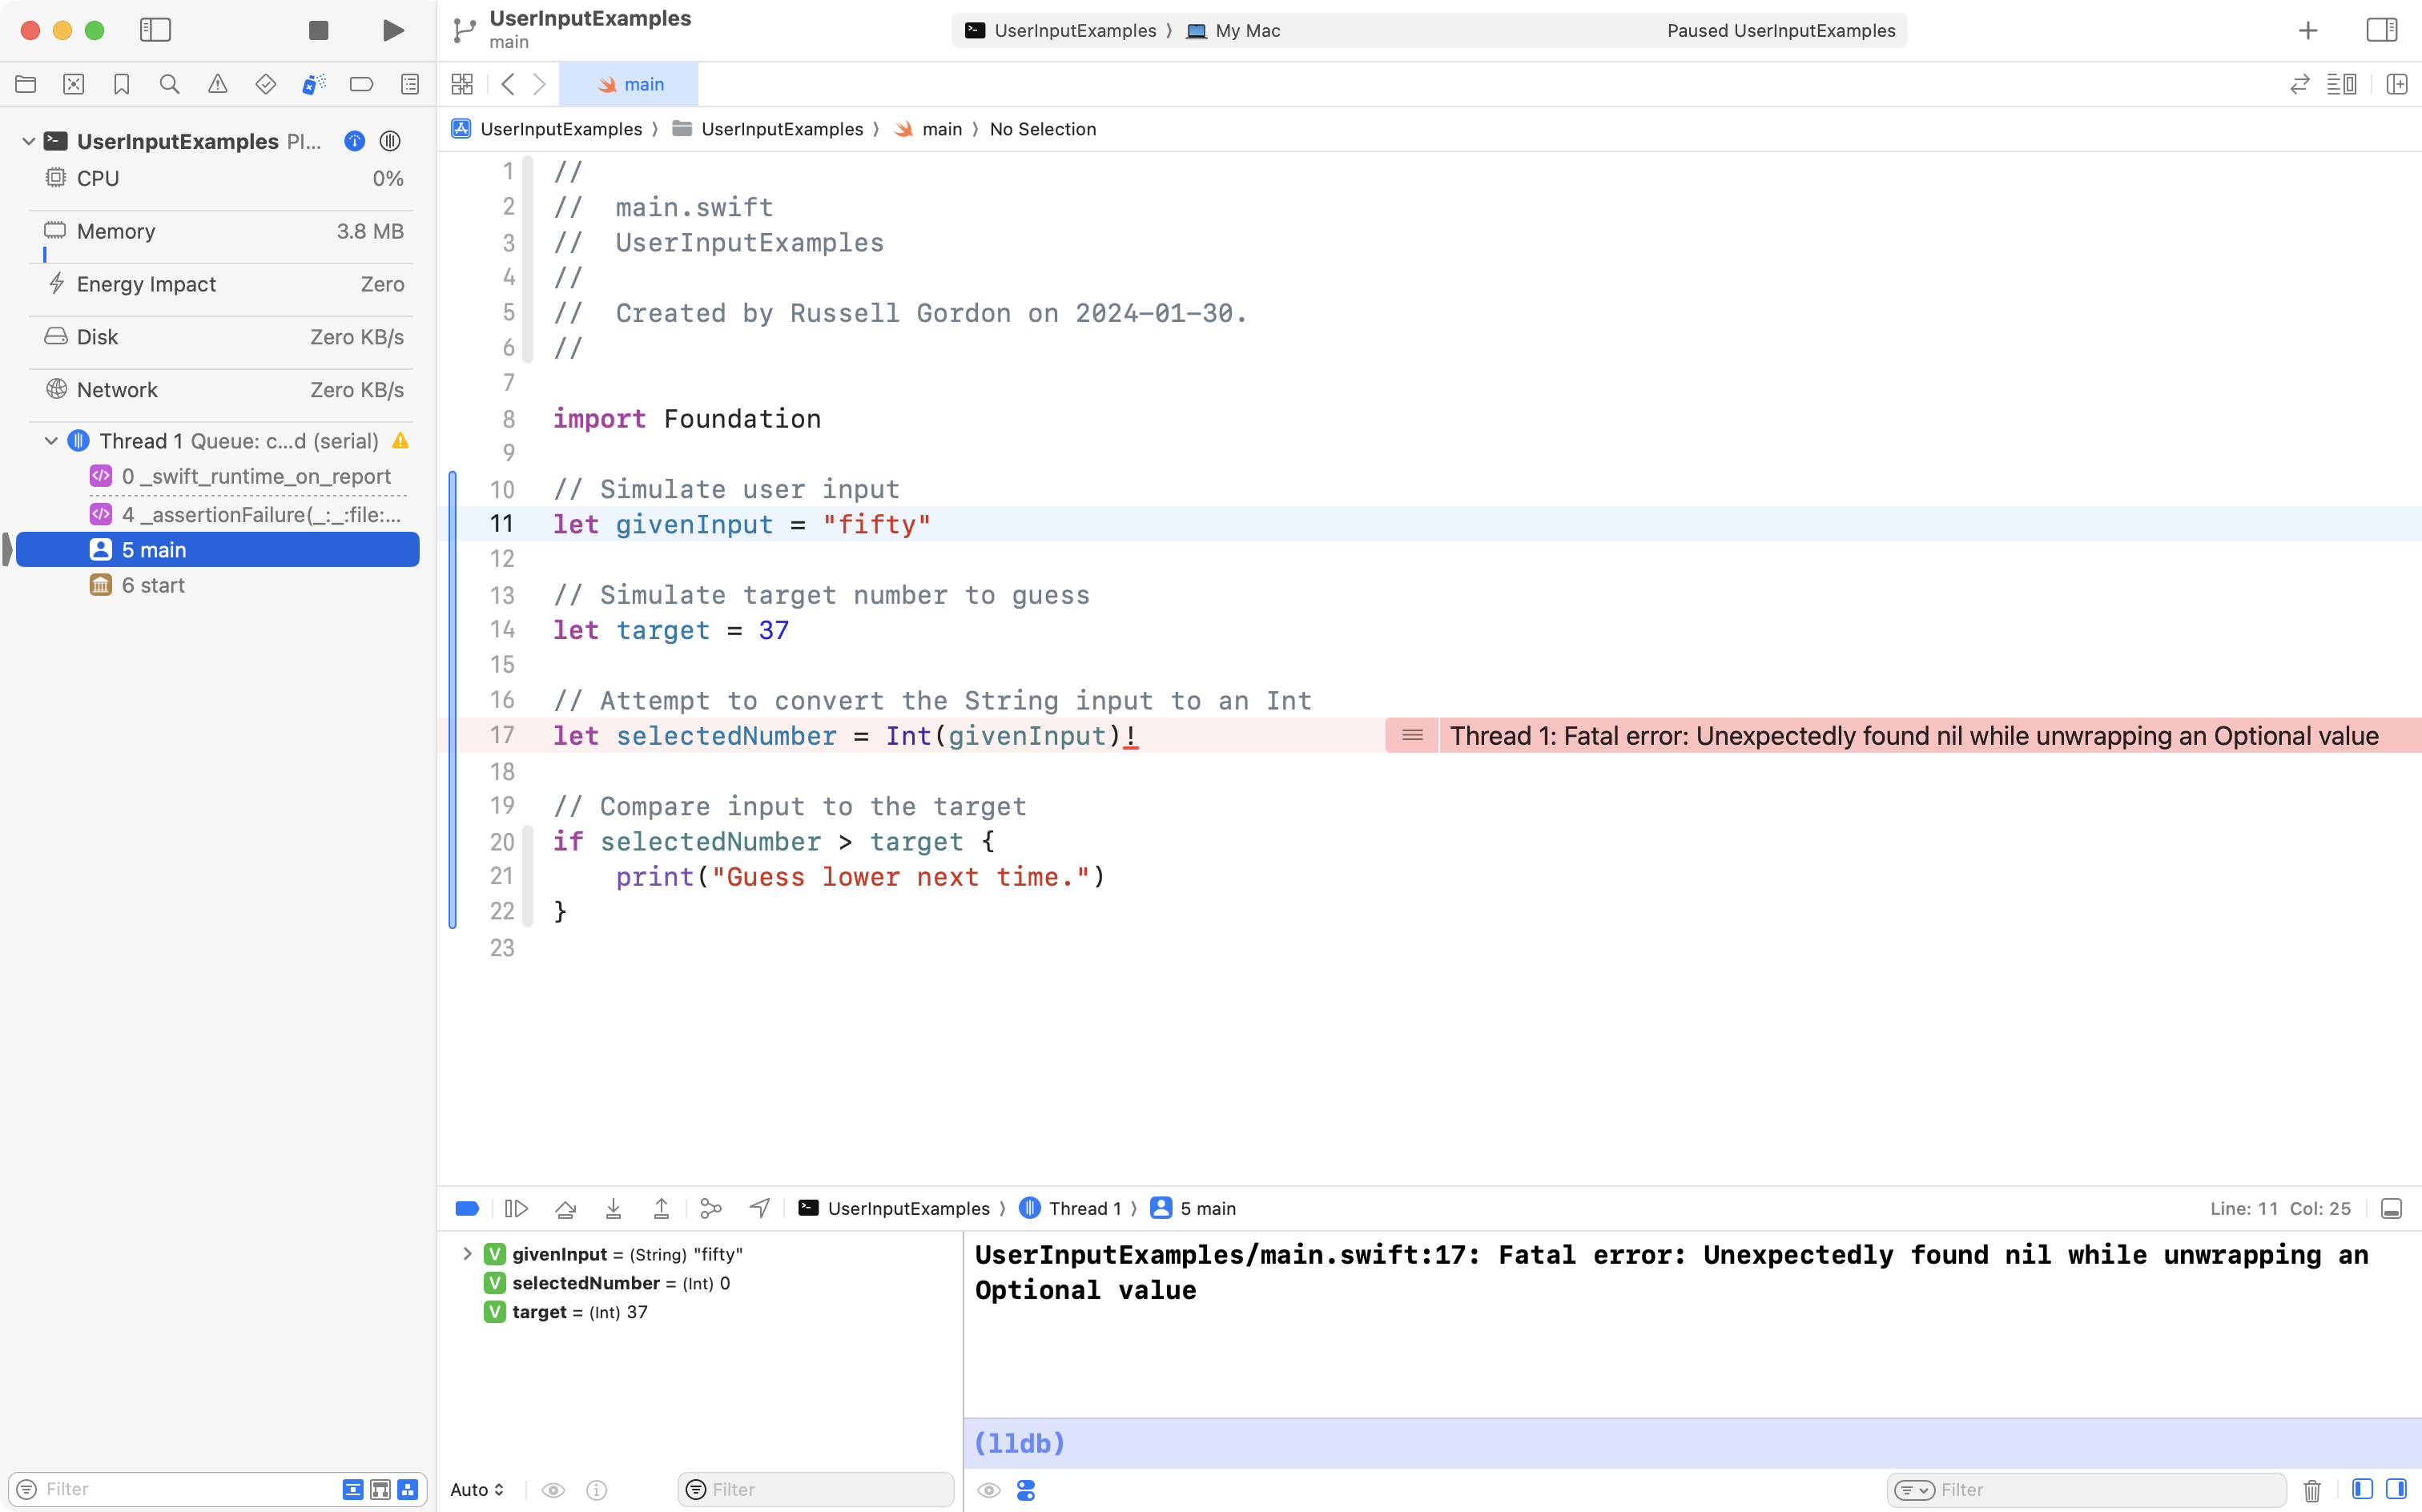
… because as the programmer, we have failed to anticipate that users make poor decisions sometimes and will occasionally… or maybe even frequently… provide us with unexpected input.
When we tried to convert the text fifty into an integer, that understandably failed – so we received a nil – but as you know – force-unwrapping a nil value leads to a crash.
So… how do we deal with this?
The Swift programming language has a control structure designed to help us in this situation – it is the guard statement.
Essentially, we ask the Swift compiler to protect us – or guard us – when the result of an operation could result in a nil value.
Change the code on line 17:
let selectedNumber = Int(givenInput)!… to the following instead:
guard let selectedNumber = Int(givenInput) else {
    print("Please provide an integer.")
    exit(0)
}
… so the program looks like this overall:
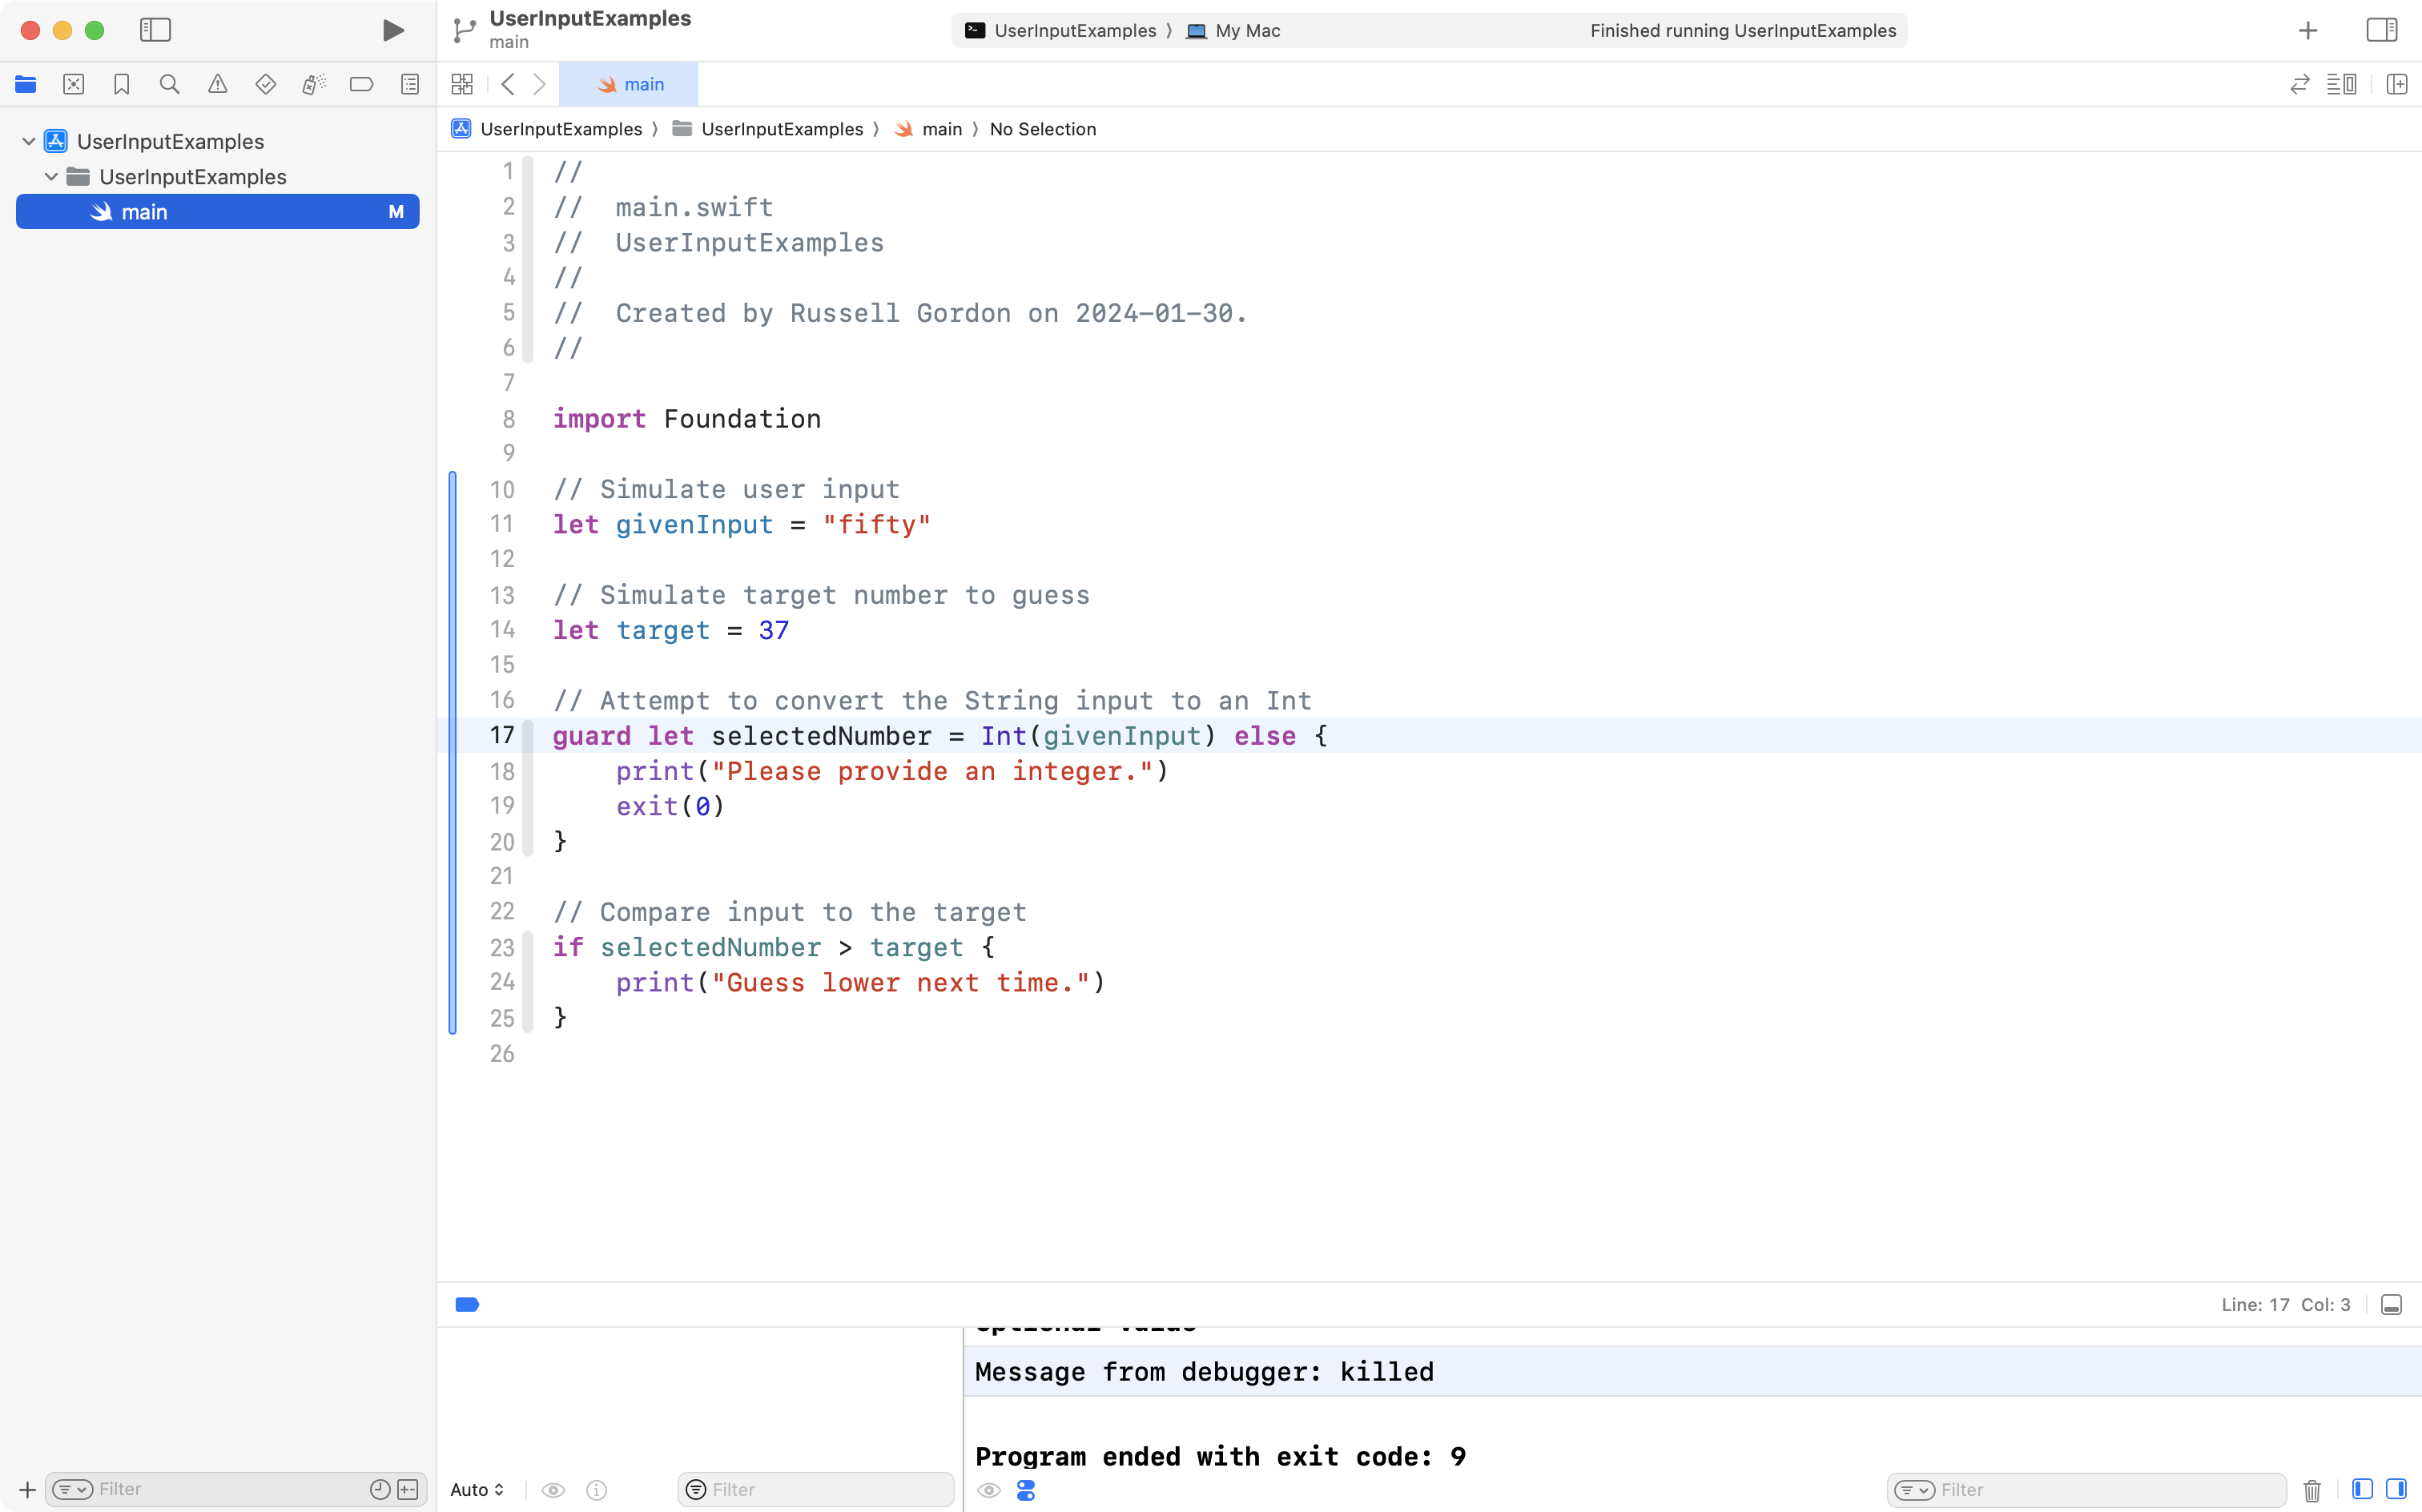
Now run the program using the Command-R keyboard shortcut.
What do you notice?
The user is still providing (simulated) incorrect input – the text fifty instead of an integer.
However, our program no longer crashes.
The user is shown a clear error message – and then the program quits gracefully:
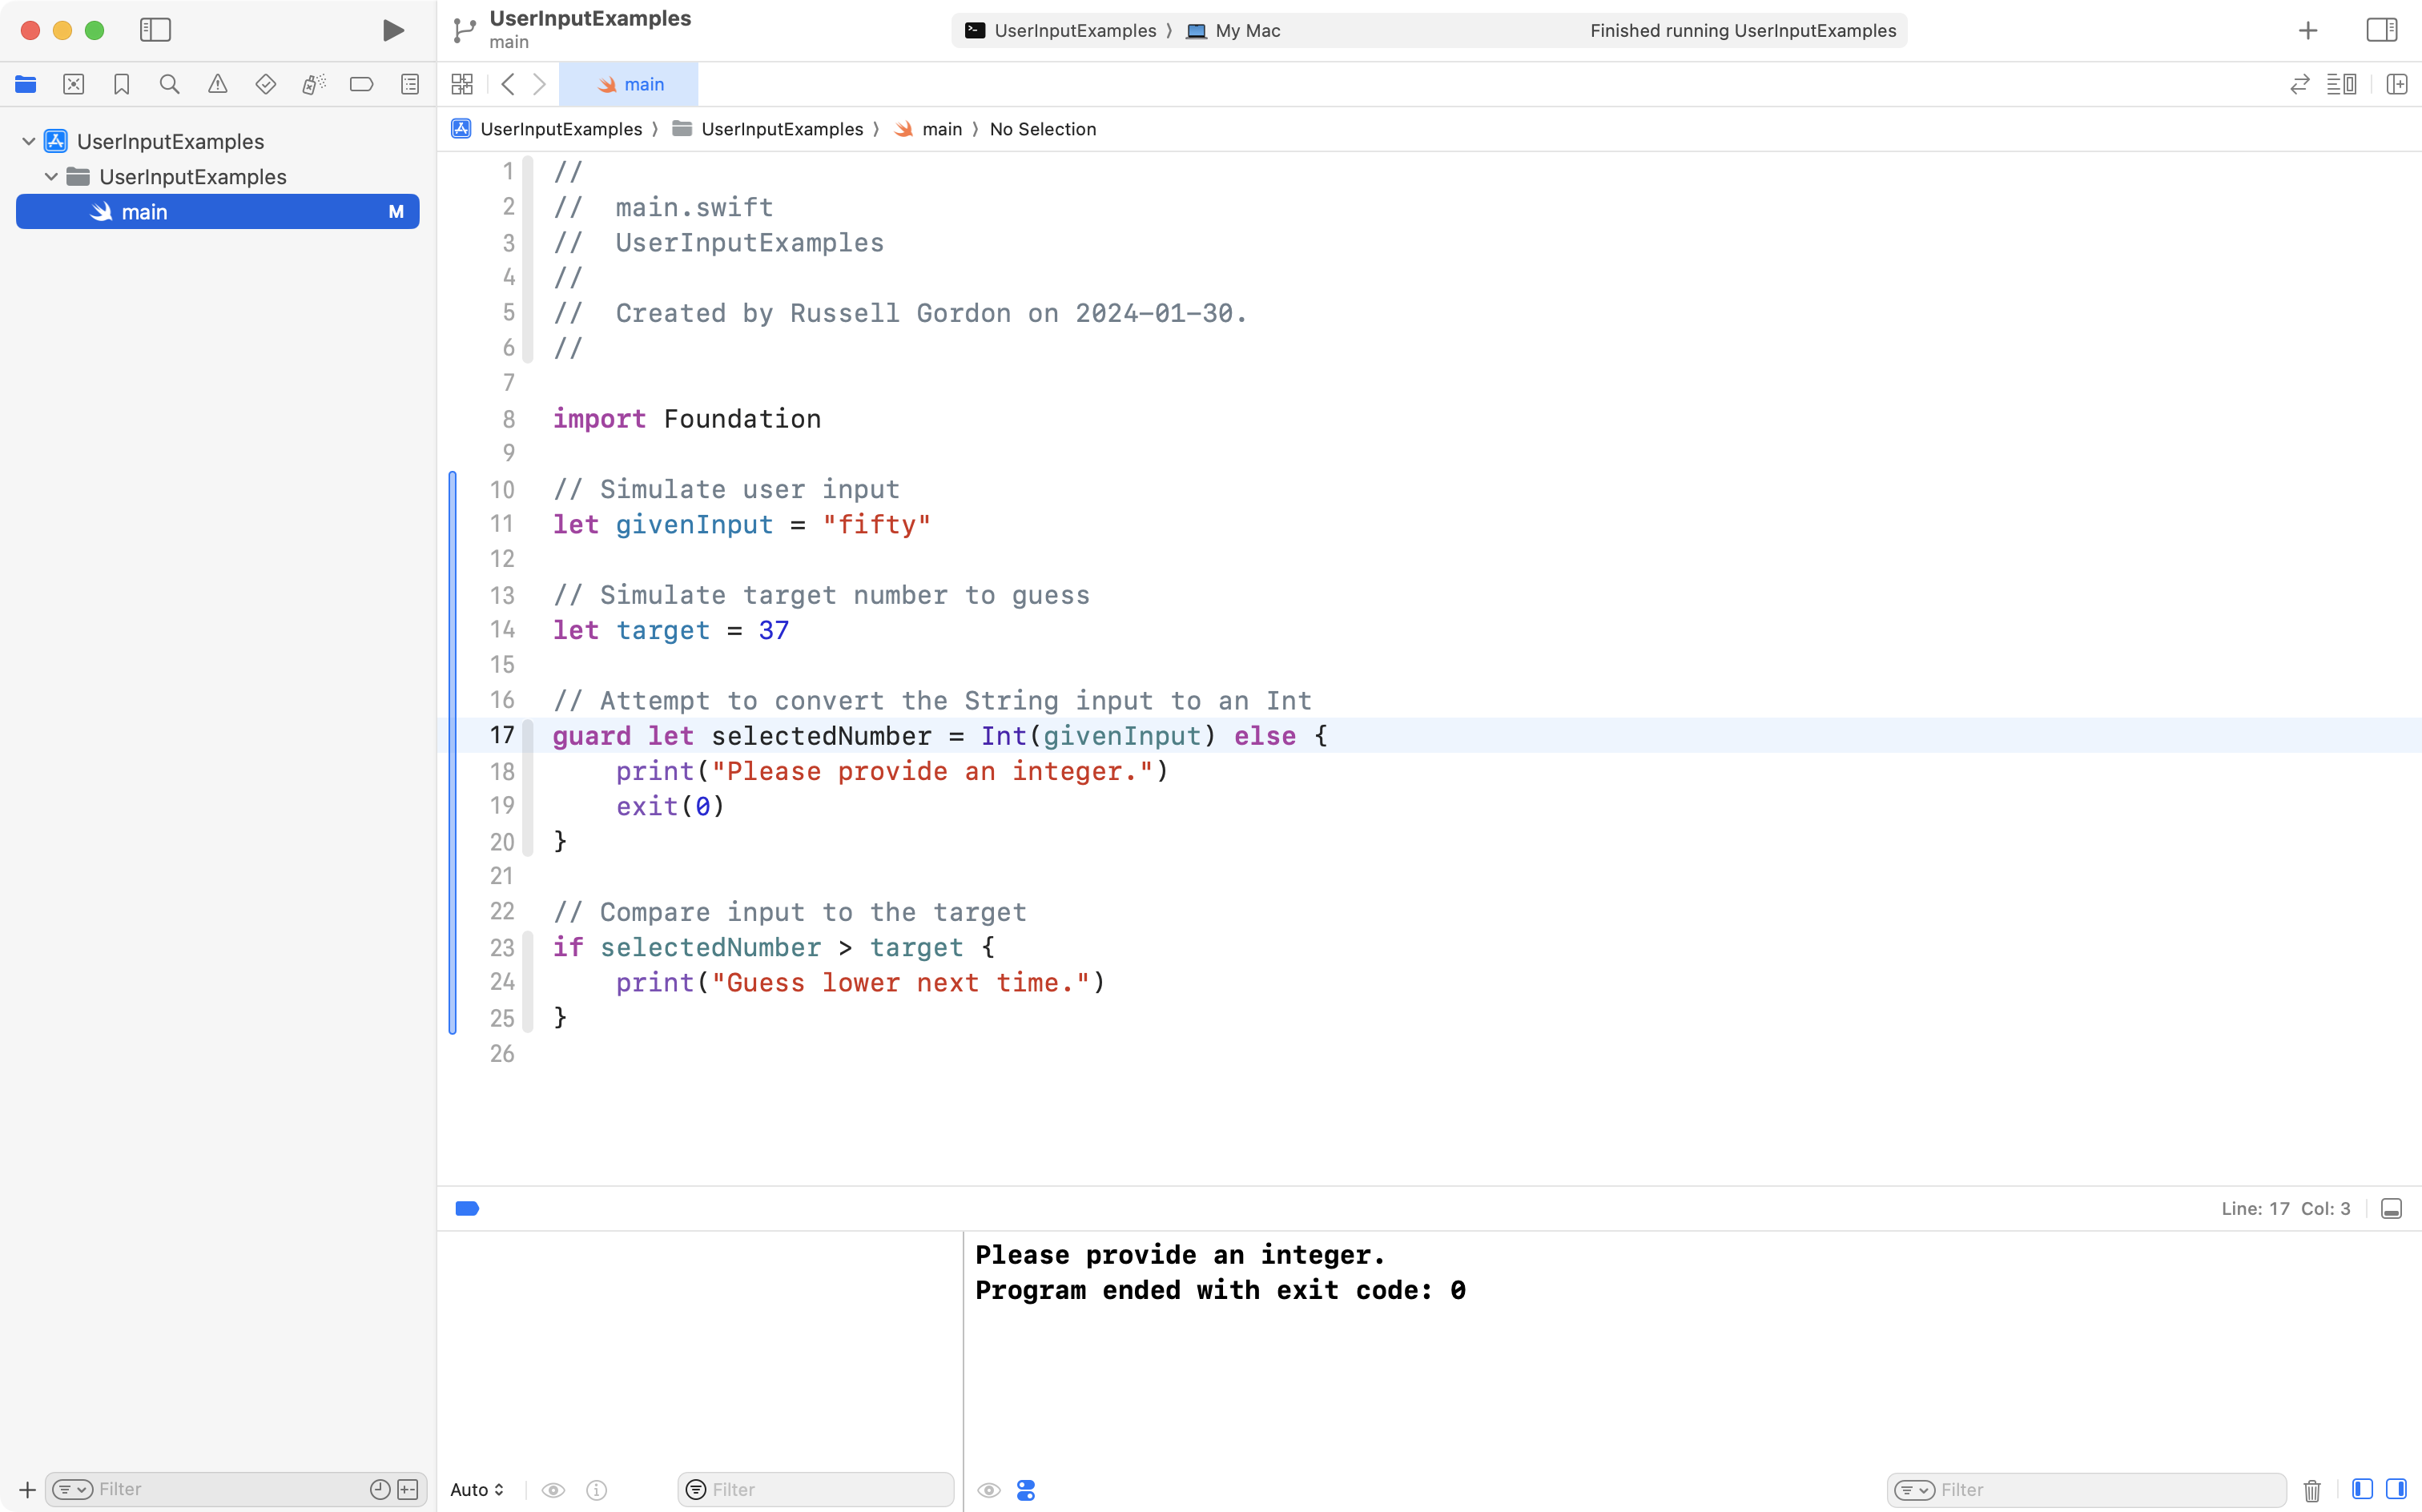
Here is an animation showing the flow of the program when bad input is provided:

On the other hand, if the conversion of givenInput into an integer value succeeds, our program continues on.
Change the simulated input on line 11 from:
let givenInput = "fifty"… back to:
let givenInput = "50"… like this:
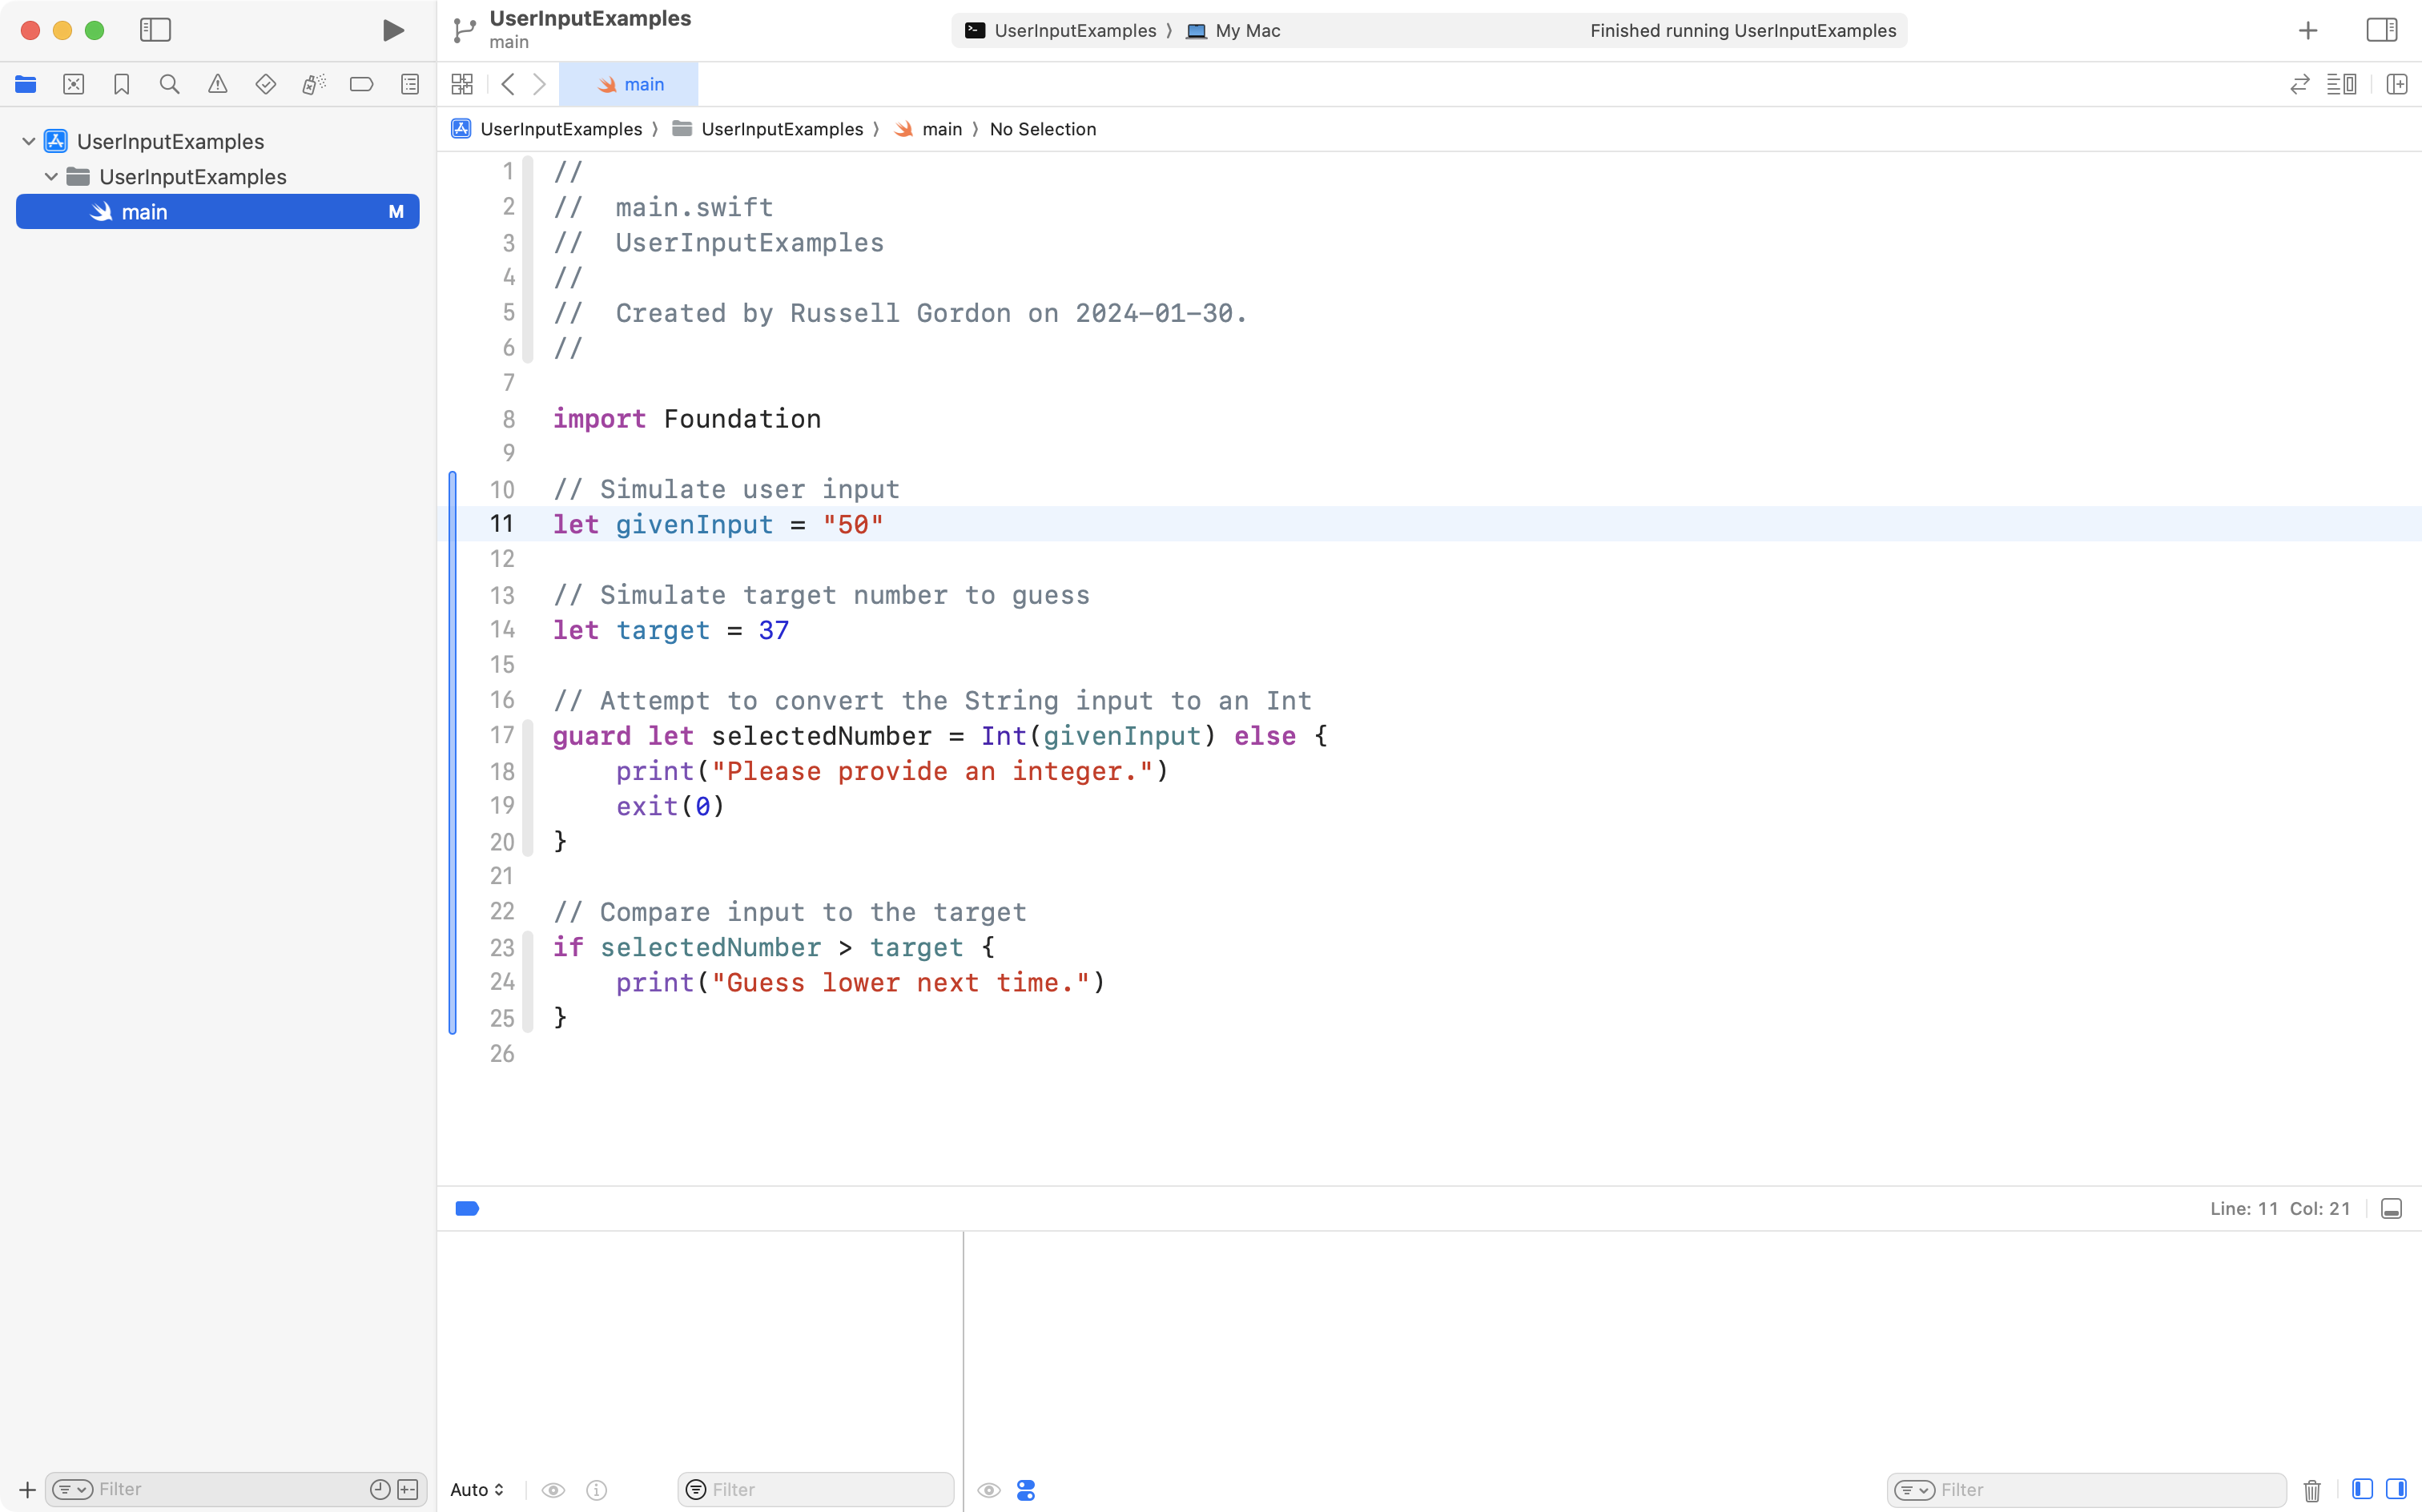
Now run the program using the Command-R keyboard shortcut.
It works as expected, telling us that the simulated input, 50, is more than the target to guess, 37, and so we are told to guess lower next time.
Here is an animation of how the program flows through a guard statement when reasonable input is provided, and the conversion to an Int works:

Summary so far
To summarize, we can only compare apples to apples – that is – we can only compare values that have the same data type.
We could simply force-unwrap givenInput from a String into an Int, but that will fail when unexpected input is provided:
Instead, we should safely unwrap the givenInput into an Int using a guard statement:
Then, when bad input is provided, we can gracefully stop the conversion, and show an appropriate error message.
IMPORTANT
The core purpose of the
guardstatement is provide a graceful early exit from a section of logic that has received bad input.When a
guardstatement is in a command-line program we can use theexitcommand to stop program execution.When a
guardstatement is inside a function we use thereturnstatement to stop running the function.
Apply to Guessing Game
Let’s take what we have learned here, and apply it to the Guessing Game app, so that it accepts text-based input, but also gracefully handles unexpected input.
You can make these changes regardless of whether you have finished the first exercise from yesterday’s lesson.
You should have something like this at present:
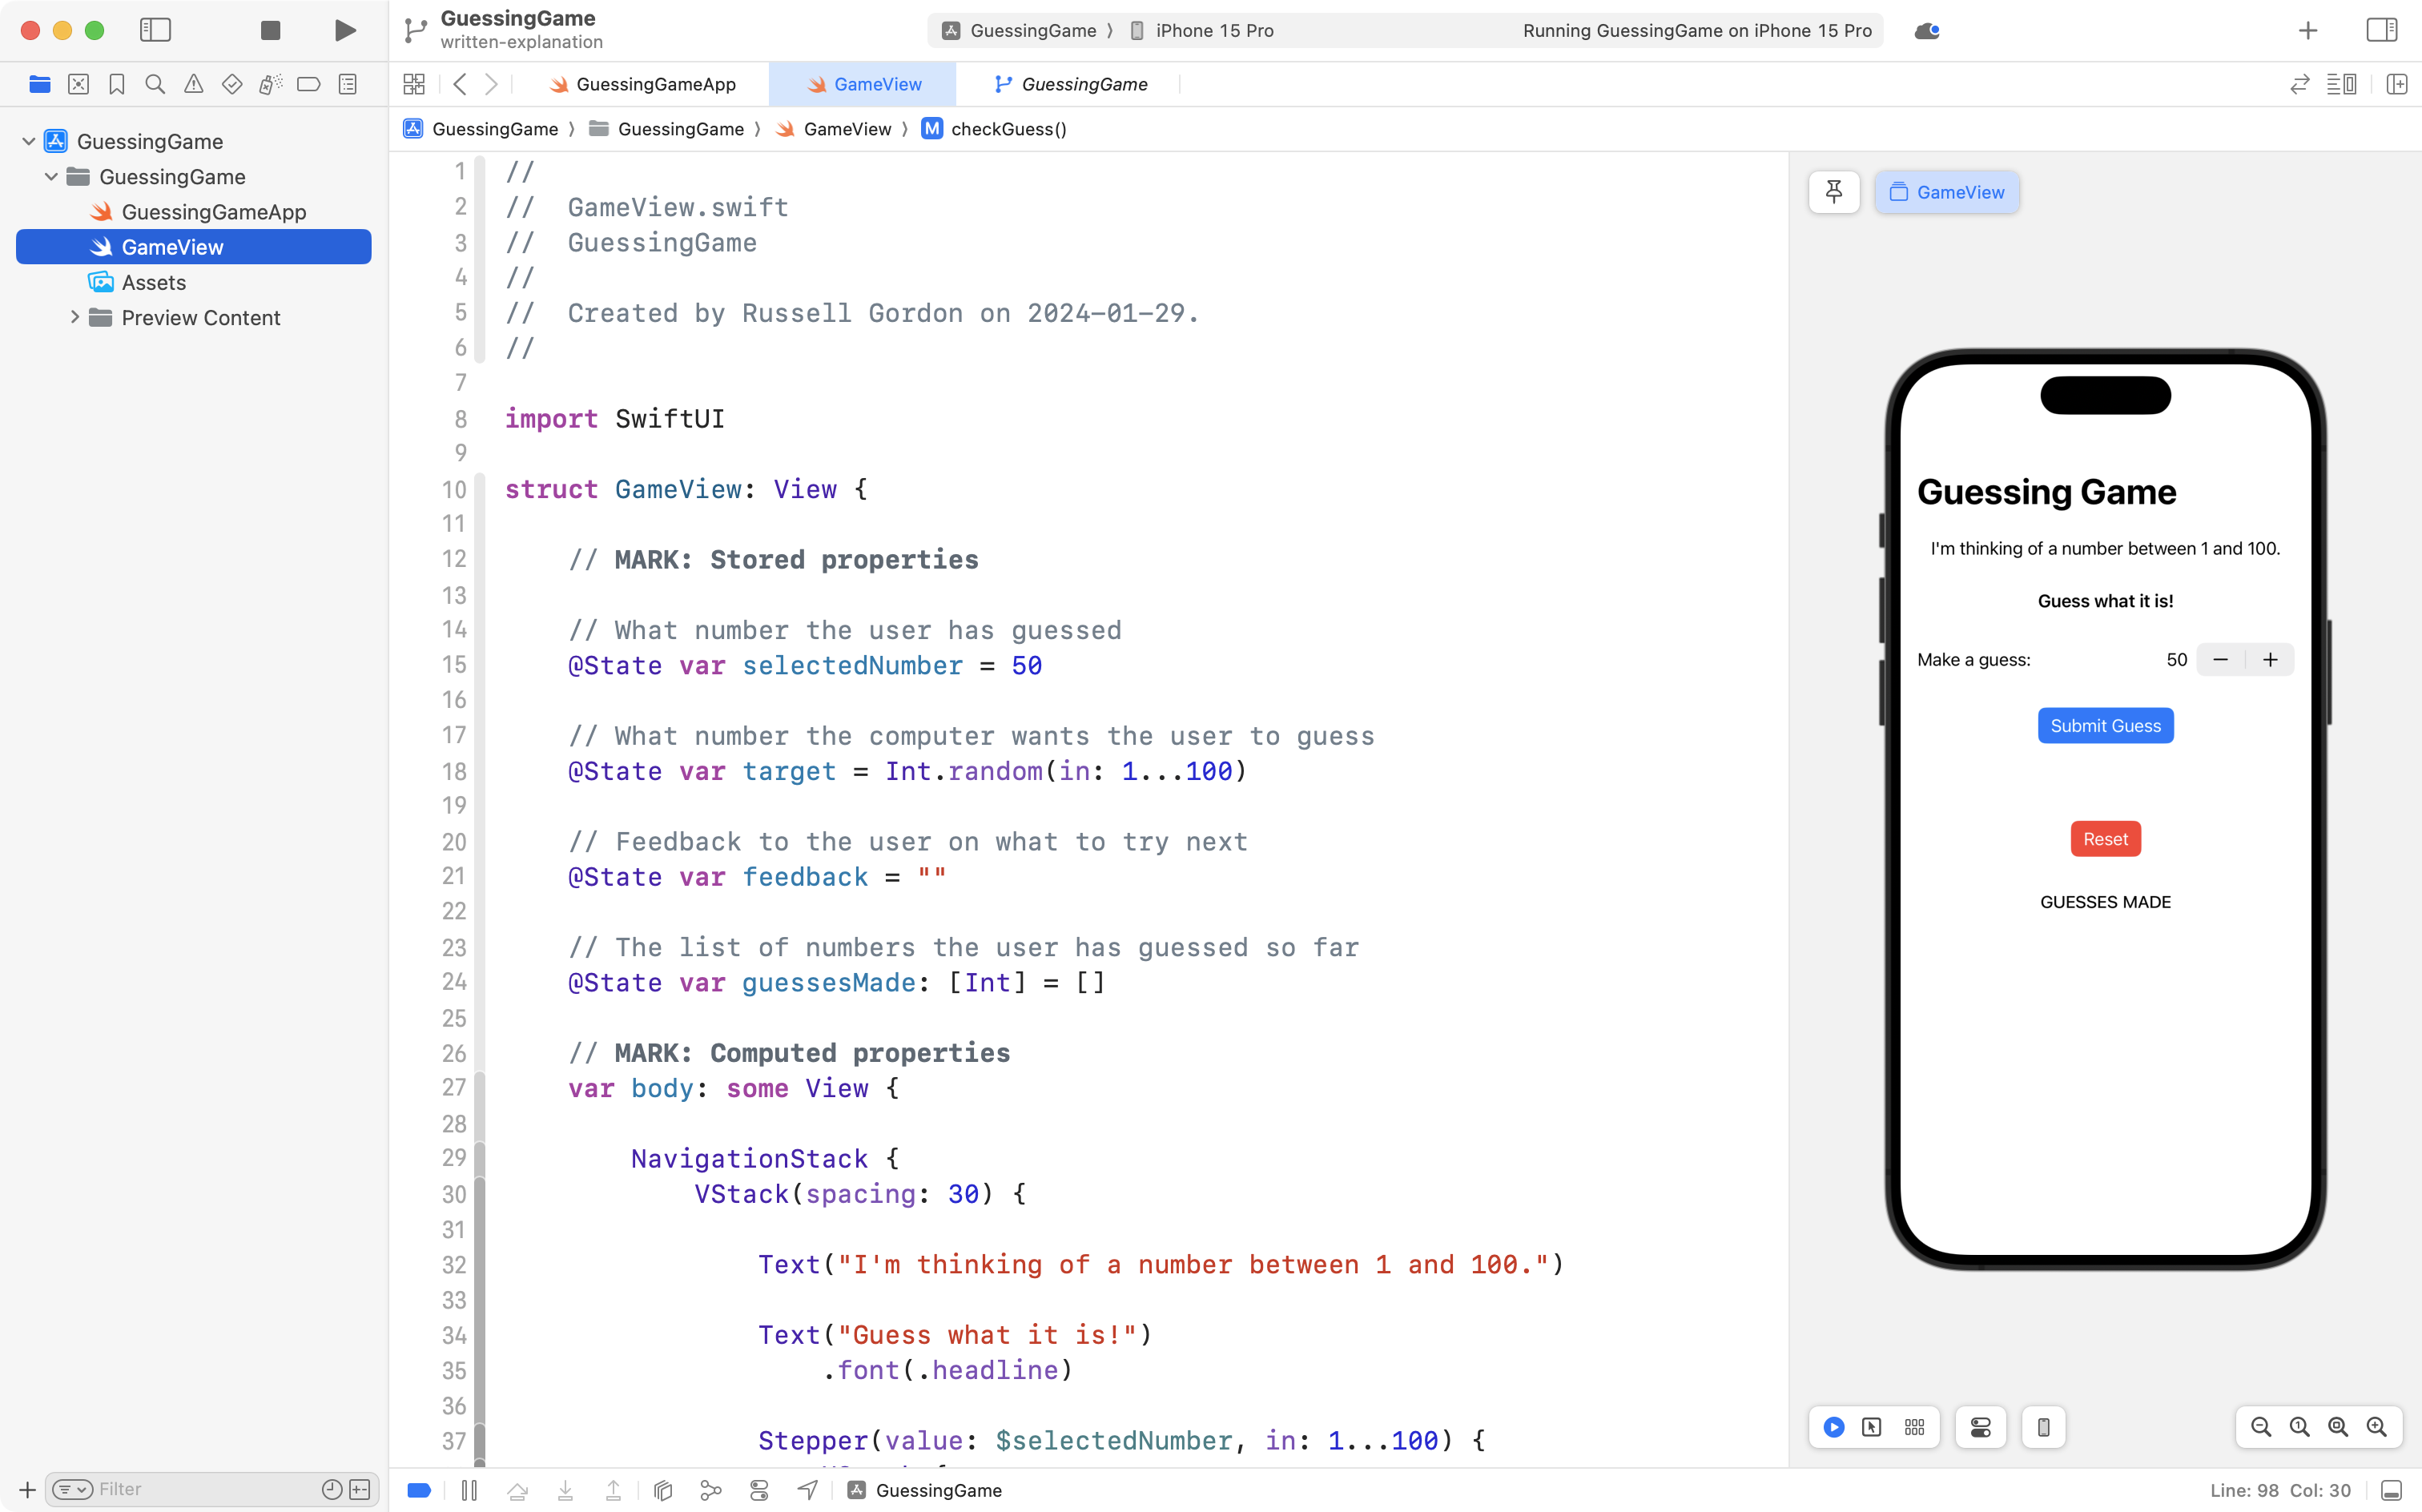
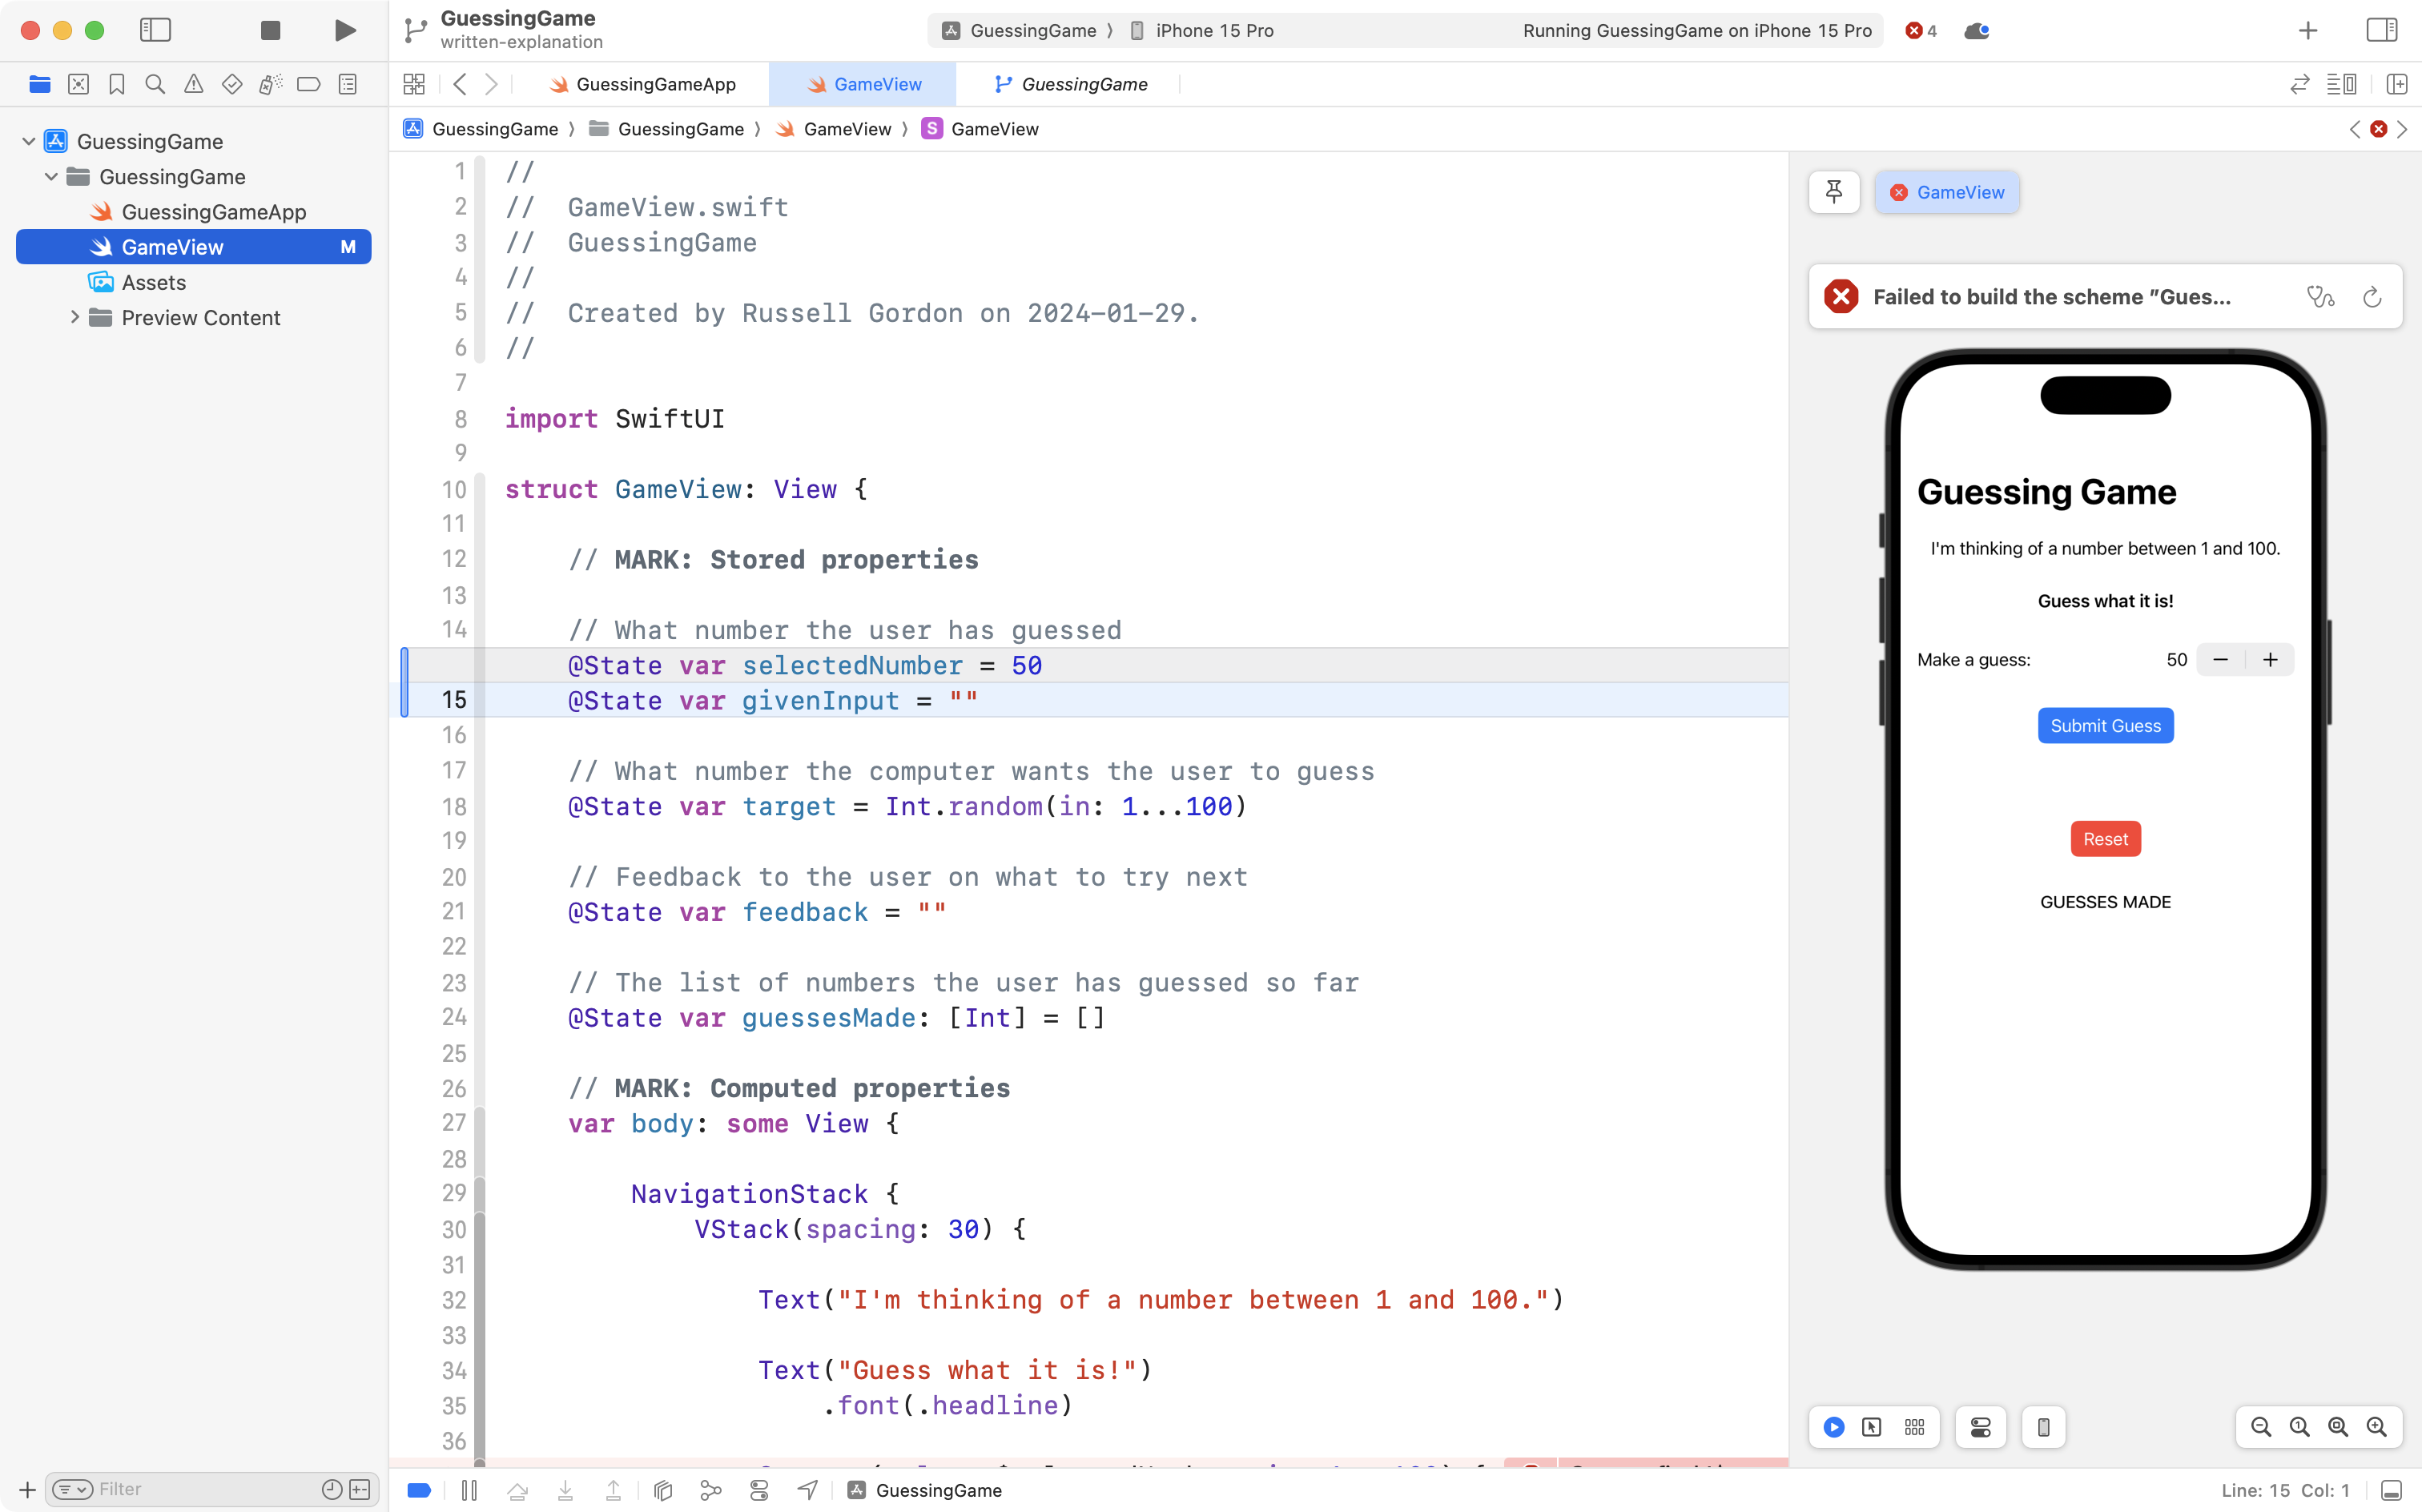
Start by changing the stored property that holds the user’s input from being an integer to being a string, like this – note that old code is in grey above and new code is in blue below:
Next, we will swap out the Stepper for a TextField instead.
Replace this code on lines 37 to 43:
Stepper(value: $selectedNumber, in: 1...100) {
	HStack {
		Text("Make a guess:")
		Spacer()
		Text("\(selectedNumber)")
	}
}
… with this code instead:
TextField("Make a guess", text: $givenInput)You program should now look like this – note the new code on lines 15 and 37:
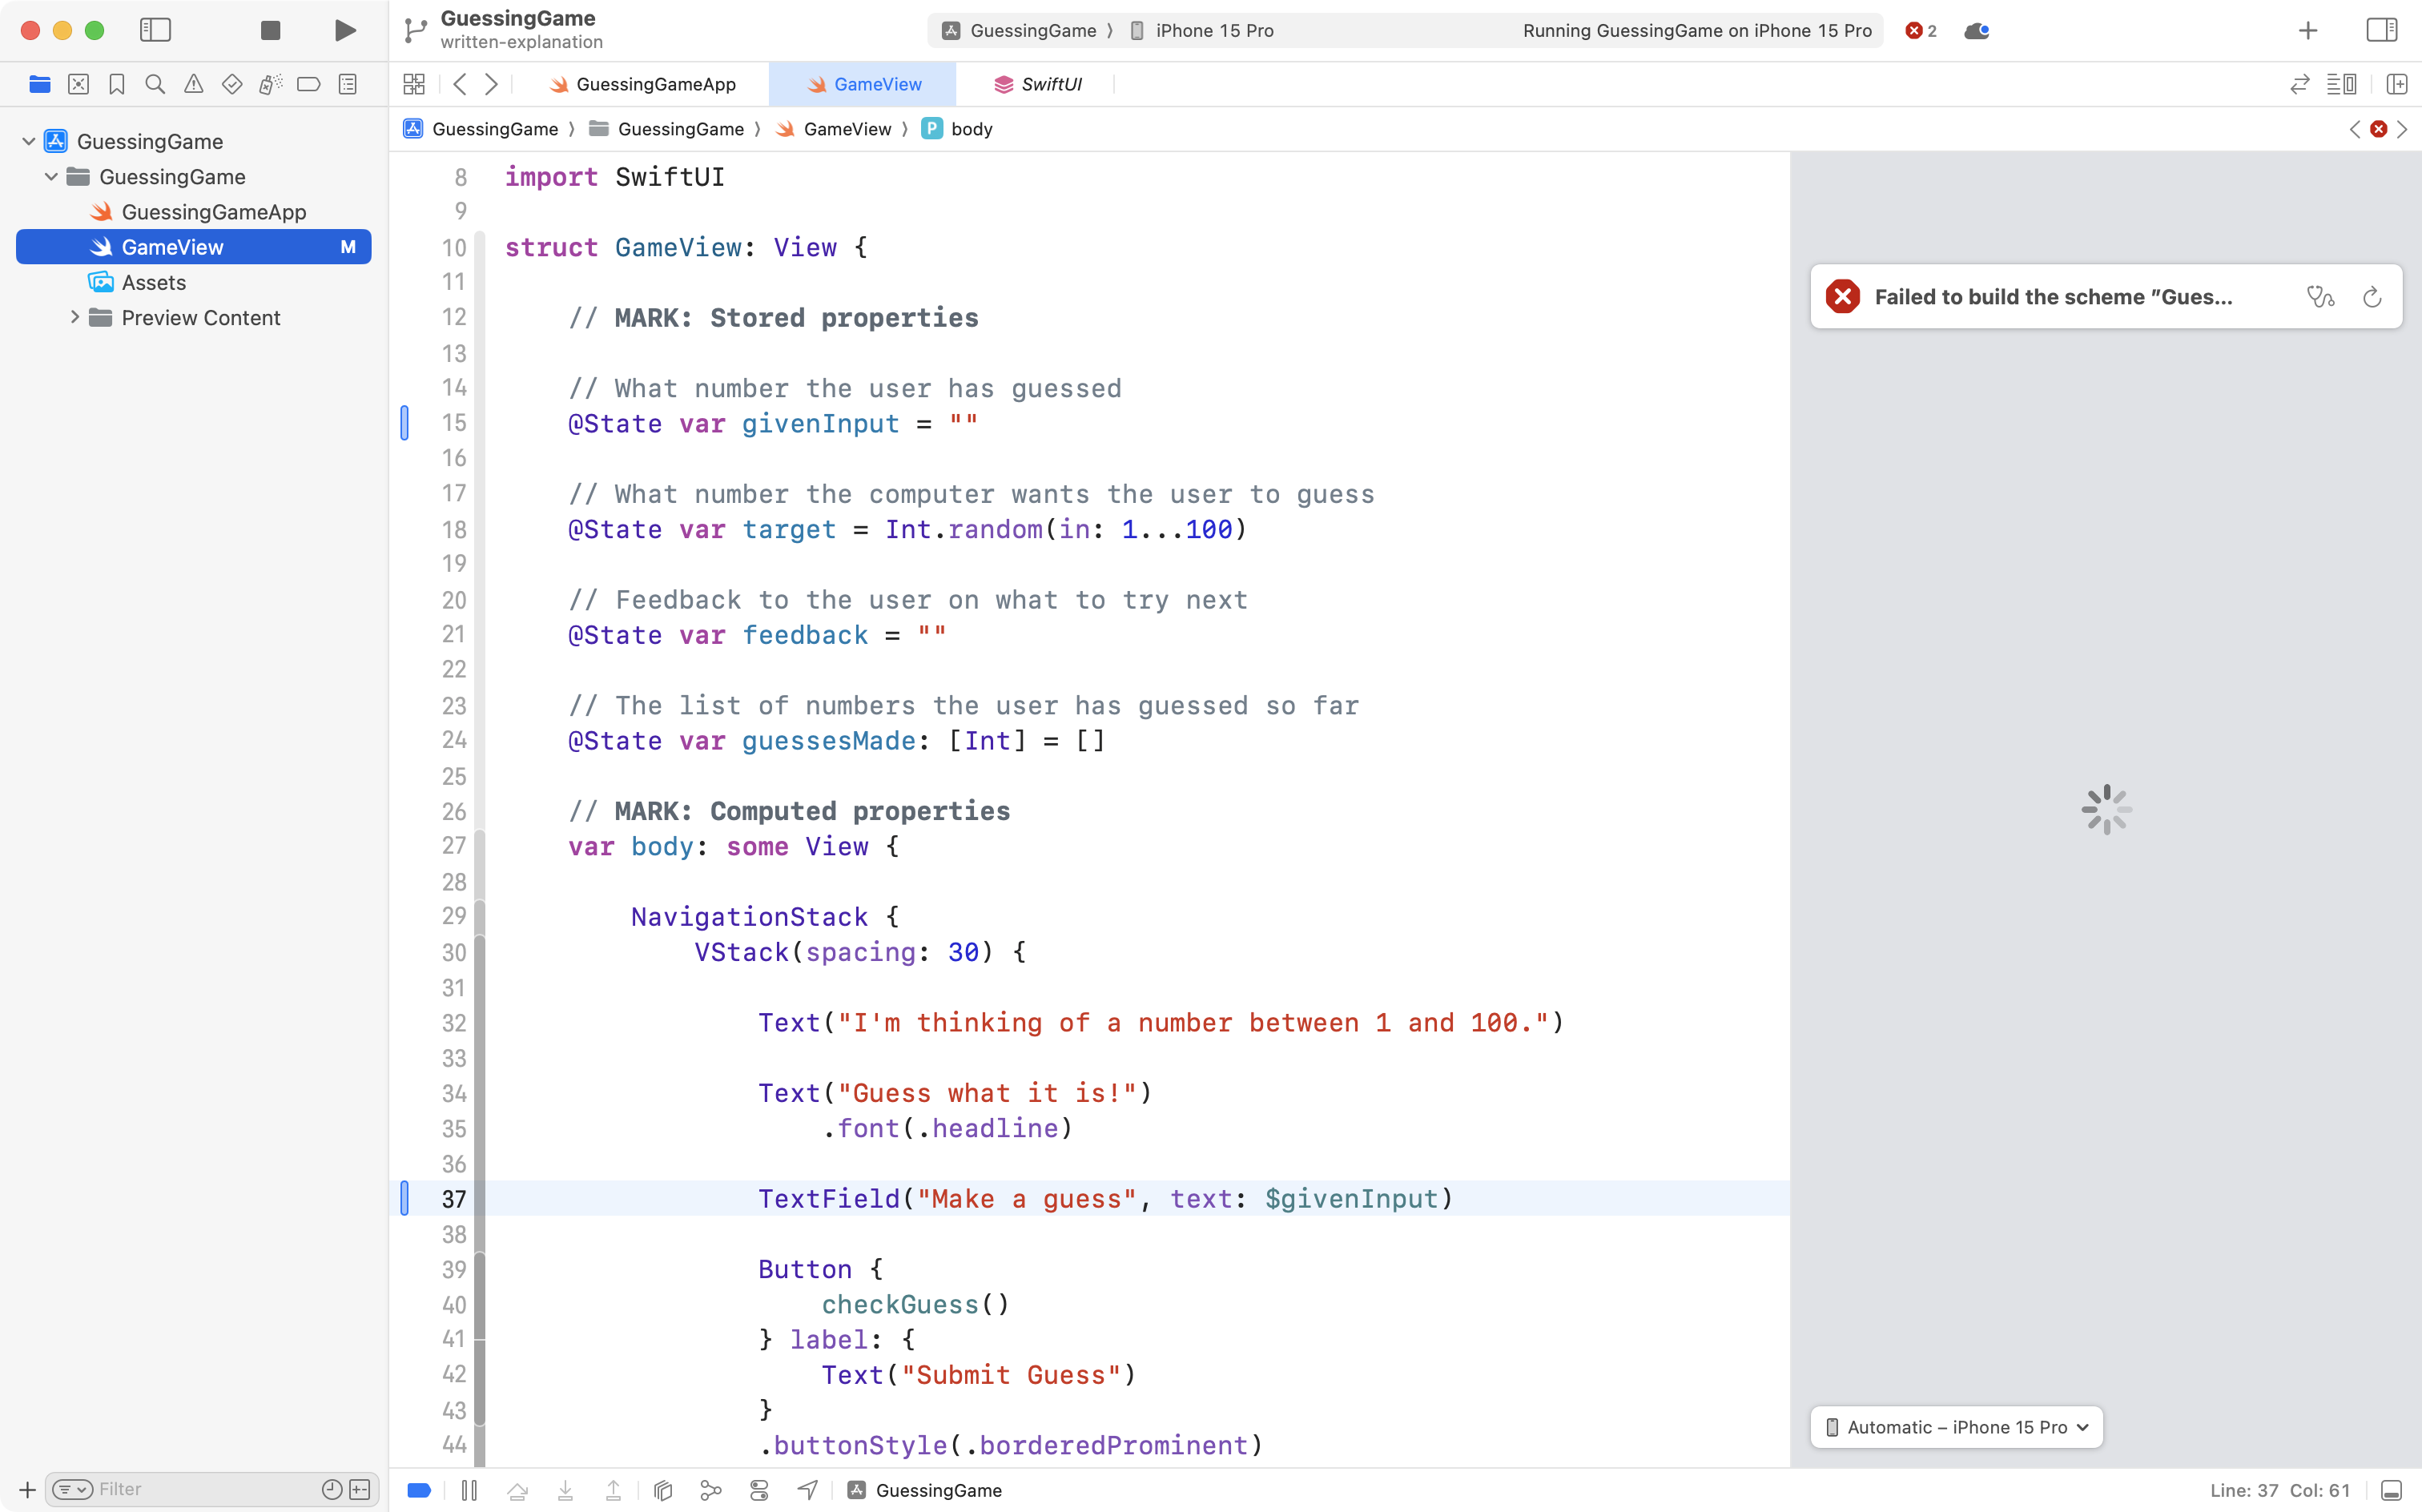
Essentially, all we have done so far is replace the stepper with a text input field, and changed the stored property that the user’s input is placed into.
Before continuing, we need to fix code in the reset function.
Scroll down to that function:
… and instead of setting the old stored property that held the user’s input back to a starting value of 50, have that line of code reset the given input back to an empty string.
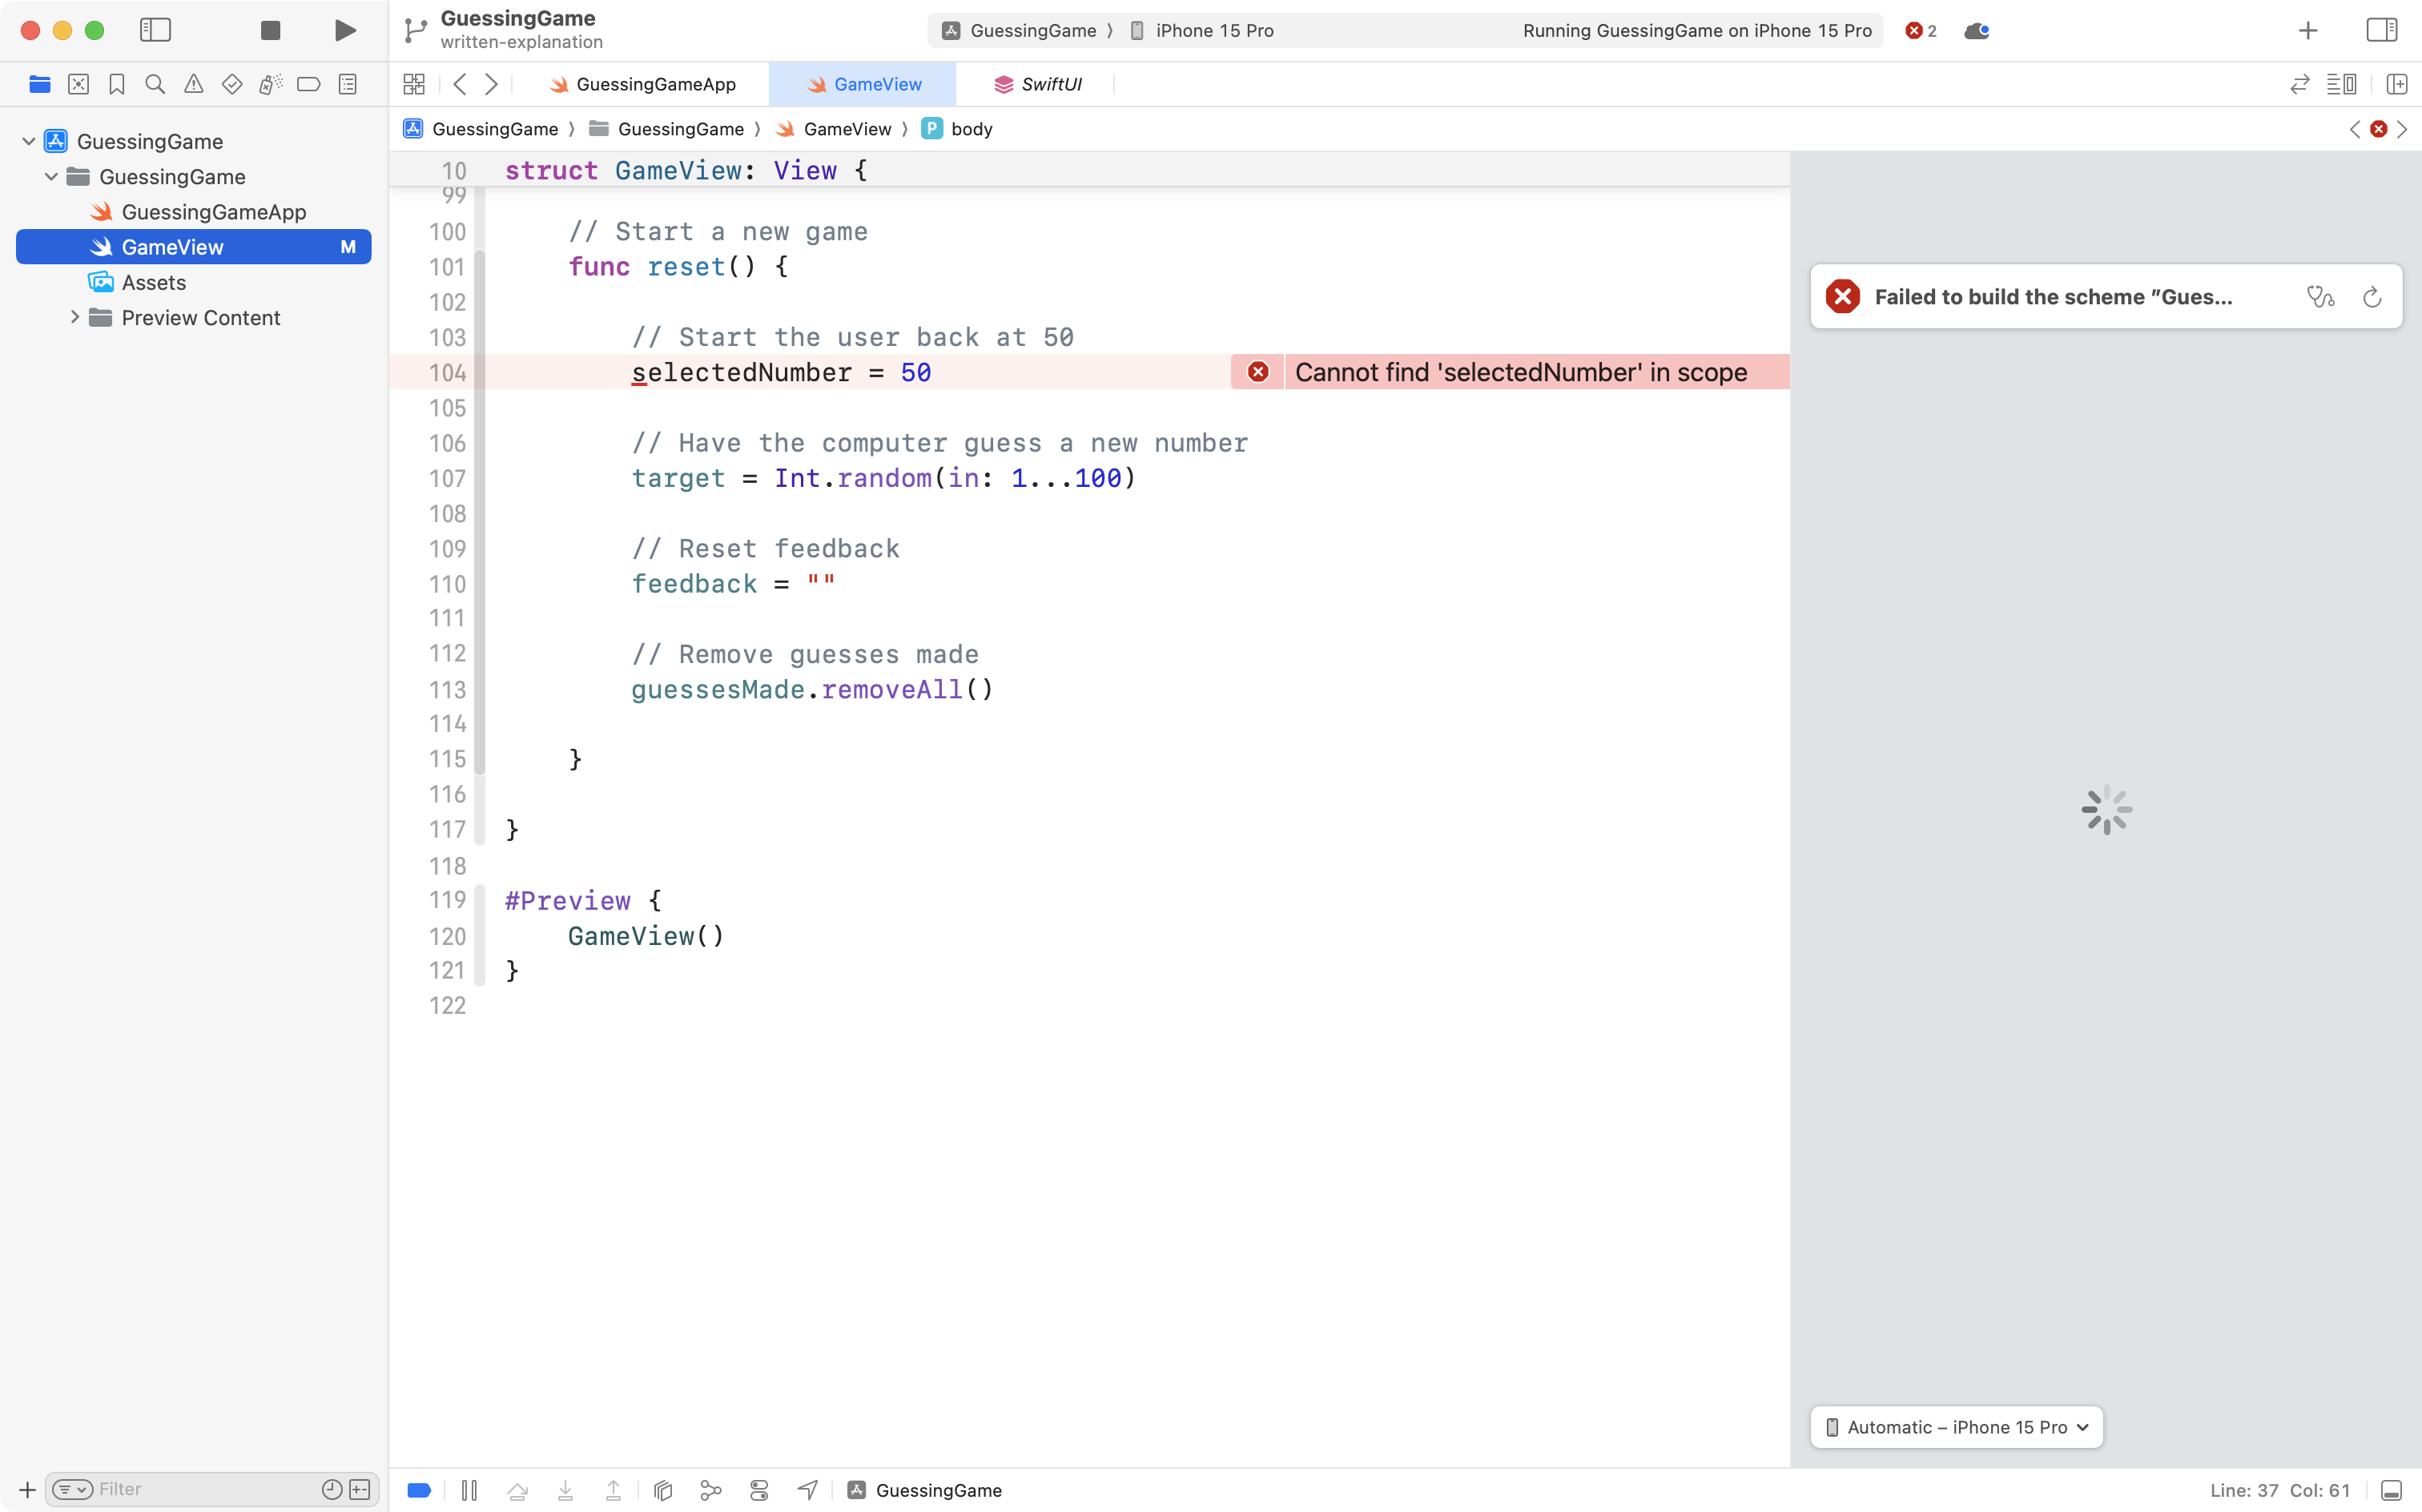
So, replace this code:
// Start the user back at 50
selectedNumber = 50
… with this:
// Start the user back with an empty string
givenInput = ""
… like this:
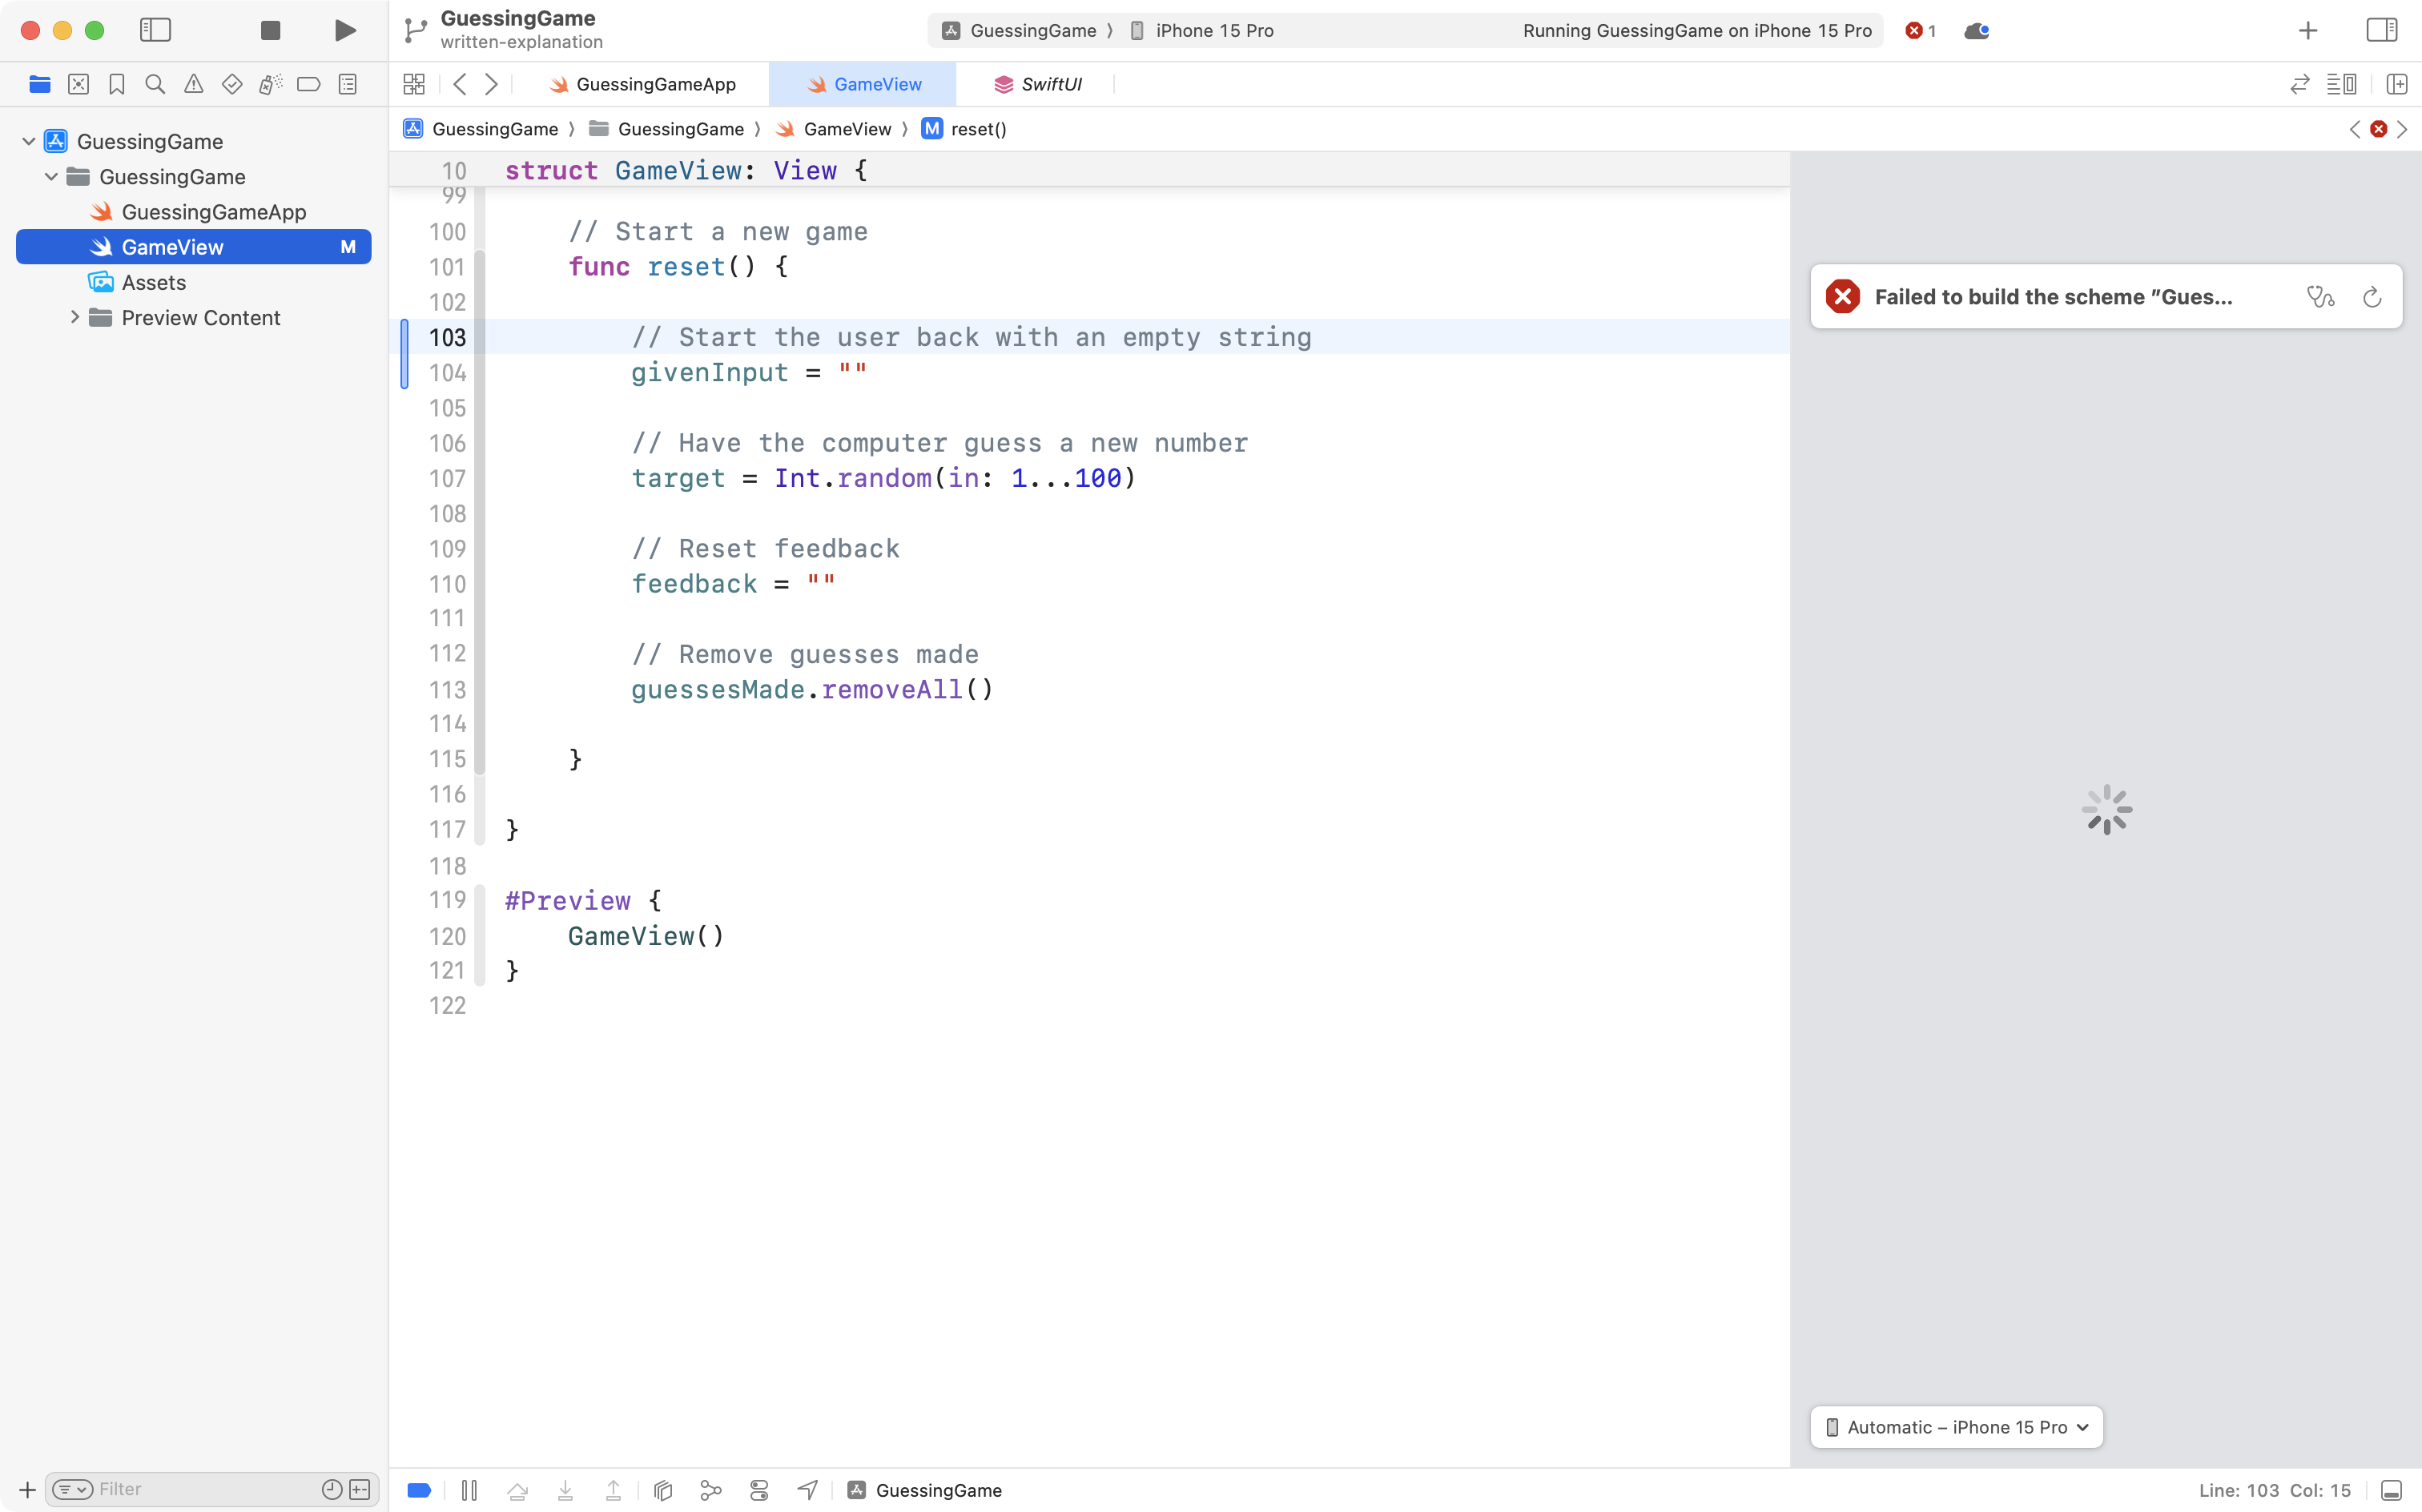
Alright – so we are now accepting text-based input. Step one is complete.
The second and final step is to convert that text-based input into a number, so that we can do our comparison to guide the user to a correct answer, and tell them when they have won the guessing game.
Scroll up to the checkGuess function:

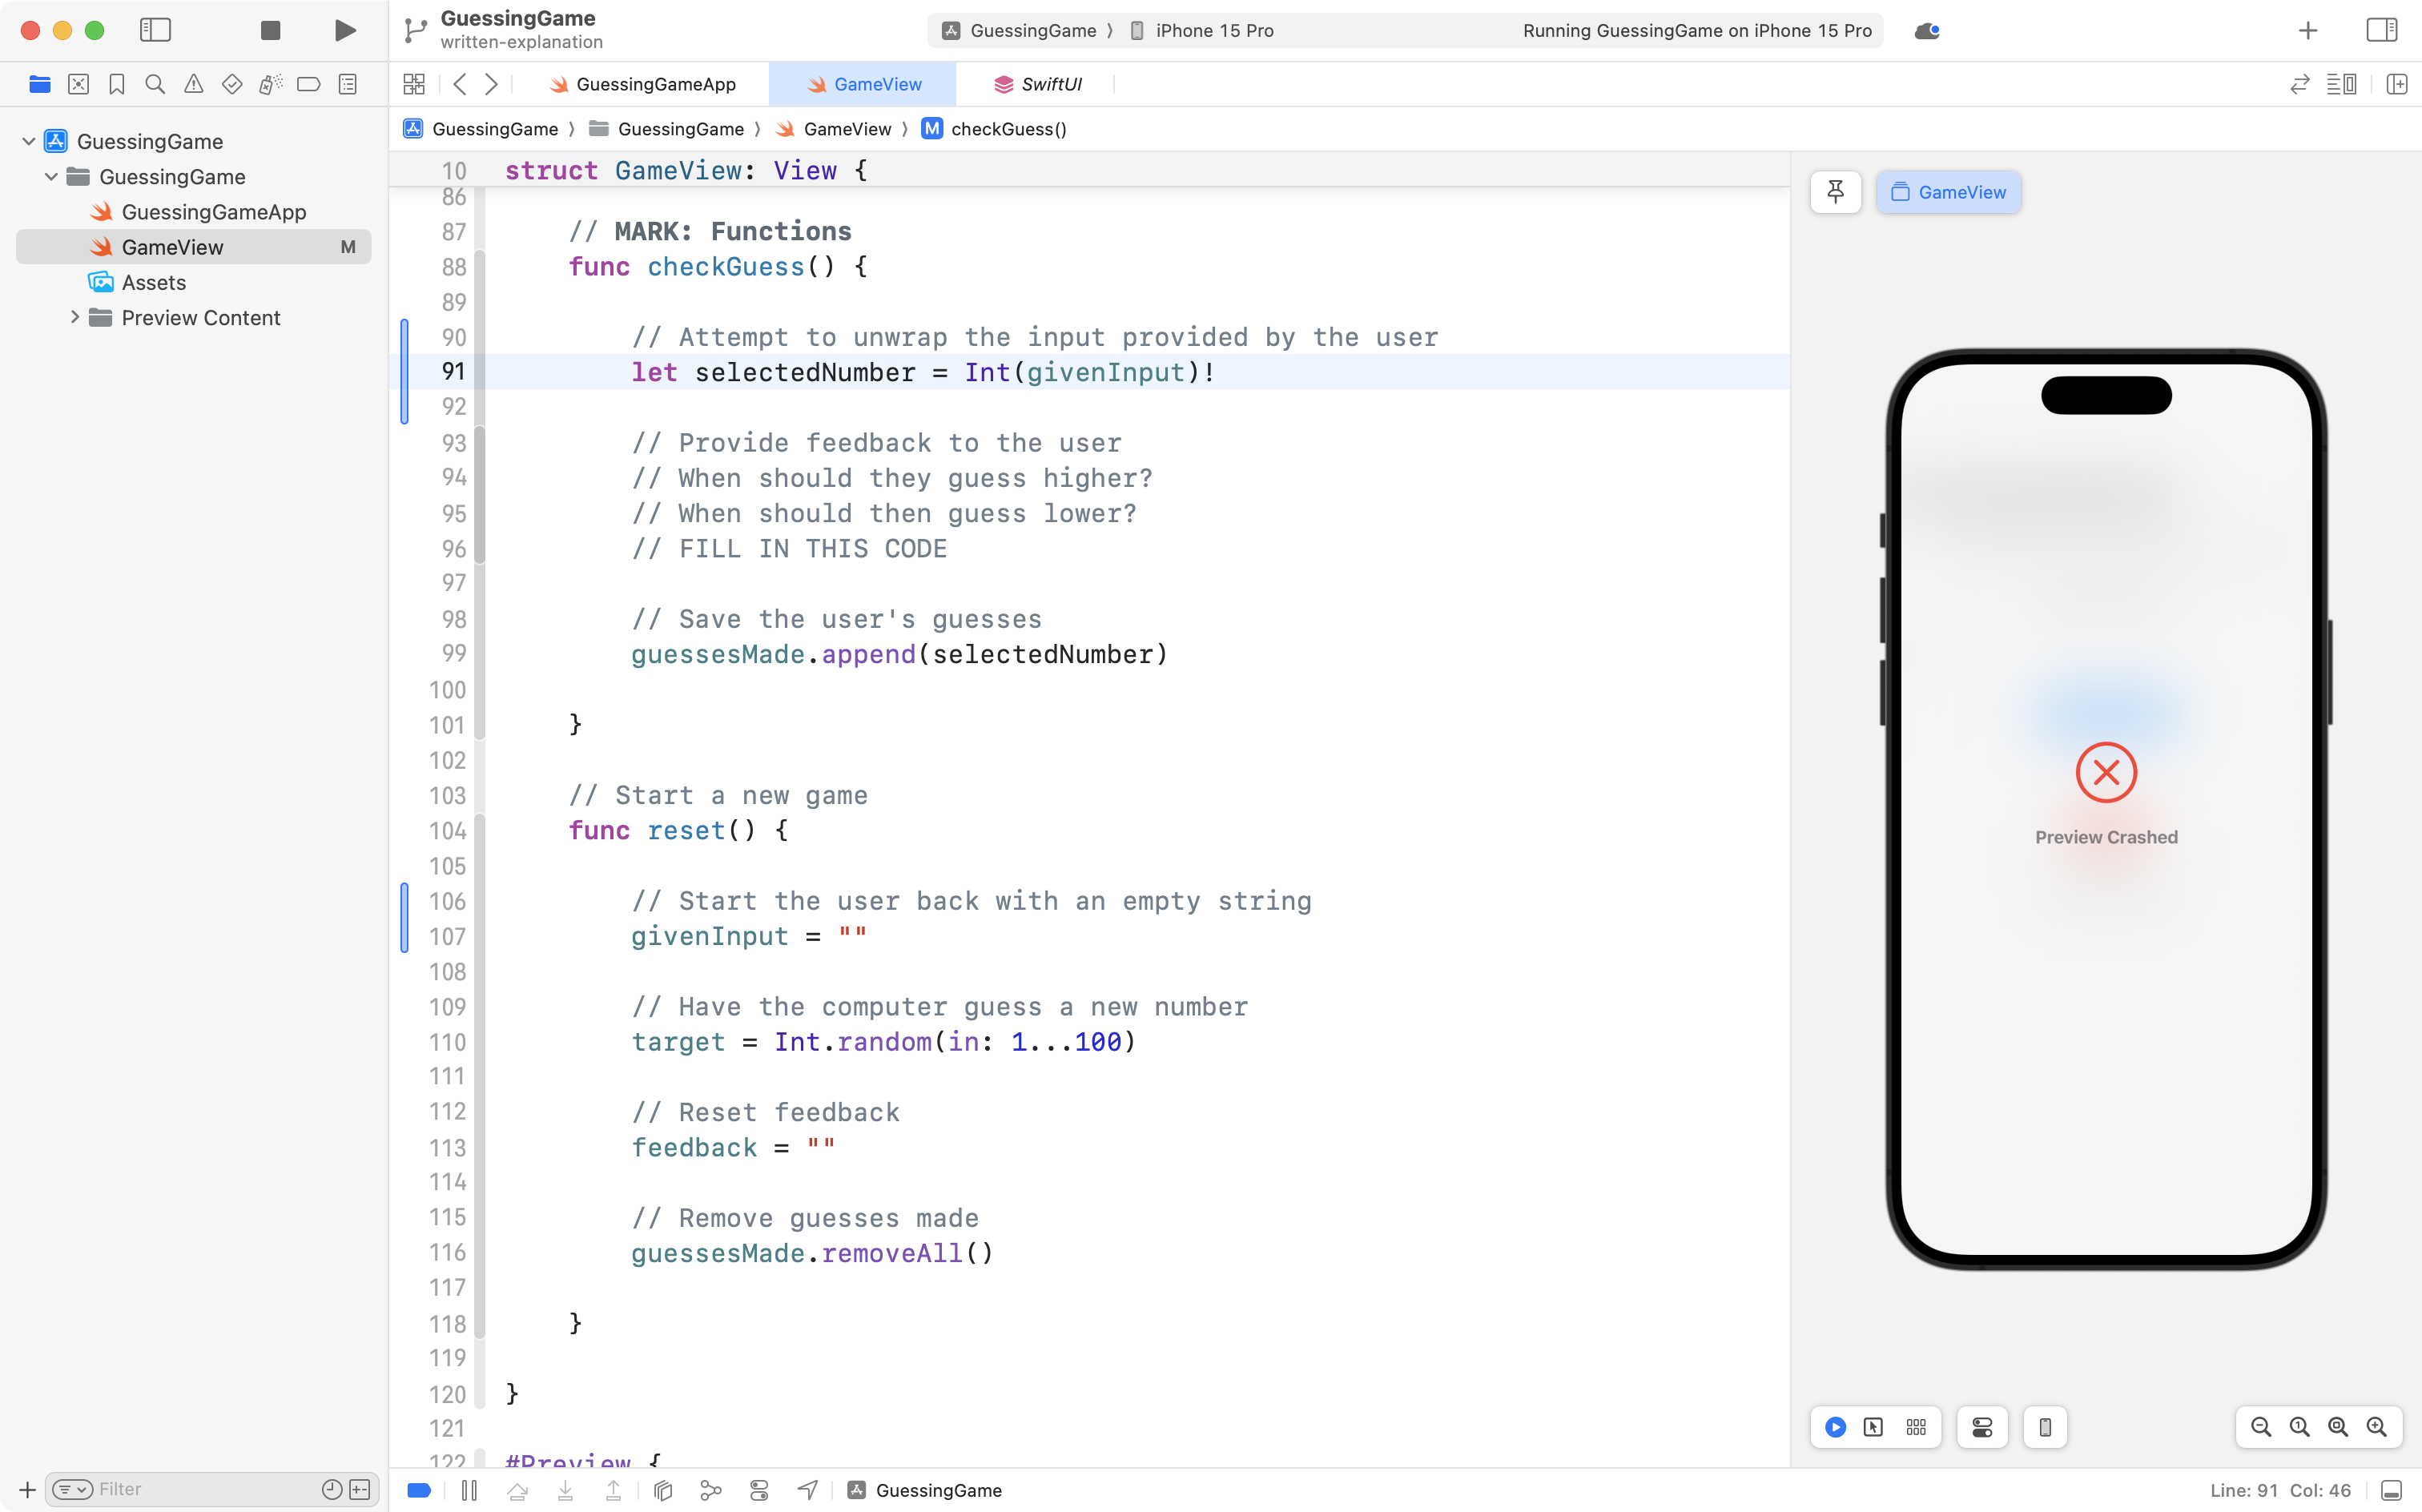
Above the section of code where we attempt to provide feedback to the user, add this code:
// Attempt to unwrap the input provided by the user
let selectedNumber = Int(givenInput)!
… like this:
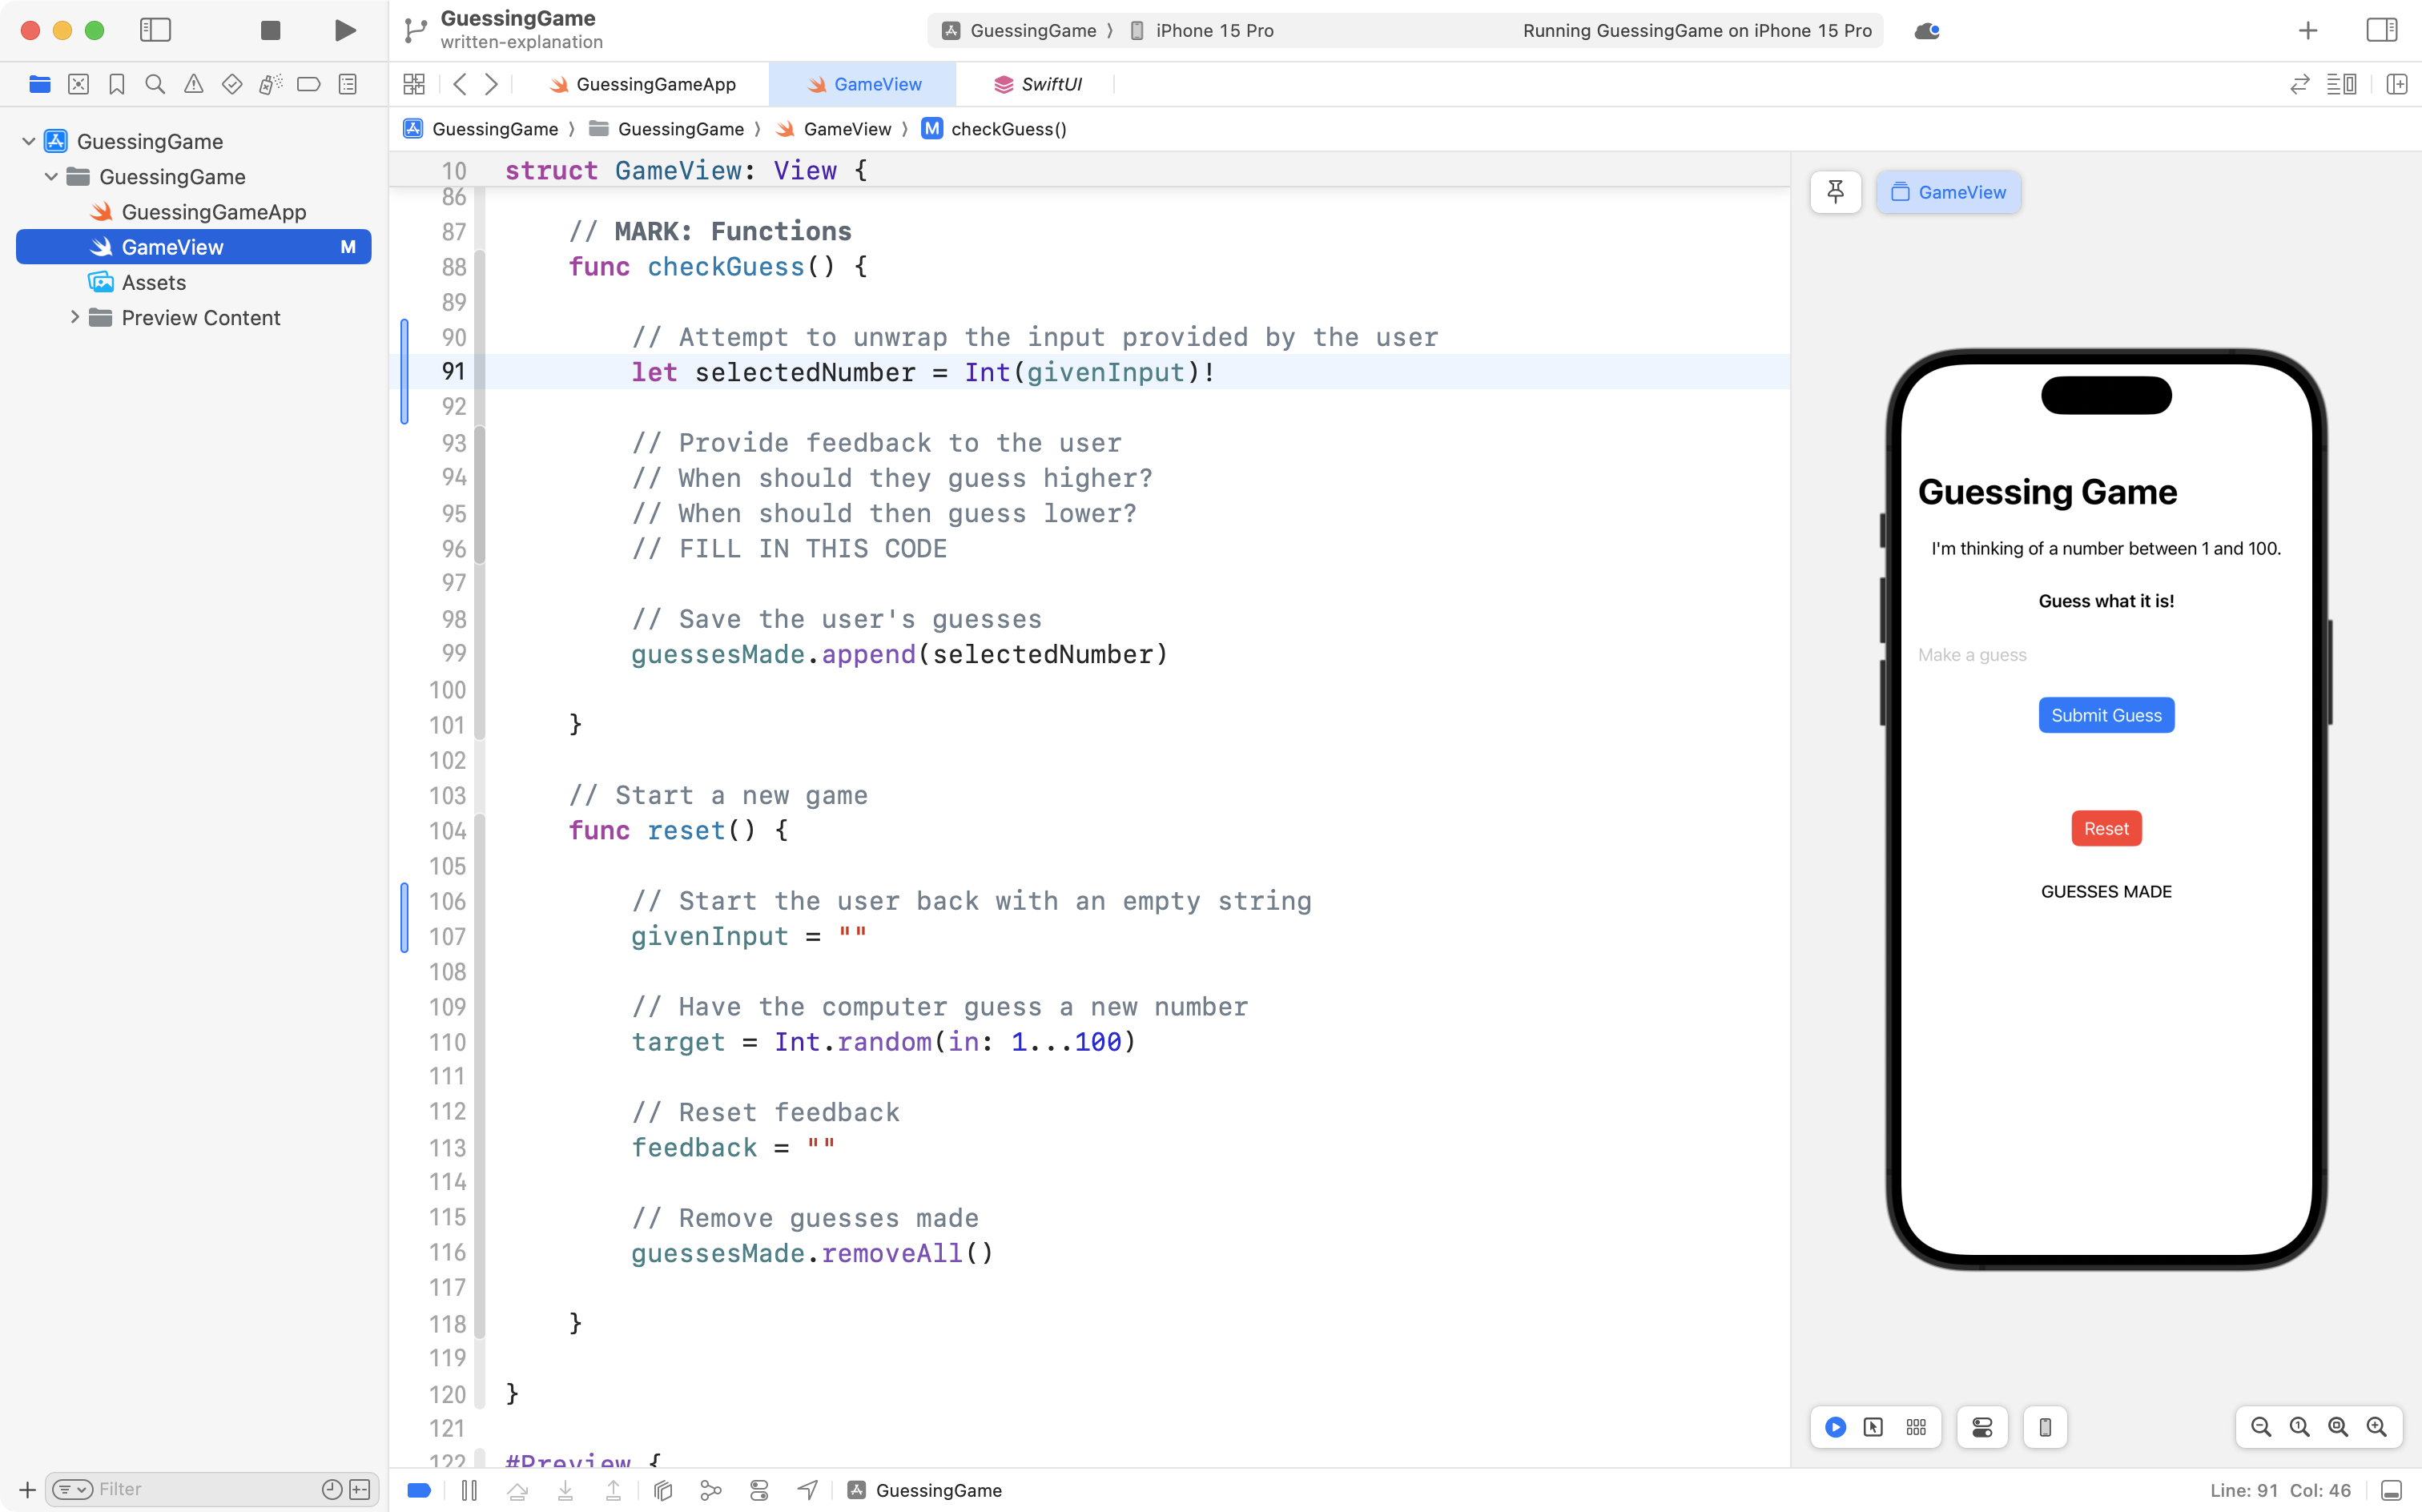
Of course, this code is not the recommended approach to doing the conversion.
Try out the program – if you type in numbers – everything works.
If you type in something that cannot be converted into an integer:
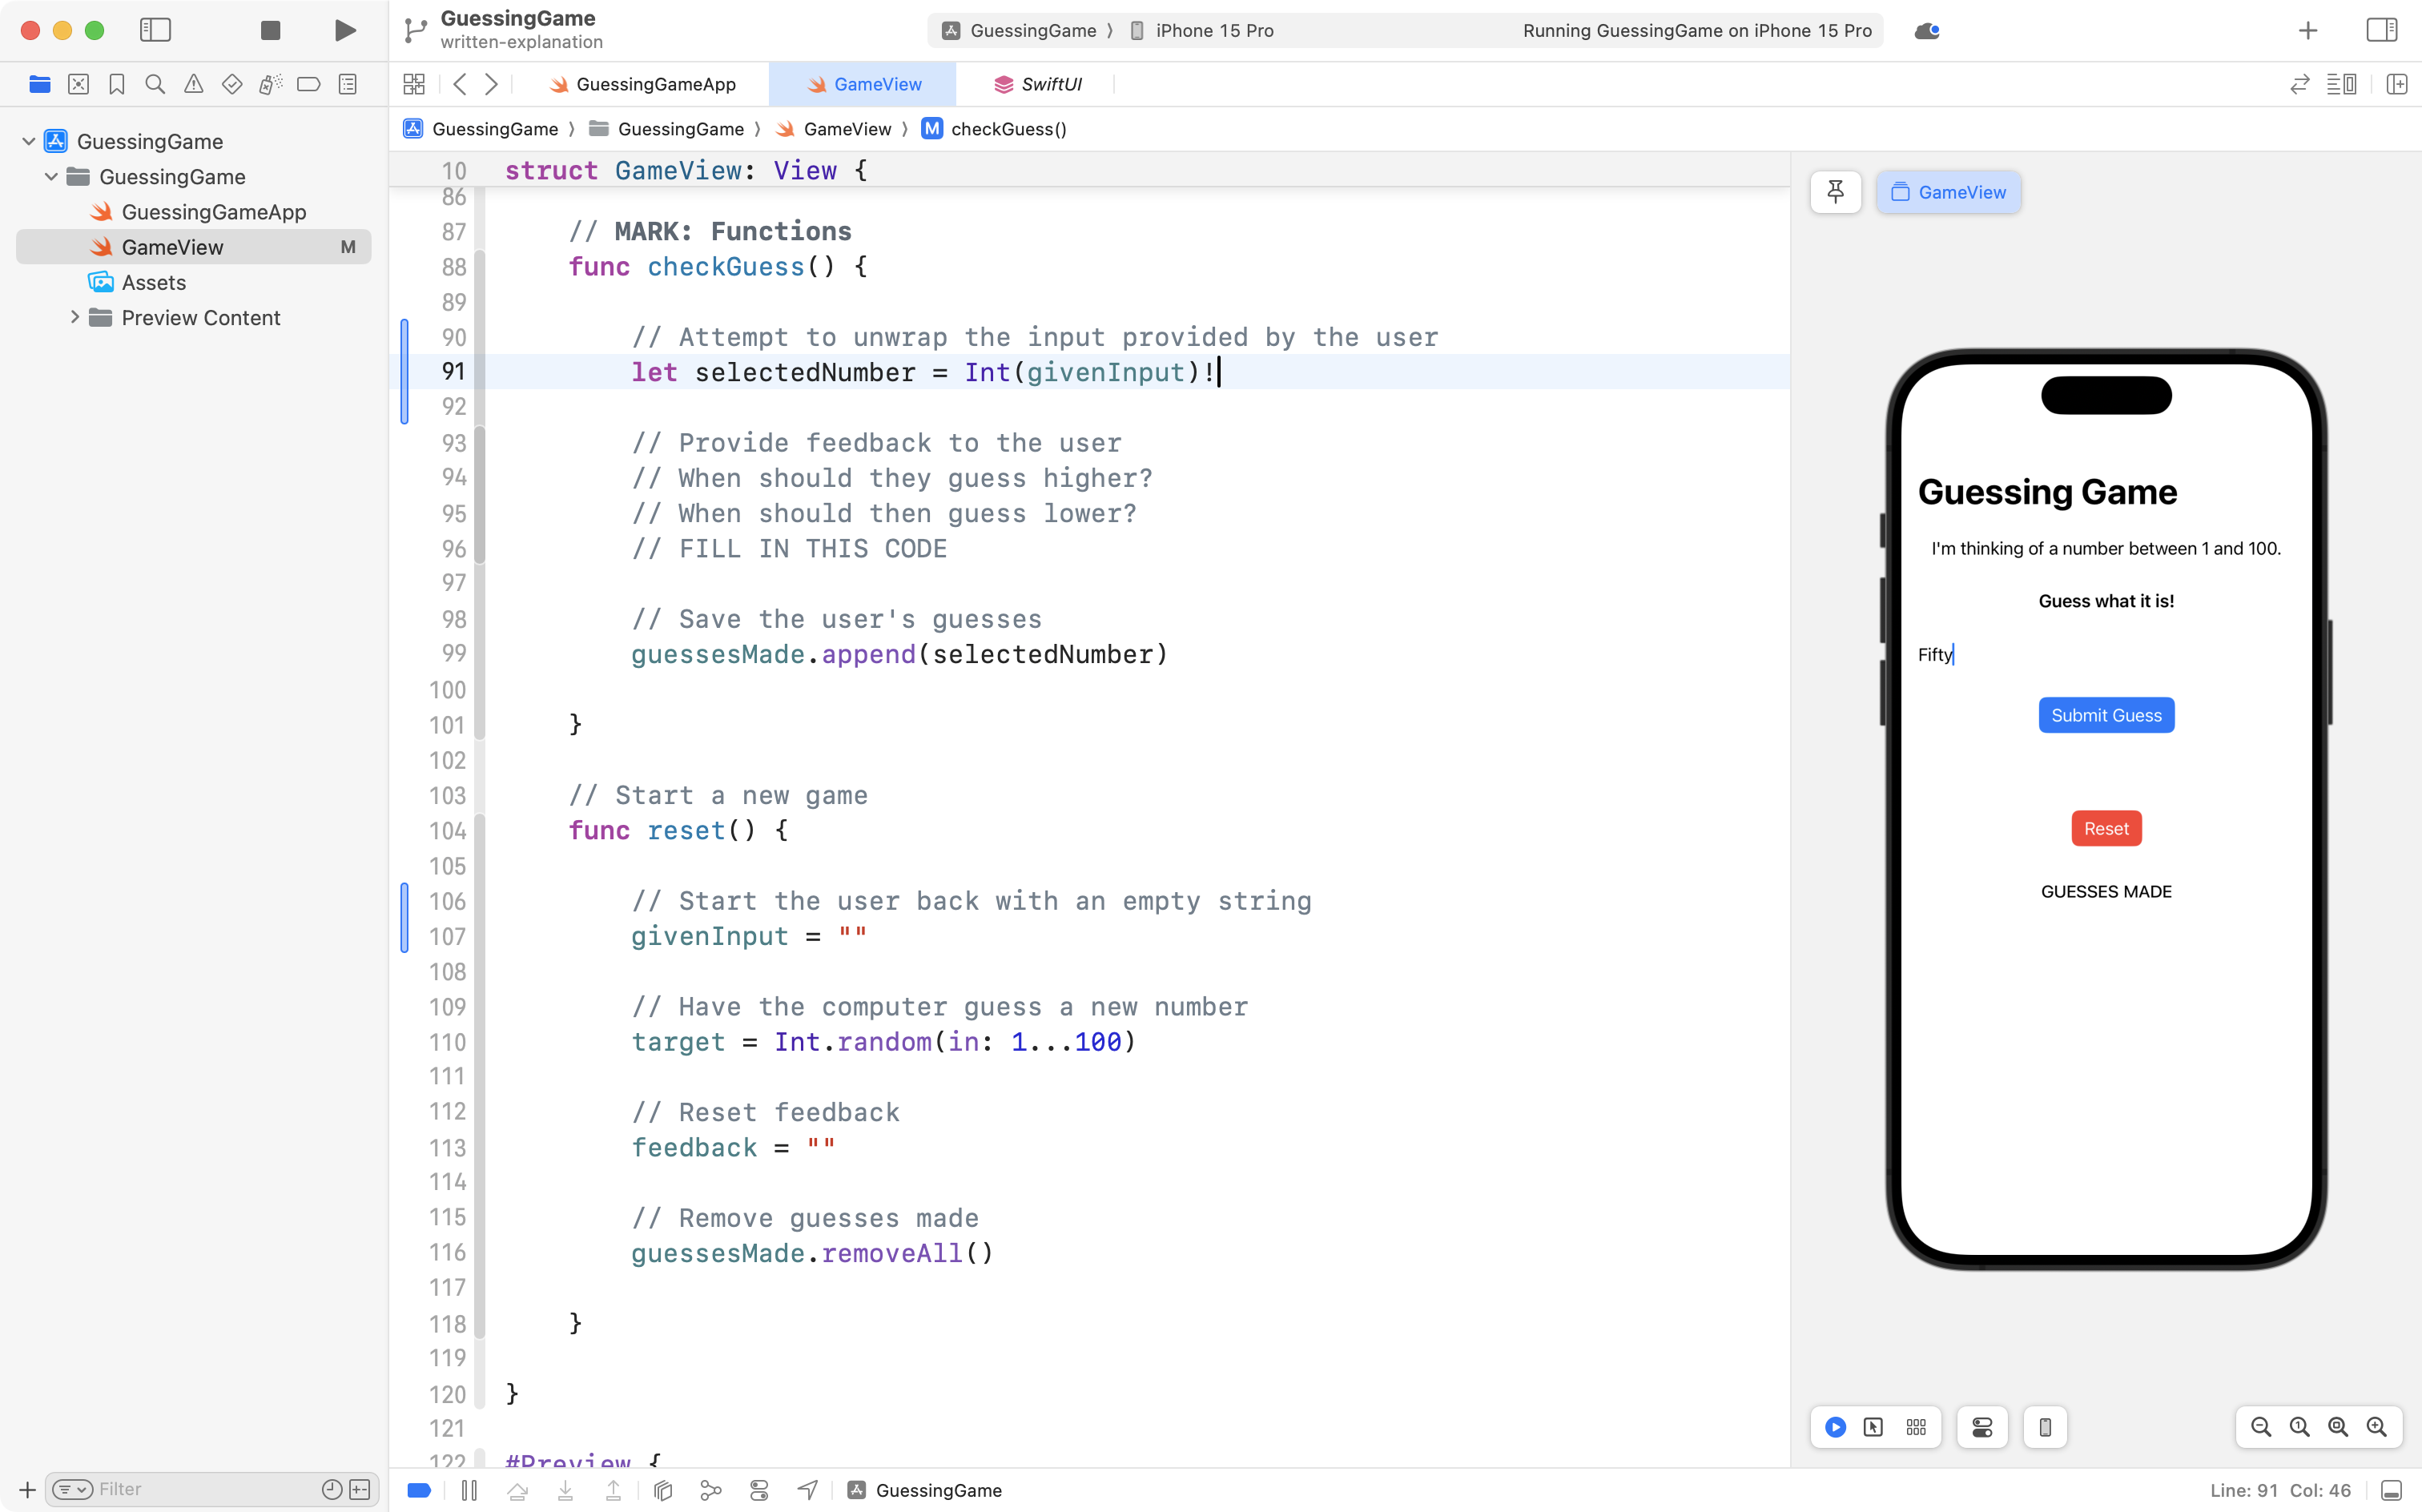
… and then try to submit your guess, the program will crash:
So, we should unwrap the conversion safely, using a guard statement instead.
Change the code on line 91 from this:
let selectedNumber = Int(givenInput)!… to this instead:
guard let selectedNumber = Int(givenInput) else {
	feedback = "Please provide an integer."
	return
}
… like this:
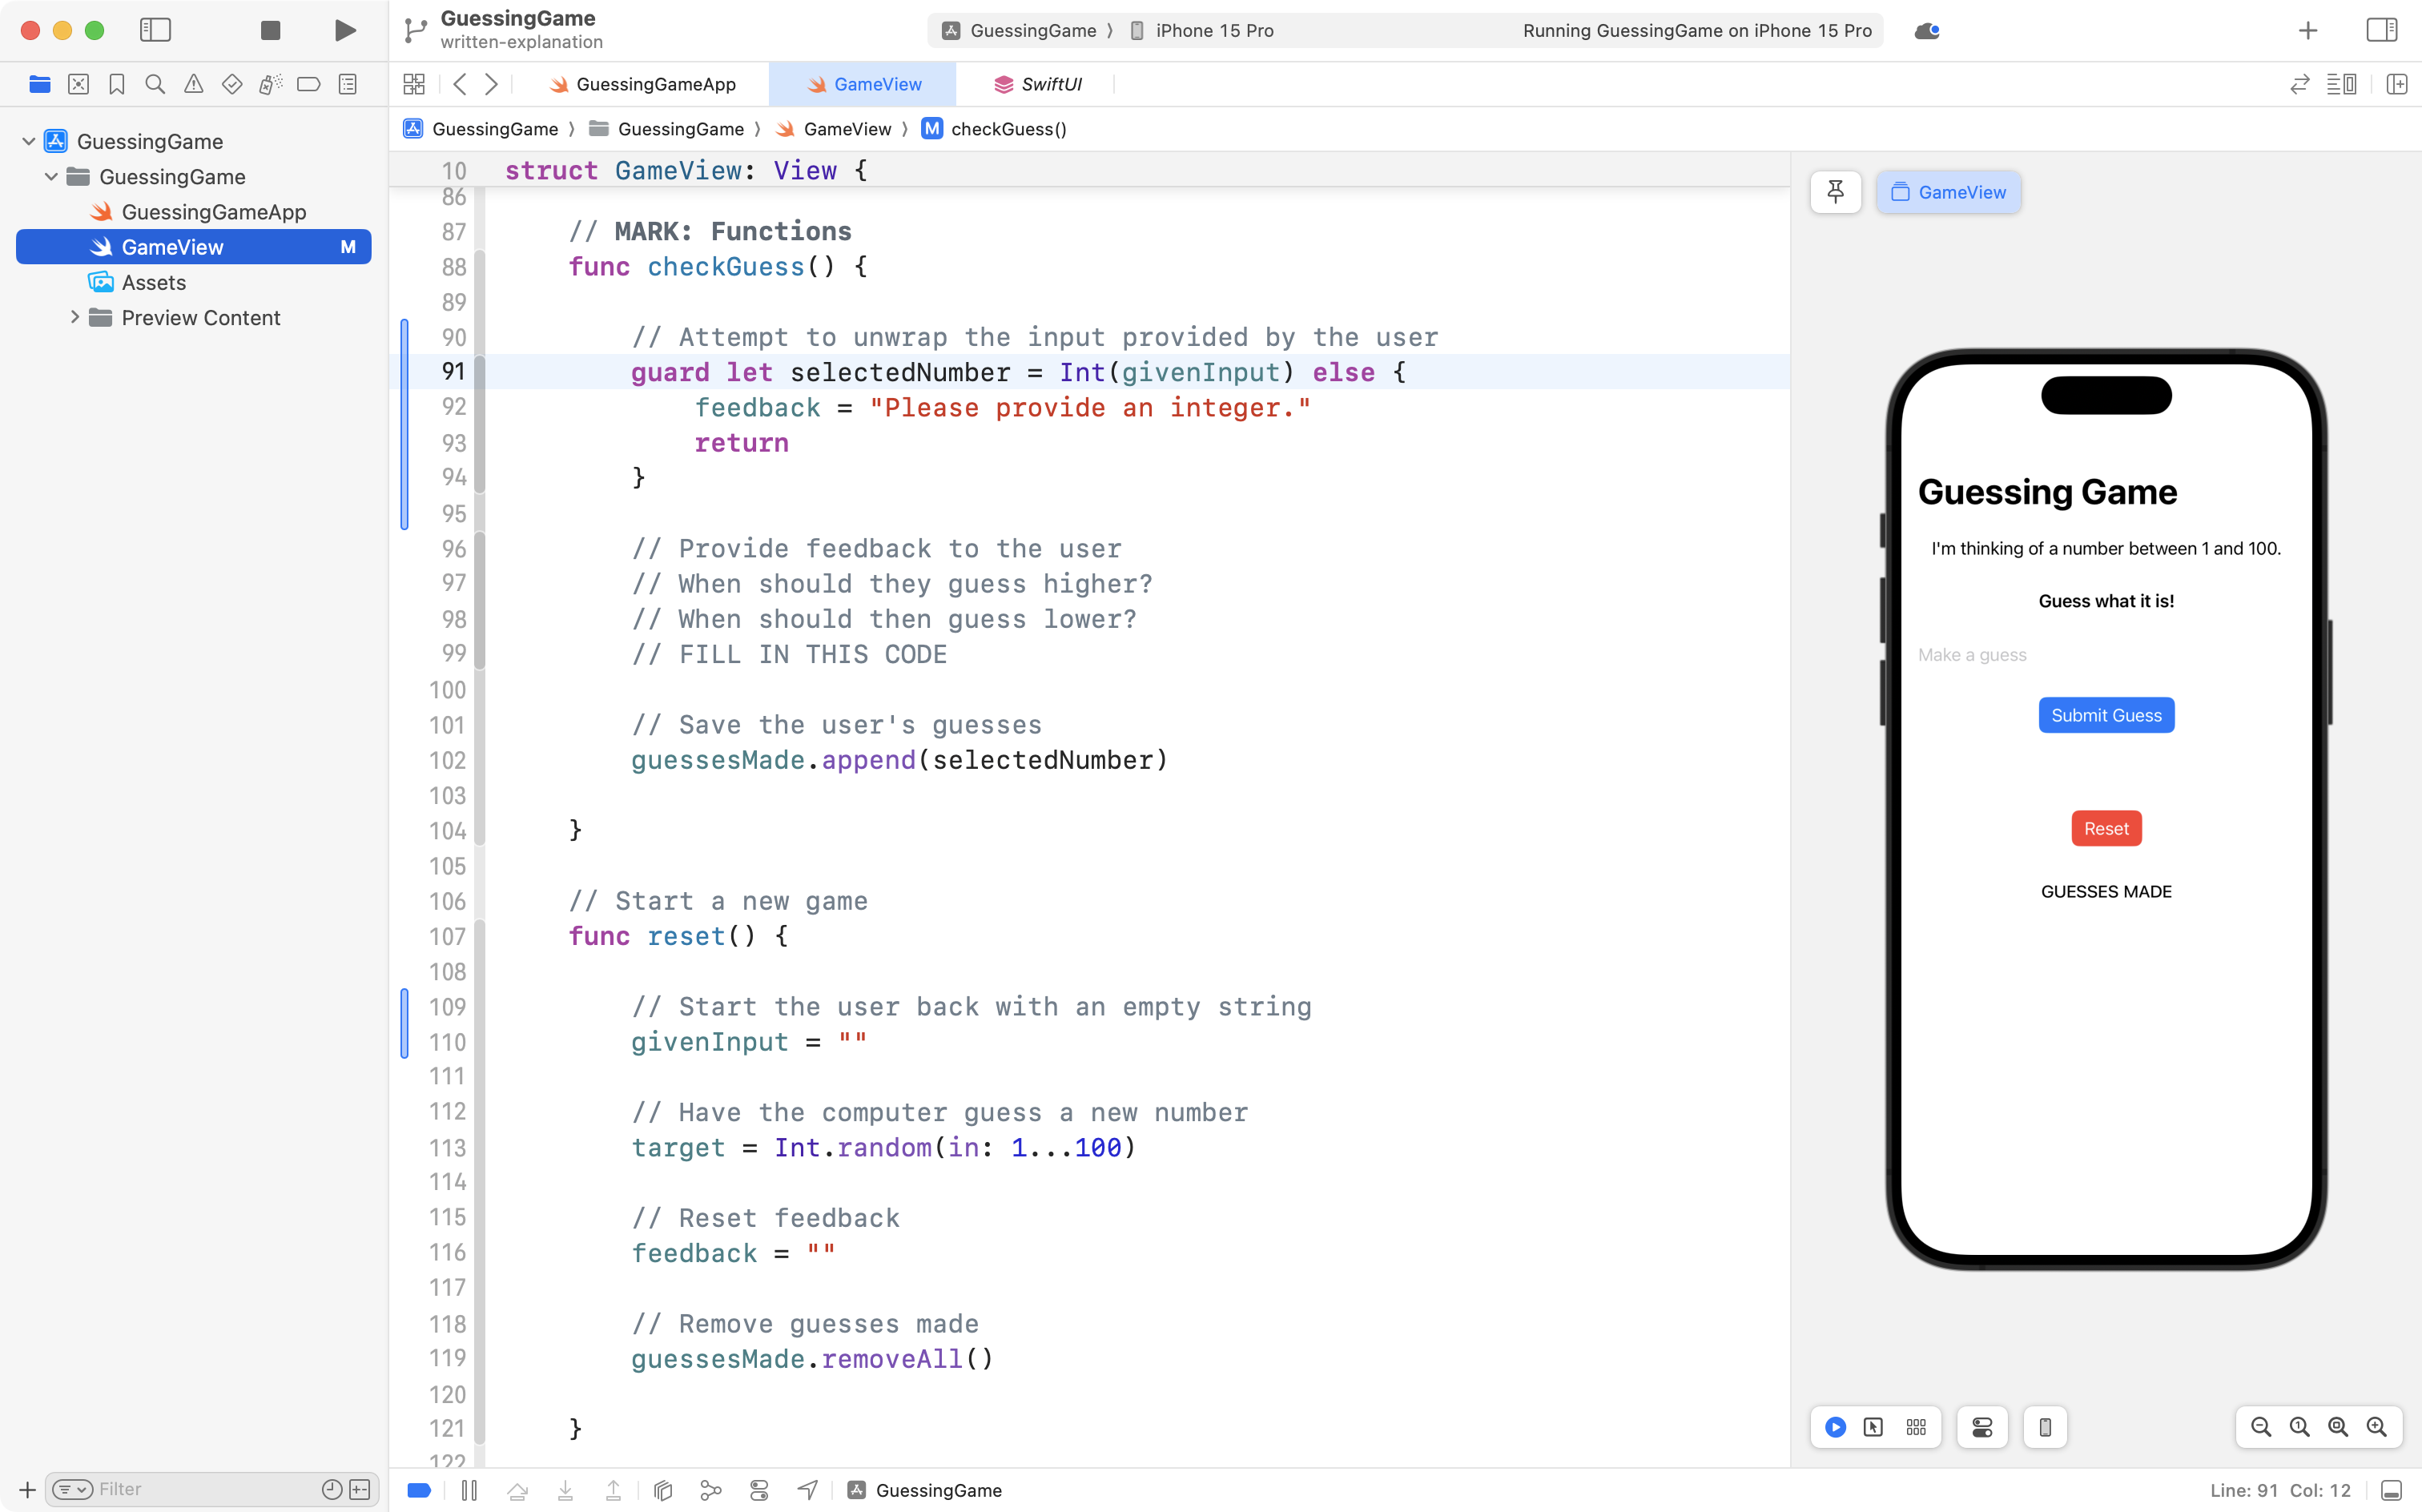
Now try providing incorrect input, and you will see that appropriate feedback is given:

Exercise
Setup
Create a new iOS project Arithmetic Buddy.
Delete ContentView.
Add a new group named Views.
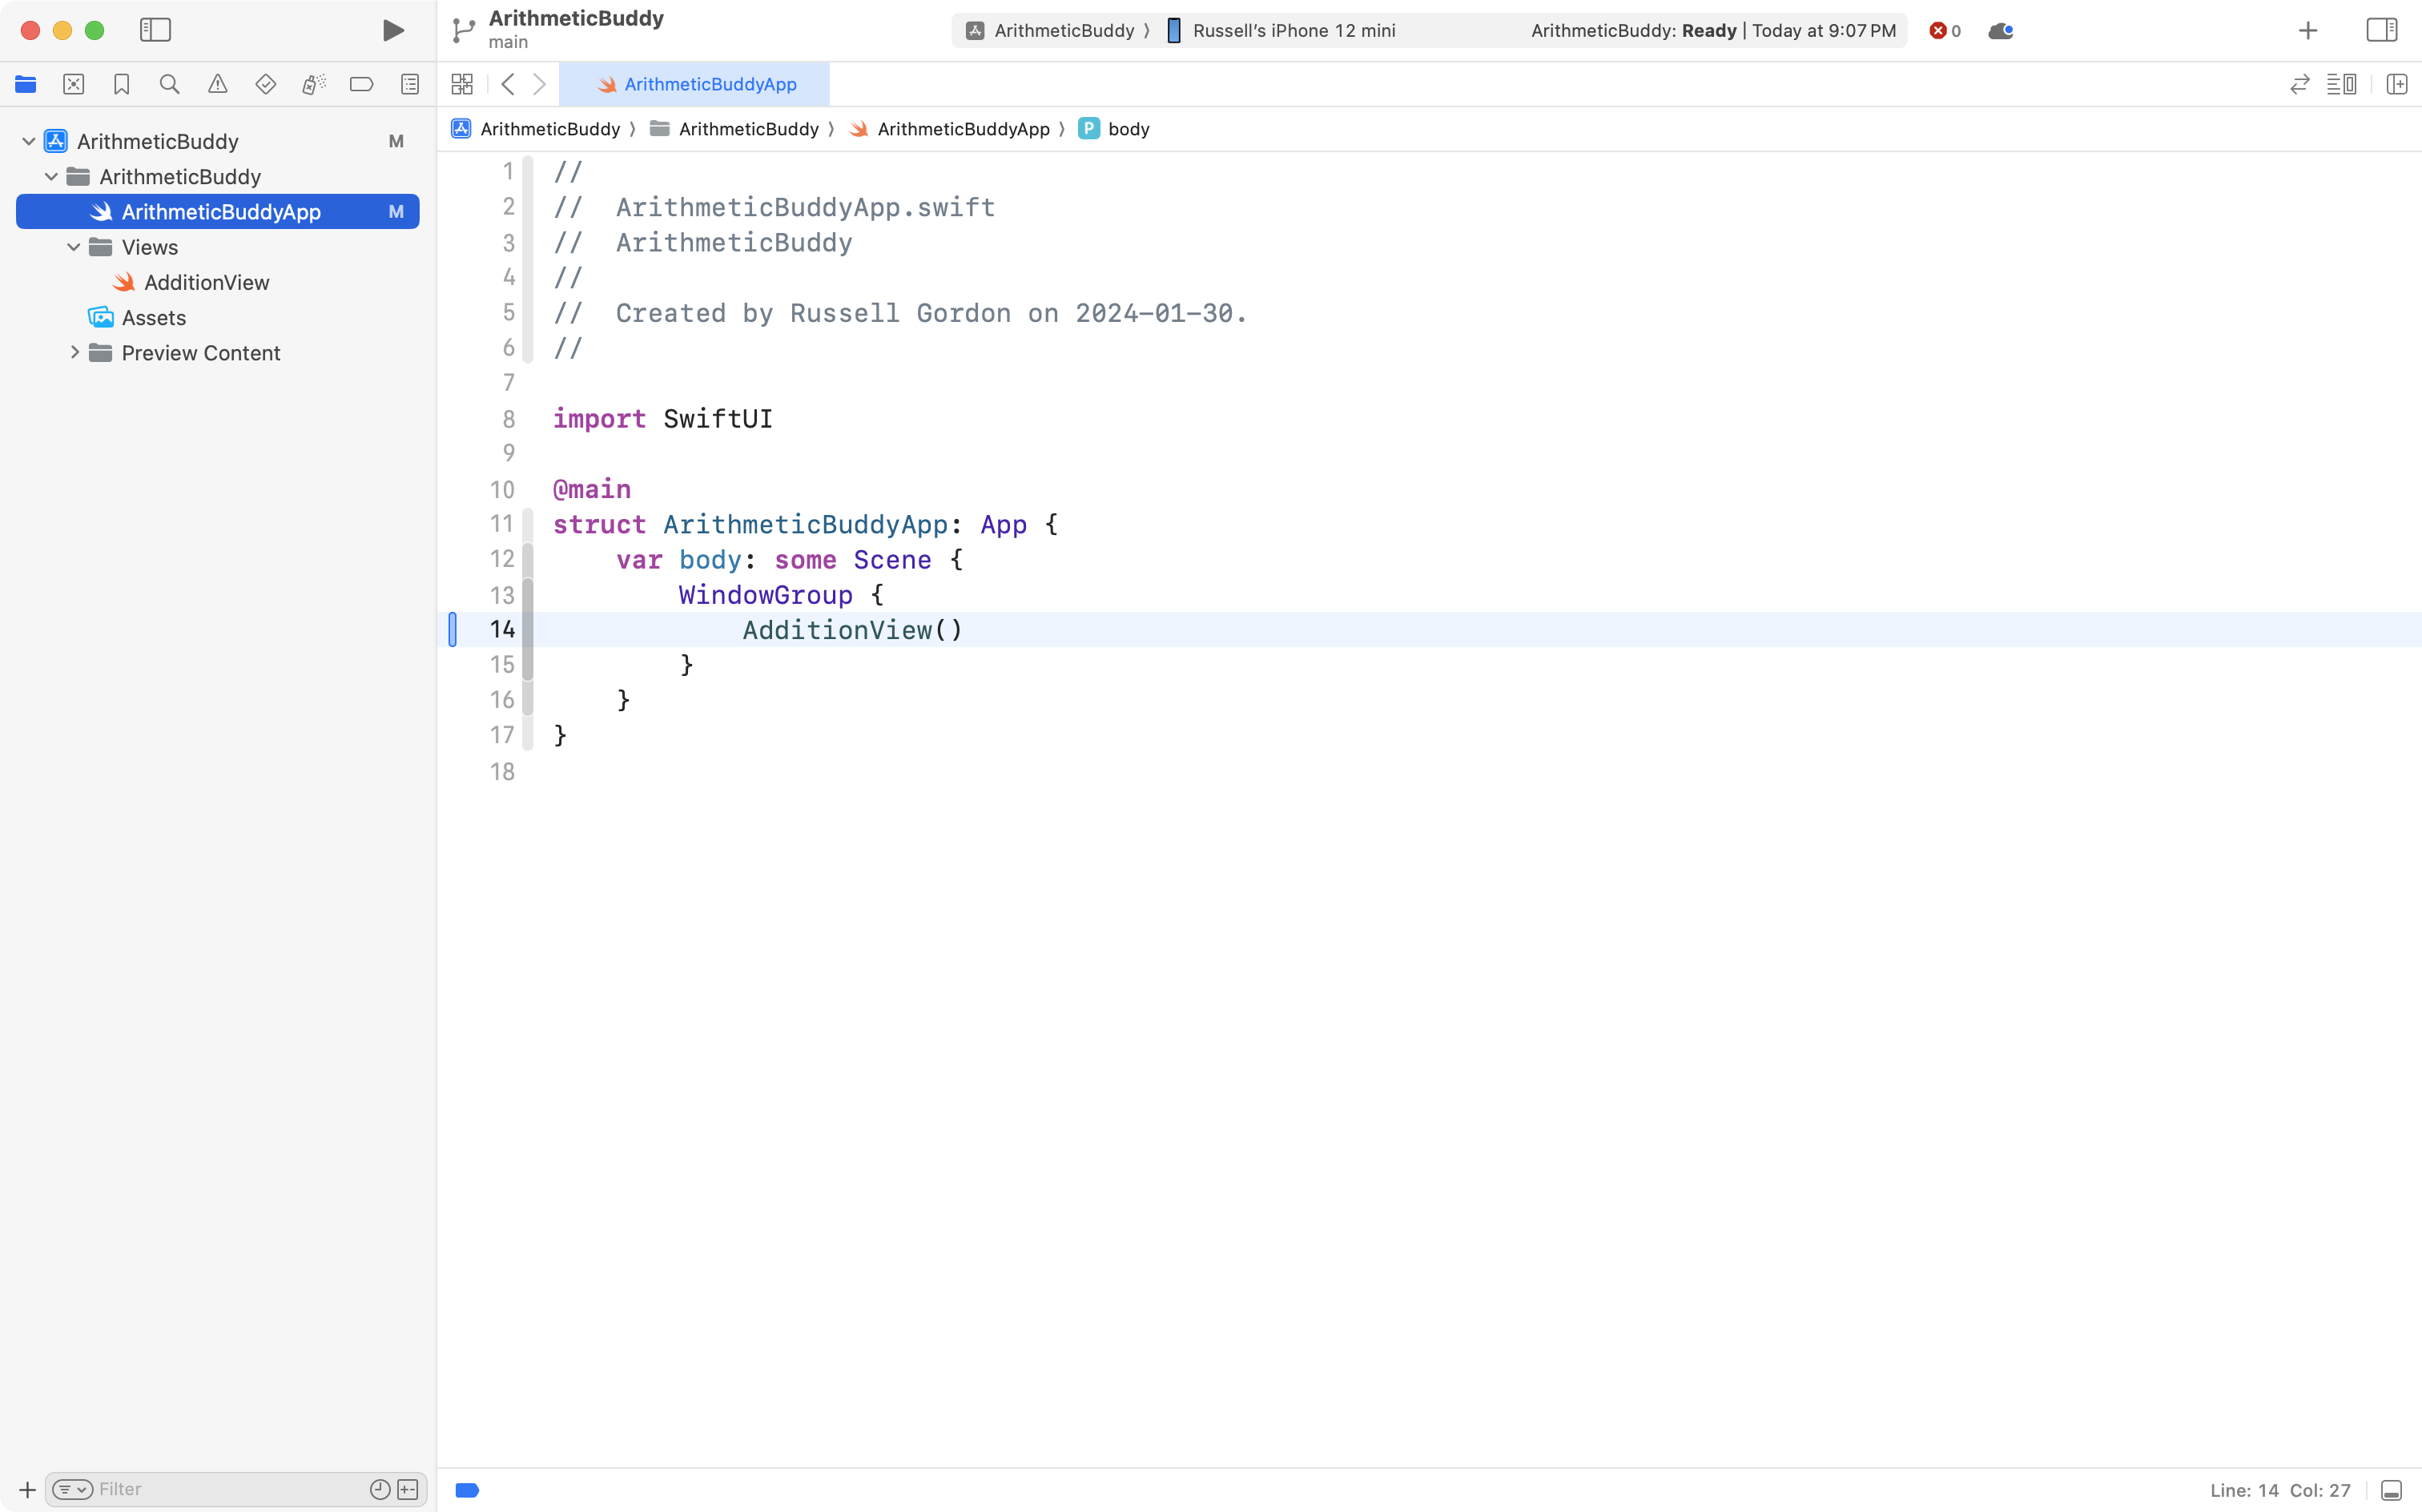
Create a new SwiftUI View named AdditionView inside the Views group.
Make the app entry point open AdditionView, like this:
Create a remote:
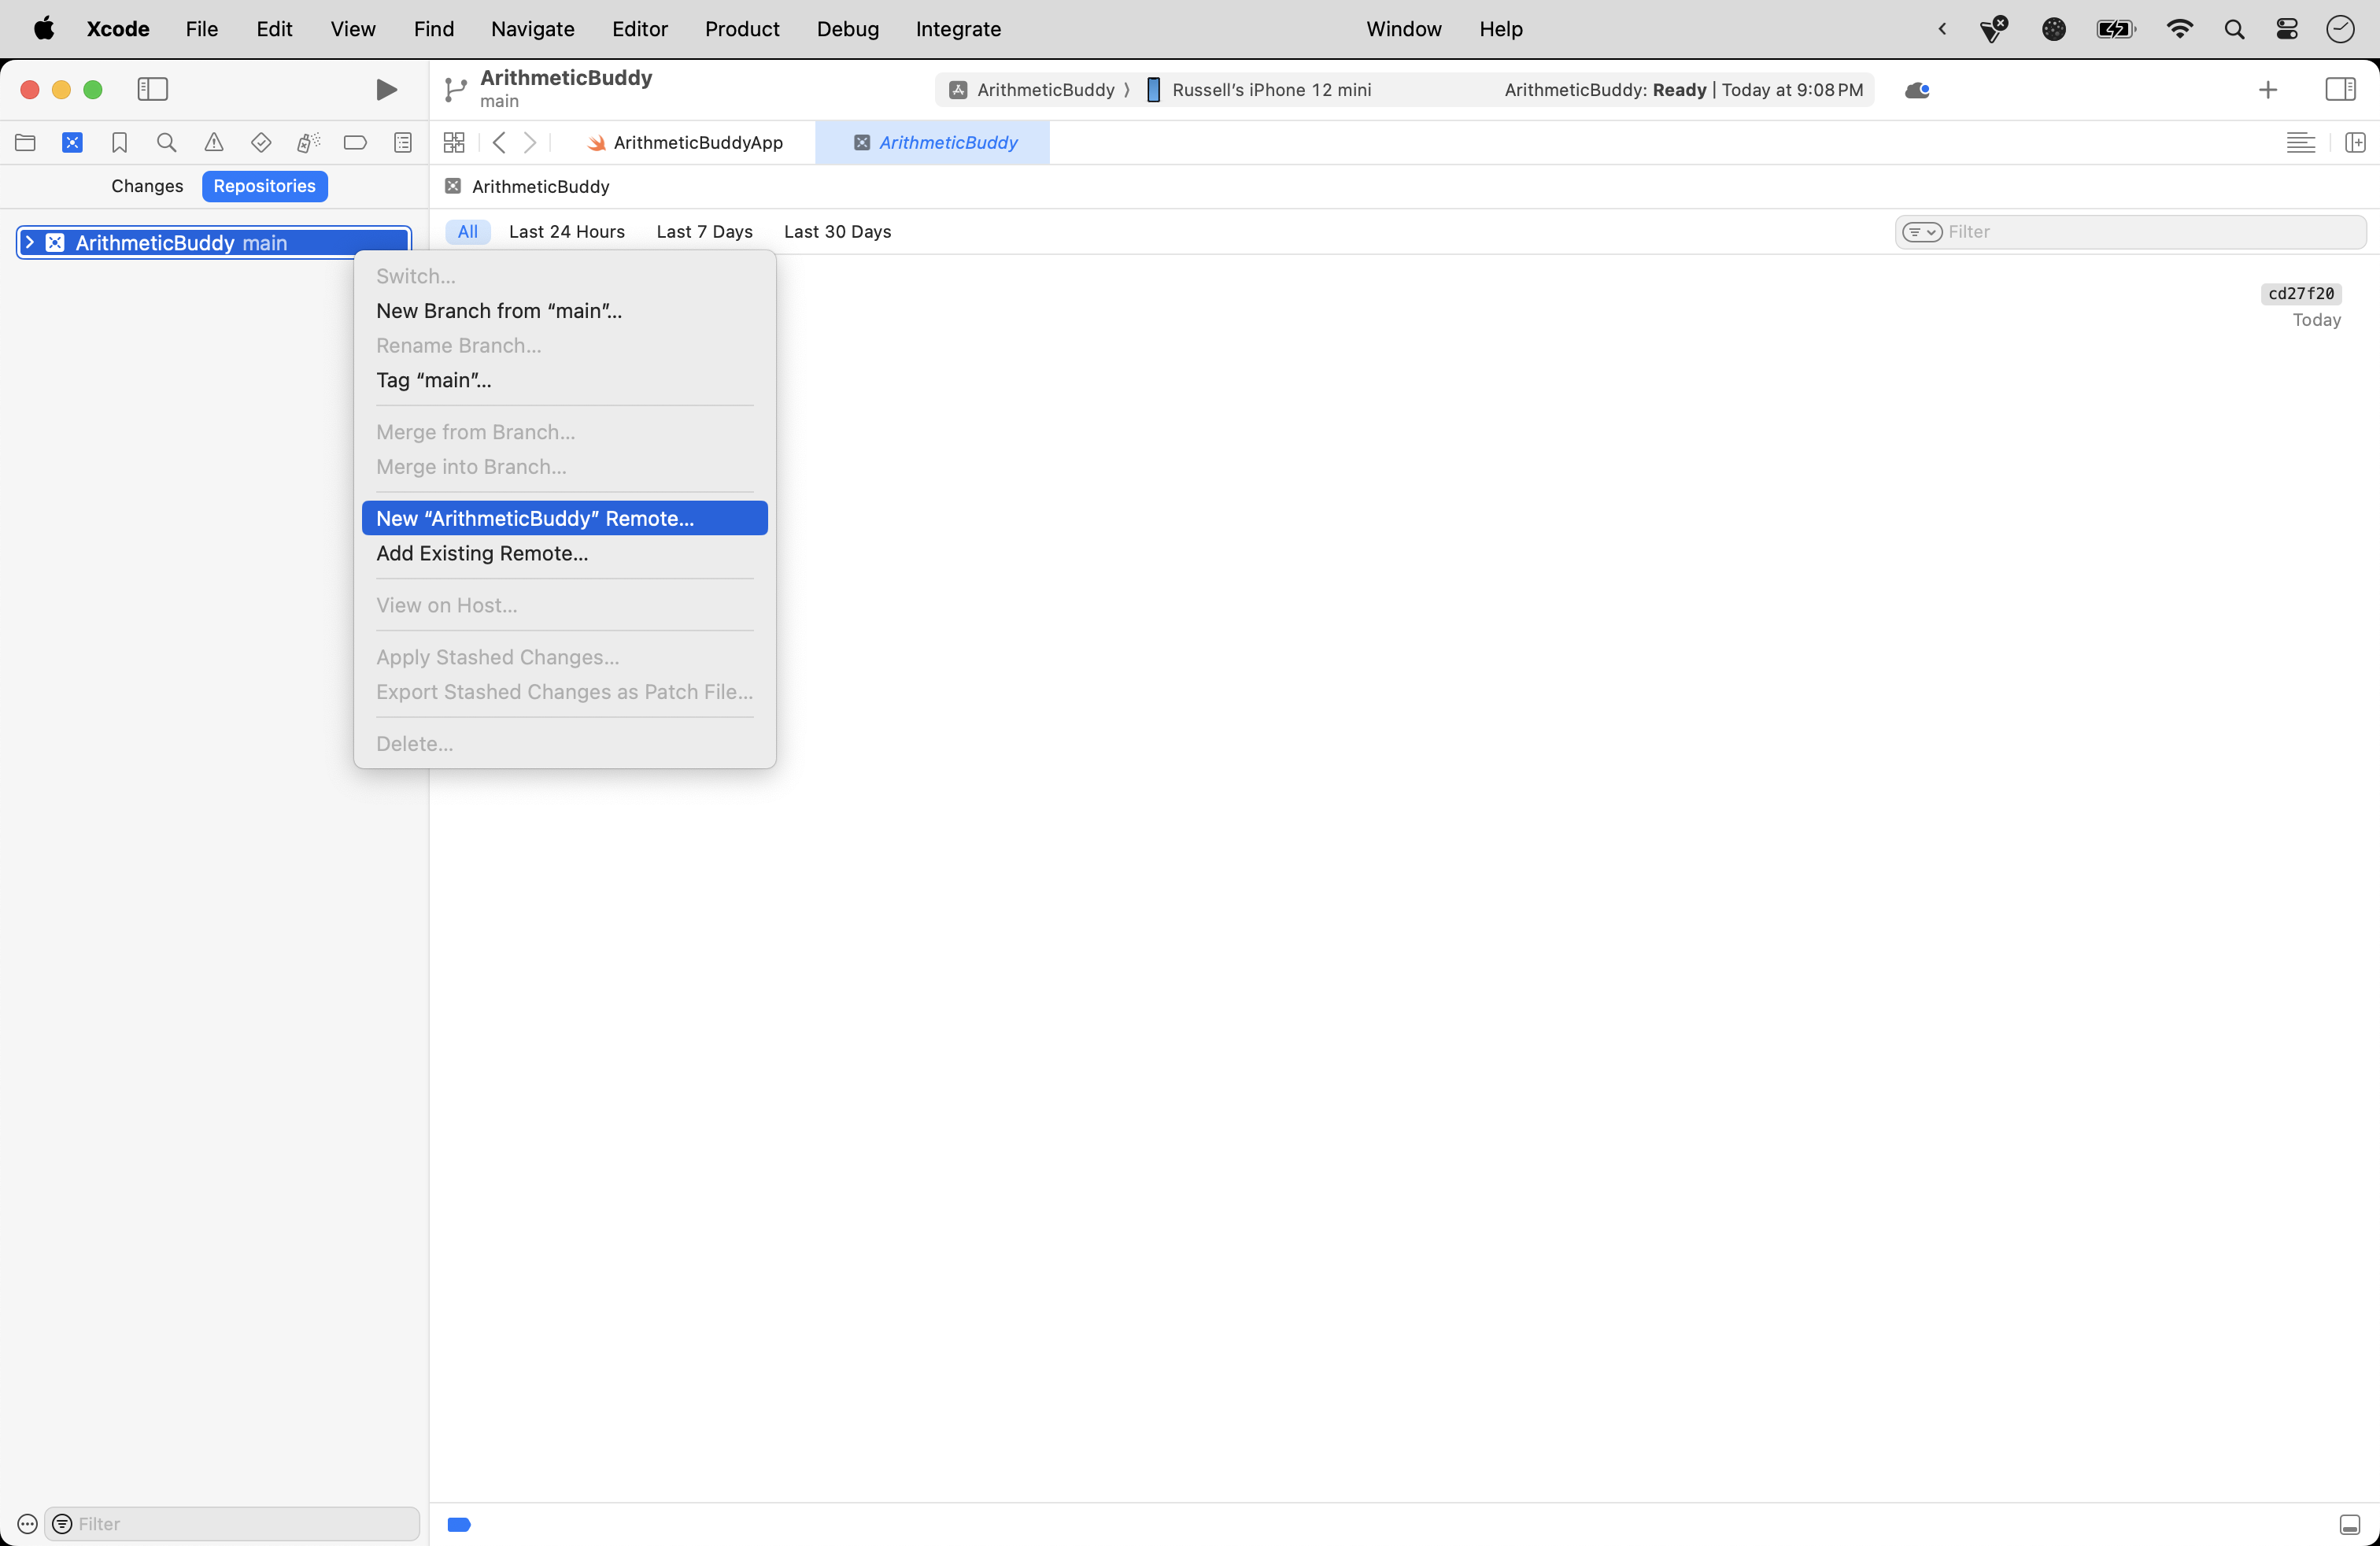
Then please commit and push your work with this message:
Created the project and finished initial project organization.
Now, copy and paste this code into AdditionView, like this:
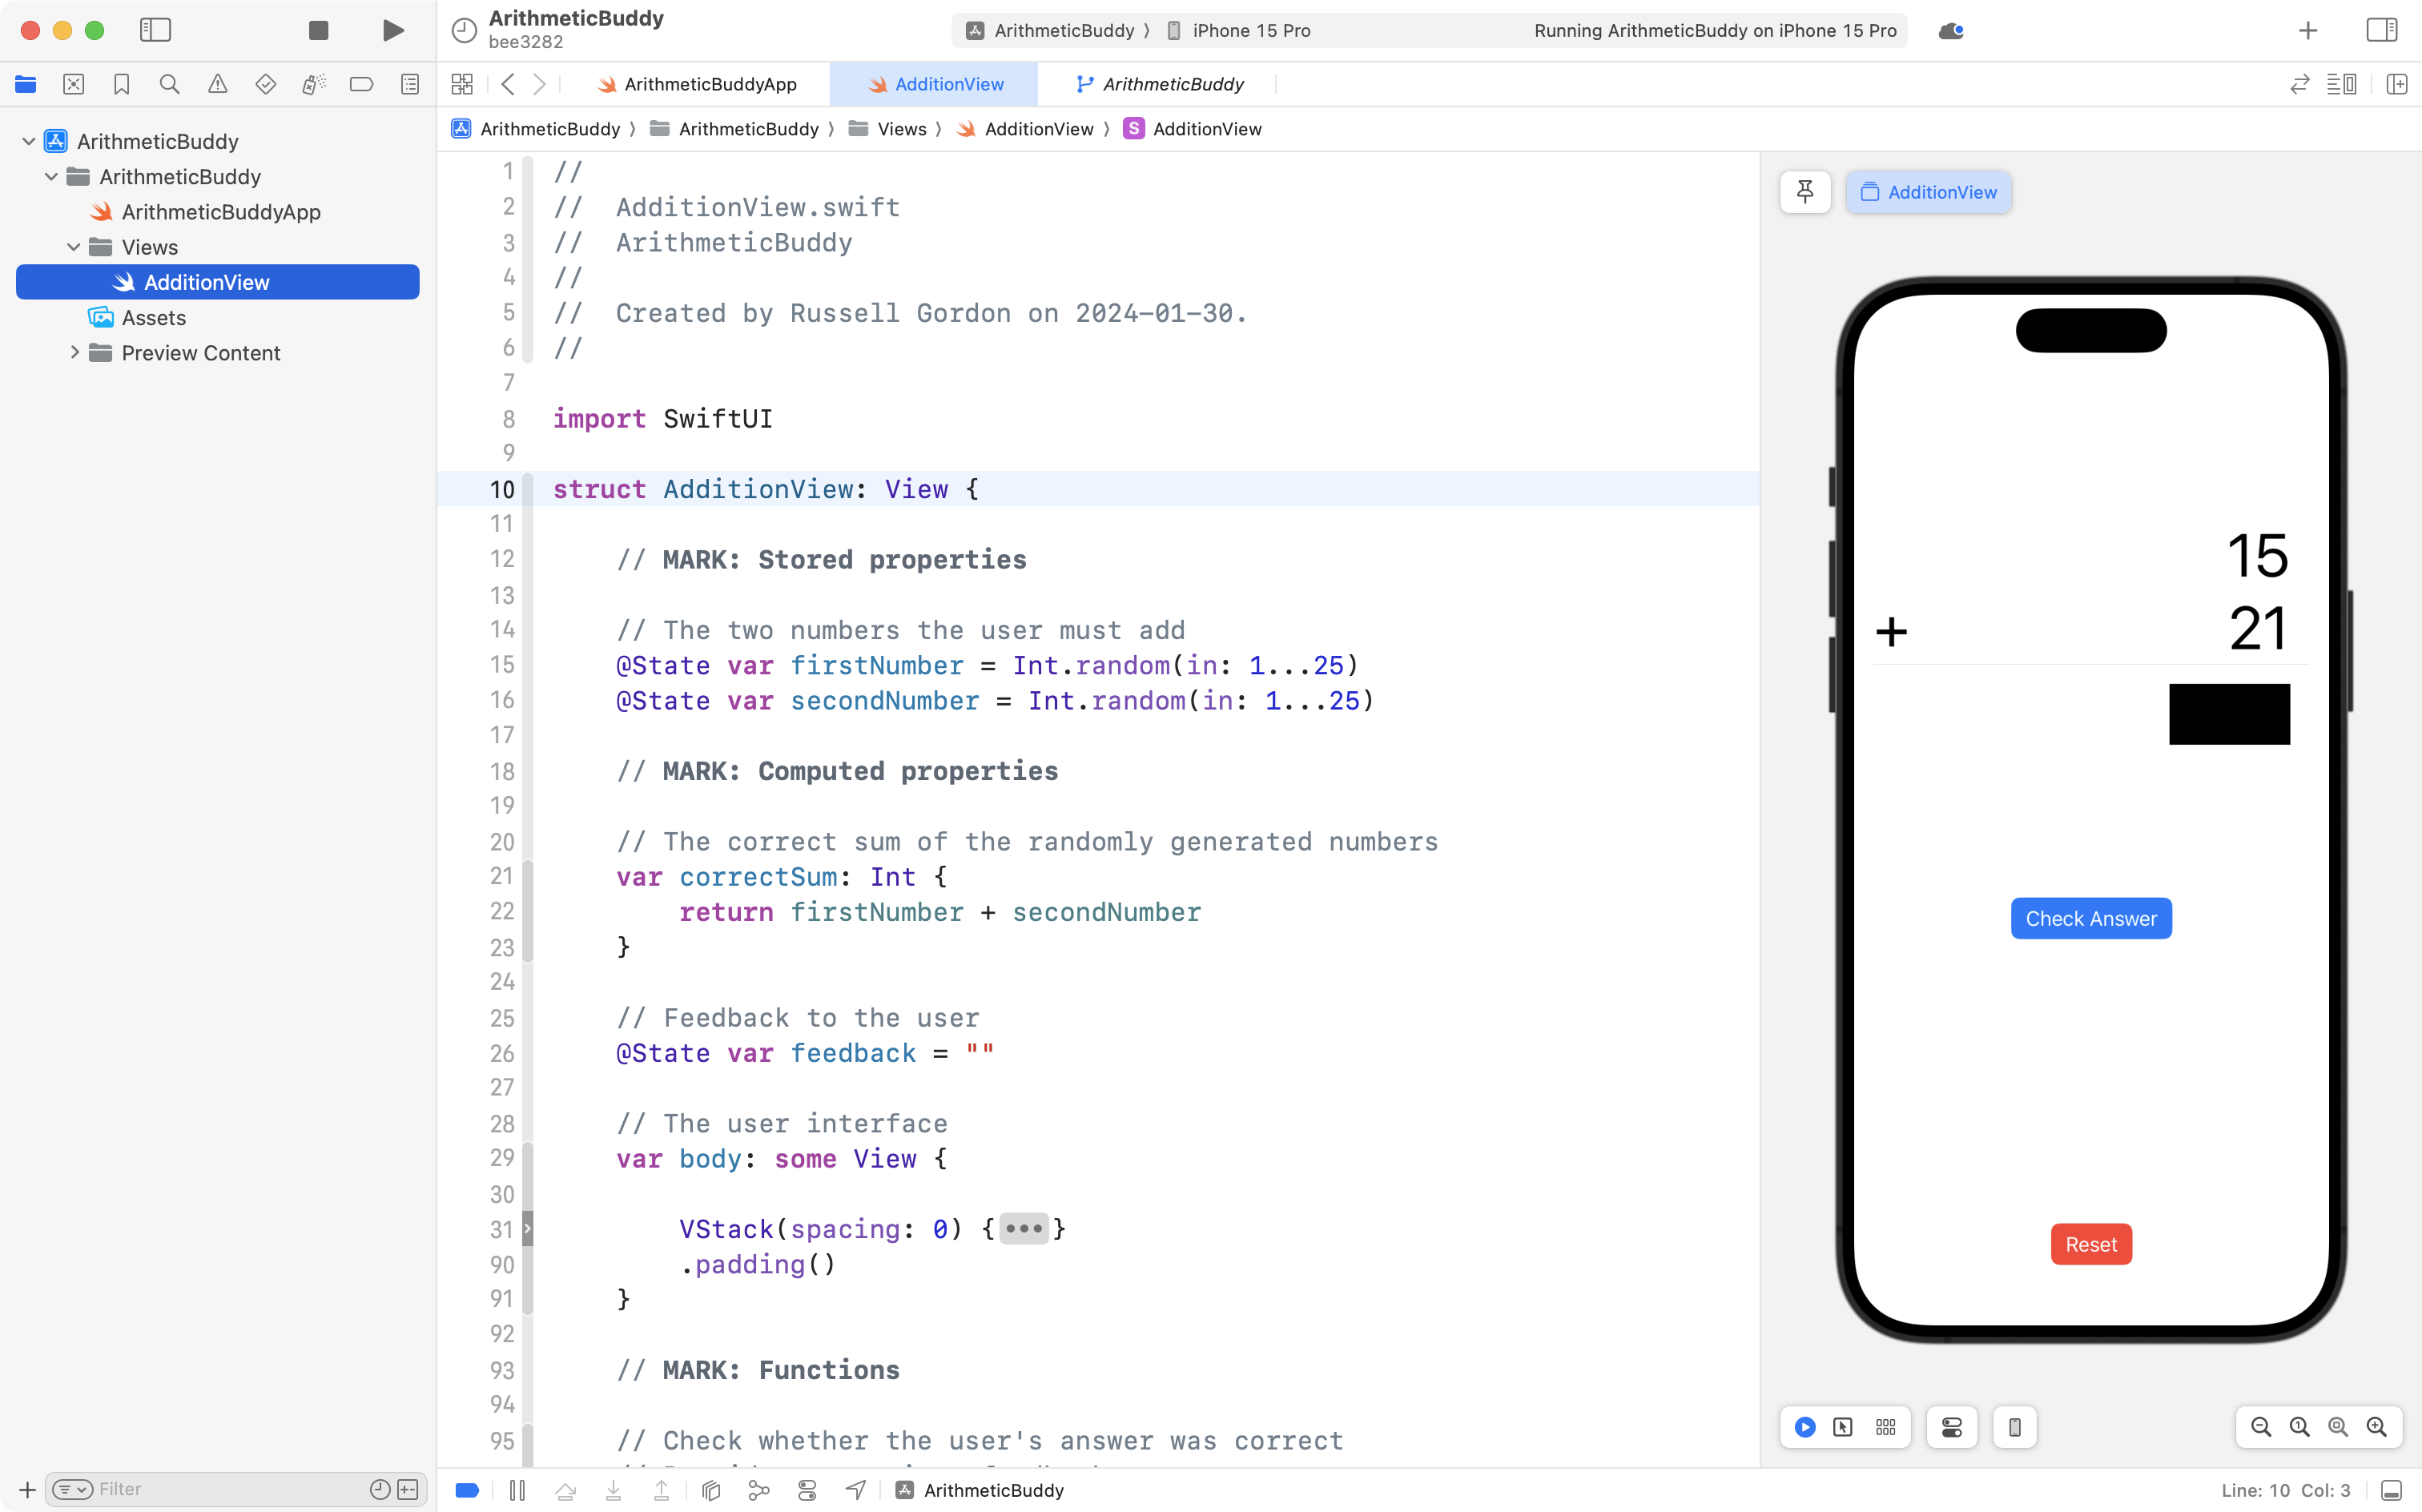
Press the Option-Command-P keyboard shortcut a few times to see what happens.
Note how the two numbers to be added change each time – that is because they are randomly generated.
Task
Complete this simple addition practice app.
You will need to:
- add a
TextField, to replace theHStackthat currently holds the blackRectangleplaceholder - add a stored property to bind the
TextFieldto, perhaps namedgivenInput - fill in the logic in the
checkAnswerfunction
Be sure that the app does not crash when unexpected input is provided!
When all is said and done, your app might work something like this: